

Page 1
Dining Table
IMPORTANT NOTE
This product is made from sturdy, high quality aluminum
and will provide years of enjoyment. Do not use power tools
to assemble and only tighten bolts until they are snug.
Carefully remove all the parts from the carton and put
them individually on a soft cloth to prevent scratches
or other damage occurring to the parts.
We have taken great care in the design of this
product and request that you carefully and strictly
follow our assembly instructions to ensure
a completed product as it was designed.
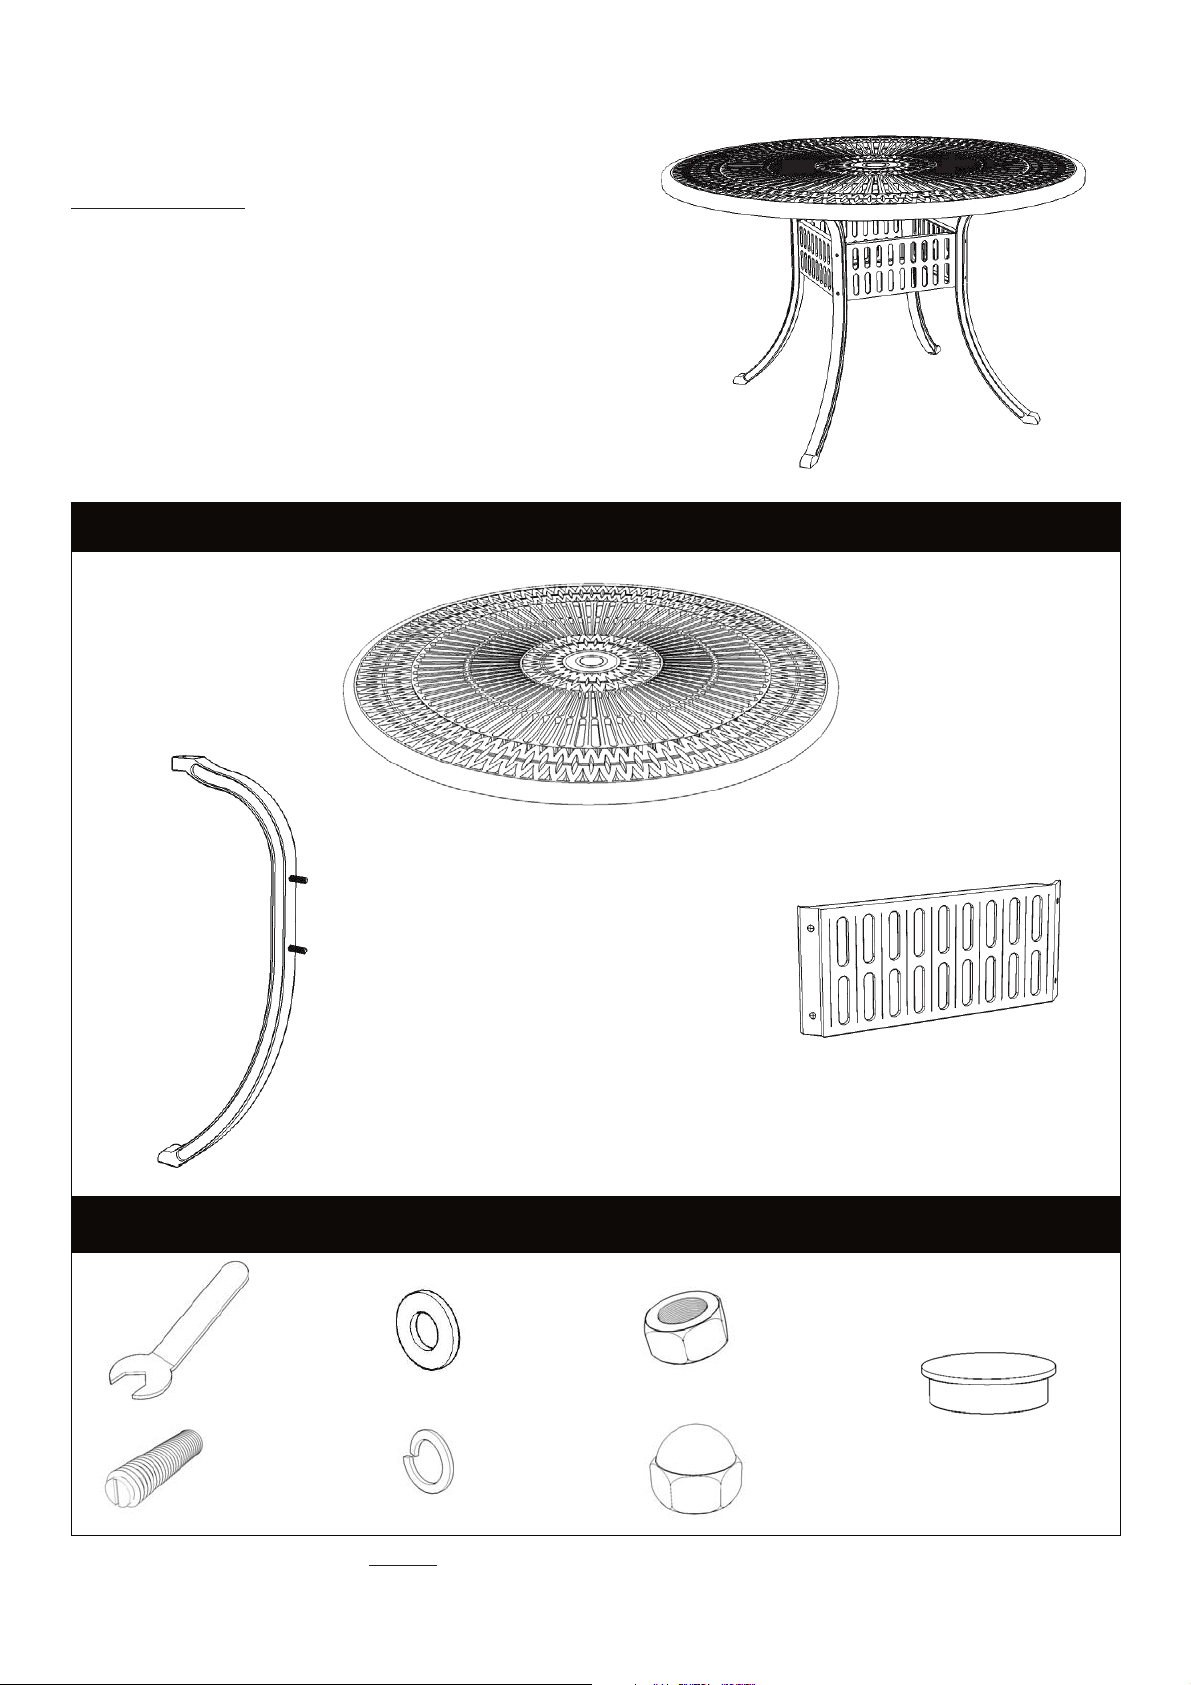
Part List
Hardware List
Key Wrench
1 pc.
B.
Leg
4 pcs.
Flat Washer
12 pcs. (+1 extra)
A.
Top
1 pc.
C.
Side Frame
4 pcs.
Nut
12 pcs. (+1 extra)
M8x40
Bolt
4 pcs. (+1 extra)
Tools required for assembly : Slotted screwdriver
Spring Washer
12 pcs. (+1 extra)
Cover
Nut Cap
12 pcs. (+1 extra)
Tools recommended for assembly : Level
1 pc.
Page 2
Assembly Instructions 2/2
IMPORTANT
* Please keep Key Wrench in a safe place as you may need to tighten up the Nuts in the future.
* Use a soft cloth between these parts and the floor.
* Do not use power tools to assembly and do not tightening the bolts and nuts.
* Do not tighten up all the bolts and nuts until each part is properly assembled.
* After assembly item must be level to work properly. Use the included adjustable levelers to level.
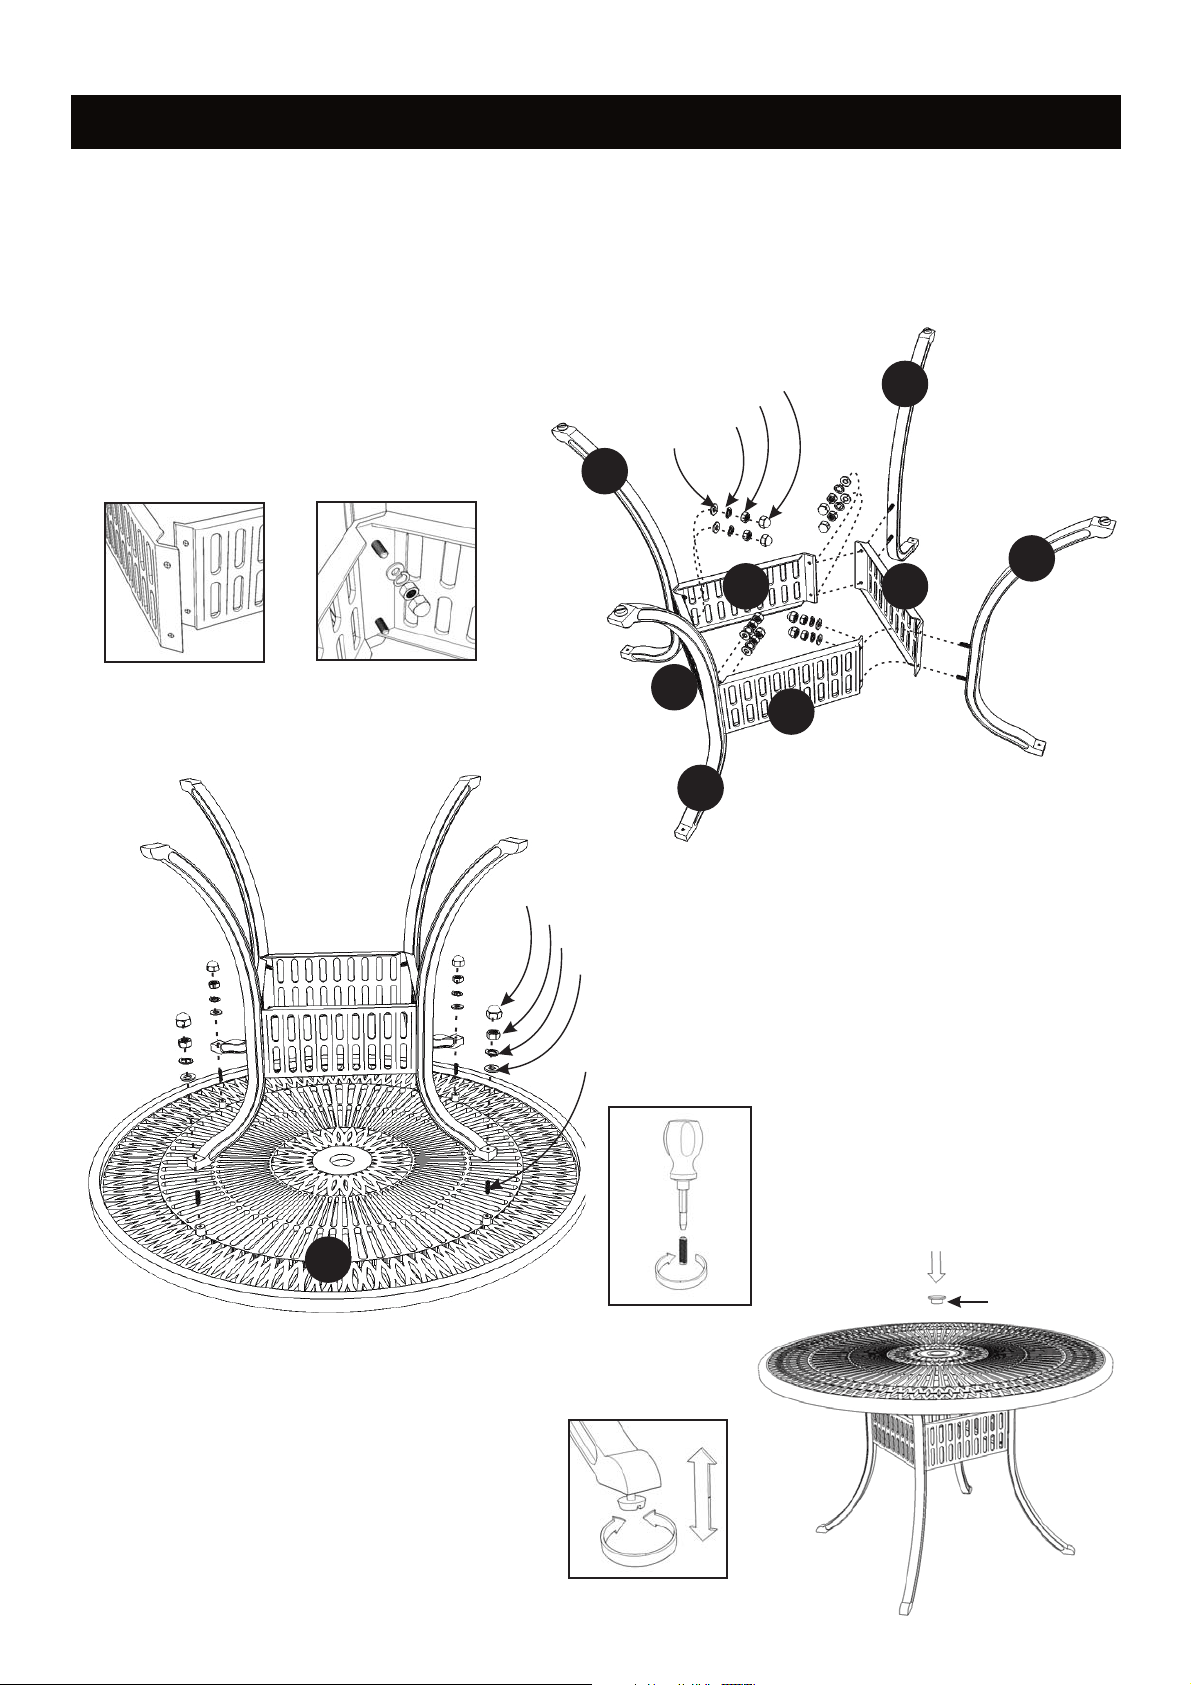
STEP 1
Nut Cap
Attach Legs (B) to Side Frames (C) with
Flat Washers, Spring Washers, Nuts and
Nut Caps. (See Figure 1 and Figure 2)
Spring Washer
Flat Washer
B
Nut
C C
B
B
Figure 1 Figure 2
A
STEP 3
Nut Cap
Nut
Spring Washer
Flat Washer
Insert Bolts into the pre-drilled holes of Top (A).
Bolt
C
C
B
STEP 2
Place Top (A) upside down on a soft cloth.
(See Figure 3)
Attach unit to Top (A) with
Flat Washers, Spring Washers,
Nuts and Nut Caps.
Cover
Figure 3
Turn the unit over to its' upright position.
Cover the umbrella hole with Cover.
To level the unit, adjust the adjustable
levelers on the bottom of the legs.
(See Figure 4)
Figure 4
 Loading...