

Page 1

Page 2
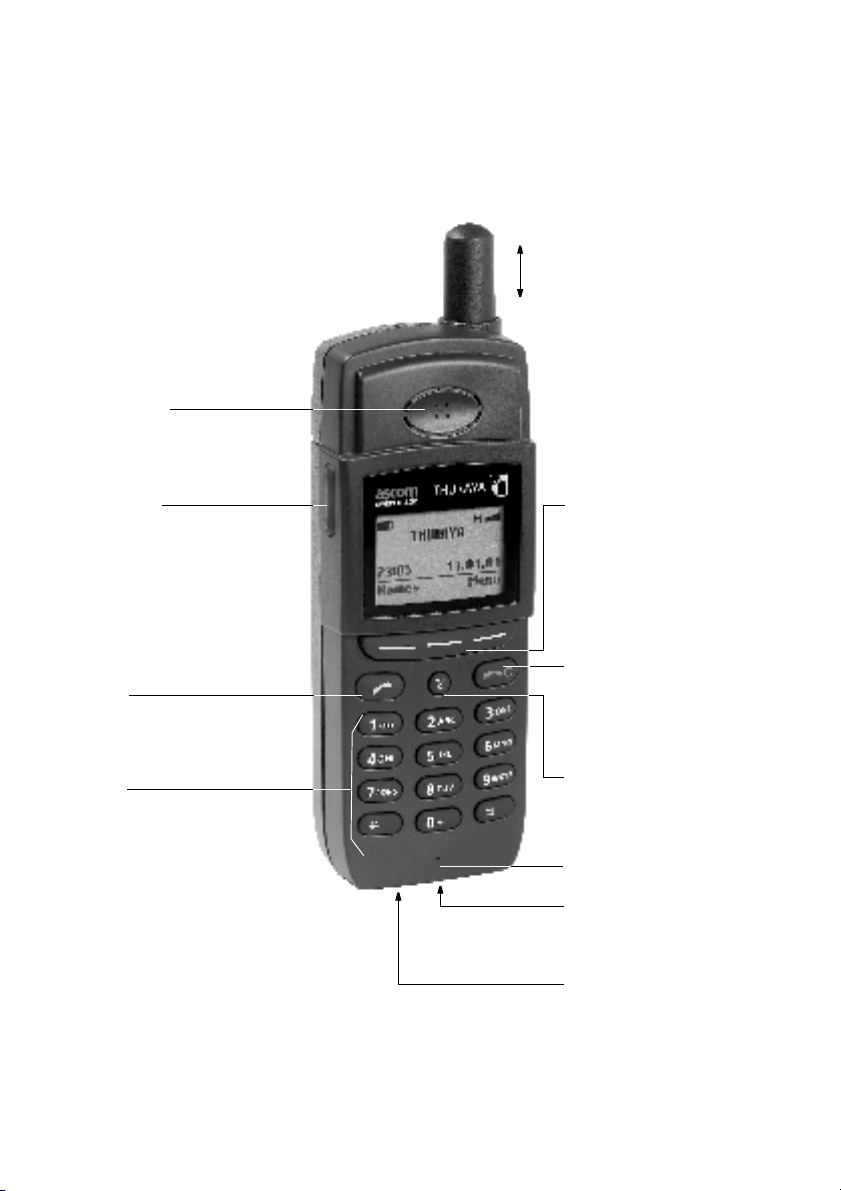
Overview
Loudspeaker
Antenna
needs to be extended
only when operating
in satellite mode
Volume key
increases/decreases volume:
– of loudspeaker or
active audio device
– of ringing
scrolls through the menu
Send key
establishes connection,
redials numbers
Keypad
dials:
– phone numbers
– short dialling numbers
– one touch dialling numbers
– quick menu access
edits:
– SMS text
– phonebook entries
– greeting
dials international prefix and enters space
0
in phonebook and SMS editor
provides access to short dialling numbers,
&
sends pause for DTMF signal
Fox key
1 to 3 context-sensitive zones
operate with softkey actions
as indicated in display line
above the key
End key
ends connection,
switches phone on/off,
rejects incoming calls,
steps back in menu
Clear key
deletes characters,
exits the menu,
steps back in menu
Microphone
Socket
for connecting
external devices
Battery
charger
socket
Page 3

Safety Instructions
General
The satellite mobile phone is used for transmitting voice, data and fax via the GSM-900
and the Thuraya satellite network and to utilize the GPS facilities.
Handle your mobile phone with care and
keep it dry.
Avoid exposing your mobile phone to
extreme hot or cold temperatures.
Avoid placing your mobile phone close to
cigarettes, open flames or any source of
heat.
Only use a soft damp cloth to clean your
mobile phone.
To avoid impaired performance, please
ensure your mobile phone’s antenna is not
bent or damaged.
In a car
It is not recommended to use your mobile
phone while driving a vehicle due to traffic
safety reasons. When using a mobile phone,
park the vehicle before telephoning. Do not
place objects, including either permanently
installed or portable mobile phone, in the
area above the airbag or in the airbag deployment area. If an in-vehicle mobile phone
is improperly installed and the airbag inflates,
it could result in serious injury.
Do not transport or store flammable gas,
liquid or explosives in the passenger compartment of a vehicle which contains your
mobile phone and accessories.
M In the vicinity of blasting work and
in explosive environments
Never use the mobile phone where blasting
work is in progress. Observe all restrictions
and follow any regulations or rules.
Areas with a potentially explosive environment are often, but not always, clearly
marked. Do not use the mobile phone while
at a filling station. Do not use near fuel or
chemicals.
3 In aircraft
Turn off your mobile phone before boarding
any aircraft. Do not use it on the ground
without crew permission.
In hospitals
Follow any regulations or rules. Turn off your
mobile phone when near medical equipment.
Electronic devices
Certain electronic equipment may not be
shielded against the RF signals emitted by
your mobile phone.
J Qualified service
Do not attempt to disassemble your mobile
phone. A broken warranty seal will void the
warranty. The mobile phone does not contain consumer serviceable components. Only
qualified service personnel may install or repair equipment.
=
Batteries and accessories
Use approved batteries and accessories only.
Use of non-approved accessories may result
in loss of performance, damage to the mobile phone, fire, electric shock or injury.
Connecting devices
F
F
FF
Never connect incompatible products. When
connecting the mobile phone to any other
device, read its user’s guide for detailed safety instructions.
Antenna and SAT reception
H
Do not remove the antenna yourself. If your
mobile phone’s antenna becomes damaged,
please take it to a certified service partner.
Only use an antenna that has been specifically designed for your mobile phone.
Unauthorised antennas, modifications or
attachments could damage the mobile
Page 4

phone and may violate the relevant regulations, causing loss of performance and radio
frequency (RF) energy above the recommended limits.
Do not hold the antenna when the mobile
phone is in use. Holding the antenna affects
call quality, may cause the mobile phone to
operate at a higher power level than needed
and shortens talk and standby times.
Hold the mobile phone
– in GSM mode as you would any other
telephone. While speaking directly into
the microphone, angle the antenna in a
direction up and over your shoulder.
– in SAT mode: Extend the antenna and
point it in the assumed direction of the
satellite. Making and receiving a call is
only possible outside houses or cars and
with no obstructions between the mobile
phone and satellite.
Emergency calls
To make or receive calls, the mobile phone
must be turned on and in a service area with
adequate radio signal strength. Emergency
calls may not be possible on all mobile phone
networks or when certain network services
and/or mobile phone features are in use.
Check with your local service provider.
}With pacemakers and hearing aids
Pacemakers
0
The various brands and models of cardiac
pacemakers available exhibit a wide range of
immunity levels to radio signals. Therefore,
people who wear a cardiac pacemaker and
who want to use a mobile phone should seek
the advice of their cardiologist. If, as a pacemaker user, you are still concerned about interaction with mobile phones, we suggest
you
– maintain a distance of 15 cm (6 inches)
between the mobile phone and your
pacemaker
– do not hold your mobile phone to your
chest, e.g., do not carry the mobile
phone in a breast pocket
– when using the mobile phone, place it to
your ear opposite the pacemaker
– refer to your pacemaker product litera-
ture for information on your particular
device.
If you have any reason to suspect that interference is taking place, turn off your mobile
phone immediately!
Hearing aids
Most new models of hearing aids are
immune to radio frequency interference
from mobile phones that are more than
2 metres away. Some are also immune to
interference when the mobile phone is
brought up to the same hearing-aided ear.
Many types of older hearing aids may be
susceptible to interference, making it very
difficult to use a mobile phone. Should interference be experienced, there are things that
can be done which may improve the situation:
– if possible use the mobile phone with
your non-aided ear
– use a hands-free accessory.
Page 5

Table of Contents
Note:
Where code numbers are given in brackets, they provide ’menu quick access’ (see page 7)
Getting started . . . . . . . . . . . . . . . . . . . . . . . . . . . . . . . . . . . . . . . . . . . . . . . . . . . . . . . . 1
Introduction . . . . . . . . . . . . . . . . . . . . . . . . . . . . . . . . . . . . . . . . . . . . . . . . . . . . . . . . . . . 1
Initial steps . . . . . . . . . . . . . . . . . . . . . . . . . . . . . . . . . . . . . . . . . . . . . . . . . . . . . . . . . . . . 2
Display . . . . . . . . . . . . . . . . . . . . . . . . . . . . . . . . . . . . . . . . . . . . . . . . . . . . . . . . . . . . . . . 4
Using the fox key and the menu . . . . . . . . . . . . . . . . . . . . . . . . . . . . . . . . . . . . . . . . . . . . 6
Making and receiving calls . . . . . . . . . . . . . . . . . . . . . . . . . . . . . . . . . . . . . . . . . . . . . . . . 8
Setting the volumes . . . . . . . . . . . . . . . . . . . . . . . . . . . . . . . . . . . . . . . . . . . . . . . . . . . . 10
Phone number lists . . . . . . . . . . . . . . . . . . . . . . . . . . . . . . . . . . . . . . . . . . . . . . . . . . . . 11
Phonebook . . . . . . . . . . . . . . . . . . . . . . . . . . . . . . . . . . . . . . . . . . . . . . . . . . . . . . . . . . . 11
List of dialled numbers (2-3) . . . . . . . . . . . . . . . . . . . . . . . . . . . . . . . . . . . . . . . . . . . . . . 15
List of missed calls (2-1)/List of received calls (2-2) . . . . . . . . . . . . . . . . . . . . . . . . . . . . . . 16
Options during a call . . . . . . . . . . . . . . . . . . . . . . . . . . . . . . . . . . . . . . . . . . . . . . . . . . . 17
Muting/unmuting the microphone . . . . . . . . . . . . . . . . . . . . . . . . . . . . . . . . . . . . . . . . . 17
Sending DTMF signals during a call . . . . . . . . . . . . . . . . . . . . . . . . . . . . . . . . . . . . . . . . . 17
Put a call on hold . . . . . . . . . . . . . . . . . . . . . . . . . . . . . . . . . . . . . . . . . . . . . . . . . . . . . . 17
Read/write SMS messages . . . . . . . . . . . . . . . . . . . . . . . . . . . . . . . . . . . . . . . . . . . . . . . . 18
See duration of the current call . . . . . . . . . . . . . . . . . . . . . . . . . . . . . . . . . . . . . . . . . . . . 18
Handling more than one call simultaneously . . . . . . . . . . . . . . . . . . . . . . . . . . . . . . . . . . 18
Diverting calls (3) . . . . . . . . . . . . . . . . . . . . . . . . . . . . . . . . . . . . . . . . . . . . . . . . . . . . . . 20
Using the voice mailbox (7-2-6)/(1-4) . . . . . . . . . . . . . . . . . . . . . . . . . . . . . . . . . . . . . . . 20
Diverting voice calls (3-1) . . . . . . . . . . . . . . . . . . . . . . . . . . . . . . . . . . . . . . . . . . . . . . . . . 21
Diverting fax calls (3-2) . . . . . . . . . . . . . . . . . . . . . . . . . . . . . . . . . . . . . . . . . . . . . . . . . . 22
Diverting data calls (3-3) . . . . . . . . . . . . . . . . . . . . . . . . . . . . . . . . . . . . . . . . . . . . . . . . . 22
Clear all diversions (3-4) . . . . . . . . . . . . . . . . . . . . . . . . . . . . . . . . . . . . . . . . . . . . . . . . . 22
SMS messages . . . . . . . . . . . . . . . . . . . . . . . . . . . . . . . . . . . . . . . . . . . . . . . . . . . . . . . . 23
Writing an SMS (1-1) . . . . . . . . . . . . . . . . . . . . . . . . . . . . . . . . . . . . . . . . . . . . . . . . . . . . 23
Reading an SMS (1-2) . . . . . . . . . . . . . . . . . . . . . . . . . . . . . . . . . . . . . . . . . . . . . . . . . . . 25
Handling SMS messages . . . . . . . . . . . . . . . . . . . . . . . . . . . . . . . . . . . . . . . . . . . . . . . . . 26
General SMS parameters (7-8) . . . . . . . . . . . . . . . . . . . . . . . . . . . . . . . . . . . . . . . . . . . . . 27
Info broadcast (1-3) . . . . . . . . . . . . . . . . . . . . . . . . . . . . . . . . . . . . . . . . . . . . . . . . . . . . 28
Switch info broadcast on/off (1-3-1) . . . . . . . . . . . . . . . . . . . . . . . . . . . . . . . . . . . . . . . . 28
Handling info broadcast topics (1-3-2) . . . . . . . . . . . . . . . . . . . . . . . . . . . . . . . . . . . . . . . 28
Set broadcast language(s) (1-3-3) . . . . . . . . . . . . . . . . . . . . . . . . . . . . . . . . . . . . . . . . . . 29
Read an info broadcast . . . . . . . . . . . . . . . . . . . . . . . . . . . . . . . . . . . . . . . . . . . . . . . . . . 29
Security settings (6) . . . . . . . . . . . . . . . . . . . . . . . . . . . . . . . . . . . . . . . . . . . . . . . . . . . . 30
Handling PINs, security code and barring code (6-3/6-4/6-5) . . . . . . . . . . . . . . . . . . . . . . 31
Call Barring (6-1) . . . . . . . . . . . . . . . . . . . . . . . . . . . . . . . . . . . . . . . . . . . . . . . . . . . . . . . 32
Fixed Dial (6-2) . . . . . . . . . . . . . . . . . . . . . . . . . . . . . . . . . . . . . . . . . . . . . . . . . . . . . . . . 34
Closed User Groups (6-8) . . . . . . . . . . . . . . . . . . . . . . . . . . . . . . . . . . . . . . . . . . . . . . . . 35
Page 6

Phone and call settings (7) . . . . . . . . . . . . . . . . . . . . . . . . . . . . . . . . . . . . . . . . . . . . . . 36
Greeting text (7-2-3) . . . . . . . . . . . . . . . . . . . . . . . . . . . . . . . . . . . . . . . . . . . . . . . . . . . . 36
Time and date (7-5) . . . . . . . . . . . . . . . . . . . . . . . . . . . . . . . . . . . . . . . . . . . . . . . . . . . . . 36
Language (7-2-1) . . . . . . . . . . . . . . . . . . . . . . . . . . . . . . . . . . . . . . . . . . . . . . . . . . . . . . 36
Numbers for voice, fax and data (7-2-4) . . . . . . . . . . . . . . . . . . . . . . . . . . . . . . . . . . . . . 37
Cost settings (7-3-7) . . . . . . . . . . . . . . . . . . . . . . . . . . . . . . . . . . . . . . . . . . . . . . . . . . . . 37
Setting baud rate for data transmission (7-9) . . . . . . . . . . . . . . . . . . . . . . . . . . . . . . . . . . 38
Any key answer (7-3-1) . . . . . . . . . . . . . . . . . . . . . . . . . . . . . . . . . . . . . . . . . . . . . . . . . . 38
Send DTMF tone (7-3-2) . . . . . . . . . . . . . . . . . . . . . . . . . . . . . . . . . . . . . . . . . . . . . . . . . 38
Set call waiting (7-3-3) . . . . . . . . . . . . . . . . . . . . . . . . . . . . . . . . . . . . . . . . . . . . . . . . . . 39
Sending of own number (7-3-4) . . . . . . . . . . . . . . . . . . . . . . . . . . . . . . . . . . . . . . . . . . . 39
Automatic redial (7-3-5) . . . . . . . . . . . . . . . . . . . . . . . . . . . . . . . . . . . . . . . . . . . . . . . . . 39
Activate/deactivate ’one touch dialling’ (7-3-6) . . . . . . . . . . . . . . . . . . . . . . . . . . . . . . . . 40
Use in a car (7-4) . . . . . . . . . . . . . . . . . . . . . . . . . . . . . . . . . . . . . . . . . . . . . . . . . . . . . . . 40
Restore factory settings (7-7-2) . . . . . . . . . . . . . . . . . . . . . . . . . . . . . . . . . . . . . . . . . . . . 40
LCD Contrast (7-2-5) . . . . . . . . . . . . . . . . . . . . . . . . . . . . . . . . . . . . . . . . . . . . . . . . . . . . 40
Network management (4/5) . . . . . . . . . . . . . . . . . . . . . . . . . . . . . . . . . . . . . . . . . . . . . 41
Operating mode: GSM and/or SAT (5) . . . . . . . . . . . . . . . . . . . . . . . . . . . . . . . . . . . . . . . 41
Network selection (4-3/4-2) . . . . . . . . . . . . . . . . . . . . . . . . . . . . . . . . . . . . . . . . . . . . . . . 42
Manual SAT registration (4-1) . . . . . . . . . . . . . . . . . . . . . . . . . . . . . . . . . . . . . . . . . . . . . 43
Sound & Alert (7-1) . . . . . . . . . . . . . . . . . . . . . . . . . . . . . . . . . . . . . . . . . . . . . . . . . . . . 44
Ringing volume (7-1-1-8) . . . . . . . . . . . . . . . . . . . . . . . . . . . . . . . . . . . . . . . . . . . . . . . . 44
Ringing melody (7-1-1) . . . . . . . . . . . . . . . . . . . . . . . . . . . . . . . . . . . . . . . . . . . . . . . . . . 44
Ringing type (7-1-1-7) . . . . . . . . . . . . . . . . . . . . . . . . . . . . . . . . . . . . . . . . . . . . . . . . . . . 46
Tones on/off (7-1-2 / 7-1-3/ 7-1-4) . . . . . . . . . . . . . . . . . . . . . . . . . . . . . . . . . . . . . . . . . . 46
Sound on/off . . . . . . . . . . . . . . . . . . . . . . . . . . . . . . . . . . . . . . . . . . . . . . . . . . . . . . . . . . 47
Alarms (7-6) . . . . . . . . . . . . . . . . . . . . . . . . . . . . . . . . . . . . . . . . . . . . . . . . . . . . . . . . . . 47
Statistics and information . . . . . . . . . . . . . . . . . . . . . . . . . . . . . . . . . . . . . . . . . . . . . . . 48
Call duration (2-4) . . . . . . . . . . . . . . . . . . . . . . . . . . . . . . . . . . . . . . . . . . . . . . . . . . . . . . 48
Call costs (2-5) . . . . . . . . . . . . . . . . . . . . . . . . . . . . . . . . . . . . . . . . . . . . . . . . . . . . . . . . 48
Remaining Credit (2-6) . . . . . . . . . . . . . . . . . . . . . . . . . . . . . . . . . . . . . . . . . . . . . . . . . . 49
SIM info (6-6) . . . . . . . . . . . . . . . . . . . . . . . . . . . . . . . . . . . . . . . . . . . . . . . . . . . . . . . . . 49
Cell info (7-2-2) . . . . . . . . . . . . . . . . . . . . . . . . . . . . . . . . . . . . . . . . . . . . . . . . . . . . . . . . 49
IMEI number (6-7) . . . . . . . . . . . . . . . . . . . . . . . . . . . . . . . . . . . . . . . . . . . . . . . . . . . . . . 49
Using the GPS facilities (8) . . . . . . . . . . . . . . . . . . . . . . . . . . . . . . . . . . . . . . . . . . . . . . . 50
Display your current position (8-1) . . . . . . . . . . . . . . . . . . . . . . . . . . . . . . . . . . . . . . . . . . 50
Way point manager (8-2) . . . . . . . . . . . . . . . . . . . . . . . . . . . . . . . . . . . . . . . . . . . . . . . . 50
Switch location track on/off (8-3) . . . . . . . . . . . . . . . . . . . . . . . . . . . . . . . . . . . . . . . . . . 51
Show continuous position (8-4) . . . . . . . . . . . . . . . . . . . . . . . . . . . . . . . . . . . . . . . . . . . . 51
Appendix . . . . . . . . . . . . . . . . . . . . . . . . . . . . . . . . . . . . . . . . . . . . . . . . . . . . . . . . . . . . 52
Troubleshooting . . . . . . . . . . . . . . . . . . . . . . . . . . . . . . . . . . . . . . . . . . . . . . . . . . . . . . . 52
Technical specifications . . . . . . . . . . . . . . . . . . . . . . . . . . . . . . . . . . . . . . . . . . . . . . . . . . 56
Using battery and charger . . . . . . . . . . . . . . . . . . . . . . . . . . . . . . . . . . . . . . . . . . . . . . . . 57
Character and digit input in text editor mode . . . . . . . . . . . . . . . . . . . . . . . . . . . . . . . . . 58
Menu system and quick access codes . . . . . . . . . . . . . . . . . . . . . . . . . . . . . . . . . . . . . . . 59
Index . . . . . . . . . . . . . . . . . . . . . . . . . . . . . . . . . . . . . . . . . . . . . . . . . . . . . . . . . . . . . . . 61
Page 7
Getting started
Introduction
Your ascom 21 is a new generation mobile
phone combining satellite (SAT), GSM-900
(Global System for Mobile communication at
900 MHz) and GPS (Global Positioning Sys-
tem) technologies. This provides you with the
advantages of three technologies in one single mobile phone. Its operation in satellite
mode is virtually identical to that of GSM
mode. Operations that you may be familiar
with using a typical GSM mobile phones will
work in a very similar manner when you are
using the Thuraya satellite service. There are,
however, a few specific differences between
GSM and Satellite operation. The purpose of
this section is to make you aware of these
differences.
When the mobile phone is idle on the satellite system and has good signal strength,
calls can be received without the need of
extending the antenna. However, when a
satellite call is answered or initiated the
antenna must be pulled out entirely.
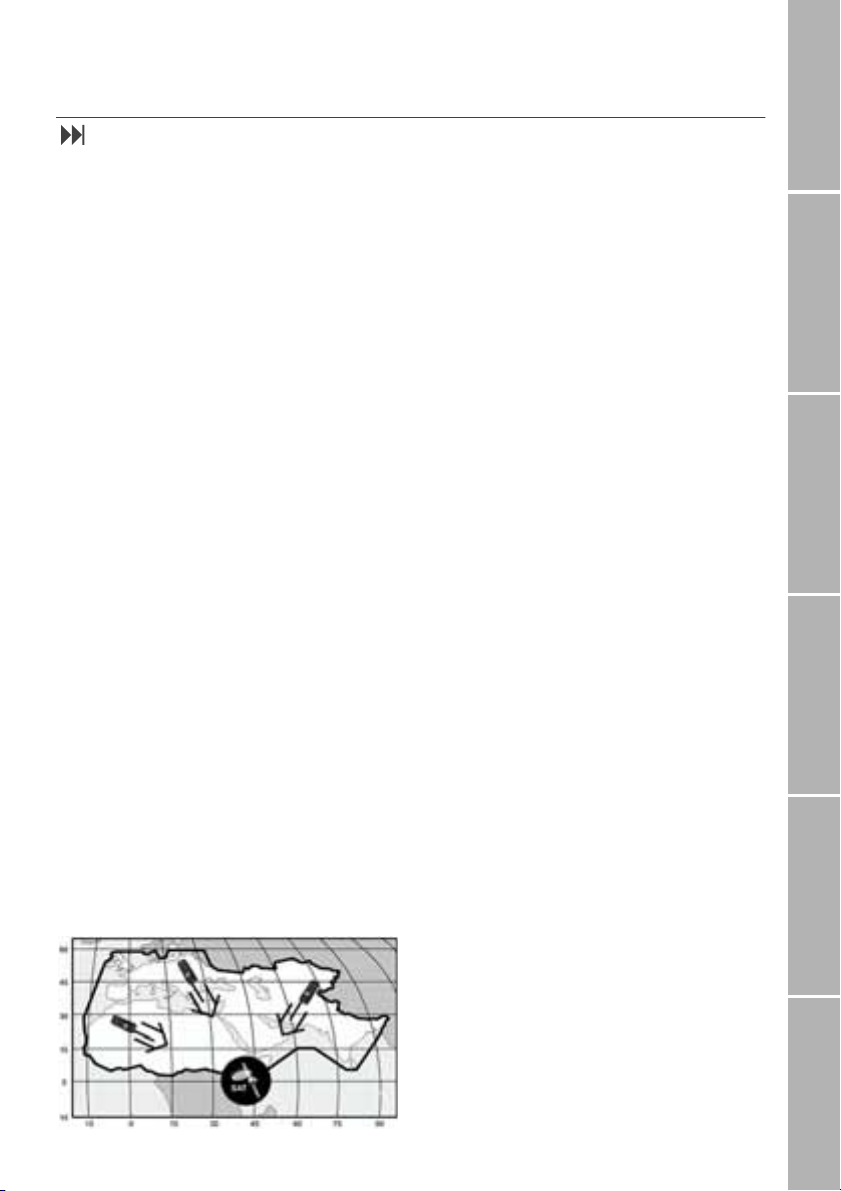
Watch the signal strength indicator on the
display and move the mobile phone for best
connection quality. Satellite calls require the
mobile phone to have a clear open surroundings with no obstruction. The presence of
obstacles such as buildings, trees or mountains between the mobile phone and the satellite will generally prevent communication.
To maintain good call quality, it is also important that the mobile phone's antenna be
pointed roughly in the direction of the
satellite:
High Power Alerting
The Thuraya system features a ’High Power
Alerting’ capability that allows you to be notified of incoming calls even when your mobile phone has poor signal coverage. When
the mobile phone receives a High Power
Alerting signal it will alert you with an ’early
ring’ and a special display message (see page
9). To answer the call, you must immediately
extend the antenna and move the mobile
phone into a position that has a clear ’line of
sight’ to the satellite. When this has occurred
the mobile phone display will change,
prompting you to answer the call and proceed with conversation. If the call is not answered promptly after the High Power Alerting signal is received, the calling party will be
diverted to voice mail and/or an
announcement stating that you are not available to answer.
Just like GSM, the satellite coverage area is
divided into many different service regions.
The mobile phone searches the network automatically (see page 42) and determines
which service region is active by registering
its presence with the Thuraya system. If the
mobile phone has not been able to update
this registration due to a weak signal, the
registration information will become out of
date or ’stale’. This is indicated on the display
by a blinking SAT icon in the left of the signal
strength indicator. This condition will clear
automatically once signal conditions improve
and a call is made or a period of time elapses.
You also have the option to speed up that
procedure by manually having the mobile
phone register with the Thuraya system.
This is accomplished with the function
Registration
page 43). Make sure you have good SAT signal strength before starting this operation.
in the mobile phone's menu (see
SAT
Phone/Call settingsNetworkSound & AlertStatistics/InfoGPS facilitiesAppendix
1
Page 8
Initial steps
}Inserting the SIM card
The SIM card (Subscriber Identity Module) is
Getting startedPhone number listsDuring a callDiversionSMS /BroadcastSecurity settings
the ’plug’ to the network and provides the
mobile phone number, memory for storing
phone numbers and short text messages
(SMS).
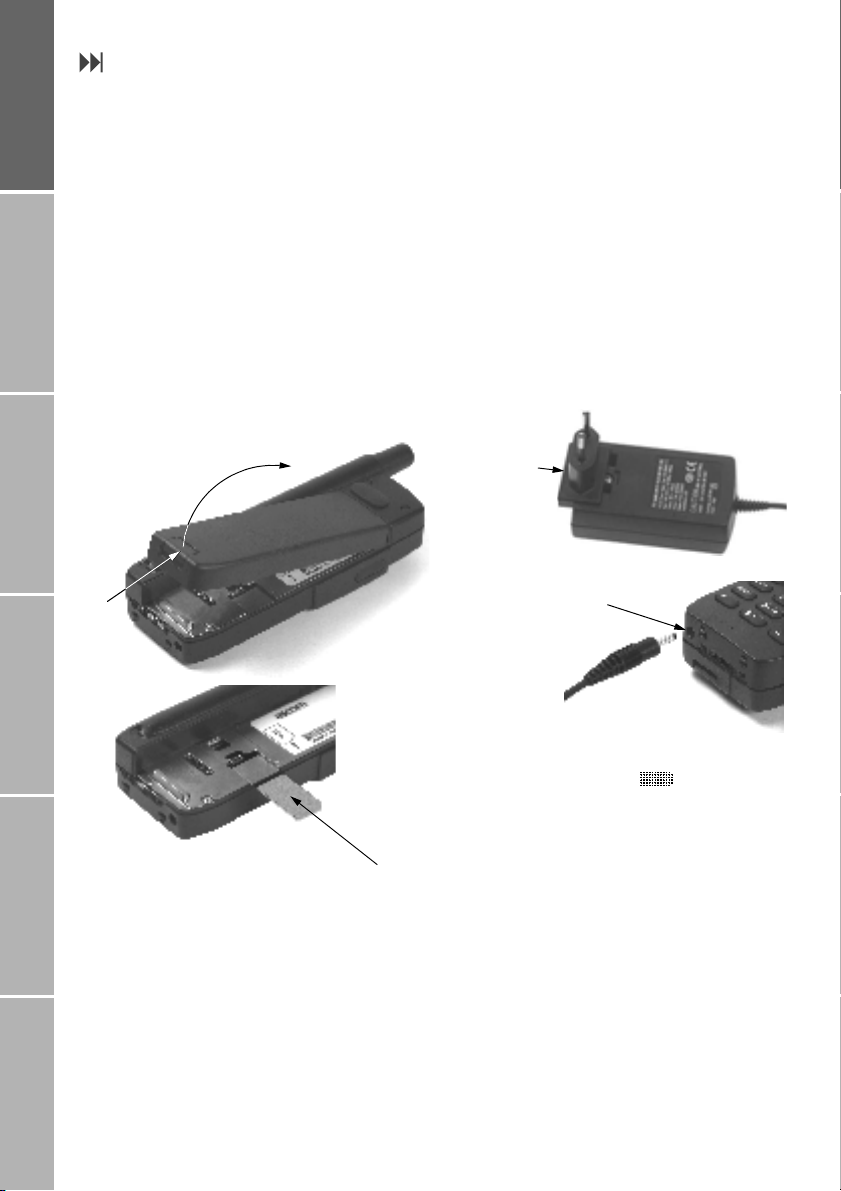
To insert the SIM card:
1. Switch off the mobile phone before removing the battery and inserting the SIM
card
2. Lift the battery from the back of the mobile phone and insert the SIM card as
shown in the pictures below
Lift
Press
}Connect the charger and
charge the battery
You should charge the battery supplied with
the mobile phone as soon as possible to obtain full battery charge.
To charge the battery:
1. Fit the country specific adapter into the
charger
2. Plug the charger plug into the charger
socket
3. Connect the charger to an AC source
Press to fit
adapter
Charger socket
Charger plug
While the battery is charging you see the
symbol changing to cyclically. The
6
battery is fully charged after 2 hours. The
charger stops charging automatically when
the battery is full. As long as the charger is
SIM card
2
not disconnected it restarts charging after a
while to keep the battery fully charged.
Further information on using charger and
battery is given on page 57.
You may still use the mobile phone while
charging the battery.
The internal clock for time, date (see page
36) and alarms (see page 47) will still keep on
running for about one hour if neither the
battery nor the charger is connected, but no
alarm will sound unless a charged battery is
connected.
Page 9
}Switch the mobile phone on/off
Press . for 2 seconds to switch the mobile phone on.
Press . for 2 seconds again to switch
the mobile phone off.
}Enter your PIN
The PIN (Personal Identification Number; 4 to
8 digits) is initially supplied together with the
SIM card by your service provider and can be
changed later (see page 31).
1. Enter PIN using keys on keypad.
Each digit entered is displayed as an
2. Press fox key below OK to confirm PIN
E F G
*
Enter PIN:
****
OK
Note:
Press
(digit to left of cursor position). Then enter
the correct digit.
to delete an incorrectly entered digit
!
SOS
The softkey SOS is available even
– when the SIM card in your mobile phone
is not valid
– when you have a valid SIM card but no
roaming with the selected service provider is possible.
After the PIN is accepted, you have to make
an emergency call in the same way as you
make a ’normal’ call.
When making an emergency call, remember
to give your name and mobile phone number
as well as the location of the emergency, as
accurately as possible. Remember that your
mobile phone may be the only means of
communication at the scene of an accident
do not cut off the call until given permission
to do so.
Note:
– Emergency calls may not be possible on
all cellular telephone networks or when
certain network services are in use.
– In uneven terrain or close to large build-
ings, the operating range can be limited,
which affects the connection.
– With some service providers it may not be
possible to make an emergency call if no
SIM card is inserted in the mobile phone.
Phone/Call settingsNetworkSound & AlertStatistics/InfoGPS facilitiesAppendix
}Emergency call (SOS)
Until you have entered the correct PIN, you
can make only emergency calls.
To make an emergency call before having
entered the PIN:
1. Press fox key below SOS
2. Press fox key below SOS again
The emergency number is called
or:
1. Enter a specific emergency number
2. Press
,
Emergency numbers
Emergency numbers normally are
– in GSM mode: 112
– in SAT mode: 112, 911, 999.
Note:
Check with your network service provider for
local emergency numbers in your area.
3
Page 10
}Lock/unlock the keypad
By locking the keypad you disable the keys so
that a number can not accidentally be
dialled, e.g. while the mobile phone is in your
Getting startedPhone number listsDuring a callDiversionSMS /BroadcastSecurity settings
pocket or bag.
With the keypad locked, you can still answer
incoming calls.
Unlock
If the keypad is locked, the softkey line
shows Unlock and in the status line the &
symbol is displayed:
&
$
!
Network
Lock
1. Press fox key below Menu
2. Press fox key below #
(to scroll to Keypad Lock)
3. Press
or:
1. Press fox key below Menu
2. Press
Select
within 3 seconds
%
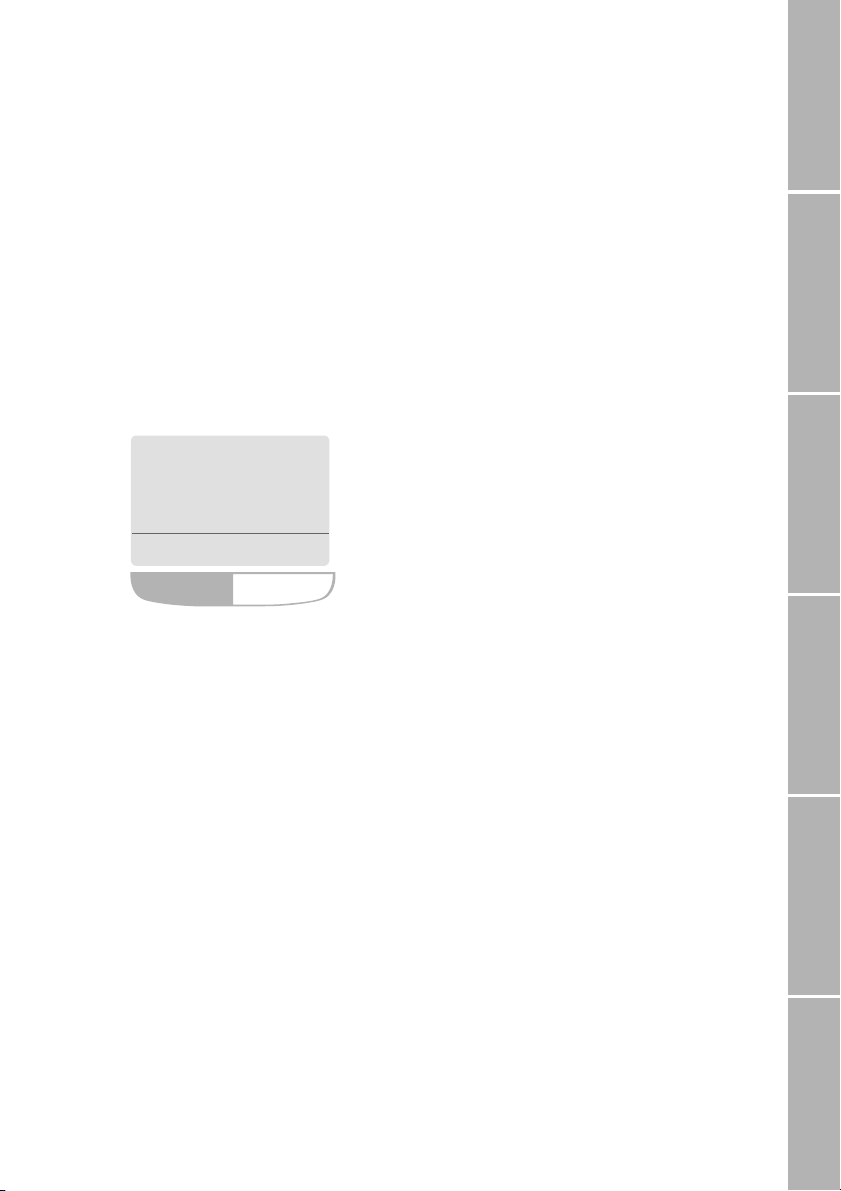
Display
}Display areas
After you have set up your mobile phone
according to the previous section, the display
will look similar to this:
$
!
1.
Network
2.
11:05p 11.01.01
Names
fox key
The display is organised into three areas;
every symbol and every input/output displayed has its own proper place. This helps
you to keep control over your ’workspace’,
even when your circumstances are changing
constantly.
Menu
3.
11:05p 11.01.01
Unlock
1. Press fox key below Unlock
2. Press
The pattern of the display areas is simple:
1. The status line shows symbols indicating
the operating conditions of the mobile
phone.
2. The main area shows data relating to
calls, menus and their submenus, and
displays the editors for the phonebook
and SMS messages. In idle mode (standby), the network name, time and date
are displayed.
3. The softkey line operates together with
the fox key beneath this line. It provides
access to menus and controls navigation
(see ’Using the fox key and the menu’ on
page 6).
within 3 seconds
%
4
Page 11

}Display symbols
$ Battery charge level indicator
(4 filling levels).
symbol blinking: Battery
6
empty, one minute is left to end an
active call at the most
% Call set up or call in progress
( Ringing tone is switched off
< An alarm is set
| An unconditional diversion is acti-
vated
& 1. Keypad is locked
2. Blinking symbol during a call:
Depending on the network, the
symbol indicates that ciphering
(call encryption) is off
} Simplified menu is activated
* New voice message has arrived
? Unread SMS
= Read SMS
\ Saved (draft) SMS
B
u
v
Active call
Call on hold
Waiting call
, While editing text in upper case
letters
. While editing text in lower case
letters
E F G Numeric input mode (e.g. phone-
book)
E J N While writing an SMS: ’Character
count-down’, starts with ’160’
S t R While sending to and receiving data
from an external device (e.g. using
the mobile phone as a modem connected to a PC):
S s : Sending data to PC,
r R : Receiving data from PC
7 Mobile Phone operates in GPS
(Global Position System) mode.
The icon is blinking if the mobile
phone loses connection to the GPS
! Signal strength in GSM mode:
4 bars indicate best conditions
" Signal strength in SAT mode. The
satellite symbol blinks when SAT
registration is no longer up to date.
Filling of the right symbol indicates
SAT signal strength
# Signal strength in High Power
Alerting mode (weak receive signal). The satellite symbol is blinking
when SAT registration is no longer
up to date
) Roaming sign: Displayed when us-
ing a network different from your
service provider’s network
Phone/Call settingsNetworkSound & AlertStatistics/InfoGPS facilitiesAppendix
5
Page 12
Using the fox key and the menu
In idle mode your mobile phone offers functions and settings which allow you to adapt
the mobile phone to your needs. You access
Getting startedPhone number listsDuring a callDiversionSMS /BroadcastSecurity settings
these functions through menus and submenus by scrolling or by using the appropriate shortcut.
}Softkey actions and menu navigation
Softkey actions for function calls and navigation in menus and lists is performed through
entries in the softkey line in conjunction with
the the fox key below this line.
Names
Menu
Press fox key on the left side to select the Names
Press fox key on the right side to select the Menu
Select
Press fox key on the left side to select the left softkey
(e.g. to scroll up in a list)
Press fox key in the middle to select the middle softkey
Press fox key on the right side to select the right softkey
(e.g. to scroll down in a list)
During a call or while you are editing a number or text, the menu system changes and
gives access to various functions, depending
on the context.
The following section describes the principles
of using the menu.
Depending on the number of softkey actions
offered (1 to 3), the fox key changes the
number of its available operating zones:
Change
Press fox key anywhere to select a single softkey displayed
Once you have entered the menu, you may
also scroll through it by pressing the upper
and lower volume key beside the loudspeaker (see page 10).
6
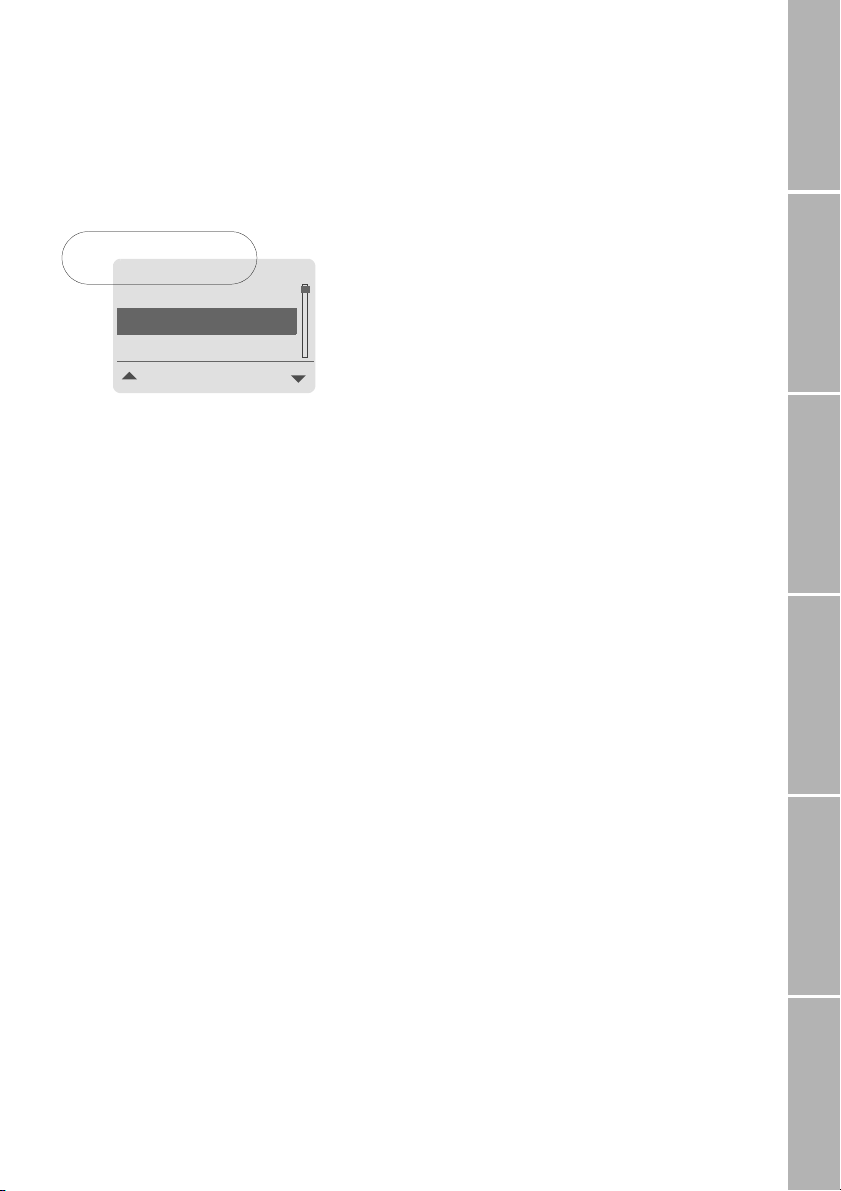
}Menu position indicator
Within a menu level the ’position indicator’
shows you the position of the entry currently
selected:
7-1-1-5-1
Others
VIP
!
Position
indicator
Business
Select
Page 13
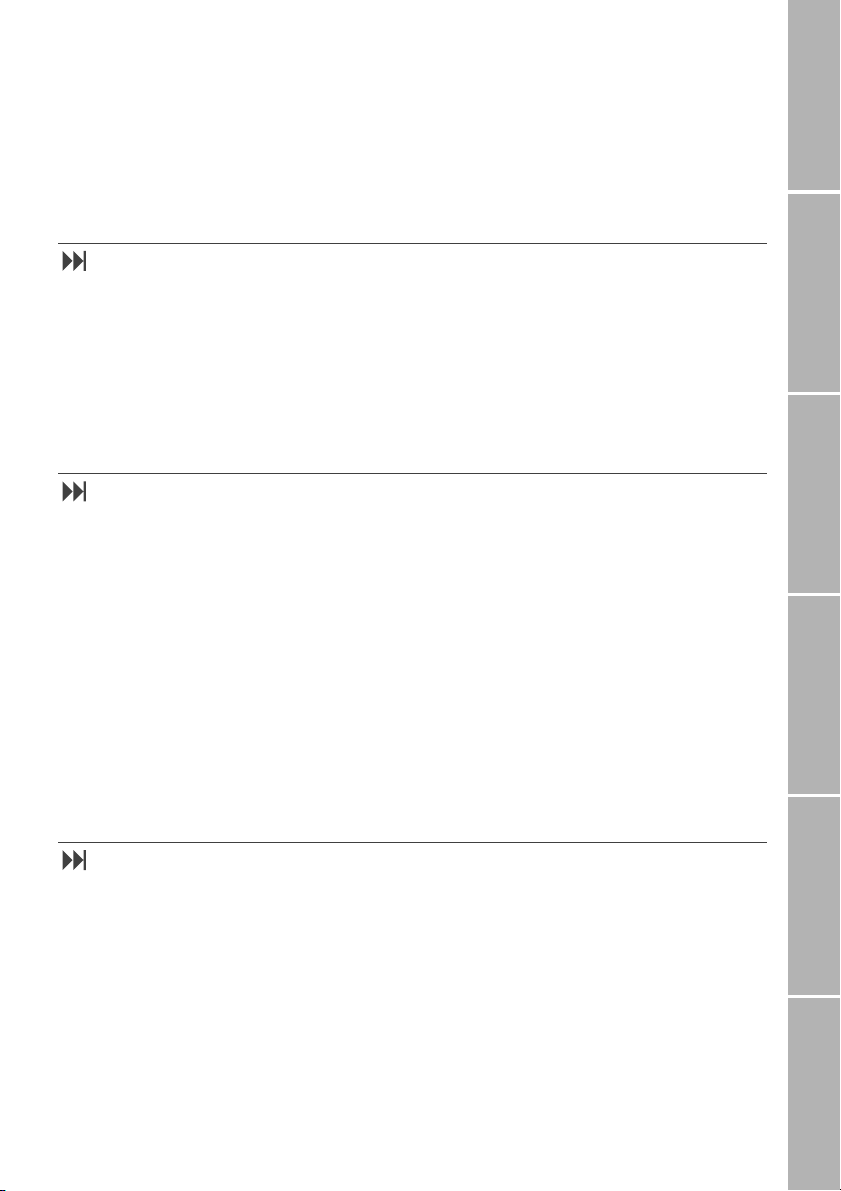
}Menu navigation using quick
access codes
Instead of navigating by means of softkeys,
you can alternatively navigate the menu by
means of ’quick access codes’. The quick access code in the display tells you the current
position in the branch of the menu tree:
Quick access code
7-1-1-5-1
!
Others
VIP
Business
Select
To make use of quick access codes for the
example above:
Press fox key below
Press
7115
Step back one menu level
If you want to continue working with the
menu and need to step back one level higher:
!
or
.
Press
Exit the menu
If you want to exit the menu system and go
back to idle mode:
Press ! for 2 seconds
Menu
}Simplified menu
You may find that you do not want to use
the complete menu all the time. In this case,
you can switch to the ’simplified menu’
which offers access to the most important
entries of the standard menu.
To switch to the simplified menu:
Press fox key below
The } symbol in the display
reminds you that the simplified
menu is activated
To switch back to the standard menu:
Press fox key below Menu for 2 seconds
again
Menu for 2 seconds
}Notation in this manual
From here on, wherever this manual describes menu navigation by scrolling with #/
$ and pressing Select, this will be presented
using the notation
Select
Menu > Settings > Sound & Alert >
Ringing > Caller Groups
instead of a long 9 step presentation like this:
1. Press fox key below Menu
2. Scroll to Settings
3. Press fox key below Select
4. Scroll to Sound & Alert
5. Press fox key below Select
6. Scroll to Ringing
7. Press fox key below Select
8. Scroll to Caller Groups
9. Press fox key below Select
The steps in this example take you to the
point at which you can change the setting.
Phone/Call settingsNetworkSound & AlertStatistics/InfoGPS facilitiesAppendix
Quick access notation
The quick access codes will be written in
this manual between brackets like this:
(7-1-1-5).
Furthermore you will find the complete list of
quick access codes together with the menu
tree on page 59.
7
Page 14

Making and receiving calls
To make calls you have to be logged in to a
network and the signal strength must be
adequate.
Getting startedPhone number listsDuring a callDiversionSMS /BroadcastSecurity settings
If in SAT mode the SAT icon 2 is flashing,
make sure that the mobile phone has a clear
view of the sky so that proper registration
can take place.
}Dial using the keypad
To dial a number in the ’traditional’ way:
Enter the number via the keypad.
For international calls press
first, until + is displayed.
Then enter the country code without a leading ’0’
Press ,
}Receiving a call
When you receive a call this is indicated in
several ways:
– You hear the ringing tone (melody and
volume according to the current setting)
– The % symbol is displayed
– The calling number is displayed if it is
transmitted. If the number is stored in
the phonebook, the corresponding name
is displayed instead of the number
Incoming calls (examples):
$
%
!
0
Note:
For more information about making and
receiving calls, see ’Options during a call’ on
page 17.
Note:
To add a pause in your dialling string you
may long press the
to indicate the pause).
key (p is displayed
%
End a call
Press
.
Accept a call
Press
,
Reject a call
Press Reject or
.
Turn ringing off
If you are called in a situation when ringing is
disturbing, you have the option to turn the
ringing tone off temporarily while the incoming call is being signalled:
Press Silent
+6547895894
Silent
%
$
Reject
!
John Fox
Silent
8
Reject
Page 15

High Power Alerting
If someone tries to call you in SAT mode, but
field strength is insufficient, the call cannot
be transmitted. Instead of this you will hear a
special ringing melody and the message
SAT Altering, Find Improved Reception’ indicated
’
on the display and the High Power Alerting
symbol (#) is displayed:
#
SAT Alerting
Find Improved
Reception
Silent
In High Power Alerting mode a call cannot be
accepted unless the user moves to a better
place for SAT signal reception (see "Introduction"), it can only be rejected and the High
Power Alerting melody can be silenced.
The call, however, will remain active as long
as the caller doesn’t end it.
Reject
Turn High Power Alerting melody off
Silent
Press
The High Power Alerting melody is
silenced, you can take measures to
accept the call (see below)
Reject the call
’Rejecting’ the call in this case means that the
mobile phone does not try to get a connection any longer.
Press Reject
The call is definitely terminated
Measures to accept the call
– Try to find a place for improved reception
– Pull out the mobile phone’s antenna
– Point it to the estimated satellite position
– Watch the field strength indicator
As soon as field strength is strong
enough the warnings disappear
from the display; now you can
accept the call as usual
If the call cannot be accepted, it is diverted to
your voice mailbox or another phone number
if activated.
Phone/Call settingsNetworkSound & AlertStatistics/InfoGPS facilitiesAppendix
9
Page 16

Setting the volumes
You can make volume settings in idle mode
and during a call with the left-hand side key
of the mobile phone. The settings made with
Getting startedPhone number listsDuring a callDiversionSMS /BroadcastSecurity settings
this key apply to
– the ringing volume
– the listening volume
– the listening volume of a connected
earset
The volumes can be set within the range of 6
levels and will be retained until the next
change.
If you want to set the ringing volume only,
refer to page 44.
To set the volumes:
Press the upper or lower key on the lefthand side of the mobile phone:
increase
decrease
With each press of the volume key,
the volumes increase or decrease
and the current level is displayed in
a bar chart:
volumes
Volume
10
Page 17

Phone number lists
There are four different lists which are stored in your mobile phone and which you can use to
call phone numbers:
– the phonebook
– the list of dialled numbers,
– the list of received calls
– the list of missed calls
Phonebook
Phone/Call settingsNetworkSound & AlertStatistics/InfoGPS facilitiesAppendix
The phonebook you can create on your SIM
card is a convenient aid to allow you to call
people by names instead of numbers.
Only the phonebook entries of the SIM card
presently inserted are available.
The number of phonebook entries you can
store and the maximum number of characters and digits for each entry depend on the
service provider’s SIM card.
Once numbers and names have been stored
in the phonebook, the mobile phone is able
to identify the names of callers (or SMS senders) by means of the phone numbers transmitted. So instead of numbers, the corresponding names are shown in the display
when you are called from a phone number
which is assigned to a phonebook name.
Moreover, the names from the phonebook
entries are found and displayed in the following lists:
– list of dialled numbers
– list of missed calls
– list of received calls.
The phonebook can also be used in all call
functions where it is possible to call another
number.
You can set up another ’phonebook’ for
’fixed dialling’, so that only certain numbers
can be called (see page 34).
Input sources for phonebook entries
There are different ways to make a new
phonebook entry:
1. First enter a number to be dialled and
then store the number in the phonebook
by pressing
2. Open the phonebook first and make a
new entry.
3. Store a number from the list of dialled
numbers in the phonebook (see page 15).
And, provided that the number was transmitted:
4. The number of an SMS sender while you
are reading the SMS (see page 26).
5. A number from the list of missed calls
(see page 16).
6. A number from the list of received calls
(see page 16).
Phonebook entries from the service
provider
Some service providers store service numbers
in the phonebook (e.g. hotline numbers);
these entries may possibly not be replaced or
deleted.
Save.
11
Page 18

}Make a phonebook entry
To make a new phonebook entry starting
from idle mode:
Getting startedPhone number listsDuring a callDiversionSMS /BroadcastSecurity settings
Enter the number to be stored
Save
Press
Note:
The first entry in the phonebook has always
to be made as described above.
The phonebook editor is displayed
or:
Names
Press
The phonebook is displayed
Options
Press
Select Add new
Enter the phone number
Next
Press
Enter the name to be assigned to the
number
How to enter letters, see ’Charac-
ter and digit input in text editor
mode’ on page 58
.
!$
Insert Name:
Paul|
Save
Save
Press
The number is saved in the phone-
Tip:
Store numbers with the international prefix
(+) and country code so that they can be
used while roaming.
book
Assign a short dialling number
After you have saved a phone number and
name in the phonebook, the mobile phone
assigns the entry to a short dialling number
from 2 up to a maximum of 255, depending
on the SIM card. Short dialling number 1 is
automatically assigned to the voice mailbox
number (see page 20). The maximum number of phonebook entries is determined by
your SIM card.
To change the assignment of a short dialling
number to a displayed phonebook entry:
Options
Press
Select Short Dialling
The currently assigned
short dialling number is displayed
Accept the number or enter a different
number
Press
Save
Note:
Phonebook entries assigned to a number
from 2 to 9 can be dialled with ’one touch
dialling’, if activated (see page 40).
Assign entry to a caller group
Furthermore you may (but need not) assign
the entry to a special ’caller group’ to which
you can also assign a special ringing tone
(see page 45).
You can assign a phonebook entry to one of
the following caller groups:
–VIP
– Business
–Private
– Family
– Others
To assign a phonebook entry to a caller
group:
Select Options > Caller Group
The list of caller groups is displayed
Scroll to the desired caller group
Press Select
12
Page 19

}Replace a phonebook entry
In case you are about to add a phonebook
entry, but the phonebook memory of your
SIM card is full, you are alerted to this and requested to enter the phonebook in order to
select an existing entry which will be replaced by the new one. Phonebook entries
stored by your service provider may possibly
not be replaced.
To replace an existing entry:
Scroll to the entry to be replaced
Replace
Press
If you don’t want to replace an entry:
Press !
The new entry will not be added to
the list
}Dial from the phonebook
Dial from the list
Press Names
The phonebook is displayed
Select the name to be called
or:
Press the key with the first letter of the
name to be dialled as often as indicated by
its position on the key
e.g. three times
name in the list beginning with ’L’
is displayed
If necessary scroll up or down the list until
the desired name is highlighted
Press
,
5
; the first
Dial short dialling numbers
In idle mode:
Enter the short dialling number assigned to
the phonebook entry (e.g.
Press
&
The assigned phonebook entry is
displayed
Press
,
25
)
One touch dialling
Phonebook entries assigned to a number
from 2 to 9 can be dialled at the press of a
single key if ’one touch dialling’ is activated
In idle mode:
2 to 9 for 2 seconds
Press
The assigned name is displayed,
the number is dialled automatically
Note:
One touch dial key 1 is automatically assigned to your voicemail number after you
have activated it (see page 20).
}Check phonebook entries
You can see the complete entry including the
phone number and short dialling number if
assigned.
To check the data of a phonebook entry:
Names
Press
The phonebook is displayed
Select the phonebook entry
Press
Options
Select Details
All data of the entry is displayed
You may check free capacity for phonebook
entries as described on page 49.
}Send phonebook entry as SMS
You can send a number from the phonebook
together with the corresponding name to an
SMS recipient:
Names
Press
The phonebook is displayed
Select the phonebook entry to be sent
Options
Press
Select Send As SMS
The SMS editor is displayed (see
page 23) with the phonebook
entry to be sent
Phone/Call settingsNetworkSound & AlertStatistics/InfoGPS facilitiesAppendix
13
Page 20

}Change a phonebook entry
You can edit a complete entry, including the
phone number, caller group assignment and
short dialling number.
Getting startedPhone number listsDuring a callDiversionSMS /BroadcastSecurity settings
Change a number and/or name
Press Names
The phonebook is displayed
Select the phonebook entry
Press
Options
Select Edit
Change the number
Press Next
Change the name (see page 58)
Save
Press
}Delete a phonebook entry
You can delete the complete entry, including
the phone number and short dialling number
if assigned. Phonebook entries stored by
your service provider may possibly not be deleted.
To delete a single phonebook entry
Press Names
The phonebook is displayed
Scroll to the phonebook entry to be
deleted
Options
Press
Select Delete
Press Delete
Change a short dialling number
Press Names
The phonebook is displayed
Select the phonebook entry
Press
Options
Select Short Dialling
The current setting is displayed
Change the short dialling number
Save
Press
Change a caller group assignment
Press Names
The phonebook is displayed
Select the phonebook entry
Press Options
Select Caller Group
The list of caller groups is displayed
Select the caller group
}Delete the phonebook (7-7-1)
If Fixed Dial is not activated:
Menu > Settings > Reset > Phonebook
Select
Press OK
If Fixed Dial is activated:
Select
Menu > Settings > Reset > Phonebook
Enter PIN2
Press OK
Press OK
Note:
Phonebook entries stored by your service
provider may possibly not be deleted.
14
Page 21

List of dialled numbers (2-3)
Your mobile phone stores the last 10 numbers you have dialled.
Note:
In case the number is stored in the phonebook and assigned to a name, the corresponding name is displayed in the list of dialled numbers instead of the number.
}See details of a dialled number
Select Menu > Call Register > Dialled Calls
The list of dialled numbers is
displayed, showing the most
recently dialled number
Scroll to the number to be redialled
Press Options
Select Details
Name (if the corresponding phonebook entry exists), number and dialling time and date are displayed
}Redial a number from the list
Select Menu > Call Register > Dialled Calls
The list of dialled numbers is
displayed, showing the most
recently dialled number
Scroll to the number to be redialled
Press
Options
Select Call
Tip: Quick redial
To redial a formerly dialled number you may
also use a quick access to the dialled numbers.
To redial the last called number:
Press
, twice
For ’automatic redial’ see page 39.
To redial a previously called number
You can select a specific number from the list
of dialled numbers and dial it again:
Store number in the phonebook
}
Select Menu > Call Register > Dialled Calls
The list of dialled numbers is
displayed, showing the most
recently dialled number
Scroll to the number to be stored
Press Options
Select Save
The phonebook editor is displayed
(see page 12)
}Delete a number from the list
Select Menu > Call Register > Dialled Calls
The list of dialled numbers is
displayed, showing the most
recently dialled number
Scroll to the number to be deleted
Press Options
Select Delete
Press Delete
}Delete all numbers in the list
Select Menu > Call Register > Dialled Calls
The list of dialled numbers is
displayed, showing the most
recently dialled number
Options
Press
Select Clear List
Press Clear
}Send as SMS
Select Menu > Call Register > Dialled Calls
The list of dialled numbers is
displayed, showing the most
recently dialled number
Scroll to the number to be sent
Options
Press
Select Send As SMS
The SMS editor is displayed (see
page 23)
Phone/Call settingsNetworkSound & AlertStatistics/InfoGPS facilitiesAppendix
,
Press
Scroll to the number to be called
Press ,
15
Page 22

List of missed calls (2-1)/List of received calls (2-2)
There are two more call lists in which numbers are stored and which you can make use
of in the very same way as the list of dialled
Getting startedPhone number listsDuring a callDiversionSMS /BroadcastSecurity settings
numbers (with the exception of ’quick redial’):
}List of missed calls
If you have missed one call or more, this will
be displayed (e.g. 2 Missed Calls), and the left
softkey changes to
By pressing
missed calls directly.
After you have entered the list by this way
the note and the softkey
available, unless you miss another call.
List.
List, you will enter the list of
List will be no longer
}List of received calls
To enter the list of received calls:
Select
Menu > Call Register > Received Calls
– The list of missed calls provides num-
bers of calls that have unsuccessfully
tried to call you
– The list of received calls provides num-
bers of calls you have accepted
Note:
In case a new SMS or a new cell broadcast arrives after the missed call, the SMS or the cell
broadcast advise respectively will replace the
missed call note.
To enter the list of missed calls, when no new
missed call is displayed:
Select
Menu > Call Register > Missed Calls
16
Page 23
Options during a call
Your mobile phone offers a number of options which are only available during a call.
You cannot use all of these features at all
times, because they vary depending on current circumstances.
Muting/unmuting the microphone
You can switch off the microphone so that
the caller is not able to hear what is being
said at your end of the line.
Sending DTMF signals during a call
During a call you can send DTMF (Dual Tone
Multi Frequency) signals, even if sending of
DTMF tones is not set in advance (see page
38).
By this you can send DTMF tones during a
call to a service which accepts only DTMF
tones, e.g. in order to enter access codes for
listening to an answering machine. After the
function is switched on, a DTMF tone is sent
with each key press.
The function has to be called for each DTMF
tone sequence to be sent.
Note:
Some supplementary services will be unavailable during satellite calls to other Thuraya
mobile phones.
To mute the microphone:
Press
Options
Select Mute
To unmute the microphone again:
Press
Unmute
To send DTMF tones during an active call:
Options
Press
Select Send DTMF
You can now dial control codes for
a service that requires DTMF tones
Send
Press
Note:
To add a pause in your dialling string you
may long press the
to indicate the pause).
key (p is displayed
%
Phone/Call settingsNetworkSound & AlertStatistics/InfoGPS facilitiesAppendix
Put a call on hold
If you have registered for this function in
your contract with your service provider, you
can interrupt a call temporarily without shutting down the connection.
To put a call ’on hold’:
Press
Options
Select Hold
To return to the call:
Press
Unhold
17
Page 24

Read/write SMS messages
You can read or write SMS messages during
a call:
Getting startedPhone number listsDuring a callDiversionSMS /BroadcastSecurity settings
Press Options
Select Messages
The menu items Write Message and
List Messages are displayed
See duration of the current call
To see the duration of the current call:
Press
Options
Select Call Duration
The elapsed time of the current call
is displayed
Press
to return to the call display
!
Handling more than one call simultaneously
If you have registered for this function in
your contract with your service provider, your
mobile phone allows you to handle more
than one call simultaneously. You may
– put a call that is in progress on hold,
while you make or answer a second call,
and then switch between the two calls
– set up a ’conference call’ to have a joint
conversation with up to five people
– put an individual or a group of confer-
ence members on hold while you add
other people to the conference call
– put conference members on hold while
you talk to someone privately (see ’Con-
nect a private call’ on page 19).
If you handle more than one call simultaneously the following symbols show a call’s
status together with the name from the
phonebook or with the number of the call, if
transmitted:
active call
B
call on hold
u
waiting call
v
For details on how to write, send and handle
messages see page 23.
}Call Waiting
When you receive a call while you are already
in a call, the new call (’waiting call’) is
announced by a special ringing tone.
To use this feature, you need to switch on
’call waiting’ (see page 39).
Accept a waiting call
You can answer the waiting call, which puts
the active call on hold:
Press
Options
Select Accept
Then you may swap between these active
calls (see page 19).
Reject a waiting call
To reject the waiting call:
Press
Reject
18
Page 25

}Make a new call
During a call you may call a new number. The
active call will be put on hold.
Enter the number via the keypad
Press
,
or:
Options
Press
Select New Call
Enter the number via the keypad
Press
,
Make a new call using the
phonebook
Press Options
Select Names
The phonebook is displayed
Scroll to the desired name
Press
,
Swap between parties
}
When you are connected with two parties
you can switch between the active call and
the call on hold. Swapping to one party puts
the other one on hold.
To swap:
Press Options
Select Swap
}Transfer a call
If you have one single call on hold and a
second one active you can connect the two
parties and disconnect yourself:
Press
Options
Select Call Transfer
}Conference call
You can have up to 6 parties in a conference
call (including yourself). You may add parties
to a conference using the phonebook, the
list of dialled numbers or the keypad.
To add a party during a call:
Make a new call (see above)
Options
Press
Select Conference
You now can talk to all parties at
the same time.
To add another call:
Make a new call and repeat these steps
Connect a private call
You can isolate a party from the conference
and talk exclusively with this ’private call’.
The other parties of the conference will be
put on hold and will not hear what you are
speaking with the ’private’ party:
Press Options
Select Private
The list of active calls is displayed
Scroll to the party you want to make a
private call with
Press
Select
The conference is put on hold and
Note:
You can only have up to two active calls at
one time. Therefore you can select
only if your second line is not busy with another call.
you can talk with the private party
Private
}End one call
To remove one call from the conference:
Press
Options
Select Remove
A list of all parties is displayed
Scroll to the call to be disconnected
Press
Remove
}End all calls in one step
Ending all calls in one step terminates the
multiparty call. All parties will be disconnected from each other and they will hear the
tone for ’line busy’.
Press Options
Select End All Calls
Phone/Call settingsNetworkSound & AlertStatistics/InfoGPS facilitiesAppendix
19
Page 26
Diverting calls (3)
This network feature diverts incoming calls to
another phone number or to your voice mailbox.
Getting startedPhone number listsDuring a callDiversionSMS/BroadcastSecurity settings
If you are not equipped to receive data, incoming data calls can be diverted to a PC
connected to a modem or a similar device.
You may divert all fax calls to a fax machine
or – as with data calls – to a PC.
You may also divert fax calls to the voice
mailbox, if your service provider supports this
feature.
Using the voice mailbox (7-2-6)/(1-4)
This service provides an ’answering machine’
in the network, and is useful when the mobile phone is turned off or unobtainable, or if
you don’t want to be disturbed. The service
can be provided for voice and fax calls. Using
the voice mailbox service may require a subscription from your service provider.
1. Before you can use the voice mailbox,
you must store your voice mailbox number on your SIM card. This number is
usually given to you by your service provider.
2. To make use of the voice mailbox function, you must divert incoming calls to
your voice mailbox.
Incoming calls can also be diverted to
– a different phone number or
– to your voice mailbox. Prerequisite for
this: you have already stored your voice
mailbox number; see below.
Depending on the network you are advised
briefly during every call setup if a diversion is
set and what kind of diversion condition it is.
Your mobile phone may also display certain
diversion settings.
You may activate or deactivate each diversion and you can check the divert status.
If all calls are diverted, this is indicated with
the | icon.
}Store voice mailbox number (7-2-6)
Select Menu > Settings > Phone >
Voicemail No.
Enter the number of your voice mailbox
Press Save
Now the number is stored on your
SIM card
}Listen to voice messages (1-4)
A new message in your voice mailbox may be
indicated by the * symbol on the status
line, but note that some service providers do
not support announcing new messages by
this way.
To listen to voice messages:
Menu > Messages > Listen Voicemail
Select
or:
Press
for two seconds
1
20
Further instructions about how to handle the
voice mailbox are given during the call and in
your service provider’s guide.
Page 27

Diverting voice calls (3-1)
You can divert incoming voice calls to your
voice mailbox or to another phone number.
Diversion conditions
Incoming voice calls can be forwarded for
the following conditions:
– All Voice (3-1-1):
All calls in general and regardless of any
circumstances are diverted to your voice
mailbox or to another phone number
(perhaps if you don’t want to be disturbed – your mobile phone will not even
ring); also called ’unconditional diversion’
Busy (3-1-2):
–
Calls are diverted to your voice mailbox
or to another phone number only if you
are talking to someone else on the mobile phone
No Reply (3-1-3):
–
Calls are diverted to your voice mailbox
or to another phone number after your
mobile phone has rung for some time,
but you haven’t answered
Not Reachable (3-1-4):
–
Calls are diverted to your voice mailbox
or to another phone number only if your
mobile phone is switched off or the
signal strength is too weak to establish
connection to your mobile phone.
Note:
You may set more than one diversion for
voice calls at a time (e.g. for
), but selecting All Voice has the highest pri-
ply
ority and will override the others.
Busy and No Re-
}Divert calls to the voice mailbox
Select Menu > Call Divert > Voice >
[diversion condition] > Activate >
Voicemail
If you have not yet stored your
voice mailbox number, you now
will get the opportunity to do this;
then the diversion will be set
}Divert calls to a phone number
Select Menu > Call Divert > Voice >
[diversion condition] > Activate >
Other Number
The last set number is displayed
Enter or change the number, or leave the
number unchanged
Press
Save
Note:
You may select a number from the phonebook by pressing
Delay time for ’No Reply’
If you select the divert condition
incoming voice call will be diverted after 15
seconds by default. You can change this setting:
Menu > Call Divert > Voice >
Select
Names.
No Reply, an
No Reply > Activate > Set Delay
Select the delay time from the list
}Show diversion status
Select Menu > Call Divert > Voice >
[diversion condition] > Status >
Voicemail
The current status is displayed
or Other Number
Phone/Call settingsNetworkSound & AlertStatistics/InfoGPS facilitiesAppendix
}Clear voice call diversion
Select Menu > Call Divert > Voice >
[diversion condition] > Deactivate >
Voicemail
or Other Number
}Clear all voice call diversions (3-1-5)
Select Menu > Call Divert > Voice >
Clear Divert
21
Page 28

Diverting fax calls (3-2)
You can divert incoming fax calls to your
voice mailbox or to another phone number.
Getting startedPhone number listsDuring a callDiversionSMS/BroadcastSecurity settings
}Divert faxes to voice mailbox
Select Menu > Call Divert > All Fax >
Activate > Voicemail
If you have not yet stored your
voice mailbox number, you now
will get the opportunity to do this;
then the diversion will be set
}Divert faxes to a phone number
Select Menu > Call Divert > All Fax >
Activate > Other Number
The last set number is displayed
Enter or change the number, or leave the
number unchanged
Save
Press
Note:
You may select a number from the phonebook by pressing Names.
Diverting data calls (3-3)
Usually voice mailboxes cannot store data
calls. So diverting data calls to your voice
mailbox probably won’t work.
}Show status of fax diversion
Select Menu > Call Divert>All Fax>Status>
Voicemail
or Other Number
}Clear fax diversion
Select Menu > Call Divert > All Fax >
Deactivate > Voicemail
or
Other Number
}Show status of data diversion
Select Menu > Call Divert>All Data>Status>
Voicemail
or Other Number
}Divert data to a phone or
PC number
Select Menu > Call Divert > All Data >
Activate > Other Number
The last set number is displayed
Enter or change the number, or leave the
number unchanged
Save
Press
Note:
You may select a number from the phonebook by pressing
Names.
Clear all diversions (3-4)
You can clear all diversions in one step:
22
}Clear data diversion
Select Menu > Call Divert > All Data >
Deactivate
Other Number
Select
Menu > Call Divert > Clear All Divert
> Voicemail or
Page 29

SMS messages
You can receive and send short text messages (SMS), each consisting of up to 160 characters.
This is a network feature and requires a subscription with the service provider.
Messages can be stored on the SIM card and
sent and received via GSM or SAT.
Writing an SMS (1-1)
To write an SMS, you have to open the SMS
editor:
Select Menu > Messages > Write Message
The SMS editor is displayed
}Editing tips
1. For instructions on how to use the keys
and move the cursor, see ’Character and
digit input in text editor mode’ on page
58.
2. When you press a key, the characters
which can be typed with this key are displayed in the middle of the softkey line.
3. The ’count down’ number in the status
line tells you how many characters you
can add to the message.
4. While entering lower case letters you see
. in the status line; while writing upper case letters, you see ,.
Prerequisite:
Store number of SMS center (7-8-1)
Before you can send or receive any messages, you need to set the number of your message center; you get this number from your
service provider:
Menu > Settings > SMS Parameter >
Select
SMS Center
Enter the number of the SMS center
Save
Press
Display while pressing a key:
E II
Thank
.
|
jkl5
The current letter is displayed inverted in the
softkey line.
Display while no key is pressed:
E II
Thank
.
|
Options
}Send a message
Select Options > Send
Enter the number or press Names to select
the number from the phonebook
Press
Send
Phone/Call settingsNetworkSound & AlertStatistics/InfoGPS facilitiesAppendix
23
Page 30

}Save a sent message
You may save the message; perhaps for
further editing or as a template:
Press
Getting startedPhone number listsDuring a callDiversionSMS/BroadcastSecurity settings
Replace an SMS in the list
In case you are about to save an SMS, but the
memory of your SIM card is full, you are
alerted to this and requested to enter the
SMS list in order to select an SMS which will
be replaced by the new one.
To replace an existing SMS after having
pressed
If you don’t want to replace an entry:
Options
Select Save
Save for a displayed SMS:
The SMS list is displayed
Scroll to the entry to be replaced
Press
Replace
Press
!
The SMS will not be added to the
list
}Set temporary SMS parameters
Some of the general SMS settings (see page
27) can be changed before sending or saving
an SMS.
SMS format
By altering the general setting you may define a different format for the current SMS
before sending, forwarding or saving:
Menu > Messages > Write Message
Select
Write the message
Press
Options
Select Format
The current setting is displayed
Press
Change
Select the desired format
Delivery report
By altering the general setting you may order
or cancel a delivery report for the current
SMS before sending, forwarding or saving:
Menu > Messages > Write Message
Select
Write the message
Press
Options
Select Delivery Report
The current setting (On or Off) is displayed
Press
Change
Press Save
24
Validity
By altering the general setting you may set a
different validity period for the current SMS
before sending, forwarding or saving:
Select
Menu > Messages > Write Message
Write the message
Press
Options
Select Validity
The current setting is displayed
Press
Change
Select the desired validity period
Page 31

Reading an SMS (1-2)
When a new message has arrived, this is displayed together with the total number of
new messages, e.g.:
$+!
5 New Messages
List
If you don’t want to see the reminder, you
can clear it by pressing
be reset for the next SMS messages to arrive.
Note:
In case you have missed a call, or a new cell
broadcast has arrived after the arrival of an
SMS, the missed call advise will replace the
message note.
The + symbol in the status line reminds you
that there are unread messages on your SIM
card. If the symbol on the status line is blinking, your SIM memory for messages is full!
You should remove some old messages. If an
SMS could not be sent to your SIM card because of a lack of memory space, the SMS
centre stores it until you have deleted some
old messages.
In order to read an SMS, you first have to enter the SMS list and select the SMS to be
read.
!. The counter will
Select an old or a saved SMS
In order to display a previously read or a
saved draft SMS:
Select
Menu > Messages > List Messages
Statistics of the SMS list are displayed:
- Number of unread messages
- Total number of messages on SIM
- Free SIM space for messages
Press List
The SMS list is displayed
}SMS list
The SMS list contains all SMS messages you
have saved and received:
$
=
George
+
Steve
\
Draft
!
Read
SMS status
At the beginning of each entry in the list, a
symbol indicates the status of the SMS:
=
Read SMS
?
Unread SMS
\
Saved (draft) SMS
Phone/Call settingsNetworkSound & AlertStatistics/InfoGPS facilitiesAppendix
Select a newly received SMS
To select a newly received SMS for reading, you can enter the SMS list immediately:
List
Press
The SMS list is displayed
}Display message text
Select the SMS to be read from the list
Press
Read
The message is displayed:
16:30 11.01.01
Maybe I’ll be late 1
hour tonight, because
there’s no ship at 6.
Options
25
Page 32

Handling SMS messages
When the SMS message text is displayed,
you have several options to handle the SMS:
– Reply to the SMS
Getting startedPhone number listsDuring a callDiversionSMS/BroadcastSecurity settings
– Edit the message text
– Forward the SMS to another recipient
– Delete the SMS
– Save the sender’s number in the phone-
book
If the message text is not already displayed,
you have to select the SMS and display the
message text as described in chapter
’Reading an SMS’ on page 25.
}Reply to an SMS
You may reply to the sender of the displayed
SMS by sending a new text message:
Options
Press
Select Reply
The SMS editor is displayed
(see page 23)
Enter the message text
Press Options
Select Send
Note:
’Reply’ is not possible for ’draft’ messages.
}Forward an SMS
You may send a received or saved SMS to a
different recipient:
Press Options
Select Forward
Enter the recipient’s number or press
Names to select the number from the
phonebook
Press
Send
}Delete an SMS
You may delete the displayed SMS:
Options
Press
Select Delete
Press Delete
}Store sender’s number in the
phonebook
Press Options
Select Save Number
The phonebook editor is displayed
(see page 12)
}Edit a received SMS
You may edit a received SMS, e.g. before you
save or forward it:
Press
Options
Select Edit
The SMS editor is displayed
(see page 23)
26
Page 33

General SMS parameters (7-8)
For the following SMS parameters you can
make settings which will be applied as general SMS parameters for all of your messages; nevertheless some can be changed for an
individual SMS (see page 24):
SMS Center (7-8-1)
–
Select to enter or change the center
number provided by your service provider
– Validity (7-8-2)
You can choose the period before the
SMS is deleted automatically in the
message center. Selectable validity periods are: 1 h, 6 h, 12 h, 24 h, 48 h,
1 week, maximum time
Format (7-8-3)
–
You can choose from the following
different SMS formats:
– Text
– Fax
– E-mail
– ERMES
(European Radio Message System)
Delivery Reports (7-8-4)
–
Display of information when the message has been delivered to its destination
or reason if it is delayed or if delivery is
not possible.
}SMS center (7-8-1)
Select Menu > Settings> SMS Parameter >
SMS Center
Enter the number of your SMS center
Press Save
}Validity (7-8-2)
Select Menu > Settings> SMS Parameter >
Validity
The current setting is displayed
Press
Change
Select the desired validity period
}SMS format (7-8-3)
Select Menu > Settings> SMS Parameter >
Format
The current setting is displayed
Press Change
Select the desired format
}Delivery reports (7-8-4)
Select Menu > Settings> SMS Parameter >
Delivery Reports
The current setting (On or Off) is displayed
Press Change
Press Save
Phone/Call settingsNetworkSound & AlertStatistics/InfoGPS facilitiesAppendix
27
Page 34
Info broadcast (1-3)
Certain service providers offer an information service (broadcast), e.g. local dialling
codes, traffic information, weather forecast,
Getting startedPhone number listsDuring a callDiversionSMS/BroadcastSecurity settings
events and other local information services.
The following options for handling broad-
casts are available:
Switch info broadcast on/off (1-3-1)
Information broadcasts related to the activated topics are sent to you automatically at
specific intervals when broadcasting is
switched on.
– Status (1-3-1)
You can switch broadcasting on or off.
– Topic (1-3-2)
To receive info broadcasts, you need a
special list of info broadcast channel
numbers from your service provider. You
can enter these numbers in your list to receive the desired information.
Set Language (1-3-3)
–
You may select the language(s) for displayed broadcasts. This setting is different from the general language settings
of the mobile phone. Only information in
the selected language(s) will be displayed.
To switch broadcasting on/off:
Messages > Info Broadcast >Status
Select
The current setting (On or Off) is displayed
Press
Change
Press Save
Handling info broadcast topics (1-3-2)
}Insert a topic
Ask your service provider for the available
topics.
Messages > Info Broadcast > Topic
Select
The topic list is displayed
Press
Options
Select Insert
Enter the topic number
Press
Next
Enter the topic name
Press
Save
28
}Select/deselect a topic (1-3-2)
To receive information about a topic, you
have to select the topic by marking it in the
topic list.
Messages > Info Broadcast > Topic
Select
The topic list is displayed
Scroll to the topic to select
Press Options
Select Mark or Unmark
Page 35

}Edit a topic
Select Messages > Info Broadcast > Topic
The topic list is displayed
Scroll to the desired topic
Press Options
Select Edit
Edit the topic number
Press
Next
Edit the topic name
Press
Save
Set broadcast language(s) (1-3-3)
}Delete a topic
Select Messages > Info Broadcast > Topic
The topic list is displayed
Scroll to the topic to delete
Press Options
Select Delete
Phone/Call settingsNetworkSound & AlertStatistics/InfoGPS facilitiesAppendix
Topics from the info broadcast system can be
displayed in several languages.
Read an info broadcast
When a new broadcast arrives, the topic
name is displayed together with the first line
of the info.
To set the broadcast language(s) for displayed topics:
Select Messages > Info Broadcast >
Set Language
A list with possible language
settings is displayed (All = receive
the messages in all languages)
Scroll to the desired language
Mark or Unmark
Press
Repeat this for each language to be
displayed
To read the whole info:
Press
Read
29
Page 36

Security settings (6)
You can protect your mobile phone against
unauthorised use by setting appropriate restrictions.
Getting startedPhone number listsDuring a callDiversionSMS/BroadcastSecurity settings
All restrictions are controlled by codes which
differ depending on the type of restriction
selected.
There are various codes you have to enter to
gain access to some of the functions of your
mobile phone:
PIN (4 to 8 digits)
The PIN (Personal Identification Number)
protects your SIM card against unauthorised
use and is supplied with the SIM card. The
PIN is required to
– switch on the mobile phone (if PIN con-
trol is activated)
– change the PIN itself.
If you enter an incorrect PIN, your input is re-
jected, you are advised to reenter the PIN.
The number of attempts you have left is displayed.
After entering an incorrect PIN three times in
succession, operation of the mobile phone is
blocked and can only be unlocked by means
of the PUK.
PIN2 (4 to 8 digits)
The PIN2 is given to you together with the
SIM card by your service provider and is required to
– insert, edit and delete fixed dialling num-
bers and activate or deactivate them
– change cost charging unit counters
– delete all phonebook entries
– change the PIN2 itself.
If you enter an incorrect PIN2, your input is
rejected, you are advised to reenter the PIN2.
The number of attempts you have left is displayed.
After entering an incorrect PIN2 three times
in succession, all functions requiring PIN2 entry are blocked and can only be unlocked by
means of the PUK2.
PUK/PUK2
If your PIN/PIN2 functions are blocked, you
need PUK/PUK2 (Personal Unlocking Key) to
activate PIN/PIN2 control again. PUK and
PUK2 are given from your service provider together with the SIM card, PIN and PIN2.
When PUK/PUK2 is required, you are asked
for it in a display. In this case do the following:
Enter the PUK/PUK2 and press
Enter a new PIN/PIN2 code and press OK
Enter the new PIN/PIN2
OK to confirm
Press
OK
30
If you enter an incorrect PUK/PUK2 ten times
in succession your SIM card is locked, you
cannot use it any longer and it has to be exchanged by your service provider.
Page 37

Security code (5 digits)
By default, the security code is not set. You
can use the security code to
– protect your mobile phone against unau-
thorised use even if another mobile
phone’s SIM card is used
– restore the factory settings of your mo-
bile phone
– switch security control by security code
off or on
– change the security code itself.
If you enter an incorrect security code
10 times in succession, the mobile phone is
locked for one hour, before you have
10 more attempts and so on. Only emergency calls can be made during this hour. If all
attempts fail, contact the manufacturer (see
at the end of this manual).
Barring code (4 digits)
The barring code (also called ’network pass-
word’) is supplied with the SIM card from
your service provider and will be needed to
handle the security with the network. It is
possible to lock some mobile phone features
that interact with the network. The barring
code is required to
– activate or deactivate the barring of calls
– change the barring code itself.
The procedures after having entered an incorrect barring code vary depending on service providers.
Handling PINs, security code and barring code (6-3/6-4/6-5)
Phone/Call settingsNetworkSound & AlertStatistics/InfoGPS facilitiesAppendix
}Activate/deactivate PIN request
(6-3)
You can switch PIN control off or on, but
beware of the risk of unauthorised use when
PIN control is switched off!
Select
Menu > Security > PIN Code
The current setting is displayed
Press
Change
Press Save
Enter PIN
Press OK
}Activate/deactivate security code
(6-5)
The security code can be deactivated and
activated again:
Select
Menu > Security > Security Code
The current setting is displayed
Change
Press
Press Save
Enter security code
OK
Press
Note:
There is no preset security code in your new
mobile phone, you are advised to set it,
when you select this function for the first
time.
31
Page 38

}Change PIN (6-4-1)
You can change your PIN to any 4 to 8 digit
number:
Select
Getting startedPhone number listsDuring a callDiversionSMS/BroadcastSecurity settings
Menu > Security > Change Codes >
Change PIN
Enter PIN
Press OK
Enter new PIN
OK
Press
Enter new PIN to confirm
OK
Press
}Change PIN2 (6-4-2)
You can change your PIN2 to any 4 to 8 digit
number:
Select
Menu > Security > Change Codes >
Change PIN2
Enter PIN2
OK
Press
Enter new PIN2
OK
Press
Enter new PIN2 to confirm
Press OK
}Change Security Code (6-4-3)
You can change the security code (5 digits):
Select
Menu > Security > Change Codes >
Security Code
Enter security code
OK
Press
Enter new security code
Press OK
Enter new security code to confirm
OK
Press
}Change Barring Code (6-4-4)
The call barring restrictions are controlled in
your network. Your barring code (network
password) is available from your service provider.
Select Menu > Security > Change Codes >
Barring Code
Enter barring code
OK
Press
Enter new barring code
Press OK
Enter new barring code to confirm
OK
Press
Call Barring (6-1)
The location of your mobile phone can be
checked by the network and in accordance
to this the destinations for outgoing call
types can be categorised.
Barring functions require subscription and
the barring code (network password).
32
Note:
Your mobile phone gives you the possibility
to bar incoming and/or outgoing calls altogether, but it doesn’t distinguish between
the services which you might want to bar
(SMS, fax call, voice call or data call) and
those you don't. If you wish to selectively bar
one or more of these services, then you must
arrange to do so with your service provider.
A corresponding barring code will be given
to you, which you then must enter in your
mobile phone as follows: *[barring code]#.
In addition it is not possible to set certain call
barrings if certain call diversions are active.
So you should check the result of the call barring activation.
Page 39

}Barring of outgoing calls (6-1-1)
Barring of the following outgoing call types
can be activated/deactivated and the current
barring status for each of them can be displayed:
All Calls (6-1-1-1)
–
All outgoing calls are blocked except
emergency calls (numbers 112 for GSM
and 112, 911 and 999 for SAT).
All Int. Calls (6-1-1-2)
–
Only national calls can be made.
– Int. Except Home (6-1-1-3)
Only calls within and to your home coun-
try can be made.
Activate/deactivate (6-1-1)
Select Menu > Security > Call Barring >
Outgoing > [call type] >
or Deactivate
Activate
Enter barring code
Press OK
}Barring of incoming calls (6-1-2)
Barring of the following incoming call types
can be activated/deactivated and the current
barring status for each of them can be displayed:
All Calls (6-1-2-1)
–
No calls can be received.
– Calls Abroad (6-1-2-2)
Calls can only be received when you are
in reach of your home network.
Activate/deactivate (6-1-2)
Select Menu > Security > Call Barring >
Incoming > [call type] >
or Deactivate
Activate
Enter barring code
OK
Press
Display status (6-1-2)
Select Menu > Security > Call Barring >
Incoming > [call type] > Status
Phone/Call settingsNetworkSound & AlertStatistics/InfoGPS facilitiesAppendix
Display status (6-1-1)
Select Menu > Security > Call Barring >
Outgoing > [call type] > Status
}Clear barring of calls (6-1-3)
Clearing barring functions requires the
barring code (network password).
Clear all barring of outgoing calls
(6-1-3-1)
Select Menu > Security > Call Barring >
Clear Barrings > Outgoing
Enter the barring code
Press OK
Clear all barring of incoming calls
(6-1-3-2)
Select Menu > Security > Call Barring >
Clear Barrings > Incoming
Enter the barring code
OK
Press
Clear all call barrings (6-1-3-3)
Select Menu > Security > Call Barring >
Clear Barrings > All
Enter the barring code
OK
Press
33
Page 40

Fixed Dial (6-2)
This function provides a second phonebook
on the SIM card for ’fixed dial’. If ’fixed dial’
is activated, only numbers from this list can
Getting startedPhone number listsDuring a callDiversionSMS/BroadcastSecurity settings
be dialled. It is possible to save partial numbers, for example area codes.
Example:
4 numbers are stored in the fixed list:
The number groups 0171, 0172, 0173 and
the unique number +4989892629.
So you are allowed to dial:
0171145875..., 017156471299 ... ,
0172565634..., 017295741642... ,
0173125862..., 017332567815... and
+4989892629 only.
If you dial a number which does not corre-
spond with the set of fixed dialling numbers,
an error message is displayed briefly.
}Add fixed dialling numbers (6-2-3)
If the fixed dialling list is full, you have to delete an entry (see page 34) before you can
add a new one.
Menu > Security > Fixed Dial >
Select
Add New
Enter PIN2
Press OK
Enter number – or initial digit(s)
Save
Press
Enter name
Save
Press
}Activate/deactivate fixed dialling
(6-2-2)
Select Menu > Security > Fixed Dial>On / Off
Press Change
Press Save
Enter PIN2
OK
Press
Note:
If ’fixed dial’ is activated, but the fixed dial list
is empty, no calls can be made!
}Change fixed dialling number (6-2-1)
You can change the number and/or name for
an entry in the fixed dialling list:
Select Menu > Security > Fixed Dial >
Show List
Scroll to the entry to be changed
Options
Press
Select Edit
Enter PIN2
OK
Press
Change the number
Next
Press
Change the name (see page 58)
Press Save
Replace a fixed dialling number
In case you are about to add a fixed dialling
number to the list, but the memory of your
SIM card is full, you are alerted to this and
soon after you are advised by a message to
replace an existing entry.
To replace an existing entry in the list:
Scroll the list to the entry to be replaced
Replace
Press
If you don’t want to replace an entry:
Press
!
The new entry will not be added to
the list
}Delete fixed dialling number (6-2-1)
Select Menu > Security > Fixed Dial >
Show List
Scroll to the desired name/number
Options
Press
Select Delete
Enter PIN2
OK
Press
Press Delete
34
Page 41

}Show details of fixed dialling
numbers (6-2-1
Select Menu > Security > Fixed Dial > Show
List
Scroll to the desired name/number
Options
Press
Select Detail
Name and number of the entry are
displayed
)
Closed User Groups (6-8)
Phone/Call settingsNetworkSound & AlertStatistics/InfoGPS facilitiesAppendix
Some service providers offer subscription to
the ’closed user group’ feature. You may
save call costs by making calls within a closed
user group. A closed user group is a pool of
phone numbers which your service provider
specifies by index number.
To activate this function you need to obtain
the index number for the desired closed user
group from your service provider.
}Activate a closed user group
Select Menu > Security > Closed Group
The current setting is displayed
Change
Press
Select On or Preset
(Preset = as arranged with your
service provider)
Only if you select On:
Enter the index number for the closed user
group given by your service provider
Save
Press
}Deactivate the closed user group
Select Menu > Security > Closed Group
The current setting is displayed
Press Change
Select Off
35
Page 42

Phone and call settings (7)
Getting startedPhone number listsDuring a callDiversionSMS/BroadcastSecurity settings
You can define a greeting text that is displayed after you entered the PIN.
Time and date (7-5)
Time and date of the internal clock are indicated in idle mode.
The time stamps are also required for
– the list of dialled numbers
– the list of missed calls
– the list of received calls and
– setting and alerting alarms.
The internal clock for alarms will still keep on
running for about one hour if neither the
battery nor the charger is connected.
}Set time (7-5-1)
Select Menu > Settings > Clock > Set Time
The current setting is displayed
Enter the correct time in the set format via
keypad
Save
Press
Greeting text (7-2-3)
}Edit greeting text
Select Menu > Settings > Phone > Greeting
The editor opens for editing the
text (see ’Character and digit input
in text editor mode’ on page 58)
Edit the greeting text
Press Save
}Set time format (7-5-2)
The setting is possible in 12 hour format (e.g.
11:05p) or 24 hour format (e.g. 23:05):
Select
Menu > Settings > Clock >Time Format
The current setting is displayed
Change
Press
Scroll to the desired the time format
Press Select
}Set date (7-5-3)
Select Menu > Settings > Clock > Set Date
The current setting is displayed
Enter the correct date in the set format
’DD.MM.YY’ (e.g. 11.09.00)
Save
Press
Language (7-2-1)
The default language for general use (e.g. for
displayed text) is preset in the SIM card (see
page 49) but you may select a custom language.
The languages for the info broadcast service
can be selected independently; see page 29.
36
To change the language setting:
Select
Menu > Settings > Phone > Language
The current setting is displayed
Scroll to the desired language
(
Automatic= language preset in the
SIM card)
Select
Press
Page 43

Numbers for voice, fax and data (7-2-4)
If you have obtained more than one mobile
phone number from your service provider
and the SIM card supports this, you can store
different mobile phone numbers for voice,
data and fax calls on the SIM card as a reminder.
Cost settings (7-3-7)
To keep control over your call costs, you may
set a charge rate, i.e. an amount of money
(in some currency) per call unit, and an accumulated call cost limit (expressed as a number of call units or as an amount of money).
Furthermore, you may select whether or not
the cost will be displayed at the end of a call.
You can make charge settings for:
Charge Rate (7-3-7-1)
–
You can choose to display cost just in
number of units in a currency. If you
want to display cost in currency you need
to enter a charge rate per unit.
Cost limit (7-3-7-2)
–
You can define a cost limit; the mobile
phone will suspend service when the cost
limit is reached.
– Cost displayed (7-3-7-3)
Cost information will be displayed after
finishing a call. This function depends on
the functionality of the network and can
be switched off or on.
You may also display cost statistics and the
amount of remaining credit; see page 48.
To store numbers for services:
Menu > Settings > Phone >
Select
Own Number > Voice
Enter the number
Press Save
or Fax or Data
}Set charge rate
Select Menu > Settings > Call > Cost >
Charge Rate
The current setting is displayed
Change
Press
Enter PIN2
OK
Press
Select the currency
Enter the currency symbol
Press Save
Enter the desired charge rate per unit
For the decimal point use the *
Press Save
}Set cost limit
Select Settings > Call > Cost > Cost Limit
The current setting is displayed
Change
Press
Enter PIN2
OK
Press
Enter the desired cost limit
Press
Save
}Switch display of cost on/off
Select Settings > Call > Cost >
Cost Displayed
The current setting is displayed
Change
Press
Press Save
Phone/Call settingsNetworkSound & AlertStatistics/InfoGPS facilitiesAppendix
37
Page 44

Setting baud rate for data transmission (7-9)
You can connect your mobile phone to a PC
to use it as a modem for data and fax
services. The PC connection also supports the
Getting startedPhone number listsDuring a callDiversionSMS/BroadcastSecurity settings
downloading of GPS information from the
mobile phone to the PC. To connect the mobile phone to a PC you need a data cable
compatible with the mobile phone.
Usually the mobile phone discovers the accurate baud rate setting for data transmission
to a PC automatically (setting
some devices do not work with the automatic baud rate setting. In this case you have
to set the baud rate manually.
The baud rate setting affects the connection
speed between the mobile phone and the PC
only. The connection speed in the GSM and
satellite network is limited to 9600 baud.
Automatic). But
Any key answer (7-3-1)
This function enables answering a call by
pressing any key (except
key and the fox key™).
.
, the volume
The following baud rates can be set:
Automatic (=standard setting of the con-
–
nected device is recognised; max.
19200 baud)
300 Baud, 1200 Baud, 2400 Baud,
–
4800 Baud, 9600 Baud,19200 Baud
Note:
The GPS NMEA protocol always uses 4800
Baud (you can not change this).
To set the baud rate with external devices:
Select
Menu > Settings > Data Link Rate
The current setting is displayed
Press Change
Scroll to the desired baud rate
Select
Press
This function can be switched off or on:
Select
Menu > Settings > Call >Any Key
Answer
The current setting is displayed
Change
Press
Press Save
Send DTMF tone (7-3-2)
This function enables sending DTMF (Dual
Tone Multi Frequency) tones during a call to
a service which accepts only DTMF tones,
e.g. in order to enter access codes for listening to an answering machine. If you have
switched this feature on, a DTMF tone is sent
with each key press during a call.
38
This function can be switched on or off:
Menu > Settings > Call >DTMF Tone
Select
The current setting is displayed
Change
Press
Press Save
Page 45

Set call waiting (7-3-3)
If your service provider supports this feature,
you can answer a call while you are telephoning with another person. Answering
the new call (’waiting’ call) will put the first
call on hold until you swap to it again (see
’Options during a call’ on page 17).
Sending of own number (7-3-4)
This is a network feature: Usually your mobile
phone number is transmitted to the phone
being called. In case you don’t want to be
identified, you may disable or enable the
sending of your mobile phone number.
Your service provider can set that your number is never shown to the called party even if
you switch on sending of your own number.
Automatic redial (7-3-5)
If automatic redial is switched on, the mobile
phone automatically redials a dialled number
which was busy or not reachable during the
first attempt.
You can interrupt redialling at any time by
pressing
End or
.
.
}Activate/deactivate ’call waiting’
(7-3-3)
Select Menu> Settings>Call>Call Waiting >
Activate
or Deactivate
Press OK
}Display status (7-3-3)
Select Menu> Settings>Call>Call Waiting >
Status
To switch off or on the sending of your mobile phone number:
Menu > Settings > Call > Send Own No.
Select
The current setting is displayed
Scroll to
Press Save
To switch automatic redial off or on:
Select
Press
Press Save
On, Off or Preset
(Preset=as arranged with service
provider)
Menu > Settings > Call >
Autom. Redial
The current setting is displayed
Change
Phone/Call settingsNetworkSound & AlertStatistics/InfoGPS facilitiesAppendix
39
Page 46

Activate/deactivate ’one touch dialling’ (7-3-6)
This function enables calling the number of a
phonebook entry assigned to a number from
1 to 9 by a long press to the corresponding
Getting startedPhone number listsDuring a callDiversionSMS/BroadcastSecurity settings
key
Note:
1
voicemail number (see page 20).
...
1
is automatically assigned to your
9
(see page 12).
Use in a car (7-4)
The following functions are helpful when
using the mobile phone in a car.
– Auto Answer (7-4-1)
Your mobile phone answers incoming
calls after 3 seconds automatically, when
connected to a vehicle docking adapter.
Backlight (7-4-2)
–
This feature determines whether the display and keys are illuminated all the time
or only when you use the mobile phone
when connected to a vehicle docking
adapter.
Restore factory settings (7-7-2)
This function can be switched on or off:
Select Menu > Settings > Call >
One Touch Dial
The current setting is displayed
Press Change
Press Save
Both, ’Auto Answer’ and ’Backlight’
switched on or off:
Select Menu > Settings > Car >
Auto Answer
Press Change
Press Save
For details on how to connect and use the
vehicle docking adapter refer to the manual
delivered with the accessory.
or Backlight
can be
You can reset the phone’s settings to the
way they were when you bought your
phone.
Note that SIM and network settings remain
unchanged.
LCD Contrast (7-2-5)
You can select the LCD contrast from
6 levels.
40
To restore the mobile phone’s factory settings:
Menu > Settings > Reset > Factory Set
Select
Enter your security code
OK
Press
Press OK
Select
Menu > Settings > Phone > LCD
Contrast
The current level is displayed in a
bar chart
Scroll to the desired level
Select
Press
Page 47

Network management (4/5)
You have the choice to telephone in satellite
mode (SAT) or in GSM 900 mode (GSM) – or
to switch automatically between the two
modes if you happen to be in an area where
only one of the two is possible.
Operating mode: GSM and/or SAT (5)
You can set the mobile phone’s operating
mode to GSM or to SAT access. Or you may
use both of them by switching between
them.
}Single mode
Irrespective of whether you select exclusive
GSM Only or SAT Only mode, you will lose net-
work connection if you leave the coverage
area that can be reached in that single mode.
To set the operation mode:
Menu > System Pref.
Select
The current setting is displayed
Change
Press
Select GSM Preferred or
SAT Preferred or
GSM Only or
SAT Only
There are several ways to fine-tune the mobile phone’s access to networks so that you
are never in danger of losing connection with
the network.
Note:
For display symbols indicating the network status and status of signal strength, see page 5.
}Preferred mode
If you decide to set the ’preferred’ access
either to GSM mode or to SAT mode, the
mobile phone will normally operate in that
preferred mode. Only if signal strength for
operation in the preferred mode becomes
too weak the mobile phone switches to
operate in the alternative mode:
GSM Preferred is selected: The mobile
– If
phone will initially attempt to access a
GSM network, if no GSM network is
available it will automatically attempt to
access a SAT network. When operating
on a SAT network, the mobile phone periodically scans for available GSM networks and will switch to GSM if the
service is available
SAT Preferred is selected: The mobile
– If
phone will initially attempt to access a
SAT network, if no SAT network is available it will automatically attempt to
access a GSM network. When operating
on a GSM network the mobile phone will
only switch to SAT service if the GSM
signal is lost. If SAT operation is desired,
the mobile phone can be manually
switched to SAT mode using the ’SAT
Only’ single mode setting.
Phone/Call settingsNetworkSound & AlertStatistics/InfoGPS facilitiesAppendix
41
Page 48

Network selection (4-3/4-2)
Once you have set the operating mode,
access to a certain GSM or SAT network can
be selected automatically or manually.
Getting startedPhone number listsDuring a callDiversionSMS/BroadcastSecurity settings
Automatic network selection:
The mobile phone automatically selects the
most preferred network available in your area. If this is not your home network, you will
see the roaming symbol ) in the display.
For roaming purposes, there is a network
preference list which can be configured.
Manual network selection:
You can select the desired network from a
list of available networks. The mobile phone
uses only this one selected network, and remains in manual mode until the automatic
mode is selected or until a different SIM card
is inserted.
}Automatic network selection (4-3)
Select Menu > Network > Network Mode
The current setting is displayed
Change
Press
Select Automatic
Network preference (4-2)
As long as field strength is strong enough
and the network allows you, calls will be
transmitted via the preferred network. You
will be connected to a different available network only if reception of the preferred network is too poor.
You can create a list of preferred networks.
Add network to preference list
You can add networks to the preference list
by yourself. You need the network code of
the network to be added.
Select Menu > Network > Preference
Your network preference list is displayed
Options
Press
Press Insert
Select a service provider from the list
Delete network from list
Select
Menu > Network > Preference
Your network preference list is displayed
Options
Press
Select Delete
Press Delete
Add a new service provider to the list of
available service providers
Select
Menu > Network > Preference
Your network preference list is displayed
Press Options
Press Insert
Select Further Networks
Enter the country code
Press Next
Enter the network code
Next
Press
Enter the service provider name
Save
Press
42
Page 49

}Manual network selection (4-3)
With manual network selection, you can
select a service provider from a list of available ones.
To set manual network selection:
Menu > Network > Network Mode
Select
The current setting is displayed
Change
Press
Select Manual
After a few seconds a list of service
providers for the active mode (GSM
or SAT) is displayed
Scroll to the desired service provider
Press Select
Manual SAT registration (4-1)
If GSM Preferred is selected, the terminal
searches the list of GSM networks only. There
is the entry
GSM networks. Select Search SAT to see the
available SAT networks:
Scroll to Search GSM respectively Search SAT
at the bottom of the service provider list
Press
Scroll to the desired service provider
Press
Search SAT at the end of the found
Select
After a pause, a list of service providers for the alternative mode
(GSM or SAT) is displayed; SAT
search may take up to a few
minutes
Select
Phone/Call settingsNetworkSound & AlertStatistics/InfoGPS facilitiesAppendix
You may find that you are no longer able to
receive SAT calls if your SAT registration is
out of date. This is indicated by the SAT icon
blinking or if the displayed service area appears to be incorrect. In this case you have to
update SAT registration manually to correct
this mismatch.
Note:
To use this function, your mobile phone has
to operate in SAT mode.
To send the signal for SAT registration:
Menu > Network > SAT Registration
Select
43
Page 50

Sound & Alert (7-1)
You may choose from a variety of different
acoustic signals for ringing and alerting
tones.
Getting startedPhone number listsDuring a callDiversionSMS/BroadcastSecurity settings
Ringing volume (7-1-1-8)
If you want to set the ringing volume only,
you have to use the menu. You can select
from 6 volume levels.
Note:
Control of the loudspeaker volume and of the
ringing volume is described on page 10.
Menu > Settings > Sound & Alert >
Select
Ringing > Volume
The current level is displayed in a
bar chart:
$
!
Select
Press Select
Scroll to the desired volume level
While adjusting the volume, the
ringing tone is played at the
particular level and the level is
shown in the display
Select
Press
Ringing melody (7-1-1)
You can select from a list of ringing melodies
to set different ringing melodies for
– incoming voice calls
– incoming faxes and data
– High Power Alerting
– alarms
– caller groups
When selecting a ringing melody as described below, first the currently active melody and then the melody of the current list position is played.
44
}Melody for incoming voice calls
(7-1-1-1)
You can set the general ringing melody for
all voice calls, except for caller groups you
have assigned to a special melody:
Select
Menu > Settings > Sound & Alert >
Ringing > Voice
The current setting is displayed
Press Change
Scroll to the desired melody
Select
Press
Page 51

}Melody for incoming faxes and
data (7-1-1-2)
You can set a ringing melody for incoming
fax and data calls:
Select
Menu > Settings > Sound & Alert >
Ringing > Data /Fax
The current setting is displayed
Change
Press
Scroll to the desired melody
Press Select
}Melody for High Power Alerting
(7-1-1-3)
You can select a specific melody which will
sound when the signal strength is too weak
to connect you with an incoming call but is
still strong enough to send an alert that
someone is trying to reach you, so you can
move to a better place for reception.
Select Menu > Settings > Sound & Alert >
Ringing > SAT Alerting
The current setting is displayed
Change
Press
Scroll to the desired melody
Press Select
}Melodies for caller groups (7-1-1-5)
It is possible to assign different ringing melodies for different caller groups corresponding
to the caller groups in the phonebook.
Note:
The setting of melodies for caller groups only
applies to voice calls! So, when you receive a
fax or a data call from a number, which is recorded in a caller group, you will not hear the
ringing melody assigned to the concerned
caller group. Instead of it the melody for incoming faxes and data (see page 45) will be
played.
To assign ringing melodies to caller groups:
Menu > Settings > Sound & Alert >
Select
Ringing > Caller Groups >
or
VIP
Business or
Private or
Family or
Others
The current setting is displayed
Change
Press
Scroll to the desired ringing melody
Press Select
Phone/Call settingsNetworkSound & AlertStatistics/InfoGPS facilitiesAppendix
}Melody for alarms (7-1-1-4)
Select Menu > Settings > Sound & Alert >
Ringing > Alarm
The current setting is displayed
Change
Press
Scroll to the desired melody
Press Select
}Earset alerting (7-1-1-6)
When earset alerting is set to On, you will
hear the ringing only in a connected earset.
If earset alerting is set to
ringing from the buzzer and in the earset.
Select
Menu > Settings > Sound & Alert >
Ringing > Earset Alert
The current setting is displayed
Change
Press
Press Save
Off, you will hear the
45
Page 52

Ringing type (7-1-1-7)
You can fine-tune the set ringing melodies
by means of the following options:
– Ring Once
Getting startedPhone number listsDuring a callDiversionSMS/BroadcastSecurity settings
The specified melodies are played only
once when a call comes in.
– Increasing
The specified melodies are played at the
lowest volume at first and keep on getting louder each time they are repeated
until the maximum volume is reached.
Continuous
–
The specified melodies are played at the
set volume repeatedly until you answer
the call or mute it.
This is the standard setting.
Silent
–
The specified ringing melodies are
switched off. As a reminder you see the
( symbol in the status line.
Tones on/off (7-1-2 / 7-1-3 / 7-1-4)
You can switch alerting tones on or off.
The ringing tone may be switched off in the
Ringing Type menu (see above). Earset alerting
can also be switched on and off in the Ringing
menu (see page 45).
}Message tone (7-1-2)
When you receive a text message your mobile phone emits a message tone.
Select
Menu > Settings > Sound & Alert >
Message Tone
The current setting is displayed
Change
Press
Press Save
– Beep Once
When a call comes in, you are alerted not
actually by a melody, but by a short single
beep.
To set the ringing type for the ringing melodies:
Menu > Settings > Sound & Alert >
Select
Ringing > Ringing Type
The list of possible settings is
displayed
Change
Press
Scroll to the desired ringing type
Press Select
}Keypad tone (7-1-3)
This sets the tone off/on, you hear when you
press the mobile phone´s keys.
Select
Menu > Settings > Sound & Alert >
Keypad Tone
The current setting is displayed
Change
Press
Press Save
}Warning tone (7-1-4)
This sets the warning and error tones off/on.
You will hear it when e. g. connecting accessories or after making wrong entries with the
keypad.
Select Menu > Settings > Sound & Alert >
Warning Tone
The current setting is displayed
Change
Press
Press Save
46
Page 53

Sound on/off
You can switch all sounds on and off.
If all sounds are off the ( symbol is indicat-
ed.
Alarms (7-6)
You may set 2 separate alarm entries with a
time, date, interval (daily, once or weekly)
and a reminder message which will be displayed, when the alarm is triggered.
The internal clock for alarms will still keep on
running for about one hour if neither the
battery nor the charger is connected.
}Set or edit the alarm
(7-6-1-3/7-6-2-3)
Select Menu > Settings > Alarm >
Alarm1
or Alarm2 >Edit
The alarm editor is displayed
Enter the time
Next
Press
Enter the date
Next
Press
Enter the reminder message
Next
Press
Select the interval (Daily, Once or Weekly)
Press Save
Now the alarm is switched on
}Switch the alarm on/off
(7-6-1-2/7-6-2-2)
Select Menu > Settings > Alarm >
Alarm1
or Alarm2 > On /Off
The current setting is displayed
Press
Change
Press Save
Press Menu
Press
within 3 seconds
&
}See the alarm setting details
(7-6-1-1/7-6-2-1)
Select Menu > Settings > Alarm >
or Alarm2 > Detail
Alarm1
Time, date, interval and reminder
message are displayed
}Stop an alarm
When the alarm is triggered, the alarm melody is played and the reminder message (if set)
is displayed.
To confirm the alarm:
Press Stop
The mobile phone is in idle mode
again and the alarm tone is
switched off
or:
Press
Snooze
After 5 minutes the alarm will alert
again; it will be repeated max. 3
times
If an alarm is not stopped within 30 seconds,
the alarm stops and will be repeated max. 3
times every 5 minutes.
Phone/Call settingsNetworkSound & AlertStatistics/InfoGPS facilitiesAppendix
When an alarm is switched on, this will be indicated in idle mode by the < symbol.
The alarm functions even when the mobile
phone is turned off.
47
Page 54

Statistics and information
Getting startedPhone number listsDuring a callDiversionSMS/BroadcastSecurity settings
Call duration (2-4)
Your mobile phone automatically records the
amount of time you have used for calls.
The call durations since the last counter reset
can be displayed for the following call categories:
– Last Call
– All Calls
– All Incoming
– All Outgoing
– SAT Incoming
– SAT Outgoing
– GSM Incoming
– GSM Outgoing
Call costs (2-5)
Your mobile phone automatically records the
approximate cost you have run up making
calls. The displayed amount of cost depends
on your cost settings (see page 37).
Call costs since the last counter reset can be
displayed for the following call categories:
– Last Call
– All Calls
– All Incoming
– All Outgoing
– SAT Incoming
– SAT Outgoing
– GSM Incoming
– GSM Outgoing
To display call duration:
Menu > Call Register > Call Duration >
Select
[call category]
The call duration is displayed.
Reset time counter (2-7-1)
You can reset the time counter of each call
category:
Select
Menu > Call Register > Reset Counter >
Time > [call category]
To display call costs:
Menu > Call Register > Call Costs >
Select
[call category]
The costs are displayed
Reset cost counter (2-7-2)
You can reset the cost counter of each call
category:
Select
Menu > Call Register > Reset Counter >
Cost > [call category]
48
Page 55

Remaining Credit (2-6)
You can display the remaining credit as
amount of call units (if you selected to display costs as amount of call units) or as the
amount of money, if you selected to display
costs as amount of money (see ’Cost settings
(7-3-7)’ on page 37).
SIM info (6-6)
The following SIM information is available:
– Name Capacity (6-6-1)
Displays the remaining space for phone-
book entries and for the fixed dial list on
the SIM card
– Msg. Capacity (6-6-2)
Displays the maximum space and the re-
maining space for SMS messages on the
SIM card
Language (6-6-3)
–
Displays the preset language on the SIM
card
Cell info (7-2-2)
To display the remaining credit:
Menu>Call Register>Remaining
Select
Credit
The remaining credit is displayed
To display the SIM info:
Menu > Security > SIM Info >
Select
Name Capacity
or Msg. Capacity or
Language
The corresponding info is displayed
Phone/Call settingsNetworkSound & AlertStatistics/InfoGPS facilitiesAppendix
Your mobile phone receives the name of the
cell it is connected to. Sending the name of
the cell is network dependent.
In SAT mode also a region string denoting
the location can be received.
IMEI number (6-7)
You may find displaying your mobile phone´s
identity number (IMEI: International Mobile
Equipment Identifier) quite useful for service
and security purposes.
To switch displaying cell info on or off:
Select
Menu > Settings > Phone > Cell Info
The current setting is displayed
Change
Press
Press Save
To display the IMEI number:
Select
Menu > Security > IMEI Number
The number is displayed
49
Page 56

Using the GPS facilities (8)
The GPS system can display information relating to the latitude, longitude, altitude,
UTC (Universal Time Coordinated, previously
Getting startedPhone number listsDuring a callDiversionSMS/BroadcastSecurity settings
’Greenwich Time’) time and date.
While you are using the location track fea-
ture, you still can make and receive calls (see
page 51).
Display your current position (8-1)
You can display the latitude, longitude, altitude, date and time of your current position,
save it under a way point name or send it as
an SMS message. The ’Z’ after the time
stamp indicates UTC.
To display data of your current position:
Select Menu > GPS Manager > Current
Position
After a while (this may last up to
several minutes), the current latitude and longitude data is displayed
Press
$ to display altitude data and
time/date
Press
# to display latitude and longitude
again.
}Send position as SMS
Press Options
Select Send as SMS
The SMS editor (see page 23) with
the current GPS data is displayed
While using all other GPS facilities, you can
only receive calls. In all cases the GPS features are suspended during calls.
Note:
To use the GPS facilities successfully, the mobile phone must have a good view of the
open sky.
}Save position as way point
The GPS data are displayed in units of degrees, minutes and seconds; you can save
the position by assigning it for instance to
the name of the place.
Press Options
The way point list is displayed
Select a storage location
If a location is selected where
another way point is already
stored, it will be overwritten without warning.
The GPS editor is displayed
Enter a name to designate the position
Press
Save
Saved way points can be referred to by the
menu item
Way Points.
Way point manager (8-2)
The way point manager shows the list with
your saved way points (up to 10). You can
display the data of a way point, edit and delete the way points, send them as SMS. Or
you may send them via a data cable to the
V.24/V.28 interface of a PC in order to track
your way manually.
50
The GPS NMEA protocol is used for transmitting way points to the PC at 4800 Baud. You
can not change this.
Page 57

}See details of a way point
Select Menu > GPS Manager > Way Points
Your way point list is displayed
Scroll to the desired way point
Options
Press
Select Details
Latitude, longitude and altitude of
the way point are displayed
}Send way point as SMS
Select Menu > GPS Manager > Way Points
Your way point list is displayed
Scroll to the desired way point
Options
Press
Select Send as SMS
The SMS editor (see page 23) with
the way point name and the GPS
data is displayed
}Send to PC
Select Menu > GPS Manager > Way Points
Your way point list is displayed
Scroll to the desired way point
Press
Options
Select Send to PC
}Edit way point name
Select Menu > GPS Manager > Way Points
Your way point list is displayed
Scroll to the desired way point
Options
Press
Select Edit
The GPS editor is displayed
Change the name of the way point (see
page 58)
Save
Press
}Delete way point from list
When your way point list contains 10 entries
and you want to add a new way point, you
can delete entries instead of overwriting
them with a new ones:
Select Menu > GPS Manager > Way Points
Your way point list is displayed
Scroll to the desired way point
Options
Press
Select Delete
Press Delete
Phone/Call settingsNetworkSound & AlertStatistics/InfoGPS facilitiesAppendix
Switch location track on/off (8-3)
To send the data from the mobile phone to a
PC you have to connect it via a data cable to
the PC whereby the NMEA 0183 V2.20 software standard is used.
The mobile phone can only be connected to
a PC serial port, not to an NMEA port.
To switch location track on or off:
Show continuous position (8-4)
This function is similar to ’Display your cur-
rent position (8-1)’, the difference being that
the displayed GPS data is constantly updated
at short intervals. This might be useful when
you are in motion, e.g. on the deck of a ship
or in an open car.
By pressing
displayed data for the same features as provided for
Options you can use the currently
Current Position (see page 50).
Menu > GPS Manager > Location Track
Select
The current setting (’on’ or ’off’) is
displayed
Change
Press
Press Save
Note:
Location Track is suspended during calls.
Select Menu > GPS Manager > Cont. Position
The current latitude and longitude
data is displayed and updated
every few seconds
Press
$ to display altitude data and
time/date
Press
# to display latitude and longitude
data again
51
Page 58

Appendix
Troubleshooting
Getting startedPhone number listsDuring a callDiversionSMS/BroadcastSecurity settings
Problem Possible reasons/Possible measures
Unable to switch on – Empty battery. Charge it. Check charging indication on display.
– Battery contacts dirty. Clean contacts. Try switching on and off
again.
– Battery has been replaced. Recharge.
Unable to make calls – Check your mobile phone’s display to make sure that the mobile
phone is switched on. If the mobile phone does not display information on its screen, check if the battery is fully charged and
properly installed.
– Check that the SIM card is not damaged and is correctly installed
in your mobile phone.
– Check that you have dialled the number correctly.
– Satellite mobile phones should have a clear view of the sky. If you
are inside a building, tunnel, or other structure that limits your
view of the sky, the satellite signal may be weak or unavailable.
To check signal strength, access the menu and follow the
prompts on the display. The higher the number of bars displayed
on your mobile phone, the better the signal.
– In SAT mode make a manual SAT Registration with the menu
Network > SAT Registration.
item
– Check that the mobile phone is switched to the proper mode.
– Check that the correct SIM card PIN has been entered. For your
security, the SIM card is blocked if an incorrect PIN is entered
three times consecutively.
– Check that outgoing calls are not barred. If barring is enabled,
cancel the bar by referring to section ’Security settings’.
– Check that the antenna is fully extended. The antenna should
point towards the satellite with a clear view to the sky.
Unable to accept calls – The satellite signal may be weak or unavailable if you are inside
a building, tunnel, or other structure. Your mobile phone should
have a clear view of the sky.
– Check active call diversions.
– Check that incoming calls are not barred. If barring is enabled,
cancel the bar by referring to section ’Security settings’.
52
Page 59

Problem Possible reasons/Possible measures
No calls possible – Dialling error. Use full national area code.
– All calls barred. Check (barring code needed to clear).
– New SIM card fitted. Check for new restrictions.
– Charge limit reached. Call your service provider or use PIN2 to re-
set.
Certain calls not possible – Call restriction set. Restrictions may be set by your service
provider. Check restrictions.
– Number is too long. Check number.
Calls are dropped – Make sure no obstruction is blocking the satellite signal. Make
sure that your mobile phone has a clear view of the sky. If you
are inside a building, tunnel, or other structure that limits your
view of the sky, the satellite signal may be weak or unavailable.
Mobile phone does not
ring when a call comes in
Interference from other
satellite mobile phones
System busy – Check that the antenna is properly positioned. The satellite mo-
People experience delays
when calling me
No network connection – Weak signal. Move higher, to a window or open space.
Mobile phone loses
network
– Check that the mobile phone is set to ring.
– If you are near another satellite mobile phone not designed for
the Thuraya system, switch the other satellite mobile phone off
or move as far away as possible to avoid interference. In some
situations, the distance required to prevent interference may be
up to 200 metres. If you see the direction in which the other satellite mobile phone is transmitting, move out of the communication path. On ships, move as far away as possible from the ship’s
satellite antenna.
bile phone requires the antenna to be fully extended.
– Make sure that your mobile phone has a clear view of the sky. If
you are inside a building, tunnel, or other structure that limits
your view of the sky, the satellite signal may be weak or unavailable.
– When someone calls you at your mobile phone number, there
may be a delay of up to 60 seconds while the system locates your
mobile phone.
– Outside GSM/SAT coverage area. Check service provider’s net-
work coverage.
– SIM card not valid. Call your service provider.
– New network not authorized. Try selecting manually, or try other
network.
– Weak signal. Reconnection or connection to another service pro-
vider is automatic. Switching off and on may accelerate this.
Phone/Call settingsNetworkSound & AlertStatistics/InfoGPS facilitiesAppendix
53
Page 60

Problem Possible reasons/Possible measures
Call diversion does not
work
Getting startedPhone number listsDuring a callDiversionSMS/BroadcastSecurity settings
Missed calls are not
diverted to the voice
mailbox
Cannot save phone
numbers or messages
Cannot find phonebook – SIM card has been changed. Refit original SIM card.
Charging problem – Battery defective. Replace it; after several years of average use, a
Mobile phone shuts
down even with good
network connection
and sufficiently
charged battery
Warning is displayed:
’Attention – Critical temperature’
SIM card error – SIM card damaged. Carry out visual check. Return SIM card to
PUK error – 3 incorrect entries. Enter PUK supplied with your SIM card as in-
– Check that you have entered the destination phone number cor-
rectly, including the country code and any required area or city
codes.
– Call barring of outgoing calls is not possible if any call diversion
for voice is switched on.
– Some call forwarding and call barring options may not be used
at the same time. For example, enabling call divert of all calls and
barring of all outgoing calls is not possible.
– Make sure that call divert is set to your voice mailbox number.
Verify your call diversion settings by following the instructions in
section ’Diverting calls’.
– Check that call barring is not active. Call diversion cannot be
used when call barring is active.
– Check that the SIM card memory is not full. Delete phonebook
entries.
gradual decline may be expected.
– Contact problem. Check mains socket and connection to mobile
phone.
– Mobile phone/battery is overheated. Let the mobile phone/bat-
tery cool down.
– Mobile phone/battery is too cold. Allow the battery/mobile
phone to warm up (e.g. in your pocket).
– Wait until ’Normal Temperature’ is displayed.
your service provider.
– SIM card contact dirty. Clean SIM card and mobile phone con-
tacts with a dry cloth.
– SIM card inserted wrong way round. Make sure that SIM card is
inserted right way round.
– 5V SIM card inserted. Order 3V or 3/5V SIM card from your
service provider
structed. If you have lost your PUK, call your service provider for
assistance.
– Service not authorised. Call your service provider.
54
Page 61

Problem Possible reasons/Possible measures
SIM card does not
accept PIN
Voice mailbox is not
working
Cannot send a message – Message memory full. Delete a message to make room.
Cannot set a function – Not supported by your service provider or registration required.
– If your SIM card does not accept your correctly entered PIN, con-
tact your service provider.
– Diversion not set. Set call diversion.
– Service provider does not support this service. Check with your
service provider.
– Check if sending of SMS barred (outgoing calls).
– SMS centre and message type not set. Set number of SMS cen-
tre.
– Destination does not have compatible mobile phone. Check.
Call your service provider.
Phone/Call settingsNetworkSound & AlertStatistics/InfoGPS facilitiesAppendix
If the mobile phone sustains a shock
– Remove and refit battery and SIM card.
– Do not dismantle.
If the mobile phone becomes wet (water)
– Dry the mobile phone off quickly with a
cloth.
– Do not heat.
– Dry the contacts thoroughly.
– Remove and refit the battery and SIM
card.
– Stand upright in an open space with free
air flow.
– Do not dismantle.
55
Page 62

Technical specifications
}Mobile Phone
Dual-mode satellite/GSM mobile phone:
Getting startedPhone number listsDuring a callDiversionSMS/BroadcastSecurity settings
– GSM at 900 MHz
– SAT at 1.5/1.6 GHz
3V and 3/5V SIM card (GSM compatible)
GPS function with 12 Channel receiver
GPS location tracking
Serial port PC interface
Standard lithium-ion battery: 7.2 V
– GSM mode:
talk time 4 h, standby time 50 h
– SAT mode:
talk time 2.5 h, standby time 35 h
Travel charger: 110/220 VAC, 50/60 Hz
}Call functions
Note:
Some of the functions are network dependent.
Primary user services:
– voice
– fax (with 9-wire V.24/V.28 data cable
accessory)
– data (with 9-wire V.24/V.28 data cable
accessory): transmission rate automatic
or adjustable from 2.4 to 19.2 Kbps
Network services:
– short message service (SMS)
– voice mailbox
– supplementary service
Call cost/call time display
Signal strength display
Conference calls
Call waiting/call hold
Separate call/fax/data divert
DTMF signalling
Automatic or manual network selection
Calling line identification presentation (CLIP)
Calling line identification restriction (CLIR)
Connected line identification presentation
(COLP)
Connected line identification restriction
(COLR)
}Call management
Automatic redial
Any key answering
Caller group identification with melodies
Welcome message
One touch dialling
Short dialling
}Paging
High Power Alerting
}Security and cost control
Emergency calls without SIM card (network
dependent)
PIN, PIN2, security code, barring code
Various call barring possibilities
Fixed dialling of numbers/prefixes
Advice of charge (GSM, SAT)
Last and cumulative call duration and charge
}Short Message Service
SMS class 0, 1, 2, 3
Send and receive messages up to 160 characters
SMS parameters format:
– Text
– Fax G3
– ERMES
– E-mail
Delivery report
Info Broadcast support
56
Page 63

Using battery and charger
For charging and recharging your mobile
phone battery, see page 2.
– Use specified Ascom chargers only.
– Never change or remove battery while
the mobile phone is connected to the
charger!
– Always disconnect charger from the
power source, when not in use!
– Do not incinerate battery.
– Do not disassemble or crush battery.
– Never leave the mobile phone connected
to a charger for more than one week!
Overcharging may shorten its life.
– Electronic products and batteries must be
disposed of properly at the end of their
life, in accordance with local facilities and
regulations.
– Never use any charger or battery that is
damaged or worn out!
– Never short-circuit the battery! Short-cir-
cuiting can occur when a metallic object
(coin, clip or pen) causes direct connection of the + and - terminals, e.g. when
you carry a spare battery in your pocket
or purse.
– Do not expose battery to high tempera-
ture 60 °C (140 °F).
– For best performance try to keep the bat-
tery between 15 °C (59 °F) and 25 °C
(77 °F). A mobile phone with a hot or cold
battery may temporarily not work, even
when the battery is fully charged. The
performance of Li-Ion batteries is particularly limited in temperatures below 0 °C
(32 °F).
– When the battery is running out of pow-
er and only about a minute of talk time
remains, a warning tone is heard and a
warning displayed. When no more talk
time is left, a note is displayed, a warning
tone is sounding and the mobile phone is
switched off automatically.
Phone/Call settingsNetworkSound & AlertStatistics/InfoGPS facilitiesAppendix
57
Page 64

Character and digit input in text editor mode
When your mobile phone is in text editor
mode, e.g. when you are writing a name in
the phonebook or when you are writing an
Getting startedPhone number listsDuring a callDiversionSMS/BroadcastSecurity settings
SMS, you use the keys on your keypad.
To write a character, press the corresponding
key as often as indicated by the character’s
position printed on the key.
The table below gives you all the characters
which can be typed:
1
2
3
4
5
6
7
8
9
0
no upper/lower case distinction 1 . ? , ! - : ; ' " ¡¿
upper case:
lower case:
upper case:
lower case:
upper case:
lower case:
upper case:
lower case:
upper case:
lower case:
upper case:
lower case:
upper case:
lower case:
upper case:
lower case:
no upper/lower case distinction ’space’ +0@&↵ § £ $ ¥
Upper case – lower case
You can switch from writing upper case
letters to lower case letters and switch back
again by pressing any of the keys
for 2 seconds.
9
Example:
To write an ’E’ press
continue with an ’i’, first press
seconds and then press it 3 times again for a
normal short time.
ABC2ÄÅÆÇ
abc2äàåæ
DEF3É
def3èé
G H I 4
g h i 4 ì
JKL5
jkl5
MNO6ÑÖØ
mno6ñöòø
PQRS7ß
pqrs7ß
TUV8Ü
tuv8üù
WXYZ9
wxyz9
3
2
two times. To
for 2
4
to
%
&
Delete characters
If you want to delete one character to the left
of the cursor, press
If you want to delete all characters, press
and hold it down until all the characters are
deleted.
58
no upper/lower case distinction */-()<=>%¤
no upper/lower case distinction # ∆ΦΓΛΩΠΨΣΘΞ
.
!
Move the cursor
Whenever it is possible to move the cursor
left, right, up or down, this is indicated in the
softkey line:
!
press the fox key under the corresponding
symbol in the softkey line.
!"#$. To move the cursor,
Page 65

Menu system and quick access codes
}Simplified menu
1 Write Message
2 List Messages
3 Listen Voicemail
4 Divert Voicemail
5 System Pref.
}Standard menu tree
1 Messages
1-1 Write Message
1-2 List Messages
1-3 Info Broadcast
1-3-1 Status
1-3-2 Topic
1-3-3 Set Language
1-4 Listen Voicemail
2 Call Register
2-1 Missed Calls
2-2 Received Calls
2-3 Dialled Calls
2-4 Call Duration
2-5 Call Costs
2-6 Remaining Credit
2-7 Reset Counter
2-7-1 Time
2-7-2 Cost
3 Call Divert
3-1 Voice
3-1-1 All Voice
3-1-2 Busy
3-1-3 No Reply
3-1-4 Not Reachable
3-1-5 Clear Divert
3-2 All Fax
3-3 All Data
3-4 Clear All Divert
4 Network
4-1 SAT Registration
4-2 Preference
4-3 Network Mode
6 Ringing Volume
7 Ringing Type
8 Current Position
9 Keypad Lock
5 System Pref.
6 Security
6-1 Call Barring
6-1-1 Outgoing
6-1-1-1 All Calls
6-1-1-2 All Int. Calls
6-1-1-3 Int. Except Home
6-1-2 Incoming
6-1-2-1 All Calls
6-1-2-2 Calls Abroad
6-1-3 Clear Barrings
6-1-3-1 Outgoing
6-1-3-2 Incoming
6-1-3-3 All
6-2 Fixed Dial
6-2-1 Show List
6-2-2 On / Off
6-2-3 Add New
6-3 PIN Code
6-4 Change Codes
6-4-1 Change PIN
6-4-2 Change PIN2
6-4-3 Security Code
6-4-4 Barring Code
6-5 Security Code
6-6 SIM Info
6-6-1 Name Capacity
6-6-2 Msg. Capacity
6-6-3 Language
6-7 IMEI Number
6-8 Closed Group
Phone/Call settingsNetworkSound & AlertStatistics/InfoGPS facilitiesAppendix
59
Page 66

Getting startedPhone number listsDuring a callDiversionSMS/BroadcastSecurity settings
7 Settings
7-1 Sound & Alert
7-1-1 Ringing
7-1-1-1 Voice
7-1-1-2 Data /Fax
7-1-1-3 SAT Alerting
7-1-1-4 Alarm
7-1-1-5 Caller Groups
7-1-1-6 Earset Alert
7-1-1-7 Ringing Type
7-1-1-8 Volume
7-1-2 Message Tone
7-1-3 Keypad Tone
7-1-4 Warning Tone
7-2 Phone
7-2-1 Language
7-2-2 Cell Info
7-2-3 Greeting
7-2-4 Own Number
7-2-4-1 Voice
7-2-4-2 Fax
7-2-4-3 Data
7-2-5 LCD Contrast
7-2-6 Voicemail No.
7-3 Call
7-3-1 Any Key Answer
7-3-2 DTMF Tone
7-3-3 Call Waiting
7-3-4 Send Own No.
7-3-5 Autom. Redial
7-3-6 One Touch Dial
7-3-7 Cost
7-3-7-1 Charge Rate
7-3-7-2 Cost Limit
7-3-7-3 Cost Displayed
7-1-1-5-1 VIP
7-1-1-5-2 Business
7-1-1-5-3 Private
7-1-1-5-4 Family
7-1-1-5-5 Others
7-4 Car
7-4-1 Auto Answer
7-4-2 Backlight
7-5 Clock
7-5-1 Set Time
7-5-2 Time Format
7-5-3 Set Date
7-6 Alarm
7-6-1 Alarm1
7-6-1-1 Detail
7-6-1-2 On /Off
7-6-1-3 Edit
7-6-2 Alarm2
7-6-2-1 Detail
7-6-2-2 On /Off
7-6-2-3 Edit
7-7 Reset
7-7-1 Phonebook
7-7-2 Factory Set
7-8 SMS Parameter
7-8-1 SMS Center
7-8-2 Validity
7-8-3 Format
7-8-4 Delivery Reports
7-9 Data Link Rate
8 GPS Manager
8-1 Current Position
8-2 Way Points
8-3 Location Track
8-4 Cont. Position
9 Keypad Lock
60
Page 67

Index
A
Accept a waiting call 18
Acoustic settings
– beep once 46
– continuous melody 46
– earset alerting 45
– increasing melody volume 46
– keypad tone 46
– listening volume 10
– melodies once 46
– melody f. alarm 45
– melody f. caller group 45
– melody f. fax/data 45
– melody f. High Power Alerting 45
– melody f. voice calls 44
– message tone 46
– ringing melodies 44
– ringing melody 44
– ringing type 46
– ringing volume 44
– Silent 46
– warning tone 46
Alarm
– confirm 47
– edit 47
– interrupt 47
– on/off 47
– set 47
– status 47
– stop 47
Any key answering 38
Automatic redial 39
B
Barring
– all calls 33
– clear all 33
– clear incoming 33
– clear outgoing 33
– deactivate 33
– incoming calls 33
– international calls 33
– options 33
– status 33
Barring code 31
– change 32
Battery 2, 57
Baud rate 38
Beep 46
Broadcast 28
– activate/deactivate topic 28, 29
– language 29
– on/off 28
– read 29
Buzzer 45
C
Call
– accept a waiting call 18
– answer 8
– conference 19
– end 8, 19
– international prefix (+) 8
– multiparty 18
– private 19
– put on hold 17
– reject 8, 18
– swap between calls 19
– transfer 19
– waiting 18, 39
Call diversion 21
– clear 21
– clear all 21
– conditions 21
– delay 21
– status 21
– to phone number 21
– to voice mailbox 21
– unconditional 21
Call register 11
Caller groups 12, 45
Car use 40
– auto answer 40
– backlight on/off 40
Charger 2, 57
Checking phonebook entries 13
Ciphering 5
Clock 2, 36, 47
Closed user group 35
Conference call 19
Cost 37, 56
61
Page 68

D
Data diversion
– clear 22
– status 22
– to PC 22
– to phone 22
Data transmission 38
Date 36
dial
– number of a missed call 16
– number of a received call 16
– number redial 15
– one touch dialling number 13, 40
– pause 8, 17
– phonebook 13
– short dialling number 13
– using keypad 8
Diversions 21, 22
– clear all 22
– to voice mailbox 20
DTMF tone 17, 38
E
Early ring 1
Earset
– alerting 45
Editor
– alarm 47
– delete characters 58
– GPS 50
– lower case letters 58
– move cursor 58
– SMS 23
– upper case letters 58
Emergency call 3, 33
Emergency numbers 3
Encryption 5
End a call 8
F
Fax diversion
– clear 22
– status 22
– to phone number 22
– to voice mailbox 22
Fixed dialling
– activate 34
– delete number 34
– edit number 34
– list 34
– replace number 34
– select number 34
G
GPS
– display position 50
– location track 51
– save position 50
– send position as SMS 50
– way points 50
Greeting text 36
GSM mode 41
H
High Power Alerting 9, 45
– early ring 1
I
IMEI number 49
incognito 39
Information service 28
International prefix (+) 8
K
Keypad
– lock 4
– tone on/off 46
– unlock 4
L
List
– caller groups 12
– dialled numbers 15
– missed calls 16
– networks 43
– phonebook 11
– received calls 16
Listening volume 10
M
Melody
– alarms 45
– caller groups 45
– calls 44
– data 45
– faxes 45
– High Power Alerting 45
62
Page 69

Memory
– full 13, 24, 34
Menu
– exit 7
– position indicator 6
– quick access 7
– quick access codes 7, 59
– simplified 7, 59
– step back 7
– tree 59
Message
– info broadcast 28
– send and save 24
– SMS 23
– voice mailbox 20
Message tone on/off 46
Multiparty call
– make a new call 19
Multiparty calls 18
– call status 18
Muting microphone 17
N
Navigation 6
– notation in the manual 7
Network
– preference list 42
Network access
– automatic 42
– GSM 41
– manual 42
– SAT 41
Network password 31
Network selection
– automatic 42
– in fixed mode 43
– in preferred mode 43
– manual 43
– provider list 43
Number
– of dialled call 15
– of missed call 16
– of received call 16
O
One touch dialling
– activate/deactivate 40
– number 12, 13
Own number sending on/off 39
P
Pause 8, 17
Phonebook
– caller group 12
– change entry 14
– check capacity 49
– check entries 13
– delete completely 14
– delete entry 14
– dial 13
– input sources 11
– new entry 12
– one touch dialling 12, 13
– provider’s entries 11
– replace entry 13
– restricted 34
– short dialling 12, 13
PIN 30
– activate/deactivate 31
– change 32
– enter 3
PIN2 30
– change 32
Private call 19
Q
Quick access codes 7
R
Redial 15
Reject a call 18
Replace
– fixed dialling number 34
– phonebook entry 13
– SMS 24
Reply to an SMS 26
Restore factory settings 40
Restricted phone numbers 34
Ringing
– High Power Alerting 1
– melody 44
– on/off 8
– ringing type 46
– volume 44
S
SAT
– mode 41
– registration 43
SAT registration 1
63
Page 70

Security 56
– barring code 31
– PIN 30
– PIN2 30
– PUK/PUK2 30
Security code 31
– activate/deactivate 31
– change 32
Send own number 39
Short dialling number 12, 13
SIM card
– info 49
– insert 2
– locked 30
– password 3
– protect 30
SIM memory
– full 13, 24, 34
Simplified menu 7, 59
SMS
– center number 23
– editor 23
– replace 24
– reply 26
– save 23
– send 23
– status 25
– template 24
– write 23
SOS call 3, 33
Specifications 56
Switch on/off 3
T
Technical specifications 56
Text message
– broadcast 28
– SMS 23
Time
– format 36
– set 36
Transfer a call 19
U
Unconditional diversion 21
UTC 50
V
Voice mail
– listen to 13, 20
– store mailbox number 20
W
Warning
– High Power Alerting 45
– tone on/off 46
Way point 50
– delete from list 51
– edit name 51
– save 50
– send as SMS 51
– send to PC 51
64
Page 71

Ascom 21 SATELLITE/GSM HANDHELD PHONE
This Limited Warranty is provided to the original end-user purchaser (the 'Buyer') of any new Ascom
21 Satellite/GSM Handheld Phone. This Limited Warranty is non-transferrable.
Warranty Coverage and Service
Ascom warrants all new Ascom 21 Satellite/GSM Handheld Phones (the 'Product') under normal use
and wear to be free from defects in material and workmanship for a period of one (1) year from the
date of purchase by the original Buyer (the 'Warranty Period'). If, under normal use and wear, the
Product becomes defective in materials or workmanship and is returned at Buyer's expense to a
Ascom Authorized Service Center during the Warranty Period, the Product will be repaired or
replaced, at Ascom's sole and exclusive option, and at no charge to Buyer. Buyer will be required to
provide reasonable proof of date of purchase. Reconditioned replacement components, parts, units
or materials may be used if the Product is repaired or replaced. Costs incurred in the removal, deinstallation or reinstallation of the Product are not covered.
THIS LIMITED WARRANTY DOES NOT COVER AND ASCOM WILL NOT BE RESPONSIBLE FOR
This Limited Warranty will be void in its entirety if the Product is serviced by anyone other than
Ascom or a Ascom Authorized Service Center. Buyer's sole and exclusive remedy shall be the repair
or replacement of the defective Product, as specifically described above. Ascom neither assumes nor
authorizes any Authorized Service Center or any other person or entity to assume any other obligation or liability beyond that which is provided for in this Limited Warranty.
This Limited Warranty does not cover the following: products or accessory equipment not manufactured or provided by Ascom; failures or defects caused by misuse, abuse, accident, alteration or
neglect; unauthorized installation, removal or repair; failure to follow instructions; fire, flood or
other acts of God; spills of food or liquids; normal wear and tear; improper installation, maintenance, operation or repair; performance of the Product when used in combination with other products or equipment not manufactured or provided by Ascom; payments for labor or service to
representatives or service centers not authorized by Ascom.
Since the satellite and GSM systems and service on which this Product operates are provided by
independent satellite and GSM service carriers, Ascom shall not be responsible for the operation,
availability, coverage, range or grade of service provided by such service carriers.
Limitation of Liability
THIS LIMITED WARRANTY IS IN LIEU OF ALL OTHER WARRANTIES, WHETHER EXPRESS, IMPLIED OR
STATUTORY, INCLUDING, WITHOUT LIMITATION, THE IMPLIED WARRANTIES OF MERCHANTABILITY
AND FITNESS FOR A PARTICULAR PURPOSE. ASCOM SHALL NOT BE LIABLE FOR DAMAGES IN
EXCESS OF THE PURCHASE PRICE OF THE PRODUCT, LESS REASONABLE AMOUNT FOR USE AND
WEAR, OR FOR ANY INCIDENTAL, SPECIAL, PUNITIVE OR CONSEQUENTIAL DAMAGES OF ANY
NATURE WHATSOEVER, OR FOR ANY DELAYS, LOSS OF USE, TIME, PROFITS, REVENUE OR SAVINGS, ANY COMMERCIAL LOSS, INCONVENIENCE, MILEAGE, DAMAGE TO BUYER'S OR TO OTHER
PERSON'S VEHICLE OR ANY OTHER PROPERTY, ARISING FROM THE USE OR INABILITY TO USE THE
PRODUCT, OR OTHERWISE FOR ANY FAILURE TO PERFORM.
All liability and obligations of Ascom under this Limited Warranty shall terminate upon the expiration of the applicable Warranty Period provided herein. This Limited Warranty sets forth the entire
responsibility of Ascom with respect to the Product. There are no other liabilities of Ascom arising
from the sale of the Product whether based on warranty, contract, negligence or other theories of
liability. In no event shall Ascom's liability exceed the cost of correcting defects as provided herein.
This Limited Warranty gives specific legal rights to Buyer, and Buyer also may have other rights which
may vary from jurisdiction to jurisdiction.
LIMITED WARRANTY
THE FOLLOWING:
Attn: Customer Service
Ascom Business Systems AG
Ziegelmattstrasse 1
CH-4503 Solothurn
Switzerland
Page 72

Internet: www.ascom.com
Hereby, Ascom Business Systems AG, declares that this mobile phone is in
compliance with the essential requirements and other relevant provisions of
Directive 1999/5/EC.
© Ascom Business Systems AG, 2001. All rights reserved.
This manual is published by Ascom Business Systems AG, without any warranty.
We reserve the right to make changes and improvements to any of the products
described in this manual without prior notice.
ABSC 20313523
x.xxx
Printed in Switzerland
Page 73

ascom Warranty Card for Ascom 21
This Warranty Card is only valid with all gaps filled in properly by the dealer.
Place the detachable IMEI-label from the gift box here:
Dealer’s stamp and signature:
Date of purchase:
Customer’s name, address, country and telephone number:
Page 74

Page 75

Page 76

 Loading...