

Asc SP008 User Manual
SP008 Solar Water Pump Kit Instructions
By All Solar Central
www.allsolarcentral.com
Thank you from the entire ASC family for purchasing
an ASC solar product! Please read this entire booklet
before assembly.
Package contents:
1 x Water Pump with 16 ft. Cable
1 x LED Light Ring with 16 ft. Cable
1 x Battery Control Box
1 x Solar Panel with 6.5 ft. Cable
1 x Solar Panel Bracket
2 x Extension Tube
1 x Ground Spike
1 x Set of Fountain Nozzles
Notes: If there is any damage to the product or missing
parts, please contact us at 1-626-582-8898 or
www.allsolarcentral.com/contactus
Assembly Steps:
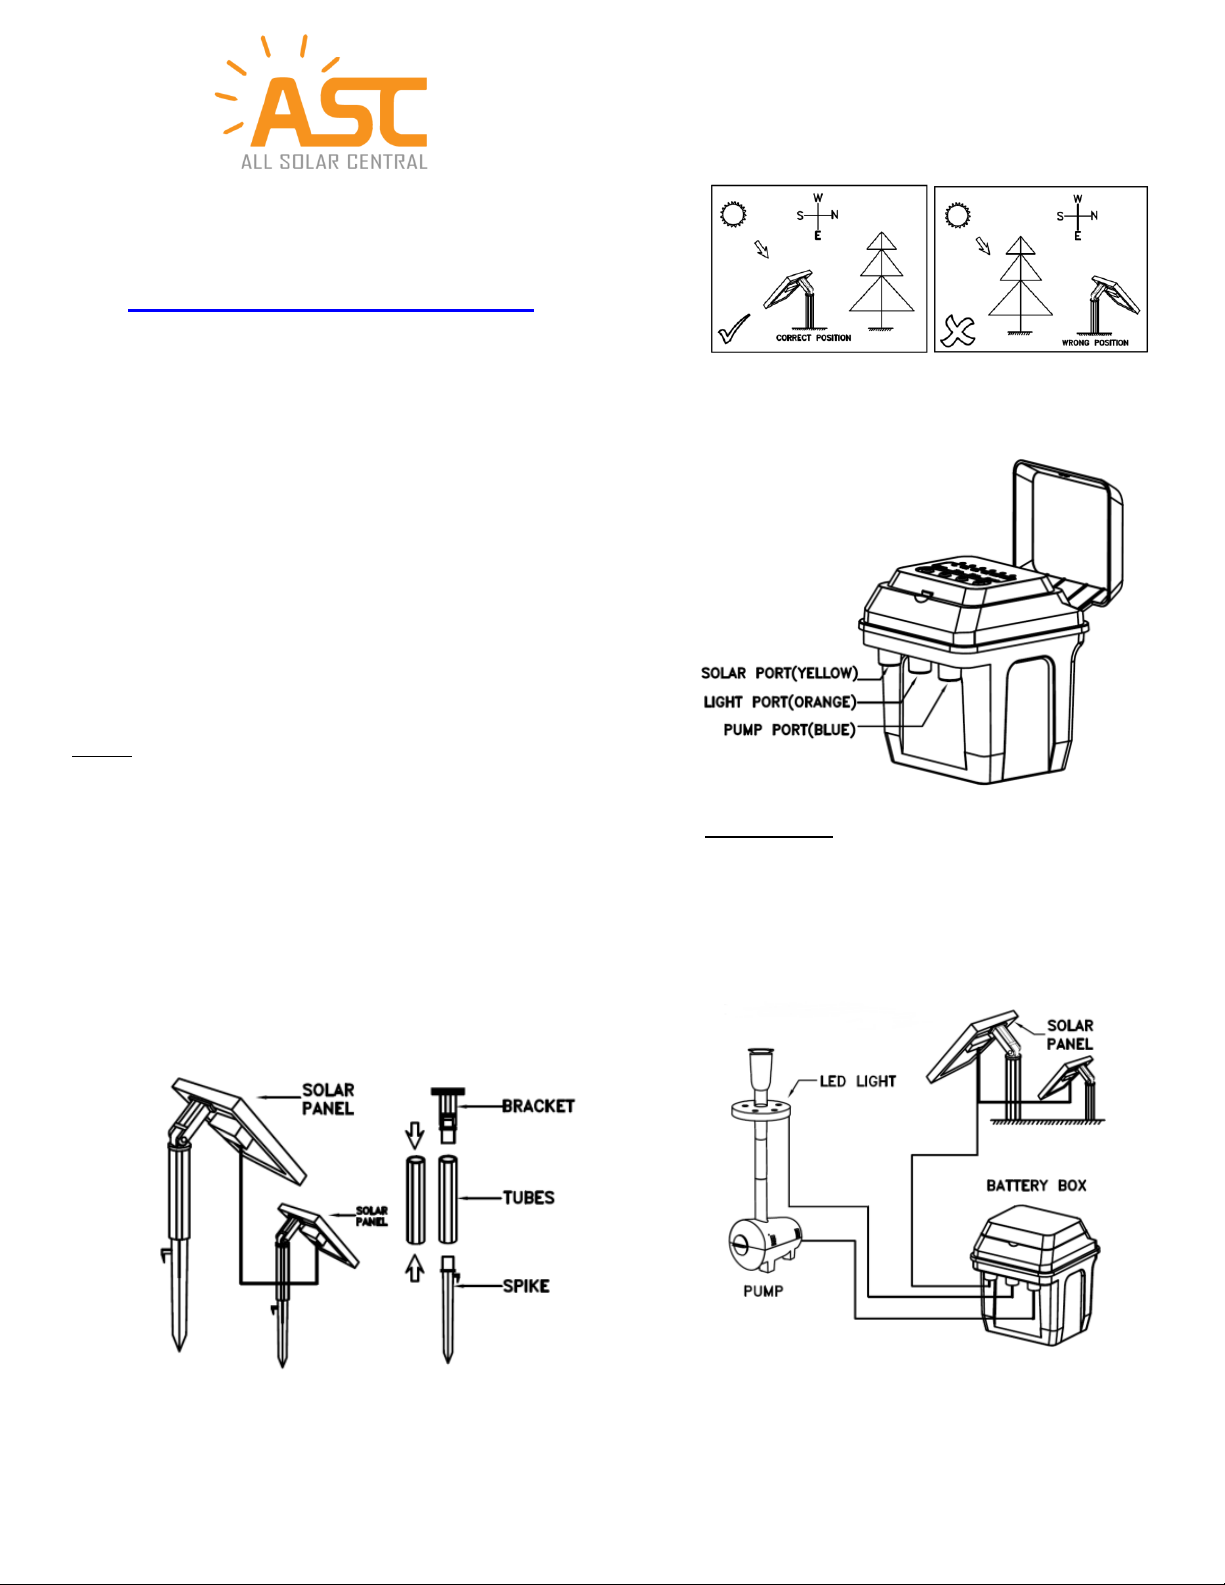
1. Connect the bracket, tubes and spike together.
Then attach the solar panel to the bracket. Slide
the holding bracket into the inside lip of the top
half of the solar panel frame. The bracket holds
the weight of the solar panel. The solar panel can
be adjusted for optimal sunlight by using the
wingnut. Please see the diagram.
daylight hours. It is important to angle the solar
panel to face the sun when the sun is at its
highest point. Ensure the solar panel is not
shaded by trees, shrubs or buildings.
3. Connect the Solar Panel, LED Light, and Pump to
the Battery Control Box (See diagram below:)
IMPORTANT!!
Slightly twist the connectors when connecting to
make sure the rubber seals are fully in the
grooves.
4. The assembled Solar Pump should look like this:
2. Insert the spike into the ground. Position the
solar panel so it’s facing south (in northern
hemisphere) as much as possible to maximize
1
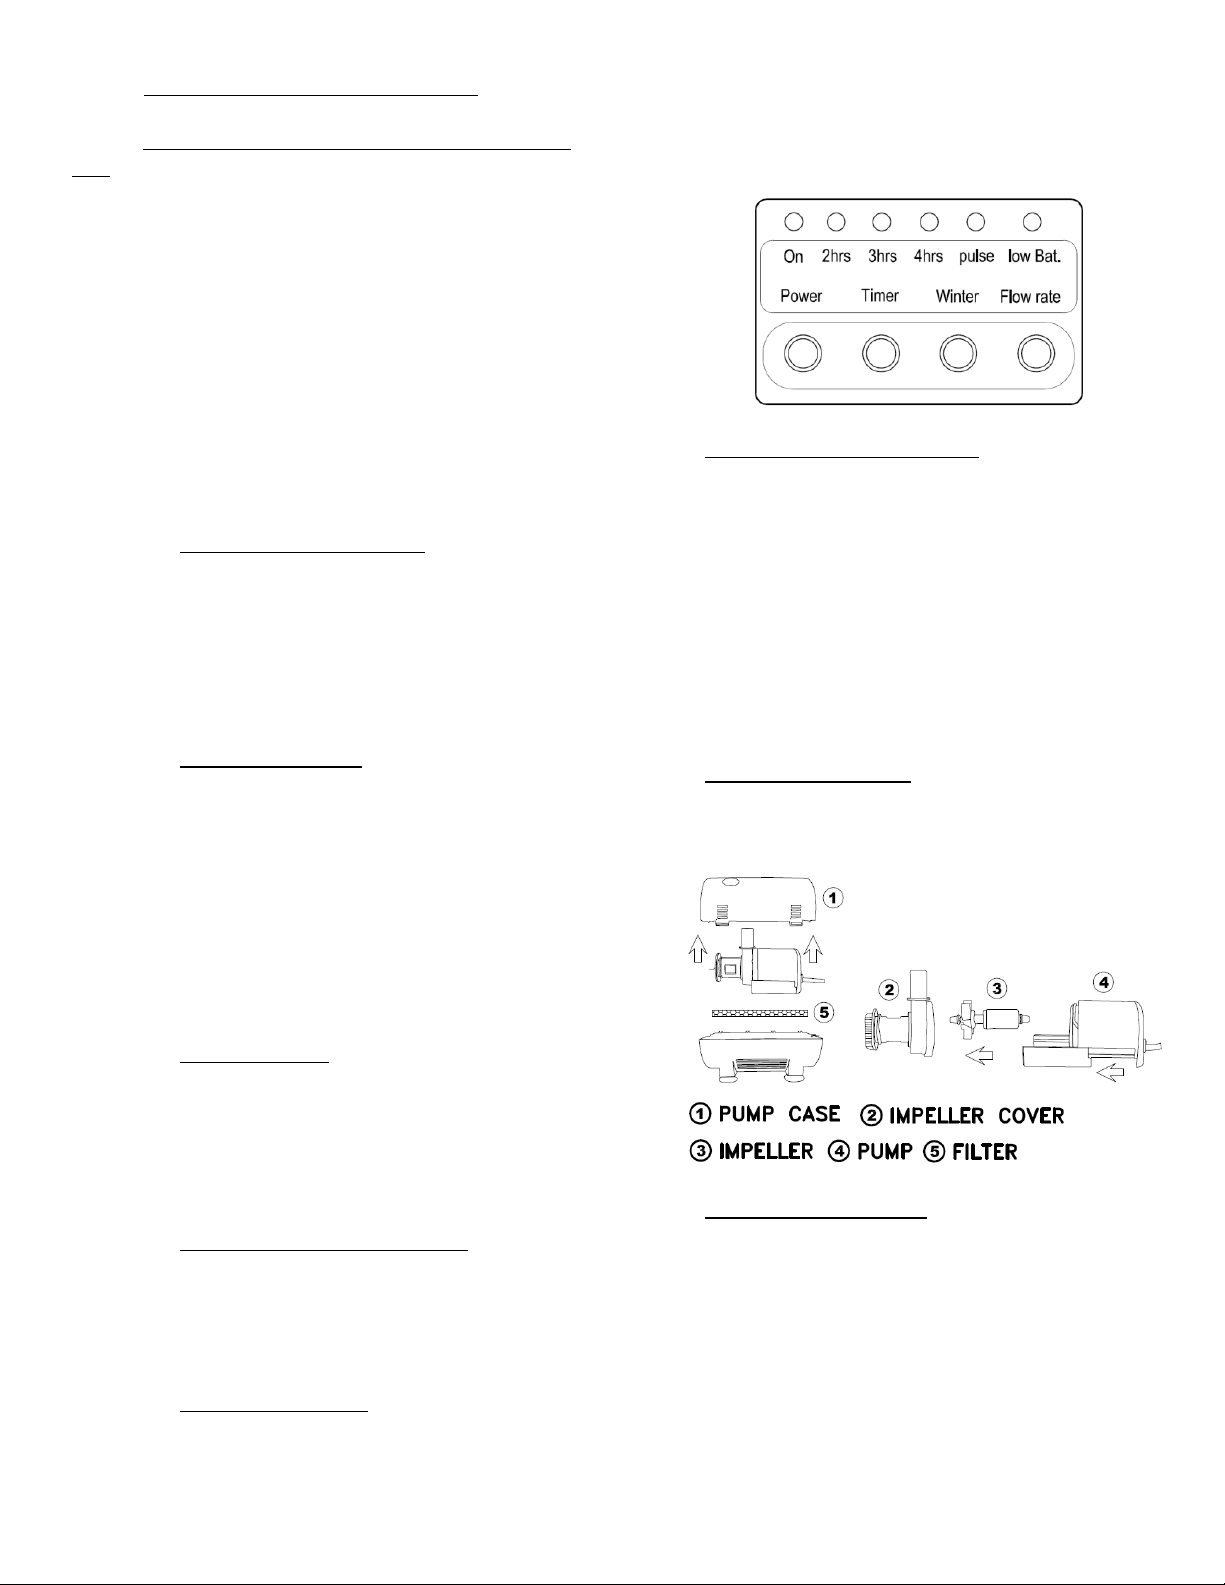
5. BATTERY CONTROL BOX OPERATION
Note: The LED light is designed to work at night
only
The solar pump is designed mainly for use during
summer hours, but it will also work in spring and
fall as long as the sunlight conditions are good
enough in your region. And the new Winter Mode
will extend battery life time during the winter.
The pump’s performance depends on the
orientation of the solar panel towards the sun
(see section 2) and the strength on sunlight.
This ASC solar pump kit comes with three
operation modes: Continuously On, 2-4hrs Timer,
and Winter mode.
a. CONTINUOUSLY ON MODE: This mode works
best if you want to maximize the pump’s daily
usage. Press [Power] button, the top
indicator light [On] will be on. The pump will
run continuously until the battery runs out of
power. The pump will automatically restart
when the battery is recharged under proper
sunlight.
b. DAILY TIMER MODE: This mode works best if
you want the pump run at the same time
every day (The time you start the mode).
Press [Timer] button repeatedly until the
indicator light [2hrs], [3hrs] or [4hrs] is lit –
the pump will run for 2, 3, or 4 hours and
shut down (in standby) for 22, 21, or 20
hours. This setting will repeat at the same
time every day. You can reset the pump’s
daily start up time by switching it to a new
desired time using this mode.
c. WINTER MODE: This mode works best in
winter or poor weather. Press [Winter]
button, the top indicator light [Pulse] will be
on. The pump will run for 20 seconds in every
60 seconds. It is recommended to use this
mode to extend battery life time in winter or
poor weather.
PUMP FLOW CONTROL button: Use this
button to adjust the water flow rate. Press
[Flow Rate] repeatedly to adjust the water
flow rate (total 3 levels). Notes: Higher water
flow rate will consume more power and
reduce the battery life time.
LOW BATTERY light: The [Low Bat.] indicator
light will be blinking when the battery is low,
and pump/LED light will shut down shortly to
protect the battery. The [Low Bat.] indicator
light will turn off until the battery is
recharged.
6. PERFORMANCE OF THE PUMP
The performance of the pump depends on the
orientation of the solar panel towards the sun
and the sunlight strength. In order to achieve
max performance, please make sure the panel is
facing in the direction of the sun. A solar panel
positioned in the shade or in poor weather will
not maximize the charge. This models pump
performance will depend on the battery power
level. The pump will not work if battery power is
too low
.
7. PUMP MAINTENANCE
If you find the pump starts losing power or stops
working, please clean the pump filter and
impeller with clean water.
8. BATTERY REPLACEMENT
If properly maintained this solar pump has been
designed to run for many years. The Lead-acid
battery does have a limited life span and might
need to be replaced after 18-24 months of use. If
the battery appears less efficient, please try to
boost charge it. To do this, leave the system off
for 2 to 3 sunny days to allow fully charge to the
2
 Loading...