

Asc SP001 User Manual
SP001 Solar Water Pump Timer Kit Instructions
All Solar Central
www.allsolarcentral.com
Thank you from the entire ASC family for purchasing an ASC solar
product! Please read this entire booklet before assembly.
Package contents:
1 x Water Pump with 16 ft. Cable
1 x LED Light Ring with 16 ft. Cable
1 x Solar Panel with Battery
1 x Solar Panel Bracket
1 x Extension Tube
1 x Ground Spike
1 x Set of Fountain Nozzles
Notes: If there is any damage to the product or missing parts, please contact us at 1-626-582-8898 or
www.allsolarcentral.com/contactus
Assembly Steps:
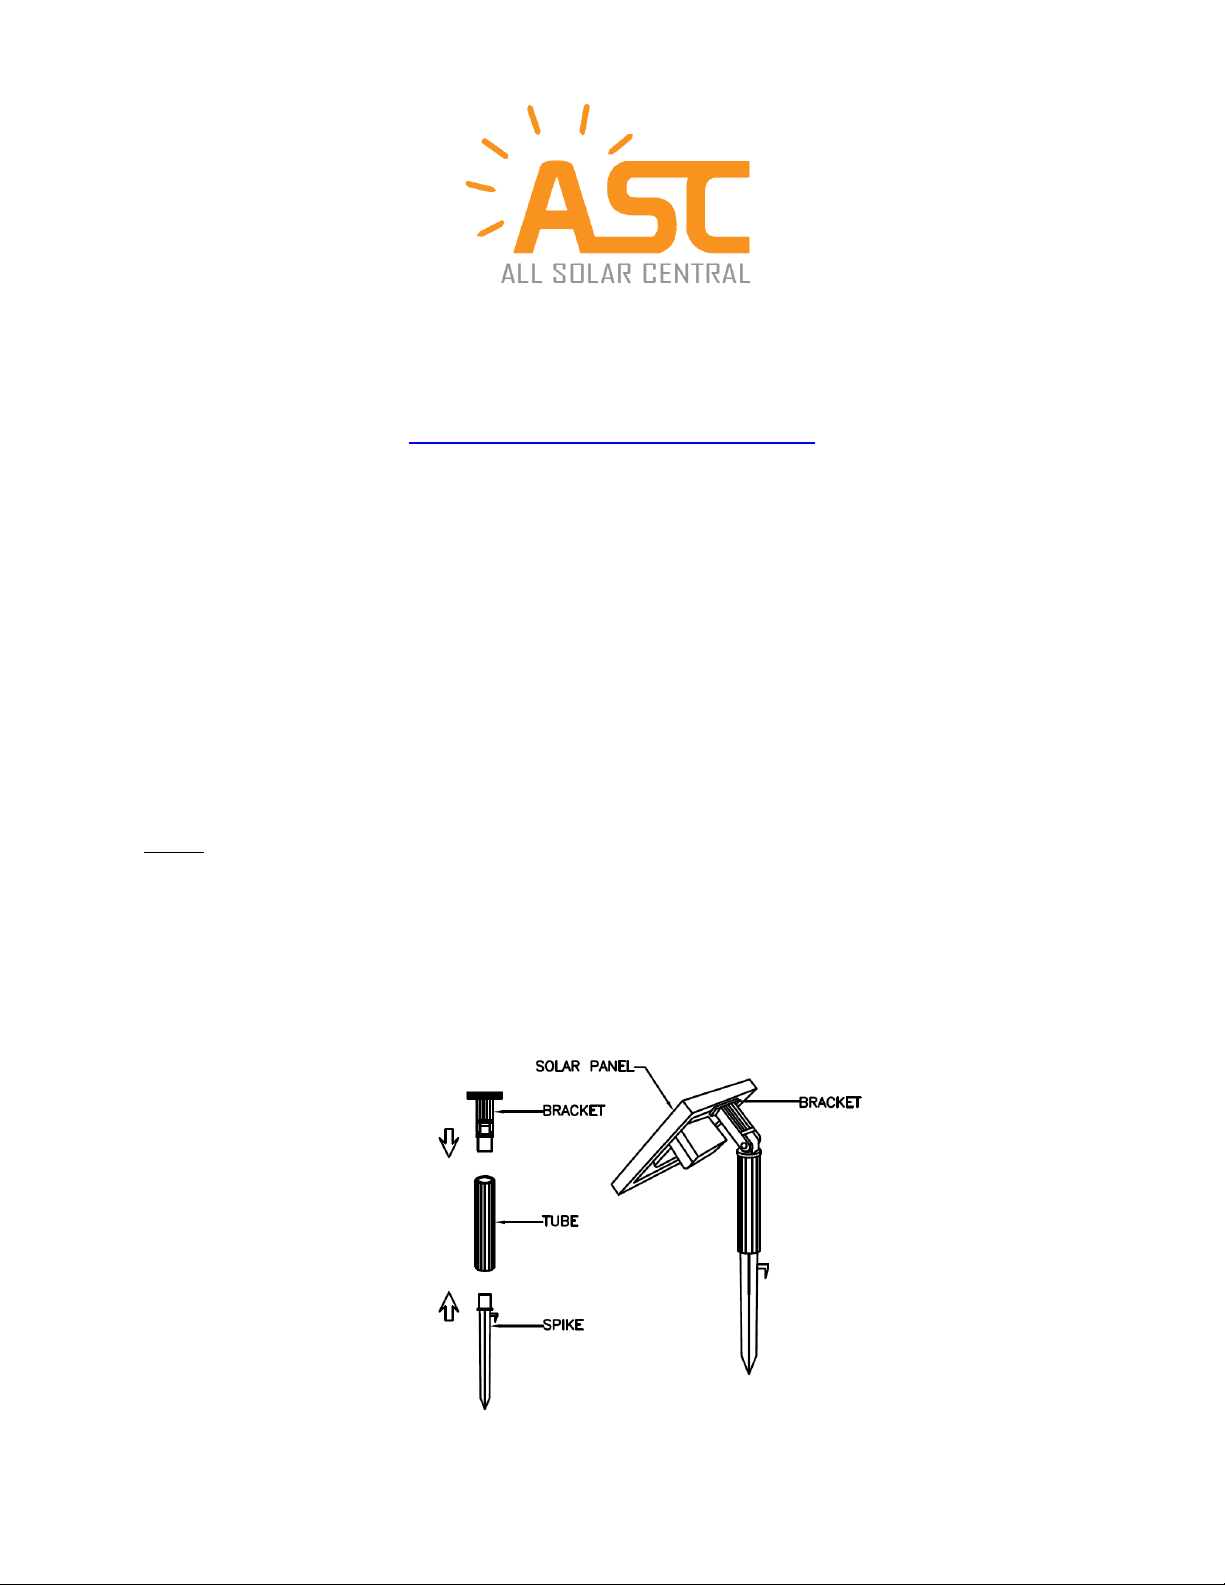
1. Connect the bracket, tubes and spike together. Then attach the solar panel to the bracket. Slide
the holding bracket into the inside lip of the top half of the solar panel frame. The bracket holds
the weight of the solar panel. The solar panel can be adjusted for optimal sunlight by using the
wingnut. Please see the diagram.
1
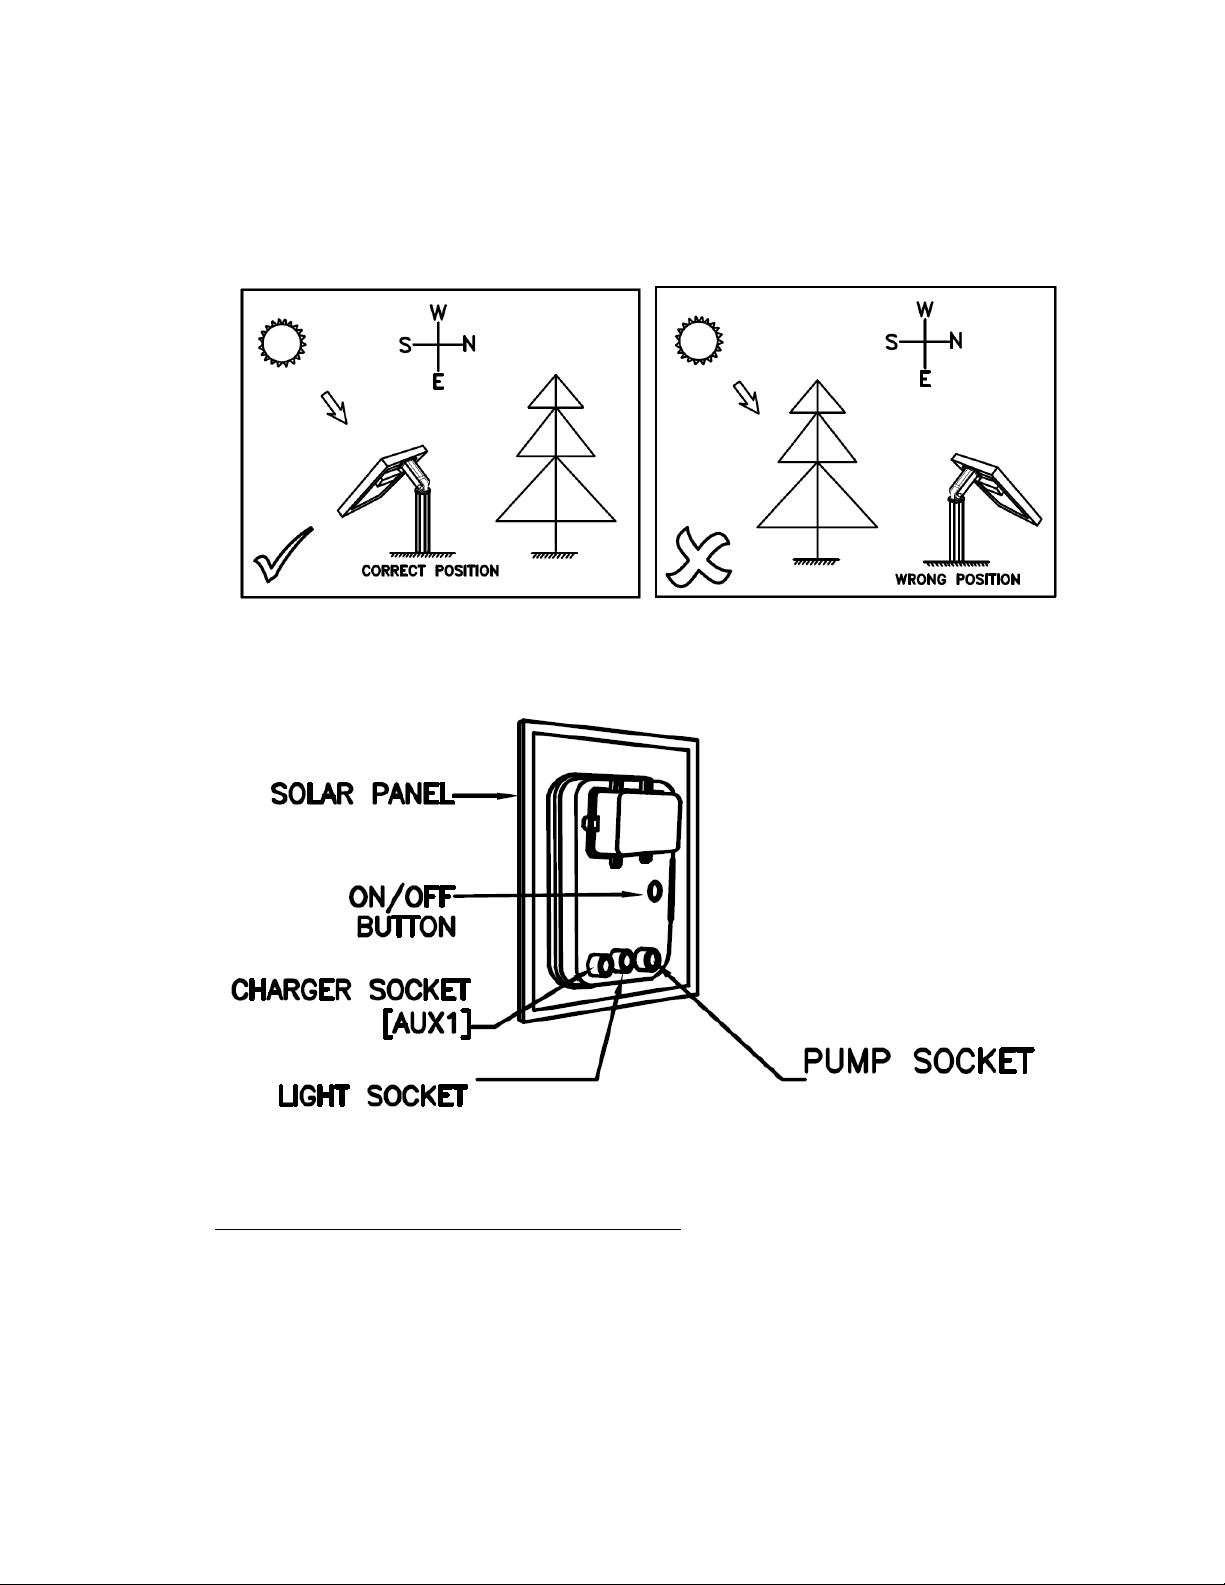
2. Insert the spike into the ground. Position the solar panel so it’s facing south (in northern
hemisphere) as much as possible to maximize daylight hours. It is important to angle the solar
panel to face the sun when the sun is at its highest point. Ensure the solar panel is not shaded by
trees, shrubs or buildings.
3. Slightly twist the pump plug, sliding it into the pump socket. Then slightly twist the LED light
plug sliding it into the light socket. Make sure the sealing rings are fully in the grooves. Your
solar pump is now ready to use.
4. You can use an AC/DC adaptor (sold separately) to charge the batteries if optimal sunlight is not
available. Connect the adaptor DC plug into the charger socket.
Note: The LED light is designed to work at night only
This ASC solar pump kit is designed to run by Solar and Battery with 3-Hour Timer Mode. This
mode works best if you want the pump run at the same time every day. Press [On/Off] button,
the pump will run for 3 hours and shut down (in standby) for 21 hours. This setting will repeat
daily at the same time. You can reset the pump’s daily start up time by restarting it at a new
desired time.
2
 Loading...