

Asc SF023 User Manual

SF023 Solar Lotus Floating Fountain Instructions
1 x Lotus Leaf
1 x
Water Flow Valve
Notes:
If there is any damage to the fountain or missing parts, please contact us at 1
-
626-582-8898 or
By All Solar Central
www.allsolarcentral.com
Thank you from the entire ASC family for purchasing an ASC solar
product! Please read this entire booklet before assembly.
PACKAGE CONTENTS:
1 x Lotus Flower
1 x 12-Hole Daisy Jet
1 x 7-Hole Daisy Jet
1 x Fountain Head Adaptor
www.allsolarcentral.com/contactus
FOUNTAIN ASSEBMLY:
1. Identify a suitable area in your pond for the lotus
floating fountain. Attach the lotus fountain to the
pump. A water flow valve is included in the
package. You can use it to adjust the fountain
height in order to fit your pond size.
In order to keep the lotus fountain stationary in
the desired position of your pond a bag and wire
pack have been provided to hold the fountain in
place. Simply fill the net bag with a small amount
of gravel and then select the desired length of the
wire to the correct depth of your pond. Then tie
the wire to the filled net bag and the pump. Now
the filled net bag will act as an anchor to keep
your lotus fountain in position and stop it from
moving around.
1 x Pump with 16ft Cable
1 x Solar Panel
1 x Solar Panel Bracket
1 x Extension Tube
1 x Ground Spike
1
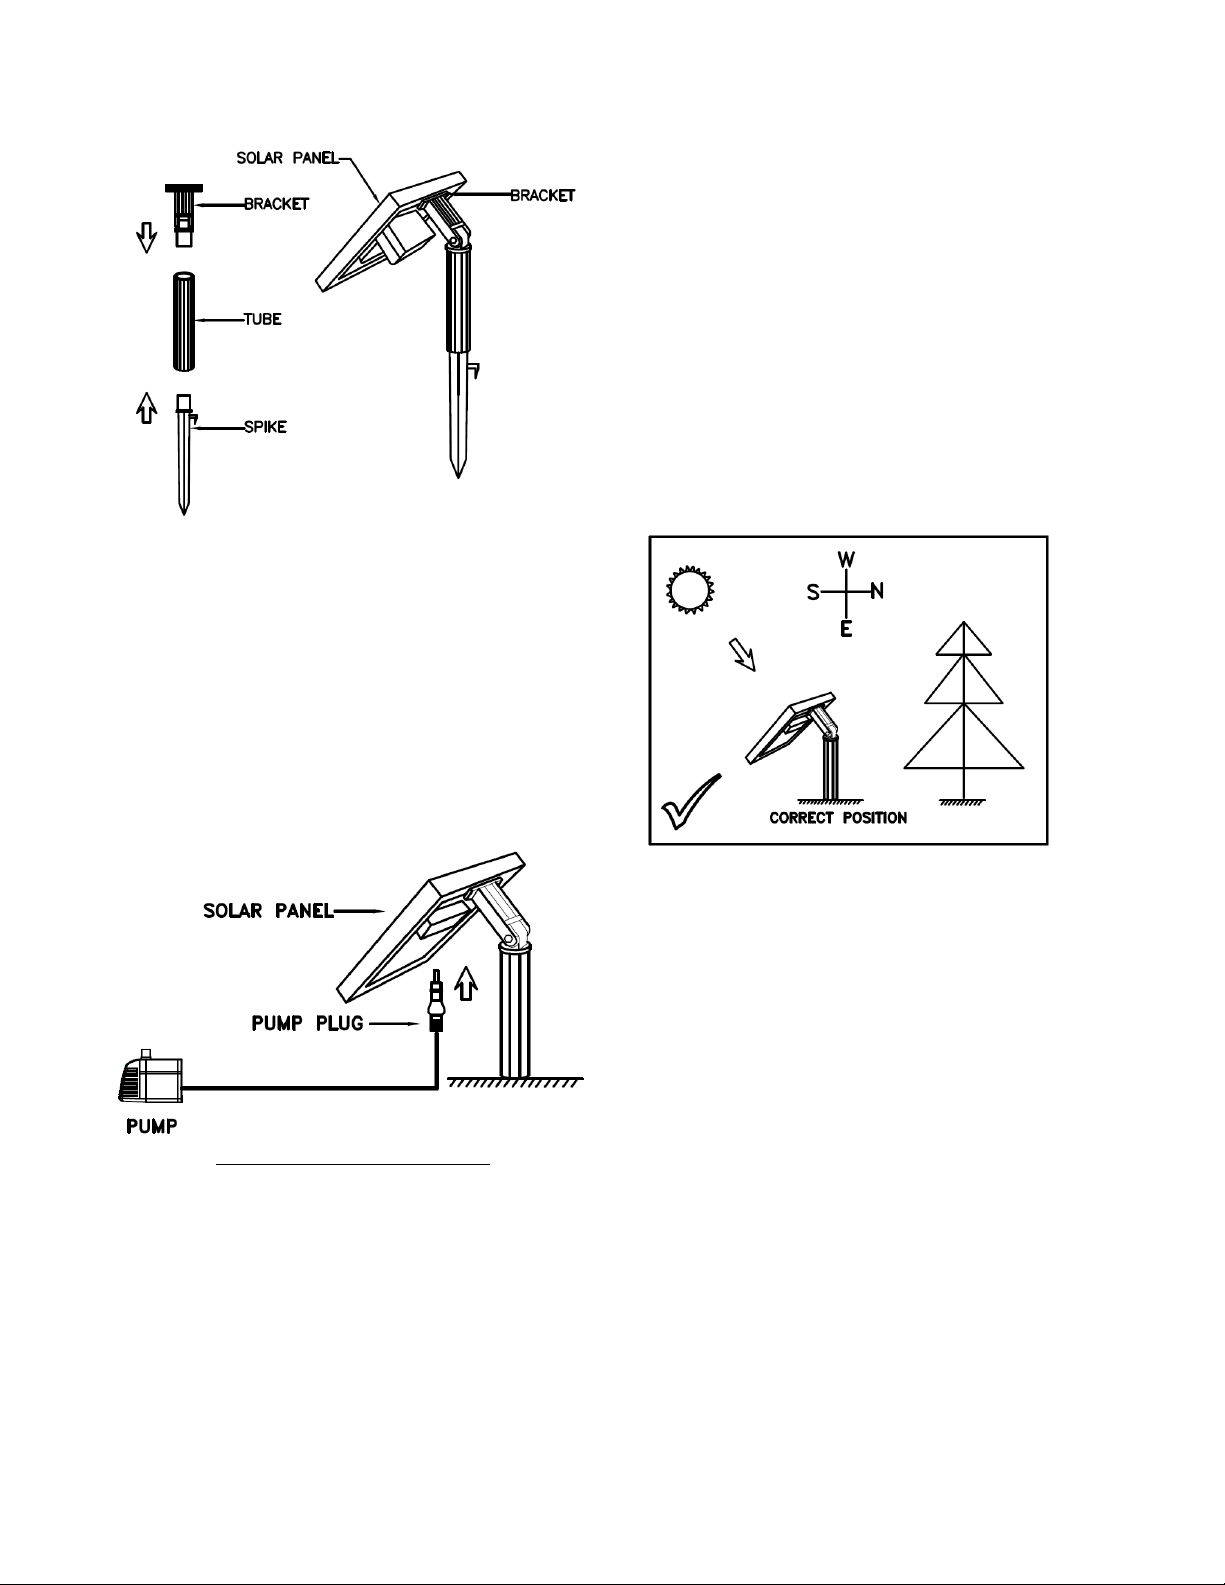
2. Connect the bracket, tubes and spike together.
3. Insert the spike into the ground. Position the
solar panel so it’s facing south (in northern
hemisphere) as much as possible to maximize
daylight hours. It is important to angle the solar
panel to face the sun when the sun is at its
highest point. Ensure the solar panel is not
shaded by trees, shrubs or buildings.
Then attach the solar panel to the bracket.
Slide the holding bracket into the inside lip of
the top half of the solar panel frame. The
bracket holds the weight of the solar panel.
The solar panel can be adjusted for optimal
sunlight by using the wingnut. Please see the
diagram.
5. PERFORMANCE OF THE PUMP
The solar pump is designed mainly for use during summer hours, but it will also work in spring
and fall as long as the sunlight conditions are good enough in your region. The pump’s
performance depends on the orientation of the solar panel towards the sun and the strength of
sunlight.
4. Twisting pump plug slightly, sliding it into
the [pump] socket. Make sure its sealing
ring is fully in the groove. Your solar pump
is now ready to use. It will begin working
once the panel is in direct sunlight.
2
 Loading...