

Asc SF021 User Manual
SF021 Solar Ceramic Frog Instructions
By All Solar Central
www.allsolarcentral.com
Thank you from the entire ASC family for purchasing
an ASC solar product! Please read this entire booklet
before assembly.
Package contents:
1 x Frog
1 x Reservoir
1 x Water Pipe and Rubber Bung
1 x Water Pump
1 x Solar Panel with Bracket
1 x Extension Tube
1 x Ground Spike
Notes: If there is any damage to the product or missing
parts, please contact us at 1-626-582-8898 or
www.allsolarcentral.com/contactus
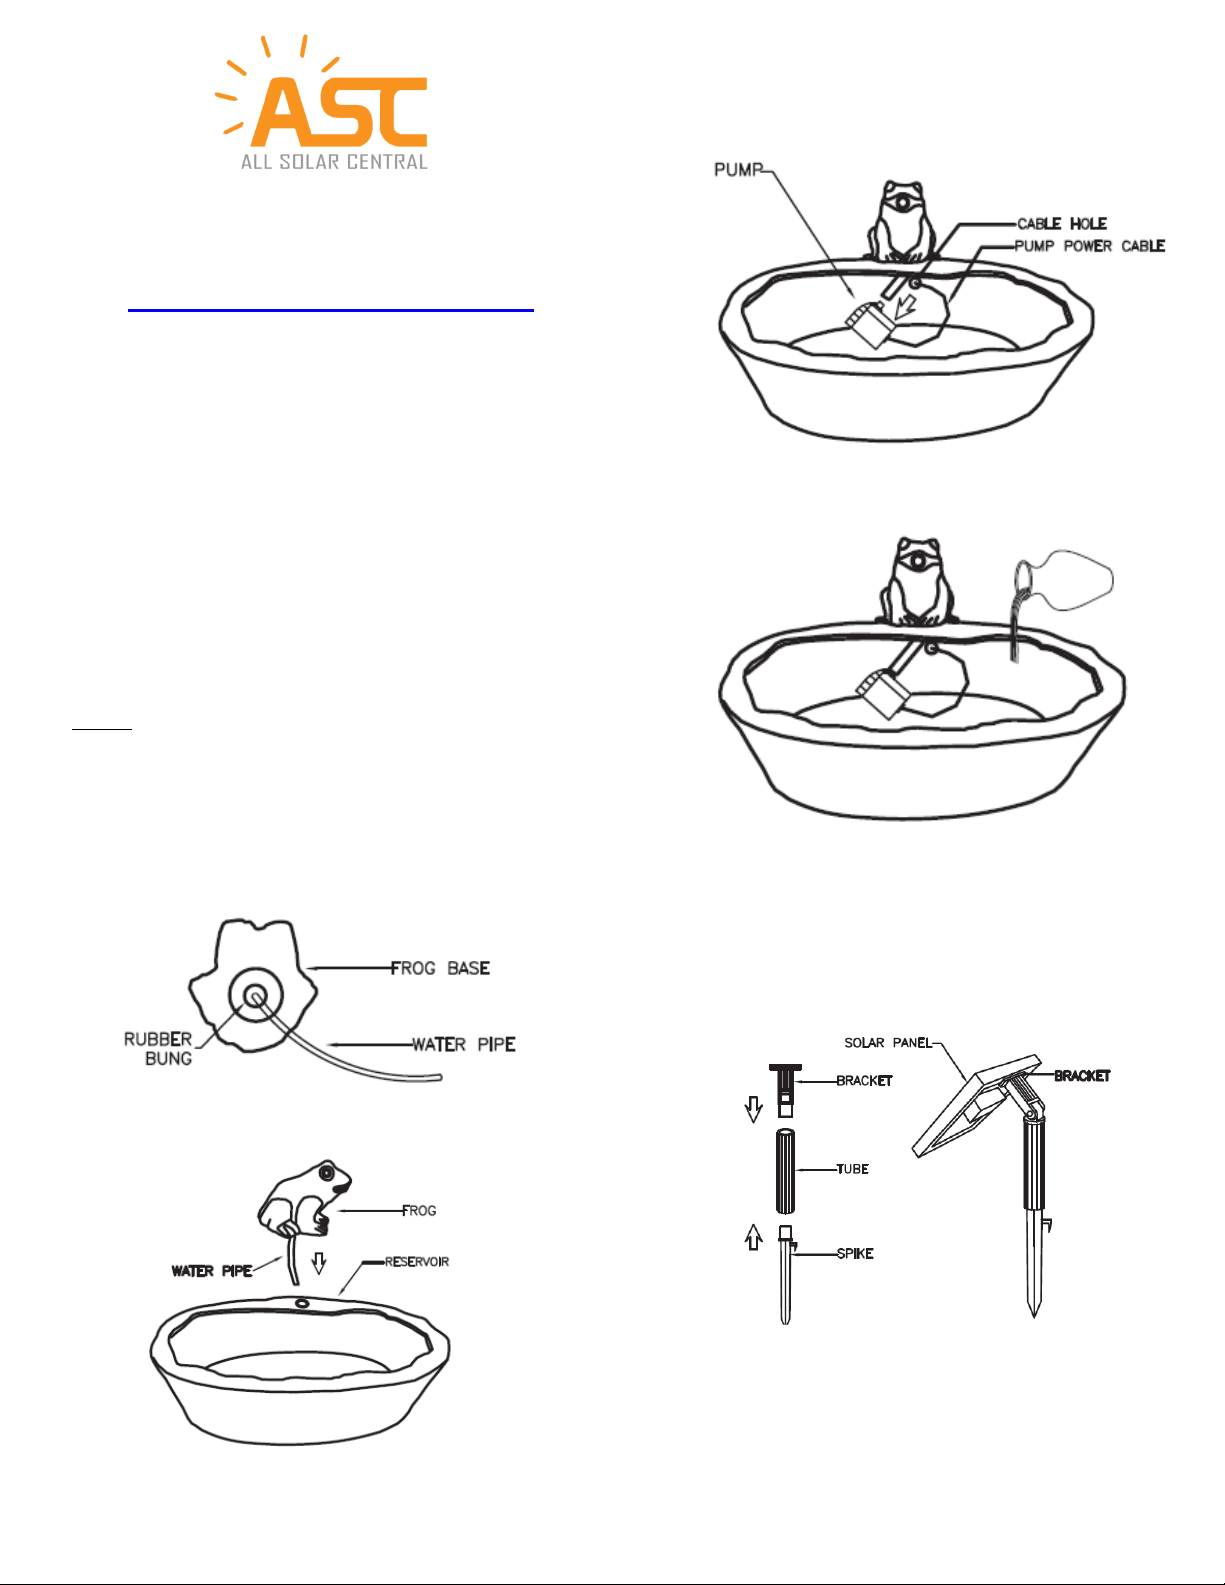
3. Attach the pump to the water pipe and exit
through a hole on the back side of the Reservoir.
4. Add appropriate amount of clean water into the
Reservoir and make sure the pump is fully
submerged in the water.
Assembly Steps:
1. Attach Water Pipe to the Frog Base with a
provided Rubber Bung
2. Attach the Frog onto the Reservoir. Put the pipe
through the hole on top surface of the Reservoir.
5. Connect the bracket, tubes and spike together.
Then attach the solar panel to the bracket. Slide
the holding bracket into the inside lip of the top
half of the solar panel frame. The bracket holds
the weight of the solar panel. The solar panel can
be adjusted for optimal sunlight by using the
wingnut. Please see the diagram.
6. Insert the spike into the ground. Position the
solar panel so it’s facing south (in northern
hemisphere) as much as possible to maximize
daylight hours. It is important to angle the solar
1

panel to face the sun when the sun is at its
highest point. Ensure the solar panel is not
shaded by trees, shrubs or buildings.
7. Connect the Pump to the back side of the Solar
Panel. IMPORTANT!! Slightly twist the connectors
when connecting to make sure the rubber seals
are fully in the grooves.
8. SOLAR PUMP FUNCTIONS
This pump runs from direct sunlight. The pumps
performance is directly related to the amount
and strength of sunlight received by the solar
panel. This solar pump is designed primarily to
operate in summer months but can also work in
spring and autumn if there is direct sunlight.
Notes: This model DOES NOT come with a
battery, so the pump will only work when the
solar panel is in sunlight. Please visit
www.allsolarcentral.com/ for additional solar
water pump kits
9. PUMP MAINTENANCE
.
If you find the pump starts losing power or stops
working, please clean the pump filter and
impeller with clean water.
10. TROUBLE SHOOTING
• Check to see if the solar panel, pump and
led light are connected properly
• Check to see if the solar panel is correctly
positioned facing the sun. Please ensure
the solar panel is not in the shade or
obstructed by trees, shrubs or a building
(see step 2).
• Check water level and make sure the
pump is fully submerged in water
• Check to see if the pump filter/impeller is
blocked by debris
• Check to see if the fountain tubing is
blocked by kinks or obstructions
• Check the pump. It may be “air locked”.
Turn the pump on/off switch several
times to clear any air that may have been
trapped.
11. WINTER PROTECTION
Indoor storage is recommended during winter
months. Normal operating temperature is
between 50 and 113 °F.
Please visit www.allsolarcentral.com for more
products and offers.
2
 Loading...