

Asc SF015 User Manual
SF015 Solar Woodland Waterfall Instructions
By All Solar Central
www.allsolarcentral.com
Thank you from the entire ASC family for purchasing
an ASC solar product! Please read this entire booklet
before assembly.
Package contents:
1 x Woodland Waterfall
1 x Door Cover
1 x Water Pump
1 x Solar Panel
1 x Solar Panel Bracket
1 x Extension Tube
1 x Ground Spike
Notes: If there is any damage to the product or missing
parts, please contact us at 1-626-582-8898 or
www.allsolarcentral.com/contactus
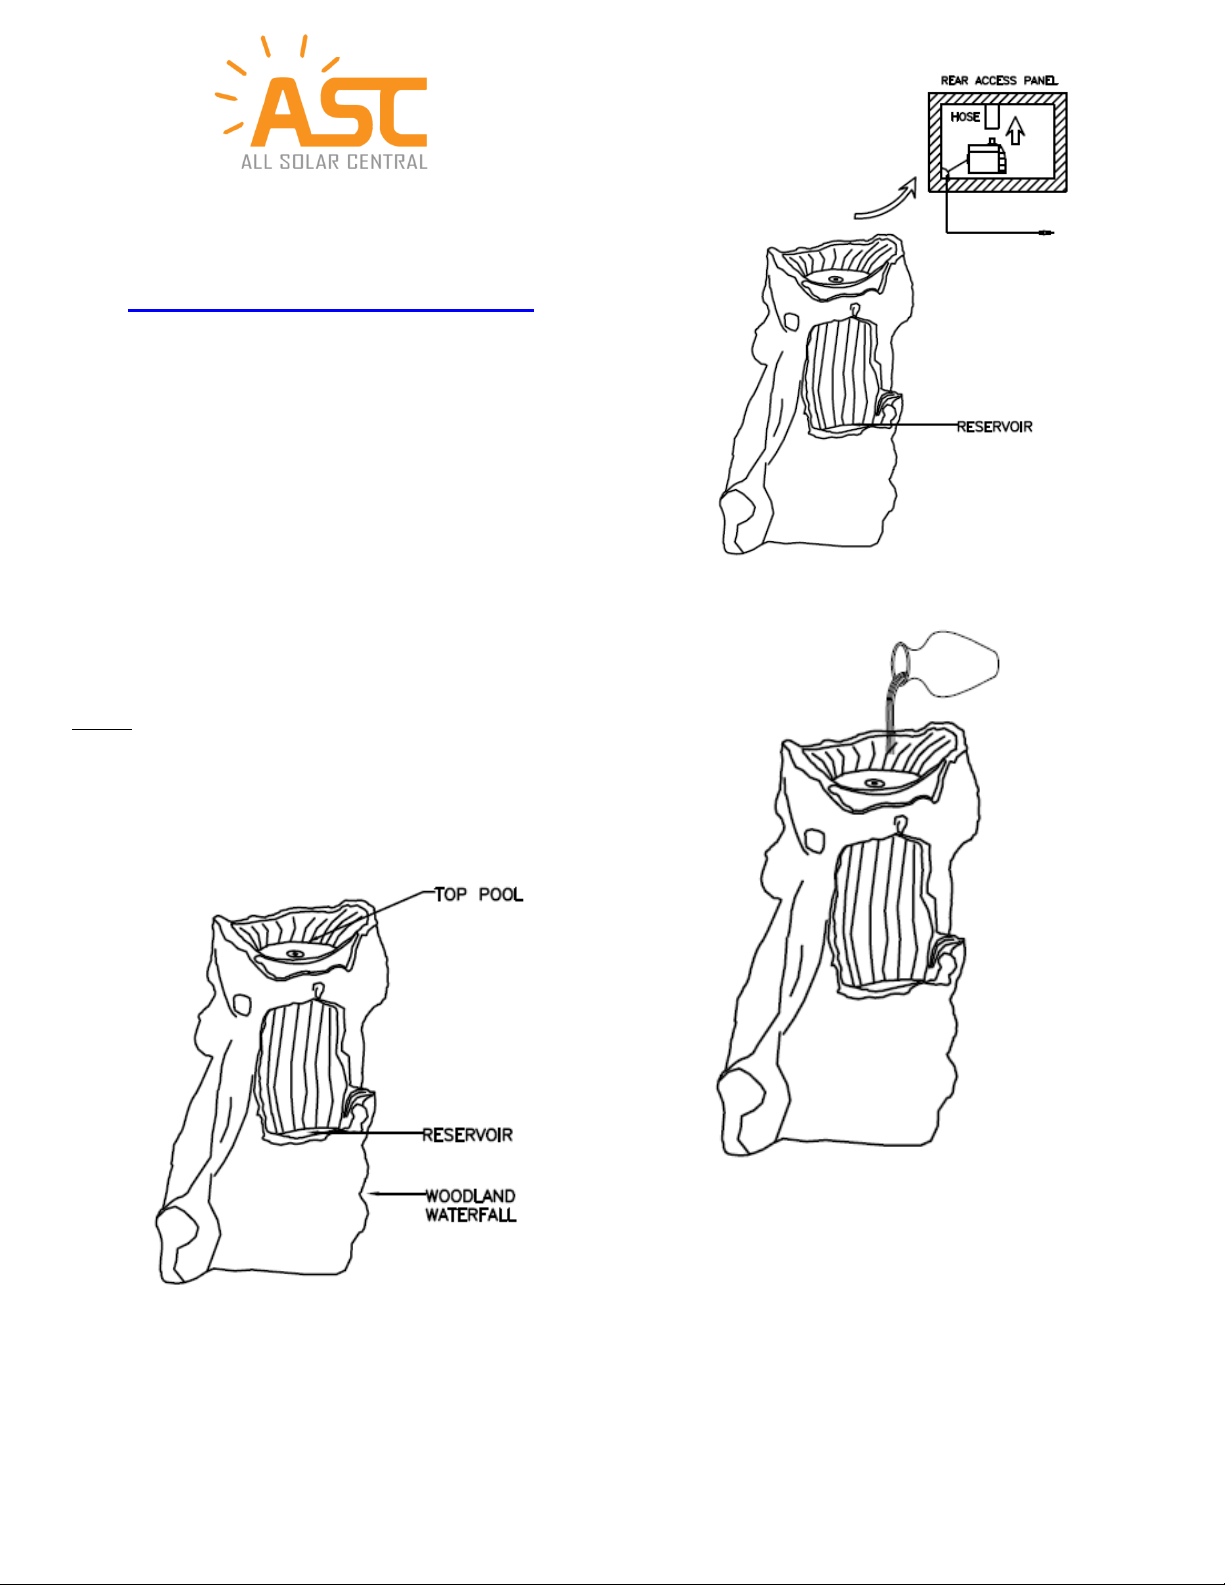
3. Fill the fountain with appropriate amount of
water to fully submerse the pump.
Assembly Steps:
1. Place your new fountain to a desirable place.
2. Attach the pump to the hose from access panel
on the back of the Woodland Water Fall
Fountain. The pump cable exists from the back
access panel.
4. Connect the bracket, tubes and spike together.
Then attach the solar panel to the bracket. Slide
the holding bracket into the inside lip of the top
half of the solar panel frame. The bracket holds
the weight of the solar panel. The solar panel can
be adjusted for optimal sunlight by using the
wingnut. Please see the diagram.
1
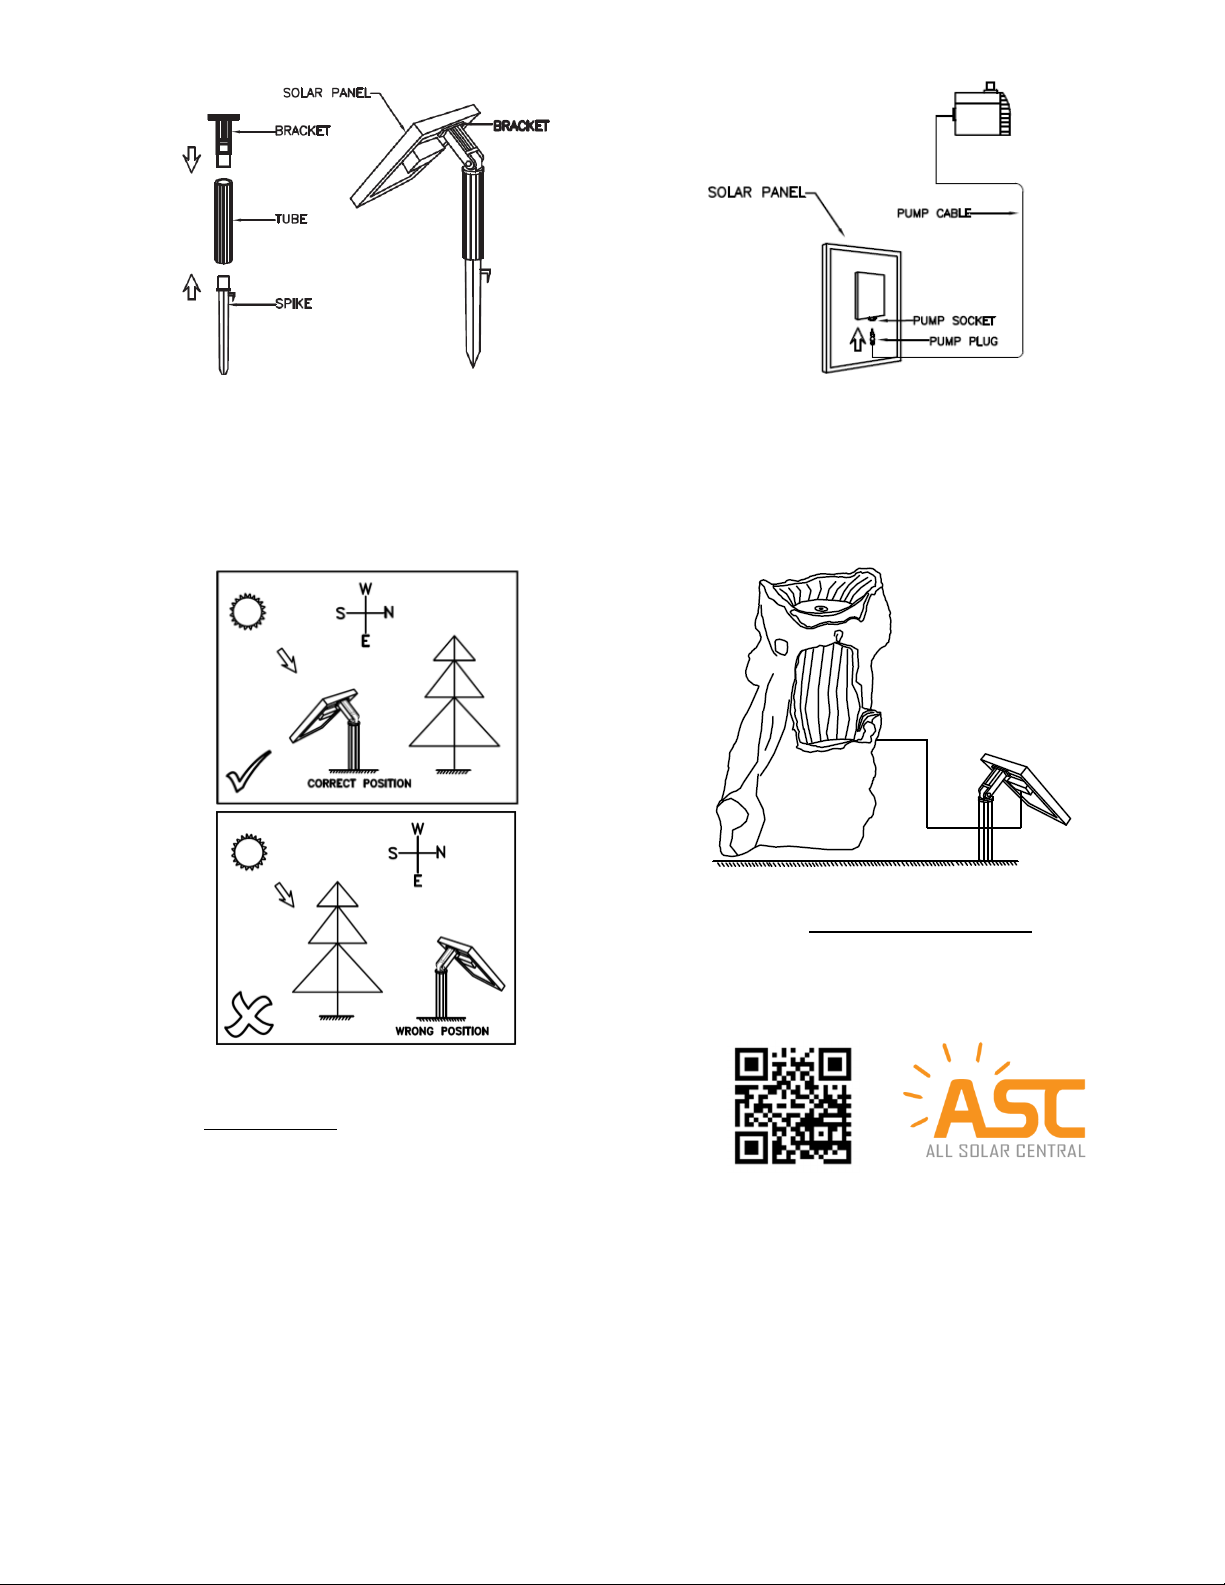
5. Insert the spike into the ground. Position the
solar panel so it’s facing south (in northern
hemisphere) as much as possible to maximize
daylight hours. It is important to angle the solar
panel to face the sun when the sun is at its
highest point. Ensure the solar panel is not
shaded by trees, shrubs or buildings.
Notes: Pump Kits might vary. Please refer to the
Solar Water Pump Kit Instructions for more
information.
7. Now your new fountain is assembled and ready
to use.
Please visit www.allsolarcentral.com for more
products and offers.
6. Connect the Pump to the back side of the Solar
Panel. IMPORTANT!! Slightly twist the connectors
when connecting to make sure the rubber seals
are fully in the grooves.
2
 Loading...