

Asc SF009 User Manual
SF009 Solar Tulip Fountain Instructions
Fountain:
Solar Water Pump Kit
:
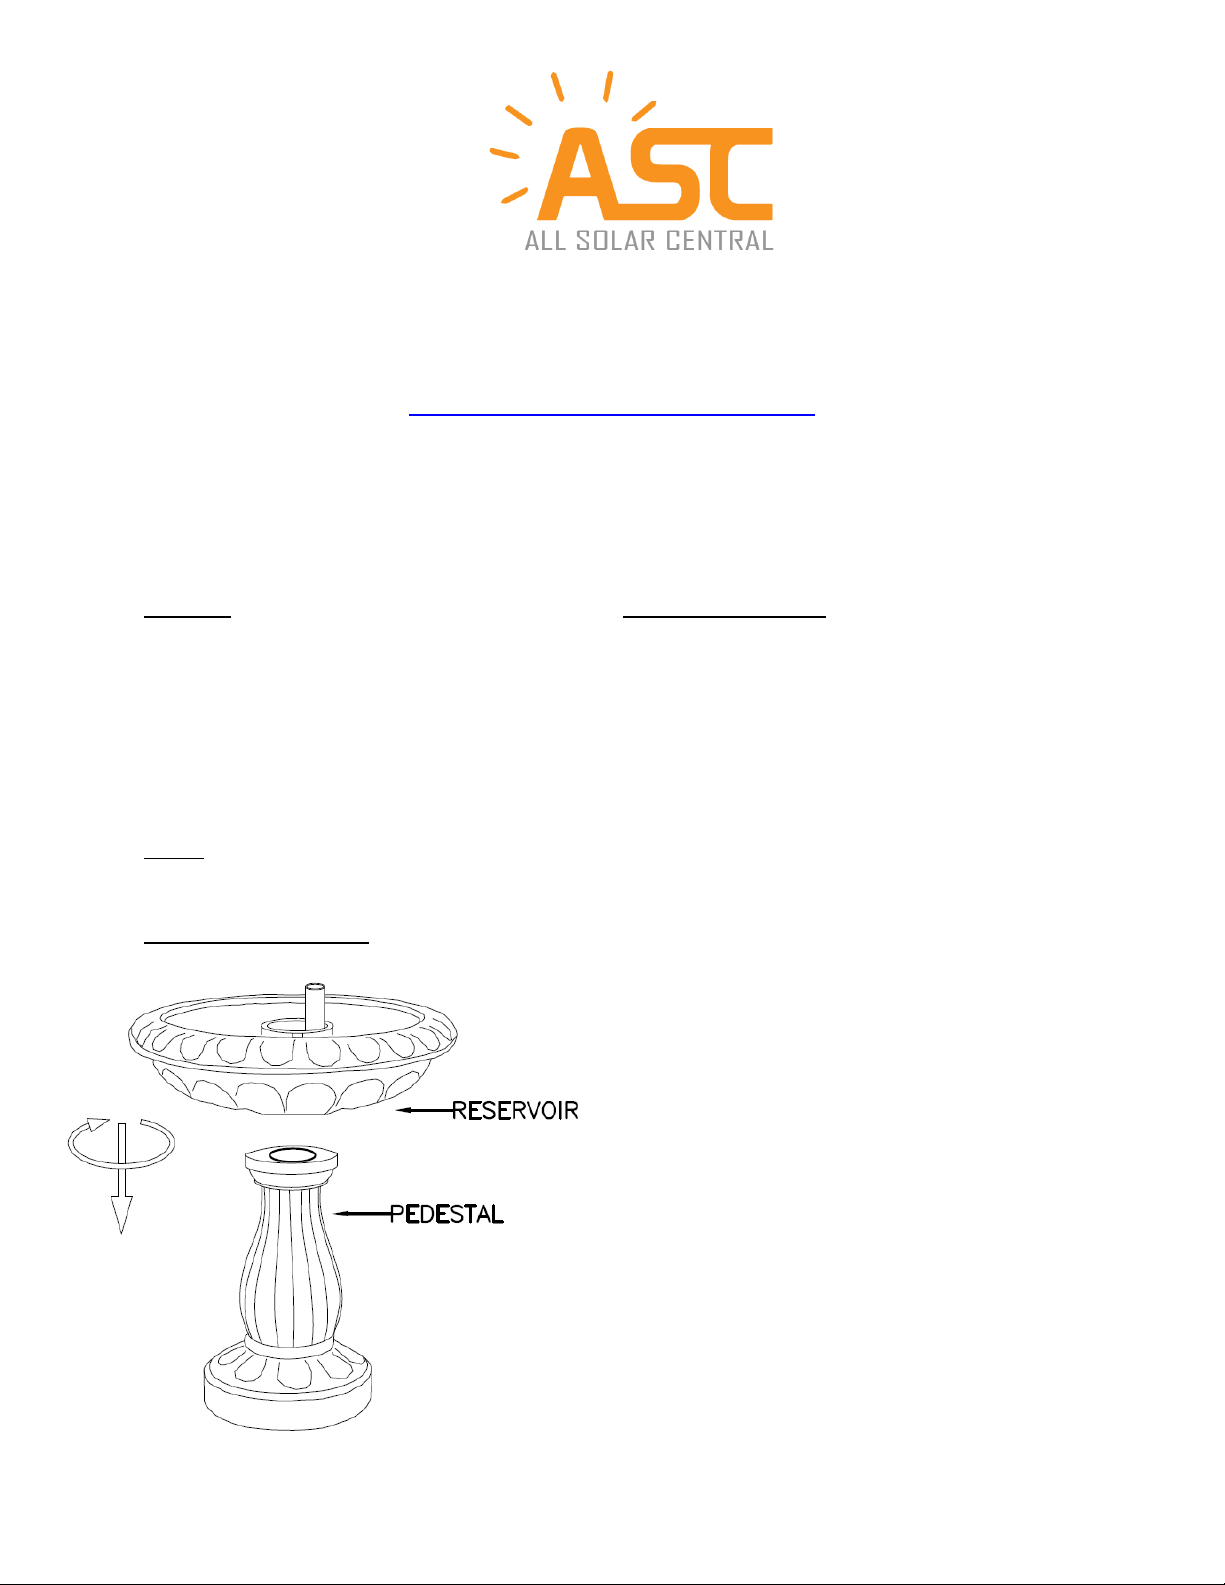
1. Place the reservoir on top of the pedestal
By All Solar Central
www.allsolarcentral.com
Thank you from the entire ASC family for purchasing an ASC solar
product! Please read this entire booklet before assembly.
Package contents:
1 x Tulip Column
1 x Reservoir
1 x Pedestal
Notes: If there is any damage to the fountain or missing parts, please contact us at 1-626-582-8898 or
www.allsolarcentral.com/contactus
FOUNTAIN ASSEMBLY:
1 x Water Pump with 16 ft. Cable
1 x LED Light
1 x Set of Fountain Nozzles
1 x Solar Panel with Battery
1 x Solar Panel Bracket
1 x Extension Tube
1 x Ground Spike
and twist the reservoir clockwise to secure it.
1
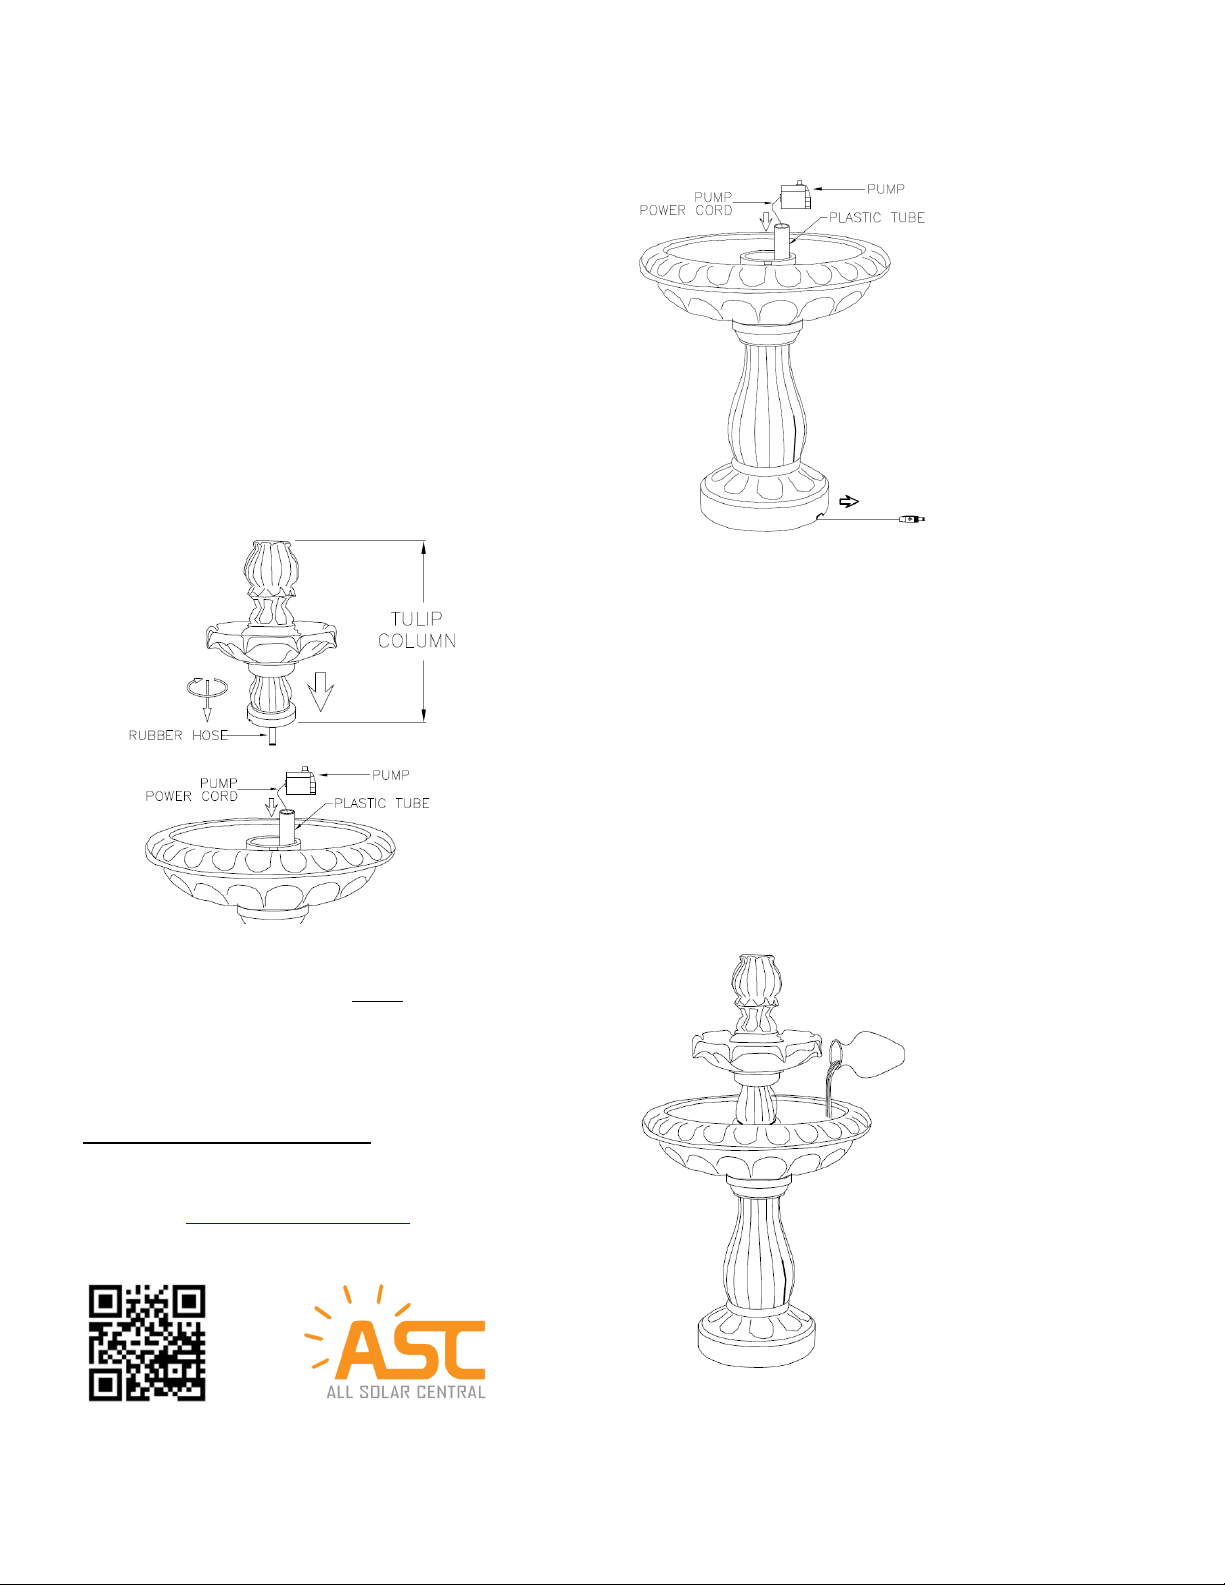
2. Feed the pump cable through the plastic tube and
slide it through the hole locate at the bottom of the
4. Fill the
reservoir
with water so the pump is
pedestal.
3. Attach the pump to the rubber hose of the
Tulip Column. Then place the Tulip Column
onto the reservoir and twist clockwise to
secure it.
completely submersed. Note: In order to reduce
mineral deposits and bacteria build-up, it is
recommend using distilled water.
SOLAR PUMP KIT ASSEMBLY:
Please refer to Solar Water Pump Kit Instructions.
Please visit www.allsolarcentral.com for more product
detail and offers.
2
 Loading...