

Page 1
IntraCore
Layer 2 Gigabit Switches v.2.0
®
35160 Series
User’s Manual
Page 2
Quick Start Guide
Follow the steps below to install the IntraCore switch:
1. Open the box and check the contents. See Chapter 1.3 Package Contents for a complete list of the
items that are included with the IntraCore switch.
2. Install the switch in an equipment or wall rack, or prepare it for desktop placement.
3. Connect the power cord to the unit and to an appropriate power source.
4. Connect network devices to the switch.
5. Refer to Chapters 3–5 to configure the IntraCore for configuration and management capabilities.
For more information on installing the switch, please refer to Chapter 2 Hardware Installation and Setup.
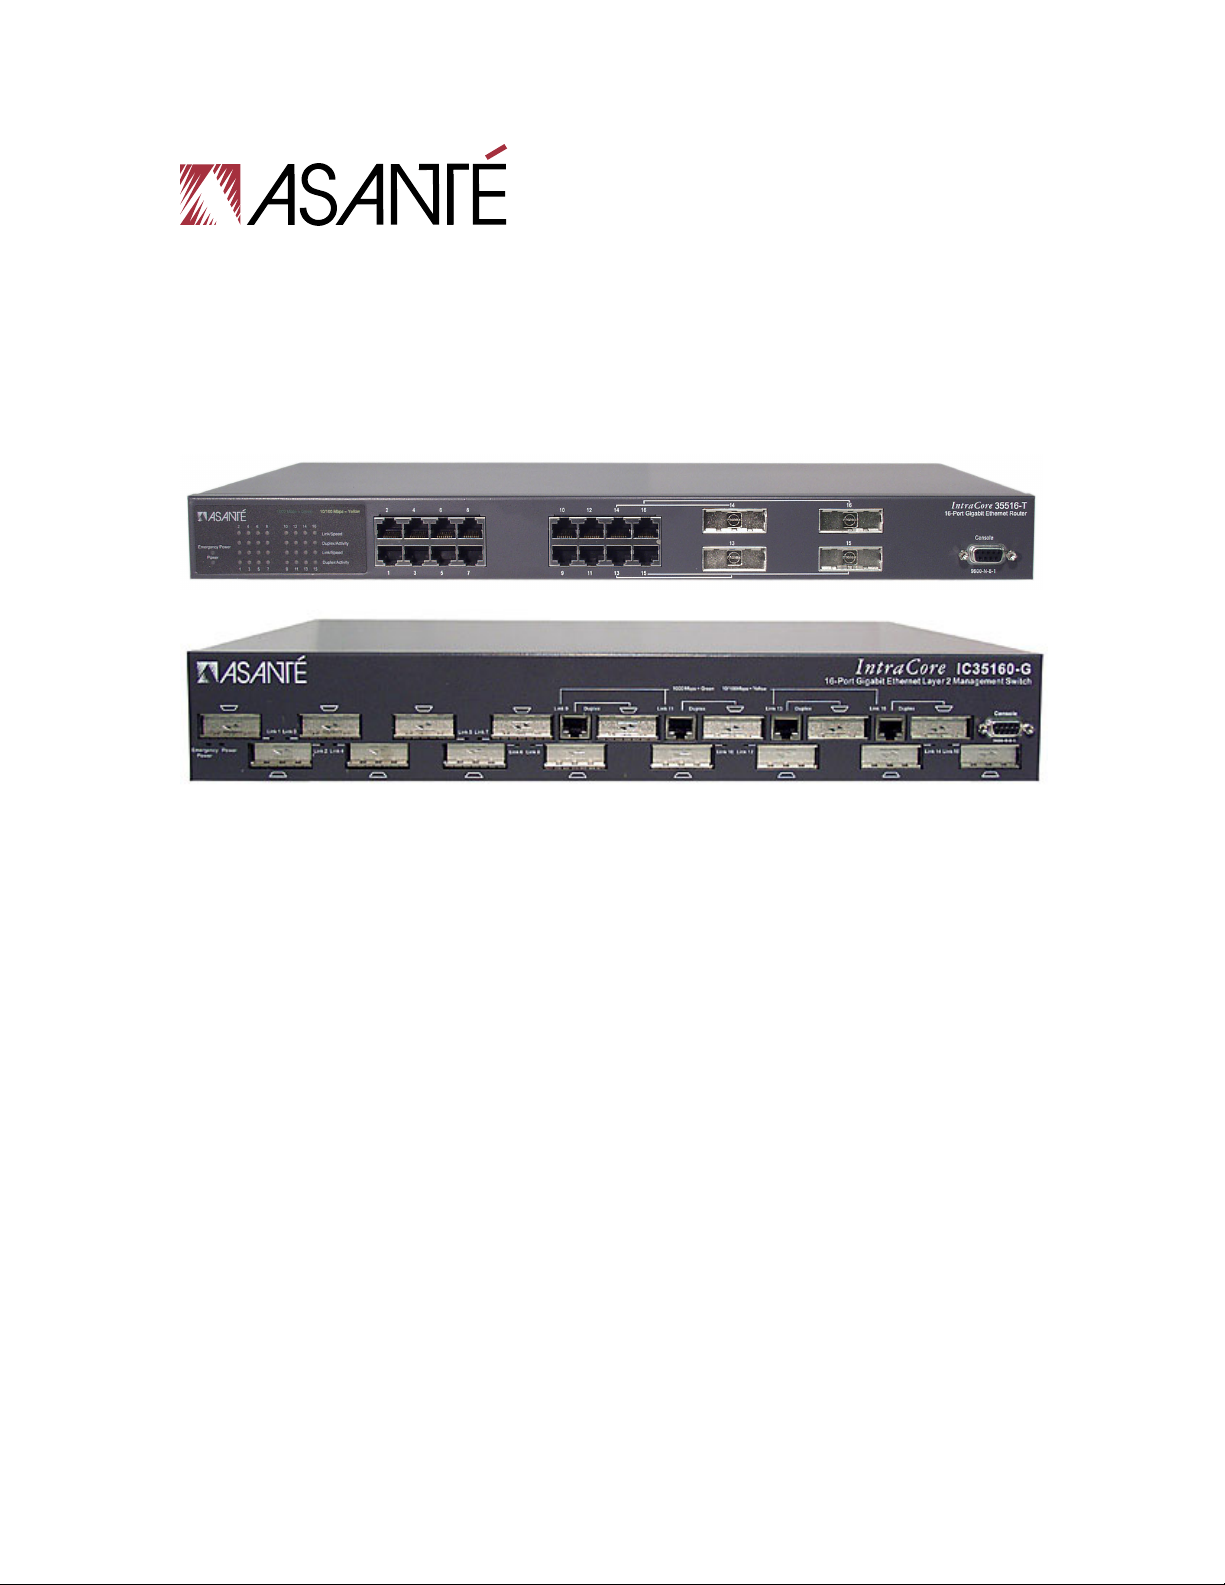
Note: The photographs shown may be from the IntraCore 35516 series. The layout of the 35516 models’
ports is identical to the respective models of the 35160 series.
2
Page 3

IntraCore 35160 Series
Layer 2 Gigabit Switches v.2.0
User’s Manual
Asanté Technologies, Inc.
821 Fox Lane
San Jose, CA 95131
USA
SALES
800-662-9686 Home/Office Solutions
800-303-9121 Enterprise Solutions
408-435-8388
TECHNICAL SUPPORT
801-566-8991: Worldwide
801-566-3787: Fax
www.asante.com/support
Copyright © 2003 Asanté Technologies, Inc. All rights reserved. No part of this document, or any associated artwork,
product design, or design concept may be copied or reproduced in whole or in part by any means without the express
written consent of Asanté Technologies, Inc. Asanté and IntraCore are registered trademarks, and the Asanté logo,
AsantéCare, Auto-Uplink, and IntraCare are trademarks of Asanté Technologies, Inc. All other brand names or product
names are trademarks or registered trademarks of their respective holders. All features and specifications are subject to
change without prior notice.
Rev. B 08/03
3
Page 4

Table of Contents
Quick Start Guide 2
Chapter 1. Introduction 6
1.1 Features 6
1.2 SwitchCore CXE2010 7
1.3 Package Contents 7
1.4 LEDs 7
1.5 Front and Back Panel Descriptions 9
1.6 Management and Configuration 9
Chapter 2. Hardware Installation and Setup 11
2.1 Installation Overview 11
2.2 Installation into an Equipment Rack 12
2.3 GBIC Interfaces 13
2.4 Installing the Optional Emergency Power Supply 14
2.5 Connecting Power 14
2.6 Connecting to the Network 15
2.7 Setup 16
2.8 Changing the Password 18
2.9 IP Assignment 18
2.10 Simple Network Management Protocol (SNMP) 19
Chapter 3. Configuration 20
3.1 General Information 21
3.2 Configuration Menu 21
3.3 Administration Configuration 22
3.4 System IP Configuration 23
3.5 Port Configuration 23
3.6 Advanced Port Configuration 25
3.7 Unicast Forwarding Database Configuration 27
3.8 Security Management 29
3.9 VLAN Management 29
3.10 Protocol Configuration 30
3.11 Trunk Group Configuration 34
3.12 QoS Priority Queue Management 35
3.13 User Interface Configuration 37
3.14 System Utilities 39
3.15 Statistics 45
Chapter 4. Advanced Management 46
4.1 SNMP and RMON Management 46
4.2 Security Management 47
4.4 IP Multicast Traffic Management 60
Chapter 5. Web-Based Management 64
5.1 Front Panel Button 65
5.2 Genl Info (General Information) Button 65
5.3 Port Config (Port Configuration) Button 66
5.4 Span Tree (Spanning Tree) Button 67
5.5 SNMP Button 68
5.6 Addr (Address) Table Button 68
5.7 VLAN Button 69
5.8 Trunking Button 71
5.9 Security Button 71
Chapter 6. SNMP Management 73
6.1 SNMP Management Operations 73
6.2 The SNMP Protocol 73
4
Page 5

6.3 Community Name and Security 74
6.4 The MIB Tree 74
Chapter 7. Switching Concepts 76
7.1 VLANs 76
7.2 Spanning Tree Protocol 77
7.3 Full Duplex, Flow Control, and Auto-negotiation 78
Appendix A. Troubleshooting 80
Appendix B. Features and Specifications 81
B.1 Features 81
B.2 Specifications 81
Appendix C. FCC Compliance and Warranty Statements 83
Appendix D. Console Port Pin Outs 85
Appendix E. Online Warranty Registration 86
Appendix F. BootP Configuration 87
5
Page 6

Chapter 1. Introduction
Thank you for purchasing the Asanté IntraCore 35160 Series Gigabit switch. These switches are a family of
multi-media and multi-protocol switches capable of supporting Layer 2 Switching and Layer 4 Type of
Service. They are designed to offer industry-leading performance at a very competitive cost of ownership.
Note: This manual revision is for use with the IC35160 firmware version 2.0. Earlier firmware versions may
not have the same features implemented, and may have different menu layouts. Some features described in
this manual may not be available on earlier firmware versions. Visit www.asante.com
Each IntraCore 35160 switch is a 16-port solution for Layer 2 Gigabit Ethernet switching using sharedmemory architecture to achieve Gigabit switching on all ports. The highly integrated system includes MAC
(Media Access Control), Address Look-up Content Addressable Memory (CAM), Switch Engine, Primary
Buffer Memory, and programmable Quality of Service (QoS).
Two models in the 35160 series cover different customer applications.
The IntraCore 35160-T is a 16-port switch that has 12 10/100/ 1000BaseT ports and 4 dual function Gigabit
ports that support either 1000BaseT RJ-45 Gigabit ports or GBIC Gigabit ports.
The IntraCore 35160-G is a 16-port switch that has 12 GBIC style Gigabit Ethernet ports and 4 dual function
Gigabit ports that support either 1000BaseT RJ-45 Gigabit ports or GBIC Gigabit ports.
The following types of GBIC modules are supported on the 35160 switches:
• 1000SX multi-mode fiber for 500m applications
• 1000LX single-mode fiber for 2km applications
• 1000LH single-mode fiber for 20km applications
• 1000LZ single-mode fiber for ultra distance (120km) applications
• 1000BaseT Copper Gigabit for low-cost 100m applications
The system can operate as a stand-alone network or be used in combination with other IntraCore series
switches in the backbone.
1.1 Features
The IntraCore 35160 is a multi-media, multi-protocol switch designed to be a high-performance, compact
switch that is field upgradeable to Layer 4 Type of Service. The following is a list of the switch’s features:
• RISC-based NMM design that supports SNMP v.1 and RMON (4 groups), telnet, console menu
driven management
• MIBs: MIB ll (RFC 1213), RMON (RFC 1757), 802.1Q/p (RFC 2674), Bridge (RFC1493), Asanté
Private MIB
• Advanced VLSI ASIC-based switch engine
• 1024 IEEE 802.1q VLAN with future upgrade including GVRP and Subnet/L3 protocol-based VLAN
• 802.1p 8-level Class of Service
• IEEE 802.1X Port-Based Access Control
• IEEE 802.1D Spanning Tree
• IEEE 802.3x Flow Control
• Port Trunking (LACP) IEEE802.3ad with 4 trunks (up to 4 links per trunk)
• V1, V2 snooping
• Support for up to 256 multicast groups
• Large address table of up to 8000 MAC addresses
• MAC address ageing
• MAC/IP address table display
• Provides Jumbo Packet support up to 16384 Bytes in size
• Port security, including Station move detection and Duplicate IP detection, 1 trusted address per
port
for the latest firmware.
6
Page 7

• Supports multiple user names and Secure Shell (SSH)
• Port Mirroring/monitoring on Ingress only
• Local and Global port management
1.2 SwitchCore CXE2010
The IC35160 utilizes a state-of-the-art packet processor on its system board, which provides 16 Gigabit
Ethernet ports. The SwitchCore CXE2010 has the following hardware features:
• 16-port 10/100/1000 switch/router that integrates MACs, CAM, packet buffer memory, and
switching engine
• Supports wire-speed L2 switching including L2 and IP multicast
• Supports DMA slave capabilities for packet data
• Wire-speed MAC address learning on-chip
• SNMP, RMON, and SMON statistics counters supported on-chip
• 128 KB internal packet buffer, external Direct RDRAM packet buffer up to 512MB
• Control and Port Mirroring
• Supports up to 4K VLAN entries
• MII/GMII and TBI connections to external PHYs
• Full Duplex 1000Mbps
• Full and Half Duplex 10/100Mbps
1.3 Package Contents
The following items are included in the switch’s package:
• Switch
• AC power cord
• Rack mount brackets with screws
• Rubber feet
• Getting Started Guide
• IntraCore 35160 CD-ROM
Contact your dealer immediately if any of these items is missing.
1.4 LEDs
The system’s front panel LED display allows the user to monitor the status of the switch. Refer to the
following sections for LED information specific to the switch’s model.
7
Page 8

1.4.1 IC35160-T
The IC35160-T has one power LED indicator, one (optional) emergency power LED, and two LED indicators
for each of the 16 ports. See the table below for a complete LED description.
LED Color Description
Power Green
Emergency
Power (optional)
Link/Speed Green
Duplex/Activity Green
Off
Green
Off
Yellow
Off
Blinking Yellow
Off
Power is on.
Power is off, or main power has failed.
Primary power has failed and optional power supply is powering the switch.
Optional power supply is in standby mode and primary power is working.
A valid 1000Mbps link has been established.
A valid 10/100Mbps link has been established.
No link has been established.
Activity has been detected in 1000Mbps.
Activity has been established in 10/100Mbps.
No link has been established.
1.4.2 IC35160-G
The IntraCore 35160-G has one power LED, one (optional) emergency power LED, two LED indicators for
10/100/1000BaseT status, and one LED for GBIC status. See the table below for a complete LED
description.
LED Color Description
Power Green
Emergency Power
(optional)
BaseT10/100/1000
Link/Activity
BaseT 10/100/1000
Duplex
GBIC
Link
Off
Green
Off
Green
Blinking Green
Yellow
Blinking Yellow
Off
Green
Yellow
Blinking Yellow
Off
Green
Off
Power is on.
Power is off, or main power supply has failed.
Primary power has failed and optional power supply is powering the switch.
Optional power supply is in standby mode and primary power is working.
A valid 1000Mbps link has been established.
Traffic is detected at 1000Mbps.
A valid 10 or 100Mbps link has been established.
Traffic is detected at 10 or 100Mbps.
No link has been established.
A full-duplex link has established.
A half-duplex link has been established.
A half-duplex link has been established, and there are collisions being detected.
No link has been established.
A valid 1000Mbps link has been established.
No link has been established.
8
Page 9
1.5 Front and Back Panel Descriptions
Refer to the following sections for detailed descriptions of the front and back panels of the IntraCore 35160
series switches.
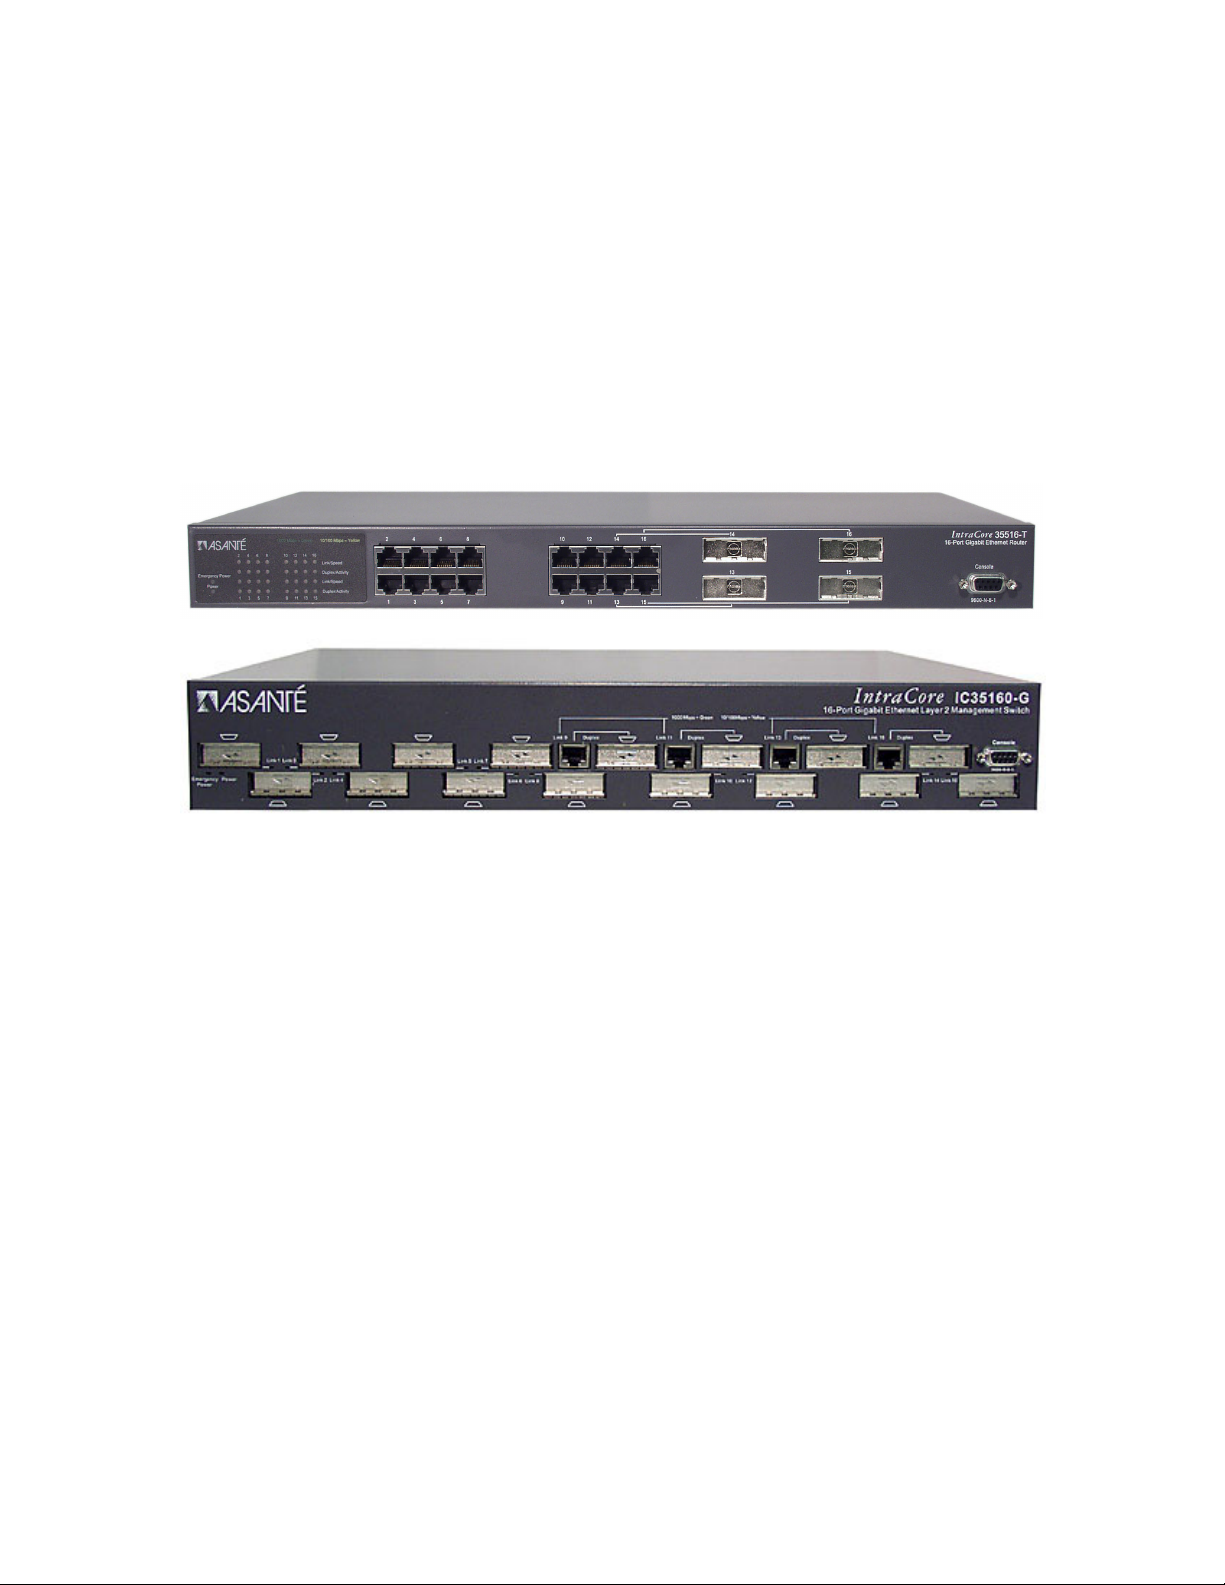
1.5.1 IC35160-T
The front panel of the IC35160-T contains the following: power and port LEDs; 12 10/100/1000BaseT ports;
4 dual-function Gigabit ports that support either 1000BaseT or GBIC style Gigabit Ethernet ports; and a
console port.
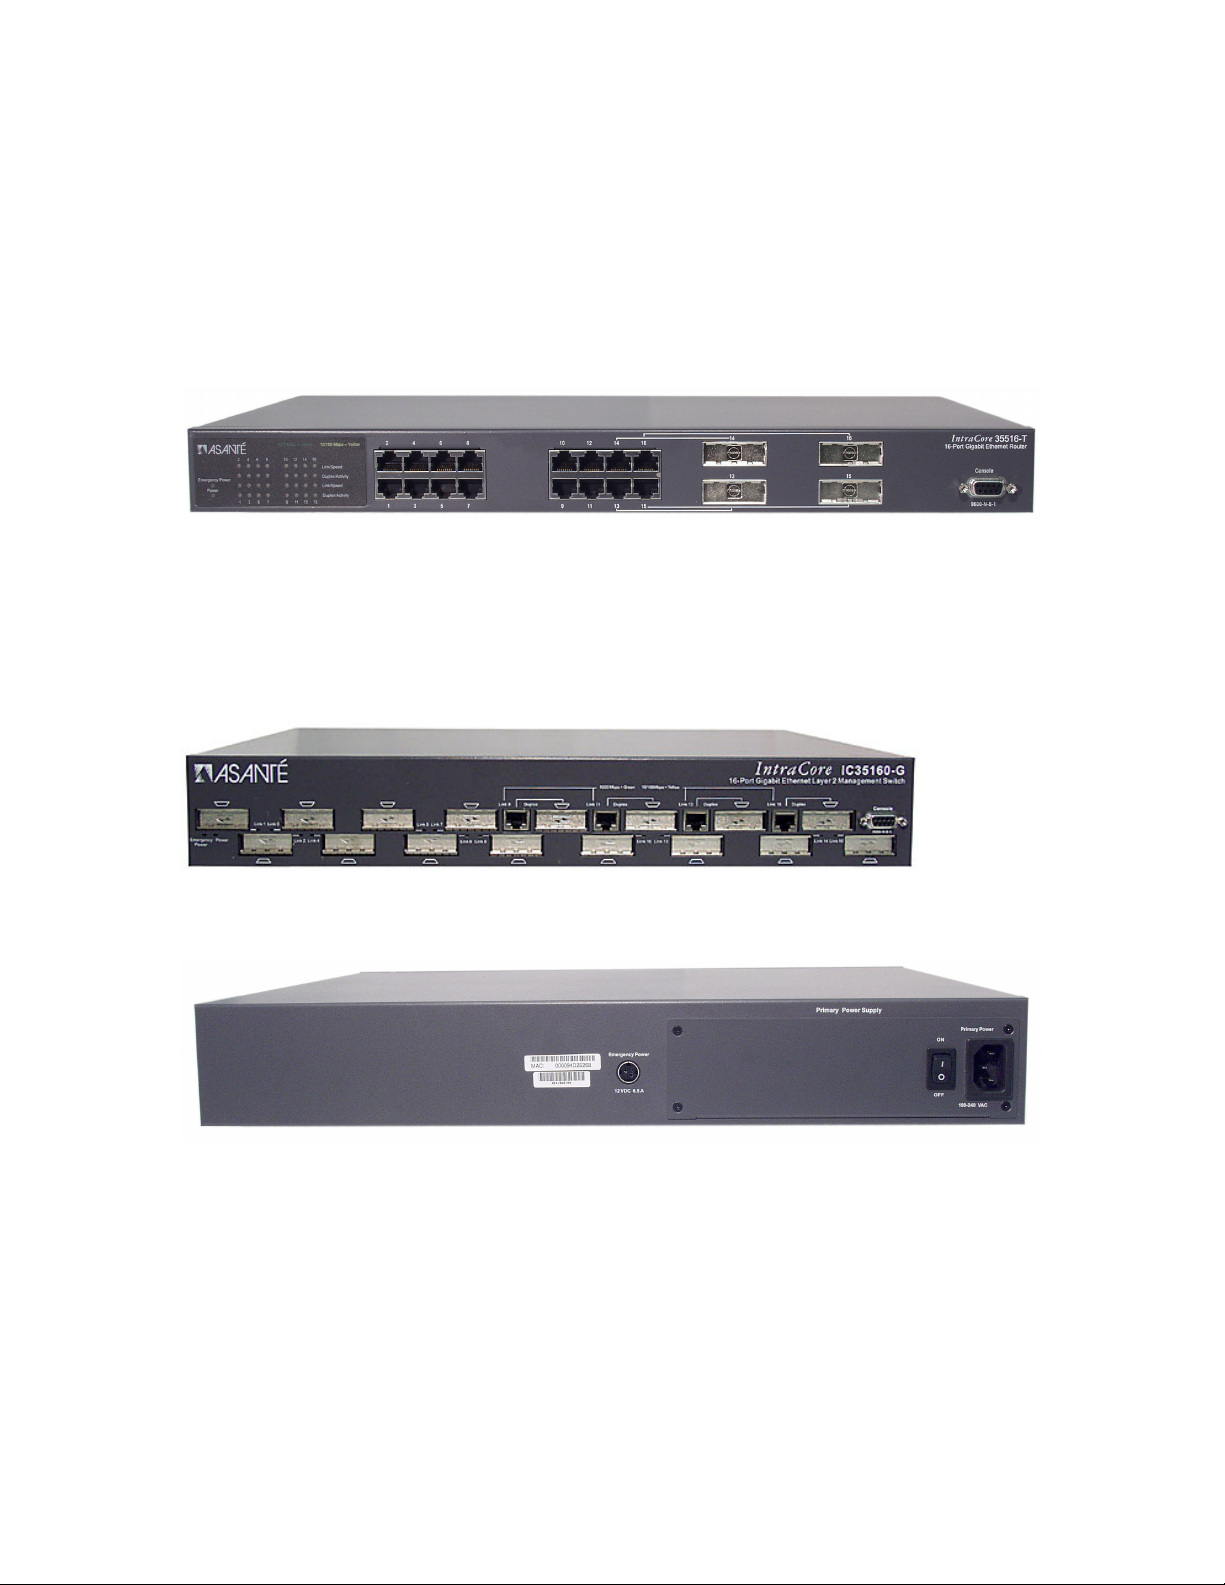
The back panel, not shown, contains a 12VDC jack for (optional) emergency power; the primary power bay
cover plate; the primary power outlet; and the on/off switch.
1.5.2 IC35160-G
The front panel of the 35160-G contains the following: power and port LEDs; 12 GBIC ports; 4 dual-function
Gigabit ports that support either 1000BaseT or GBIC style Gigabit Ethernet ports; and a console port.
The back panel, shown below, contains: a 12VDC jack for (optional) emergency power, the primary power
bay cover plate, the on/off switch, and the primary power outlet.
1.6 Management and Configuration
A user can manage the switch with three different methods: web, console/telnet, or SNMP software. They
may prefer using a web browser to enable configuring the switch from any local or remote computer, via the
network, or they may wish to use a console for out-of-band management. SNMP is an advanced
management application, and is mostly automatic, giving the user the information without having to go
through an interface step by step (Note: The switch is shipped with BootP support. See Appendix F BootP
Configuration for more information on setting up BootP.)
9
Page 10

1.6.1 Console Interface
Users can access the switch in a more traditional way by connecting a PC or terminal to the console port or
by telnet across the network. The menus are organized in a manner similar to the web-based interface. A
detailed description can be found in Chapter 3 Configuration.
1.6.2 Web-Based Interface
With Internet access, users can link directly to the local switch’s home page. Users can configure the switch,
monitor the LED panel, and display statistics graphically. A detailed description can be found in Chapter 5
Web-Based Management.
1.6.3 SNMP Management
Because the switch supports SNMP, users can manage the switch with an SNMP-compatible management
station running platforms such as HP OpenView. It also supports a comprehensive set of MIB extensions,
along with MIB II, Ethernet MIB, the 802.1D bridge MIB, and 4 groups of RMON. Please see Chapter 3
Configuration, or Chapter 6 SNMP Management for more information.
10
Page 11

Chapter 2. Hardware Installation and Setup
The following guidelines will help the user to easily install the switch, and to ensure that it has the proper
power supply and environment.
2.1 Installation Overview
Follow these steps to install the IntraCore switch:
1. Open the box and check the contents. See Chapter 1.3 Package Contents for a complete list of the
items included with the IntraCore switch.
2. Install the switch in an equipment or wall rack, or prepare it for desktop placement.
3. Connect the power cord to the unit and to an appropriate power source.
4. Connect network devices to the switch.
See the sections below for more detailed installation instructions.
2.1.1 Safety Overview
The following information provides safety guidelines to ensure the user’s safety and to protect the
switch from damage.
Note: This information is intended as a guideline, and may not include every possible hazard to
which the user may be exposed. Use caution when installing this switch.
• Only trained and qualified personnel should be allowed to install or replace this equipment
• Always use caution when lifting heavy equipment
• Keep the unit clean
• Keep tools and components off the floor and away from foot traffic
• Avoid wearing rings or chains (or other jewelry) that could get caught in the switch. Metal objects
can heat up and cause serious injury to persons and damage to the equipment. Avoid wearing
loose clothing (such as ties or loose sleeves) when working around the switch
When working with electricity, follow these guidelines:
• Disconnect all external cables before installing or removing the cover
• Do not work alone when working with electricity
• Always check that the cord has been disconnected from the outlet before performing hardware
configuration
• Do not tamper with the equipment. Doing so could void the warranty
• Examine the work area for potential hazards (such as wet floors or ungrounded cables)
2.1.2 Recommended Installation Tools
You will need the following tools and equipment (not included) to install the switch into an equipment rack:
• Flat head screwdriver
• Phillips head screwdriver
• Antistatic mat or foam
11
Page 12
2.1.3 Power Requirements
The electrical outlet should be located near the switch and be easily accessible. It must also be properly
grounded. Make sure the power source adheres to the following guidelines:
• Power: Auto Switching 110/240 VAC
• Frequency range: 50/60 Hz
• Maximum Input AC Current: 1.0A at 115 VAC full load
2.1.4 Environmental Requirements
The switch must be installed in a clean, dry, dust-free area with adequate air circulation to maintain the
following environmental limits:
• Operating Temperature: 0° to 40° C (32° to 104° F)
• Relative Humidity: 10% to 90% non-condensing
Avoid direct sunlight, heat sources, or areas with high levels of electromagnetic interference. Failure to
observe these limits may cause damage to the switch and void the warranty.
2.1.5 Cooling and Airflow
The IntraCore 35000 series switches use internal fans for air-cooling. Do not restrict airflow by covering or
obstructing air vents on the sides of the switch.
2.2 Installation into an Equipment Rack
Important! Before continuing, disconnect all cables from the unit.
To mount the switch onto an equipment rack:
1. Place the switch on a flat, stable surface.
2. Locate a rack-mounting bracket (supplied) and place it over the
mounting holes on one side of the unit.
3. Use the screws (supplied) to secure the bracket (with a Phillips
screwdriver).
4. Repeat the two previous steps on the other side of the unit.
5. Place the switch in the equipment rack.
6. Secure the switch by securing its mounting brackets onto the equipment rack with the appropriate
screws (supplied).
Important! Make sure the unit is supported until all the mounting screws for each bracket are secured to the
equipment rack. Failure to do so could cause the unit to fall, which may result in personal injury or damage
to the unit.
2.2.1 Equipment Rack Guidelines
Use the following guidelines to ensure that the switch will fit safely within the equipment rack:
• Size: 17.5 x 10.0 x 1.8 inches (IC35160-T)
17.5 x 10.0 x 2.5 inches (IC35160-G)
• Ventilation: Ensure that the rack is installed in a room in which the temperature remains below 40°
C (104° F). Be sure that no obstructions, such as other equipment or cables, block airflow to or
from the vents of the switch
• Clearance: In addition to providing clearance for ventilation, ensure that adequate clearance for
servicing the switch from the front exists
12
Page 13

2.3 GBIC Interfaces
The GBIC Interface is the industry standard for Gigabit Ethernet Interfaces. Some of the benefits of GBIC
include reducing the components needed in a “spares” inventory, being able to choose from a wide variety
of manufacturers with cross-vendor compatibility, and having competitive prices.
Instructions for installing, removing, and maintaining GBIC modules are provided in following sections.
Model Part Number Standard Media
GBIC 1000SX 99-00549-01 1000BaseSX Multi-mode fiber
GBIC 1000SX
3.3-5V
GBIC 1000LX 99-00550-01 1000BaseLX Single mode fiber
GBIC 1000LX
3.3-5V
GBIC 1000T 99-00673-01 1000BaseT Category 5 UTP copper
GBIC 1000TP 99-00647-07 1000BaseT Category 5 UTP copper
Table 2-1 GBIC Modules by Asanté
99-00609-01 1000BaseSX Multi-mode fiber
99-00629-01 1000BaseLX Single mode fiber
2.3.1 Installing a GBIC
GBICs are hot-swappable. This means that they can be inserted and removed while the unit is powered on.
However, please allow 40-60 seconds for the switch to recognize the module when it has been installed
while the unit is on.
1. Wearing an ESD (electro-static discharge) wrist strap, remove the GBIC module from its protective
packaging.
2. Verify that the GBIC is the correct type for the network (see the table above).
3. Grip the sides of the GBIC with the thumb and forefinger, and then insert the GBIC into the slot on
the face of the switch.
4. Slide the GBIC into the slot until hearing or feeling a click. The click indicates that the GBIC is
locked into the slot.
5. Fiber GBIC modules: Remove the rubber plugs from the end of the GBIC module. Save them for
future use.
6. Attach the appropriate cable.
Note: After installing a GBIC 1000T module, the link LED may light even before a valid cable has been
connected. This is a normal condition for most 1000BaseT GBIC modules.
13
Page 14

2.3.2 Removing a GBIC
Caution: GBIC 1000T modules run hot under normal operating conditions. When it has been removed from
the system, place it on a heat-resistant surface and allow the module to cool before handling.
Note: Unnecessary removals/insertions of a GBIC module will lead to premature failure of the GBIC. The
rated duty cycle for a GBIC module is 100 to 500 removals/insertions.
Follow the steps below to remove a GBIC interface from a Gigabit Ethernet module:
1. Disconnect the cable from the GBIC module.
2. Release the GBIC from the slot by simultaneously squeezing the locking tabs on both sides of the
GBIC.
3. Slide the GBIC out of the slot.
4. Fiber GBIC modules: Install the rubber plugs in the GBIC optical bores, and place the GBIC in
protective packaging.
2.3.3 GBIC Care and Handling
Follow these GBIC maintenance guidelines:
• GBICs are static-sensitive. To prevent ESD damage, follow normal board and component handling
procedures. Wear an ESD wrist strap
• Fiber GBIC modules are very sensitive to dust and contaminants. When they are not connected to
a fiber-optic cable, install the rubber plugs in the optical bores
• The ferrules of the optical connectors may pick up debris that can obstruct the optical bore. Use an
alcohol swab or equivalent to clean the ferrules of the optical connector
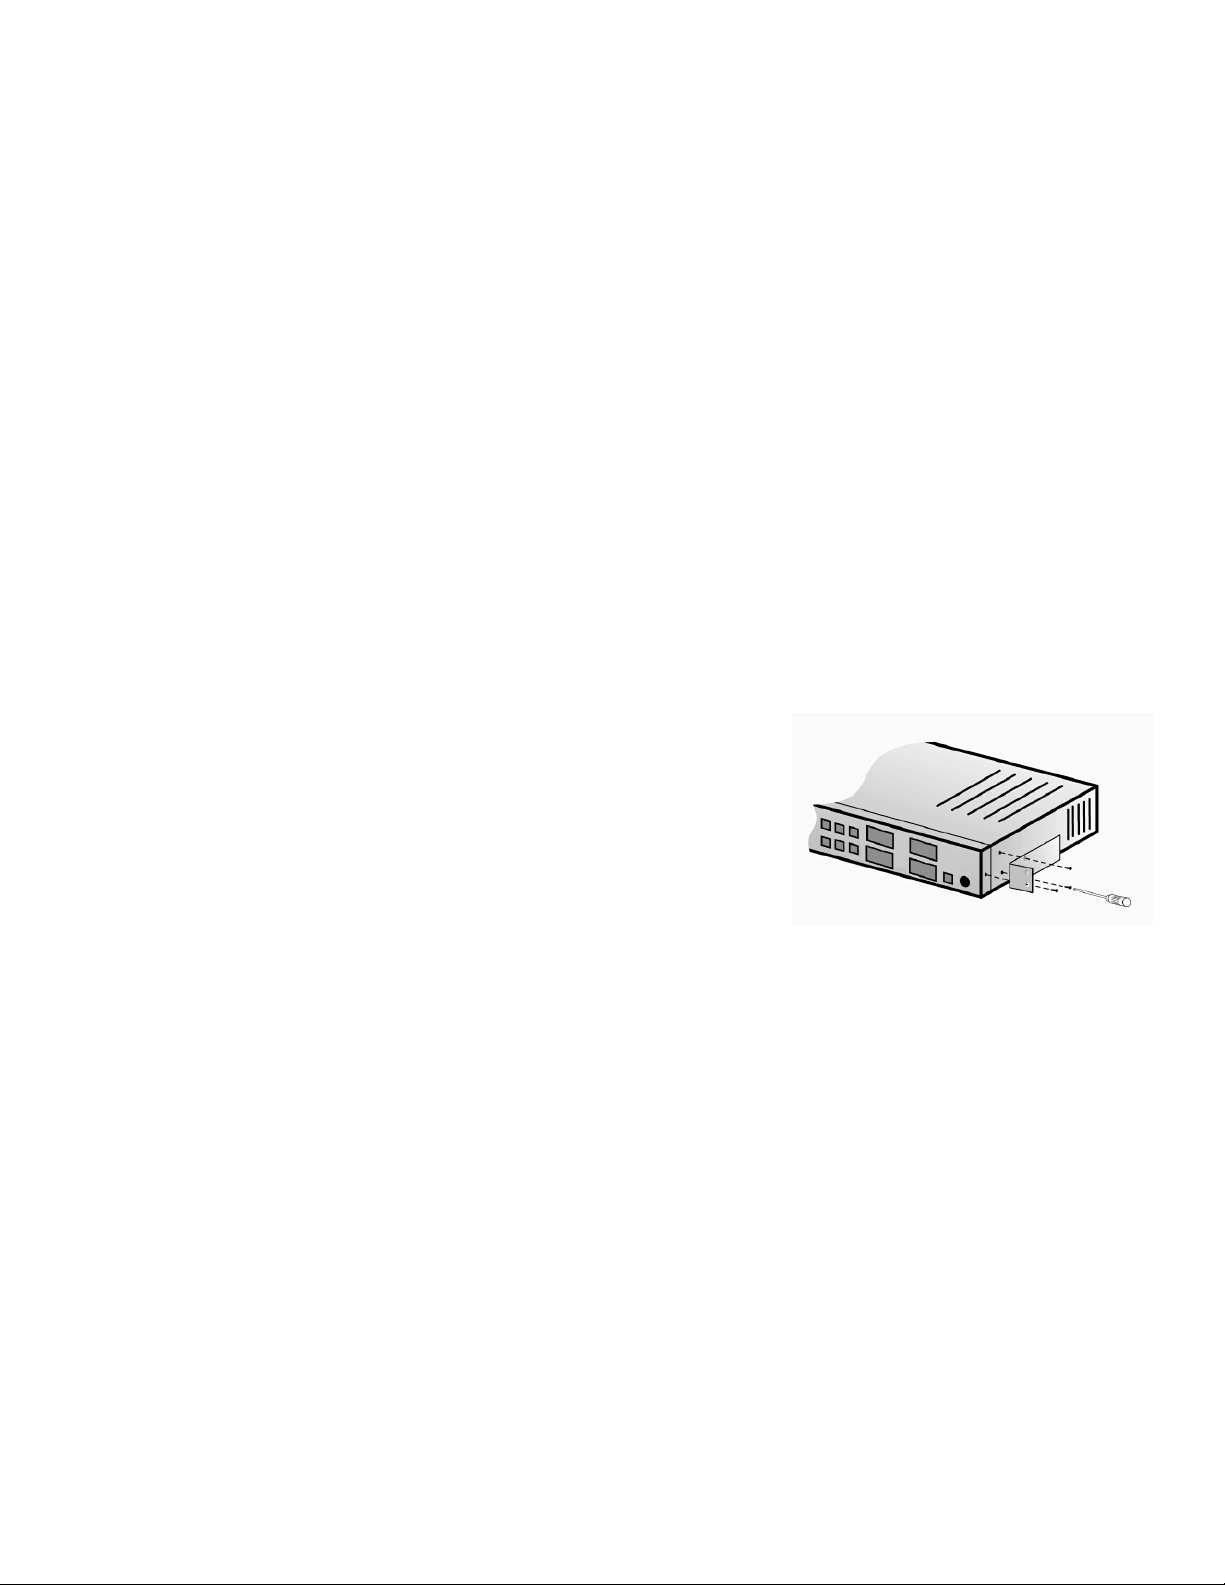
2.4 Installing the Optional Emergency Power Supply
To ensure increased reliability for mission-critical applications, the IC35160 can be equipped with a 12VDC
emergency backup power supply (the IC35-EPS12, sold separately). When installed, the emergency power
supply is in standby mode. Should the primary unit fail, the DC backup automatically switches on and the
LED on the front panel lights. In addition, an SNMP fault notice is sent.
Should the IC35-EPS12 become active due to a fault with the primary power, the unit should be swapped
out at the earliest convenience and sent for repair. The IC35-EPS12 is designed to be a temporary
replacement when the primary power fails, not a permanent replacement.
To install the optional power supply, simply attach the 12VDC connector of the power supply to the jack
located in the center of the rear panel of the switch. Connect the power cord to the power supply and plug
the power cord into an outlet.
Important! The optional power supply becomes HOT under normal operating conditions. To avoid damage
or injury, set the power supply on a heat-resistant surface and USE CAUTION when handling the unit.
2.5 Connecting Power
Important: Carefully review the power requirements (Chapter 2.1.3) before connecting power to the switch.
Use the following procedure to connect power to the switch:
1. Plug one end of the supplied power cord into the power connector on the back of the unit.
2. Plug the other end into a grounded AC outlet.
3. Turn on the switch’s power. The power LED will begin its initialization process.
The front panel LEDs blink and the power LED illuminates when it has initialized. The switch is ready for
connection to the network.
Important: If the power does not come on, check the next section to ensure that the correct cabling is used.
14
Page 15

2.6 Connecting to the Network
The switch may be connected to an Ethernet network with the unit powered on or off.
procedure to make the network connections:
1. Connect the network devices to the switch, following the cable guidelines outlined below.
2. After the unit is connected to the network, it can be configured for management capabilities (see
the following chapters for information on configuration).
2.6.1 10/100/1000BaseT Ports Cabling Procedures
The 10/100/1000 ports on the switch allow for the connection of 10BaseT, 100BaseTX, or 1000BaseT
network devices. The ports are compatible with IEEE 802.3 and 802.3u standards.
Important: The switch must be located within 100 meters of its attached 10BaseT or 100BaseTX devices.
Use the following guidelines to determine the cabling requirements for the network devices:
• Connecting to Network Station: Category 5 UTP (Unshielded Twisted-
Pair) straight-through cable (100 meters maximum) with RJ-45 connectors
• Connecting to Repeater/Hub/Switch’s Uplink port: Category 5, UTP
straight-through cable (100 meters maximum) with RJ-45 connectors
Note: These switches have no specific uplink ports. All 10/100 ports on these
switches are auto-sensing MDI/MDI-X. This advanced feature means that the
10/100 ports will automatically determine whether the device at the other end of the link is a hub, switch, or
workstation, and adjust its signals accordingly.
Although 10/100BaseT requires only pins 1, 2, 3, and 6, Asanté strongly recommends cables with all 8 wires
connected as shown in Table 2-2 below.
Use the following
1000BaseT requires that all four pairs (8 wires) be connected correctly, using Category 5 or better
Unshielded Twisted Pair (UTP) cable (to a distance of 100 meters). Table 2-1 shows the correct pairing of all
eight wires.
Pin Number
Table 2-2 Pin Numbers and Wire Colors
15
Pair Number & Wire Colors
1 2 White/Orange
2 2 Orange/White
3 3 White/ Green
4 1 Blue/White
5 1 White/Blue
6 3 Green/White
7 4 White/Brown
8 4 Brown/White
Page 16
2.6.2 Gigabit Ethernet Ports Cabling Procedures
Cabling requirements for the optional hardware modules depend on the type of module installed. Use the
following guidelines to determine the particular cabling requirements of the module(s):
• 1000BaseSX GBIC: Cables with SC-type fiber connectors; 62.5-micron multimode fiber (MMF)
media up to 275 meters (902 feet) long, or 50-micron MMF media up to 550 meters (1805 feet)
long
• 1000BaseLX GBIC: Cables with SC-type fiber connectors; 10-micron single mode fiber media up to
5 kilometers (16,405 feet) long
• 1000BaseLH GBIC: Cables with SC-type fiber connectors; 10-micron single mode fiber media up to
20 kilometers (65,617 feet) long
• 1000BaseLX Long Haul GBIC: Cables with SC-type fiber connectors; 10-micron single mode fiber
media up to 100 kilometers (328,100 feet) long
• 1000BaseLZ GBIC: Cables with SC-type fiber connectors; 10-micron single mode fiber media up to
120 kilometers (393,701 feet) long
• 1000BaseT: Category 5 or better Unshielded Twisted Pair (UTP) cable to a distance of 100 meters
(328.1 feet) long
2.7 Setup
The following sections describe the steps for setting up the switch for basic configuration, and putting into
place basic security measures (setting up password protection, changing from the default IP address, and
configuring the SNMP host table).
In order to configure the switch, connect to it through a console (out-of-band management), through the web
browser, or through a telnet session.
2.7.1 Connecting to a Console
When attaching a workstation to the device, a standard straight-through CAT5 cable may be used, even
when the workstation is attached via a patch panel. No crossover cable is needed with the MDX/MDI ports.
It is recommended that the switch be kept off the network until proper IP settings have been set.
To connect the switch to a console or computer, set up the system in the following manner:
1. Plug power cord into the back of unit.
2. Attach a straight-through serial cable between the RS232 port and a COM port on the PC.
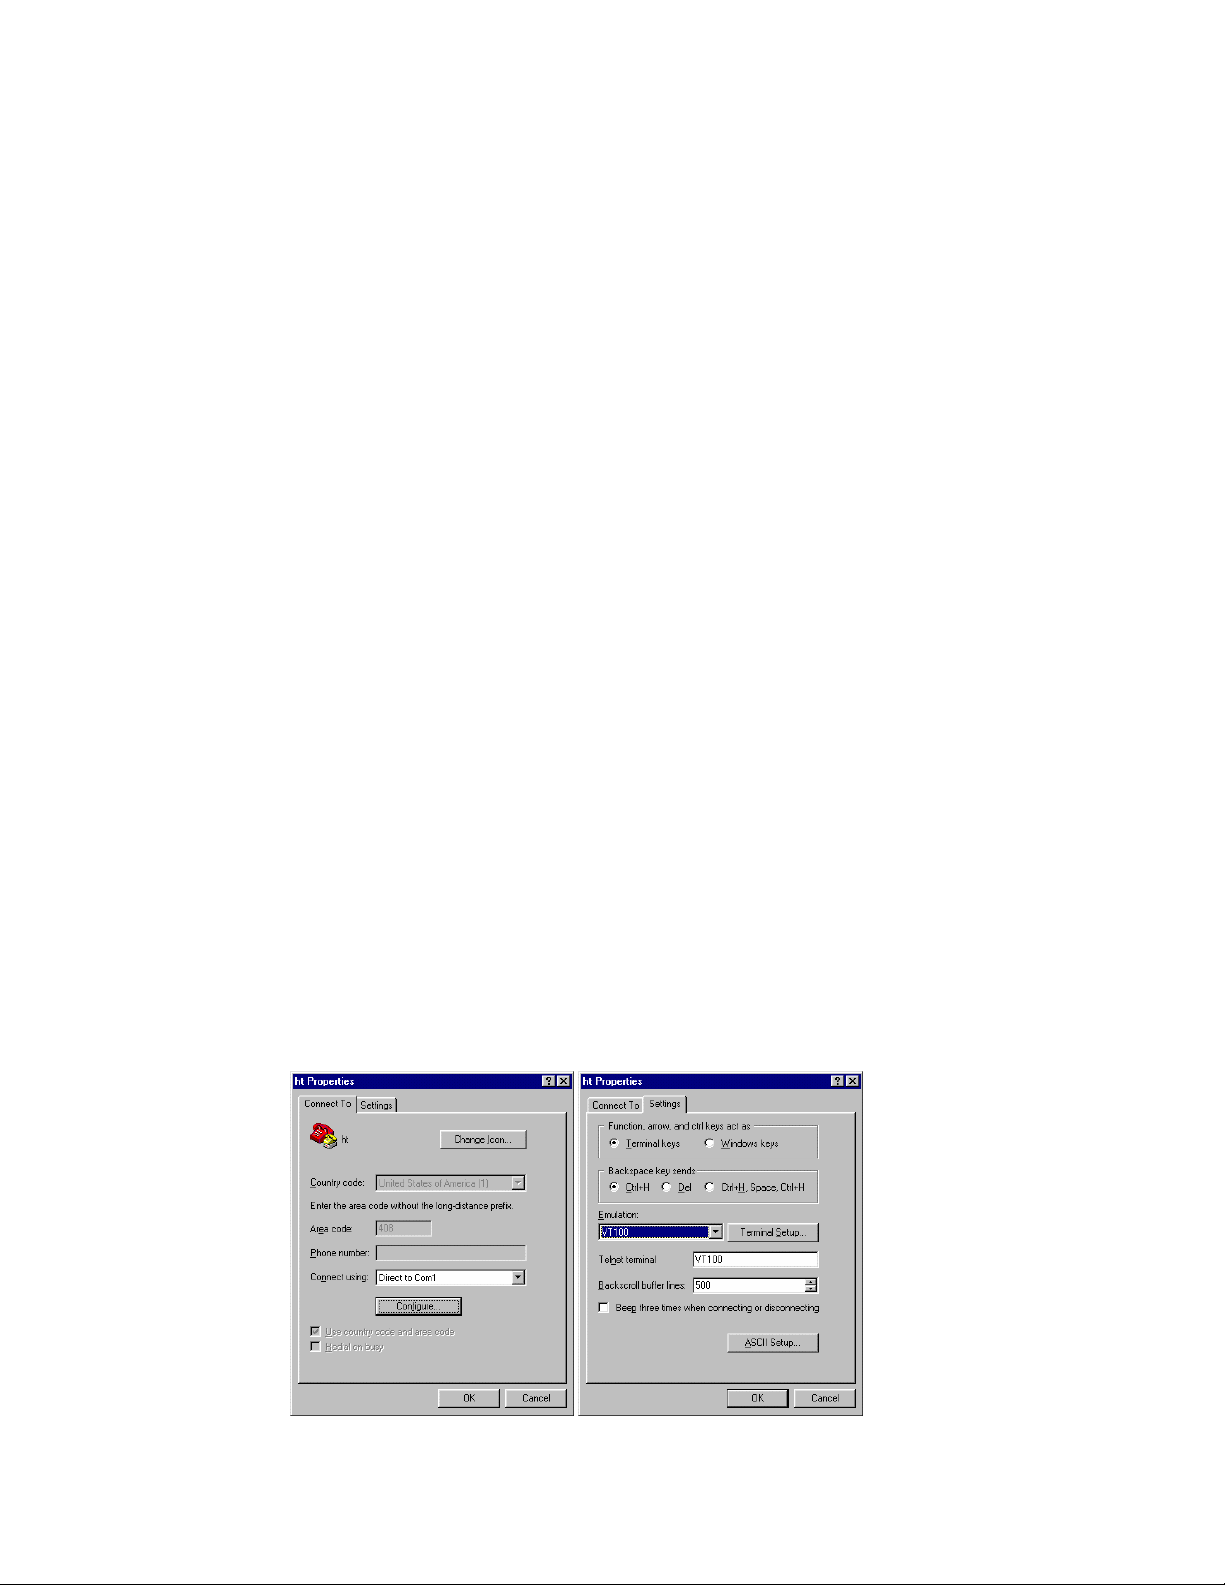
3. Set up a HyperTerminal (or equivalent terminal program) in the following manner:
• Open the HyperTerminal program, and from its file menu, right click on Properties
• Under the Connect To tab, choose the appropriate COM port (such as COM1 or COM2)
16
Page 17
• Under the Settings tab, choose VT100 for Emulation mode
• Select Terminal keys for Function, Arrow, and Ctrl keys. Be sure the setting is for Terminal keys,
NOT Windows keys
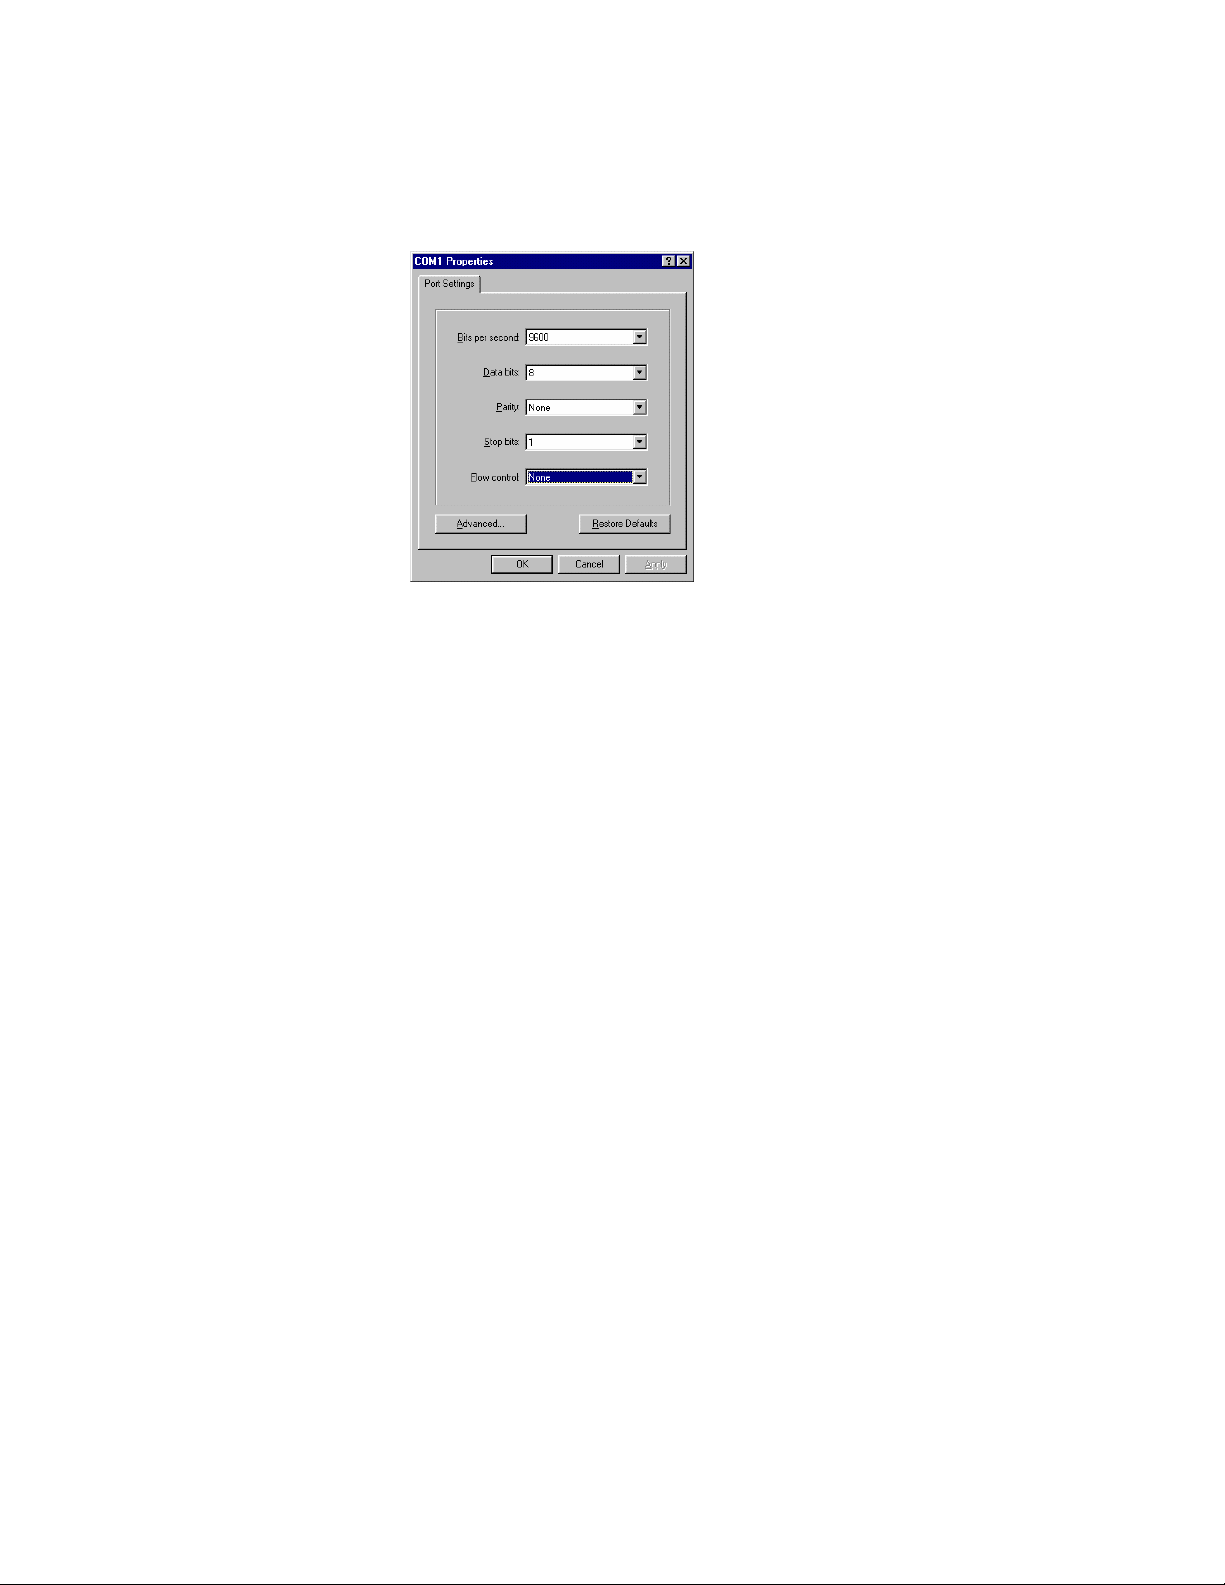
• Back under the Connect To tab, press the Configuration button
• Set the data rate to 9600 Baud
• Set data format to 8 data bits, 1 stop bit and no parity
• Set flow control to NONE
Now that terminal is set up correctly, power on the switch (boot sequence will display in terminal).
2.7.2 Connecting Via the Web Browser
To connect to the switch via the web browser, first configure the computer’s IP address to be on the same IP
address subnet as the switch (the switch’s default IP is 192.168.0.1). Make sure that the HTTP server is
enabled on the switch (see Chapter 3.12 User Interface Configuration). For more information on how to
configure the TCP/IP settings, please refer to the computer manufacturer’s user’s manual.
Now launch the web browser and enter the switch’s default IP address into the address field. You will need
to enter the user name (root) and password (Asante). The Introduction page will appear. Proceed through
the pages to configure each variable. See Chapter 5 Web-Based Management for more information on
configuring the switch via the web browser.
2.7.3 Connecting Via Telnet
To connect to the switch via a telnet session, first configure the computer’s IP address to be on the same IP
address subnet as the switch (192.168.0.X). Make sure that Telnet is enabled on the switch (see Chapter
3.12 User Interface Configuration). For more information on how to configure the TCP/IP settings, please
refer to the computer manufacturer’s user’s manual.
Now run a telnet session to configure and manage the switch. The Login screen will appear. For the initial
SSH login, the username and password are fixed as root and Asante, respectively. Enter the username and
password to access the Main Menu, and proceed to select the variables to configure. See Chapter 3
Configuration for more information on configuring the switch via telnet.
17
Page 18

2.8 Changing the Password
The default password (which is Asante, and is case-sensitive) may allow immediate access to ANYONE on
the network. To protect the switch from unauthorized changes to the configuration, change the
administrator’s password. It can only be changed through the console or telnet interfaces.
To change the administrator’s password, follow these steps:
1. Establish a telnet session, and type Asante at the password prompt.
2. Press Enter to proceed.
3. Type c to access the Configuration menu.
4. Type u to access the User Interface Configuration sub-menu.
5. Type p to select Change Password.
6. Type the current password (Asante) and press Enter.
7. Type the new password and press Enter.
8. Re-type the new password to confirm the entry, and press Enter.
2.9 IP Assignment
To change the IP address of the switch from the default setting:
1. Access the System IP Configuration menu by typing i in the Configuration menu.
2. Type the command letter of the option you want to change.
3. Type the new address at the prompt.
To cancel a change, type ctrl-c at the command prompt.
4. Press Enter. The IP setting change for the switch takes effect.
5. Type q to quit and return to the Configuration menu.
When the reset is complete, the switch should be seen on the network. If not, check the IP information again
to ensure that all the data is correct.
18
Page 19

2.10 Simple Network Management Protocol (SNMP)
The SNMP Configuration Menu allows the user to configure the unit’s read and write community strings, and
to enable or disable authentication traps. This menu also allows the user to specify which of the network
management stations will receive traps from the switch.
The r option in the Configuration Menu displays the Protocol Configuration page. From there, select n to
display the SNMP (Simple Network Management Protocol) Configuration Menu, as shown below.
IntraCore 35160-T SNMP Configuration Menu
SNMP Read Community: public
SNMP Write Community: private
Trap Authentication: Disabled
SNMP Trap Receivers:
IP Address Community
1. <empty> <empty>
2. <empty> <empty>
3. <empty> <empty>
4. <empty> <empty>
<Cmd> <Description>
r Set SNMP Read Community
w Set SNMP Write Community
t Toggle Trap Authentication Enable/Disable
a Add/Update SNMP Trap Receiver
d Delete SNMP Trap Receiver
q Return to previous menu
root>
Important! Be sure to change the SNMP community strings in order to prevent unauthorized access to
management information. See Chapter 3 Configuration for details.
Also, see Chapter 6 SNMP Management for more detailed information on the SNMP protocol.
19
Page 20

Chapter 3. Configuration
This chapter describes the log in procedure and configuration of the switch via the console or telnet
interfaces. For information on configuring the switch via the web browser, see Chapter 5 Web-Based
Management.
Note: The screens shown are from the IC35160-T. The IC35160-G may have slightly different screens, but
this will not affect the configuration instructions. The web browser user interface (Chapter 5) may also vary,
but should not affect the configuration instructions.
Logging In
After connecting to the IC35160, you will immediately need to log in. For the initial SSH login, the username
and password are fixed as root and Asante, respectively. After that, any user can authenticate using SSH
(up to 4 user sessions at a time), and there will be no SSH login prompt.
For logging into the switch via Telnet or web, the default user names are root, readwrite, and readonly,
and the default password is Asante.
Important! The default password is Asante. The password is case-sensitive; enter it exactly as shown.
After successfully logging in, the Main Menu screen is displayed. Type the corresponding command letter to
access sub-menus within a menu.
==============================================================
IntraCore 35160-T Remote Management System Version 2.0
Compiled Date: Jun 17 2003 20:41:25
Asante Technologies, Inc.
Copyright (c) 2003 Asante Technologies, Inc.
==============================================================
Main Menu
<Cmd> <Description>
g General Information
c Configuration
s Statistics
q Close Connection
root>
From the Main Menu, the user can access three submenus:
• General Information
• Configuration
• Statistics
If using Telnet, a fourth option for closing the connection is available as well.
Accessing a Submenu
To access a submenu, type the command letter that corresponds with the option needed. For example, type
g for General Information.
Exiting a Submenu
To exit a submenu, type q.
To exit a command line without changing the configuration setting (for example, the “Change Password”
option in the User Interface Configuration Menu), press ctrl-c.
20
Page 21

3.1 General Information
The General Information Screen displays the current system information of the switch, such as its name, IP
address, and boot information. The information displayed is read-only.
To view General Information, type g from the Main Menu. A screen similar to that below appears.
IntraCore 35160-T General Information Menu
System up since: 07/16/2003 Wed. 03:57:59pm
Software Version
Bank 1 Image Version/Date: 1.20B/Jun 17 2003 20:41:25 (Running)
Bank 2 Image Version/Date: 1.10 /May 20 2003 18:01:54
System Information
PROM Image Version/Date: 1.01 /Nov 20 2002 10:47:44
DRAM Size: 32.0MB Flash Size: 4.0MB
Config NVRAM Size: 128KB Console Baud Rate: 9600 bps
Serial No. :
Administration Information
System Name: <none>
System Location: <none>
System Contact: <none>
System MAC Address, IP Address, Subnet Mask and Router
MAC Address: 00:00:94:BF:00:46
IP Address: xxx.xxx.xxx.xxx
Subnet Mask: 255.255.255.0
Router: xxx.xxx.xxx.xxx
Bootstrap Configuration
Boot Load Mode: LOCAL
Press any key to continue...
To exit the General Information Screen, press any key on the keyboard.
3.2 Configuration Menu
The Configuration Menu allows the user to manage and configure the switch and each of its ports. However,
you must be logged in with user name root or readwrite in order to make changes to the switch’s
configuration. If you are logged in as readonly, you have read-only access, and no configuration options will
be available to you.
In the following screen, the user has read-only access, and is checking the bootstrap configuration (System
Utilities/Bootstrap Configuration) Menu.
IntraCore 35160-T Bootstrap Configuration Menu
Bank 1 Image Version/Date: 1.20B/Jun 17 2003 20:41:25 (Running)
Bank 2 Image Version/Date: 1.10 /May 20 2003 18:01:54
Load Mode: Local
Boot Bank: 1
<Cmd> <Description>
q Return to previous menu
readonly>
21
Page 22

To access the Configuration Menu when you are logged in as root or readwrite, type c from the Main
Menu. The Configuration Menu appears, as shown below (from a telnet session):
IntraCore 35160-T Configuration Menu Power Unit Status = OK
<Cmd> <Description>
a Administration Configuration
i IP Configuration
p Port Configuration
d Forwarding Database Configuration
t Security Management
v VLAN Management
r Protocol Configuration
g Trunk Group Configuration
o QoS Management
u User Interface Configuration
s System Utilities
q Return to previous menu
root>
Accessing a Submenu
To access a submenu, type the command letter that corresponds with the configuration option needed. For
example, type a to access the Administration Configuration Menu.
Most of the configuration options are described in detail in the rest of this chapter. The more advanced
configuration options are discussed in Chapter 4 Advanced Management.
3.3 Administration Configuration
The System Administration Configuration Menu displays, and allows the user to change the name of the
switch, its location, and the contact information.
IntraCore 35160-T System Admin. Configuration Menu
Description: Asante Technologies, Inc. IntraCore 35160-T Version: FW(2.0)
Object ID: 1.3.6.1.4.1.298.2.2.30
Name: <none>
Location: <none>
Contact: <none>
<Cmd> <Description>
n Set System Name
l Set System Location
c Set System Contact Information
q Return to previous menu
root>
Changing System Administration Info
To change the name, location, or contact information for the switch, use the following procedure:
1. Open the Administration Configuration Menu by typing a in the Configuration Menu.
2. Type the command letter (n, l, or c) of the item to be changed in the System Administration
Configuration Menu.
3. At the prompt, type the new information.
Note: Each parameter is limited to 64 characters, including spaces.
To cancel a selected option, press ctrl-c at the command prompt.
22
Page 23

4. Press Enter. The system administration information changes take effect.
5. Type q to quit and return to the Configuration Menu.
3.4 System IP Configuration
The System IP Configuration Menu displays, and allows the user to change, the information needed to
access the switch over the network via in-band management.
IntraCore 35160-T System IP Configuration Menu
System MAC Address: 00:00:94:BF:00:46
System IP Address: xxx.xxx.xxx.xxx
System Subnet Mask: 255.255.255.0
System Default Router: xxx.xxx.xxx.xxx
<Cmd> <Description>
i Set IP Address
m Set Subnet Mask
r Set Default Router
q Return to previous menu
root>
Important! The default router address is set to 0.0.0.0.
Changing System IP Information
To change the IP address, subnet mask, or default router of the switch, use the following procedure:
1. Open the System IP Configuration Menu by typing i in the Configuration Menu.
2. Type the command letter (i, m, or r) of the option to change.
3. Type the new address at the prompt.
Important! Follow the format: number.number.number.number
To cancel a change, press ctrl-c at the command prompt.
4. Press Enter. The IP setting change for the switch takes effect.
5. Type q to quit and return to the Configuration Menu.
3.5 Port Configuration
The Port Configuration Menu allows the user to manually configure each port of the switch for port speed,
duplex, and auto-negotiation. It also provides an overview of the entire system’s port operating status.
To access the Port Configuration Menu, type p in the Configuration Menu.
23
Page 24

IntraCore 35160-T Basic Port Configuration Menu
Port: [01] Port Name: <none>
1 8 9 16
======== ========
Operating Status: -------- -++---+Auto Negotiation: ******** ********
Speed/Duplex: gggggggg ggFgggHg
Port Status: Enabled Link Status: Down (GMII)
Auto-Nego: Enabled Link Speed: N/A
<Cmd> <Description>
h Help for Legends
t Toggle Port Status Enable/Disable
a Enable/Disable Auto-Negotiation
l Set 10M/100M/1000M bps Link Speed
d Toggle Half/Full Duplex
v Advanced Port Configuration
g Global Port Configuration
e Set port name
q Return to previous menu
root>
S)elect port N)ext port P)rev port
To see legends explaining the symbols used for both the Basic and Global Port Configuration Menu settings,
type h. A screen appears, as shown below.
Legends for port status: Legends for port speed & duplex:
X - Absent f - 10 Mbps & full duplex
- - Link down F - 100 Mbps & full duplex
D - Disabled by Mgmt Action h - 10 Mbps & half duplex
d - Disabled by Security Violation H - 100 Mbps & half duplex
B - Blocking G - 1 Gbps & full duplex(fiber)
S - Listening g - 1 Gbps & full
duplex(copper)
R - Learning Legends for port priority:
+ - Forwarding 0 - priority 0 (lowest)
M - Mirror Port 1 - priority 1
2 - priority 2
Legends for Enable/Disable State: 3 - priority 3
- - Disabled 4 - priority 4
* - Enabled 5 - priority 5
6 - priority 6
Legends for Auto-Nego Advertisement: 7 - priority 7 (highest)
A - 100Base-TX full duplex mode Legends for Auto-Negotiation:
B - 100Base-TX half duplex mode * - Enabled
C - 10Base-T full duplex mode C - Disabled, Copper only
D - 10Base-T half duplex mode F - Disabled, Fiber only
Press any key to continue...
24
Page 25

3.5.1 Enabling or Disabling a Port
The enabling or disabling of a port is a manual operation that can be used to isolate a network device that
might be causing problems on the network, or to prevent unauthorized use of a port or station.
To enable or disable a port, use the following procedure:
1. Access the Basic Port Configuration Menu by typing p in the Configuration Menu.
2. To select the port to enable or disable, type s, n, or p in the Basic Port Configuration Menu.
3. To toggle the port’s connection to either enabled or disabled status, then type t.
The port’s status is changed immediately, and it is reflected in the Port Configuration Menu’s Port Status
indication and the Operating Status symbol for the port.
Important! Be careful not to disable the port to which your console/computer is connected. This will
disconnect the computer from the switch and prevent further configuration of the switch. Likewise, be
cautious about disabling uplink ports on the switch.
3.6 Advanced Port Configuration
The Advanced Port Configuration Menu allows the user to enable or disable 802.3x flow control, enable or
disable Traffic Class of Service, set the default priority of a port, and set the maximum packet length.
To access the Advanced Port Configuration Menu, type v in the Port Configuration Menu. The Advanced
Port Configuration Menu appears, as shown below.
IntraCore 35160-T Advanced Port Configuration Menu
Port: [01] Port Name: <none>
1 8 9 16
======== ========
Operating Status: -------- -++---+Flow Ctrl: -------- -------Class Of Service: ******** ********
Priority: 00000000 00000000
Flow Control: Disabled
IEEE 802.1p Traffic Class Of Service: Enabled
Port Default Priority: 0
Port Max Pkt Length: 1522
<Cmd> <Description>
h Help for Legends
f Toggle Flow Control Enable/Disable
c Toggle Traffic Class Of Service (COS) Enable/Disable
i Set Port Default Priority
l Set Port Max Packet Length
q Return to previous menu
root>
S)elect port N)ext port P)rev port
The following subsections explain the configuration options in the Advanced Port Configuration Menu.
25
Page 26

3.6.1 Enabling or Disabling 802.3x Flow Control
Use the following procedure to control traffic and avoid congestion, such as during a shortage of buffer
resources for the port. Flow control is accomplished by means of standard PAUSE control frames for each
port, independent of all others. Before enabling the flow control for a port, that port must be configured to
operate in Full Duplex mode.
If the user enables flow control on a port, and that port runs short of buffer resources, the port will transmit
PAUSE frames. When it receives them, the link partner obeys these PAUSE frames. When the low-resource
situation is relieved, the port sends out PAUSE frames with zero time values. This ends the pause state that
was imposed on the end-station.
To enable flow control, take the following steps:
1. Access the Port Configuration Menu by typing p in the Configuration Menu.
2. Type v in the Basic Port Configuration Menu to open the Advanced Port Configuration Menu.
3. To select the port to enable or to disable the flow control, type s, n, or p.
4. To toggle flow control for the selected port, type f.
In the Advanced Port Configuration Menu, the Flow Control symbol for the selected port reflects its change
in state, as does the 802.3x Flow Control setting.
Important! When using this method of flow control, the link partner must be configured to recognize PAUSE
frames.
3.6.2 Setting Port Class of Service
To set a port’s Class of Service, take the following steps:
1. Access the Port Configuration Menu by typing p in the Configuration Menu.
2. Type v to access the Advanced Port Configuration Menu.
3. To select the port to enable or to disable Class of Service, type s, n, or p.
4. To toggle traffic Class of Service for the selected port, type c.
In the Advanced Port Configuration Menu, the Traffic Class of Service symbol for the selected port reflects
its change in state.
3.6.3 Setting Port Default Priority
This priority setting determines the order in which the port forwards packets. Each port is associated with a
traffic class: zero (0) is the lowest, and the default priority level. Seven (7) is the highest priority level. Use
the following procedure to set the priority for a port:
1. Access the Port Configuration Menu by typing p in the Configuration Menu.
2. Type v to access the Advanced Port Configuration Menu.
3. Use s, n, or p to select the port to set the default priority.
4. Type i to set the priority for the selected port.
5. Enter the priority, from 0 to 7, and press Enter.
The new default priority is shown on the Advanced Port Configuration Menu.
3.6.4 Setting Port Maximum Packet Length
The maximum packet length determines how large data packets can be in order to be sent to or received by
a port. This allows the user to:
1. Access the Port Configuration Menu by typing p in the Configuration Menu.
2. Type v to access the Advanced Port Configuration Menu.
3. Use s, n, or p to select the port on which to set the packet length.
4. Type l to set the maximum packet length.
5. Enter the value and press Enter.
26
Page 27

The new maximum packet length is shown on the Advanced Port Configuration Menu.
3.6.5 Global Port Configuration
The Global Port Configuration Menu allows the user to simultaneously change the configuration information
for all ports.
To change the port configuration for all ports, use the following procedure:
1. From the Configuration Menu, type p to access the Port Configuration Menu.
2. From the Basic Port Configuration Menu, type g. The Global Port Configuration Menu appears, as
shown below.
IntraCore 35160-T Global Port Configuration Menu
1 8 9 16
======== ========
Operating Status: -------- -++---+Auto Negotiation: ******** ********
Speed/Duplex: GGGGGGGG GGFGGGHG
Flow Ctrl: -------- -------Class Of Service: ******** ********
Priority: 00000000 00000000
<Cmd> <Description>
t Select Global Port Status Enable/Disable
a Select Global Auto-Negotiation Enable/Disable
l Select Global 10/100/1000 Mbps Link Speed
d Select Global Half/Full Duplex
f Toggle Global Flow Control Enable/Disable
c Toggle Global Class Of Service (COS) Enable/Disable
i Set Global Port Default Priority
m Set MAX Packet Length
q Return to previous menu
root>
3. Type the corresponding command letter to configure the desired feature(s). The change is reflected
immediately in the Global Port Configuration Menu.
3.7 Unicast Forwarding Database Configuration
The Unicast Forwarding Database Configuration Menu allows the user to view and search for addresses in
the MAC (Media Access Control) Forwarding Table on the switch. It also provides options for displaying
MAC addresses and IP/MAC binding by individual port or by VLAN.
The MAC Forwarding Table is a table of node addresses that the switch automatically builds by “learning.” It
performs this task by monitoring the packets that pass through the switch, checking the source and
destination addresses, and then recording the source address information in the table.
The switch uses the information in this table to decide whether a frame should be forwarded to a particular
destination port or “flooded” to all ports other than to the received port. Each entry consists of three parts:
the MAC address of the device, the port number on which it was received, and the VLAN number.
Note: The MAC address table can hold a maximum of 8,192 entries.
27
Page 28

Type d in the Configuration Menu. The Unicast Forwarding Database Configuration Menu appears, as
shown below.
IntraCore 35160-T Unicast Forwarding Database Configuration Menu
Age-out Time: 300 sec.
MAC Address Count: 5
IP Address Count: 2
<Cmd> <Description>
a Display All Forwarding Database With/Without IP
p Display Forwarding Database By Port With/Without IP
v Display Forwarding Database By VLAN With/Without IP
m Search for MAC Address
i Search for IP Address
t Set Age-Out Time
c IP Multicast Traffic Management
q Return to previous menu
root>
3.7.1 Displaying the Forwarding Database
Use the following procedure to view the Unicast Forwarding Database table:
1. Open the Unicast Forwarding Database Configuration Menu by typing d in the Configuration Menu.
2. Type a, p, or v, depending on the range of MAC addresses to be viewed.
Type a to display the MAC addresses learned on all ports on the switch.
Type p to specify a unit and port (it displays the MAC addresses for that port only).
Type v to specify a VLAN (it displays the MAC addresses for the member ports of that VLAN only).
3. At the prompt that appears, type y to see IP addresses in the display or type n to see the display
without IP addresses, then press Enter. The selected display appears.
Below is an example of the Unicast Forwarding Database table for all ports, without the IP displayed.
The Type field refers to the type of MAC address. The Type setting may be:
• S = static (set by management, and will not age out)
• D = dynamic (learned by the switch; will be aged out)
• I = Self (the MAC address of the switch)
Entry Type : ( D = Dynamic , S = Static , I = Self )
+----+-----------------+----+-----------------+---------+
|Port| Port Name |Type| MAC Address | VLAN ID |
+----+-----------------+----+-----------------+---------+
-- <none> I 00:00:84:BF:00:46 - 3 <none> D 00:00:94:00:00:10 0001
3 <none> D 00:00:94:A0:B6:7B 0001
3 <none> D 00:00:94:A1:D2:45 0001
3 <none> D 00:00:94:AA:64:37 0001
3 <none> D 00:00:94:BF:00:01 0001
3 <none> D 00:00:94:CB:BC:6F 0001
3 <none> D 00:0A:27:AE:50:66 0001
3 <none> D 00:C0:02:78:02:75 0001
3 <none> D 00:E0:52:01:44:46 0001
End of Summary, Quit
28
Page 29

3.7.2 Searching for a MAC Address
The Unicast Forwarding Database can be searched by MAC address or by IP address. To search for a
specific MAC or IP address, use the following procedure:
1. Access the Unicast Forwarding Database Configuration Menu by typing d in the Configuration
Menu.
2. Type m to search for a MAC address.
Type i to search for an IP address.
3. Type the MAC or IP address at the prompt.
4. Press Enter.
If the address is located, it is displayed, with its associated information. If the address is not located, a
message appears, stating this.
The Search Summary screen tells the location of the MAC or IP address, the unit, port, and the domain
name. Configuration information—such as the type, age, and priority—are also displayed.
3.7.3 Setting the MAC Address Age-Out Time
This option sets the Age-Out Time for the MAC Forwarding Table.
The Age-Out Time is the number of seconds that addresses remain in the table after being learned by the
switch. The default is 300 seconds.
Use the following procedure to set the MAC address Age-Out Time.
1. Access the Unicast Forwarding Database Configuration Menu by typing d in the Configuration
Menu.
2. Type t to set the MAC Address Age-Out Time.
3. Enter the new Age-Out time (in seconds) at the prompt.
4. Press Enter.
The MAC Address Age-Out Time is changed and is displayed at the top of the Unicast Forwarding Database
Configuration Menu.
3.7.4 IP Multicast Traffic Management
See Chapter 4 Advanced Management.
3.8 Security Management
See Chapter 4 Advanced Management.
3.9 VLAN Management
See Chapter 4 Advanced Management.
29
Page 30

3.10 Protocol Configuration
To access the Protocol Configuration Menu, enter the letter r from the Configuration Menu. Use the listed
command letters to configure Simple Network Management Protocol (SNMP) and Spanning Tree Protocol
(STP).
IntraCore 35160-T Protocol Configuration Menu
<Cmd> <Description>
n SNMP Configuration
s Spanning Tree Configuration
q Return to previous menu
root>
3.10.1 SNMP Configuration
To access the SNMP Configuration Menu, enter the letter n from the Protocol Configuration Menu. Use the
listed command letters to configure the community strings, trap authentication, and the trap receiver.
IntraCore 35160-T SNMP Configuration Menu
SNMP Read Community: public
SNMP Write Community: private
Trap Authentication: Disabled
SNMP Trap Receivers:
IP Address Community
1. <empty> <empty>
2. <empty> <empty>
3. <empty> <empty>
4. <empty> <empty>
<Cmd> <Description>
r Set SNMP Read Community
w Set SNMP Write Community
t Toggle Trap Authentication Enable/Disable
a Add/Update SNMP Trap Receiver
d Delete SNMP Trap Receiver
q Return to previous menu
root>
Changing Community Strings
Important! Be sure to change the SNMP community strings in order to prevent unauthorized access to
management information.
To change the switch’s community strings, use the following procedure:
1. Open the SNMP Configuration Menu by typing n in the Configuration Menu.
2. To change the read community string, type r. To change the write community string, type w.
3. At the prompt, type a new community string.
For a description of read and write community strings, see the following table:
30
Page 31

Settings Description
SNMP Read
Community
SNMP Write
Community
Trap
Authentication
SNMP Trap
Receivers
The string that defines access rights for reading SNMP data objects. The default is
public.
The string that defines access rights for writing SNMP data objects. The default is
private.
The status of the SNMP agent for authentication trap generation. The default is
disabled.
The IP addresses of the network management stations that can receive traps from
the switch. Normally, these addresses are the same as your network management
software systems’ IP addresses.
Important! A maximum of four trap receivers is allowed.
To cancel a selected option, press ctrl-c at the command prompt.
4. Press Enter. The new string takes effect.
5. Type q to quit and return to the Configuration Menu.
Enabling Authentication Traps
The switch can be set to generate authentication traps. Authentication traps are messages sent across the
network to an SNMP network management station. They alert the manager when someone attempts to read
or change data without the proper community string.
To set the switch to generate traps, use the following procedure:
1. Open the SNMP Configuration Menu by typing n in the Configuration Menu.
2. To toggle trap authentication to Enabled, type t.
To cancel the change, press ctrl-c at the command prompt.
3. Press Enter. The new setting takes effect.
4. Type q to quit and return to the Configuration Menu.
Adding or Updating a Trap Receiver
Trap receivers are network management stations designated to receive traps from the switch.
Important! The maximum number of trap receivers that can be set is four.
To add or update a trap receiver entry, use the following procedure:
1. Open the SNMP Configuration Menu by typing n in the Configuration Menu.
2. Type a to Add/Update Trap Receiver. An IP prompt appears.
3. Type the new or updated IP address of the network management station to receive traps. Press
Enter.
To cancel an entry, press ctrl-c at the command prompt.
4. Type the trap receiver’s community string when prompted for it, then press Enter again.
The trap receiver entry is added or updated. Type q to return to the Configuration Menu.
31
Page 32

Deleting a Trap Receiver
Use the following procedure to delete a trap receiver that has been previously designated:
1. Open the SNMP Configuration Menu by typing n in the Configuration Menu.
2. Type d to Delete a Trap Receiver. A prompt for the entry of the trap receiver appears.
3. Enter the number of the entry to be deleted (1,2,3, or 4) and press Enter.
The trap receiver is deleted from the SNMP Trap Receivers list.
For further details on using SNMP, see Chapter 6 SNMP Management.
3.10.2 Spanning Tree Protocol (STP) Configuration
The Spanning Tree Protocol (STP) is a part of the IEEE 802.1D standard that provides for redundancy in a
bridged LAN by allowing multiple links between points in the LAN.
Without the use of STP, multiple links in a bridged network will result in bridging loops, which can generate
excess broadcast traffic that can bring down an entire network. See Chapter 7 Switching Concepts for a
more detailed explanation.
To access the STP Configuration Menu, enter the letter s from the Protocol Configuration Menu. Use the
listed command letters to configure priority, hello time, maximum age, forward delay, and port configuration.
IntraCore 35160-T Spanning Tree Configuration Menu
STP Status: Enabled
Bridge ID: 8000 00:00:94:BF:00:46
Designated Root: 0000 00:00:94:D2:5B:08
Root Port: 15
Root Path Cost: 20130
Addr Ageout Time: 300
Hello Time: 2 Sec. Bridge Hello Time: 2 Sec.
Maximum Age: 20 Sec. Bridge Maximum Age: 20 Sec.
Forward Delay: 15 Sec. Bridge Forward Delay: 15 Sec.
<Cmd> <Description>
t Toggle STP Enable/Disable
i Set Bridge Priority
h Set Bridge Hello Time
a Set Bridge Maximum Age
d Set Bridge Forward Delay
p Spanning Tree Port Configuration
q Return to previous menu
root>
32
Page 33

Enabling and Disabling STP
The switch is shipped with Spanning Tree enabled on all ports by default. To enable or disable STP on the
switch, use the following procedure:
1. Open the Spanning Tree Configuration Menu by typing s in the Protocol Configuration Menu.
2. Type t to toggle STP to enabled or disabled.
When STP is disabled, there is a prompt to confirm the change. The STP status is changed. The
status is displayed near the top of the Spanning Tree Configuration Menu.
Important! Only attempt to set the following parameters if the user has experience with the 802.1D
specification. In most cases, the default values will suffice. See Chapter 7 Switching Concepts for a more
detailed explanation of each parameter.
3. Type i to set Bridge Priority.
4. Type h to set Bridge Hello Time.
5. Type a to set Bridge Maximum Age
6. Type d to set Bridge Forward Delay.
Spanning Tree Port Configuration
To set the Port Priority and Port Path Cost values for STP, access the Spanning Tree Port Configuration
Menu shown below by typing p in the Spanning Tree Configuration Menu.
IntraCore 35160-T Spanning Tree Port Configuration Menu Port: [01]
Port Name: <none>
Port Speed: 1000 Mbps
Port Status: Enabled
Port State: Forwarding
Port MAC Address: 00:00:94:BF:00:46
Port Priority: 0x80
Port Path Cost: 4
<Cmd> <Description>
i Set Port Priority
c Set Port Path Cost
q Return to previous menu
root>
S)elect port N)ext port P)rev port
Setting Port Priority and Path Cost
Use the following procedure to set the STP Port Priority and Path Cost values:
1. Access the Spanning Tree Port Configuration Menu by typing p in the Spanning Tree Configuration
Menu.
2. Use the s, n, and p commands to select the port to configure.
3. Type i to set the Port Priority.
Type c to set the Port Path Cost.
4. Enter a value for the setting. See Chapter 7 Switching Concepts for more information.
5. Press Enter.
The new Port Priority or Port Path Cost is displayed in the Spanning Tree Port Configuration Menu.
33
Page 34

3.11 Trunk Group Configuration
The IC35160 supports link aggregation (port trunking). This feature is used to combine two or more links
(ports) in order to increase the overall bandwidth of the link, thereby sharing or balancing the data load. Link
aggregation creates better redundancy and fault tolerance, as network traffic is dynamically distributed
across ports as links are added to the trunk. If a single cable goes down, the connection will not fail—
especially important for mission critical links and server connections. Use the following guidelines in
aggregating/trunking ports on the IC35160:
1. A maximum of four trunks can be created, each of which can support up to four ports. The ports in
a trunk cannot physically be more than 8 ports apart (i.e., port 1 cannot be in a trunk with port 9).
2. This firmware version does not support Link Aggregation Control Protocol (LACP). It requires
manual configuration.
3. Each port in a trunk must be the same speed (either 100Mbps or 1000Mbps), and each port must
be running in Full-Duplex mode.
4. Each port in a trunk must be assigned the same VLAN attributes; e.g., the same port type, VLAN
membership, and port VLAN ID (PVID).
To configure link aggregation, type g in the Configuration Menu to access the Trunk Group Configuration
Menu. Create a Trunk Group or type S to select a Trunk Group (TID 1–4) to configure.
IntraCore 35160-T Trunk Group Configuration Menu
<Cmd> <Description>
c Create Trunk Group
r Remove Trunk Group
a Set Trunk Name
p Add Trunk Group Ports
d Delete Trunk Group Ports
e Toggle Trunk Group Speed
i Change Trunk Group VLAN ID
l Add VLANs to Trunk Group
m Remove VLANs From Trunk Group
o Set Trunk Port Type
f Toggle Trunk Ingress Filter
u Trunk Group Configuration Summary
root>
S)elect TID N)ext TID Prev) TID H)elp Q)uit
Type H for help with trunking.
Port Input Format
1. Port# > 1-4 (implies ports 1 to 4)
2. Port# > 1-3,8 (implies port 1 to 3 & 8)
Trunk Ports
There cannot be a trunk group with single port as member.
There can be at most 4 ports in a trunk group.
Ports can't be in a trunk group if...
1. their VLAN configuration is different, for example if their PVID's
are different, or their VLAN membership's are different, or their port
type are different,
2. they are from different devices
Load Balancing: MAC addresses learned on a port in a trunk group have trunk ID
associated with them instead of port ID. For such MAC addresses, forwarding
port is selected based on source/destination combination, meaning, for the same
destination, if sources are different, forwarding port may also be different.
TVID: Default trunk VID for ingress untagged frame VLAN classification.
Trunk VIDs: VIDs of VLANs that have trunk group as a member.
Press any key to continue...
34
Page 35

3.12 QoS Priority Queue Management
Quality of Service (QoS) Priority Queue is a feature that allows the switch to prioritize packets, thereby
ensuring that high-priority traffic is handled before low-priority traffic when there is congestion on the
network. This can improve network performance and bandwidth utilization on your network.
You can configure four traffic priorities by defining filters, based on packet characteristics, that cause the
switch to place traffic into one of these four queues; the queue with the highest priority is serviced first until it
is empty, then the lower queues are serviced in sequence.
Defining the Priority List
A priority list contains the definitions for a set of priority queues. The priority list specifies which queue a
packet will be placed in. In order to perform queuing using a priority list, you must assign the list to a protocol
or ingress port. The same priority list can be applied to multiple port numbers.
To define a priority list, perform the tasks described in the following section.
Assigning Packets to Priority Queues
Assign packets to priority queues based on one of the following qualities:
• Protocol type
• Interface where the packets enter the switch (Ingress port)
You can specify multiple assignment rules. The priority-list commands are read in order of appearance until
a matching protocol or interface type is found. When a match is found, the packet is assigned to the
appropriate queue and the search ends. Packets that do not match other assignment rules are assigned to
the default queue.
Type o in the Configuration Menu to access the QoS Priority Management Menu. Type i in the QoS Priority
Queue Management Menu to set a priority list. Follow the prompts to configure the list.
IntraCore 35160-T QoS Priority Queue Management Menu
<Cmd> <Description>
l Display Priority List
i Set Priority List
t Remove Priority List
p Priority Group Configuration
g Set Global Priority Group
r Reset All Priority Queue Configuration to Factory Default
q Return to previous menu
Enter queue list number (1 - 16) > 1
Please select classifier type Protocol or Ingress port (p/i) >
Enter ingress port number (1 - 16) > 1
Please set priority (L: Low, N: Normal, M: Medium, H: High) >
Save "priority-list 1 interface 1 high" ? (y/n) >
35
Page 36

To assign a Priority Group to an interface, type p in the QoS Priority Queue Management Menu to access
the Priority Group Configuration Menu. Only one list can be assigned per interface. Type g to set the Priority
Group, or type the corresponding command letter to select another task.
IntraCore 35160-T Priority Group Configuration Menu Port: [01]
Port Name: <none>
Priority Group Info:
[+: Priority Group Enabled, -: No Priority Group]
Priority Group Status: [01]-------- [09]-------Priority List Number: [<none>]
<Cmd> <Description>
u Display Priority Group
g Set Priority Group
o Remove Priority Group
r Reset Priority Group Configuration to Factory Default
q Return to previous menu
root>
S)elect port N)ext port P)rev port
Example:
Set TELNET traffic as high priority traffic on ingress port 10.
First, create Priority List 1, by following these steps:
1. Type i in the QoS Priority Queue Management Menu.
2. Enter queue list number 1.
3. Select p to choose protocol.
4. Select TCP by typing t.
5. Enter the layer 4 port number (Telnet is 23).
6. Set the priority (L, N, M, or H, as shown).
7. Type y to save the configuration, or n to cancel.
Enter queue list number (1 - 16) > 1
Please select classifier type Protocol or Ingress port (p/i) >
Please select TCP or UDP (t/u) >
Enter layer 4 port number (1 - 65536) > 23
Please set priority (L: Low, N: Normal, M: Medium, H: High) >
Save "priority-list 1 protocol ip high tcp 12" ? (y/n) >
Next, you can assign Priority List 1 on port 10 as a priority group:
1. From the Priority Group Configuration Menu, type g to set a Priority Group.
2. Enter the port number (1 through 16), in this case, 10.
3. Follow the onscreen instructions to assign Priority List 1 to port 10.
36
Page 37

3.13 User Interface Configuration
To access the User Interface Configuration Menu, enter the letter u from the Configuration Menu. Use the
listed command letters to configure user interfaces (SSH, Telnet, and HTTP server), UI timeout, passwords,
add/delete access hosts, and access control.
IntraCore 35160-T User Interface Configuration Menu
Console UI Idle Time Out: Console UI idle time-out feature is disabled
SSH/Telnet UI Idle Time Out: 5 Min. HTTP Server Status: DISABLED
Telnet Server Status: ENABLED SSH Server Status: ENABLED
Session Status Source IP Access Hosts:
1 Telnet xxx.xxx.xxx.xxx 1. <empty>
2 Inactive <none> 2. <empty>
3 Inactive <none> 3. <empty>
4 Inactive <none> 4. <empty>
<Cmd> <Description>
c Set Console UI Time Out
t Set SSH/Telnet UI Time Out
p Change Password
a Add Access host
d Delete Access host
s Toggle SSH Enable/Disable
n Toggle Telnet Enable/Disable
h Toggle to Enable/Disable HTTP Server
x Access Control
q Return to previous menu
root>
3.13.1 Setting Console UI Time-out Period
Use the following procedure to set the console user interface idle time-out:
1. Type c in the User Interface Configuration Menu. A prompt for the number of minutes is displayed.
2. Enter the desired idle time-out in minutes.
Note: The default time-out is 5 minutes. Range for time-out is 0–60 minutes (0 indicates no time-
out, or the time-out feature is disabled). To exit without making any changes, press ctrl-c.
3. Press Enter.
The new Console UI Time Out is reflected in the User Interface Configuration Menu.
3.13.2 Setting SSH/Telnet UI Time-out
Use the following procedure to change the SSH/Telnet Time-out.
1. Type t in the User Interface Configuration Menu.
A prompt for the number of minutes is displayed.
2. Enter the desired idle time-out in minutes.
Note: The default time-out is 5 minutes. Range for time-out is 0–60.
To exit without changes, press ctrl-c.
3. Press Enter.
37
Page 38

The new SSH/Telnet UI Time Out is reflected in the User Interface Configuration Menu. After configuring the
desired time-outs, type q to return to the previous menu.
3.13.3 Change Password
Use this option to change the password that the user must enter when they log in.
Important! The factory default password is Asante. The password is case-sensitive.
To change the current Local Management Interface or Web-based Interface password, use the following
procedure:
1. Type p in the User Interface Configuration Menu.
2. Type the password that is used at the prompt.
3. Type a new password at the “Enter Current Password” prompt.
Important! The password is case-sensitive. The password can be up to a maximum of 20
characters in length. The password characters can be any ASCII code.
4. Press Enter.
5. Type the new password again at the confirmation password prompt.
To cancel the change in password, type ctrl-c.
6. Press Enter.
The password change takes effect.
7. Type q to return to the Configuration Menu.
Now enter the new password each time when logging into the Configuration Menu.
3.13.4 Adding or Deleting an Access Host
You can add up to 4 access hosts by entering their IP addresses. To add an access host, type a in the User
Interface Configuration Menu. At the prompt, enter the IP address. The host address will be listed at the top
of the screen next to Source IP. To delete an access host, type d in the User Interface Configuration Menu
and enter the entry number.
3.13.5 Enabling or Disabling SSH and Telnet
SSH is a popular software-based protocol for securing access to a remote computer. When enabled, SSH
encrypts the otherwise clear text of Telnet commands so that user names and passwords cannot be
intercepted and used to gain unauthorized access to the switch. SSH automatically encrypts and decrypts
data, so that it is transparent to the user.
The IC35160 v.1.10 supports SSH v.1 (blowfish only) and SSH v.2 (password authentication, MAC, key
exchange, and encryption). Use the following guidelines in running SSH on the IC35160:
1. SSH is enabled by default. At startup, you may have to wait approximately 2 minutes before being
able to log in. This delay is normal, due to key preparation.
2. At the initial SSH login prompt, use the fixed user name root and the fixed password Asante. After
that, any user can authenticate using SSH, but will still need to enter the switch login user name
(the default is also root) and password (the default is also Asante) in order to log onto the switch.
3. Telnet and SSH are both enabled by default. There can be a shared maximum of 4 user sessions
at any one time. All three services (Telnet, HTTP, and SSH) can be separately disabled or enabled,
but the HTTP Server and SSH cannot both be enabled at the same time.
SSH is enabled by default. To disable or re-enable SSH or Telnet, type the corresponding command letter (s
or n) in the User Interface Configuration Menu.
38
Page 39

3.13.6 Enabling or Disabling the Web Server
The current HTTP Server Status is shown in the User Interface Configuration.
Important! For security, the web server is disabled by default. It cannot be enabled if SSH is currently
enabled. One or the other must be left disabled.
To toggle the status of the HTTP server, type h in the User Interface Configuration Menu.
3.13.7 Access Control
The enhanced switch login process allows for multiple users to access the switch. There are three predefined (default) user names: root (with read-write access), readwrite (with read-write access), and
readonly (with read-only access). Additionally, each user may be assigned their own login password (the
default password for all users is Asante, and it is case-sensitive). Up to eight user names can be assigned,
but only the user name root can add or delete users (see the following screen). Remote root login can be
enabled/disabled in the Access Control Configuration Menu.
To access the Access Control Configuration Menu, enter the letter x from the User Interface Configuration
Menu. Use the listed command letters to configure users, passwords, group membership, and remote login.
IntraCore 35160-T Access Control Configuration Menu
Remote Login: Enable
User Name: Group Membership:
readonly : read-only
readwrite : read-write
<Cmd> <Description>
a Add User
d Delete User
p Change User Password
e Edit User Group Membership
i Group Information
t Toggle Remote Login
q Return to previous menu
root>
3.14 System Utilities
To access the System Utilities Menu, enter the letter s from the Configuration Menu. Use the listed
command letters to configure port mirroring, system clock, system reset options, system log, bootstrap
parameters, TFTP, and PING.
IntraCore 35160-T System Utility Menu
<Cmd> <Description>
m Port Mirroring Configuration
o System Clock Configuration
r System Reset Options
l System Log
b Bootstrap Configuration
t TFTP File Transfers
p PING Utility
q Return to previous menu
root>
39
Page 40

3.14.1 Port Mirroring
Port Mirroring allows the user to configure the switch to copy all traffic associated with one port (the Monitor
Port) to a Mirror Port on the switch. The user can connect the Mirror Port to a network analyzer or RMON
probe for packet analysis. The user can configure the Monitor Port to send either transmitted or received
traffic to the Mirror Port.
IntraCore 35160-T Port Mirroring Configuration Menu
System Port Mirroring Status: [Disabled]
Monitor Port list:
1 <empty>
2 <empty>
3 <empty>
4 <empty>
<Cmd> <Description>
a Add Monitor Port
d Delete Monitor Port
t Toggle System Port Mirroring Enable/Disable
q Return to previous menu
root>
Enabling or Disabling System Port Mirroring
To enable or disable Port Mirroring, use the following procedure:
1. Type m in the System Utility menu to display the Port Mirroring Configuration menu.
2. Type t to toggle System Port Mirroring.
The change is reflected immediately in the settings shown at the top of the Port Mirroring Configuration
menu.
Adding or Deleting a Monitor Port
To specify which port to monitor (up to four), use the following procedure:
1. Type m in the System Utility menu to display the Port Mirroring Configuration menu.
2. Type a and then enter the port number of the specific port.
3. Type d to delete a specific port.
The change is reflected immediately in the settings shown at the top of the Port Mirroring Configuration
menu.
40
Page 41

3.14.2 System Clock
Select o from the System Utility Menu to access the System Clock Configuration Menu. Use the command
letters to set the date and time.
IntraCore 35160-T System Clock Configuration Menu
System up since: 07/16/2003 Wed. 03:57:59pm
Current date/time: 07/24/2003 Thu. 10:12:48am
<Cmd> <Description>
d Set [D]ate
t Set [T]ime
q Return to previous menu
root>
3.14.3 System Reset
The System Reset Configuration Menu allows the user to reset the switch by performing a “warm” reboot. It
also allows the user to schedule a reset up to 24 hours in advance. Type r from the System Utility Menu to
access the System Reset Configuration Menu.
IntraCore 35160-T System Reset Configuration Menu
Bank 1 Image Version/Date: 1.20B/Jun 17 2003 20:41:25 (Running)
Bank 2 Image Version/Date: 1.10 /May 20 2003 18:01:54
Reset Status: Stop
Reset Type: Normal
Reset Countdown: 1 sec.
Load Mode: Local
Boot Bank: 1
<Cmd> <Description>
s Schedule Reset Time
c Cancel Reset
r Reset Switch
a Toggle Boot Bank
d Reset Switch to Factory Default
i Reset Switch to Factory Default except IP and Bootstrap
q Return to previous menu
root>
Resetting the Switch
To reset the switch, use the following procedure:
1. Open the System Reset Menu by typing r in the System Utility Menu.
2. Type r, d, or i. Typing r resets the switch to its current configuration. Typing d resets switch to the
factory default. Typing i resets the switch to the factory default, but without affecting its IP and
Bootstrap configuration.
3. Type y to confirm the reset or type n to cancel the reset.
Note: During the scheduled reset operation, refresh the screen in order to view the reset
countdown.
41
Page 42

Scheduling a System Reset
The user can schedule the switch to automatically perform a reset from one second up to 24 hours (86,400
seconds) in advance.
To schedule a reset, use the following procedure:
1. Open the System Reset Menu by typing r in the System Utility Menu.
2. Type s to schedule a reset time (within the specified range).
3. Enter the number of seconds the switch will wait before it automatically resets.
Important! The maximum number of seconds that can be entered is 86,400 (24 hours).
4. Press Enter. The switch will reset automatically after the number of seconds specified.
3.14.4 System Log
The switch’s system log records and displays any major system events on the switch, such as fatal errors,
plugging in or removing a module, and so on.
To view the system log, use the following procedure:
1. Type l in the System Utility Menu. The System Log Menu appears, as shown below.
IntraCore 35160-T System Log Menu
<Cmd> <Description>
l Display System Log
c Clear System Log
q Return to previous menu
root>
2. Type l in the System Log Menu to display the current system log.
The system log displays any major system events that have occurred on the switch. If no major
events have occurred, “System up” messages are displayed.
IntraCore 35160-T System Log Summary
==============================================================================
1. 08/22/2002 12:53:30pm System up
2. 08/22/2002 12:55:52pm System up
3. 08/22/2002 02:38:50pm System up
4. 08/22/2002 02:43:38pm System up
5. 08/22/2002 02:47:21pm System up
6. 08/22/2002 02:47:54pm Spanning Tree Task Disabled
7. 08/22/2002 02:52:34pm System up
8. 08/22/2002 02:55:37pm Primary Power unit failed !
9. 08/22/2002 02:55:39pm Primary Power unit failed !
10. 08/22/2002 02:55:41pm Primary Power unit failed !
11. 08/22/2002 02:55:44pm Primary Power unit failed !
12. 08/22/2002 02:55:46pm Primary Power unit failed !
13. 08/22/2002 02:55:48pm Primary Power unit failed !
14. 08/22/2002 02:55:51pm Primary Power unit failed !
15. 08/22/2002 02:56:01pm Primary Power unit failed !
16. 08/26/2002 09:20:02am System up
17. 08/26/2002 09:23:42am Spanning Tree Task Enabled
18. 08/26/2002 11:30:00am System up
19. 08/26/2002 01:40:20pm System up
20. 08/26/2002 01:46:00pm System up
End of system log, Quit
Note: The system log holds a maximum of 64 entries.
42
Page 43

3. Type n to display the next page of System Log information, or type q to quit.
Clearing the System Log
Use the following procedure to clear all entries from the current System Log:
1. Open the System Log Menu by typing l in the System Utility Menu.
2. Type c to clear the current System Log.
New entries will accrue as events occur.
3.14.5 Bootstrap Configuration
The Bootstrap Configuration Menu displays, and allows the user to change, the bootstrap parameters used
for loading the software for the switch at startup, and for downloading a new version of software when one is
issued.
To access the Bootstrap Configuration Menu, type b in the System Utility Menu. If the Load Mode is set to
Local, a screen similar to that below will appear.
IntraCore 35160-T Bootstrap Configuration Menu
Bank 1 Image Version/Date: 1.20B/Jun 17 2003 20:41:25 (Running)
Bank 2 Image Version/Date: 1.10 /May 20 2003 18:01:54
Load Mode: Local
Boot Bank: 1
<Cmd> <Description>
r Set Load Mode to REMOTE
a Toggle Boot Bank
o Commence Bootstrap Sequence
q Return to previous menu
root>
When the switch is powered on, it loads its software via one of two methods: locally (via its internal flash
memory, which is the default setting) or remotely over the network. The user can change the bootstrap
configuration from this menu. See Appendix F BootP Configuration for more information on BootP and the
Remote mode.
43
Page 44

3.14.6 TFTP File Transfers
The software image file must be downloaded from a server on the network that is running a TFTP server
application.
IntraCore 35160-T TFTP File Downloading Menu
Bank 1 Image Version/Date: 1.20B/Jun 17 2003 20:41:25 (Running)
Bank 2 Image Version/Date: 1.10 /May 20 2003 18:01:54
File Type: Image
Server IP: xxx.xxx.xxx.xxx
File Name: rt35160_120B.IMA
Retry Count: 5
Destination Bank: 2
<Cmd> <Description>
s Set Server IP Address
f Set File Name
t Toggle File Type
c Change to File Upload
d Download Image File to Destination Bank
b Download and Reboot from the Image File
r Set Retry Count
a Toggle Destination Bank
q Return to previous menu
root>
To upgrade the switch software via TFTP, use the following procedure:
1. Access the TFTP Image File Downloading Configuration Menu by typing t in the System Utility
Menu.
2. Type s to set the image server IP address.
3. At the prompt, enter the IP address of the server containing the image file, then press Enter.
4. Type f to set the image file name.
5. At the prompt, enter the image file’s name and path, then press Enter.
6. Type r to set the retry count.
7. At the prompt, enter the number of attempts the switch will make to download the image file, then
press Enter.
8. Select the Destination Image Bank by typing a. Select the Bank on which the software is not
currently running.
9. To download the image file to the destination bank, type d. This option allows the user to change
the boot bank at a later time or to use the System Reset Configuration to schedule a reset, at which
time the new software will be run.
OR
To download the image file and reset the switch, type b. This option immediately boots the switch
with the new version of software.
10. Type q to return to the System Utility Menu.
44
Page 45

3.14.7 PING Utility
Type p on the System Utility Menu to enter an IP address to Ping.
IntraCore 35160-T System Utility Menu
<Cmd> <Description>
m Port Mirroring Configuration
o System Clock Configuration
r System Reset Options
l System Log
b Bootstrap Configuration
t TFTP File Transfers
p PING Utility
q Return to previous menu
Enter IP Address (ddd.ddd.ddd.ddd)>
3.15 Statistics
Viewing statistics on a regular basis allows the manager to evaluate the network’s performance. The
manager can view current statistics for the switch on a per-port basis and can change the view of those
statistics and the counters displayed in it. To view statistics, enter the command letter s from the Main Menu
to access the Port Statistics Counters screen. This screen displays the statistic counters for each port. Use
the command letters p, s, or n to select the desired port.
IntraCore 35160-T Port Statistics Counters Port: 1
Elapsed Time Since Up: 007:17:53:31
<Counter Name> <Total> <Avg./s> <Counter Name> <Total> <Avg./s>
Total RX Pkts 0 0 Total RX Bytes 0 0
Good Broadcast 0 0 Good Multicast 0 0
Total TX Pkts 0 0 Total TX Bytes 0 0
TX Unicast 0 0 TX Non-unicast 0 0
Oversize Pkts 0 0 CRCAlign Errors 0 0
Fragments 0 0 FCS Errors 0 0
Collisions 0 0 Late Events 0 0
64-Byte Pkts 0 0 65-127 Pkts 0 0
128-255 Pkts 0 0 256-511 Pkts 0 0
512-1023 Pkts 0 0 1024-1518 Pkts 0 0
<Cmd> <Description> <Cmd> <Description> <Cmd> <Description>
r since reset p prev port n next port
t stop refresh s select port q quit
root>
1. Use the s command to select a port to see the counters, or use n and p to find the port.
2. Type t to stop the periodic updating of the counters, in order to record what they are at that time.
3. Type r to see a display of the same counters, but accrued since the last reset of the counters.
4. Type r in the “since reset” screen to reset the statistics counters in order to see them accrue again
from zero.
5. Type q to quit either statistics screen and return to the Main Menu.
45
Page 46

Chapter 4. Advanced Management
This chapter deals with the advanced management of the switch, via the console mode or telnet connection.
See Chapter 5 Web-Based Management for information on managing the switch through the web browser.
The following sections describe the these advanced topics for management of the IntraCore 35160:
• SNMP and RMON Management
• Security Management
• VLAN Management
• Multicast Management
4.1 SNMP and RMON Management
The Simple Network Management Protocol (SNMP) may be used to manage the IntraCore 35160. The
SNMP agent supports database objects that are defined in the following management information bases
(MIBs):
• MIB II (RFC 1213)
• Bridge MIB (RFC 1493)
• RMON (RFC 1757) 4 groups—Ethernet Statistics, Ethernet History, Alarm, and Events (see the
next section for details)
• Private Asanté 35160 MIB
Any SNMP-based network management application can be used to manage the switch. For information on
management of switches, refer to the SNMP software manual. Also, see Chapter 6 SNMP Management for
more information on SNMP protocol.
For details on console-based SNMP settings, see “SNMP Configuration” in Chapter 3.
RMON Management
Remote Network Monitoring (RMON) allows the network manager to gather data on the network’s traffic for
future retrieval. RMON is an Internet Standard defined in RFC1757.
Using RMON, a network monitor (also called a probe) listens to traffic on the network and gathers statistics
that may be retrieved later by a network management station using SNMP, as described in the previous
section.
The four groups of RMON that are supported by the switch are described in Chapter 6 SNMP Management.
The IntraCore 35160 switches provide control of the RMON groups only through SNMP. For information on
controlling RMON groups, please refer to the documentation for the SNMP management application.
46
Page 47

4.2 Security Management
To access the Security Management Menu, type t in the Configuration Menu. Use the listed command
letters to configure port security, duplicate IP detection and trap, and station movement trap, or to display
the duplicated IP list and reset all security parameters to factory default.
IntraCore 35160-T Security Management Menu
Duplicated-IP Monitoring Status : Enable
Duplicated-IP Trap Status : Enable
Station Movement Trap Status : Disable
<Cmd> <Description>
p Port Security Configuration
x 802.1X Configuration
d Toggle Duplicated-IP Detection Enable/Disable
i Toggle Duplicated-IP Trap Enable/Disable
l Display Duplicated-IP List
s Toggle Station Movement Trap Enable/Disable
r Reset All Security Configuration to Factory Default
q Return to previous menu
root>
Important! For any traps (alerts) to be sent, one or more devices must be designated as trap receivers. See
“SNMP Configuration” in Chapter 3.
4.2.1 Duplicated IP Detection and Trap
The duplicated IP detection and duplicated IP trap security measures allow the user to monitor the use of a
single IP address by two stations.
If duplicated IP detection is enabled, the switch starts monitoring the broadcast Address Resolution Protocol
(ARP) traffic from all of its ports, to detect duplicated IP address conditions. When duplicate IP addresses
are used on the system, the MAC addresses of both stations and the ports they accessed are logged.
If both duplicated IP detection and duplicated IP trap are enabled, the designated trap receiver gets an alert
each time a duplicated IP address is used on the system. In order to send duplicated IP traps, duplicated IP
detection must be enabled.
By default, duplicated IP detection and trapping are enabled.
Enabling and Disabling Duplicated IP Detection
To enable or disable detection of duplicated IP addresses:
1. From the Configuration Menu, type t to access the Security Management Menu.
2. Type d to toggle duplicated IP detection.
Enabling and Disabling Duplicated IP Trap
To enable the sending of a trap when a duplicated IP is detected, first enable duplicated IP detection. See
the previous subsection, “Enabling and Disabling Duplicated IP Detection.”
To enable or disable the sending of a trap when a duplicated IP is detected:
1. From the Configuration Menu, type t to access the Security Management Menu.
2. Type i to toggle duplicated IP trap.
Viewing a List of Duplicated IP Addresses
To view a list of duplicated IP addresses that have been detected at the switch:
47
Page 48

1. From the Configuration Menu, type t to access the Security Management Menu.
2. Type l to display the duplicated IP list. A screen appears, similar to the following screen.
+---------------+-----------------+--+-----------------+--+
| IP Address | Owner MAC | P| Spoofer MAC | P|
+---------------+-----------------+--+-----------------+--+
xxx.xxx.xxx.xxx 00:00:94:CC:C5:36 1 00:00:94:CC:C7:37 17
xxx.xxx.xxx.xxx 00:00:94:CC:C5:36 1 00:00:94:CC:C7:37 17
xxx.xxx.xxx.xxx 00:00:94:CC:C5:36 1 00:00:94:CC:C7:37 17
End of Summary, Quit
4.2.2 Enabling and Disabling Station Movement Trap
The station movement trap security measure ensures that when any end station is moved from one switch
port to another, an alert is sent to the designated trap receiver. Station movement is detected when a
station’s MAC address (already learned by the switch) appears on a different switch port. The station
movement trap includes the station’s MAC address and IP address (if available) and the switch’s port
numbers.
By default, station movement trap is disabled.
To enable or disable detection of the movement of a station on the switch:
1. From the Configuration Menu, type t to access the Security Management Menu.
2. Type s to toggle the station movement trap.
4.2.3 Configuring Port Security
To access the Port Security Configuration Menu, type t in the Configuration Menu to access the Security
Management Menu, then type p to access the Port Security Configuration Menu. A screen similar to the
following will appear:
IntraCore 35160-T Port Security Configuration Menu
Port: 01 Port Name: <none>
Port Security Info:
[+: Port Security Enabled, -: No Port Security, !: Port Disabled By Security]
Port Security Status: [01]-------- [09]--------
Port Security Type: <none>
Port New Node Detect Trap Status: [Disabled]
Port Intruder Detect Trap Status: [Enabled]
Port Trusted MAC Address: [<none>]
<Cmd> <Description>
o Set/Clear Port Security
t Toggle Port Security Trap Enable/Disable
i Insert/Modify Port Trusted MAC Address
d Display Port Intruder Nodes
h Port Security Help
q Return to previous menu
root>
S)elect port N)ext port P)rev port
48
Page 49

Configuring Port New Node Detection Trap
The port new node detection trap security measure (also called “port security trap”) ensures that when any
new device is connected to the secured port, an alert will be sent to the designated trap receiver. The new
device is detected when it is connected to the switch and its MAC address is recognized as one not present
in the current address table. The information shown in the alert includes the new node’s MAC address and
IP address (if available) and the port to which they are connected.
After a device has been connected and has generated traffic on the network, the trap will not be re-sent. If
the switch ages out the MAC address of a connected device from its forwarding database, new traffic from
that device will result in a new node trap being sent. The default age-out time is 300 seconds. The user may
reduce the number of traps sent by lengthening the age-out time, as explained in “Setting the MAC Address
Age-Out Time” in Chapter 3.
By default, New Node detection is disabled.
To enable or disable detection of a new node on the system, first set the security level on a port or group of
ports to 1. Then, if it is not already enabled, enable New Node detection.
To set security level 1 on a port:
1. From the Configuration Menu, type t to access the Security Management Menu.
2. Type p to access the Port Security Configuration Menu.
3. Select o to Set/Clear port security.
4. Type s to set security.
5. Type the numbers of the ports on which to set the security. The manager can specify a single port,
a series of port numbers separated by commas, a range of ports shown with a hyphen, or a
combination of ranges and single ports. For example, type 1-8, 14 to specify ports one through
eight, and port fourteen. See Help for more information.
6. Type l for Port Security Level 1.
To enable New Node detection:
1. From the Configuration Menu, type t to access the Security Management Menu.
2. Type p to access the Port Security Configuration Menu.
3. Type t to choose Toggle Port Security Trap.
4. Type 1 to toggle the new node trap (if it is not already enabled).
Configuring Port Lock and Intruder Lock
The port intruder security measure creates a port-trusted MAC address that is the only station with full rights
to have traffic the port. Attempts to send traffic to the port from other stations are regarded as security
intrusions, and can be disallowed. The security measure may be enabled as a port lock (security level 2) or
an intruder lock (security level 3).
Note: The three security levels are mutually exclusive; a port can have security level 1, level 2, or level 3,
but never a combination of security levels.
To configure security level 2 or 3, specify the port-trusted MAC address directly, or direct the system to trust
the address of the first station that addresses the port. By trusting the first station to address the port, the
manager can configure port security before knowing which system will ultimately use that port.
When security level 2 (port lock) is enabled and an intruder attempts to direct traffic to the port, the port is
immediately disabled. The port is then re-enabled only by clearing the security level by management.
When security level 3 (intruder lock) is enabled and an intruder attempts to direct traffic to the port, the
switch locks out the intruder’s MAC address; the port will not accept any traffic from that station. The
intruder’s address is then re-enabled only by clearing the security level by management.
Important! If the security level is set at 2 or 3, the Intruder Trap must also be set. If this trap is not set, no
notification that the port has been disabled can be received. See “Setting the Intruder Trap” section below.
49
Page 50

By default, security levels 2 and 3 are both disabled.
Configuring Security Level 2 or Level 3
To set security level 2 (port lock) or level 3 (intruder lock) on a port:
1. From the Configuration Menu, type t to access the Security Management Menu.
2. Type p to access the Port Security Configuration Menu.
3. Select o to Set/Clear port security.
4. Type s to set security and enter the port number(s).
5. Type 2 to select Port Security with Port Lock, or 3 to select Port Security with Intruder Lock.
6. Type 1 to have the system trust the first station that addresses this port, or type 2 to enter a specific
port-trusted MAC address. If selecting type 2, there is a prompt to enter an address where the
values are hexadecimal and separated by colons, as follows: xx:xx:xx:xx:xx:xx
Setting the Intruder Trap
If the security level is set at 2 or 3, please ensure the Intruder Trap is set. Enabling this trap directs the
system to send an alert to the designated trap receiver when an intruder tries to access the port. To set the
intruder trap:
1. From the Configuration Menu, type t to access the Security Management Menu.
2. Type p to access the Port Security Configuration Menu.
3. Type t to choose Toggle Port Security Trap.
4. Type 1 to toggle the new node trap (if it is not already enabled).
Inserting/Modifying a Port Trusted MAC Address
When port security level 2 or 3 has been set for a port, the manager must specify the port-trusted MAC
address. Change the port-trusted MAC address for a port without completing all the steps to set the port
security.
To add or change the port-trusted MAC address:
1. From the Configuration Menu, type t to access the Security Management Menu.
2. Type p to access the Port Security Configuration Menu.
3. Type i, and then follow the instructions on the screen.
Resetting Security to Defaults
To reset the security measures on the switch to the factory defaults, access the Security Management Menu
by typing t in the Configuration Menu. Then type r to reset all of the security configurations to the factory-set
defaults. These defaults and their meanings were discussed in the sections on each security measure,
covered earlier in this chapter.
4.2.4 Port-based Network Access Control
IEEE 802.1X is a standard used for Port based Network Access Control, where the “port” can be either a
physical port or logical port by which a point-to-point connection is designated. The concept of 802.1X is to
provide a standardized security authentication method for IEEE-based network technologies, including Local
Area Networks (LANs) and Wireless LANs (WLANs).
Compared with technologies such as MAC filtering and Access Control Lists (ACLs), IEEE 802.1X is a new
technology that provides scalability with minimal administration overhead. By authenticating user access at
the network edge, network administrators can be assured that no unauthorized access will take place, and
all of the user authentication can take place on a centralized authentication server.
50
Page 51

Note: The IC35160 802.1X implementation supports following clients:
Windows XP (Microsoft)
Windows 2000 + SP4 (Microsoft)
The IC35160 802.1X implementation supports following RADIUS servers:
Internet Authentication Service (Microsoft)
The IEEE 802.1X Supplicant (or client) is the network access device requesting LAN services. The
Authenticator is the network access point that has authentication enabled, and can be a wireless access
point or LAN switch ports. The Authentication server performs the authentication, permitting or denying
access to the network based on the client’s user name and password. The 802.1X standard specifies a
Remote Authentication Dial-in User Service (RADIUS) server that supports the following:
• RFC 2284 PPP Extensible Authentication Protocol (EAP)
• RFC 2865 that Remote Authentication Dial-In User Service (RADIUS)
• RFC 2869 RADIUS Extensions
Extensible Authentication Protocol (EAP) is the protocol that is used between the client and the
authenticator. The 802.1X standard specifies encapsulation methods for transmitting EAP messages.
Protocol Access Entity (PAE) is the 802.1X logical component of the client and authenticator that exchange
EAP messages.
Since 802.1X is a perimeter security technology, network administrators should continue to deploy existing
security policies to control network traffic. Port-based access control will deny unauthorized network access,
but it will not control network traffic from authorized users. This may be a concern for network administrators
that want to secure network areas with the use of existing methods including VLANs, ACLs or MAC filtering
where it is required.
Most 802.1X client implementations and some authenticator implementations use reserved group MAC
address to communicate. MAC Bridges that are aware of such reserved group addresses will not propagate
the EAPOL packets sent to such addresses. In these cases, the client will always be unauthorized because
the switch cannot receive EAP responses from it.
The switch port through which the authenticator (the IC35160) communicates with the RADIUS server
should be set to “Force Authenticated” or “No 802.1X”. Otherwise the authenticator cannot get a RADIUS
response and all clients will be unauthorized.
From the Security Menu, type x to access the 802.1X Configuration Menu.
51
Page 52

IntraCore 35160-T 802.1X Configuration Menu
802.1X Awareness : Enabled
SystemAuthControl : Disabled
1 8 9 16
Port Control: -------- --------
-: Force Authenticated M: Auto Mode (Multiple Host)
U: Force UnAuthenticated S: Auto Mode (Single Host)
F: First Come, First Serve (Single Host)
<Cmd> <Description>
x Toggle 802.1X Enable/Disable
s Toggle System Auth Control
c Set Port Control
a Display All Logical Port Status
p Display Logical Port Status By Port
t Set Timing Parameters
r Set RADIUS Parameters
h Legend Help
q Return to previous menu
root>
Port Control Settings
Asanté’s implementation of 802.1X extends the standard by using MAC based logical port support. Two new
port control modes, Auto Mode (Multiple Hosts) and First Come, First Serve (Single Host), are provided to
assist administrators in fine-tuning this security feature.
By default, 802.1X Awareness and SystemAuthControl are disabled and all switch ports are placed in “Force
Authenticated” state. For the SystemAuthControl to be enabled, 802.1X awareness must also be enabled.
Legend Name Description
802.1X
Awareness
SystemAuth
Control
M Auto Mode (Multiple
S Auto Mode (Single
F First Come, Fist
To set Port Control, type c in the 802.1X Configuration Menu. Type the letter of the corresponding setting
and press Enter.
Enabled The switch recognizes 802.1X packets and will not forward packets
with an 802.1X reserved MAC address.
Disabled The switch isn’t 802.1X aware and authorizes all packets.
Enabled The 802.1X protocol will be enabled on each individual port according
to its own Port Control settings.
Disabled The switch works as if there is no 802.1X support, and all ports work
as if they are in ForceAuthenticated mode.
The traffic to or from multiple hosts through this port is allowed or
Hosts)
Host)
Serve
blocked by 802.1X protocol operation. The hosts are differentiated by
their MAC addresses. All hosts are blocked or unblocked
independently.
The traffic to or from multiple hosts through this port is allowed or
blocked by 802.1X protocol operation. The hosts are differentiated by
their MAC addresses. If any host is authenticated through this port,
then all hosts that attached to the same port are authenticated too.
The traffic to or from multiple hosts through this port is allowed or
blocked by 802.1X protocol operation. The hosts are differentiated by
their MAC addresses. If any host is authenticated, then all other hosts
that attached to the same port are unauthenticated, (i.e. blocked).
52
Page 53

Setting Timers
To set the timing parameters, type t in the 802.1X Configuration Menu. After changing any of the parameters
listed below, the change will be noted in the top of the menu screen.
IntraCore 35160-T 802.1X Constant Configuration Menu
Quiet-period <0..65535,default=60> : 60
Tx-period <0..65535,default=30> : 30
Supplicant-timeout <1..300,default=30> : 30
Server-timeout <1..300,default=30> : 30
MaxReq <1..10,default=2> : 2
ReAuthMax <1..10,default=2> : 2
ReAuth-period <1..N,default=3600> : 3600
<Cmd> <Description>
e Quiet-period
t Tx-period
p Supplicant-timeout
s Server-timeout
m MaxReq
a ReAuthMax
r Reauth-period
q Return to previous menu
root>
The Quiet-period is the time the authenticator (the IC35160) will wait, if the client is not successfully
authenticated, before allowing the client to try again. The default is set to 60 seconds. To adjust the quietperiod, type e in the Constant Configuration Menu.
The Tx-period is the time the authenticator will wait, while waiting for response to identity request, before
retransmitting the identity request message. The default is set to 30 seconds. To adjust the Tx-period, type t
in the Constant Configuration Menu.
The Supplicant-timeout is the time the authenticator must wait before determining that timeout is occurred
while waiting for client response. The default is set to 30 seconds. To adjust the Supplicant-timeout, type p
in the Constant Configuration Menu.
The Server-timeout is the time the authenticator must wait before determining that timeout is occurred while
waiting for the authentication server response. The default is set to 30 seconds. To adjust the Servertimeout, type s in the Constant Configuration Menu.
The MaxReq is the maximum number of times used to re-transmit a request message to the client before it
times out. The default value is 2 times. To adjust the MaxReq value, type m in the Constant Configuration
Menu.
The ReAuthMax is the number of re-authentication attempts that are permitted before the authorized client
becomes unauthorized. The default value is 2 attempts. To adjust the ReAuthMax value, type a in the
Constant Configuration Menu.
The ReAuth-period is the time used by authenticator to determine when re-authentication of the client takes
place. The default is set to 3600 seconds. To adjust the ReAuth-period, type r in the Constant Configuration
Menu.
53
Page 54

Setting RADIUS Parameters
To enter the802.1X RADIUS Configuration Menu, type r in the 802.1X Configuration Menu. Use the
command letters to configure the corresponding values for the RADIUS server on your network.
IntraCore 35160-T 802.1X RADIUS Configuration Menu
Radius Server IP : 192.168.0.1
Shared Key : radius-key
NAS-Identifier : IntraCore 35160-T BF-00-46
Called-Station-Id : 00-00-94-BF-00-46
Server Port : 1812
<Cmd> <Description>
s RADIUS Server IP
k Shared Key
n NAS-Identifier
p RADIUS Port
q Return to previous menu
root>
The following lists the default values:
• Radius Server IP: 192.168.0.1
• Shared Key: radius-key
• NAS-Identifier: this value is the switch model plus the last three bytes of the switch’s MAC address
• Called-Station-Id: this value is the MAC address of the switch.
• Server Port: 1812
54
Page 55

4.3 VLAN Management
A virtual LAN, or VLAN, is a logical grouping that allows stations to communicate as if they were physically
connected to a single LAN, independent of the actual physical configuration of a network. The IntraCore
35160 supports port-based VLANs, in compliance with the IEEE 802.1Q standard. The following sections
describe how to configure and manage VLANs on the switch. For more information on VLANs, see Chapter
7 Switching Concepts.
4.3.1 VLAN Specifications for the IntraCore 35160 Series
The switch supports the following features of the IEEE 802.1Q standard:
• Port-based VLAN management
• Up to 1024 manually-configurable VLANs
• Default VLAN
• VLAN creation and deletion
• VLAN port member addition and deletion
• VLAN untagged set addition and deletion
• Configurable VID range: 2 to 4094
• Port VID configurable range: 1 to 4094
• Port ingress filtering
• Port admit frame type
• Independent VLAN learning (IVL)
• Shared VLAN learning (SVL)
• GVRP for dynamic VLAN learning (to be supported; later versions)
• Single STP (Spanning Tree Protocol) spanning multiple VLANs
• SNMP-based VLAN management
Other VLAN Features of the switch
• VLAN management security
• VLAN MAC address insertion and removal
• Console UI management of VLANs
• Web interface management of VLANs
The management operations allowed are as follows:
• Creation
• Deletion
• Name configuration
• VID change configuration
• Adding and deleting port members
• Adding and deleting untagged sets
• Sharing and unsharing VLANs
• Inserting and removing MAC addresses
• Toggling management access
To access the VLAN Management Menu, type v in the Configuration Menu. A screen similar to the following
appears:
55
Page 56

IntraCore 35160-T VLAN Management Menu
VLAN Version: 1 VLAN Type: Port Based
Max. Supported VLAN ID: 4094 Max. Supported VLANs: 1024
Number of VLANs Configured: 64 Number of Active VLANs: 64
<Cmd> <Description>
v VLAN Group Static Configuration
p VLAN Port Attribute Configuration
d Display VLAN Groups Summary
a Display Port VLAN Attribute Summary
r Reset VLAN Configuration to Factory Default
q Return to previous menu
Command>
4.3.2 Configuring Static VLAN Groups
To access the VLAN Group Static Configuration Menu, type v in the Configuration Menu to access the
VLAN Management Menu, then type v again to access the VLAN Group Static Configuration Menu. A
screen similar to the following appears:
IntraCore 35160-T VLAN Group Static Configuration Menu VID:[0001]
Name: Default VLAN Created By: Mgmt
Mgm Access: Enable Status: Active
Port List 1 8 9 16
======== ========
++++++++ ++++++++ +: static
d: dynamic
-: Not Member
<Cmd> <Description> <Cmd> <Description>
c Create VLAN r Remove VLAN
e Set VLAN Name t Toggle Mgmt Access
m Move ports to this VLAN d Delete Port Members
o Overlap Ports To This Vlan f Display Vlan-Grp Information
l Toggle To Vlan-prt Config Menu
Command>
S)elect VID N)ext VLAN P)rev VLAN H)elp Q)uit
Navigate to the desired VLAN to configure by typing a command (s, n, or p) as shown at the bottom of the
screen. With the Select command, select a VLAN by its VLAN ID (VID); type the VID of an existing VLAN, or
the VID of a VLAN you will create.
Creating a VLAN
Follow the steps below to create a new VLAN:
1. Type c from the VLAN Group Static Configuration Menu.
2. Type s to select the VLAN, and then enter the VLAN ID (VID) that has been chosen for use. Notice
that the VID for an unused VLAN is 0000.
3. Press Enter.
4. Type e to set the VLAN name (up to 32 characters) and press Enter.
5. Type m to select the ports to be assigned the VLAN.
To make more than one assignment, separate each one with a comma. For example, 8,11
specifies ports 8 and 11. To specify a range of ports, use a hyphen. For example, 1-3, 8, 11
specifies ports 1, 2, 3, 8, and 11. See Help for more information about specifying units and ports.
56
Page 57

Removing a VLAN
To remove the VLAN, from the VLAN Group Static Configuration Menu, type r.
Enabling and Disabling Management Access
The IntraCore 35160 supports configurable management access for VLANs. By default, management
access is enabled, and all devices connected to the switch in a VLAN can communicate with the switch
management agent.
Important! Management access for a VLAN can be disabled. If security is a concern for members of a
particular VLAN, disabling management access for that VLAN will prevent any member of that VLAN from
attempting to change the switch’s configuration.
To enable or disable management access for this VLAN, from the VLAN Group Static Configuration Menu,
type s to select the VLAN, then type t to toggle management access.
Important! DO NOT disable Management Access if you are using only the default VLAN.
Adding/Moving Port Members
To add ports as members of the VLAN, from the VLAN Group Static Configuration Menu, type m. Follow the
instructions on the screen to enter the port number to assign to the VLAN. Adding a port to a VLAN does not
affect the port’s status on any other VLAN.
Deleting Port Members
To delete ports as members of the VLAN, from the VLAN Group Static Configuration Menu, type d. Follow
the instructions on the screen to enter the port number to delete from the VLAN. Deleting a port from a
VLAN does not affect the port’s status on any other VLAN.
4.3.3 Advanced Static VLAN Configuration
To specify Tagging or No Tagging for a Port, type l from the VLAN Group Static Configuration Menu. This
accesses the VLAN Port Configuration Menu. Next, type e to select Advanced Configuration Menu, as
shown on the following screen:
IntraCore 35160-T VLAN Advanced Port Configuration Menu Port:[01]
Port VLAN ID (PVID): 0001
Acceptable Frame Type: All Frames
Port Ingress Filtering: Disabled
Port Type: Normal
VLAN Membership : 0001u
<Cmd> <Description>
f Toggle Port Ingress Filtering Enable/Disable
t Toggle Acceptable Frame Type(All Frames/VLAN-Tagged Frames Only)
g Set Tag/Untag Ports
q Return to previous menu
root>
S)elect port N)ext port P)rev port
Specifying Tagging or No Tagging for a Port
Each VLAN maintains a list of ports that do not send tagged frames. When adding a port member to a
VLAN, it is added to the untagged set by default. This means the frames sent out on this port will be
untagged. Type s to select the port number, and then type g to set the port to send only tagged frames for
any given VLAN.
57
Page 58

4.3.4 Configuring VLAN Port Attributes
To configure port attributes, type p in the VLAN Management Menu (or l in the VLAN Group Static
Configuration Menu). This accesses the VLAN port configuration menu, shown below. Navigate to the port
to configure by typing a command (s, n, or p), as shown at the bottom of the screen.
IntraCore 35160-T VLAN Port Configuration Menu
Port: [01] Port Name: <none>
Port VLAN ID (PVID): 0001 Port Type: Normal
Acceptable Frame Type: All Frames
Port Ingress Filtering: Disabled
VLAN Membership : 0001u
<Cmd> <Description>
c Change Port VLAN ID
a Add VLANs to Port
d Delete VLANs from Port
t Set Port Type (IEEE 802.1Q Trunk/ASANTE Trunk/Normal)
e Advanced Config Menu
r VLAN Group Static Config Menu
q Return to previous menu
root>
S)elect port N)ext port P)rev port
Setting the Port VLAN ID
Port VLAN ID (PVID) is used for VLAN classification of incoming untagged frames and is meaning only
when a port is configured to receive both untagged and tagged frames. It is used to assign untagged frames
to the VLAN identified by the PVID.
By default, each port on the switch has a PVID of 1 (the default VLAN). The allowed PVID range is 1 to
4094. For ports that are configured to receive only tagged frames, the PVID is meaningless and the port is
assigned a PVID of 4095.
For ports that are members of more than one VLAN, received frames are assigned as follows:
• A tagged frame is forwarded to the VLAN matching the VID in the tag field of the frame
• An untagged frame is forwarded to the VLAN matching the PVID
To set the VLAN ID for the port (PVID), from the VLAN Port Configuration Menu, type c. Enter the number to
be assigned (from 1–4094). Press Enter when done.
Adding and Deleting VLANs from the Port
To add or delete VLANs assigned to a port, type a to add, or d to delete from the VLAN Port Configuration
Menu. Follow the instructions on the screen.
Enabling and Disabling Port Ingress Filtering
By default, a port will accept and forward tagged frames whether or not the port is a member of a VLAN
matching the VID of the tagged frame. If ingress filtering is enabled, incoming tagged frames are forwarded
only if the port is a member of the VLAN matching the VID of the tagged frame. All other frames are dropped
and no addresses will be learned. To enable or disable ingress filtering on the port, type e to access the
Advanced Configuration submenu, and then type f to toggle port ingress filtering.
Configuring Port Receive Frame Type
By default, all ports on the switch receive both 802.1Q tagged frames and untagged frames. A port may be
configured to receive only 802.1Q tagged frames. If a port is configured to receive only tagged frames, any
58
Page 59

untagged frames received by the port are dropped and the source address of the untagged frames is not
learned.
Incoming tagged frames are forwarded to the VLAN whose VID is included in the tag header of the frame.
See “Enabling and Disabling Port Ingress Filtering” in this chapter for more information about the forwarding
and filtering of received tagged frames. To toggle the port between receiving all frames and receiving only
tagged frames, from the VLAN Port Configuration Menu, type e to access the Advanced Configuration
submenu, and then type t.
Setting Port Type
Select the port type. The switch is set at Normal by default.
4.3.5 Displaying a Summary of VLAN Groups
To view a summary of VLAN groups, type v in the Configuration Menu to access the VLAN Management
Menu, then type d to access the VLAN Group Summary. A screen similar to the following appears:
IntraCore 35160-T VLAN Group Summary
+-------+-------------------+-----------+----------------------------------+
|VLAN ID| VLAN Name |Mgmt Access| Port Membership |
+-------+-------------------+-----------+----------------------------------+
1 Default VLAN Enable 1-16
2 test2 Enable 4-8
3 test3 Enable 4-8
4 test4 Enable 4-8
5 test5 Enable 4-8
6 test6 Enable 4-8
7 test7 Enable 4-8
8 test8 Enable 4-8
9 test9 Enable 4-8
10 test10 Enable 4-8
11 test11 Enable 4-8
12 test12 Enable 4-8
13 test13 Enable 4-8
14 test14 Enable 4-8
15 test15 Enable 4-8
16 test16 Enable 4-8
17 test17 Enable 4-8
18 test18 Enable 4-8
S)elect VID Goto V)lan Index Vlan G)rp Menu Vlan Grp I)nfo Menu Q)uit N)ext Page
59
Page 60

4.3.6 Displaying a VLAN Port Summary
To view a unit port VLAN summary, type v in the Configuration Menu to access the VLAN Management
Menu, then type a to access the Port VLAN Attribute Summary. A screen similar to the one following will
appear. To view the summary for other units, type a command as shown at the bottom of the screen.
IntraCore 35160-T Port VLAN Info
======|======|===================|=============|=================|============|
Port | PVID | Vlan Membership |Accept Frames|Ingress Filtering| Port Type |
======|======|===================|=============|=================|============|
1 | 0001 | 0001u | All Frames | Disabled | Normal |
2 | 0001 | 0001u | All Frames | Disabled | Normal |
3 | 0001 | 0001u | All Frames | Disabled | Normal |
4 | 0001 | 0001u 0002u 0003u | All Frames | Disabled | Normal |
| | 0004u 0005u 0006u | | | |
| | 0007u 0008u 0009u | | | |
| | 0010u 0011u 0012u | | | |
| | 0013u 0014u 0015u | | | |
| | 0016u 0017u 0018u | | | |
| | 0019u 0020u 0021u | | | |
| | 0022u 0023u 0024u | | | |
| | 0025u 0026u 0027u | | | |
| | 0028u 0029u 0030u | | | |
| | 0031u 0032u 0033u | | | |
| | 0034u 0035u 0036u | | | |
| | 0037u 0038u 0039u | | | |
Q)uit N)ext Page Vlan G)rp Summ Vlan Port M)enu H)elp
4.3.7 Resetting VLAN Configuration to Defaults
To reset the security measures on the switch to the factory defaults, access the VLAN Management Menu
by typing v in the Configuration Menu. Then type r to reset all of the VLAN configurations that were
changed back to the factory-set defaults.
4.4 IP Multicast Traffic Management
Multicast traffic is a means to transmit a multimedia stream from the Internet (a video conference, for
example) without requiring a TCP connection from every remote host that wants to receive the stream. The
stream is sent to the multicast address, and from there it’s propagated to all interested parties on the
Internet.
Traditional IP communication allows a host to send packets to a single host (unicast transmission) or to all
hosts (broadcast transmission). IP multicast provides a third scheme, allowing a host to send packets to a
subset of all hosts (group transmission).
Multicast Addresses
Multicasts are sent to special IP addresses in the range from 224.0.0.0 through 239.0.0.0. These are also
called “Class D” addresses. The IP multicast address always begins with the four bits 1110 (which identifies
the address as a multicast). The remaining 28 bits of the multicast address specify the individual multicast
group.
When an end station wants to join in an IP multicast group, it binds the multicast address of that group to its
network interface. When a node is using an IP multicast address, it also uses an Ethernet multicast address.
Ethernet IP multicast addresses begin 01:00:5e. The remaining 24 bits are the lowest 24 bits of the IP
multicast address. A 1-to-1 mapping of IP multicast addresses to Ethernet multicast addresses does not
exist. When configuring a VLAN for multicast traffic, specify the Ethernet address for the multicast group
(see “Multicast Forwarding Database Configuration” in this chapter).
60
Page 61

IGMP
Communication on a LAN (between the end stations and the routers) is managed by the Internet Group
Management Protocol (IGMP). For complete information about IGMP, see RFC 1112, “Host Extensions...”
and RFC 2236, “Internet Group Management Protocol, Version 2” <ftp://ftp.isi.edu/in-notes/ rfc2236.txt>.
A router that supports multicast and IGMP sends periodic messages called “queries” on its LAN interfaces.
These queries inquire if any end stations want to join a multicast group. End stations signal their desire to
join the multicast group by responding with an IGMP “report.” By using a multicast routing protocol, such as
Protocol-Independent Multicast (PIM), routers maintain forwarding tables that they use to forward multicast
datagrams.
Packets delivered to members of the multicast group are identified by a single multicast group address. Any
host, regardless of whether it is a member of a group, can send to a group. However, only the members of a
group receive the message. Membership in an IP multicast group is dynamic; hosts can join and leave at
any time. There is no restriction on the location or number of members in a multicast group. A host can be a
member of more than one multicast group at a time.
IGMP Snooping
A traditional Layer-2 switch is unable to determine which end stations on the LAN are interested in which
multicast groups. To avoid unnecessary flooding, the switch may use IGMP Snooping. That means the
switch listens to IGMP messages to learn which ports want multicast traffic from which multicast groups. The
switch inserts the correct Ethernet multicast address into the forwarding table for the ports where an end
station has joined a multicast group.
4.4.1 Configuring IP Multicast Traffic Management
The Multicast Traffic Management Menu allows the manager to set up group transmission. To access the
Multicast Traffic Management Menu, type c in the Unicast Forwarding Database Configuration Menu. This
accesses a screen similar to the following:
IntraCore 35160-T IP Multicast Traffic Management Menu VID: [01]
IP Multicast Forwarding Database
--------------------------------
IP Multicast Address Count : 0
IGMP : [Disabled]
IGMP Query : [Disabled]
IGMP Proxy Report Forward : [Disabled]
Query Port Info: [+: Query Port -: Non-Query Port]
-------- --------
<Cmd> <Description>
i Toggle IGMP Enable/Disable
v Advanced IGMP Configuration
m IP Multicast Forwarding Database Configuration
r Reset IP Multicast Forwarding Database
d Display Group Addresses
a Display Group Addresses in All VLAN
q Return to previous menu
root>
S)elect VLAN N)ext VLAN P)rev VLAN
Enabling and Disabling IGMP Snooping
To enable or disable IGMP Snooping on the switch, from the Multicast Traffic Management Menu, type i to
toggle the status of IGMP Snooping.
61
Page 62

Advanced IGMP Configuration
To enable or disable transmitting query packets, set the query interval, or to enable or disable IGMP Proxy
Report Forward, type v in the IP Multicast Traffic Management Menu.
IntraCore 35160-T IP Multicast Advanced Configuration Menu VID: [01]
IGMP Query : [Disabled]
IGMP Query Interval : 120 seconds
IGMP Proxy Report Forward : [Disabled]
<Cmd> <Description>
r Enable/Disable Transmitting Query packets
i Set Query Interval
x Toggle IGMP Proxy Report Forward Enable/Disable
q Return to previous menu
root>
S)elect VLAN N)ext VLAN P)rev VLAN
Displaying a Summary of Group Addresses
To display a list of multicast group addresses for the current VLAN, from the IP Multicast Traffic
Management Menu, type d. This accesses a screen similar to the following:
+--------------------+-----------------+-----------------------------------+
| Multicast IP Addr | Action | Port Membership |
+--------------------+-----------------+-----------------------------------+
No entry was found
End of Summary, Quit
To display a list of all multicast group addresses, from the IP Multicast Traffic Management Menu, type a.
This accesses a screen similar to the following:
+-------------------+--------+------------+----------------------------------+
| Multicast IP Addr | VID | Action | Port Membership |
+-------------------+--------+------------+----------------------------------+
No entry was found
End of Summary, Quit
62
Page 63

4.4.2 IP Multicast Forwarding Database Configuration
The Multicast Forwarding Database lists addresses of multicast groups, and assigns them to specific
VLANs. It also lists the ports within a VLAN that can receive traffic from the multicast address.
To access the Multicast FDB Configuration Menu, type c in the Configuration Menu to display the IP
Multicast Traffic Management Menu, and then type m. A screen similar to the following will appear:
IntraCore 35160-T IP Multicast FDB Configuration Menu VID: [01]
IP Multicast Address: <none>
Created By: <none>
Group Member Info: [ s: Static, d: Dynamic, +: Vlan, -: Not Member ]
Port List 1 8 9 16
======== ========
++++++++ ++++++++
<Cmd> <Description>
o Add/Delete Ports
i Insert Multicast IP Addr
r Remove Multicast IP Addr
q Return to previous menu
root>
S)elect VLAN N)ext VLAN P)rev VLAN Select A)ddr Nex)t Addr Prev) Addr
Use the commands at the bottom of the menu to select a VLAN or Multicast Group address.
Adding Ports to the Selected Address
To add or delete ports belonging to the multicast group:
1. Select the VLAN that contains the ports and the address. Type s and enter the VID of the selected
VLAN.
2. Select the Multicast Group address. Type a and enter the multicast IP address.
3. Type o and follow the instructions.
Inserting a Multicast Group Address
Inserting an address adds that address to the list of Multicast Groups for the current VLAN. The addresses
begin 01:00:5e. The remaining 24 bits are the lowest 24 bits of the IP multicast address.
1. Select the VLAN to be assigned the new address. Type s and enter the VID of the selected VLAN.
2. Type i and follow the instructions to add the new address.
Removing a Multicast Group Address
1. Select a VLAN from which the address will be removed. Type s and enter the VID of the selected
VLAN.
2. Type r and follow the instructions to remove the address.
63
Page 64

Chapter 5. Web-Based Management
This chapter describes how to manage the switch by means of a Web browser, using Web pages to monitor
and configure the switch. Most of the options and functions provided by Web browser management are
similar to those of the Local Management Interface. For additional details about managing the switch, refer
to Chapter 3 Configuration, and Chapter 4 Advanced Management.
Important! To use Web browser management, the switch must be configured with an IP address. For
instructions on assigning an IP address to the switch, see Chapter 2.8 Changing the Password.
Important! The Web browser interface to the switch is disabled by default. To enable the Web browser
interface, use the User Interface Configuration Menu via a telnet session or console connection (see
Chapter 3.12 User Interface Configuration).
Accessing with a Web Browser
Once an IP address has been assigned to the switch and the Web browser interface has been enabled, use
a Web browser to manage the switch. Locate a computer that is attached to the same subnet as the switch.
To access the HTTP server:
1. Connect a computer with a functioning World Wide Web browser to the switch and open the
browser.
2. Type the switch IP address in the URL field, then press Enter.
3. Enter user name root and a password in the dialog box that opens. The password is the same as
the current console password (the default password is Asante).
Note: The user name and password are case-sensitive and must appear exactly as they are shown
here.
4. Press Enter.
The Web Browser Management Overview page appears, as shown below (screens may appear slightly
different than those pictured):
64
Page 65

The Web Browser Management Overview page contains a sidebar with 9 management option buttons, and
a view of the IntraCore front panel that displays real-time switch operating information, as well as contact
information for Asanté Technologies, Inc.
Note: The browser pages shown in this chapter are typical of those used for the IntraCore, and settings are
given only as examples. The user must configure the IntraCore with parameters that are specific to the
user’s application and site requirements.
Management Buttons
The buttons on the left provide the following options:
• Front Panel
• Genl Info (General Information)
• Port Config (Port Configuration)
• Span Tree (Spanning Tree Protocol Configuration)
• SNMP (Simple Network Management Protocol)
• Addr Table (IP/MAC Address Table)
• VLAN (Virtual LAN Configuration)
• Trunking
• Security
The following sections describe and explain the pages that are displayed when each of the buttons are
clicked.
5.1 Front Panel Button
This button opens (or refreshes) the Web Browser Management Overview page. This is the top-level or
opening page. The Web Browser Management Overview page was shown previously and contains the
following elements:
• Front panel display
• Port configuration table
5.2 Genl Info (General Information) Button
This button opens the switch’s General Information page, as shown in the following screen:
65
Page 66

The page has six sections, which are listed at the top of the page. To view another section, click a link at
the top of the page or scroll down.
5.3 Port Config (Port Configuration) Button
This button opens the Port Configuration page, which provides a comprehensive overview of the status of
each port on the IntraCore, as shown below.
To configure individual ports, click on the associated blue number in the left-hand margin to access that
port’s configuration page.
Configure the variables by choosing the desired option from each drop-down menu.
66
Page 67

5.4 Span Tree (Spanning Tree) Button
This button opens the Spanning Tree Protocol (STP) Configuration page, which shows the STP
Configuration of the switch, as shown below.
STP configuration is explained in Chapter 4 Advanced Management. Click the STP Port Configuration
button to display the STP Configuration settings for each port (see the port configuration page following), or
configure the ports all together (globally) from the right side of the page. Click Apply Changes to have the
new configuration take effect, or click the Restore button to restore the defaults.
Important! Do NOT configure any STP parameters without knowledge of and experience with the IEEE
802.1D specification.
67
Page 68

5.5 SNMP Button
This button displays the SNMP (Simple Network Management Protocol) page, as shown below.
See SNMP Configuration in Chapter 3 for an explanation of SNMP settings.
5.6 Addr (Address) Table Button
The Addr Table button opens the MAC and IP Address Table page, which displays two tables, as shown in
the following screen:
The top table displays the counts of IP and MAC addresses for each port. The lower table displays IP and
MAC addresses for either a particular port, or for all ports. The activity status (Entry) and the VLAN ID are
also displayed for each device.
68
Page 69

To see the MAC and IP addresses, the activity status, and the VLAN ID for the devices connected to a
particular port, click the port’s number in the top table. Use the Search boxes to search for either an IP or
MAC address on the switch.
5.7 VLAN Button
This button opens the VLAN Groups page, as shown on the following screen.
5.7.1 VLAN Configuration
VLAN Group - Create
To create a VLAN group, enter a VID and a name for the new VLAN, enable Mgmt Access for the VLAN and
click Apply.
The VLAN Groups page shows the VLANs created on the switch, and the ports that are assigned to each
VLAN. For more complete information about VLANs, see Chapter 4 Advanced Management and Chapter 6
SNMP Management. Click on the VLAN ID number to go to the VLAN Group configuration page, where a
port member can be added or removed, and also where the VLAN itself is modified or removed.
69
Page 70

5.7.2 Port Configuration
To configure the VLAN ports, click on the VLAN Ports link at the top of the VLAN Groups page.
Click on the port number to go to the VLAN Port configuration page, as shown on the following screen.
Here, the user can set the port type, assign a port VLAN ID, add or delete VLANs from the port, select
acceptable frame types, enable port ingress filtering. Click Apply Changes when finished. Restart the
switch for the changes to take effect.
Set Port Type
Select IEEE 802.1Q Trunk, Asanté Trunk, or Normal from the drop-down menu.
Port VLAN ID (PVID)
Enter the PVID. See Chapter 4 Advanced Management for more information.
Acceptable Frame Type
Select the frame-type from the drop-down menu that the port will accept: All Frames or VLAN-Tagged
Frames Only.
70
Page 71

Port Ingress Filtering
From the drop-down menu, select Disabled or Enabled. See Chapter 4 Advanced Management for more
information.
Tag/Untag Port Egress Type
Click Tag Port Egress Type to set the port to send tagged frames for any given VLAN. Click Untag Port
Egress Type to set the port to send untagged frames. See Chapter 4 Advanced Management for more
information.
5.8 Trunking Button
The IC35160 supports link aggregation (port trunking). This feature is used to combine two or more links
(ports) in order to increase the overall bandwidth of the link, thereby sharing or balancing the data load. Link
aggregation creates better redundancy and fault tolerance, as network traffic is dynamically distributed
across ports as links are added to the trunk. If a single cable goes down, the connection will not fail—
especially important for mission critical links and server connections. See Chapter 3 Configuration for more
information on port trunking.
5.9 Security Button
This button opens the Security page, which provides a summary of the security of each port on each switch,
as shown below.
71
Page 72

To access the configuration pages for individual ports, click on the respective port number in the left-hand
column. Select the Security Level from the drop-down menu (None, 1-New node trap, 2-Intruder lock port,
and 3-Intruder lock MAC).
72
Page 73

Chapter 6. SNMP Management
The IntraCore 35160 switch can be managed using a Simple Network Management Protocol (SNMP)
compatible management station running platforms such as HP OpenView or MG Soft’s MIB Browser.
6.1 SNMP Management Operations
A network management application is concerned with performance statistics gathered by the devices on the
managed network, in reading and changing current configuration information, and in receiving alerts of
unusual events.
The information is stored in a database, which is described by Management Information Base documents
(MIBs). Most of these MIBs are available from the Internet Engineering Task Force (IETF), the global body
that defines Internet standards. Many managed devices also include data that is described by a proprietary
MIB.
A managed device incorporates software called an agent. The agent is able to read the information in the
device, to update configuration information, and to communicate with a management application using a
standard protocol (SNMP).
The switch supports the following Management Information Bases (MIBs):
1. MIB II: Management Information Base for Network Management of TCP/IP based Internets (RFC 1213).
2. Ethernet Interface MIB: Definitions of Managed Objects for the Ethernet-like Interface Types (RFC
1643).
3. Bridge MIB: Definitions of Managed Objects for Bridges (RFC 1493).
4. RMON MIB: Remote Network Monitoring Management Information Base (RFC 1757). Four groups are
supported:
• The Ethernet Statistics Group
• The Ethernet History Group
• The Alarm Group
• The Event Group
5. ASANTE-SWITCH-MIB: Enterprise MIB for management of features specific to the 35160. The MIB file
is available at Asanté’s website, www.asante.com.
6.2 The SNMP Protocol
The SNMP protocol is an industry-standard protocol communicating over the User Datagram Protocol,
exchanging Protocol Data Units (PDUs).
The five different types of SNMP PDUs are
1. Get Request – The manager requests the value of a variable from the agent.
2. Get-Next Request – The manager requests the value of the next variable in order from the agent.
This is often used to walk a MIB and retrieve many values one after the other.
3. Set Request – The manager tells the agent to change the value of a given variable.
4. Get Response – The agent returns the data for any of the above requests and confirms any
changes of value.
5. Trap – The agent sends data to the manager on its own initiative in response to predefined events
(such as hardware failure).
Note: The description above is accurate for version 1 of the SNMP protocol. Versions 2 and 3 add other
types of PDUs.
73
Page 74

6.3 Community Name and Security
SNMP v.1 was not designed to be a secure protocol. There is no true password, although the string known
as a community string does serve some of the same purposes.
SNMP-aware devices, such as this switch, often ship with well-known community strings. For this reason, it
is important that the manager change the default community strings before putting the switch on a network.
The 35160 Series switches improve on normal security by requiring the management station to appear in
the SNMP host table before the agent will recognize the manager.
6.4 The MIB Tree
When the SNMP was designed, a formal structure for creating new management objects was created. A
tree represents the structure: nodes in the tree are represented as strings of numbers separated by periods.
The three components of the tree are
1. The unnamed root of the tree contains a set of characters common to all MIB objects located
beneath the root. Objects beneath unnamed are said to be in that root’s domain.
2. A sub-tree contains a subset of the information available at the root. A sub-tree may also serve as
a root and have sub-trees of its own.
3. A leaf is a sub-tree with no additional sub-trees in its domain. A leaf represents a single MIB object
whose characteristics are unique from any other MIB object.
The group or organization that owns the sub-tree path assigns sub-tree numbers. The object names in the
path are unique all the way to the end of the path.
6.4.1 Name Space Path
The name space path is used by the SNMP protocol to define the piece of data that the manager wants.
The three main name space paths are
1. ISO (International Standards Organization): All sub-tree leaves are under the ISO control.
2. CCITT (Consultative Committee on International Telephony and Telegraphy): the group that sets
the standards for the interconnection of telephone equipment).
3. ISO-CCITT: Joint ISO and CCITT.
Each MIB object can be located by following a path from unnamed, through the sub-trees, to the leaf,
following the string of numbers. The part of the tree that is of interest to SNMP starts with the “internet”
node:
iso.org.dod.internet or 1.3.6.1
Interesting nodes under that one include:
• internet.mgmt.mib-2 or 1.3.6.1.2.1
• internet.private.enterprises or 1.3.6.1.4.1
Most of the industry-standard management objects appear under mib-2, while objects defined by individual
manufacturers appear under enterprises. Asanté Technologies, Inc. has 298 as its enterprise number
(1.3.6.1.4.1.298). At the time of this writing, nearly 10,000 enterprise numbers have been assigned. A list of
enterprise numbers can be found at ftp://ftp.isi.edu/in-notes/iana/assignments/enterprise-numbers/
.
74
Page 75

6.4.2 MIB Groups Supported
The following MIB-II groups are supported:
• The System group – General information about the managed system, such as contact information
and system name
• The Interfaces group – Information about each interface in the managed unit, and statistics for that
interface
• The Address Translation group – This group is deprecated, and should not be used
• The IP group – Contains counters for Internet Protocol Traffic. It includes as a sub-group the IP
Net-to-Media table, which tracks MAC-to-IP address mappings
• The ICMP group – Keeps statistics for Internet Control Protocol datagrams
• The TCP group – Keeps statistics for the Transmission Control Protocol, including a table of
established connections
• The UDP group – Keeps statistics for the User Datagram Protocol
• The EGP group – Keeps statistics on the Exterior Gateway Protocol
• The SNMP group – Keeps statistics on the Simple Network Management Protocol
The following Bridge MIBs are supported:
• The dot1dBase group – Contains the objects that apply to all types of bridges
• The dot1dStp group – Contains objects to manage the Spanning Tree Protocol
• The dot1dTp group – Contains objects that describe the bridge’s function as a transparent bridge
• The dot1dStatic group – Allows the creation and management of static entries in the bridge’s
forwarding table
The switch supports the Ethernet-like MIB:
• The Ethernet-like Statistics group – Records statistics relevant to Ethernet’s CSMA/CD access
method
The following RMON MIBs are supported:
• The Ethernet Statistics group – Records statistics for each Ethernet interface on the switch,
including records of frame sizes received
• The Ethernet History group – Collects statistics for each interface in buckets covering a user-
selectable time period
• The Alarm group – Allows the manager to set a threshold on a counter, and to configure a
response if the threshold is crossed in either a rising or falling direction
• The Event group – Allows the manager to configure a response when an alarm is triggered.
Responses include a trap or log entry
For more information on SNMP, refer to the SNMP software user’s manual.
75
Page 76

Chapter 7. Switching Concepts
A bridge is a hardware device used to connect multiple networks into one big network. However, when a
bridge receives a broadcast from one interface, it will forward the frame to all interfaces and flood the wire,
easily overwhelming the network.
The traditional solution to the problem of broadcast flooding is to use a router. The disadvantages of a router
include higher cost (the initial purchase price and higher maintenance costs) and slower rate pf processing
incoming data, leading to increased latency with decreased network performance. A switch (basically a
complex bridge) can process data at a faster rate than a router, and can limit unnecessary flooded traffic by
learning the addresses of the stations on the system. A switch can be used to create broadcasts domains
(via VLANs), and can be employed as an alternate solution to using routers to contain broadcast flooding.
While a bridge connects network segments via interfaces, a switch connects segments via its ports, like a
hub. But, unlike a hub, the ports of a switch can be configured to belong to a specific network, thereby
separating traffic, providing security and reducing overall network congestion.
The following sections provide brief explanations of some of the concepts related to switching. If more
information is required, please refer to networking books, online resources, or the MIS manager.
7.1 VLANs
A virtual local area network, or VLAN, is a logical grouping that allows stations to communicate as if they
were physically connected to a single LAN, independent of the actual physical configuration of a network. A
VLAN localizes flooded traffic to parts of LAN segments, rather than to an entire LAN, offering a simple
solution to network performance, security, and bandwidth utilization.
7.1.1 Port-Based VLANs
Port-based VLANs are the simplest of many VLAN approaches (others are based on MAC addresses,
protocol type, and higher layers that are not currently supported by the IEEE 802.1Q standard) that solve the
problem of unnecessary flooding. The switch currently supports port-based VLANs in compliance with the
IEEE standard.
A port-based VLAN allows the administrator to assign individual ports to a VLAN. Any broadcast (sent to
every user in the network) or multicast (sent to a pre-specified group of users) traffic received on a port in a
VLAN is limited by the VLAN boundaries so that only workstations whose ports are members of the same
VLAN see those frames.
7.1.2 VLAN ID and Tagged Frames
The IntraCore 35160 supports 1024 manually configurable VLANs. Each VLAN is identified by a 12-bit (1-
4095) VLAN ID (VID). No two VLANs may have the same VID if they reside on the same switch. However,
by assigning the same VID to VLANs on multiple switches, the broadcast domain may be extended over a
large network. The switch is shipped with a single default VLAN, with a VID of 0.
In a network with only one switch, the switch itself keeps track of which ports belong to which VLAN. In a
network with multiple switches, the information about which VLAN an Ethernet frame belongs to must be
sent along with the frame. This is done by inserting a tag field, as defined in IEEE 802.1Q, in the frame. The
tag includes a VLAN ID field that matches the VID assigned to a VLAN on the switch. The switch will then
assign the frame to the VLAN represented by the tag field.
A port map is used to specify which ports are members of each VLAN. Each VLAN has a set of untagged
ports that specifies which port members of the VLAN transmit only untagged frames. The untagged set can
be a subset of the port map, or it can be the same as the port map. If a port is in the VLAN port map and not
in the VLAN untagged set, that port transmits tagged frames only. The switch includes all ports in its
untagged set by default.
76
Page 77

7.1.3 Port VLAN ID
To allow untagged packets to participate in a VLAN, a Port VLAN ID (PVID) must be assigned in the
relevant port(s).
Each port on the switch has a default PVID of 1 (the default VLAN) and will receive both tagged and
untagged frames. The manager may configure the PVID of any desired port (the range is 1 to 4094). For
ports that have been configured to receive only tagged frames, the PVID is meaningless. If a port is
configured to receive only tagged frames, then any untagged frame received will be dropped. Tagged
frames that are received will be forwarded to the VLAN represented by the VID in the tag header of the
frame.
7.2 Spanning Tree Protocol
The Spanning Tree Protocol (STP) is part of the IEEE 802.1D standard. It provides for a redundant network
without the redundant traffic through closed paths. For example, in a network without spanning tree protocol,
the same message will be broadcast through multiple paths, which may start an unending packet-passing
cycle. This in turn causes a great amount of extra network traffic, leading to network downtime. The STP
reduces a network like this, with multiple, redundant connections, to one in which all points are connected,
but where there is only one path between any two points (the connections span the entire network, and the
paths are branched, like a tree).
7.2.1 How It Works
All of the bridges (a switch is a complex bridge) on the network communicate with each other using special
packets of data called Bridge Protocol Data Units (BPDUs). The information exchanged in the BPDUs allows
the bridges on the network to do the following:
• Elect a single bridge to be the root bridge
• Calculate the shortest path from each bridge to the root bridge
• Select a designated bridge on each segment, which lies closest to the root and forwards all traffic
to it
• Select a port on each bridge to forward traffic to the root
• Select the ports on each bridge that forward traffic, and place the redundant ports in blocking states
7.2.2 Spanning Tree Parameters
The operation of the spanning tree algorithm is governed by several parameters. The manager should
attempt to set these parameters only if they have experience with the 802.1D specification. To set the
parameters listed below, access the Spanning Tree/Bridge Settings screen (console or telnet), or the
Spanning Tree/Bridge Settings page (in the Web interface).
Bridge Priority
Setting the Bridge Priority to a low value will increase the likelihood that the current bridge will become the
root bridge. If the current bridge is located physically near the center of the network, decrease the Bridge
Priority from its default value of 32768 to make it become the root bridge. If the current bridge is near the
edge of the network, it is best to leave the value of the Bridge Priority at its default setting.
Hello Time
This is the time period between BPDUs transmitted by each bridge. The default setting is 2 seconds.
Maximum Age
Each bridge should receive regular configuration BPDUs from the direction of the root bridge. If the
maximum age timer expires before the bridge receives another BPDU, it assumes that a change in the
topology has occurred, and it begins recalculating the spanning tree. The default setting for Maximum Age is
20 seconds.
77
Page 78

Forward Delay
After a recalculation of the spanning tree, the Forward Delay parameter regulates the delay before each port
begins transmitting traffic. If a port begins forwarding traffic too soon (before a new root bridge has been
selected), the network can be adversely affected. The default value for Forward Delay is 15 seconds.
Note: The above parameters (Hello Time, Maximum Age, and Forward Delay) are constrained by the
following formula:
(Hello Time + 1) <= Maximum Age <= 2 x (Forward Delay – 1)
In general, reducing the values of these timers will make the spanning tree react faster when the topology
changes, but may cause temporary loops as the tree stabilizes in its new configuration. Increasing the
values of these timers will make the tree react more slowly to changes in topology, but will make an
unintended reconfiguration less likely. All of the bridges on the network will use the values set by the root
bridge. It is only necessary to reconfigure that bridge if changing the parameters.
7.2.3 Spanning Tree Port Configuration
To set the Port Priority and Port Path Cost values for STP, access the Spanning Tree/Port Settings screen
(console or telnet), or the Spanning Tree/Port Settings page (in the Web interface).
Port Priority
The port priority is a spanning tree parameter that ranks each port, so that if two or more ports have the
same path cost, the STP selects the path with the highest priority (the lowest numerical value). By changing
the priority of a port, it can be more, or less, likely to become the root port. The default value is 128, and the
value range is 0 – 255.
Port Path Cost
Port path cost is the spanning tree parameter that assigns a cost factor to each port. The lower the assigned
port path cost is, the more likely that port will be accessed. The default port path cost for a 10 Mbps or 100
Mbps port is the result to the equation:
Path cost = 1000/LAN speed (in Mbps)
Therefore, for 10 Mbps ports, the default port path cost is 100. For 100 Mbps ports, it is 10. To allow for
faster networks, the port path cost for a 1000 Mbps port is set by the standard at 4.
7.3 Full Duplex, Flow Control, and Auto-negotiation
These switching concepts are all related to maintaining a high rate of data transmission necessary for an
efficient network.
7.3.1 Full Duplex
Traditionally, Ethernet has operated in half-duplex mode, meaning that a node or workstation could either
send or receive data, but not both simultaneously. Now, with the use of structured wiring using Unshielded
Twisted Pair cabling and switched Ethernet, a workstation may operate in full-duplex mode, sending and
receiving data at the same time. The ability to use full-duplex mode can potentially double the basic capacity
of the channel, so that a Fast Ethernet connection may carry up to 200 Mbps.
In order to use full-duplex, an Ethernet station must have separate channels to send and receive data. UTP
cabling provides this, whereas the older coaxial Ethernet did not. The station must also have a direct
connection to a switched port. A station connected to only a repeater cannot operate in full-duplex mode.
Also, it is critical that both ends of the Ethernet link “agree” on whether the link will operate in full- or halfduplex. See 7.3.3 Auto-Negotiation for more details.
78
Page 79

7.3.2 Flow Control
With a link operating at a high data rate, a switch may experience occasional limitations in the buffer space
used to store Ethernet frames before forwarding them. In this situation, if the sending station continues to
send frames, the switch will have no option but to discard the frames. This may quickly lead to unacceptable
delays in upper-level protocols.
In order to avoid unnecessarily dropping frames, a switch may implement Flow Control. Flow control is a
feature that allows the switch to recognize when the buffer space is limited, and to send an Ethernet PAUSE
frame to its link partner to cease transmission for a specified period. As with a full-duplex link, both ends of
the link must understand flow control for the mechanism to operate properly.
7.3.3 Auto-Negotiation
As discussed previously, make sure that both ends of a link agree about the duplex and flow control settings
to be used (as well as the speed of the connection). In even a mid-sized network, making sure that all the
links agree on all these parameters would be too big a job if the network manager had to configure every
connection manually.
To make configuration as automatic as possible, the IEEE has defined standards so that most connections
can be automatically configured by the hardware, without manual intervention. Devices can agree on the
speed, duplex mode, and flow control settings for each individual connection. The possible links states are
ranked:
1000 Mbps/Full Duplex
1000 Mbps/Half Duplex
100 Mbps/Full Duplex
100 Mbps/Half Duplex
10 Mbps/Full Duplex
10 Mbps/Half Duplex
With auto-negotiation, the link partners will configure the link to operate at the highest speed and duplex
state that both support.
Auto-negotiation is supported on IntraCore switches on all UTP ports.
Note: If an Ethernet device that is capable of auto-negotiation is connected to a port that has autonegotiation turned off, the auto-negotiating device will default to half duplex mode. If the port that is not using
auto-negotiation is set to full duplex, the link will have a duplex mismatch, and will be so slow that it may be
unusable. If an Ethernet port has been configured to operate in full-duplex mode, configure the link partner
to also operate in full-duplex. It is almost always better to let auto-negotiation take care of this.
79
Page 80

Appendix A. Troubleshooting
In the unlikely event the switch does not operate properly, follow the troubleshooting tips below. If more help
is needed, contact Asanté’s technical support at support@asante.com.
Problem Possible Solutions
The Power LED is not lit.
The Emergency Power LED is not lit.
The 10/100/1000 port Link LEDs are not lit. Check the cable connections. Make sure the
The GBIC Link LED is not lit. Check the GBIC connector. Make sure the cables are
Cannot establish communication to another
device (switch, router, workstation, etc.).
Cannot auto-negotiate the port speed. Make sure that auto-negotiation is supported and
LED will turn off during system initialization. Check
the power connection. Plug the power cord into
another known working AC outlet.
The primary power supply has failed. Install the
optional emergency power supply and have the
primary power supply serviced as soon as possible.
This is normal. The emergency power supply LED will
only light if the primary power supply fails and the unit
takes over powering the switch.
connectors are seated correctly in each port, and that
the correct type of cable is used in each port. See
Chapter 2.6 Connecting to the Network for more
information.
inserted correctly, with the Transmit (Tx) connector
on one side of the link connected to the Receive (Rx)
connector on the other side of the link.
• Make sure the Link LED for the port in use is on.
Make sure the correct cable type is used. See
Chapter 2.6 Connecting to the Network for more
information on cabling procedures
• Make sure the IP address, subnet mask, and
VLAN membership of the switch are correct
• Make sure the switch port and the device are both
in the same VLAN
• Try to connect to a different port
enabled on both sides of the link (in both devices).
80
Page 81

Appendix B. Features and Specifications
The sections below list the features and product specifications for the IntraCore 35160 Series Gigabit
Ethernet switches.
B.1 Features
The following is a summary of the management features of the 35160 Series switches:
Graphical User Interface: HTML browser-based with password protection for local and remote
management
Command Line Interface: Menu-driven telnet or in-band (via front panel console port)
Front Panel: Graphical representation of unit with real-time network status
General Information: Software version, dual firmware banks. Admin, system, and bootstrap
information. Switch address and system clock
Statistics: User-configurable graph types (bar chart, line chart, table) and counters (since
up, rate, since reset) for RX/TX/Error for each port and unit. Table view also
shows current, peak average, and total packets for each port
Port Configuration: State (forwarding, blocking), status (enabled, disabled), link status (up, down)
and mode (speed, duplex), auto-negotiation, flow control, priority, trunking, and
security. Detailed statistics include TX counters (total frames, total bytes,
dropped frames), RX counters (total frames, total bytes, unicast, non-unicast),
frame counters (multicast, broadcast, by packet sizes), collisions and errors
(undersized, oversized, CRC/alignment, fragments, FCS, late events, total)
Spanning Tree: IEEE 802.1D supported
IEEE 802.1S (Spanning Tree per VLAN) future support
IEEE802.1 W (Rapid Spanning Trees) future support
SNMP: Separate read and write communities, and trap authentication. Four configurable
trap receivers (IP address and community)
Address Table: Per-port counts for MAC and IP addresses. Integrated utilities to sort or search
for specific IP/MAC address. Address table shows unit, port, entry (dynamic,
static, or multiple), IP address, MAC address, and VID
VLAN: Configurable PVID, frame type, and ingress filtering
RMON: Embedded remote monitoring supports four groups (history, statistics, alarms,
and events)
Port Security: IEEE 802.1X port-based network access control (Microsoft Windows XP and
Windows 2000 + SP4 only). Station move detection and duplicate IP address
detection with one (1) trusted address per port
Supported OS: Windows 95/98/Me/NT/2000/XP, Mac OS 9 and higher, and Linux
B.2 Specifications
Connectors: Gigabit Ethernet with Auto-Uplink
for GBIC transceiver module
Console: Serial (RS-232): DB9
Status Indicators: Separate link-activity, speed (10/100/Gigabit) and duplex (full or half) LEDs for
each port; system power, emergency backup power
Physical Characteristics
Dimensions: IC35160-T: 17.5 x 10.0 x 1.8 inches (390 x 220 x 39 mm)
IC35160-G: 17.5 x 10.0 x 2.7 inches (390 x 220 x 58 mm)
Mounting: Install into a standard 19-inch rack (1 RU height) or placed on a desktop;
rackmount kit and rubber feet included
™
(10/100/1000BaseTX): RJ-45 or GBIC holder
81
Page 82

Environmental Range
Operating Temperature: 32º to 104º F (0º to 40º C)
Relative Humidity: 10% to 90% non-condensing
Power: Auto-switching, 110-240 VAC, 50/60 Hz; grounded IEC cord
Redundant DC Power: 12VDC Auto-switching from main 110/240 VAC for emergency backup
Standards Compliance
IEEE: IEEE 802.1D spanning tree and bridge filters
IEEE 802.1p prioritization (class of service)
IEEE 802.1Q virtual LAN (VLAN)
IEEE 802.1X port-based access control
IEEE 802.3x full duplex and flow control
IEEE 802.3z 1000BaseSX over 50 micron multi-mode fiber; maximum distance
1,804 feet (550 meters)
IEEE 802.3ab 1000BaseT over Category 5 UTP (4 pairs); maximum distance
328 feet (100 meters)
IEEE 802.3u 100BaseTX over Category 5 UTP (2 pairs); maximum distance 328
feet (100 meters)
IEEE 802.3 10BaseT over Category 3 UTP (2 pairs); maximum distance 328 feet
(100 meters)
IETF: RFC 1155 SMI
RFC 1757 RMON
RFC 1157 SNMP
RFC 1493 Bridge MIB
RFC 1213 MIB II
Asanté Private MIB
Safety: UL 1950, CUL, TUV/GS
Emissions: FCC Class A, CE
Technical Support and Warranty
IntraCare
™:
Free technical support and advanced warranty support for 3 years. Includes free
telephone support, 24-hour support via web and ftp, complete product warranty
with second business day (within the United States) advanced replacement, and
software maintenance agreement.
AsantéCare
™
: Optional extended technical support and product warranty for 2 additional years.
See Appendix C FCC Compliance and Warranty Statements for more detailed information.
82
Page 83

Appendix C. FCC Compliance and Warranty Statements
FCC Compliance Statement
This equipment has been tested and found to comply with the limits for a Class A digital device, pursuant to
part 15 of the FCC Rules. These limits are designed to provide reasonable protection against harmful
interference when the equipment is operated in a commercial environment. This equipment generates, uses,
and can radiate radio frequency energy and, if not installed and used in accordance with the instruction
manual, may cause harmful interference to radio communications. Operation of this equipment in a
residential area is likely to cause harmful interference, in which case the user will be required to correct the
interference at his or her own expense.
Important Safety Instructions
Caution: Do not use an RJ-11 (telephone) cable to connect network equipment.
1. Read all of these instructions.
2. Save these instructions for later use.
3. Follow all warnings and instructions marked on the product.
4. Unplug this product from the wall outlet before cleaning. Do not use liquid cleaners or aerosol cleaners.
Use a damp cloth for cleaning.
5. Do not use this product near water.
6. Do not place this product on an unstable cart or stand. The product may fall, causing serious damage to
the product.
7. The air vent should never be blocked (such as by placing the product on a bed, sofa or rug). This
product should never be placed near or over a radiator or heat register. This product should not be
placed in a built-in installation unless proper ventilation is provided.
8. This product should be operated from the type of power source indicated on the marking label. If you
are not sure of the type of power available, consult your dealer or local power company.
9. This product is equipped with a three-wire grounding type plug, which is a plug having a third
(grounding) pin. This plug will only fit into a grounding type power outlet. This is a safety feature. If you
are unable to insert the plug into the outlet, contact your electrician to replace your outlet. Do not defeat
the purpose of the grounding type plug.
10. Do not allow anything to rest on the power cord. Do not place this product where people will walk on the
cord.
11. If an extension cord is used with this product, make sure that the total ampere ratings on the products
into the extension cord do not exceed the extension cord ampere rating. Also make sure that the total of
all products plugged into the wall outlet does not exceed 15 amperes.
12. Never push objects of any kind into this product through air ventilation slots as they may touch
dangerous voltage points or short out parts that could result in a risk of fire or electric shock. Never spill
liquid of any kind on the product.
13. Do not attempt to service this product yourself, as opening or removing covers may expose you to
dangerous voltage points or other risks. Refer all servicing to service personnel.
IntraCare Warranty Statement
Products: IntraCore 35160-T
IntraCore 35160-G
Duration: 3 years
Advanced Warranty United States: Second Business Day
Replacement: Other Countries: See your local distributor or reseller.
1. Asanté Technologies warrants (to the original end-user purchaser) the covered IntraCore products
against defects in materials and workmanship for the period specified above. If Asanté receives
notice of such defects during the warranty period, Asanté will, at its option, either repair or replace
products that prove to be defective. Replacement products may be either new or like-new.
2. Asanté warrants that Asanté software will not fail to execute its programming instructions, for the
period specified previously, due to defects in material and workmanship when properly installed
83
Page 84

and used. If Asanté receives notice of such defects during the warranty period, Asanté will replace
software media that does not execute its programming instructions due to such defects.
3. Asanté does not warrant that the operation of Asanté products will be uninterrupted or error free. If
Asanté is unable, within a reasonable time, to repair or replace any product to a condition as
warranted, customer would be entitled to a refund of the pro-rated purchase price upon prompt
return of the product.
4. Asanté products may contain remanufactured parts equivalent to new in performance.
5. The warranty period begins on the date of delivery or on the date of installation if installed by
Asanté.
6. Warranty does not apply to defects resulting from (a) improper or inadequate maintenance or
calibration, (b) software, interfacing, parts, or supplies not received from Asanté, (c) unauthorized
modification or misuse, (d) operation outside of the published environmental specifications for the
product, or (e) improper site preparation or maintenance. This warranty expressly excludes
problems arising from compatibility with other vendors’ products, or future compatibility due to thirdparty software or driver updates.
7. TO THE EXTENT ALLOWED BY LOCAL LAW, THE PREVIOUS WARRANTIES ARE EXCLUSIVE
AND NO OTHER WARRANTY OR CONDITION, WHETHER WRITTEN OR ORAL, IS
EXPRESSED OR IMPLIED AND ASANTÉ SPECIFICALLY DISCLAIMS ANY IMPLIED
WARRANTIES OR CONDITIONS OF MERCHANTABILITY, SATISFACTORY QUALITY, AND
FITNESS FOR A PARTICULAR PURPOSE.
8. Asanté will be liable for damage to tangible property per incident up to the greater of $10,000 or the
actual amount paid for the product that is the subject of the claim, and for damages for bodily injury
or death, to the extent that all such damages are determined by a court of competent jurisdiction to
have been directly caused by a defective Asanté product.
9. TO THE EXTENT ALLOWED BY LOCAL LAW, THE REMEDIES IN THIS WARRANTY
STATEMENT ARE THE CUSTOMER’S SOLE AND EXCLUSIVE REMEDIES. EXCEPT AS
INDICATED PREVIOUSLY, IN NO EVENT WILL ASANTÉ OR ITS SUPPLIERS BE LIABLE FOR
LOSS OF DATA OR FOR DIRECT, SPECIAL, INCIDENTAL, CONSEQUENTIAL (INCLUDING
LOST PROFIT OR DATA), OR OTHER DAMAGE, WHETHER BASED IN CONTRACT, OR
OTHERWISE.
Some jurisdictions do not allow the exclusion or limitation of incidental or consequential damages or
imitations on how long an implied warranty lasts, so the previous limitations or exclusions may not apply to
you. This warranty gives you specific legal rights, and you may have other rights, which vary from jurisdiction
to jurisdiction.
84
Page 85

Appendix D. Console Port Pin Outs
The console port is used to connect with a terminal using a serial modem RS-232C cable (available from
Radio Shack’s website, www.radioshack.com, catalog # 26-117). The setting is 9600-N81. The table below
lists the pin outs.
Pin Number Signal Name
1 CD Carrier Detect
2 RD Receive Data
3 TD Transmit Data
4 DTR Data Terminal Ready
5 SG Signal Ground
6 DSR Data Set Ready
7 RTS Request to Send
8 CD Carrier Detect
9 RI Ring Indicator
85
Page 86

Appendix E. Online Warranty Registration
Before calling Asanté Technical Support, please register the switch online at
www.asante.com/support/registration.html. By doing so, you’ll be entitled to special offers, up-to-date
information, and important product bulletins.
You may also register the switch by using the warranty card found in the printed Getting Started Guide.
86
Page 87

Appendix F. BootP Configuration
The switch is shipped with BootP support. If the network contains a BootP server configured with available,
valid IP addresses, BootP allows the switch to be configured automatically with an IP address when it is
connected to the network and is powered on.
Important! BootP configuration works only if switch does not have an IP address assigned to it.
Use the following procedure to set up BootP:
1. Make sure the network has a BootP server configured with a valid IP address entry for the switch.
2. When the switch is connected to the network and is powered on, it automatically transmits a BootP
request across the network (up to 10 times) until it receives a valid IP address from the BootP
server.
3. After an IP address is received, the switch can be managed via in-band access. For more
information, see Chapter 3 Configuration and Chapter 4 Advanced Management.
To verify that a valid IP address was received, try to “ping” the switch. If you can access the unit, it is
properly configured with an IP address.
Bootstrap Configuration
The Bootstrap Configuration Menu displays (and allows you to change) the bootstrap parameters used for
loading the software for the switch at startup, and for downloading a new version of software when one is
issued.
When switch is powered on, it loads its software via one of two methods: locally (via its internal flash
memory, which is the default setting) or remotely over the network.
Important! The default Load Mode setting for the switch is Local.
Image Banks
The switch has two banks to store its runtime software. The banks are referred to as bank 1 and bank 2.
Either of these banks may be the Boot Bank, which is the bank from which the runtime code will be loaded
the next time the switch is booted.
When downloading new runtime image codes, you may specify either of the two banks as the Destination
Bank in which the new code will be loaded.
Loading Software Locally
The switch will always boot locally unless you set it to boot load remotely (see “Loading Software Remotely”
below). It would then download the new image code and reset to load locally. To specify the Boot Bank that
the switch will use when it boots locally, use the following procedure:
1. Open the Bootstrap Configuration Menu by typing s in the Configuration Menu, and b in the System
Utility Menu.
2. Type a in the Bootstrap Configuration Menu if you need to toggle the Boot Bank setting for the next
boot. Typically, you will want to set the boot bank to be the one on which the latest version of the
Image resides.
The switch is now set to load software locally from its flash memory. This occurs whenever the unit is
powered on or reset.
87
Page 88

Loading Software Remotely
To set the switch to download its software over the network from a remote server, use the following
procedure:
1. Open the Local Bootstrap Configuration Menu by typing b in System Utility Menu.
2. Open the Remote Bootstrap Configuration Menu by typing r in the Local Bootstrap Configuration
Menu. The menu appears, as shown below.
IntraCore 35160-T Bootstrap Configuration Menu
Bank 1 Image Version/Date: 1.20B/Jun 17 2003 20:41:25 (Running)
Bank 2 Image Version/Date: 1.10 /May 20 2003 18:01:54
Load Mode: Remote
Boot Mode: BOOTP-TFTP
Boot Server IP: N/A
Boot File Name: N/A
Retry Count: 5
Boot Bank: 1
<Cmd> <Description>
b Set Boot Mode to BOOTP-TFTP
t Set Boot Mode to TFTP only
l Set Load Mode to LOCAL
s Set Boot Server IP Address
f Set Boot File Name
c Set Remote Boot Retry Count
a Toggle Boot Bank
o Commence Bootstrap Sequence
q Return to previous menu
root>
3. Type b to set the Boot Mode to BootP-TFTP, or type t to set Boot Mode to TFTP only. If you
choose BootP-TFTP mode, the options for setting the IP Address of the TFTP server and the Boot
File Name become unavailable; in this case, skip Steps 4–7 and go on to Step 8.
4. Type s in the Bootstrap Configuration Menu to select the option Set Boot Server IP Address.
5. At the prompt, type the IP address of the remote boot server that contains the switch’s software
image file. Then press Enter. The Bootstrap Configuration Menu appears.
6. Type f to select the option Set Boot File Name.
7. Type the software’s file name/network path at the prompt.
8. Press Enter.
Note: If you decide to use Local Load Mode rather than Remote, type I, and the Local Bootstrap
Configuration Menu appears.
The switch is now set to download its software remotely from the network. This will occur the next time the
unit is powered on or reset.
88
 Loading...