

Page 1
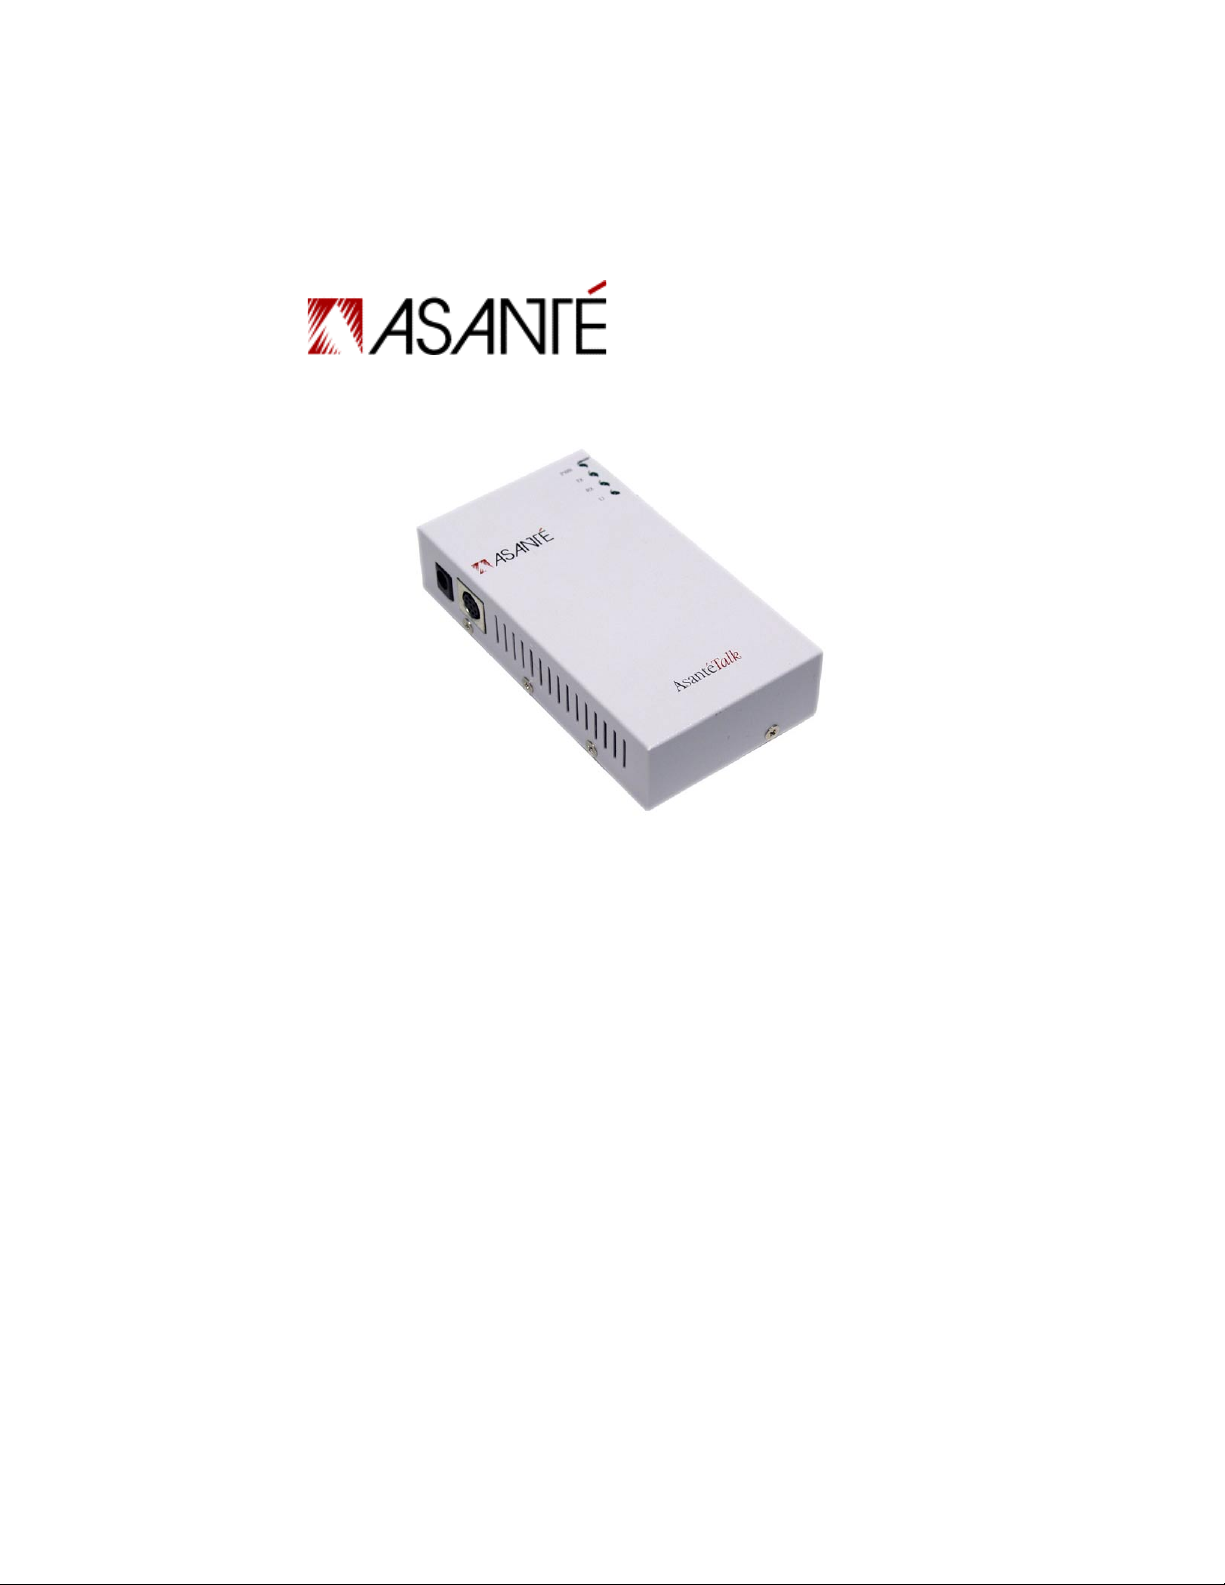
AsantéTalk
Ethernet to LocalTalk
Converter
User’s Manual
Page 2

Quick Start Guide
This section will guide you in setting up your AsantéTalk to your Macintosh computer.
Follow the steps below to set up a direct connection or LAN connection with the AsantéTalk:
SANTÉ
A
(Yellow cable - direct connection)
1. Open the side door to expose the ports found inside your computer.
2. Locate the Ethernet port inside the computer. Plug the yellow direct connect cable into the computer’s Ethernet port.
3. Plug the other end of the yellow direct connect cable into the AsantéTalk.
4. Plug the power adapter into the AsantéTalk and then into a power outlet.
5. Plug the white mini din-8 to mini din-8 cable into the Side B of the AsantéTalk.
6. Plug the other end of the mini din-8 cable into your LocalTalk
puter.
SANTÉ
A
(Silver cable - LAN connection)
1. Open the side door to expose the ports found inside your computer.
2. Locate the Ethernet port inside the computer. Plug a standard LAN cable into the
computer’s Ethernet port. Plug the other end of the standard LAN cable into a
hub or switch.
3. Plug the silver LAN cable into the AsantéTalk’s Ethernet port. Plug the other end
of the silver LAN cable into a switch or hub.
4. Plug the power adapter into the AsantéTalk and then into a power outlet.
5. Plug the existing LocalTalk network connection into Side B of the AsantéTalk.
6. If you have an network connection (i.e. cable modem, DSL, or T1 line) that connects your system to the Internet, you will need to temporarily disconnect it from
the network in order to set up the AsantéTalk and your printer.
DIRECT CONNECTION TO THE ETHERNET EQUIPPED MACINTOSH
T
ALK
®
TALK
CONNECTION TO THE ETHERNET EQUIPPED MACINTOSH
LAN
printer or com-
™
2
AsantéTalk Ethernet to LocalTalk Converter
Page 3

Table of Contents
Quick Start Guide 2
Chapter 1 Introduction 5
Chapter 2 Specifications 11
Chapter 3 Frequently Asked Questions 13
Chapter 4 Troubleshooting 21
Appendix A Online Warranty Registration and Card 33
User’s Manual
3
Page 4

4
AsantéTalk Ethernet to LocalTalk Converter
Page 5
Chapter 1 Introduction
AsantéTalk is designed to allow Apple Macintosh systems using the
on-board Apple Ethernet adapter to communicate with existing LocalTalk devices such as printers and other Macintosh computers.
The AsantéTalk connects a LocalTalk network (or printer) and an
Ethernet network (or your computer). After you have installed it on
both networks, devices on the two networks will be able to communicate through the AsantéTalk.
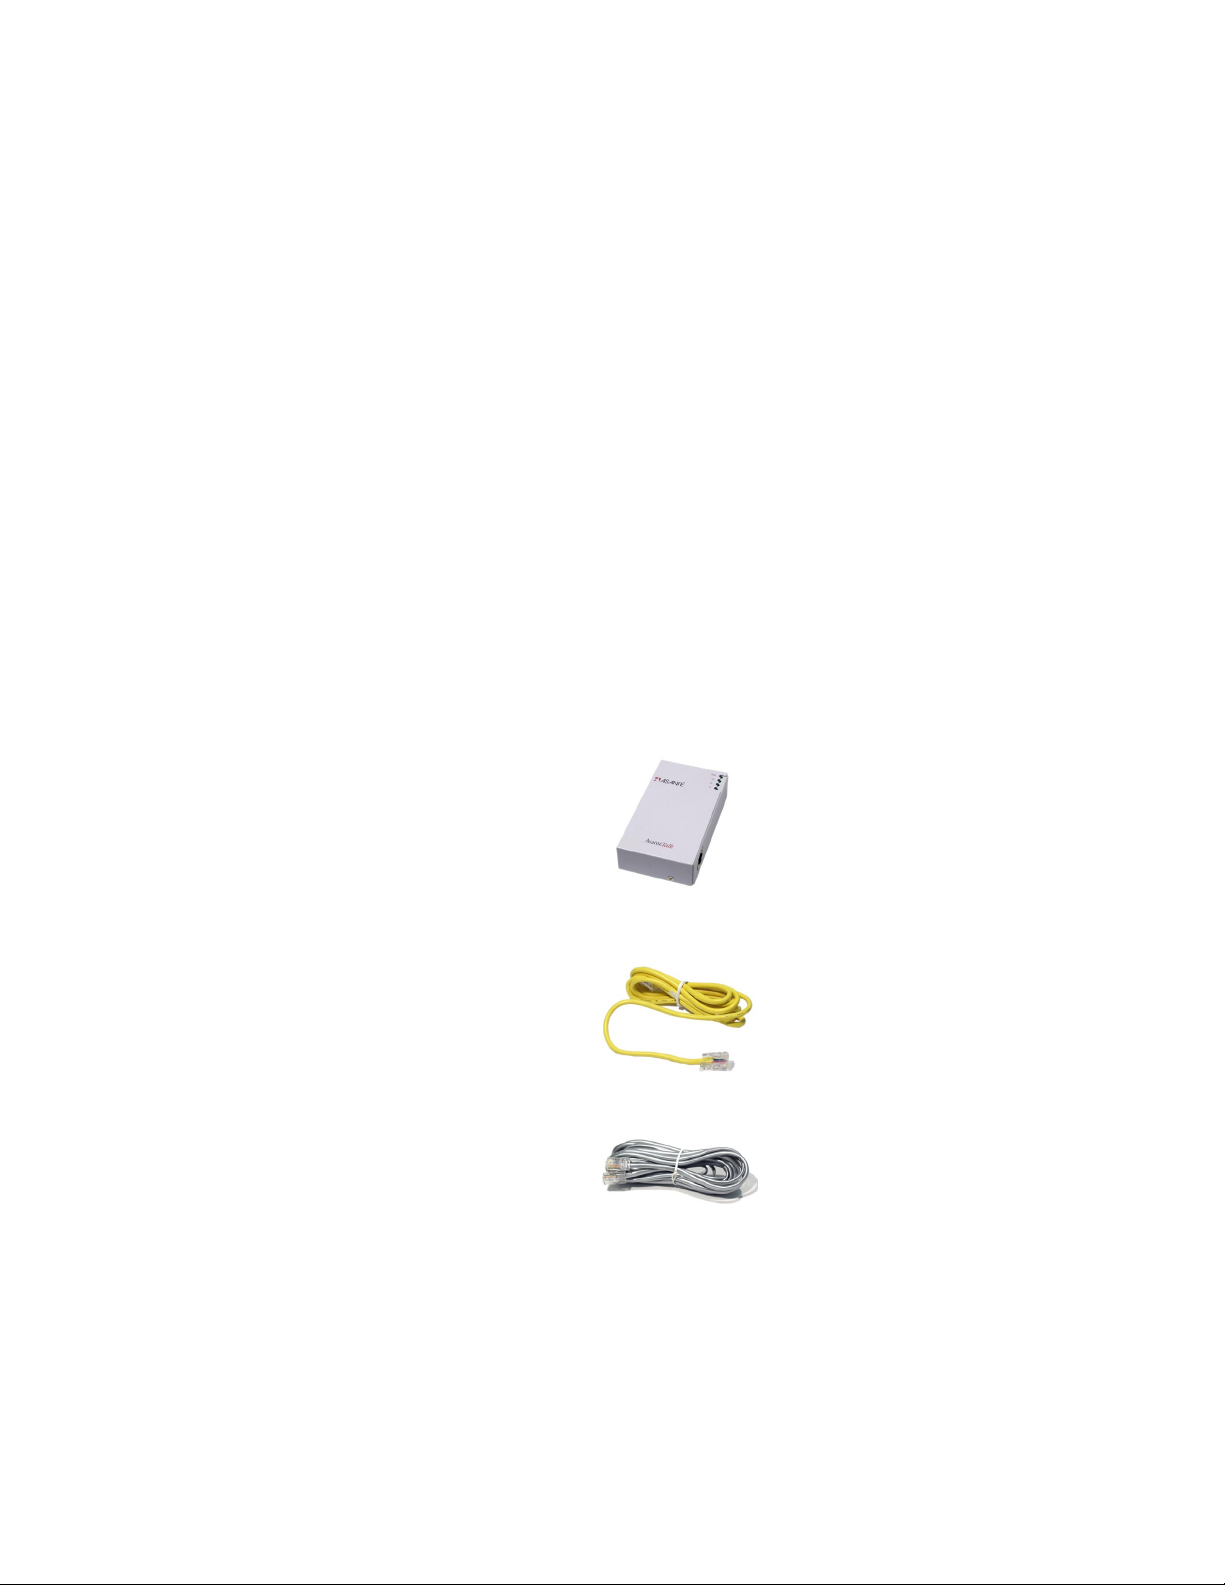
1.1 Package Contents
Before beginning the installation process, check the package contents against the items listed here. If any items are found to be
missing, contact your dealer immediately.
•
1 AsantéTalk converter
•
1 yellow RJ45 UTP crossover Ethernet cable
•
1 silver RJ45 UTP Ethernet cable
User’s Manual
5
Page 6

•
1 din-8 to din-8 serial cable
•
1 power supply
•
User’s Manual (this document)
1.2 Installation Steps
Follow the steps below to connect your AsantéTalk converter:
1. Connect the AsantéTalk to your LocalTalk network or printer.
2. Connect the AsantéTalk to your computer or existing Ethernet
network.
3. (Optional) Configure your computer to communicate over
Ethernet.
Attaching the AsantéTalk to your LocalTalk network
Connect a LocalTalk adapter to the din-8 port on the AsantéTalk.
Then, connect your LocalTalk cable to the LocalTalk port on the
adapter.
See the Quick Start Guide (p. 2) for more information.
1. The AsantéTalk supports a maximum of eight (8) devices plus
the AsantéTalk, or nine (9) nodes maximum.
2. The LocalTalk network must be configured as a “bus” network.
3. The LocalTalk network must be properly terminated at both
ends of the LocalTalk cable.
Note: LocalTalk adapters/connectors from approved sources
may be used.
•
LocalTalk network configurations wired as a “star” or
“modified star” are not supported.
Note: It is recommended that the AsantéTalk be installed as
the first device in the LocalTalk network. The LocalTalk connector on the AsantéTalk must also include a LocalTalk
Terminator, which is normally included with the LocalTalk con-
6
AsantéTalk Ethernet to LocalTalk Converter
Page 7

nector kit. The installation of each LocalTalk device on the LocalTalk network segment requires a LocalTalk adapter for
proper communication. The LocalTalk network segment may
include any combination of printers and computer systems on
LocalTalk. The last device in the LocalTalk network chain must
include a terminating resistor.
Ethernet Installation Process
AsantéTalk includes a 10Mbps Ethernet connection--making installation to new or existing networks simple. AsantéTalk was designed
with Apple computers in mind, where simple network operation and
printing is required with LocalTalk printers.
Attaching the AsantéTalk to your Ethernet network
To create an Ethernet network with your computer system, Asanté
includes two Ethernet cables.
The first cable is YELLOW in color and is designed as an industrystandard “crossover” cable. This cable is used for communicating
from the computer directly to the AsantéTalk.
The second Ethernet cable is SILVER in color and is wired as an
industry-standard 10BaseT Ethernet cable. This cable is used when
connecting the AsantéTalk to an Ethernet switch or Ethernet hub.
Installation may require a longer Ethernet cable. Please follow IEEE
Ethernet cabling requirements for wiring and installation.
Attaching the AsantéTalk directly to your computer
The yellow crossover cable is used to establish the physical network connection when the configuration consists of the AsantéTalk
and the computer. To connect this cable, simply insert one end of
the cable into the RJ45 female cable connector. The other end of
the yellow cable will attach to the RJ45 port on the AsantéTalk. Insert the cable end into the appropriate connector.
•
During boot up, the computer will attempt to auto-negotiate
with any attached Ethernet device. To eliminate autonegotiation problems, make sure the AsantéTalk is powered up before booting the computer
User’s Manual
7
Page 8

Attaching the AsantéTalk to Your Existing Ethernet Network
The AsantéTalk may be added to an existing network using the
SILVER cable. This cable is wired as a straight-through cable and is
used to establish a network connection to a port on an Ethernet
switch or Ethernet hub.
To connect this cable, simply connect the RJ45 connector to any
available port on the Ethernet switch or Ethernet hub. Insert one
end of the cable into the RJ45 female cable connector.
Note: Do not install this cable or any other straight-thru 10BaseT
cable to a hub or switch uplink port.
The other end of the silver cable will attach to the RJ45 port on the
AsantéTalk. Insert the cable end into the connector.
If a longer Ethernet cable is required, follow predefined IEEE
Ethernet wiring requirements for wiring 10BaseT RJ45 cables.
Ethernet Installation Guidelines
1. A maximum distance of 100 meters (330 feet) for an individual
Ethernet cable drop must be maintained.
2. Ethernet 10BaseT requires adherence to IEEE 802.3 Wiring
Guidelines.
3. The AsantéTalk may be connected to an Ethernet switch or
Ethernet hub.
4. AsantéTalk does not support auto-negotiation. Ethernet
switches or hubs must be able to turn off or disable this feature
for proper operation.
1.3 Configure Your Computer for Ethernet Communi-
cation
Follow the steps below to establish an Ethernet connection to your
Macintosh:
1. Set your AppleTalk control panel to show “Connect via:
Ethernet.”
2. Set your TCP/IP control panel to:
•
Modem
puter’s modem
, if you connect to the Internet using the com-
8
AsantéTalk Ethernet to LocalTalk Converter
Page 9

•
Ethernet, if you connect to the Internet using your Local
Area Network
Note: See the documentation that came with your computer if you
need more information.
1.4 AsantéTalk Power-Up
AsantéTalk takes approximately 15 seconds to come up on a network. It automatically detects the presence of LocalTalk devices
and registers them as nodes on the Ethernet network.
After the AsantéTalk is active on the Ethernet network, any LocalTalk nodes that are connected to the LocalTalk segment of the network will appear within the Apple Macintosh Chooser. Those nodes
will be able to utilize server resources on either Ethernet or LocalTalk (if operating systems are close) and AppleTalk capable printers
on the LocalTalk side of the network.
1.5 AsantéTalk LEDs
The four (4) LEDs on the AsantéTalk indicate activity on the
Ethernet and LocalTalk networks. The LEDs are shown on the table
below:
LED Name Purpose
PWR Power
TX Transmit
RX Receive
LI Link Integrity
User’s Manual
Table 1--Four LEDs
9
Page 10

1.6 Supported Printers
AsantéTalk will support AppleTalk printers, provided that the individual printers are configured with a LocalTalk communications port.
For AppleTalk compatibility information, consult your printer manufacturer.
Each LocalTalk printer must be connected to the AsantéTalk with
an approved LocalTalk adapter. The LocalTalk network must be
properly terminated with two (2) terminating resistors.
1.7 Supported Apple Computer Systems
•
AsantéTalk will support Apple Computer Macintosh systems
designed with a built-in LocalTalk communications port
•
Each LocalTalk Macintosh must be connected to the
AsantéTalk with an approved LocalTalk adapter and the
LocalTalk network must be properly terminated
10
AsantéTalk Ethernet to LocalTalk Converter
Page 11

Chapter 2 Specifications
The following is a list of the AsantéTalk converter’s specifications:
Devices Supported
Apple Macintosh computers with built-in Ethernet ports (for
example, iMac, eMac, G3, and G4) running AppleTalk (and
all LocalTalk compatible printers), with Mac OS 7.6, 8.x,
9.1, 9.2.1, OS X, OS X.1, and OS X.2
Maximum Cable Distance
RJ45 Port:
100 meters (328 feet) on unshielded twisted-pair (UTP)
cable
LEDs
Power, Transmit, Receive, and Link Integrity
Dimensions
4.5" x 2.6" x 1" (114.3 x 66.0 x 25.4 mm)
Power Supply
115 VAC at 30 watts
60Hz (220 V available)
Standards Compliance
IEEE 802.3 Ethernet specifications for Unshielded Twisted
Pair (10BaseT) media, AppleTalk Phase 2 protocol
Support
Limited Lifetime Warranty, free technical support
User’s Manual
11
Page 12

12
AsantéTalk Ethernet to LocalTalk Converter
Page 13

Chapter 3 Frequently Asked Questions
This chapter covers frequently asked questions regarding the
AsantéTalk.
AsantéTalk Power-Up Sequence
Q: Is there an approved power-up sequence for the AsantéTalk?
A: Yes. In general, turn on all LocalTalk devices first: printers,
laptops and desktop computers. After these are all functioning, do
EITHER of the following:
If the AsantéTalk will be connected to an existing Ethernet net-
work, connect the silver Ethernet cable to a hub, bridge, or
router, and power up the AsantéTalk. If the AsantéTalk will be
connected to a computer, connect the yellow crossover cable
to both AsantéTalk and computer, power up the AsantéTalk,
THEN power up the computer.
Q: All my devices are on the same power strip. When I start up my
computer in the morning, it doesn’t “see” my printer. Why?
A: For each LocalTalk device to be accessible via AsantéTalk, ALL
LocalTalk devices--including the printer and computer systems-must be powered up first. This will enable the AsantéTalk to see
each LocalTalk node.
Q: How long does it take for the AsantéTalk to power up?
A: It takes approximately 15 seconds for AsantéTalk to boot and
become an active node.
Q: Why can’t my PowerBook be seen on the LocalTalk network
when I plug it into the network in the morning?
A: During its power-up sequence, the AsantéTalk polls the LocalTalk network for any available nodes. Nodes that are added after
the AsantéTalk is powered on may not be seen. Power off the
AsantéTalk for 30 seconds, then reconnect power to resolve this
problem.
User’s Manual
13
Page 14

Q: During the boot process of the computer (when connected
directly to the AsantéTalk), the green LED labeled “LI” (Link Integ-
rity) on the AsantéTalk will flash repeatedly. What causes this?
A: The AsantéTalk is attempting to auto-negotiate with the com-
puter. AsantéTalk does not support Ethernet auto-negotiation. Always power up the AsantéTalk BEFORE booting the computer.
LocalTalk Network Topology
Q: Will every printer with a Mini din-8 connector (round) work with
the AsantéTalk?
A: No. Only LocalTalk capable printers will work, even though they
have a similar connector.
Q: Can I use the AsantéTalk serial cable on an AppleTalk compatible printer?
A: No. The AsantéTalk serial cable connector is designed for serial
printers and for connecting a LocalTalk computer to the AsantéTalk.
It was not designed to establish a LocalTalk network, nor was it designed to communicate with a printer that supports the AppleTalk
protocol.
Q: What cabling should I use to connect my AppleTalk printer to the
AsantéTalk?
A: LocalTalk connector kits are available for building a LocalTalk
network. One connector must be provided for each LocalTalk device. If a single printer should be attached to a computer, for example, two LocalTalk connectors would need to be provided; one for
the AsantéTalk, and one for the AppleTalk printer.
Q: What is the difference between LocalTalk and AppleTalk?
A: LocalTalk topology refers to the physical cabling used to connect
the network devices. AppleTalk protocol compatibility refers to the
software language the devices (computers and printers) use to
communicate with each other.
Q: Is LocalTalk topology different from Ethernet topology?
A: Yes. LocalTalk topology employs a “bus” or “daisy chain” wiring
14
AsantéTalk Ethernet to LocalTalk Converter
Page 15

scheme. Ethernet employs a “star” wiring scheme.
Q: How is a “star” topology different from a “bus” topology?
A: A “Star” topology requires that all cable runs terminate at a central point such as a hub, bridge or router. 10BaseT Ethernet is the
most common Ethernet used with AppleTalk. A “bus” or “daisy
chain” topology (such as a LocalTalk network uses) connects several devices in a row. It requires termination at the beginning and
end of the “bus” for proper communication to occur.
Q: Does AsantéTalk support LocalTalk connection devices that utilize a “star” topology?
A: No. While some makers of LocalTalk connection devices utilize a
“star” topology configuration, the AsantéTalk complies with the LocalTalk “bus” topology specification.
Q: Does it matter where the AsantéTalk resides in the LocalTalk
network topology?
A: Yes. The AsantéTalk should ALWAYS be at the beginning of the
LocalTalk network topology, and should be properly terminated.
Q: What port do I plug the LocalTalk connector into on my LocalTalk
Macintosh?
A: If your Macintosh has a Network Control Panel, you should select
LocalTalk Built-in and plug your LocalTalk adapter connector into
the Printer port. If your Macintosh is running Open Transport and
has an AppleTalk Control Panel, you can select either the Printer or
Modem port. Connect the LocalTalk adapter into the port that will be
used for communication. (Note – This will NOT work with the iMac –
it does not have a Local-talk printer port!)
Q: How many LocalTalk devices can I attach to the AsantéTalk?
A: The AsantéTalk will support up to 8 additional Local-talk devices.
Ethernet Questions
Q: What do the LEDs (lights) on my AsantéTalk mean?
A: The four LEDs on the AsantéTalk help you with diagnostics. The
User’s Manual
15
Page 16

solid Power LED shows that the unit is receiving power. The solid
green LI (or Link Integrity) LED indicates that a valid connection has
been made between the AsantéTalk and another Ethernet device.
The RX and TX LEDs blink when traffic is received from (RX) or
transmitted to (TX) the Ethernet portion of the network.
Q: Why isn’t there a solid green LI (Link Integrity) light after I’ve
plugged in my Ethernet cable?
A: Possibly for 2 reasons: 1) you are using the wrong cable. The
yellow cable must be used to attach the AsantéTalk to an Ethernet
computer. The silver cable must be used to attach the AsantéTalk
to an existing Ethernet network; 2) the cable may be defective or
the wrong type. If possible, use the appropriate cable supplied with
your AsantéTalk. If not, use a standard IEEE Ethernet Category 3 or
5 Ethernet cable.
Q: Is the LocalTalk topology style different from Ethernet topology?
A: Yes. LocalTalk topology employs a “bus” or “daisy chain” wiring
scheme. Ethernet employs a “star” wiring scheme.
Q: How is a “star” topology different from a “bus” topology?
A: A “star” topology requires that all cable runs terminate at a central point such as a hub, bridge, or router. 10BaseT Ethernet is the
most common Ethernet used with AppleTalk. A “bus” or “daisy
chain” topology (such as a LocalTalk network uses) connects several devices in a row. It requires termination at the beginning and
end of the “bus” for proper communication to occur.
Q: Could I use the yellow Ethernet cable to connect the AsantéTalk
to a switch, hub, or bridge?
A: No. The yellow Ethernet cable that is supplied with the
AsantéTalk is a crossover cable and will not work when connected
to a port on a switch, hub, or bridge.
Q: Could I use the silver cable to connect my computer to the AsantéTalk?
A: No. The silver cable is designed to connect the AsantéTalk to a
port on a switch, hub, or bridge. To connect the AsantéTalk to a
computer, use the yellow cable that was provided with the AsantéTalk.
16
AsantéTalk Ethernet to LocalTalk Converter
Page 17

Q: What type of Ethernet cable do I need to connect the AsantéTalk
to a switch, hub, or bridge?
A: An Ethernet cable that is wired as a standard IEEE 10BaseT cable is required. The cable must be a Category 3 or 5 type and not
exceed an overall length of 100 meters or 328 feet.
Q: I just connected an Apple computer to the AsantéTalk via
Ethernet. Why don’t I see my LocalTalk printers or systems?
A: After connecting the yellow cable to the AsantéTalk and the computer, the computer must be configured for the proper connection
method. To verify or configure the setting, if using OS 7.6 through
OS 9.2.2, simply open the control panel device named “AppleTalk.”
For proper operation, the “Connect Via” selection must be set to
Ethernet. If using OS 10, go to the Network Pane, set Show to the
Ethernet port, click on the
AppleTalk Active
, and then click
AppleTalk
tab, click the box
Apply Now
.
Make
Q: When I switch to Ethernet in my AppleTalk control panel, it takes
awhile before it switches. Is this normal?
A: Yes. When making the Ethernet selection, the system will poll the
Ethernet network and may hesitate for a few moments; this is normal. When it finishes switching, save the configuration, then go to
the “Chooser” and select the appropriate resource icon.
Q: Is the AsantéTalk a router?
A: No. AsantéTalk is simply a LocalTalk to Ethernet converter
that allows the Apple iMac or other Macintosh systems utilizing the
EtherTalk protocol on Ethernet to print and share files with AppleTalk protocol-compatible systems or printers on LocalTalk.
Q: Will the AsantéTalk process TCP/IP?
A: No. Because the AsantéTalk is not a router, it will not pass IP
packets.
Q: If AsantéTalk is not a router how do I establish zones within my
Ethernet network?
User’s Manual
17
Page 18

A: Any router, including a Windows NT server, that has been properly configured is capable of establishing zones for the network.
Both hardware and software routers are available that allow EtherTalk and LocalTalk traffic. The AsantéTalk will reflect any zones
created by a router. Consult your network administrator for more
information. However, since there is no utility to control the AsantéTalk, there is no way to determine what zone it will show up in if
there is more than one zone.
AppleTalk Protocol Compatibility
Q: What is AppleTalk protocol compatibility?
A: AppleTalk protocol is the “language” used by devices within an
Apple network. One of the features of AppleTalk is that devices can
be “shared” (accessed by multiple users). This protocol is not dependent upon the type of topology (physical connections) used in
the network.
Q: What types of devices does AsantéTalk support?
A: The AsantéTalk supports all AppleTalk-compatible computers
and printers. However, since Apple Computer
it’s implementation of AppleTalk, it is possible that there may be
incompatibilities between older and newer versions of operating
systems that are completely unrelated to the AsantéTalk.
Q: How can I tell if my printer is AppleTalk compatible?
A: A sure way is to contact the printer manufacturer. A quick way to
tell is by looking at the kind of icon that is used to access the printer.
If the Apple LaserWriter icon is used to access the printer, it is an
AppleTalk compatible printer. Most third-party AppleTalk printer
icons will have a little cable hooking into the icon. The letters "AT"
will also appear. Another way is to click on the printer icon. If the
printer name shows up on the righthand side of the “Chooser” window, it is an AppleTalk-compatible printer. If you are requested to
choose either the printer or modem port, it is a serial printer and
cannot be shared.
™
continues to change
18
AsantéTalk Ethernet to LocalTalk Converter
Page 19

Q: Which driver should I use to access my AppleTalk printer?
A: Some printers utilize Apple’s LaserWriter icon. Others, such as
HP and Epson, provide both serial drivers and AppleTalk drivers for
their printers. Consult your printer manufacturer for the correct drivers to use.
User’s Manual
19
Page 20

20
AsantéTalk Ethernet to LocalTalk Converter
Page 21

Chapter 4 Troubleshooting
This chapter looks at some common problems with setup and configuration of the AsantéTalk and offers some solutions. If you cannot
resolve your problem after trying the following solutions, contact
Technical Support for assistance (see Appendix A: Online Warranty
Registration and Card).
4.1 Most Common Problems and Questions
The following section describes the most common problems associated with setup and installation of the AsantéTalk converter.
1. The AsantéTalk must be the last LocalTalk device powered up
under any configuration.
•
Completely connect and power up all LocalTalk devices
and wait until all LocalTalk devices are fully ready, then
power up the AsantéTalk. Wait at least 30 seconds and
then check to see if network resources are available
•
If devices on the LocalTalk side of the bridge are turned
off, the AsantéTalk must also be powered down. When the
LocalTalk devices are to be used again, allow them to be
completely powered up before turning the AsantéTalk back
on
•
The AsantéTalk works best if it and all LocalTalk devices
are always left powered up
•
Devices on the Ethernet side of the network do not have
this restriction
2. Not all printers will work with the din-8 to din-8 cable provided
with the AsantéTalk.
•
Some printers require that you employ LocalTalk connectors between the printer and the AsantéTalk. LocalTalk
connectors must be purchased separately
•
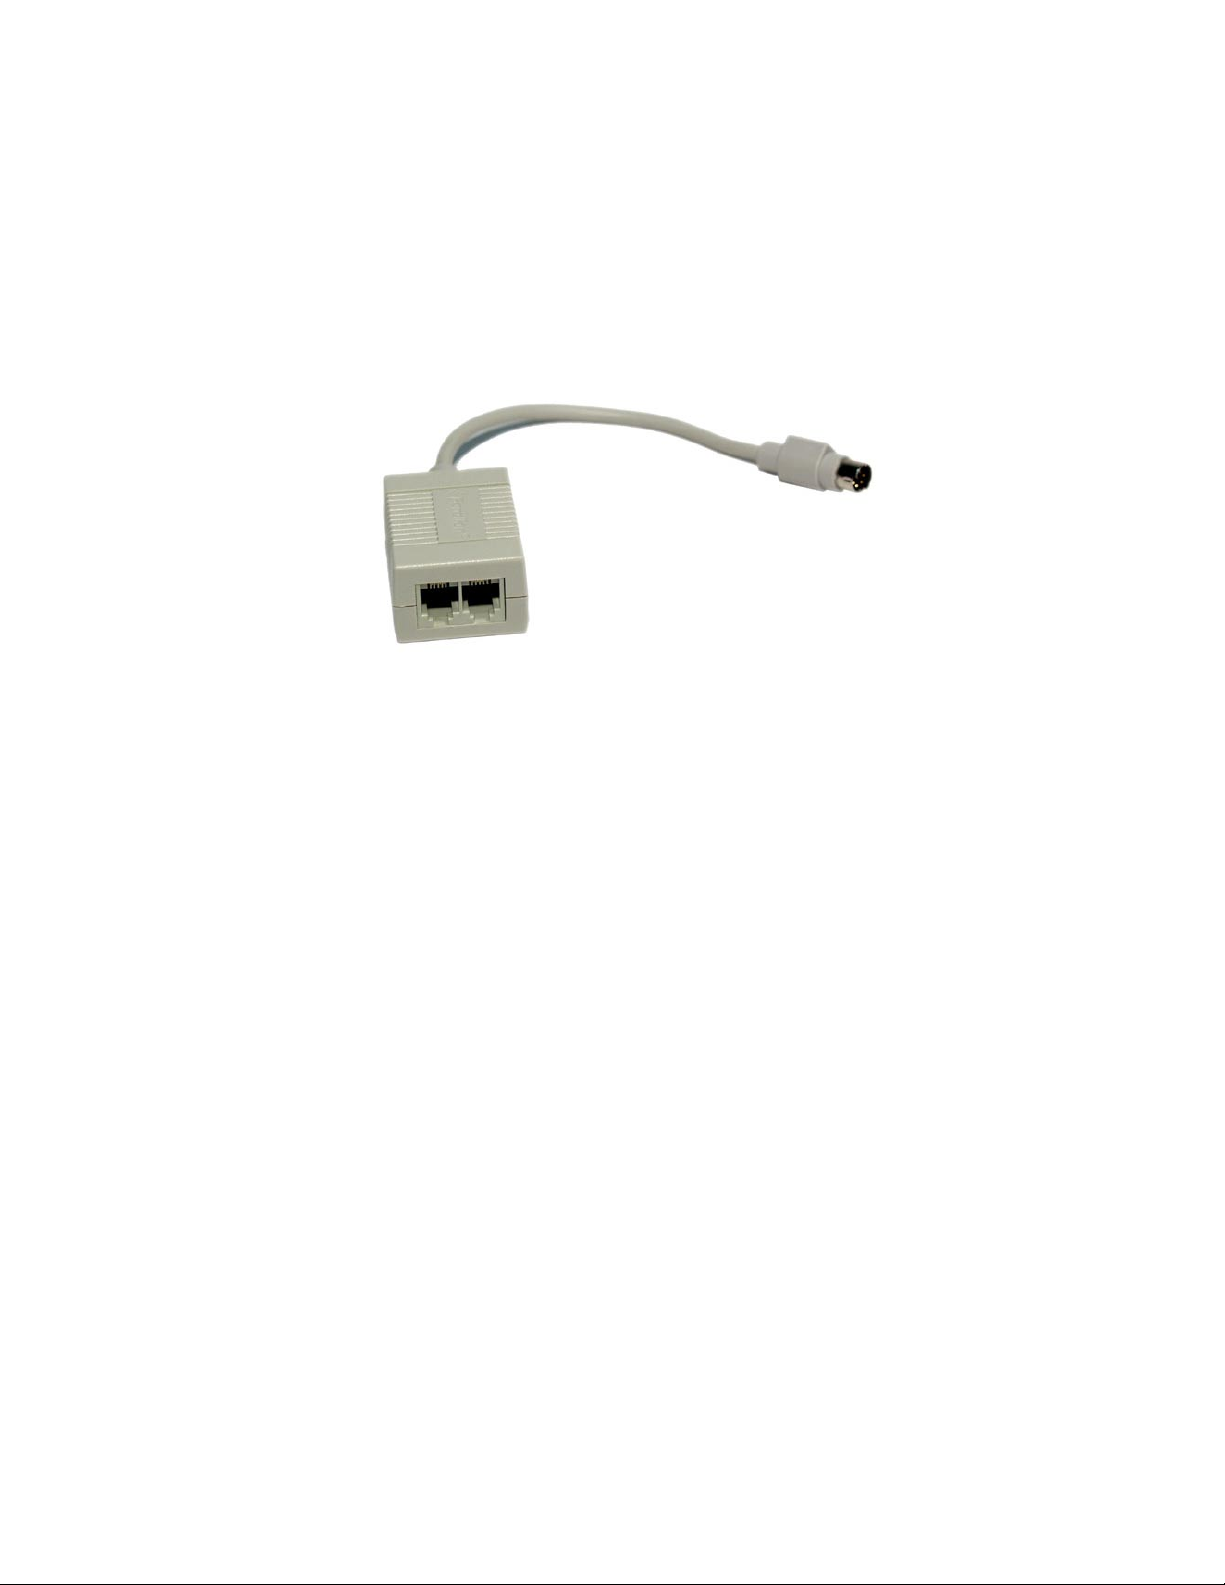
A LocalTalk connector is a box that appears something like
this:
User’s Manual
21
Page 22
22
•
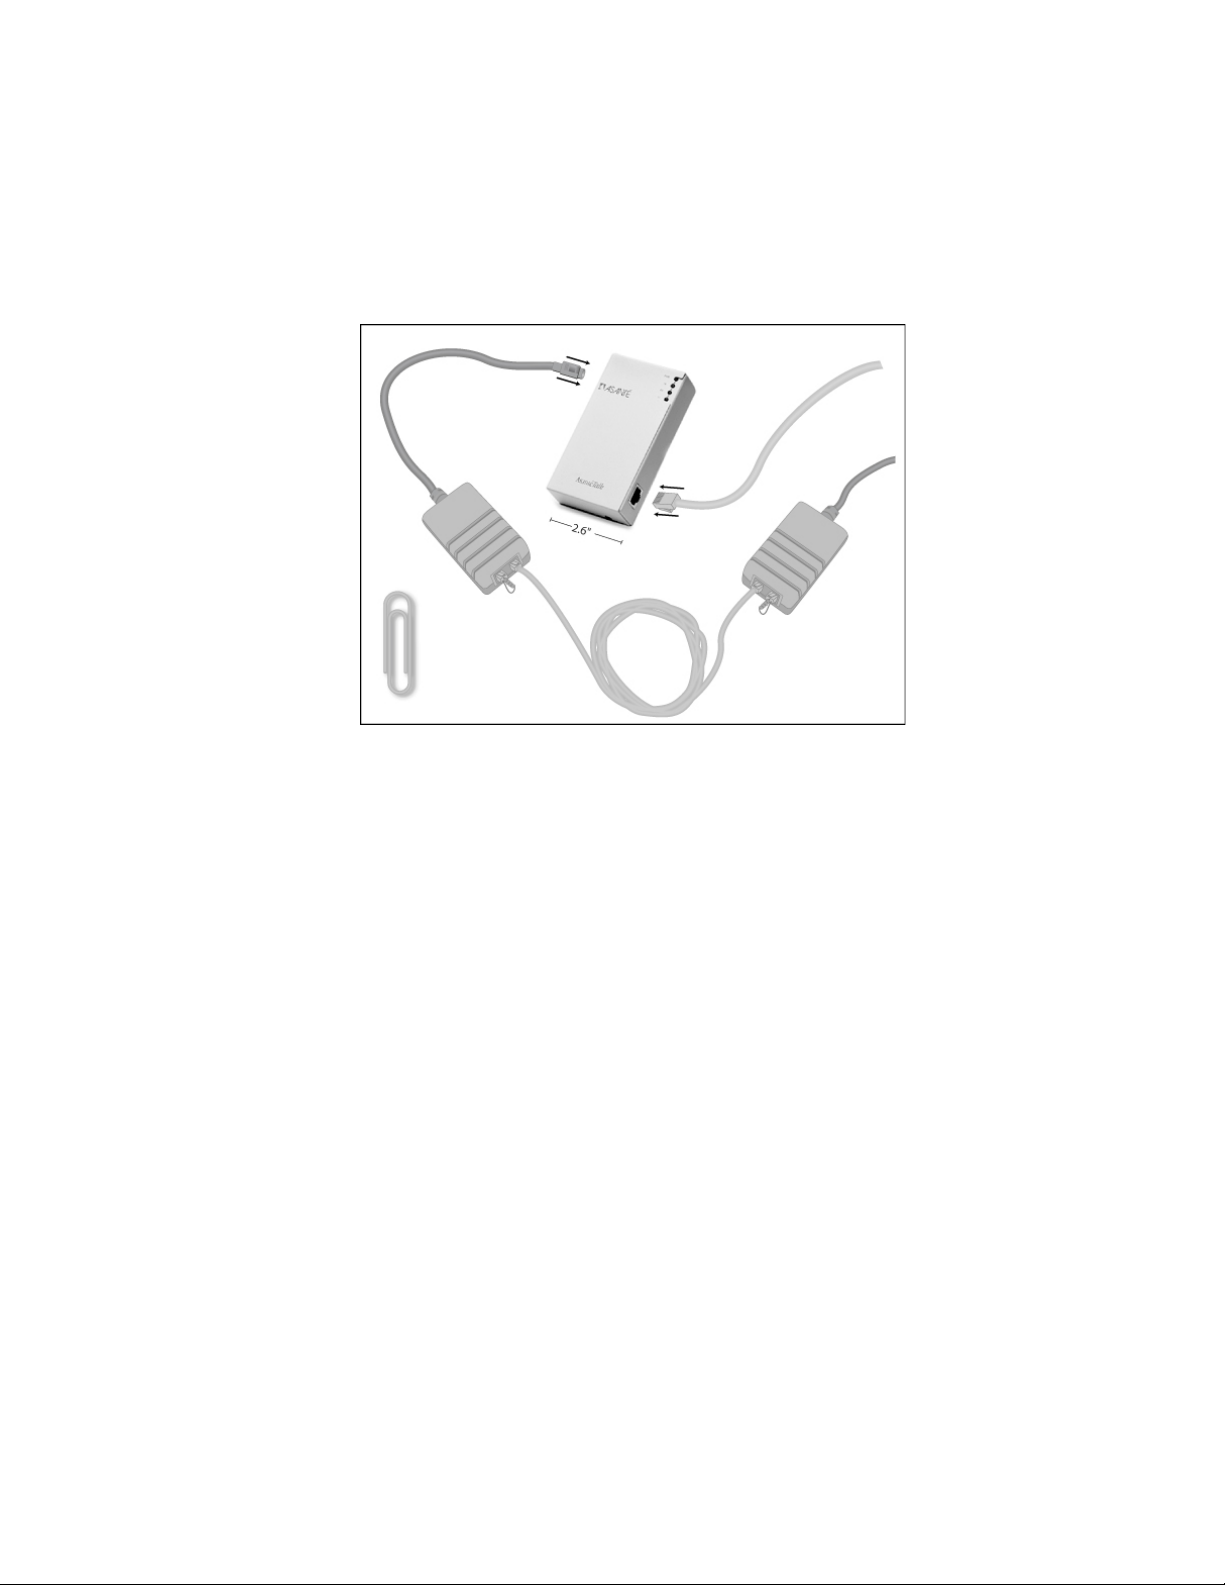
Two LocalTalk connectors are REQUIRED. One of these
connectors must be plugged into the AsantéTalk via the
attached din-8 cable. The other must be plugged into the
printer’s din-8 connection. A phone cord (RJ11) must then
be connected between the two LocalTalk connectors. A
terminator must then be plugged into the spare phone jack
on each end of the daisy chain (at the first and last LocalTalk connector). The phone cord and a terminator will
come with each LocalTalk connector
AsantéTalk Ethernet to LocalTalk Converter
Page 23
•
“Star LocalTalk” connectors ARE NOT compatible with the
AsantéTalk. “Star LocalTalk” connectors have only one
RJ11 phone jack, instead of two
•
Asanté recommends that LocalTalk connectors be used
with any printers not manufactured by Apple. HP printers
specifically require the use of LocalTalk connectors. Apple’s Color StyleWriter Series also requires LocalTalk connectors
3. The printer must be LocalTalk capable.
•
Some printers only have serial, not LocalTalk, functionality.
Serial and LocalTalk connections use the same din-8 port.
The printer MUST BE LocalTalk capable to work with the
AsantéTalk
•
On some printers, LocalTalk is an option that must be purchased separately. This option must be installed for the
printer to work with the AsantéTalk
•
To verify your printer’s features, please check with the
manufacturer. The following URLs may be helpful:
User’s Manual
23
Page 24

http://www.info.apple.com/info.apple.com/applespec/
applespec.taf
http://www.hp.com/cposupport/nonjsnav/prhome.html
http://www.epson.com/support/instans/prselmac.html
4. The yellow Ethernet cable versus the silver Ethernet cable.
•
The yellow Ethernet cable is a crossover cable. As such, it
is for use when the AsantéTalk is plugged directly into the
Ethernet port of a Mac
•
The silver Ethernet cable is a straight-through cable. It is to
be employed when connecting the AsantéTalk into an
Ethernet hub or switch
•
If the correct cable is used, the “LI” LED on the AsantéTalk
will light
5. Multiple LocalTalk devices and the AsantéTalk.
•
When attaching more than one LocalTalk printer or computer, LocalTalk connectors must be used to “daisy chain”
the devices together
•
One LocalTalk connector must be plugged into each LocalTalk device, including the AsantéTalk. Phone cables
(RJ11) must then be used to go from one device to the
next in a straight line. The devices at the two ends of the
chain must have a terminator plugged into the spare RJ11
phone jack. The AsantéTalk MUST BE one of these two
devices at the end. In other words, the LocalTalk connec-
tor plugged into the AsantéTalk must have the terminator
in one of its RJ11 phone jacks
•
All RJ11 cables must be at least 6 feet long
•
Star configurations or passive star configurations are NOT
compatible with the AsantéTalk. For this reason, the
AsantéTalk cannot be in the middle of a daisy chain configuration
•
Multiple AsantéTalk units cannot be added to the same
LocalTalk daisy chain. If you need to add multiple Ethernet
Macs to a LocalTalk daisy chain, you must connect the
Ethernet devices to a hub and then connect one AsantéTalk between the hub and the LocalTalk network
24
AsantéTalk Ethernet to LocalTalk Converter
Page 25

•
The AsantéTalk can have a MAXIMUM of 8 LocalTalk devices
(computers and printers) attached to its LocalTalk port
6. AppleTalk drivers versus serial drivers.
•
If you select the driver for your printer in the Chooser and it
asks you to choose either the printer or modem port, you are
not using the correct driver. This is the serial driver. For the AsantéTalk to function, you must use the printer’s AppleTalk
driver. If you do not have the AppleTalk driver for your printer,
please contact the printer’s manufacturer
7. File sharing between computers.
•
Power-up procedures followed for printers must also be followed with computers on the LocalTalk side of the bridge
•
Sharing must be set up on all computers that need to be accessed on the network. Sharing is a feature of the MacOS, so
Apple must be contacted for further information and help
•
Macs running MacOS 8.5.1 cannot share files with Macs that
are not running Open Transport. This again is a MacOS issue,
so Apple must be contacted for further information and help
(Mac OS 7.6 was the first to use Open Transport natively. Mac
OS 7.5.3 has an optional or Custom install for adding Open
Transport. Mac OS 7.5 and older can only use Classic Networking.)
8. AsantéTalk versus Micro AsantéPrint.
•
The Micro AsantéPrint is an older version of the AsantéTalk,
with some additional features and some limitations
•
The Micro AsantéPrint is better suited for large networks with
AppleTalk zones. It includes a software program that allows you
to select into which zone the device and its printers will appear
•
The Micro AsantéPrint will not work when connected to an autosensing port or computer. Thus, it cannot be connected directly
to an iMac, Blue & White G3, or a 10/100 hub or switch
•
The Micro AsantéPrint is for printers only. LocalTalk computers
are not supported for file sharing
User’s Manual
25
Page 26

9. I still cannot see my printer or computer!
•
If, after following all of these instructions, the printer or LocalTalk computer is still not accessible by the network,
something is probably physically wrong with the setup
•
By the process of elimination, you need to test the
Ethernet cables, the din-8 to din-8 cable, or the LocalTalk
connectors--including the phone (RJ11) cable and the terminators. For example, plug the printer directly into a Mac
that has a printer port using the same LocalTalk cabling
and see if the printer is accessible
•
Use the Ethernet cable to connect to some other Ethernet
device to test its functionality
•
If all the cables prove to be functioning, then the
AsantéTalk itself may be defective. Contact Asanté’s Technical Support
4.2 Basic Configuration Instructions
This section provides step-by-step instructions for three configuration scenarios. If you cannot find your solution here, contact Technical Support (see Appendix A: Online Warranty Registration and
Card).
A Macintosh Computer with one printer
Follow the steps below to configure a Macintosh computer and one
printer:
1. Power up the Mac.
2. Take the YELLOW Ethernet cable and connect one end into
the Ethernet port of the Mac. Plug the other end into the
AsantéTalk.
3. Take the din-8 cable and plug one end into the printer. Plug the
other end into the AsantéTalk.
4. Power up the printer. Wait until printer is completely warmed up
and ready to print.
5. Take the din-8 cable and plug one end into the printer. Plug the
other end into the AsantéTalk.
6. Plug the power transformer into the AsantéTalk. On occasion,
the Mac may also need to be restarted after powering up the
AsantéTalk.
26
AsantéTalk Ethernet to LocalTalk Converter
Page 27

7. Wait 30 seconds.
8. Go to the AppleTalk control panel of the Mac. Make sure it is
set to “connect via Ethernet.”
9. On the AsantéTalk, the power and “LI” LEDs should now be lit.
10. Go to the “Chooser” in the Mac. Select the appropriate AppleTalk driver for your printer. The window to the right should then
show your printer. For questions on which driver should be selected, please contact your printer’s manufacturer.
11. Proceed with printer setup as outlined by the printer’s manufacturer.
A Macintosh computer and one printer using LocalTalk connectors
: To decide when LocalTalk connectors are required instead of
Note
the din-8 to din-8 cable, please see note 2 of the Most Common
Problems Section (p. 21).
Follow the steps below to configure one Macintosh and one printer
using LocalTalk connectors:
1. Power up the Mac.
2. Take the YELLOW Ethernet cable and connect one end into
the Ethernet port of the Mac. Plug the other end into the
AsantéTalk.
3. Plug one LocalTalk connector into the din-8 port of the
AsantéTalk. Plug another LocalTalk connector into the din-8
port of the printer. Connect the two LocalTalk connectors together with the phone cable that came with the LocalTalk connector. In the spare phone jack of each LocalTalk connector,
plug in the terminator.
4. Power up the printer. Wait until the printer is completely
warmed up and ready to print.
5. Plug one LocalTalk connector into the din-8 port of the
AsantéTalk. Plug another LocalTalk connector into the din-8
port of the printer. Connect the two LocalTalk connectors together with the phone cable that came with the LocalTalk connector. In the spare phone jack of each LocalTalk connector,
plug in the terminator.
6. Plug the power transformer into the AsantéTalk. On occasion,
the Mac may also need to be restarted after powering up the
AsantéTalk.
7. Wait 30 seconds.
User’s Manual
27
Page 28

8. Go to the AppleTalk control panel of the Mac. Make sure it is
set to “connect via Ethernet.”
9. On the AsantéTalk, the power and “LI” LEDs should now be lit.
10. Go to the “Chooser” in the Mac. Select the appropriate AppleTalk driver for your printer. The window to the right should then
show your printer. For questions regarding which driver should
be selected, please contact your printer’s manufacturer.
11. Proceed with printer setup as outlined by the printer’s manufacturer.
The AsantéTalk, an Ethernet hub/switch, and one printer
Follow the steps below to configure the AsantéTalk, an Ethernet
hub or switch, and one printer:
1. Plug AsantéTalk into the Ethernet hub/switch with the SILVER
Ethernet cable.
2. Power up a Mac that is also connected to the Ethernet hub/
switch.
3. Go to the AppleTalk control panel of the Mac. Make sure it is
set to “connect via Ethernet.”
4. Connect the printer to the AsantéTalk using either the din-8 to
din-8 cable or LocalTalk connectors as described in item number 5 above.
5. Power up the printer. Wait until printer is completely warmed up
and ready to print.
6. Connect the printer to the AsantéTalk using either the din-8din-8 cable or LocalTalk connectors as described above.
7. Plug the power transformer into the AsantéTalk.
8. Wait 30 seconds.
9. On the AsantéTalk, the power and “LI” LEDs should now be lit.
10. Go to the “Chooser” in the Mac. Select the appropriate AppleTalk driver for your printer. The window to the right should then
show your printer. For questions regarding which driver should
be selected, please contact your printer’s manufacturer.
11. Proceed with printer setup as outlined by the printer’s manufacturer.
28
AsantéTalk Ethernet to LocalTalk Converter
Page 29

4.3 AsantéTalk and OS X
The AsantéTalk will work with OS X (and OS 9.2). You will need to
set your printer up by selecting AppleTalk devices in the
Print Center/Add printer selection screen. Asanté has been conducting intensive research with OS 10.x and OS 9.2.x compatibility
with our products. The following sections describe notable issues
and their solutions for using the AsantéTalk with these operating
systems.
Apple File Services (AFS)
The biggest change in the OS is to the Apple File services protocol
that makes some legacy devices (such as older AppleTalk printers)
unusable. OS 10.x and OS 9.2.x do not support Apple File Protocol
(AFP) over AppleTalk. Instead, they use AFS.
This change will cause problems when talking to workstations running a previous version of the legacy Macintosh OS, and devices
designed for operation with AFP. Some older AppleTalk printers are
not supported by the release of OS 10 (and this may be true of OS
9.2 as well). We have found that our office’s LaserWriter 4/600 is
fully supported, but our older LaserWriter NTR is not functional using the LaserWriter 8 drivers supplied with the OS 10.x version. If
your printer is not working and you are using these versions of the
OS, then it is possible that the printer might not be supported by the
current release of this OS.
Driver/Preference Conflict
There is an apparent driver/preference conflict between the OS
9.2.2 and the AsantéTalk. The solution requires the removal of sev-
eral preferences in order to allow printing to proceed with various
printer drivers. In these instances, the printer can be seen from the
printer Utilities, but will not print. The problem can be resolved by
removing the following extensions:
•
IdleTime
•
N2MP3
Note: True Finder Integration Control Panel from Stuffit is
also recommended for removal, by Apple, to fully address
this issue.
Utilities/
User’s Manual
29
Page 30

See Apple’s Discussion pages (discussions.info.apple.com), under
Mac OS Mac OS 9 Discussions Mac OS 9.2—9.2.2 Usage, and
search for related printing items.
Unregistered Addresses
If you continue to experience problems after addressing the above
issues, it is likely to be caused by a common error that is a function
of the AsantéTalk using registered addresses for devices that have
been restarted (such as when there has been a power outage).
These new addresses are unregistered and this is what causes the
failure to find the other devices. Follow the steps below to resolve
this issue:
1. Make sure that the yellow cable is used from the workstation to
the AsantéTalk.
2. If using a hub, make sure that the silver cable is used, and that
its connection to the hub is through a numbered port (not the
uplink port).
3. Use the serial cable from the AsantéTalk to the printer. You can
move the cables without powering down any devices, as they
do not carry any voltage.
4. With the AsantéTalk attached to the LocalTalk network, and
with all other devices powered on, power down the AsantéTalk
for about 5 seconds.
5. Plug the power back in, and in about 40 seconds, everything
should show up in Chooser.
If these steps do not work, continue with the following:
6. Leave all AsantéTalk cables in place and shut down all systems attached to the LocalTalk chain, including the AsantéTalk.
7. If you have a cable or DSL modem, disconnect the modem
from your hub.
8. Leaving the AsantéTalk off, individually restart the devices attached to the LocalTalk string. Allow the workstations to come
fully to the desktop and all the printers to completely cycle and
print (if enabled) the status page.
9. Restart the AsantéTalk.
10. From the Ethernet workstation, select the Apple Share icon
from
Chooser
. You should see the attached systems on the
LocalTalk chain and should also be able to print to the remote
printers.
30
AsantéTalk Ethernet to LocalTalk Converter
Page 31

If these steps do not work, continue with the following:
11. Power down the AsantéTalk and remove the printer cable.
12. Power up the AsantéTalk.
13. While the TX light is flashing, attach the printer cable back into
the AsantéTalk.
14. After waiting 1 minute, re-attach your cable or DSL modem (if
used) to the hub.
These procedures ought to resolve this problem and it is recommended that you now leave the AsantéTalk powered up to avoid
having to reconfigure its set up. If the printer still does not show up,
please contact Asanté technical support at www.asante.com/
support.
User’s Manual
31
Page 32

32
AsantéTalk Ethernet to LocalTalk Converter
Page 33
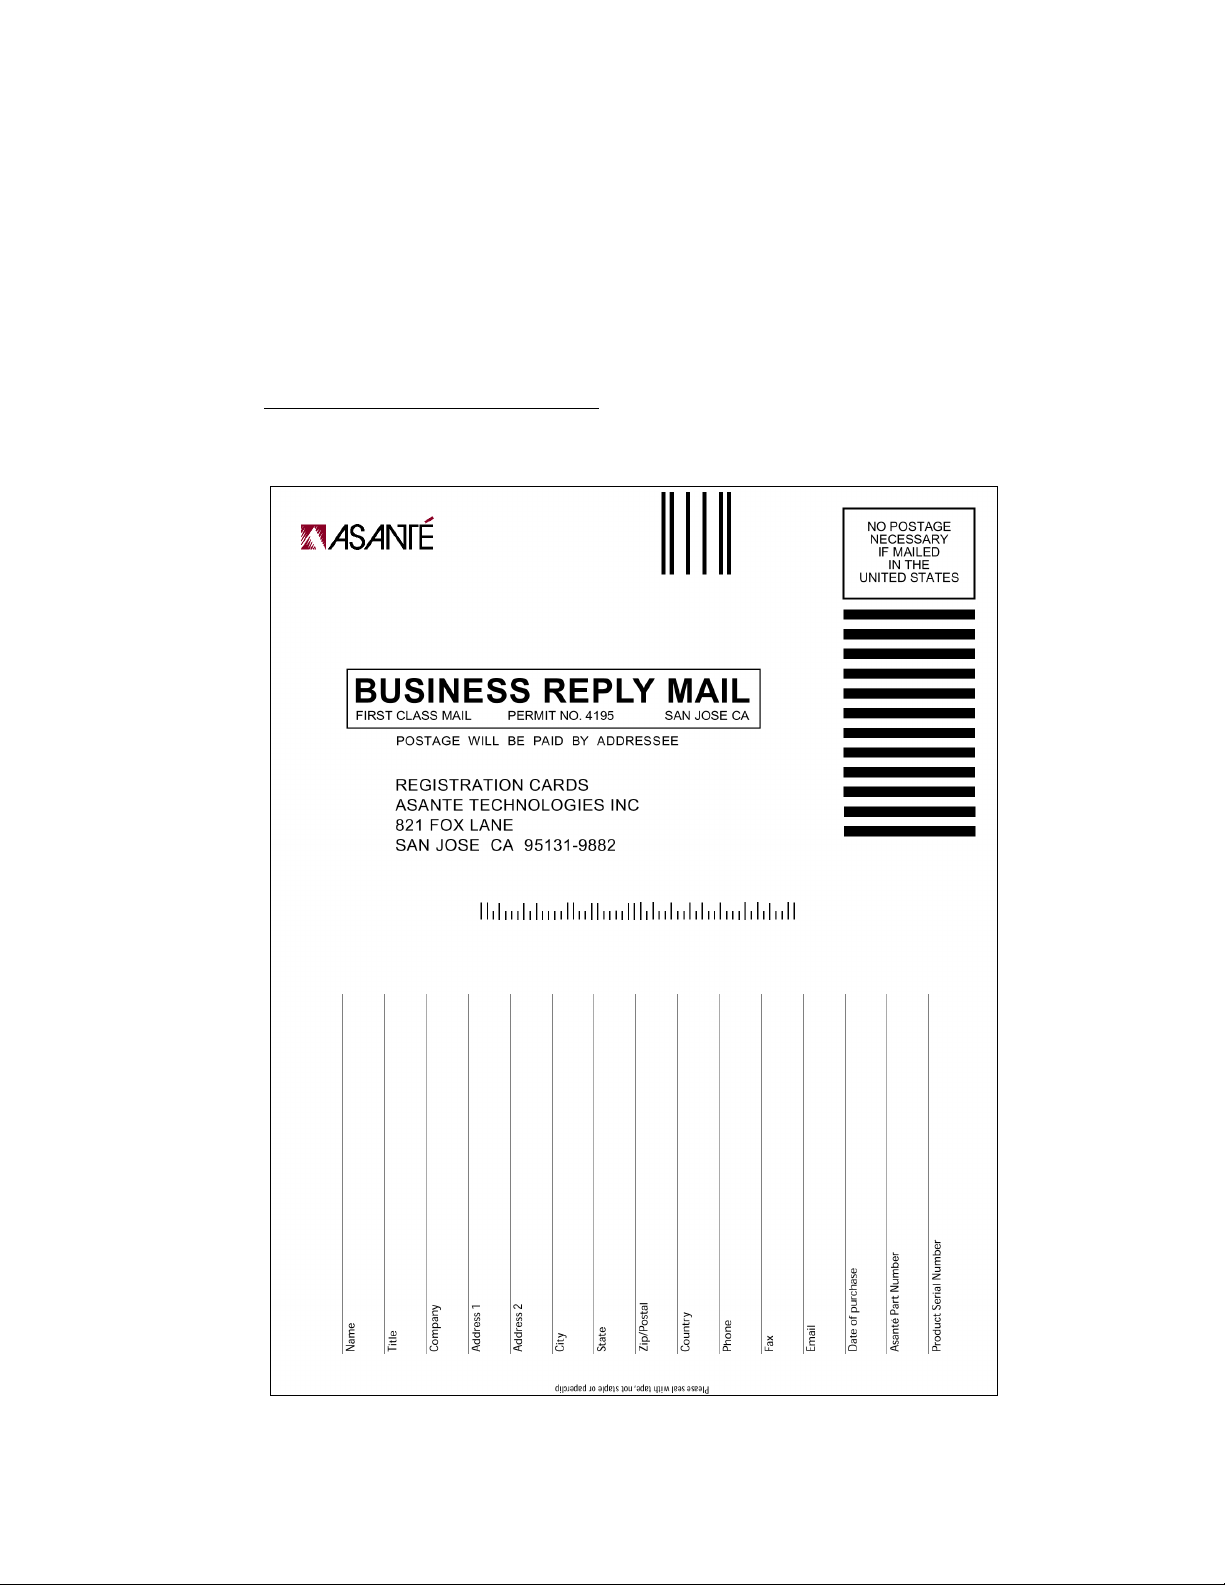
Appendix A Online Warranty Registration and Card
Before contacting Asanté’s Technical Support, please register your product online at
www.asante.com/support/registration.html
will be entitled to special offers, up-to-date information and important product bulletins.
or by using the card below. By doing so, you
Page 34

34
AsantéTalk Ethernet to LocalTalk Converter
Page 35

User’s Manual
35
Page 36

AsantéTalk Ethernet to LocalTalk Converter
User’s Manual
Asanté Technologies, Inc.
821 Fox Lane
San Jose, CA 95131
USA
ALES
S
800-662-9686 Home/Office Solutions
800-303-9121 Enterprise Solutions
408-435-8388
[email protected]
ECHNICAL SUPPORT
T
801-566-8991 Worldwide
801-566-3787 FAX
www.asante.com/support
Copyright © 2003 Asanté Technologies, Inc. Asanté is a registered trademark of Asanté Technologies, Inc. The Asanté logo and AsantéTalk are trademarks of Asanté Technologies, Inc.
All other names or marks are trademarks or registered trademarks of their respective owners.
All features and specifications are subject to change without prior notice.
P/N 06-00628-00 Rev. A 5/03
 Loading...