

Page 1

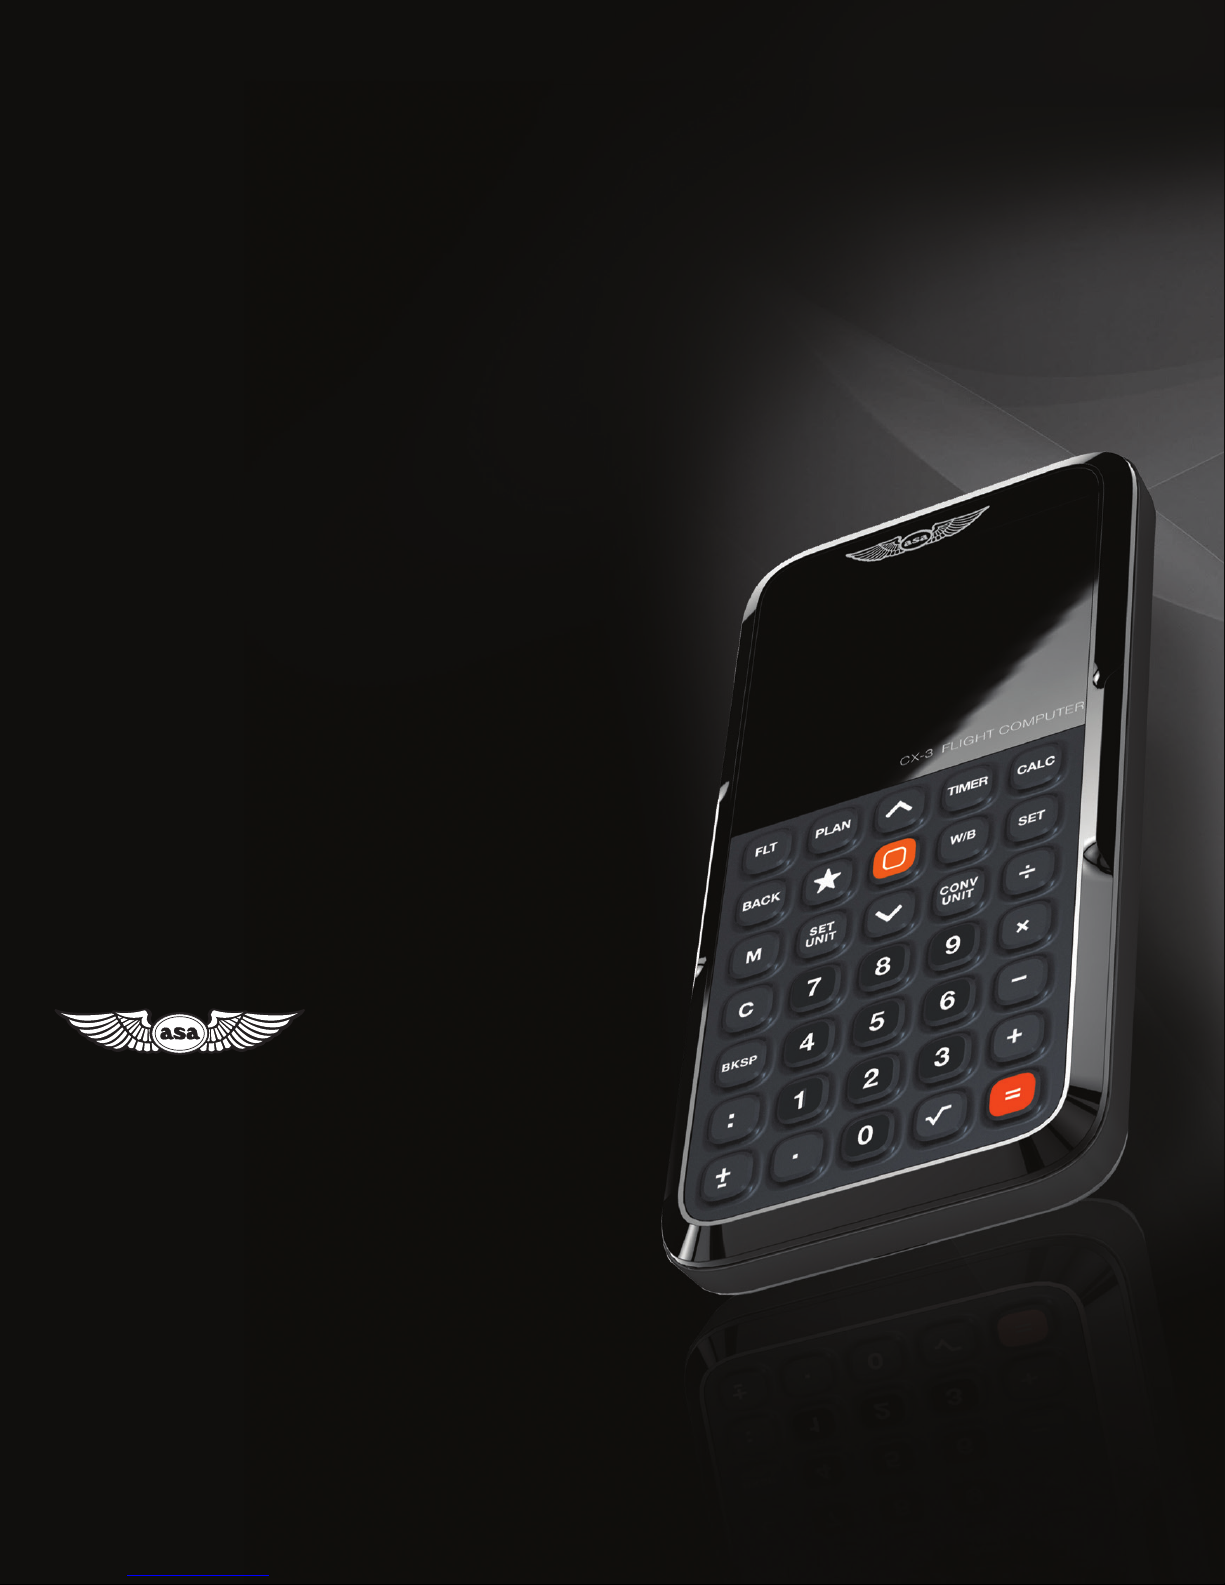
CX
Flight Computer
-
3
USER’S GUIDE
CX3
Page 2

USER’S GUIDE
CONTENTS
-
CX
3
Flight Computer
Introduction
Keypad . . . . . . . . . . . . . . . . . . .
Screen Overview
Line Icons . . . . . . . . . . . . . . . . .
Battery Indicator . . . . . . . . . . . . . . 3
Getting Started . . . . . . . . . . . . . . 4
Setting Preferences . . . . . . . . . . . . 4
Theme . . . . . . . . . . . . . . . . . 4
Backlighting . . . . . . . . . . . . . . 4
Time Set . . . . . . . . . . . . . . . . 4
Default Units . . . . . . . . . . . . . . 4
Unit Changes . . . . . . . . . . . . . . 4
Favorite . . . . . . . . . . . . . . . . . 4
Aircraft Prole. . . . . . . . . . . . . . 5
User Data. . . . . . . . . . . . . . . . 5
Version . . . . . . . . . . . . . . . . . 5
Resetting . . . . . . . . . . . . . . . . . 5
USB . . . . . . . . . . . . . . . . . . . . 5
Menu System . . . . . . . . . . . . . . . 6
Favorite . . . . . . . . . . . . . . . . . . 6
FLT (E6-B Functions) . . . . . . . . . . . 7
Unit Conversions . . . . . . . . . . . . . 7
Altitude . . . . . . . . . . . . . . . . . . 8
Pressure Altitude . . . . . . . . . . . . 8
Density Altitude . . . . . . . . . . . . . 8
Cloud Base . . . . . . . . . . . . . . . . 8
Standard Atmosphere . . . . . . . . . . . 9
Airspeed . . . . . . . . . . . . . . . . . . 9
Planned TAS . . . . . . . . . . . . . . 9
Actual TAS . . . . . . . . . . . . . . . 9
Required CAS . . . . . . . . . . . . . 9
Planned MACH# . . . . . . . . . . . . 10
Actual MACH# . . . . . . . . . . . . . 10
. . . . . . . . . . . . . . . . 1
2
. . . . . . . . . . . . . . 3
3
Fuel . . . . . . . . . . . . . . . . . . . . 10
Fuel Burn . . . . . . . . . . . . . . . . 10
Fuel Rate . . . . . . . . . . . . . . . . 10
Endurance . . . . . . . . . . . . . . . 10
Ground Speed. . . . . . . . . . . . . . . 10
Glide. . . . . . . . . . . . . . . . . . . . 11
Climb & Descent. . . . . . . . . . . . . . 11
Wind Component . . . . . . . . . . . . . 11
Estimated Time Arrival . . . . . . . . . . . 11
To-From . . . . . . . . . . . . . . . . . . 12
Compass Heading . . . . . . . . . . . . 12
Wind Correction . . . . . . . . . . . . . . 12
Rhumb Line . . . . . . . . . . . . . . . . 12
Holding Pattern . . . . . . . . . . . . . . 12
Plan (Trip Functions). . . . . . . . . . . . 13
Timer . . . . . . . . . . . . . . . . . . . .
Stopwatch. . . . . . . . . . . . . . . . . 15
Count Down . . . . . . . . . . . . . . . . 15
Calc (Calculator) . . . . . . . . . . . . . . 15
W/B (E6-B FUNCTION)
Weight and Balance . . . . . . . . . . . 16
Weight Shift Formula. . . . . . . . . . . 17
%MAC. . . . . . . . . . . . . . . . . . 17
Appendix A: Service Policy . . . . . . . . 18
Troubleshooting . . . . . . . . . . . . . 18
Battery Replacement . . . . . . . . . . 18
Limited Warranty. . . . . . . . . . . . . 18
Appendix B: Updating the CX-3 Firmware 19
Appendix C: CX-3 Backup Procedure . .
Saving Data . . . . . . . . . . . . . . . . 20
Restoring Data. . . . . . . . . . . . . . . 20
Appendix D: Abbreviations Guide . . . . 21
. . . . . . . . . . 16
15
20
Page 3
-
CX
3
Flight Computer
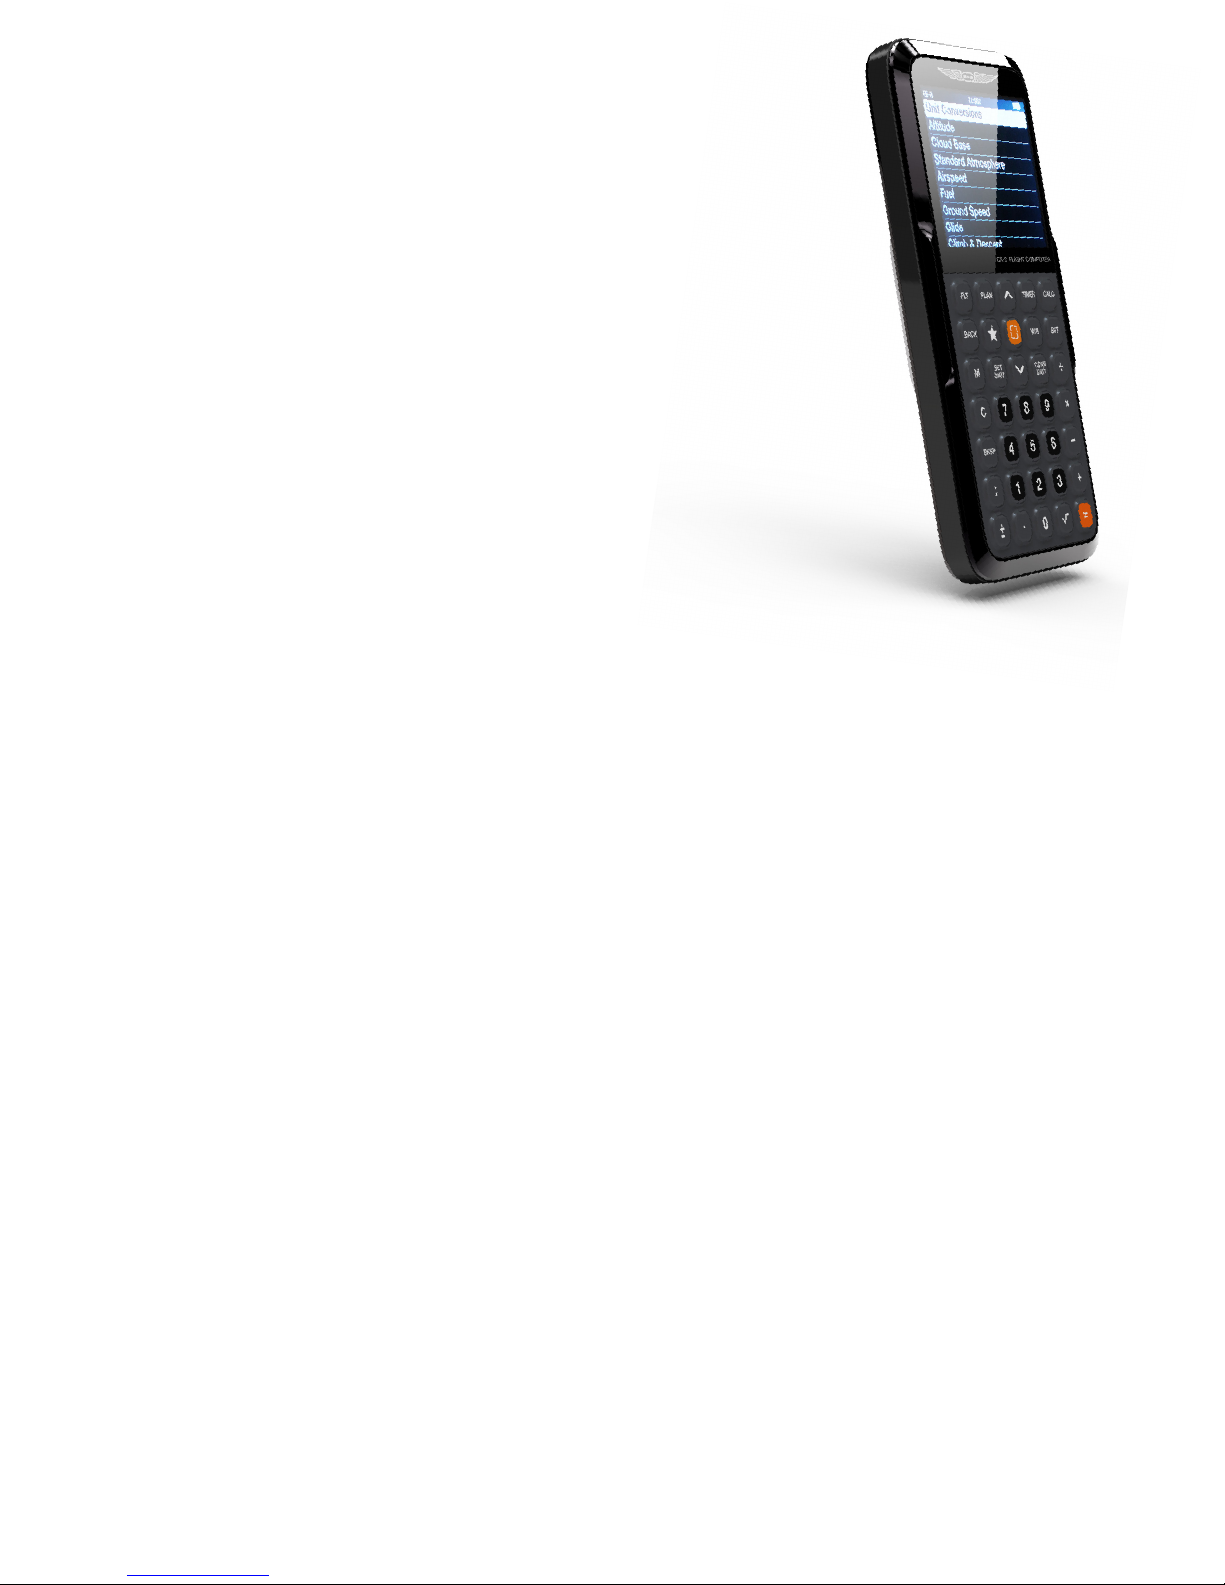
INTRODUCTION
ASA’s CX-3 is the next generation aviation ight
computer. Using the latest microchip and display
technologies, the CX-3 features make it the most
versatile and useful aviation calculator available.
May be used during FAA and Canadian
Knowledge Exams. The CX-3 complies with FAA
Order 8080.6 and Advisory Circular (AC) 60-11, “Test
Aids and Materials That May be Used by Airman
Knowledge Testing Applicants”; therefore, you may
bring the CX-3 with you to the testing centers for all
pilot, mechanic, and dispatcher FAA exams.
Numerous aviation functions. You can calculate
everything from true airspeed, Mach number, fuel
burn, and holding patterns to headwind/crosswind
components, center of gravity (CG), and many more.
The menu structure provides easy entry, review, and
editing within each function. Multiple problems can
be solved within one function.
User-friendly. The color LCD screen displays a
menu of functions and the inputs and outputs of a
selected function with easy-to-read menus and data
displays. The inputs and outputs of each function
are separated on the display screen to distinguish
between entered numbers and calculated values,
along with their corresponding units of measurement.
The menu organization reects the normal process
for planning and executing a ight. The result is a
natural ow from one function to the next with a
minimum of keystrokes: to plan a ight, simply work
from the menus in sequential order as you ll in your
ight plan form.
Non-volatile memory. All settings, including
aircraft prole, weight and balance data, trip plan
data, values entered by the user, and calculations
performed by the device, will be retained until the
batteries are removed or the user performs a memory
reset. Follow the procedure outlined in Appendix C
on page 20 to back up and restore memory.
Ergonomic design. The CX-3 features a simple
keyboard and slim design. The non-slip cover
protects your computer inside a ight bag and ts on
the back of the unit for easy storage while in use.
Unit conversions. The CX-3 has 12 unit
conversions: Distance, Speed, Duration,
Temperature, Pressure, Volume, Rate, Weight, Rate
of Climb/Descent, Angle of Climb/Descent, Torque,
and Angle. These 12 conversion categories contain
38 different conversion units for more than 100
functions.
Timers and clocks. The CX-3 has two timers: a
stopwatch that counts up and a countdown timer.
The stopwatch can be used to keep track of elapsed
time or to determine the time required to y a known
distance. The countdown timer can be used as a
reminder to switch fuel tanks, or to determine the
missed approach point on a non-precision instrument
approach. An internal clock continues running even
when the ight computer is turned off. UTC and local
time can be displayed, and the time can be set with
UTC, destination, or local time.
Interactive functions. The CX-3 is designed so
the functions can be used together. You can perform
“chain” calculations where the answer to a preceding
problem is automatically entered in subsequent
problems. Standard mathematical calculations and
conversions can be performed within each aviation
function.
Up to date. Check often for new CX-3 updates
online at www.asa2y.com/CX3
procedure is outlined in Appendix B on page 19 of
this guide.
. The update
– 1 –
Page 4
CX-3
Flight Computer
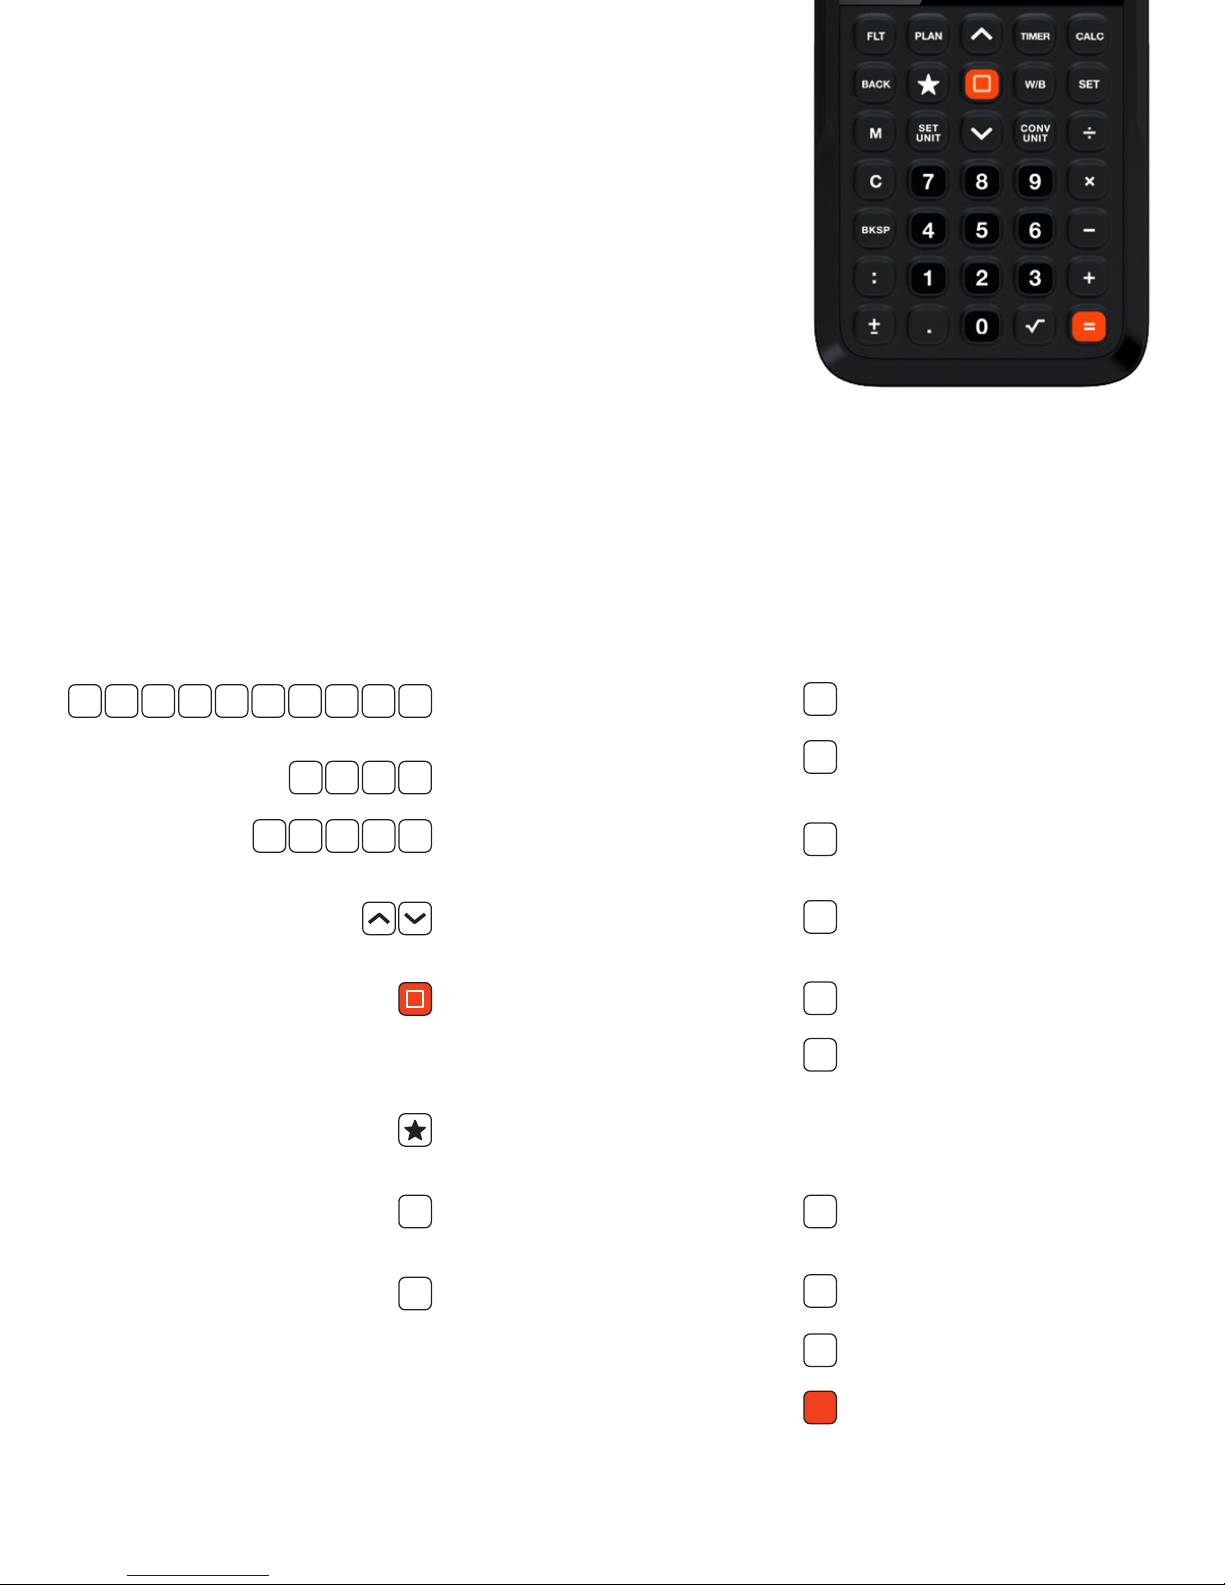
KEYPAD
The CX-3’s simple keypad is possible because of the sophisticated
display screen and menu structure. The advantages of such a keypad are
twofold: A calculator with 35 keys is simpler to use than one with 50 or
more, and it is small enough to t in a shirt pocket. Both advantages make
the CX-3 useful to pilots in day-to-day operations.
0 1 2 3 4 5 6 7 8 9
÷ x — +
FLT PLAN TIMER CALC W/B
BACK
Numeric keys for entering
numbers.
Standard arithmetic operators.
Selects each of the ve main
menus.
Used to navigate through the
menu structure.
Power to turn CX-3 ON/OFF.
Select highlighted menu item,
or enter current input line when
function is requesting input.
Favorites: sets a saved function for
easy recall.
Changes display to the previous
menu.
M
Memory function for saving numbers.
SET
Sets the current units for a given
UNIT
function.
CONV
Converts the current value into
UNIT
another unit.
C
Clears current input line. In calculator
mode, clears the math completely.
BKSP
Deletes the last entered value.
:
Separates hours from minutes and
minutes from seconds on time
inputs. For example, 2 hours, 38
minutes and 45 seconds will display
as 02:38:45.
+
Changes sign (positive or negative)
−
of current input line.
SET
Use to access the CX-3’s
preferences settings (Theme,
Backlighting, Time Set, Units,
Aircraft Prole, etc.)
– 2 –
.
Decimal point.
Activates the square root function.
√
Completes the calculation.
=
Page 5
CX-3
Flight Computer
SCREEN OVERVIEW
The status bar at the top of the screen includes the name of the current
menu function, display time, and battery indicator. Below the status bar
is the submenu identifying the function name. The highlighted line item
indicates the currently selected function. The bottom line will be cut in half
to show that there are more elds below.
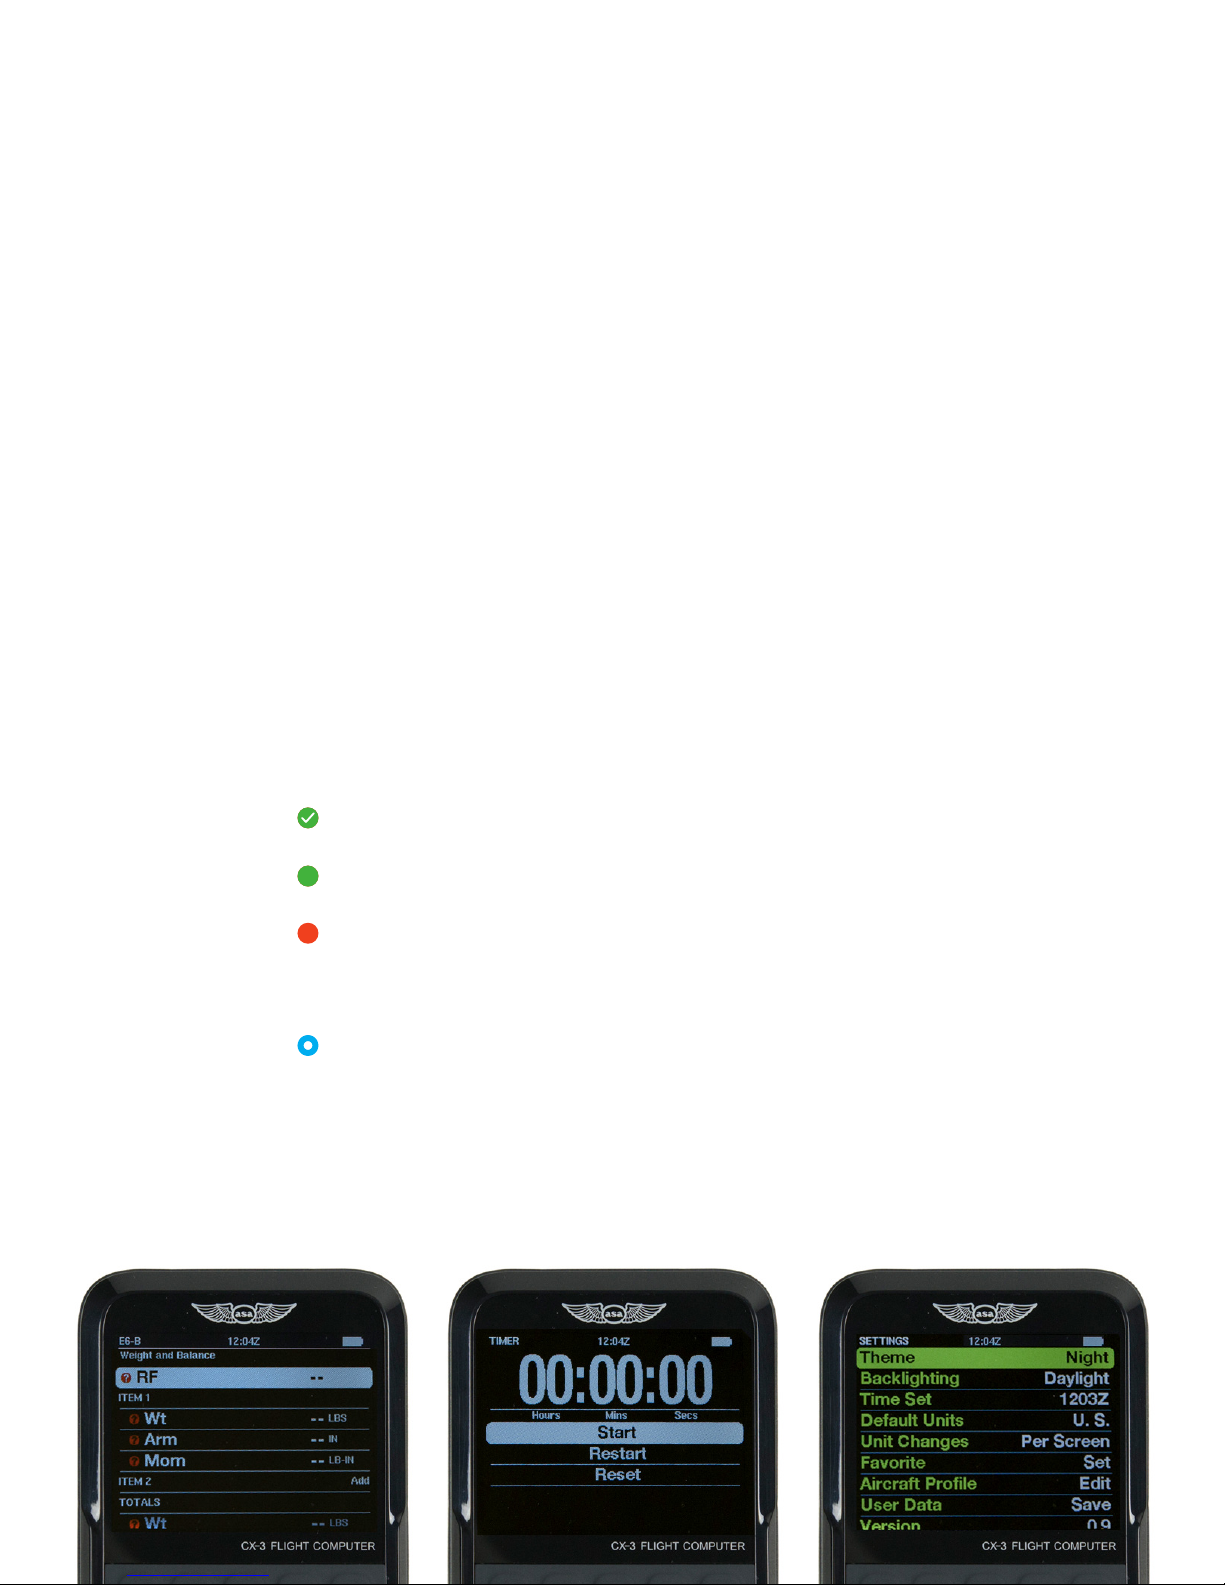
◗ LINE ICONS
Line icons indicate data that is missing, entered,
solved for, or entered and saved elsewhere.
Line icons will change as values are entered and
calculations are solved.
A green icon with a check mark indicates
entered data.
=
A green icon with an equals sign indicates
calculated data.
An amber icon indicates unsolved data; the
?
unsolved eld is shown on the right side of
the screen with 2 dashes (where the value will
appear when entered).
A blue circle icon indicates repeated global
values if more than one leg is added to the trip.
◗ BATTERY INDICATOR
The battery level is checked every 15 seconds
and multiple readings are taken before the level is
updated. The battery indicator will display four levels:
100%, 75%, 50%, and 25%. The icon will display as
white unless the battery level is at or below 25%, at
which point it will display as red.
– 3 –
Page 6
CX-3
Flight Computer
GETTING STARTED
PRESS THE ORANGE POWER button located in
the middle of the CX-3 to turn the ight computer on.
Hold the orange power button for 3 seconds to turn
the ight computer off. The CX-3 keypad backlighting
will automatically turn off after 3 minutes of inactivity;
backlighting can be turned back on by pressing any
key. If left inactive for 10 minutes, the CX-3 will turn
off; information will be saved and you can resume
by pressing the power button. This feature prevents
battery exhaustion if the computer is inadvertently left
on. When rst turned on, the CX-3 will return to the
most recent menu used before the device was last
turned off.
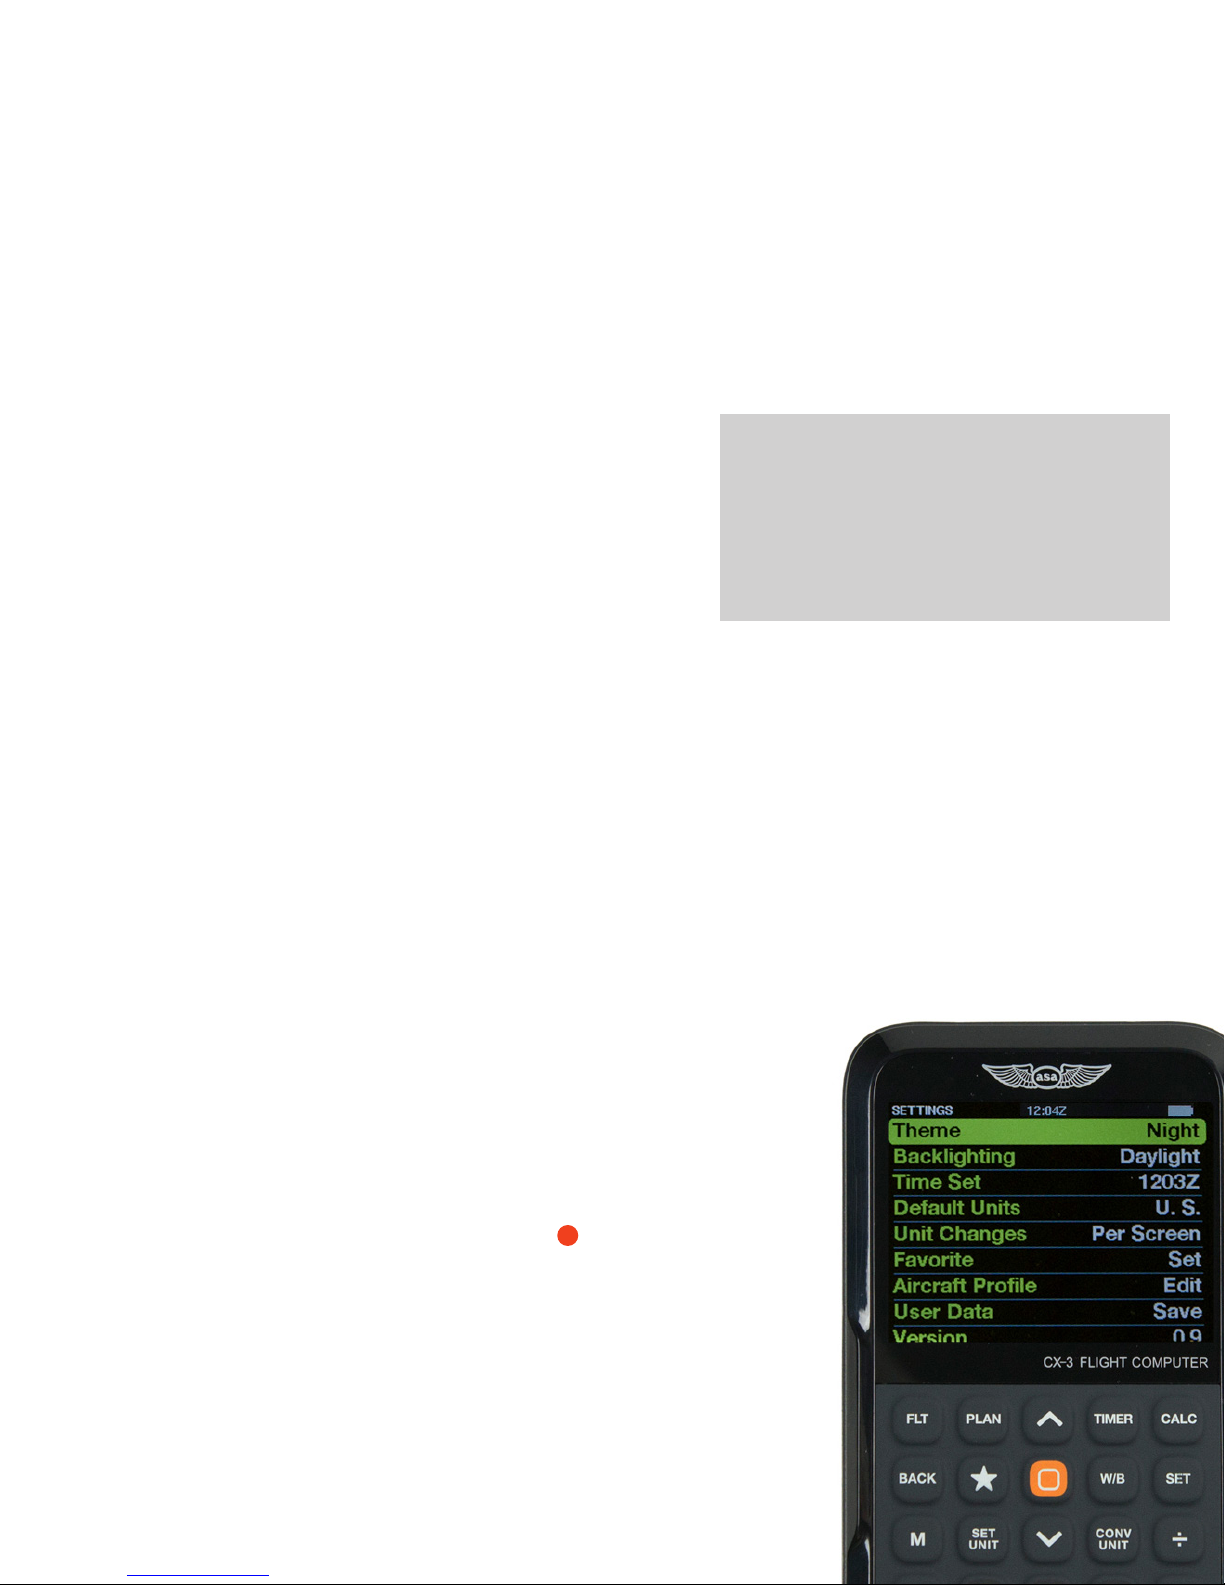
◗ SETTING PREFERENCES
Press the button, scroll to the item you want to
set, and tap enter.
Theme
Choose from three options for maximum visibility while
in use.
— Standard: Black background, white lettering
— Night: Black background, green and white lettering
— Daylight: White background, black lettering
Backlighting
Choose from four options to improve visibility given the
ambient light conditions.
— Normal: Medium backlit screen; keypad not lit.
— Daylight: Maximum backlit screen; keypad not lit.
— Dusk: Medium-low backlit screen; keypad lit.
— Night: Low backlit screen; keypad lit.
*(Note: Normal backlighting will conserve battery
power for the longest period.)
Time Set
The CX-3 uses a 24-hour clock and does not account
for daylight saving time. The internal clock lets you
set both local and UTC time and will continue running
even with the calculator turned off. The CX-3 contains
SET
a single clock representing Coordinated Universal
Time (UTC), also known as Greenwich Mean Time
(GMT) or Zulu time. There are two steps to set the
internal clock. First, set the UTC or Local time and
Destination time. Next, set the Timezone for both
local and destination.
If the time is after noon, you will need to enter the
time based on a 24-hour clock; for example, 2 p.m.
would be 14:00:00. To set the clock to 1:30 p.m. in
the Pacic Time Zone:
1. Press button, scroll to Time Set and tap
2. Scroll to Time Zone: Local and tap enter.
3. Scroll up to select the Pacic Time Zone and tap
4. Scroll to Time Set: Local.
5. Input and tap enter.
6. You will now see UTC 21:30:00 and Local
7. Scroll to Time Zone: Destination and tap enter to
The display time on the top status bar will show
the time as displayed under Time Set: Local. If you
would like the status bar to display UTC time, select
“GMT, Western European” under Set Time Zone:
Local. Note that a Z now appears after the display
time to signify that all times shown are UTC.
Default Units
Set the device to default to U.S. or Metric units.
Unit Changes
This allows for units to be changed for a given
calculation per screen or per line item. For example,
“Individually” will modify the unit for a single line in a
given calculation while “Per Screen” will change all
instances of that unit for a given calculation.
Favorite
This allows for creating a shortcut to a specic
function. This shortcut will be saved and accessed by
pressing the button.
SET
enter.
enter.
01 : :33
13:30:00.
set a destination Time Zone
– 4 –
Page 7
CX-3
Flight Computer
Aircraft Prole
This feature allows for entering specic data for the
airplane most frequently used for quick reference and
input when calculating weight and balance.
— K: The instrument calibration factor of the airplane.
This is used to calculate OAT from TAT (and viceversa) and is dependent on airspeed. It is set to
a default value of 1.0. This value is dependent on
the aircraft.
— Prole Valid: This allows you to set your prole On
or Off once all data is entered. If On, the aircraft
prole data will be used for all weight and balance
calculations.
— Empty Aircraft: Enter a reduction factor (RF). An
RF of 1 means all entries are taken at face value.
An RF of 100 means each moment is divided
by 100 before the calculator displays it or the
operator enters it; this will be taken into account
when the total and CG are computed. Enter 2 out
of 3 of the values for Wt, Arm, and Mom; the CX-3
will calculate the third automatically.
— Fuel (FuelAux): Type can be selected by pressing
enter (Av Gas: 6 lbs., Jet Fuel: 6.84 lbs., Oil: 7.50
lbs.).
◗ RESETTING
To wipe the memory and reset the CX-3, remove
all of the batteries. The FAA requires that all the
memory in an electronic ight computer be cleared
prior to use during FAA Knowledge Exams. You
may want to back up your data before resetting the
CX-3; see Appendix C on page 20 for instructions.
◗ USB
The CX-3 accepts a micro-type B-USB plug (not
included) to connect to the computer. This feature
allows users to save their settings and data. Once
connected to a computer, the CX-3 will be displayed
as a mass storage device when the unit is turned
on. The le “data.cx3” can then be saved and
reloaded back onto the CX-3 after factory defaults
have been restored. Instructions for updating the
CX-3’s rmware can be found in Appendix B on
page 19, and the procedure for backing up and
restoring data is detailed in Appendix C on page 20.
— Individual Item Arms: Enter up to three arms for
pilot/passenger locations (each can be considered
a row). Enter up to two cargo station locations
and three custom elds available for various other
required stations.
* Note that all unsolved data elds must contain
a value for the prole to be valid. If a eld is not
required, simply enter a value of 0.00 (i.e., Custom 1
= 0.00 IN).
User Data
This allows you to Cancel, Save, and Recall
Version
This displays the rmware version installed on the CX-3.
?
user data.
– 5 –
Page 8
CX-3
Flight Computer
MENU SYSTEM
The CX-3 menu system is organized to reect the natural order of ight. Simply
work through the menus in sequential order as you complete your ight plan.
When a menu is displayed, the menu items can
be selected by highlighting a particular choice by
scrolling or followed by tapping the enter key.
To return to the previous menu, press the key.
You can go directly to the Flight, Plan, Timer,
Calculator, and Weight & Balance menus by pressing
FLT PLAN TIMER CALC
the , , , , and keys. Any CX-3
function can be reached with a maximum of 2
keystrokes. See Appendix D on page 21 for a quick
guide to names and abbreviations of the various
functions.
The computer will prompt you for the inputs with
an amber question mark, and the answers will display
with a green equals sign. The formulas used for these
functions handle multiple units of measure. The CX-3
will convert any headings exceeding 360 to remain
within 360°. For example, if you enter 390 for any
heading, the CX-3 will change this to 30 once you
tap enter. All math and conversion functions can be
carried out on any input line.
The CX-3 remembers the most recent display
of variables, whether it was an input or an answer.
The CX-3 will offer these again for any subsequent
function requiring the same variables for a solution.
This allows for “chains” of problems, where a value
W/B
BACK
that is an answer in one function will be automatically
entered as input in a succeeding function. If a
function is repeated, any and all input lines will be
re-entered automatically by tapping enter. This allows
you to repeat a calculation where only one or two
inputs are changed, with minimum effort. You may
delete the inputs to be changed by pressing C or
simply typing in replacement numbers. Resetting the
computer will delete everything in memory. This will
reset all variables to zero.
The numbers displayed as inputs are the numbers
used in the calculations. The CX-3 will round each
input variable to two decimal places. Similarly, each
function output variable is also rounded to two
decimal places. This rounding procedure means
the display will always be accurate for the numbers
displayed and keep numbers manageable, yet will
also allow for precise answers.
◗ FAVORITE
The button is a shortcut to a specic function.
This shortcut can be saved or changed in the
settings menu and can then be quickly accessed by
pressing the button.
– 6 –
Page 9

CX-3
Flight Computer
FLT (E6-B FUNCTIONS)
◗ UNIT CONVERSIONS
Often it is necessary to convert from one unit of
measurement to another. The CX-3 has 12 conversion
functions that are activated by tapping the key
while a value has been selected. The unit labels appear
to the right of the value.
— To convert 100 KM to nautical miles, press until
NM is displayed. The answer is 54 NM.
— To convert 200 knots to KPH (kilometers per hour),
scroll down to Spd and press until KPH is
displayed. The answer is 370.4 KPH.
— To convert 75 minutes to hours, scroll down to Dur
and press until HR is displayed. The answer is
CONV
UNIT
1.25 HR.
— To convert -20° Celsius to Fahrenheit, scroll down
to Temp and press until °F is displayed. The
CONV
UNIT
answer is -4°F.
— To convert 29.78 inches of mercury to mb, scroll
down to Pres and press until MB is displayed.
The answer is 1008.47 MB.
— To convert 50 U.S. gallons to liters, scroll down to
Vol and press until L is displayed. The answer is
CONV
UNIT
189.27 L.
— To convert 9.5 U.S. gallons per hour to liters per
hour, scroll down to Rate and press until LPH is
displayed. The answer is 35.96 LPH.
— To convert 2,000 pounds to kilograms, scroll down
to Wt and press until KG is displayed. The
CONV
UNIT
answer is 907.18 KG.
— To convert 500 feet per minute to meters per
second, scroll down to RoC and press . The
answer is 2.54 M/S.
— To convert 1,000 feet per nautical mile to feet per
statute mile, scroll down to AoC and press until
FT/SM is displayed. The answer is 868.98 FT/SM.
— To convert 50 pounds per inch to kilograms per
meter, scroll down to Torq and press until KG M
is displayed. The answer is .58 KG M.
— To convert 180.5 degrees to degrees, minutes,
seconds, scroll down to Angle and press . The
answer is 180:30:00 DMS.
CONV
UNIT
CONV
UNIT
CONV
UNIT
CONV
CONV
UNIT
– 7 –
CONV
UNIT
UNIT
CONV
UNIT
CONV
UNIT
CONV
UNIT
Page 10

◗ ALTITUDE
Pressure Altitude
In aviation calculations, air pressure is normally
specied by an altitude in a standard atmosphere,
instead of pounds per square inch or inches of
mercury. The altitude corresponding to a given
pressure is called the pressure altitude (PAlt). An
aviation altimeter displays PAlt when the altimeter
setting window is adjusted to the standard
atmospheric pressure at sea level, 29.92" Hg. PAlt is
required to calculate true airspeed (TAS) and density
altitude (DAlt).
The Altitude function calculates pressure altitude
(PAlt), given the indicated altitude (IAlt) and altimeter
setting (Baro) obtained from the automated ight
service station (AFSS) or Air Trafc Control (ATC).
An altimeter adjusted to this setting will indicate
the altitude of the aireld when the aircraft is on the
ground.
Problem: You are planning to y at 4,500 feet
IAlt and the current altimeter setting is 30.15" Hg.
What PAlt should you use to calculate the TAS?
Solution:
Altitude line and tap enter. Enter IAlt by pressing
setting:
The display will show PAlt equal to 4289 FT.
E6-B 10:34
Press the key. Highlight the
and tap enter. Enter the altimeter
0 04 5
.0 13 5
and tap enter.
FLT
Unit Conversions
Altitude
Cloud Base
Standard Atmosphere
Airspeed
Fuel
Ground Speed
Glide
Climb & Descent
Wind Component
Estimated Time Arrival
To - From
Compass Heading
Wind Correction
Rhumb Line
Holding Pattern
Problem: What is the PAlt at an airport with a
eld elevation of 5,900 feet and a 29.75" Hg
altimeter setting?
Solution:
Altitude line and tap enter. Enter IAlt:
Enter the altimeter setting:
The display will show PAlt equal to 6059 FT.
Density Altitude
In aviation calculations, air density is normally
specied by an altitude in a standard atmosphere,
instead of pounds per cubic foot. The altitude
corresponding to a given density is called the density
altitude (DAlt). The Altitude function computes density
altitude (DAlt) based on pressure altitude (PAlt) and
the outside air temperature (OAT).
Problem: What is the DAlt at an airport with
a eld elevation of 5,900, 29.75" Hg altimeter
setting, and 75°F OAT?
Solution:
line and tap enter. Enter IAlt:
Scroll the curser to Baro and enter the altimeter
setting:
Scroll down to OAT and input , tap enter.
The display will show PAlt equal to 6059 FT and
DAlt equal to 8427 FT.
◗ CLOUD BASE
The Cloud Base function computes the altitude of the
cloud base above ground level (AGL). The function
prompts for the dew point (Dewp) and outside air
temperature (OAT) at the aireld. If you want the
elevation of the cloud base above mean sea level
(MSL), you must add the elevation of the aireld to
the result from the Cloud Base function.
Problem: At approximately what altitude above
the surface can the pilot expect the base
of cumuliform clouds to be if the surface air
temperature is 82°F and the dew point is 38°F?
Solution:
and tap enter. You are prompted for the outside
air temperature (OAT). Press:
You are then prompted for dew point (Dewp).
Press:
3 8
The answer is 10,000 FT AGL.
Press the key. Highlight the
0 05 9
and tap enter.
.9 72 5
and tap enter.
Press the key. Highlight the Altitude
0 05 9
and tap enter.
and tap enter.
Press the key. Scroll to Cloud Base
28
and tap enter.
and tap enter.
FLT
FLT
.9 72 5
7 5
FLT
– 8 –
Page 11

◗ STANDARD ATMOSPHERE
Since air pressure and air density are specied by
an altitude in a standard atmosphere, you may want
to nd the standard atmosphere for a given altitude.
The International Civil Aviation Organization (ICAO)
has established standard conditions for temperature
and pressure. You can enter an altitude (Alt) in
the StdAtmos function and obtain the outside air
temperature (OAT); pressure in inches of mercury (IN
Hg); and pressure in millibars (mb) for the standard
atmosphere. The StdAtmos function is valid up to
278,385 feet.
Problem: What are the standard atmospheric
conditions at sea level?
Solution:
Press the key. Scroll to Standard
FLT
Atmosphere and tap enter. You are prompted for
the altitude. Press:
0
and tap enter to enter 0 feet, or sea level.
The display will show 29.92 IN HG, 59°F OAT.
Problem: What are the standard atmospheric
conditions at 20,000 feet?
Solution: Select the Standard Atmosphere
function. You are prompted for the altitude. Press:
0 0 0 02
and tap enter to input
20,000 feet.
The display will show 13.75 IN HG, -12°F OAT.
◗ AIRSPEED
Planned and Actual True Airspeed (TAS) and Mach
number can be calculated and are dependent on
the temperature input. Planned airspeeds require the
use of outside air temperature (OAT), obtainable from
the preight weather brieng or from what you read
on a thermometer on the ground. Actual airspeeds
require the use of total air temperature (TAT), which is
obtained by a probe having velocity with respect to the
air (essentially, the thermometer in your aircraft). TAT is
warmer than OAT, because of kinetic heating due to
compression on the upstream side of the probe.
Planned TAS
The Airspeed function can compute the true airspeed
(TAS) for a planned calibrated airspeed (CAS) with the
inputs Planned CAS, OAT, and PAlt. It is important to
use the OAT and PAlt at the planned ight altitude.
OAT may be obtained from winds aloft forecasts.
OAT can also be determined from the TAT during
ight. PAlt is normally obtained from the Altitude
function. The Airspeed function calculates TAS, TAT
(which can be used as a cross-check with the inight TAT), and Mach Number (MACH).
Problem: You plan to y 125 knots CAS, 8,500
feet PAlt, and 23°F OAT. Compute TAS and TAT.
Solution: Press the key. Select the Airspeed
FLT
submenu and tap enter. Scroll to CAS, input and
tap enter for the planned CAS. Scroll to enter the
OAT:
2 3
and tap enter. Scroll to enter the PAlt:
and tap enter to enter 8,500 feet
0058
PAlt.
The display will show 141.03 KTS TAS, 28°F TAT,
and 0.221 MACH.
Actual TAS
The Airspeed function can compute true airspeed
using information from instruments during an actual
ight. The inputs to this function are CAS, TAT, and
PAlt. The Airspeed function calculates TAS, OAT
(which can be used as an input to Plan TAS and Req
CAS functions), and Mach Number (MACH).
Problem: Compute the TAS at 6,500 feet PAlt,
+10°C TAT, at a CAS of 150 MPH.
Solution: Press the key. Select the Airspeed
FLT
submenu. Convert from knots to miles per hour by
scrolling down to CAS and by pressing , (you
CONV
UNIT
will also need to convert TAT from °F to °C) then
press:
and tap enter to input 150 MPH, then
and tap enter to input 10°C TAT, then
and tap enter again to enter
01 5
01
0056
6,500 feet PAlt.
The display will show 166.64 MPH TAS, 7°C OAT,
and 0.222 MACH.
Required CAS
The Airspeed function can compute the calibrated
airspeed required to achieve a given true airspeed
with the inputs TAS, OAT, and PAlt. The Airspeed
function calculates CAS, TAT, and MACH.
Problem: What is the required CAS or MACH to
obtain 150 knots TAS with 41°F OAT and 6,500
feet PAlt?
Solution:
Press the key. Select the Airspeed
FLT
submenu. Press:
and tap enter to input 150 knots
01 5
TAS, then
14
and tap enter to input 41°F OAT, and then
and tap enter to input 6,500 feet
0056
PAlt.
The display will show 135.58 KTS CAS, 46°F TAT,
and 0.231 MACH.
– 9 –
Page 12

Planned MACH#
The Airspeed function can compute true airspeed for
a planned MACH with the inputs Planned MACH and
OAT. It is important to use the OAT at the planned
ight altitude. The Airspeed function computes TAS,
and TAT (to be used as a cross-check against the
in-ight TAT).
Problem: Compute TAS for 0.72 MACH and
-31°F OAT.
Solution: Press the key. Select the Airspeed
FLT
submenu. Press:
. 7 2
and tap enter to input 0.72 MACH,
and then
and tap enter to input
3 1
+
−
-31°F OAT.
The display will now show 432.98 KTS TAS and
13°F TAT.
Actual MACH#
The Airspeed function can compute true airspeed
using information from instruments during an actual
ight. The inputs to this function are Actual MACH,
and TAT. The Act MACH# function calculates TAS,
and OAT.
Problem: Compute the TAS given 0.82 MACH
with -4°F TAT.
Solution: Press the key. Select the Airspeed
FLT
submenu by scrolling to the Airspeed line. Tap
enter. Press:
. 8 2
and tap enter to input 0.82 MACH,
and then
+
4
and tap enter to input -4°F T
−
AT.
The display will show 477.32 KTS TAS and -58°F
OAT.
◗ FUEL
Fuel Burn
The Fuel function calculates the amount of fuel (Vol)
consumed over a specied time Duration (Dur) at a
specied rate (Rate).
Problem: How much fuel will burn in 1 hour, 14
minutes, and 38 seconds at a rate of 9.5 gallons
per hour?
Solution:
Press the key. Select the Fuel
submenu. Scroll to Dur and press , to get
FLT
CONV
UNIT
HMS. Next press:
1 : 1 4 : 3 8
and tap enter to
input 1:14:38 HMS Dur, and then:
Fuel Rate
The Fuel function calculates the fuel rate (Rate) from
the amount of fuel (Wt) consumed over a given time
duration (Dur).
Problem: What is rate of fuel consumption if
9,500 pounds of fuel were burned in the last 2
hours, 30 minutes?
Solution:
Press the key. Select the Fuel
FLT
submenu. Scroll to Dur and press:
2 : 3 0 : 0 0
and tap enter to
input 2:30 HMS Dur, and then scroll to Wt and
press:
and tap enter to input 9,500 LBS
0059
of Fuel.
The display will show a Rate of 3,800 LBS/HR.
Endurance
The Fuel function can calculate the duration of
time (Dur) a specied amount of fuel (Vol) will be
consumed at a specied rate (Rate).
Problem: How much ight time do you have with
38 gallons of fuel on board, and a power setting
that gives a fuel burn rate of 9.5 gallons per hour?
Solution: Press the key. Select the Fuel
FLT
submenu. Press:
3 8
and tap enter to input 38 U.S. GAL Vol,
and then:
9 . 5
and tap enter to input 9.5 U.S. GPH
Rate.
The display will show 3:59:59 HMS Dur (3 hours,
59 minutes, 59 seconds).
◗ GROUND SPEED
The Ground Speed function computes ground speed
given a distance (Dist) and ight duration (Dur).
Problem: What is the ground speed if 5 nautical
miles are own in 2 minutes, 32 seconds?
Solution:
Press the key. Select the Ground
FLT
Speed submenu. Press:
5
and tap enter to input 5 NM Dist. Press to
get HMS, then
0 0 : 0 2 : 3 2
and tap enter to
input 00:02:32 HMS Dur.
The display will show 118.42 KTS GS.
and tap enter to
5.9
Rate.
The display will show 11.82 U.S. GAL VOL.
input 9.5 U.S. GPH
– 10 –
Page 13

◗ GLIDE
Glide can compute the horizontal distance (Dist) in
nautical miles, given the glide ratio (Rat) and descent
(Desc) in feet.
Problem: An aircraft has a best glide ratio of 30:1.
What is the maximum number of nautical miles
traveled while losing 2,000 feet?
Solution:
Press the key. Select the Glide
FLT
submenu. Press:
3 0
and tap enter for 30:1 Rat, then
and tap enter for 2000 FT Desc.
0002
The answer is a distance of 9.87 NM.
Glide can compute descent (Desc) in feet, given the
glide ratio (Rat) and horizontal distance (Dist).
Problem: How many feet will an aircraft sink in 15
nautical miles if the lift/drag ratio is 22:1?
Solution:
Press the key. Select the Glide
FLT
submenu. Press:
2 2
and tap enter for 22:1 Rat, then
1 5
and tap enter for 15 NM Dist.
The answer is 4,143 FT Desc.
Glide can compute the glide ratio (Rat) given the
horizontal distance (Dist) and the descent (Desc).
Problem: An aircraft has lost 2,000 feet in 9
nautical miles. What is the glide ratio for the
aircraft?
Solution:
Press the key. Select the Glide
FLT
submenu. Press:
and tap enter for 2000 FT Desc,
then and tap enter for 9 NM Dist.
0002
9
The answer is a glide ratio of 27.3:1.
◗ CLIMB & DESCENT
By entering distance (Dist) and descent (Desc) you
can acquire angle of climb or descent (AoC/D) and
glide ratio (Rat). You can also enter in ground speed
(GS) and get your rate of climb or descent (RoC/D).
Note that Desc will work for both altitudes either
climbing or descending.
Problem: An aircraft has lost 5,000 feet in 30
nautical miles. What is the angle of descent and
glide ratio for this aircraft?
Solution:
Press the key. Select the Climb &
FLT
Descent submenu. Press:
3 0
and tap enter for 30 NM Dist, then
and tap enter for 5000 FT Desc.
0005
The answers are 166.67 FT/NM AoC/D and
36.5:1 Rat.
Problem: The same aircraft from the previous
problem has a ground speed of 90 knots. What is
the rate of descent?
Solution: Press:
9 0
and tap enter for 90 KTS GS.
The answer is 250 FPM RoC/D
◗ WIND COMPONENT
The Wind Component function computes the
headwind or tailwind component and the left or right
crosswind component for a given wind and runway.
The wind speed can be in knots, miles per hour or
kilometers per hour.
Since runways are numbered by their magnetic
course, the wind direction must be magnetic as
well (predicted winds aloft are given in true, rather
than magnetic orientation, while airport wind
advisories and runway headings are both magnetic).
The runway number must be entered—not the
course. The inputs are WSpd, WDir, and Runway.
Remember: it must be the runway number, not the
heading. For example, runway 27 (not 270), and
runway 9 (not 90). The outputs are crosswind
(X Wnd)—negative is a left crosswind, positive is a
right crosswind; headwind (H Wnd)—positive is a
headwind, negative is a tailwind.
Problem: Assume a wind of 350° at 10 knots.
What are the head/tailwind and crosswind
components for a landing on runway 03?
Solution:
Press the key. Select the Wind
FLT
Component submenu. Press:
1 0
and tap enter for 10 KTS WSpd, then
3 5 0
and tap enter for 350° WDir, then
3
and tap enter for Runway 3.
The answer will be -6.43 KTS X Wnd (the negative
sign indicates a left crosswind) and 7.66 KTS H
Wnd (a positive number indicates a headwind).
◗ ESTIMATED TIME ARRIVAL
The Estimated Time Arrival function computes the
estimated time of arrival (ETA), given the departure
time (Dep) and ight duration (Dur).
Problem: What is your ETA if you plan to depart
at 9:30 a.m. for a 2.5 hour ight?
Solution: Press the key. Select the Estimated
FLT
Time Arrival submenu. Press:
2 . 5
to enter 2.5 HR Dur, then
9 : 3 0 : 0 0
and tap enter to set
9:30:00 UTC Dep.
The display will show 12:00:00 UTC as the ETA.
– 11 –
Page 14

◗ TO-FROM
The To-From function converts a course from (From)
a location into the course to (To) the same location
along the same radial, providing the reciprocal of any
number.
Problem: What is the course TO the VORTAC if
you are on the 150° radial?
Solution:
Press the key. Select the To-From
FLT
submenu. Press:
1 5 0
and tap enter to input 150° From.
The display will show 330° as the course TO the
station.
◗ COMPASS HEADING
This function is used to account for the inherent
inaccuracies of the compass, caused by the
difference between the direction indicated by the
magnetic compass and the true North Pole (magnetic
variation), as well as magnetic disturbances within
the aircraft (deviation). The inputs to this function are
THdg, magnetic variation (Var), and deviation (Dev).
The output is the compass heading (CHdg) and
magnetic heading (MHdg).
Problem: What is the compass heading for
a ight on a true heading of 203°, where the
compass deviation card indicates a 4° compass
deviation and the sectional chart indicates the
ight will have a 4° westerly variation?
Solution: Press the key. Select the Compass
FLT
Heading submenu. Press:
2 0 3
and tap enter to input the 203° THdg,
then
and tap enter to input 500 KTS TAS,
5 0 0
then
and tap enter to input 355° TCrs,
3 5 5
then
and tap enter to input 350° THdg.
3 5 0
The display will show 47.99 KTS WSpd, 290°
WDir and -5° WCA.
◗ RHUMB LINE
The Rhumb Line function allows you to compute
the true course (TCrs) and distance (Dist) between
multiple points (Lat, Long).
Problem: What is the true course and
distance between JFK (40.6°, 73.7°) and LAX
(33.9°, 118.4°)?
Solution: Press the key. Select the
FLT
Rhumb Line submenu. Scroll to POINT: A Lat
and press , to set the units to degrees (°).
CONV
UNIT
Next, press:
4 0 . 6
and tap enter to input 40.6°
Lat, then
7 3 . 7
and tap enter to input 73.7°
Long for Point A. Then Scroll down to Point B
and press:
3 3 . 9
and tap enter to input 33.9°
Lat, then
1 1 8 . 4
and tap enter to input
118.4° Long.
The display will show 259° TCrs and 2,169.82
NM Dist.
4
and tap enter to input the 4° Var (east is
least, west is best: enter a positive number for a
westerly variation and a negative number for an
easterly variation), then
4
and tap enter to input 4° Dev.
The display will show 211.0° for the CHdg and
207° for MHdg.
◗ WIND CORRECTION
The Wind Correction function allows you to compute
the wind direction and speed during a ight. The
inputs to this function are GS, TAS, TCrs, THdg and
the outputs are WSpd, WDir and WCA.
Problem: Find the wind direction, wind speed
and wind correction angle given 350° THdg, 478
kts GS, 355° TCrs, and 500 kts TAS.
Solution: Press the key. Select the Wind
FLT
Correction submenu. Press:
4 7 8
and tap enter to input 478 KTS GS,
then
– 12 –
◗ HOLDING PATTERN
Holding may be necessary when ATC is unable to
clear a ight to its destination. The CX-3 will make
easy work of determining what type of entry is
necessary (Entry), as well as the inbound heading
(Inbound).
Problem: What is the recommended procedure
to enter the holding pattern when an airplane is
heading 155° and is instructed to hold on the
270° radial, performing standard right turns?
Solution: Press , slide to the Holding Pattern
FLT
function and tap enter. Make sure the turn
direction is on Right (tap enter to toggle between
Right and Left) and scroll down to Head. Press:
1 5 5
and tap enter to input the airplane’s
heading of 155°, then
2 7 0
and tap enter to input 270° for the
holding radial.
The display will show Direct Entry and 90° as the
Inbound heading.
Page 15

CX-3
Flight Computer
PLAN (TRIP FUNCTIONS)
This button and associated menu items are used for planning a cross-
country trip. Once all legs of the cross-country trip have been entered, the
display will show the total trip. This consists of total distance (Dist), estimated
time enroute (ETE), estimated time of arrival (ETA), and fuel burned (Fuel).
Note that a blue circle icon indicates a repeated global
value if more than one leg is added to the trip. If the
value remains the same from leg to leg, you will just
need to scroll past. Pressing enter on a repeated global
value will do nothing, unless you change the input.
TRIP 10:34
Total Trip
Leg 1
Problem: Plan a cross-country trip from Renton Muni
(KRNT) to Forks (S18) to Ocean Shores Muni (W04)
and back to KRNT. The aircraft used for the crosscountry is a Cessna 172. The 172 burns 9.5 U.S.
GPH, has a TAS of 110 KTS, and has a deviation of
0°. The area of the cross-country has a variation of
17° E, and you are departing at 12:00:00 UTC. Given
for Leg 1:
Distance between KRNT and S18: 92.3
nautical miles
True Course between KRNT and S18: 288°
Wind Direction is 350° at 3 KTS
Review
Add
◗ 1st LEG SOLUTION: Press , scroll to Leg 1
and tap enter. Press:
and tap enter to input the distance of
9 2 . 3
92.3 NM, then
2 8 8
and tap enter to input the true course of
288°, then
and tap enter to input the true airspeed
1 1 0
of 110 KTS, then
3 5 0
and tap enter to input wind direction,
then
and tap enter to input the wind speed of 3 KTS,
3
then
and tap enter for -17° variation, then
1 7
and tap enter to input the deviation of 0°, then
0
and tap enter to input the fuel rate of 9.5
9 . 5
U.S. GPH, and then nally
1 2 : 0 0 : 0 0
and tap enter to
input the departure time.
Press , scroll down to Leg 2 and tap enter.
Given for Leg 2:
+
−
BACK
Distance between S18 and W04: 57.3
nautical miles
True Course between S18 and W04: 170°
Wind Direction is 200° at 6 KTS
PLAN
– 13 –
Page 16

CX-3
Flight Computer
PLAN (TRIP FUNCTIONS) CONTINUED
◗ 2nd LEG SOLUTION: The blue circle on the left
side of the screen indicates inputs for Leg 1. Press:
5 7 . 3
and tap enter to input the distance of
57.3 NM, then
1 7 0
170°, then
1 1 0
of 110 KTS, then
2 0 0
then
and tap enter to input the wind speed of 6 KTS,
then
1 7
variation, then
and tap enter to input the deviation of 0°, and
0
then nally
9 . 5
U.S. GPH.
Make sure the departure time shows 12:51:00 UTC.
Press , scroll down to Leg 3 and tap enter.
Given for Leg 3:
and tap enter to input the true course of
and tap enter to input the true airspeed
and tap enter to input wind direction,
+
and tap enter to input -17° for the
−
and tap enter to input the fuel rate of 9.5
BACK
Distance between W04 and KRNT: 84.2
nautical miles
True Course between W04 and KRNT: 069°
Wind Direction is 140° at 5 KTS
◗ 3rd LEG SOLUTION: The blue circle on the left
side of the screen indicates inputs for Leg 2. Press:
8 4 . 2
and tap enter to input the distance
of 84.2 NM, then
6 9
and tap enter to input the true course of
069°, then
1 1 0
and tap enter to input the true airspeed
of 110 KTS, then
1 4 0
then
and tap enter to input the wind speed of 5 KTS,
56
then
1 7
0
and tap enter to input the deviation of 0°, and
then nally
9 . 5
U.S. GPH.
The last step is to make sure the departure time
shows 13:23:49 UTC. Press , scroll up to Total
Trip and tap enter. The totals for the trip are distance
233.8 NM, estimated time enroute 2:10:29 HMS,
estimated time of arrival 14:10:29 UTC, and fuel used
20.66 U.S. GAL.
and tap enter to input wind direction,
+
and tap enter for -17° variation, then
−
and tap enter to input the fuel rate of 9.5
BACK
– 14 –
Page 17
CX-3
Flight Computer
TIMER
The CX-3 has two timers: a stopwatch that counts up
and a countdown timer. The stopwatch can be used
to keep track of elapsed time or to determine the
time required to y a known distance. The countdown
timer can be used as a reminder to switch fuel tanks
or to determine the missed approach point on a
non-precision instrument
approach.
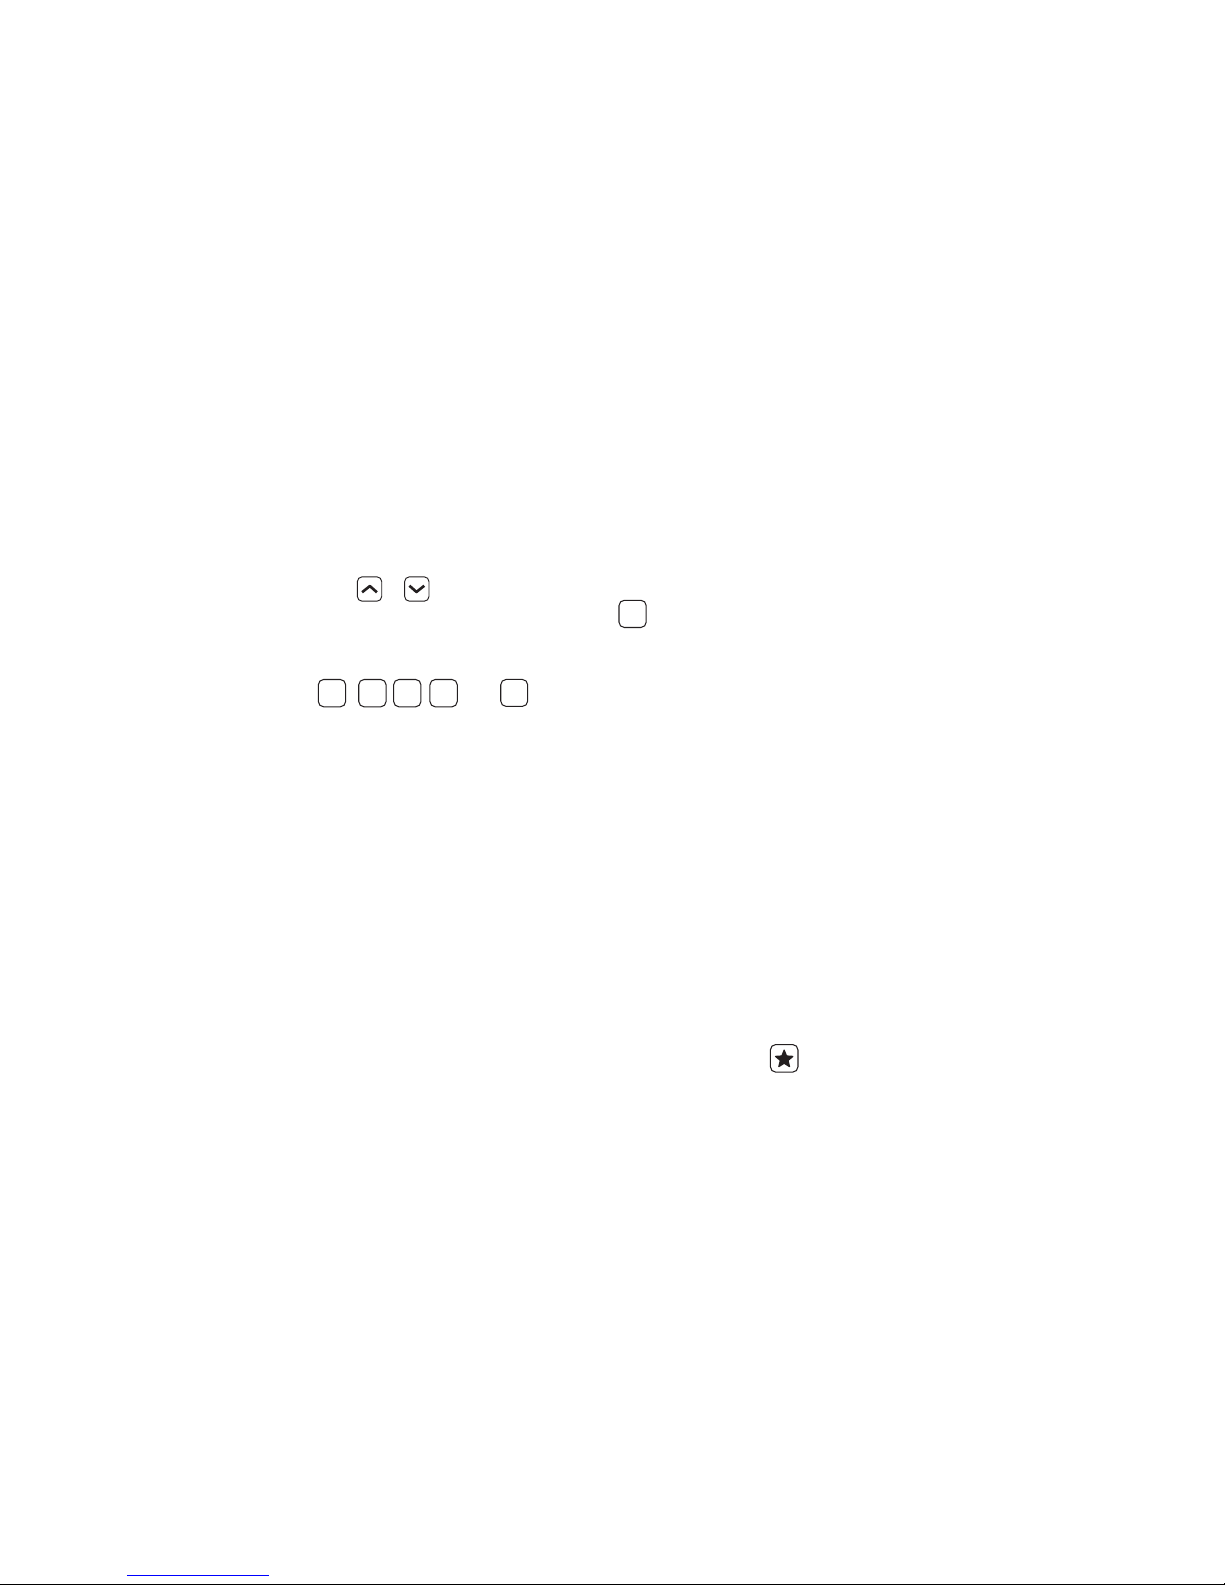
◗ STOPWATCH
The Stopwatch will count
from zero to 99:59:59.
TIMER
Press to access the
Stopwatch.
1. Select Start and
tap enter to start the
Stopwatch.
2. Select Stop and tap enter to stop the
Stopwatch. Tap enter again to begin the
Stopwatch from where it left off.
3. Scroll down to Reset and tap enter to return the
Stopwatch to 00:00:00. Scroll back up to Start
and tap enter to begin the stopwatch again.
◗ COUNTDOWN
The countdown timer will run from any preset value
R
(as high as 99:59:59) down to zero. Press to
access the countdown timer.
1.Slide up to highlight the time value and type in
the value you want to begin the countdown
from. For example, press
to enter 2 minutes, 30 seconds. Scroll down
to Start and tap enter to start the countdown
timer.
2. Tap enter to stop the timer at any time.
3. The timer will continue counting down after zero
is reached. In this case, a negative sign will
precede the time and the font will turn red.
To return to Stopwatch mode, scroll down to reset
and tap enter.
0 0 0 2 3 0
TIME
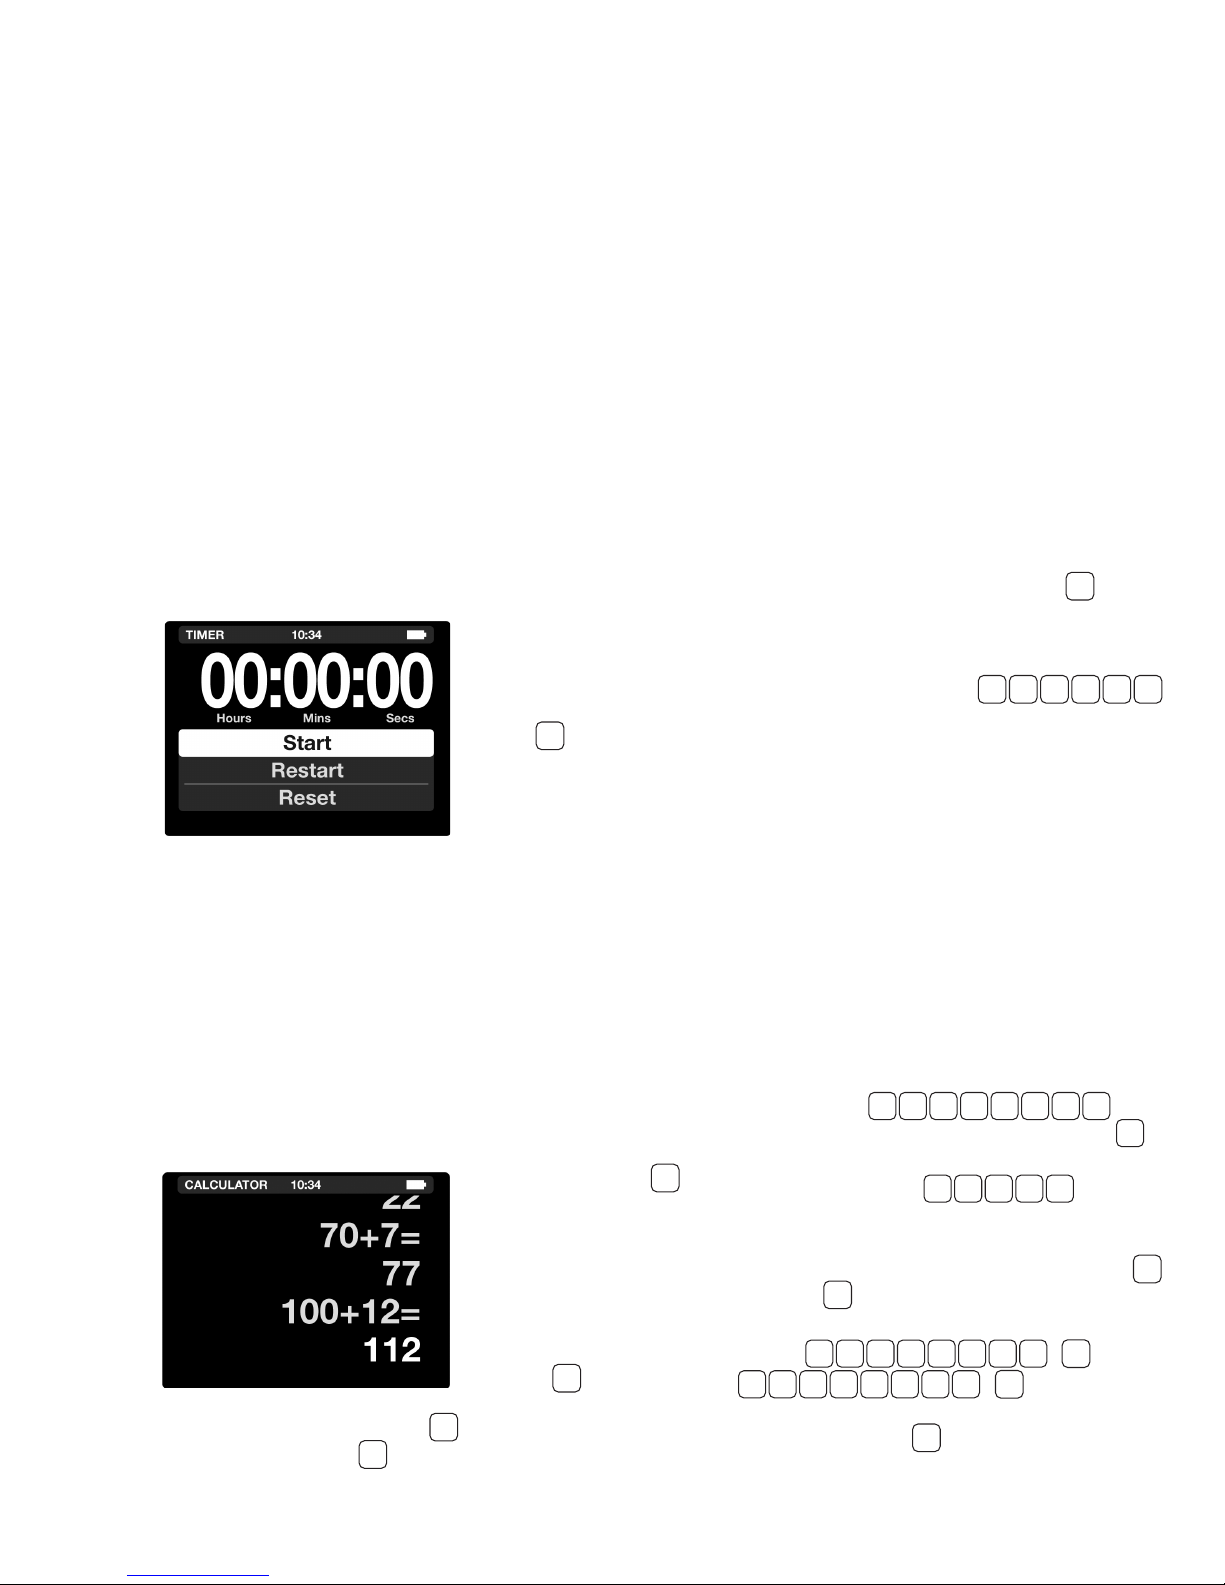
CALC (CALCULATOR)
The CX-3 is conventional regarding mathematics.
The computer performs the four standard arithmetic
operations (addition, subtraction, multiplication and
by either pressing , which clears one line, or by
pressing , which clears the entire screen.
CALC
division), as well as the
square root function, .
It will accept input numbers
up to a maximum of 8 digits
and display results with a
maximum of 8 digits with a
oating decimal point and a
minus sign. The sign of any
number can be changed
with the key. The
calculator can be cleared
C
+
−
– 15 –
With the CX-3 turned on, add the numbers 123 and
456 by pressing .
The number 579 will be displayed. Now press
√
to change the number to: -579. As a nal step, multiply
-579 by 6.5 by keying in , resulting
in the answer: -3763.5.
The CX-3 also has the ability to compute and
convert time units. With the CX-3 turned on, press
and press to change into HH:MM:SS (00:00:00).
To solve 02:14:17 + 03:15:00
Press
1 2 : 1 4 : 1 7
, resulting in an
0 3 : 1 5 : 0 0
answer of 05:29:17. You can convert this number to
a decimal by pressing and vice versa.
1 2 3 + 4 5 6 =
x 6 . 5 =
CONV
UNIT
CONV
UNIT
+
−
CALC
+
=
Page 18

CX-3
Flight Computer
W/B (E6-B FUNCTIONS)
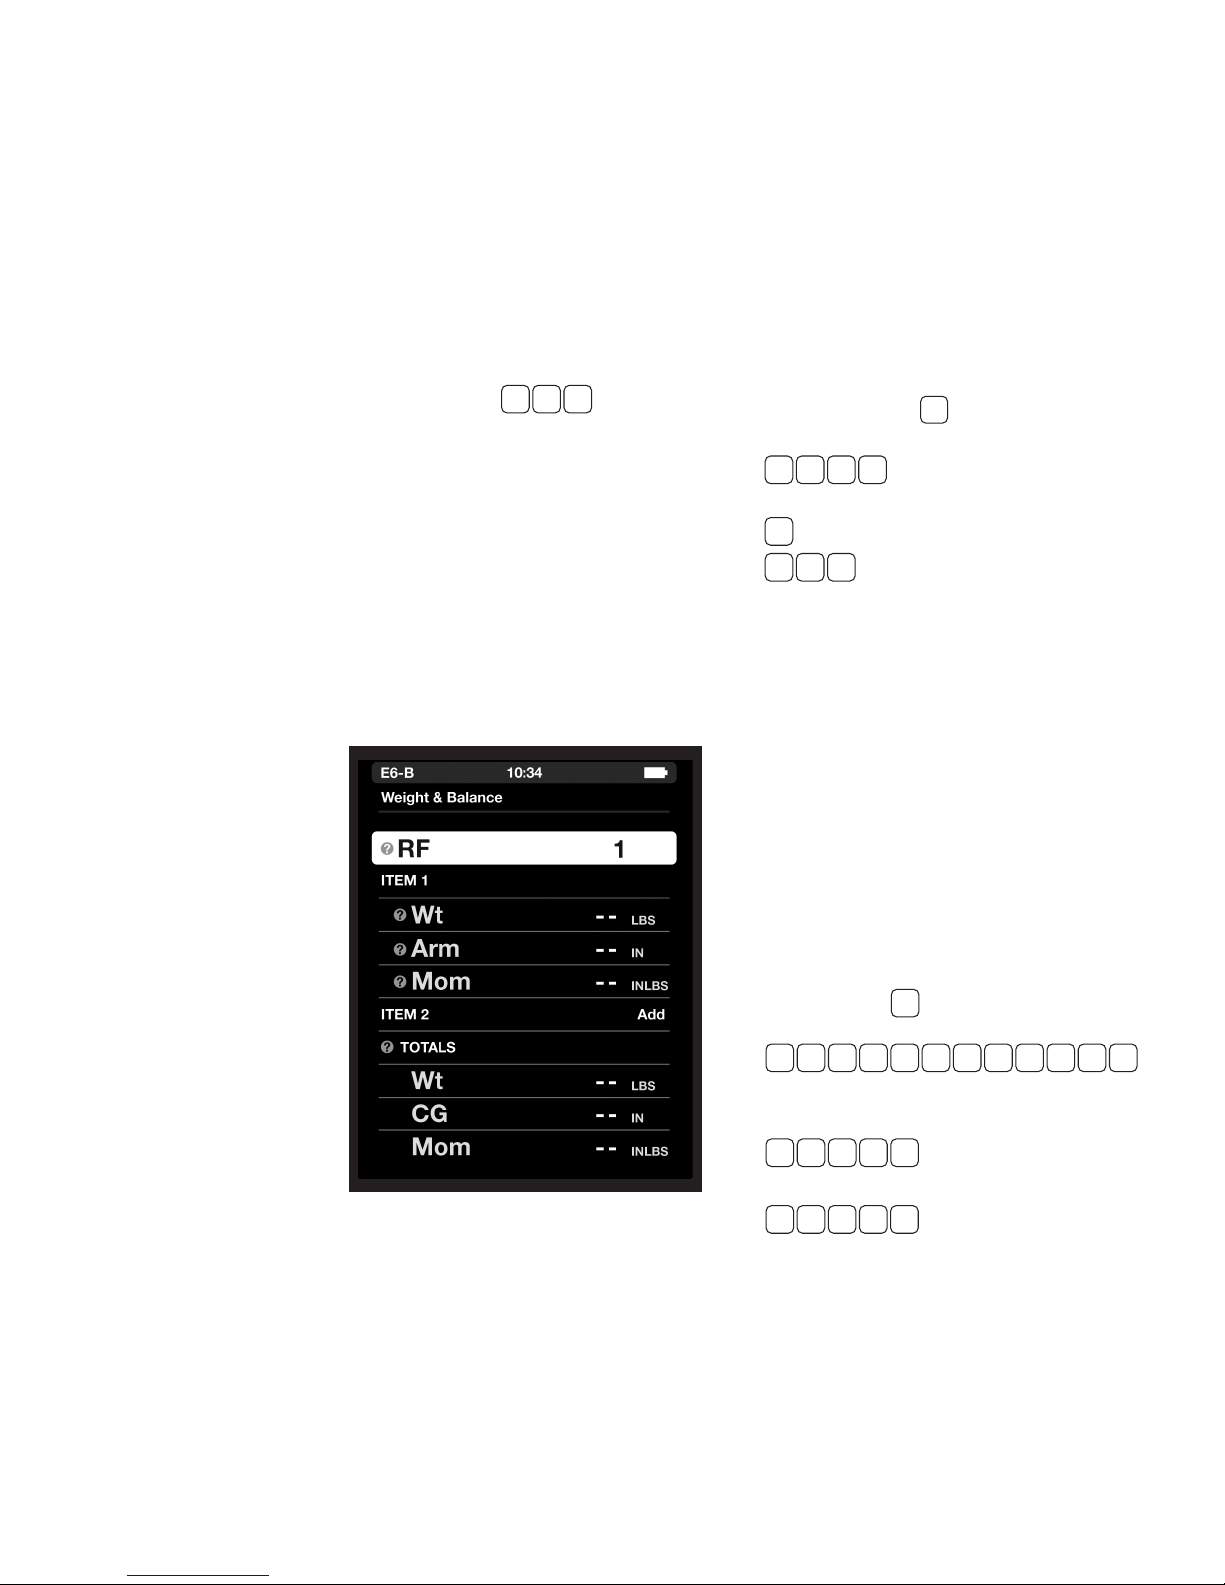
◗ WEIGHT AND BALANCE
The CX-3 performs all of the calculations necessary
for proper aircraft loading. The rst four items in
the Wt/Bal menu are used to dene the moment
reduction factor (RF), enter weight (Wt), enter arm
(Arm), and obtain the moment (Mom). An “ITEM”
is something that has an assigned weight and
corresponding arm and/or moment. Additional ITEMs
can be added as necessary. The steps are described
below in the context of solving a basic weight and
balance problem.
Standard weights used in aviation include:
...... 6 lbs/gal
AvGas
..... 6.84 lbs/gal
Jet fuel
Oil ......... 7.5 lbs/gal
(Remember: there are 4 quarts in a gallon)
Problem: Find the gross weight (GW) and center
of gravity (CG), given:
1. Aircraft empty weight: 1,495 lbs weight,
151,593 lb-in moment
2. Pilot and passengers: 380 lbs, 64’’ arm
3. Rear-seat passenger: 150 lbs, 75’’ arm
4. Fuel: 180 lbs, 96" arm
Solution: Press the key.
1. Select the Weight and Balance submenu. You
will dene the parameters for the totals (weight,
moment, and CG). An “ITEM” is a variable
with 2 of 3 known parameters such as weight
and arm, or weight and moment. The CX-3
can calculate 8 items for any one problem. If
you have more than 8 items, work 3 problems
(one with half the items; a second with the
remaining items; and a third with 2 items, using
the answers from the rst 2 calculations). You
are rst prompted for the reduction factor (RF).
Reduction factors are used with aircraft that
generate large moments for the purpose of
keeping the numbers a manageable size. It
W/B
does not affect the arms or weights involved
in the calculation. An RF of 100 means each
moment is divided by 100 before the calculator
displays it or the operator enters it; this will be
taken into account when the total and CG are
computed. RF of 1 means the moment entries
will be taken at face value.
2. Press and tap enter to set 1 as the
3. Slide to ITEM 1, tap enter. Input the information
4. Slide to ITEM 2, and tap enter to provide the
5. Slide to add ITEM 3 and tap enter to provide
6. Slide to add ITEM 4 and tap enter to provide
7. Slide to see the Weight and Balance Totals.
Wt
Mom
CG ........ 92.72 IN
1
reduction factor.
for the rst item.
1 4 9 5
Press and tap enter for aircraft
weight, then and tap
enter for the aircraft moment. This results in
101.40 IN for the aircraft arm.
inputs for item number 2. Press
and tap enter to input the weight, then
and tap enter to input the arm for item number
2. This results in a moment of 24,320 LB-IN.
the inputs for item number 3. Press
and tap enter to input the weight, then
and tap enter to input the arm for item number
3. This results in a moment of 11,250 LB-IN.
the inputs for item number 4. Press
and tap enter to input the weight, then
and tap enter to input the arm for item number
4. This results in a moment of 17,280 LB-IN.
This displays output only, accounting for the
inputs in the items above. For this problem, the
outputs are:
......... 2,205 LBS
....... 204,443.00 LB-IN
1 5 1 5 9 3
3 8 0
6 4
1 5 0
7 5
1 8 0
9 6
– 16 –
Page 19
Problem: Given the information above, nd the
GW and CG if the 150-lb passenger exits the
aircraft, and 50 lbs of fuel are added.
Solution: The #Items/RF is not changing, nor is
the empty weight of the aircraft, so you do not
need to review the rst 2 items.
1. To change the passenger
load, scroll up to ITEM 3. Your previous entries
for this item will be displayed, and Remove will
be displayed to the right of ITEM 3. Tap enter to
delete ITEM 3.
2. To change the fuel load, scroll down to the (Wt)
line for ITEM 4. Press and tap enter
+ 5 0
to nd the new fuel weight (230 lbs). Scroll
down to Arm and tap enter (it will automatically
remember the previous value of 96 IN). A new
moment for this item is calculated to be 22,080
LB-IN.
3. Scroll to the Weight and Balance Totals. This
will display output only, accounting for the
weight/load changes:
......... 2,105.00 LBS
Wt
Mom ....... 197,993.00 LB IN
CG ........ 94.06 IN
◗ WEIGHT SHIFT FORMULA
The amount of weight that must shift to move the
CG to a desired location may be found using this
function. This function can also be used to nd
the change in CG or Arm from adding or removing
weight.
Problem: Find weight of the item (Item Wt) that
must shift to move the CG to a desired location,
given:
1. Total weight, 7,500 LBS
2. Change in CG, 1 IN
3. Distance weight is shifted, 120 IN
Solution: Press the key. Select the Weight
W/B
Shift Formula submenu. At Total Wt, press:
7 5 0 0
and tap enter to input 7,500
LBS, then
1
and tap enter to input 1 IN for ∆CG, and then
1 2 0
and tap enter to input 120 IN for
∆Arm.
The display will show 62.5 LBS Item Wt.
◗ %MAC
Large aircraft operations often require the CG be
expressed as a percent of the mean aerodynamic
chord (%MAC). This function calculates the %MAC
given the CG, the length of the mean aerodynamic
chord (MAC), and the leading edge of the mean
aerodynamic chord (LMAC).
Problem: Determine the CG in percent of MAC
given:
....... 860.2 to 1040.9
MAC
CG ........ 910.2’’
LMAC ...... 860.2’’
Solution: Press
function and tap enter. Press:
1 0 4 0 . 9 - 8 6 0 . 2
and tap enter for the MAC.
The result should be 180.7 IN. Then press:
9 21 0 .
and tap enter for the CG,
and then
W / B
, then slide to the %MAC
– 17 –
and tap enter for LMAC.
28 6 0 .
The display will show 27.7% for the CG in %MAC.
Page 20

CX-3
Flight Computer
APPENDIX A: Service Policy
◗ TROUBLESHOOTING
1. If the CX-3 screen display fails to illuminate, check for
improperly inserted or discharged batteries. See battery
replacement instructions below.
2. The CX-3 screen is adjustable for display brightness.
SET
Tap and select Backlighting to scroll through the 4
different brightness settings.
3. To ensure problems are being entered accurately, review
the screen and User’s Guide to ensure you have not
missed a crucial step or mis-entered data inputs.
If your CX-3 Flight Computer is not working properly after
performing these three steps, return to:
Aviation Supplies & Academics, Inc.
Product Returns
7005 132nd Place SE
Newcastle, Washington 98059-3153
We suggest retaining a tracking number for all returned
shipments. ASA cannot assume any responsibility for loss of or
damage to shipments.
Please describe the difculty experienced with the computer,
and include return address information with your name, address,
city, state, and zip code. Please print. The shipment should be
carefully packaged and adequately protected against shock and
rough handling.
Visit the ASA website (www.asa2y.com/CX3) for manual
revisions and FAQs for this product. For technical support, write
to us by email at: support@asa2y.com.
◗ BATTERY REPLACEMENT
The CX-3 ight computer uses 4 AAA batteries. This calculator
has been designed to consume the minimal current possible
from your alkaline batteries; therefore, the batteries should last
approximately 20 hours usage time under normal conditions. To
replace batteries:
1. Remove the entire back cover of the ight computer; nd a
ridge at bottom center and lift up.
2. Remove old batteries and insert 4 new batteries with
correct polarity as displayed within battery compartment.
3. Press the cover back into place until it clicks down and ts
ush. The cover will only press on in the correct direction.
◗ LIMITED WARRANTY
Aviation Supplies & Academics, Inc. (ASA) warrants this
electronic computer, Model Number CX-3, to the original
purchaser for a period of ve years from the initial date of
purchase, against defects in material and workmanship.
Batteries are not covered by this warranty.
For the above ve-year limited warranty period, ASA will either
amend or substitute a reconditioned model of identical quality (at
ASA’s option), provided the product is returned postage prepaid
to ASA. In the event of substitution with a reconditioned model,
the warranty of the original computer will be upheld. Other than
the above requirements, repair, adjustments and/or substitutions
will be made at no charge.
ASA strives to provide the most rugged and reliable equipment
possible. So few items are received for repair that it is not
economical to maintain parts inventory, test equipment, and
trained repair technicians to perform electronic repair work.
Therefore, a replacement unit (new or remanufactured) is sent in
exchange for units returned for service or repair.
ASA will not be liable for lapse of use of the computer or
other secondary or sequential costs, expenditures, or damages
brought about by the purchaser. Implied warranties originating
out of this sale, including but not limited to the implied warranties
of merchantability and tness for a particular purpose, are
limited in duration to the above ve-year period. ASA shall not
be liable for loss of use of the computer or other incidental or
consequential costs, expenses, or damages incurred by the
purchaser.
Some states do not allow the exclusion or limitation of implied
warranties or consequential damages; so, the above limitations
or exclusions may not apply to you.
Record the purchase date in the space provided below. Refer
to this when contacting ASA regarding this product.
The CX-3 is an instruction and information aid, and is not an
avionics instrument.
Purchase Date: ________________________________
– 18 –
Page 21

CX-3
Flight Computer
APPENDIX B: Updating the CX-3 Firmware
Updates will periodically become available at www.asa2y.com/CX3.
Follow these steps to keep your CX-3 Flight Computer up to date:
1. Download the CX-3 rmware update le to your
computer.
2. Remove one battery from the device.
3. Attach the micro USB cable to your computer and
CX-3.
4. While holding the Power Switch ON, insert battery.
• This will put the device into Bootloader mode.
The device will appear as a USB hard drive with
the name BOOTLOADER.
• Note: the screen on the device will remain
blank.
5. Open the BOOTLOADER hard drive.
• There should be a single text le named
“READY.TXT”
6. Drag the new CX-3 rmware into the
BOOTLOADER hard drive window.
• The le will begin to download to the device
and may take several seconds.
• Once it successfully downloads, the bootloader
will load the new rmware into ash memory
and reset the device.
• Note: at this point, the BOOTLOADER hard
drive will disappear.
7. Verify successful download and programming of
the device.
• Once the device resets, the BOOTLOADER
hard drive will be available once again.
• Open the BOOTLOADER hard drive.
• If the rmware was updated successfully, there
will be a single text le named “SUCCESS.TXT”
8. Reset device to run new rmware.
• Remove and replace a battery. This will reset
the device and run the normal program.
• Turn on the device using the power switch.
• Verify version on main settings screen (scroll
down to bottom of list).
– 19 –
Page 22

CX-3
Flight Computer
APPENDIX C: CX-3 Backup Procedure
All settings and data from the CX-3 Flight Computer can be stored on a
computer and easily retrieved by following these steps.
◗ SAVING DATA
1. Press and navigate to User Data and select Save.
2. Attach the micro USB cable to your computer and
CX-3.
3. The CX-3 will appear on the computer as a USB
thumb drive named “CX-3_DATA.” Navigate to
this device using Windows Explorer (Windows) or
Finder (Mac).
4. Copy the le “DATA.CX3” to somewhere on your
computer to save your user data.
5. Eject the “CX-3_DATA” thumb drive from your
computer and disconnect the micro USB cable.
◗ RESTORING DATA
1. Turn the CX-3 on.
2. Attach the micro USB cable to your computer and
CX-3.
3. The CX-3 will appear on the computer as a USB
thumb drive named “CX-3_DATA.” Navigate to
this device using Windows Explorer (Windows) or
Finder (Mac).
4. Delete the le “DATA.CX3.”
5. Copy your saved version of “DATA.CX3” from your
computer and paste it to the “CX-3_DATA” thumb
drive.
6. Eject the “CX-3_DATA” thumb drive from the
computer and disconnect the micro USB cable.
7. Press and scroll to User Data and select Recall.
– 20 –
Page 23

CX-3
Flight Computer
APPENDIX D: Abbreviations Guide
∆Arm change in the arm
∆CG change in the center of gravity
%MAC percentage of mean aerodynamic chord
Act actual
AGL above ground level
Alt altitude
AoC/D angle of climb/descent
Arm arm
ASA Aviation Supplies & Academics
Baro barometer
CALC calculator
CAS calibrated airspeed
CG center of gravity
CHdg compass heading
CONV UNIT conversion units
Custom custom arm location
CX-3 best ight computer ever
DAlt density altitude
Dep departure time
Desc descent
Dev deviation
Dewp dew point
Dist distance
Dur duration
ETA estimated time of arrival
ETE estimated time enroute
FLT ight
FuelAux auxiliary fuel tanks
Glide Desc glide descent
Glide Dist gliding distance
GMT Greenwich Mean Time
GS ground speed
GW gross weight
Hdg heading
HWnd headwind
IAlt indicated altitude
Lat latitude
LMAC leading edge mean aerodynamic chord
Long longitude
MAC mean aerodynamic chord
MACH mach number
MHdg magnetic heading
Mom moment
OAT outside air temperature
PAlt pressure altitude
Pax passenger
Plan planned
Pres pressure
Rat glide ratio
Rate fuel burn rate
ReqCAS required CAS
RF reduction factor
RnWy runway
RoC/D rate of climb/descent
SET settings
Spd speed
StdAtmos standard atmosphere
TAS true airspeed
TAT total air temperature
TCrs true course
THdg true heading
Torq torque
UTC Universal Coordinated Time
Var magnetic variation
Vol volume
W/B weight & balance
WCA wind correction angle
WDir wind direction
WSpd wind speed
Wt weight
Wt/Arm weight/arm
WT/BAL weight and balance
Wt/Mom weight/moment
XWnd crosswind
– 21 –
Page 24
CX
Flight Computer
-
3
© 2017 Aviation Supplies & Academics, Inc.
All rights reserved.
Aviation Supplies & Academics, Inc.
7005 132nd Place SE
Newcastle, WA 98059-3153
www.asa2fly.com
Visit the ASA website (www.asa2y.com/CX3) for any manual revisions, rmware
updates, technical support, and FAQs for this product as they become available.
 Loading...