Arzel Zoning AirBoss User Guide

Page 1
4801 Commerce Parkway Cleveland, Ohio 44128 • Phone: 216-831-6068 • Fax: 216-831-6074
www.arzelzoning.com • havencomfort.com
Innovative Zoning Solutions
Made Simple and Reliable
Contents:(
* AirBoss Sensor V * Airflow Indicator Instructions p. 3 * Basic Troubleshooting Procedures for all Panels p. 4
* Bypass Sizi * Damper Troubleshooting with a Digital Manometer p. 7
* HeatPumPro Troubleshooting Guide * Pump Integrity Test p. 11 * Temporary panel “Work-Around” Procedures p. 12 * Warranty Information p. 13
ng Chart p. 6
erification Test p. 2
p. 8
Page 2

Spare Parts Contents
Part Part Number Quantity
Airflow Indicator AIRFLOW 1
Black Couplings FIT-TC025 25
Black Elbows FIT-TE025 25
Black Plugs
Black Ts
20 amp Fuses
Modulating Bypass Transmitter
Panel Pump
Red Caps N/A 12
Sensor
Sensor Solenoid Solenoid
Transformer
FIT-TP025 FIT-TT025
PAN-FUSE2
MOD-BYPAS1
PMP-PUMP1
SEN-RESPRO
SEN-UPS12 PAN-SOLO4 PAN-SOLO5
TRANS-40VARS
25 25
5 1 1
1 1 1 1 1
1
Page 3

AirBoss



  



 


 
 

   
 









    


 
  

 

 



 



  




 


 
  


(Fig. 11a)







  



1.?

 


  


 


       
™

   
  
 
 

2
Page 4
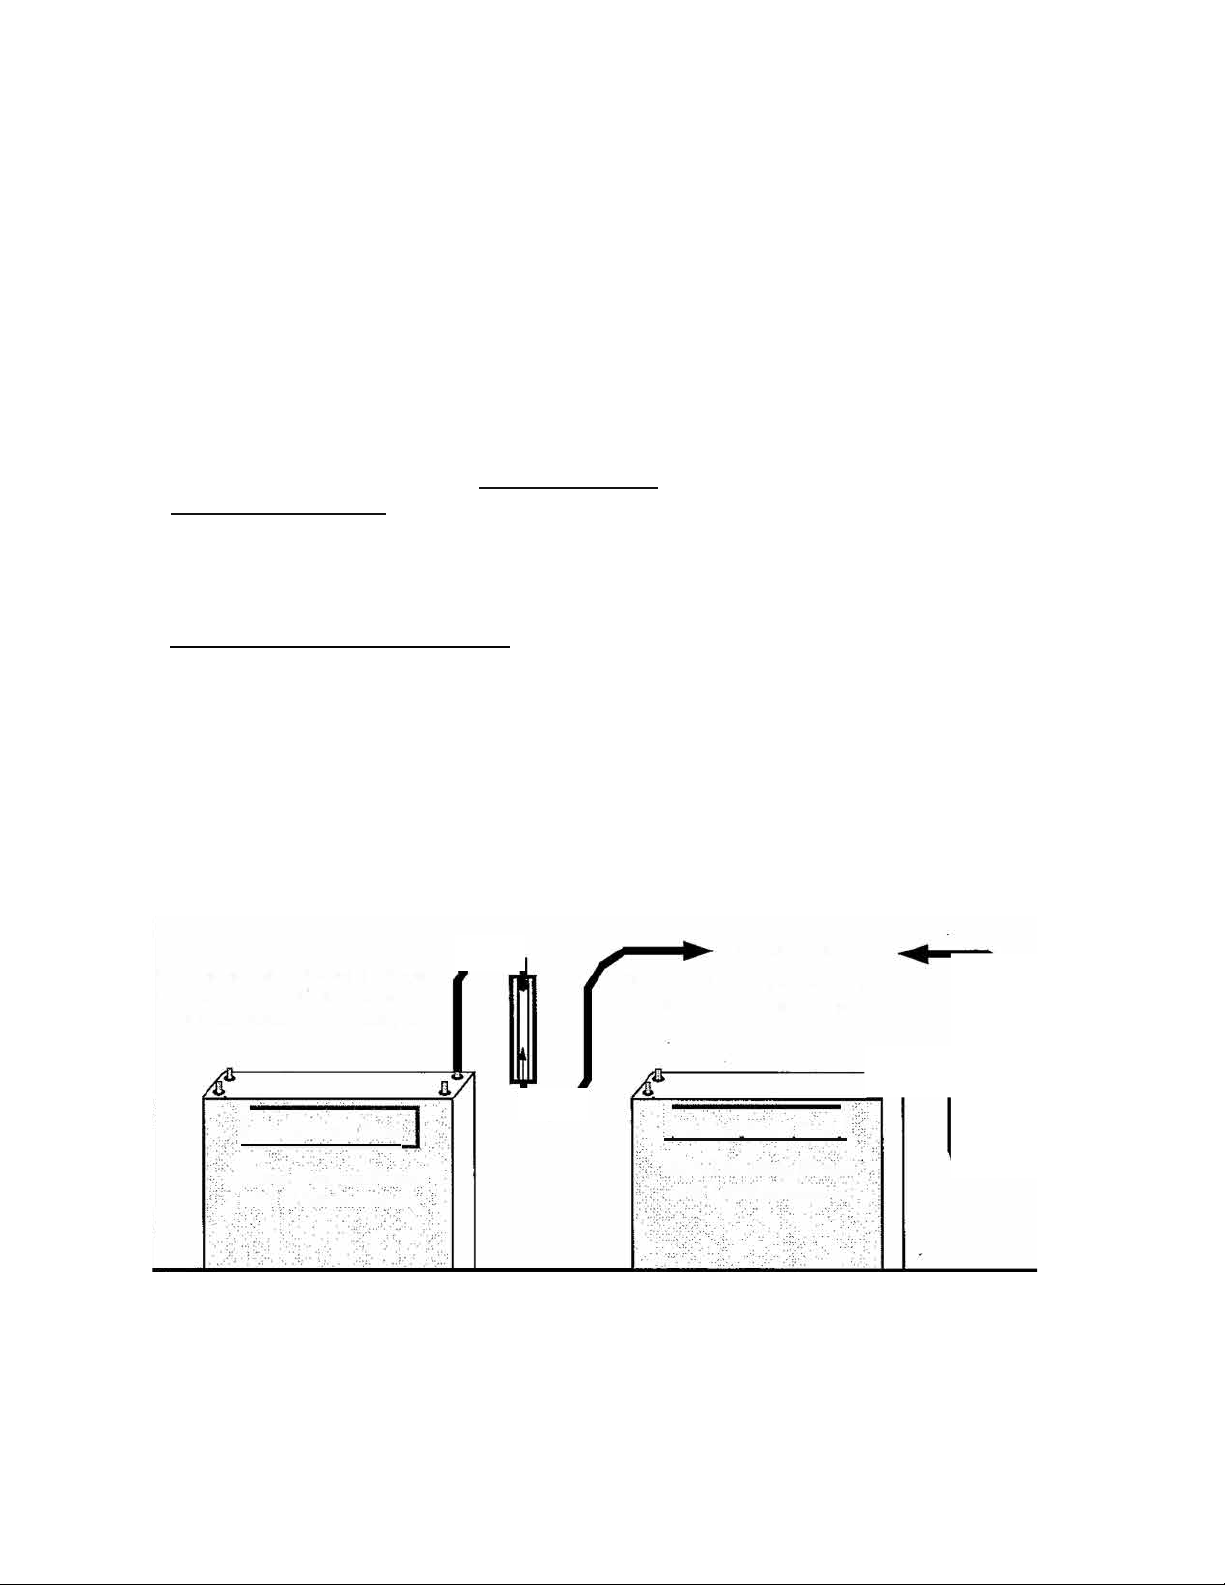
"Air Flow Indicator" Instructions

    


     

  
 
 
 



 
! 


!














3
Page 5


 
v·nc 
 
    

 
 
 
      


  
  


 








 
  
 


 
     

 




 
 





4
Page 6
Testing a Boards "Output" Relays
 


   
(])�


  
 

  
 
 

 

  
  

 

Damper Options
 
  




 
 

  
5
Page 7
6
Page 8
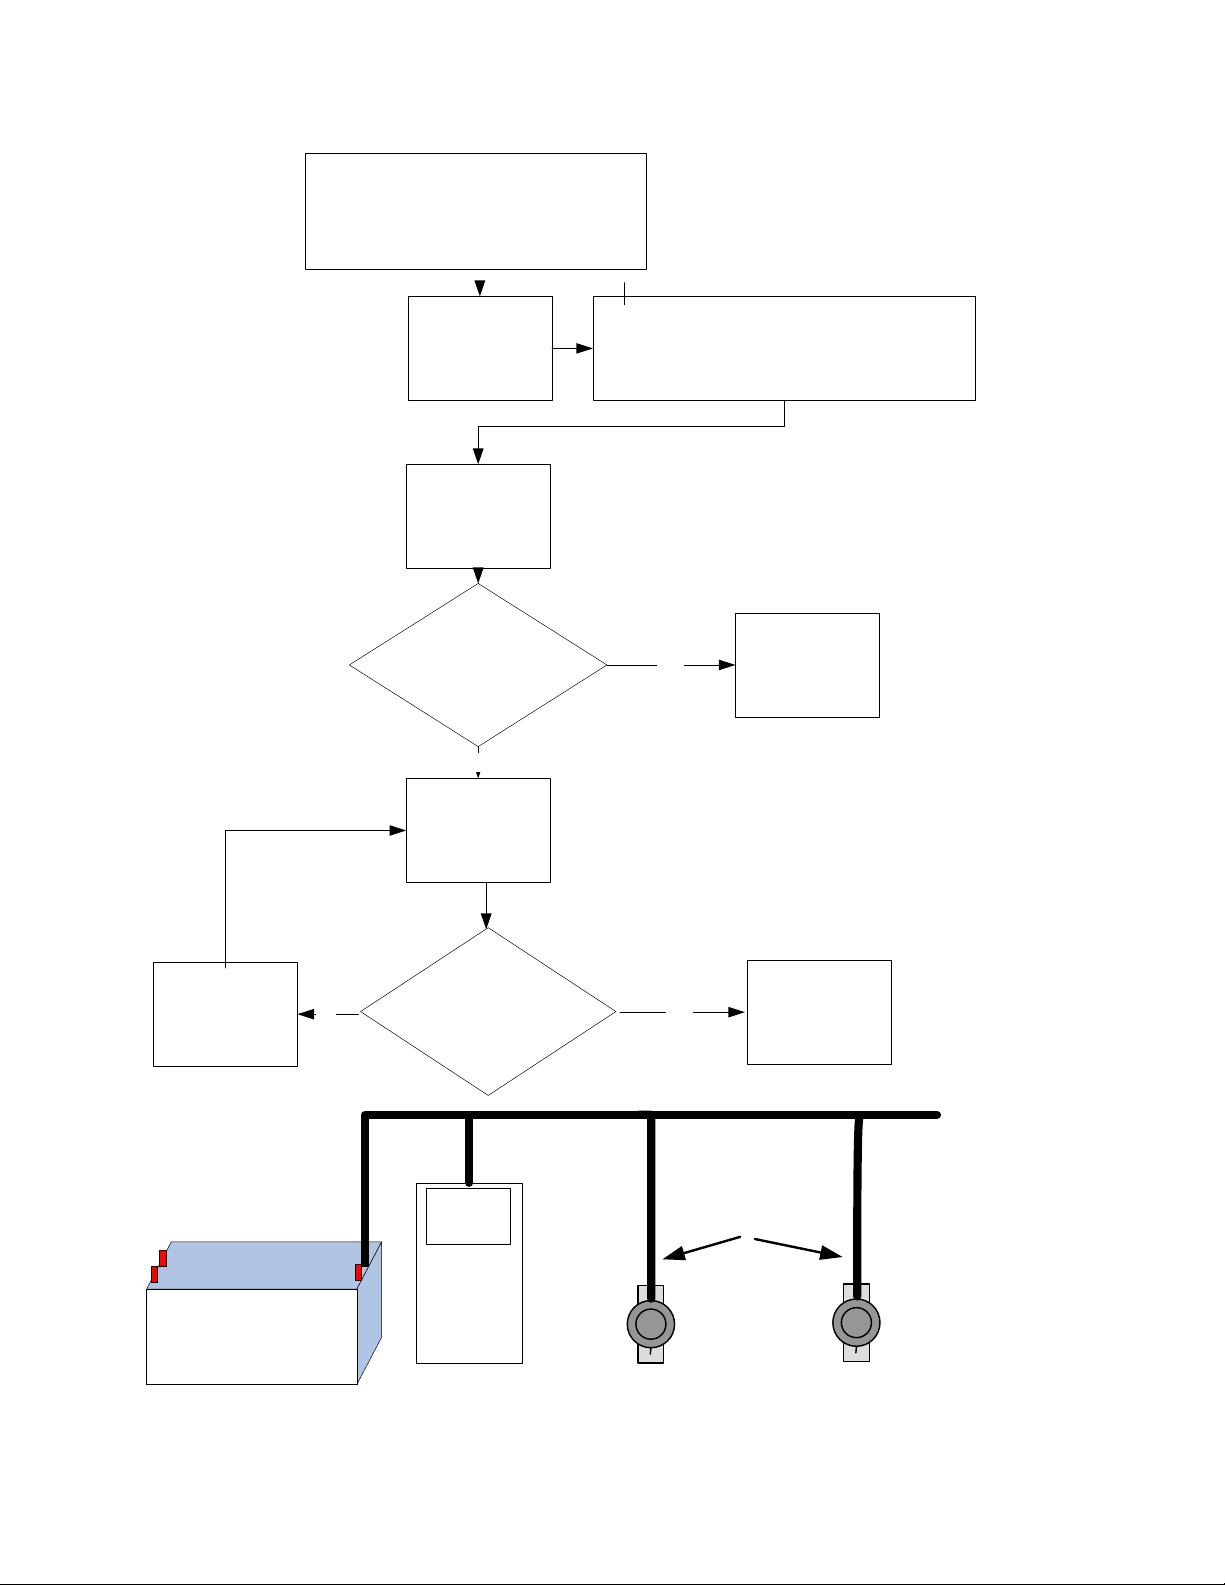
Damper troubleshooting using A digital monometer
The monometer must be capable of reading up to 40" WC.
Pressure and vacuum
Complete the pump check out procedure
before proceeding with damper
troubleshooting. Document the pressure and
vacuum readings.
Turn the board
power switch to off
Turn the MPS
switch to on or
manual.
Did the vacuum reading
match the reading on the
pump (+/- 5" WC.).
NO
Cap off or pinch off the tube going to a
damper in that
zone
Install the monometer in one zone using a tee and
some tubing and cap off the remaining zones.
The dampers in
Yes
the zone are OK, repeat the process with the remaining
zones.
Go to the next damper in line
Arzel Zone panel
No
Did the vacuum reading
match the reading on the
pump (+/- 5" WC.).
45" WC.
Monometer
The Damper is
Yes
Cap off tee or
bad replace the
damper.
Pinch off branch tubes with a pair of
pliers
7
Page 9

HeatPumPro Panel
Troubleshooting Overview
HeatPumPro's LCD Display Set-Up
The Liquid Crystal Display (LCD) on the HeatPumPro panel is your portal to customizing the zoning installations. The set-up options allow for easy system set up and is design to utilize the control sequence that is the best fit for your customer. The HeatPumPro set-up Wizard will balancing energy usage while maintaining safe equipment operation.
To turn on the LCD display for
the first time, push
the red "Reset"
button on the board just beneath
the LCD display.
To Accesses the
"Set-Up Wizard"
from the welcome screen, locate
the blue "ENTER"
button on the board below the
LCD display screen.
8
Page 10

The LCD screen on the HeatPumPro provides a simple way to view system operations. Once the operating parameters are set in the Set-Up Wizard, the LCD display will default to the "Main Operations" screen shown below.
Energized Output(s)
(to equipment)
 

 




Time Remaining for the
"Post Purge" cycles



Compressor Stages
(

4 min timed off cycle)
    
   
Status of zone activity
Cycle time of zone call will be displayed here.
9
Page 11

 1

 
"Zone 1"
not being served and having a zone weight of 35%
screen showing an illegal
(YI-ILL
) call,
d






10
Page 12
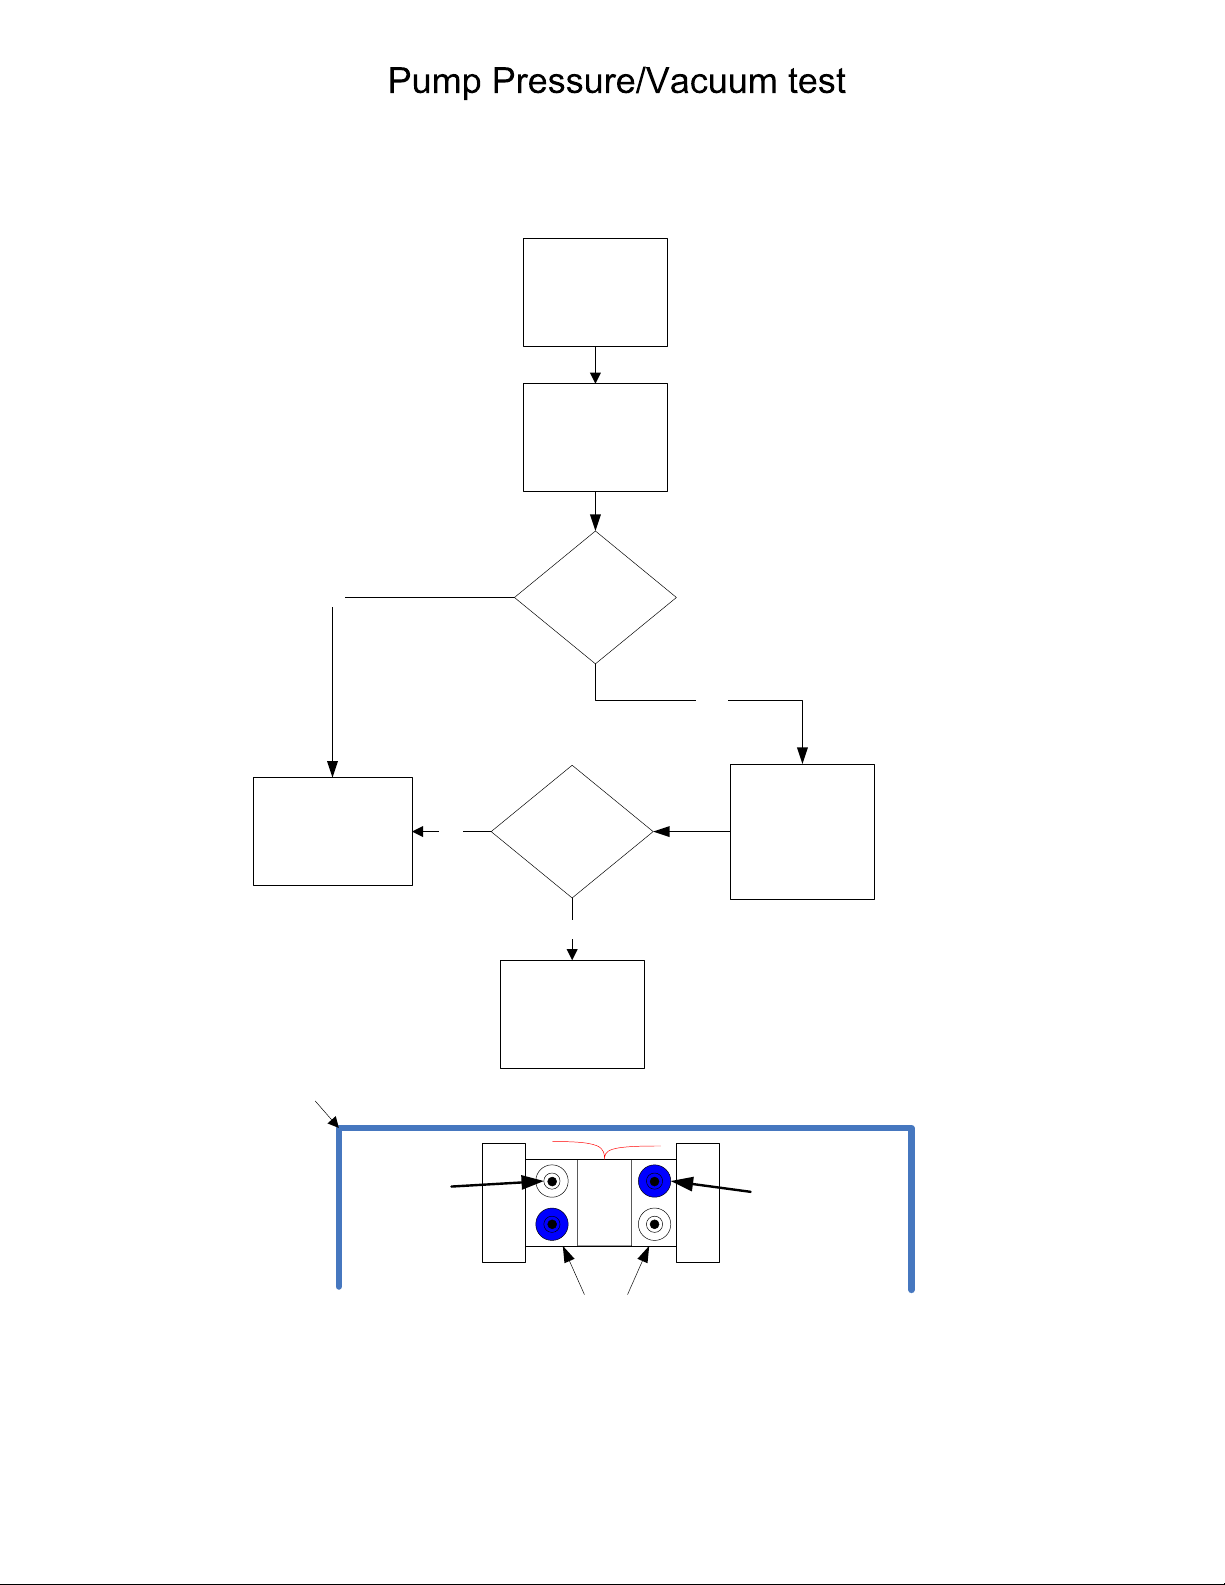
A digital monometer that will measure at least 40" W.C. pressure and vacuum is required to
properly test the pump.
Turn the panel off and turn the MPS
switch to the on/
maunal position
Remove the blue
tube form the
vacuum side of the
pump and connect
the monometer
Is the the
NO
vacuum greater
than -35" W.C.
YES
Replace the Pump
Part# PMP-PUMP1
Panel
Enclosure
Pressure Port
NO
Is the the
vacuum greater
than +40" W.C.
YES
The pump is OK
proceed to damper
trouble shooting
Open to atmosphere
Do Not connect
anything to these ports
Remove the
Yellow tube form
the Pressure side
of the pump and
connect the
monometer
Vacuum Port
Top View
11
Page 13

How$to$Temporarily$Bypass$an$Arzel$Zoning$Panel$
The$following$instructions$will$create$a$“Non$Zoned”$system$
1) Turn$power$switch$off$located$on$top$left$of$every$Arzel$zoning$panel.
2) Turn$MPS$(Manual$Pump$Switch)$located$at$the$bottom$of$the$panel$to$the$“On$or$Manual”
position.$$This$will$start$the$pump$and$open$up$all$of$the$dampers$in$the$system.
3) Remove$the$thermostat$wires$from$the$zone$that$you$would$care$to$have$operate$the$system$and
connect$them$directly$to$the$HVAC$output$terminals$along$with$the$existing$equipment$wires.
How$to$Temporarily$Bypass$a$Defective$Power$Switch$on$a$Circuit$Board$
The$following$instructions$will$bypass$a$defective$power$switch$
until$the$circuit$board$can$be$replaced$
1) Either$unplug$the$Arzel$40$VA$transformer$from$the$duplex$receptacle,$or$turn$off$line$voltage$to
the 100VA$transformer.$$Whichever$may$apply.
2) Remove$the$wires$from$the$“R$and$the$C”$terminals$to$the$left$of$the$power$switch$on$the$circuit
board coming$from$the$Arzel$transformer.
3) Connect$the$“R$and$the$C”$wires$that$were$removed$to$the$“R$and$the$C”$terminals$on$any$one$the
zones,$along$with$the$existing$wires$that$are$already$on$the$terminals.
4) Reapply$power$to$the$Arzel$transformer.
How$to$Temporarily$Bypass$a$Defective$Sensor$on$a$HeatPumPro$or$GTPro$
The$following$instructions$will$bypass$a$defective$LAT,$OAT$or$Loop$sensor$
until$the$sensor$can$be$replaced$
1) Remove$all$three$wires$(R$W$B)$from$the$defective$sensor$terminals$that$is$registering$0$degrees.
Place a$small$piece$of$thermostat$wire$as$a$jumper$between$the$“R$and$the$W”$terminals.$$The
display$will now$register$200$degrees.
2) Remove$the$wire$“R”$wire$from$the$defective$sensor$terminals$that$is$registering$200$degrees.$The
display$will$now$register$0$degrees.
12
Page 14

Three%Step%Warranty%Process%
1. Call%(800)%611-8 312%to%diagnose%failed%parts and
continue%the%warranty%process
2. Any%diagnosis%of%failed%parts%must%be verified%by
Arzel%Technical%Support%to receive% an%RMA (Return%Material Authorization)
3. All%warranty%claims%must%include% the%serial
number%of%the% panel
%%%Panel%Serial%Number%Location
13
Page 15

Arzel Product Registration & Warranty Claim Process
Product Re
gistration:
www.arzelzoning.com/warranty/
Warranty Claims:
To receive an RMA, technicians must call while on site (no call returned to distributors without prior authorization may be denied or subject to 20% processing fee.
Call 800-611-8312 while on the job site to diagnose failed parts and continue the warranty process.
Any diagnosis of failed parts must be verified by Arzel® Technical Support to receive an RMA (Return Material Authorization).
All warranty claims must include the serial number of the panel (see image on page 13.)
Arzel® will ship warranty parts directly to licensed contractors via UPS ground.
Next day air available at additional cost.
no warranty). Warranties
Arzel® Technical Support is available 7 days a week from 8am-9pm EST
14

Loading...