

Page 1
2
Page 2
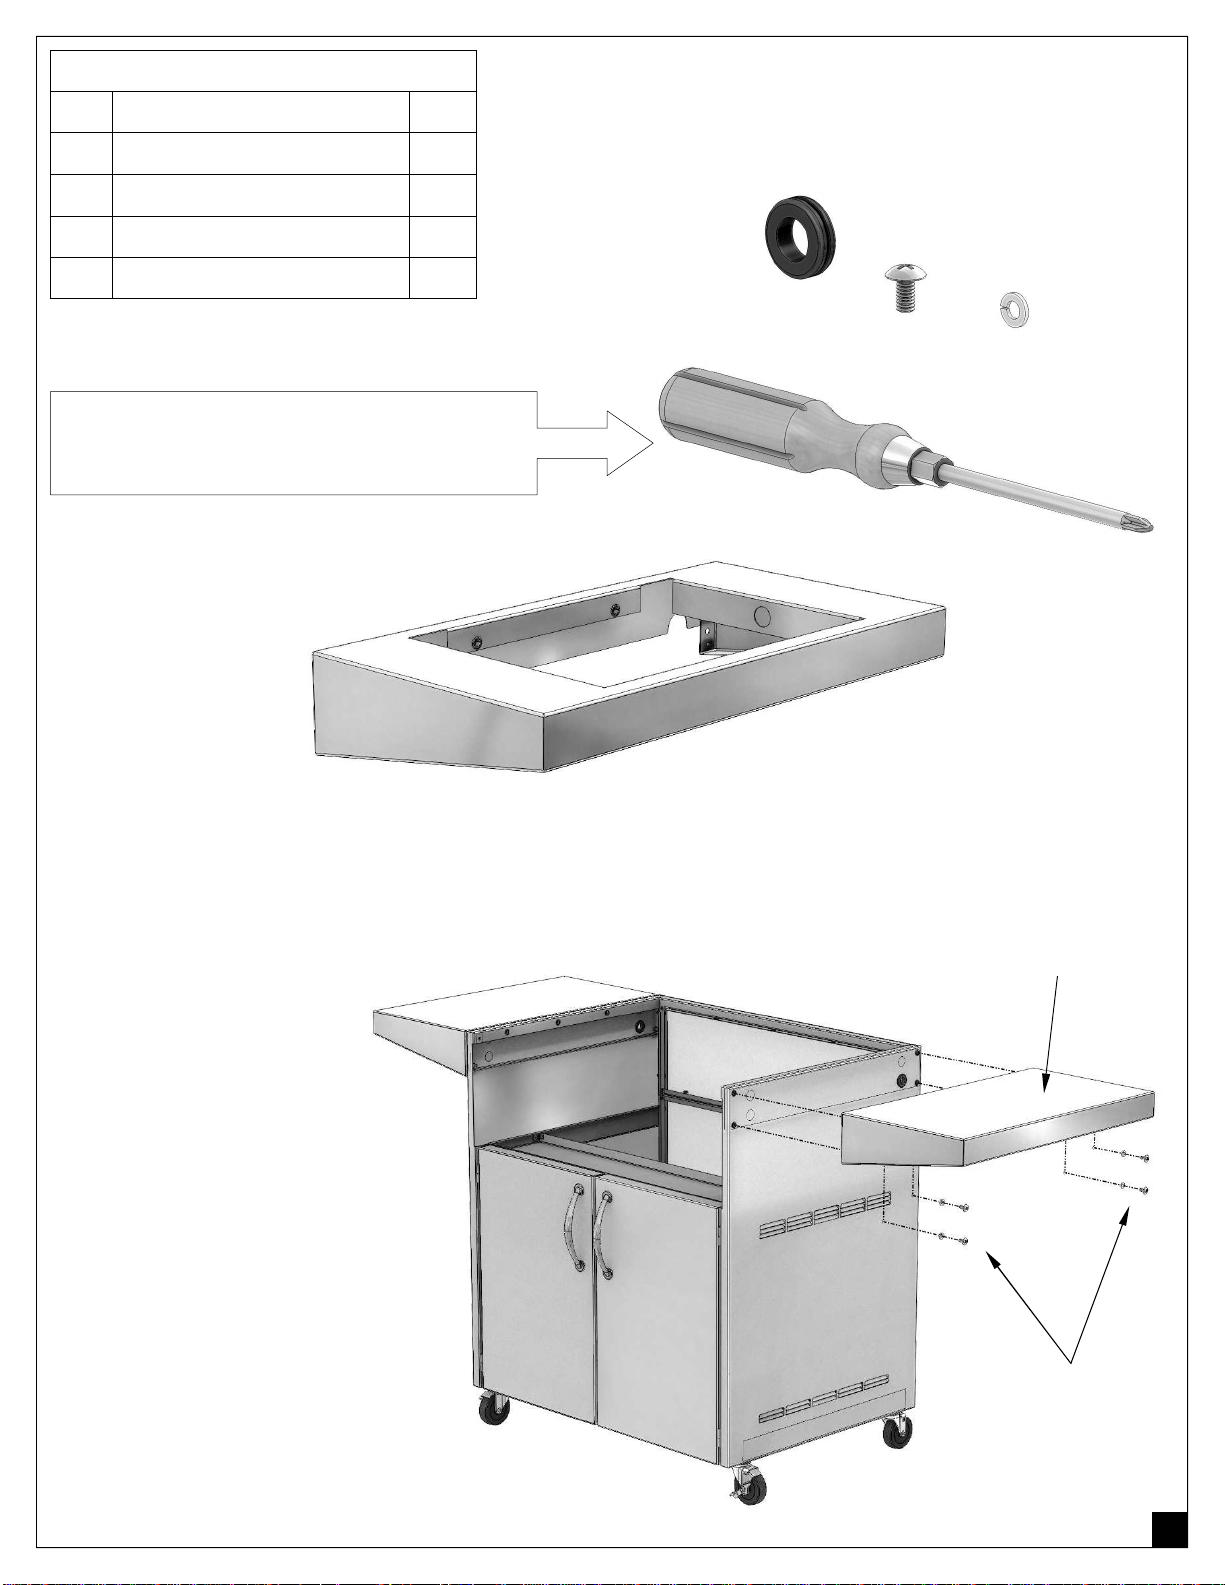
COMPONENTS INCLUDED IN THIS KIT:
ITEM DESCRIPTION: QTY:
A GROMMET 1
B 1/4” LOCK WASHER 5
C 1/4-20 x 1/2” SCREW 5
D SHELF (AS SHOWN BELOW) 1
ITEM NOT INCLUDED AND REQUIRED
FOR ASSEMBLY OF THIS UNIT:
STANDARD #2 PHILIPS SCREWDRIVER
A
B
C
ASSEMBLY PROCEDURE:
STEP 1:
To begin installing the Side
Burner Mounting Shelf in
your
Artisan
first remove the appropriate
existing shelf unit out of it.
This is accomplished by removing the 4 screws and
lock washers located on the
under the shelf and on the
sides. Save this screws
and washers for later use.
(See Figure # 1)
Note: ARTC-32 shown in
this drawing is for illustrative purposes only. These
same instructions apply to
cart, you must
D
EXISTING
SHELF
SCREWS
AND
WASHERS
all
Artisan
cart models.
Figure # 1
Page 3
STEP 2:
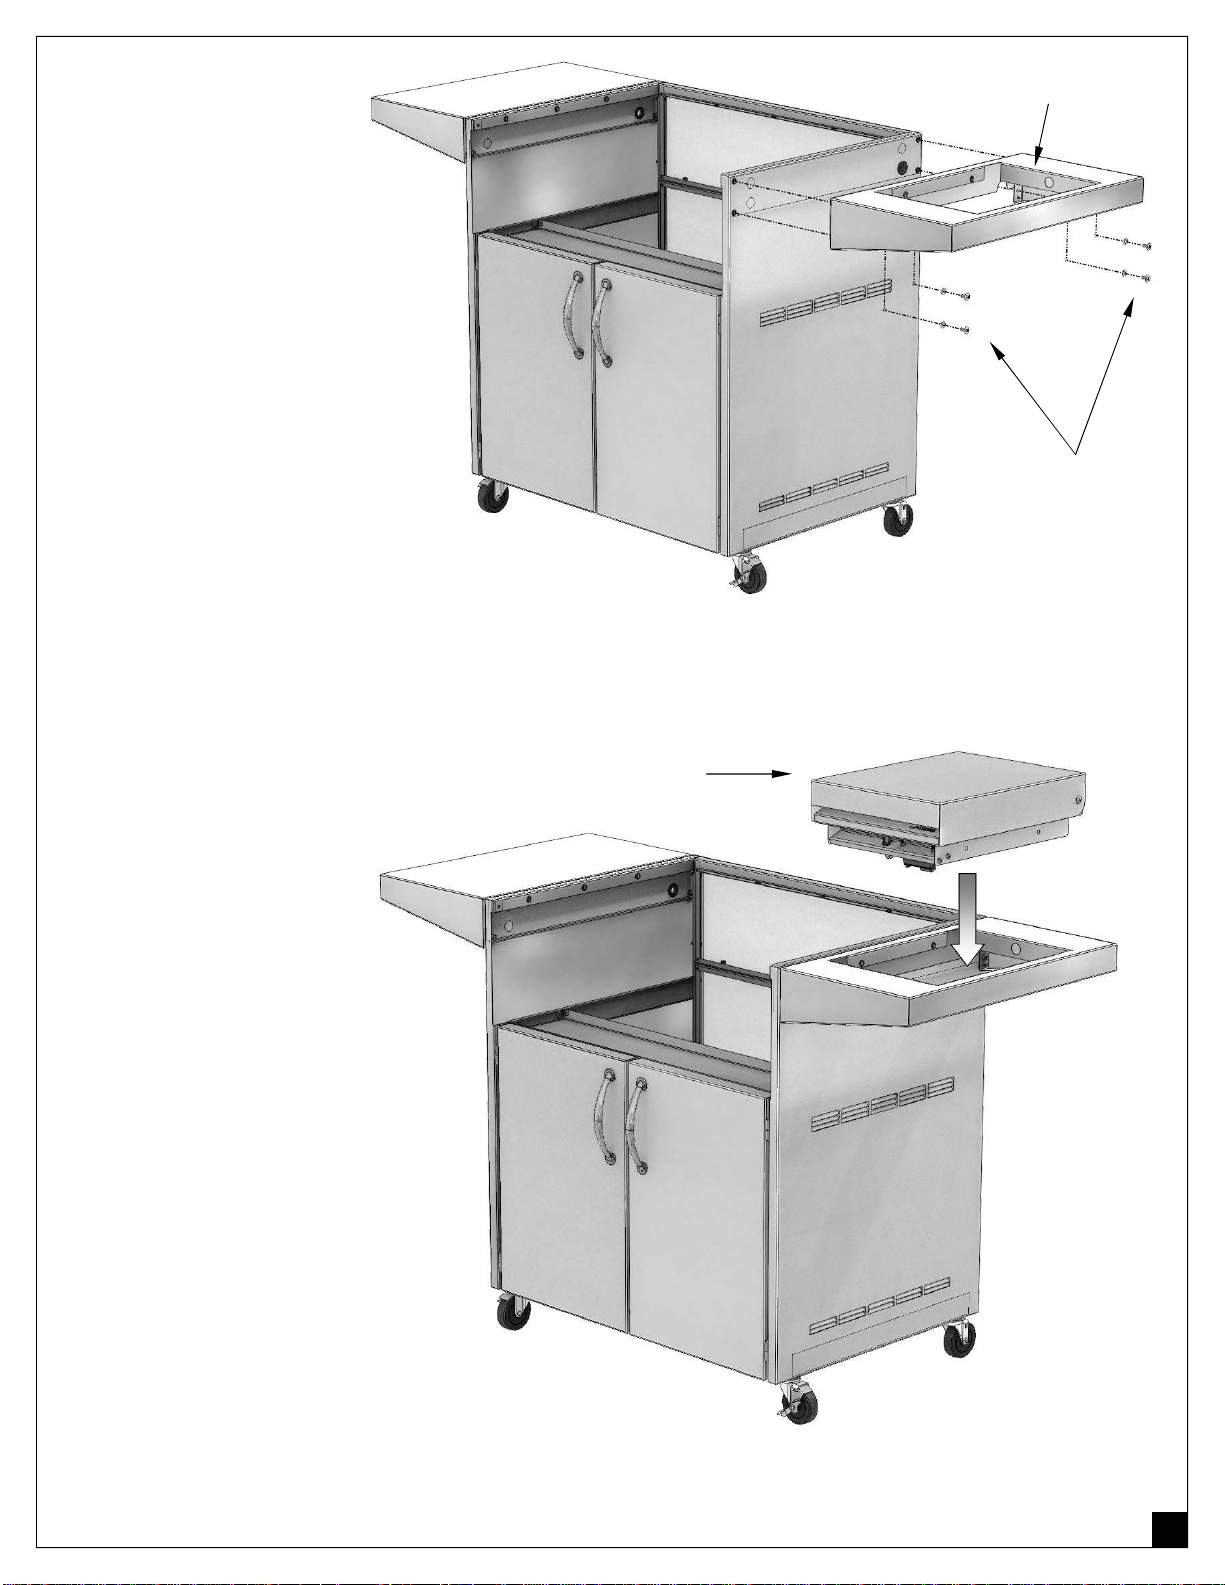
Install the ARTC-SBM shelf
unit by using the same
screws and washers you
saved on STEP 1.
Tighten screws while aligning the shelf to the sides
and top edges of the cart
unit’s side panel.
(See Figure # 2)
NEW ARTC-SBM
SHELF UNIT
SCREWS
AND
WASHERS
Figure # 2
STEP 3:
Now your
Artisan
Side
Burner ART-SB1 can be
installed on the side mounting shelf unit.
(See figure # 3)
Lower the ART-SB1 unit
onto the opening of the
shelf.
ART-SB1 SIDE
BURNER UNIT
Figure # 3
3
Page 4
STEP 4:
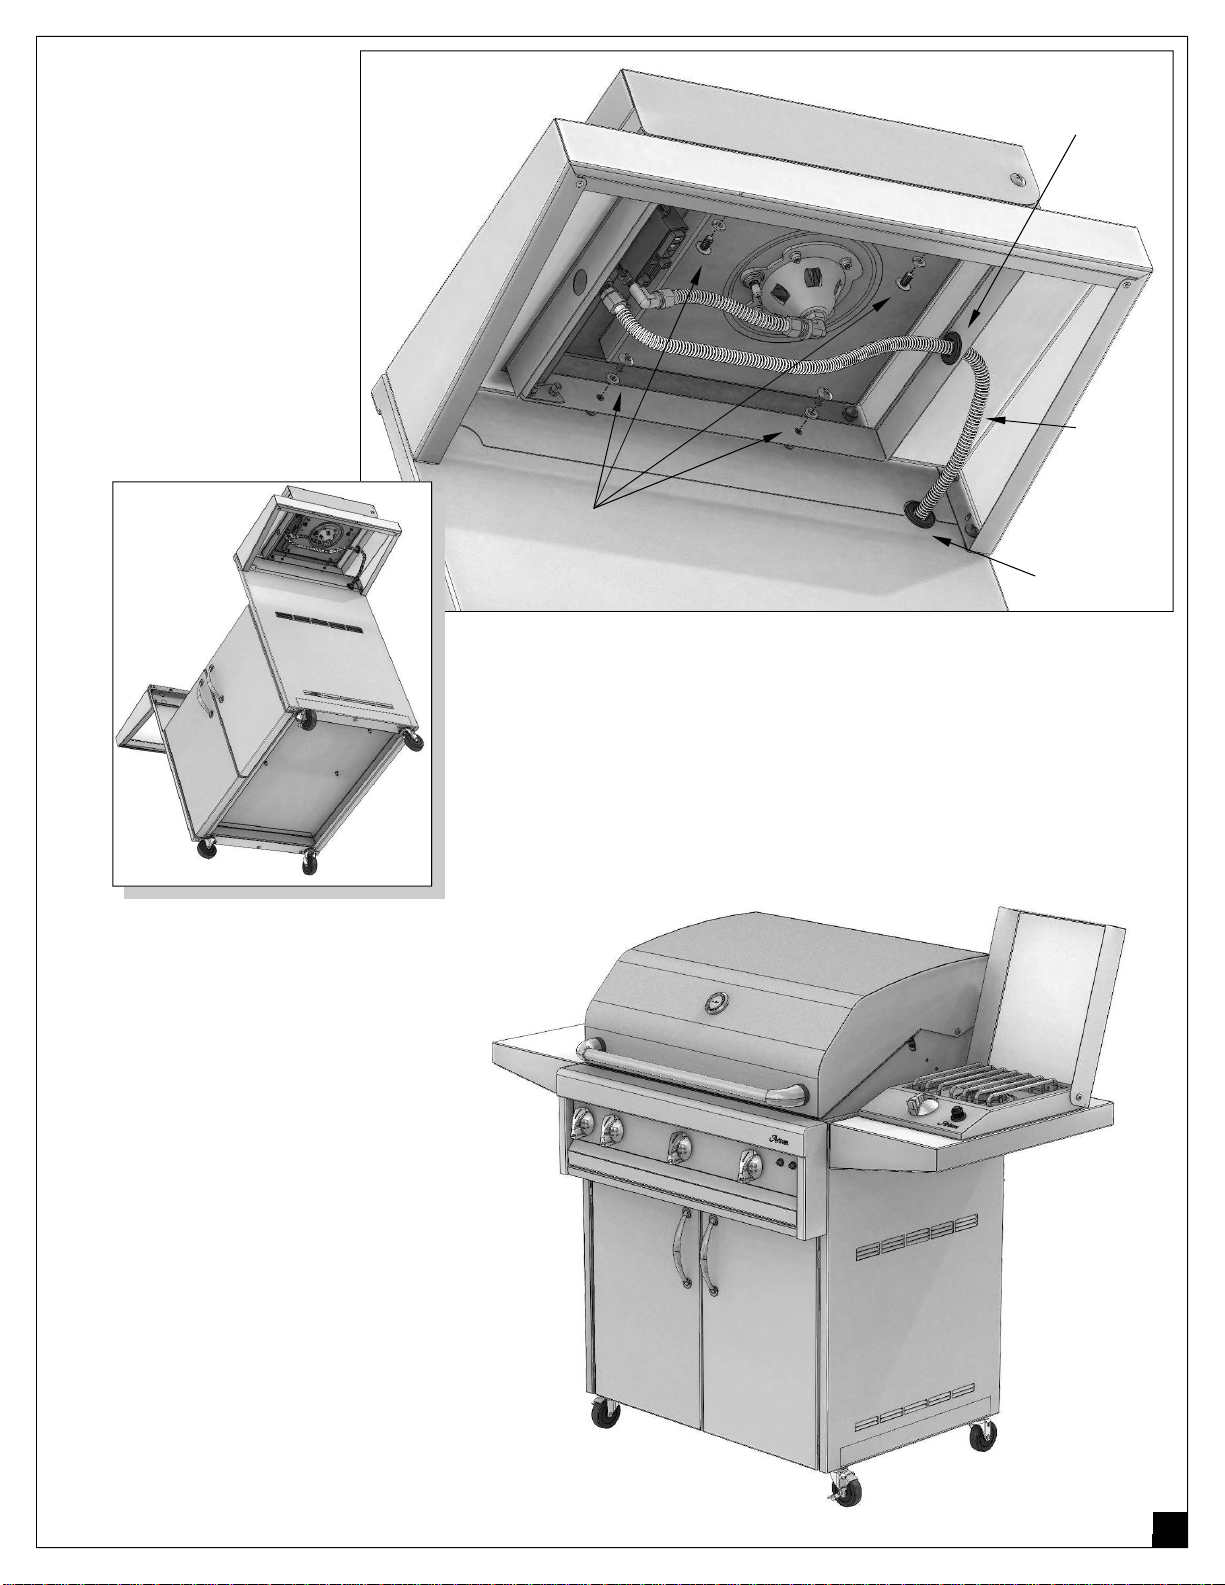
Fasten the ART-SB1 Side
Burner to the ARTC-SBM
side mounting shelf with
the 4 screws and lock
washers provided in this
kit.
(See figure # 4)
Insert the grommet provided to protect and guide
the supply gas line to the
side burner unit.
NEW
GROMMET
GAS
SUPPLY
LINE
SCREWS
AND
WASHERS
Figure # 4
EXISTING
GROMMET
Guide the supply gas line thought the existing grommet in the
STEP 5:
When fully assembled with your
Artisan
BBQ, the Side Burner
Unit ART-SB1, becomes a permanent accessory of your Cart
Mounted Unit as shown on Figure
# 5.
cart and connect to the
Artisan
shown on the ART-SB1 Manual.
BBQ unit as required and
Figure # 5
4
Page 5

NOTES:
5
Page 6

Artisan
™ ARTC-SBM Assembly Instructions
Artisan
All Rights Reserved • 06/2011
™ USA Grills
6
 Loading...