

Artisan 880 OPERATORS and SPARTS PARTS Manual
MODEL
880
Pin
Point
(Saddle
Sewing
2 Needle
OPERATORS
and
Stitch)
Machine,
Chainstitch
SPARTS PARTS
Manual
-----
CONT
ENTS -----
1. Prec
auti
ons bef
1) Sa fety
2)
Pr
ecaution before St
3)
Pr
ecaution for Op
ore
pr
ecautions
starting operation···········..·..·· ·..······.· , , 1
arting
erating
~
Operation
·· ·..·· · ··..·..··..····..· · · ·..········· 1
Conditions··..·..·..· ·..· ····..·..·..···..·· ·..·..········ ·..····..··· 1
·······..· ··.· · 1
2. How to use the sewing machine ··..· ·..·..· ·..· · ·..·..·······..· · · · · ·..· · ·:·· 1
1) How to set the needle ·..· · ·..· · 1
2) How to
3)
Adjustment
4) Pressing for sewn goods··..·····..···· ·· · ······..·· ····..···..·..··..·..············· ····· ···..··..··..·..·2
5) Sewing condition 2
6) Upper
3. C
auti
1) Oilin g ·..······..···· · ·..··..· · · ·..·····..·· ···..··· ··..· · ····..·..· · · ·..3
2) Clean periodically in
4. Outline of machine
I) Timing
2)
Height
3) How to fit needle
4) Adjustment of needle guide 6
5)
Adjustment
6)
Adjustment
5.
Parts
catalog ····..·..··..··..·..· ······· · · · ·..· ··8
threading
· ·..·..··..··..·..·· ·..·..· · ········..···..·..·..·······..··········..···..··..·· ···· ·..··..·.. 1
of stitch length ···..· ·..···· ·..·2
thr
ead
tension ·..· ·..·..· · ·2
on f
or
use to use the sewing machin e ·· ·..· · ·····..·..·..· ·..·..· ·· ·..· ·· ·..3
of
of
needle
needle
of
thread
of
thread
accordanc
adju
stment
and
feed dog·..· ·..·..· • · · ·..·..···..·· ··..··..· 4
bar·
· ····..···..·· ·..·..······..·..· · · ·..· ········..·..·..· ···· ·..·..· ·..4
and
looper · · ·..·..·..· ··..·· ·· ··..· · ·..· · · ·· ···· 5
tension
tightening..· ·..·· ··..· • ·..·..····..· ·· ··..·..·· ·..·· ·· ··7
e with using frequ ency..····..·..·..······..·..···..· · ·..·· ··..· ··4
..··· ·..·· · ·..·..·· ·· ·..· ·· ·..· · ··..·· 4
sprin
g· · ·· ·····..· ·..·..·· ··..··· · · · · ···..··6
A)
Arm
bed & Its accessories ..· ·..·..·· ·..· · ·· · · ·..· · ·..· ·8
B) Sewing mechanism ······..··· ·· ·..····..···..··············· 10
C) Feeding
D) Stitch
Presser
E)
F) Oil
and
feed lifting &
regulator
mechanism : ·..·..·..··..·· 16
Lower
shaft
mechanism ..· ·..·..· · · · · · ·....·..···..13
foot mechanism ·..··..·..· · · ·..··18
lubrication
mechanism · ·..·· · ·..····· ··..·..·..· ··· · ··..·· ·· ·..·..·..·..··..· ·•·..···..20
G) Accessories..··..· ·..··..··..· ·..· ·..· ·..·· · · ···..·..·..·..··· ·· ·..·..·..· ·22
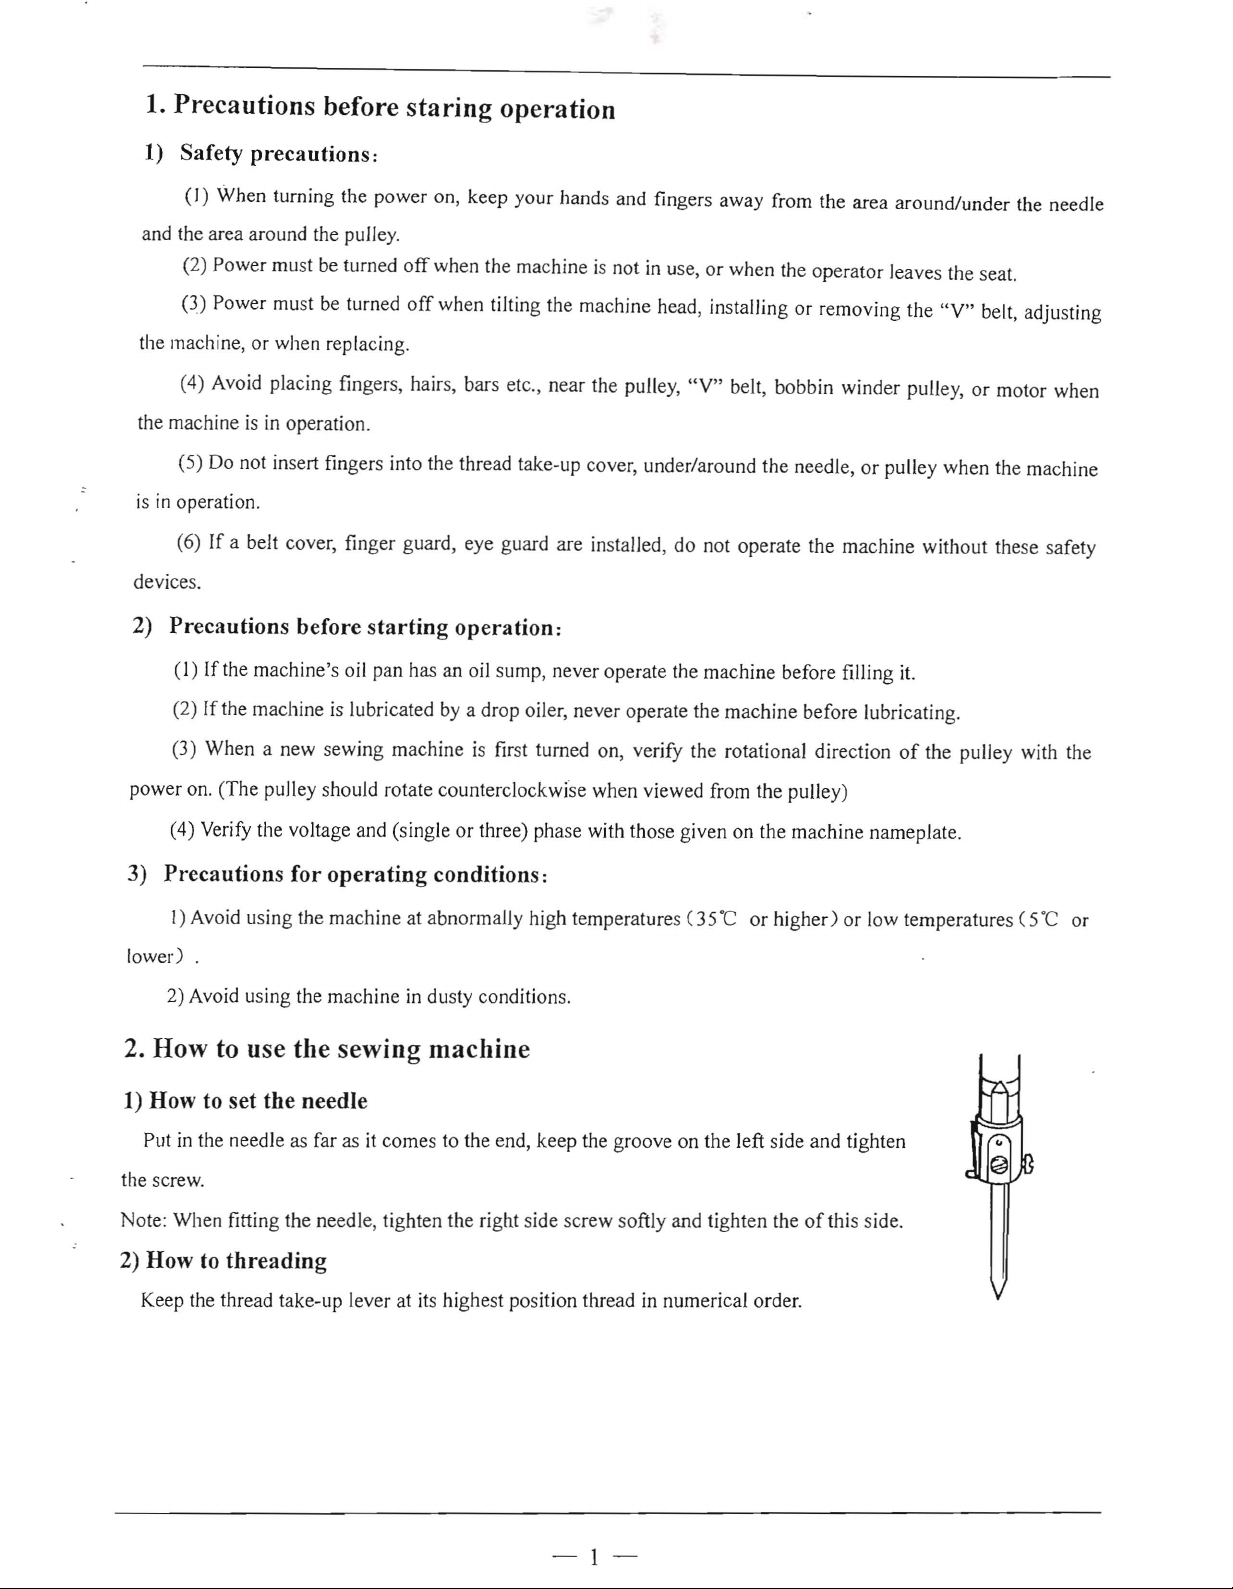
1. Precautions before
1) Safety precautions:
staring
operation
() When turning the power on, keep
and the area around the pulley.
(2) Power must be turned
(3) Power must be turned
the mach ine, or when replacing.
(4) Avoid placing fingers, hairs, bars etc., near the pulley,
the machine is in operation.
(5) Do not insert fingers into the thread take -up cover, under/around the needle, or pulley when the machine
is in operation.
(6) If a belt cover, fin
devices.
2) Precautions before
(I)
If the machine's oil pan has an oil sump, never operate the machine before filling it.
(2) If the machine is lubricated by a drop oiler, never operate the machine before lubricating.
(3) When a new sewing machine is first turned on, verify the rotational direction
off
when the machine is not in use, or when the operator leaves the seat.
off
when tilting the machine head, installing or removing the
ger
guard, eye guard are installed, do not operate the machine without these safety
starting
your
operation:
hands and finger s away from the area around/under the needle
"V"
belt, adjusting
"V
" belt, bobbin winder pulley, or motor when
of
the pulle y with the
power on. (The pulley should rotate counterclockwise when viewed from the pulley)
(4) Verify the voltage and (single or three) phase with those given on the machine nameplate.
3) Precautions for
I) Avoid using the machine at abnormally high temperatures C35·C or
lower) .
2) Avoid using the machine in dusty conditions.
operating
conditions:
higher)
or low temperatures ( 5·C or
2. How to use the sewing machine
1) How to set the needle
Put in the needle as far as it comes to the end, keep the groove on the left side and tighten
the screw.
of
Note: When fitting the needl e, tighten the right side screw softly and tighten the
2) How to
Keep the thread take-up lever at its highest position thread in numerical order.
threading
this side.
-1-
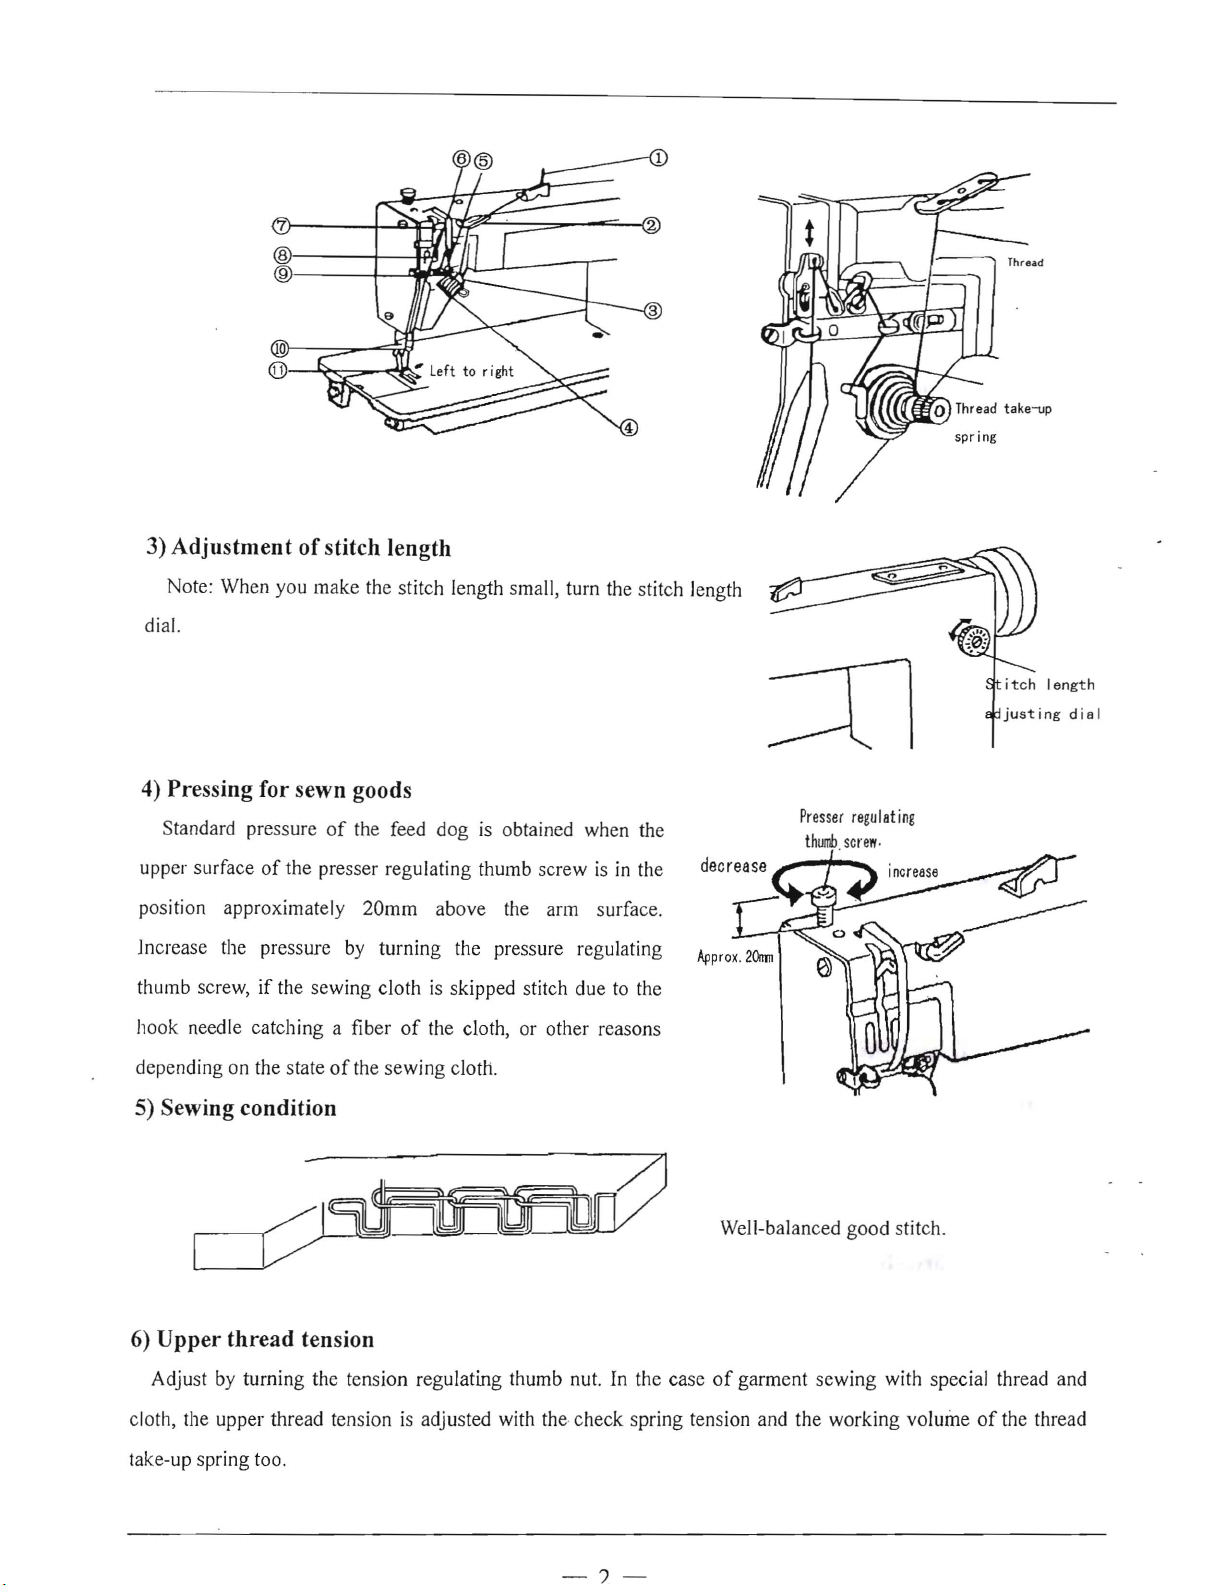
3) Adjustment of stitch length
Note: When you make the stitch length small, turn the stitch length
dial.
4) Pressing for sewn goods
Standard pressure of the feed dog is obtained when the
upper surface of the presser regulating thumb screw is in the
position approximately 20mm above the arm surface.
Jncrease the pressure by turning the pressure regulating
thumb screw, if the sewing cloth is skipped stitch due to the
hook needle catching a fiber of the cloth, or other reasons
Presser
thumb
.
regulating
scren
-
depending on the state
of
the sewing cloth.
S) Sewing condition
Well-balanced good stitch.
6)
Upper
Adjust by turning the tension regulating thumb nut. In the case
cloth, the upper thread tension is adjusted with the check spring tension and the working volume of the thread
take-up spring too.
thread
tension
-?
of
garment sewing with special thread and
-
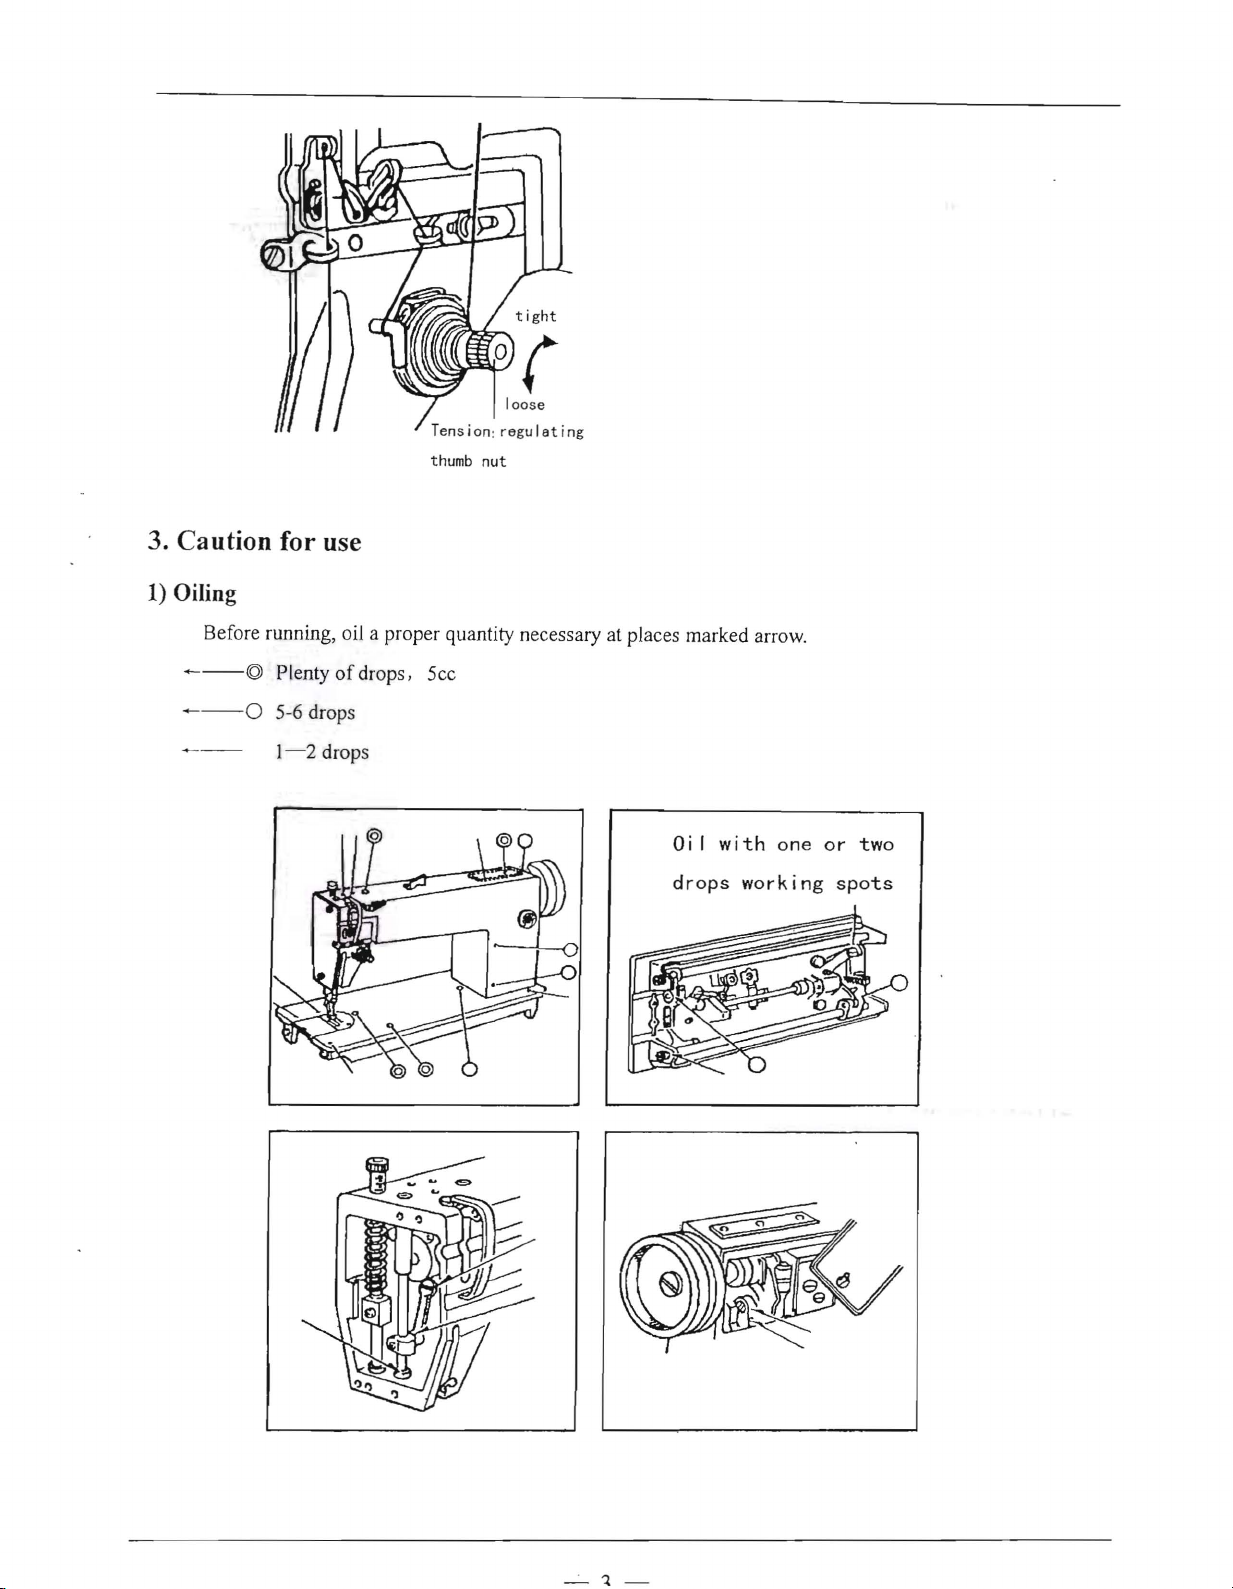
loose
Tens ion: r
t humb nut
egulating
3. Caution for use
1) Oiling
Before running, oil a proper quantity necessary at places marked arrow.
- -
-©
Plenty of drops , Scc
---0
5-6 drops
]
-2
drops
Oi I
drops
with
working
one or two
spots
-
·1
-
2) Clean periodically in accordance with using frequency
Remove the needle plate. Take
for assembling
hand and tighten it evenly with a long screwdriver.
Note: When fitting the needle plate, fit so that the needle might
the center
4. Outline
1) Timing
The height
shall be approximately Imm. To adjust height
LIp
feed
the needle and feed dog properly, set the feed dial to
that the top
needle plate as illustrated in
need Ie plate after feeding has been completed.
dog is earl ier, proper thread tension cannot be obtained and the sewing
cloth will get caught by the needle easily. To adjust the timing
dog,
near side by loosening the two feed cam set-screws
or down by loosening the screw (Fig. I). To adjust the trimming
LI
se the feed cam . To advance the timing, move the feed cam to the
of
the needle plate , turn the screw 2 or 3 times with
of
the hole
of
of
needle and feed dog
of
feed dog from the needle plate to the top
pf
the parent needle enters approximately 0 to
of
the needle plate .
machine adjustment
Fig.2, when the needle top is flush with the
off
dust in the grooves
of
the feed dog, move the
If
the timing
of
of
"8"
and make sure
lmm
"A"
as illustrated in
the feeder. As
come
feeder teeth
from the
of
the feed
of
the feed
Fig.3. To retard the timing, move the feed cam to the far side.
your
to
of
Fi g. 1
@
2) Height
When the needle bar is at the top
dead point, a standard distance
of
needle bar
(Fig.d, "B'') between the needle
plate is as given in the
loop
of
the parent needle is changed depending on the type
be used. To adjust the height
set screw as illustrated in
N
eed
le
gauge
(m
m)
2
Table 1. Check the proper distance, since the thread
of
the needle bar, loosen the needle bar holder
Fig.5.
Size B
Tetoron
8~8
thread
.
5
(mm
)
Cotton
thre
7.5-8
-
ad
L1-
Fig.4
of
the thread to
Table I
Fig.3
3) How to fit needle and looper
(l)
When the large looper is in its advance end position, the
size between the side
bottom
position
looper block as illustrated in
of
(angle
as illustrated in
the size
the large looper adjusting arm so that it clears the large looper shaft. To increase the travel amount, move the
large looper adjusting arm so that it comes closer to the large looper
shaft. Since the travel position
timing
adjustment, align the needle with the looper while confirming the
proper timing. Table 3
(Fig. 6, "C") shall be as given in Table 2. To adjust the
of
the large looper, loosen the tightening screw in the large
(2) When the needle bar is at the lowest dead point, the distance between the large looper top and the side
the parent needle (Fig.S,"D'') shall be as given in Table 3. To adjust this distance , adjust the travel amount
of
the oscillating block) by changing the position
Fig.9. Decrease the travel amount, if the size
"0"
is insufficient. To decrease the travel amount, loosen the tightening screw with a spanner and move
of
the large looper to the needle well be changed by this
of
the hook needle and the large looper slot
Fig. 7.
Fig
.6
of
the tightening screw in the large looper adjusting arm
of
the large looper (Fig.6,
"C')
Tetoron
------------
Cotton
"0"
is excessive, or increase the travel amount if
and the
------------
Tetoron
Cotton
thread
thread
thr
thread
Table 2
ead
Size
0-1
1-2
Si
ze 0 (mm)
C (rum)
1
-2
3
-5
Fig
.8
(3) When the top
the parent needle after the large looper has been advanced from its
back end position , the top
the upper end
Fig.Ill
. To adjust this position, loosen the setscrew
of
of
the large looper is aligned with the center
of
the large looper shall be 2 to
the needle hole in the parent needle as illustrated in
of
Fig.9
3mm
above
the large looper.
-5-
~FU.~=t2-3mm
of
Fig.10
(4) When the small looper is in its left most position, the position
must come out I to 2mm from the side face
excessive, the chain-off thread will be difficult to come out. To adjust the
position
illustrated in
of
the small looper, loosen the setscrew in the small looper block as
Fig.n.
Fig.11
of
the hook needle as illustrated in
of
the slot bottom in the small looper
Flg.Ll
.
If
this projection is
Fig
,12
(5) The trimming
of
timing
state that the threads is properly threaded through the hook needle.
To adjust the timing
advance the timing, loosen the two setscrews in the right large rod
with a hexagon wrench (2.5mm) as illustrated in Fig.13, and move
the hexagon wrench up. To retard the timing move the hexagon
wrench down . Tighten up the set-screws making sure that the
setscrews are closely fit to the collar on the right-hand side.
4)
Adjustment
Install the needle guide to the upper and lower side, making sure that the needle guide will not come into
contact with the lower surface
by loosening the setscrew in the needle guide as illustrated in
the large looper. Adjust the timing while confirming the
of
the small looper is almost same as the
of
the small looper, use the right large rod . To
of
needle guide
of
the large looper (Fig.14,
F j it. 13
"E")
. To adjust this position, position the needle guide
Fig.14.
I~l
F j g . 14
5)
Adjustment
when threading the large looper (Fig.I S}, reduce the working volume ofthe thread tension spring, if the loop
of
the parent needle thread is insufficient. Or increase the working volume, if the loop is excessive . Excessive or
insufficient loop size may cause
(fig.Iti), loosen the small screw in the upper thread adjuster and turn the upper thread adjuster (upper thread
adjusting shaft) all the
tensioner shoe by moving the presser foot down.
of
thread
tension
way
so as to adjust the distance between the thread adju
spring
jumping of
stitches. To adjust the working v
Fig.16
Fig
.16
olume
If
this tensioner shoe is raised, the thread may not be tightened
of
the thread tension spring
ster
, confirm the close fit ofthe
 Loading...