

Artesia AG30, AG50 Owner`s Manual

Contents
TAKING CARE OF YOUR DI GITA L PIANO
SERVICE AN D MODI FICATION
HANDLING AND TRANSPORT
CLEANING
LOCATION
POWER
PANEL CO NTROLS
CONNE CTOR PANEL
BOTTOM OF PIANO
DEMO
PLAY DEMO SONGS
CHOOSE A DEMO SONG
PLAY ALONG DEMO SONGS
KEYBO ARD VO ICE S
VOICE SELE CT
ADJUSTING THE KE YBOARD VO ICE VO LUME
LAYER VOICE
SPLIT VOIC E
REVERB/CH ORU S
DUET
EQUALIZER
RHYTH M
RHYTHM STYLE SELECT
USING THE RHY THM ST YLE
ADJUSTING THE TE MPO
SPLIT POIN T FOR AUTO ACCO MPANIMENT
ADJUSTING THE CH ORD
ADJUSTING THE AU TO ACCOMPANIM ENT VOLUM E
AU TO ACCOM PA NIM ENT
SINGLE MODE
FINGERED MODE
USING THE AUTO ACC OMPANIMENT
.............................................................................................
.................................................................................
.................................................................................
.....................................................................................
........................................................................
......................................................................
......................................................................
...................................................................
..........................................................
......................................................................
..........................................................................
...........................................................................
.............................................................................
....................................................................
.........................................................................................
...............................................................................
........................................................................................
...........................................................
..........................................................
...............................................................
..........................................................................
.....................................................................
................................................
...................................................
..................................................
.....................................................
.........................................................
.....................................
........................
...........................
......................................
.............
4
4
4
4
4
5
6
12
13
14
14
14
14
15
15
16
17
18
19
20
20
22
22
23
24
25
25
25
26
26
26
27
1

Contents
METRONOME
FUNCT ION
ADJUSTING THE KE YBOARD VO ICE VO LUME
TRANSPOSE
MASTER TUNE
TOU CH CUR E
MAIN OC TAVE
SPLIT OCTAVE
DUAL OC TAVE
SPLIT POIN T
CHORD POIN T
CHORD TYPE
MAIN/SPLI T/D UAL PAN
REVERB TYPE
REVERB LEVEL
................................................................................
........................................................................................
.................................................................................
..............................................................................
...............................................................................
..............................................................................
.............................................................................
..............................................................................
................................................................................
..............................................................................
................................................................................
...............................................................
................................................................................
.............................................................................
............................
29
30
30
31
31
31
31
31
32
32
32
32
32
33
33
CHORUS TYPE
CHORUS LEVEL
USB MIDI IN
MIDI OU T
LOCAL
USB PLAY MODE
USB PLAY SPEED
AUTO RECO RD TRA CK
USB MUTE TRAC K
BLUETO OT H
AUTO CLOS E TIME
FACTORY RESET
REGIS TRAT ION MEMORY
SAVE REGI STRATION
RECALL REGIS TRAT ION
......................................................................................
...........................................................................................
............................................................................
............................................................................
.................................................................................
..........................................................................
..........................................................................
........................................................................
.................................................................................
......................................................................
..........................................................................
.................................................................
................................................................
................................................................
............................................................
33
34
35
35
35
36
36
36
36
37
37
37
38
38
38
STYLE HOLD
...............................................................................
2
39

Contents
RECOR D
LOCAL RECORDING
PLAY BACK
DELECTING TRACKS
USB RECORDIN G
PLAY BACK
DELECTING TRACKS
PLAY ALONG SONGS
SELECT AND LI STEN TO A SONG
PRACTICIN G THE RIGHT HAND MELODY OF THE SONG
PRACTICIN G THE LEFT HAND MELODY OF THE SONG
PRACTICIN G BOTH HA NDS OF THE SONG
USB
INSERT TH E USB
REMOVE THE US B
............................................................................................
......................................................................
..................................................................................
....................................................................
........................................................................
...................................................................................
...................................................................
........................................................................
................................................
.................................
....................................................................................................
......................................................................
........................................................................
...........
...........
40
40
41
41
42
42
43
44
44
45
45
46
47
47
47
PLAY
BLUETOOTH
BT-1 ARTESIA BLUETOOTH CONNECTI ON
BLUETO OT H CONN ECT ION
MIDI
MIDI CO NNE CTION
MIDI OU T
LOCAL ON/OFF
MIDI IM PLE MENTATIO N CHART
AU TO BASS CHORD FINGE RING GUID E
VOICE LIST
STYLE LIST
TROUB LESHOOTING
SPECI FICATIONS
..............................................................................................
.......................................................................................
.......................................................
............................................................................................
....................................................................
....................................................................................
...........................................................................
................................................
........................................
...................................................................................
...................................................................................
.......................................................................
.......................................................................
................................
47
48
48
48
50
50
50
50
51
52
53
54
55
56
3

TAKING CARE OF YOUR DIGITAL PIANO
This digital piano will supply you with years of musical enjoyment if you follow the simple rules
listed below.
SERVICE AND MODIFICATION
Do not attempt to open the piano or make any change in the circuits or parts of the unit. This
product should be serviced by qualified service personnel when;
·The power supply cord or the plug has been damaged,
·Liquid has been spattered into the unit or it has been exposed to rain,
·The instrument does not appear to operate normally or exhibits a marked change in
performance,
·The instrument has been dropped or the cabinet has damaged.
HANDLING AND TRANSPORT
·Never apply excessive force th the controls, connectors or other parts of the instrument.
·Always unplug cables by gripping the plug firmly, not by pulling on the cable.
·Disconnect all cables before moving the instrument.
·Physical shocks caused by dropping, bumping, or placing heavy objects on the instrument
can result in scratches and/or more serious damage.
·Avoid placing vinyl objects on top of the instrument, vinyl can stick to and discolor the surface.
CLEANING
·Clean the cabinet and panel with a soft, nonabrasive, dry cloth. A wax based polish may be
used on the cabinet. Do not use paint thinner or chemical based polishes.
·To maintain the luster of the keys and buttons wipe with a clean, slightly damp cloth, and
then polish with a soft dry cloth.
LOCATION
·Direct sunlight (near a window)
·High temperatures (near a heat source, outside, or near a window)
·Excessive humidity
·Excessive dust
·Strong vibration
·Leave enough space around the piano for it to be properly ventilated.
·This instrument contains digital circuitry and may cause interference if placed too close to
radio or television receivers. If interference occurs, move the instrument further away from
the affected equipment.
4

POWER
·Turn the power switch off when the instrument is not in use.
·To avoid damage, turn the power switches of all related devices off prior to connection or
disconnection of MIDI cables.
·Turn the power off if the main cable is damaged or the instrument is spattered with liquid.
·Do not switch the unit on and off in quick succession, this places an undue load on the
electronic components.
·Unplug the AC power cord during an electrical storm.
·Avoid plugging the AC power cord into the same outlet as appliances with high power
consumption, such as electric heaters or refrigerators.
·Carefully check the amplifier volume control before starting to play. Excessive volume can
cause permanent hearing loss.
5
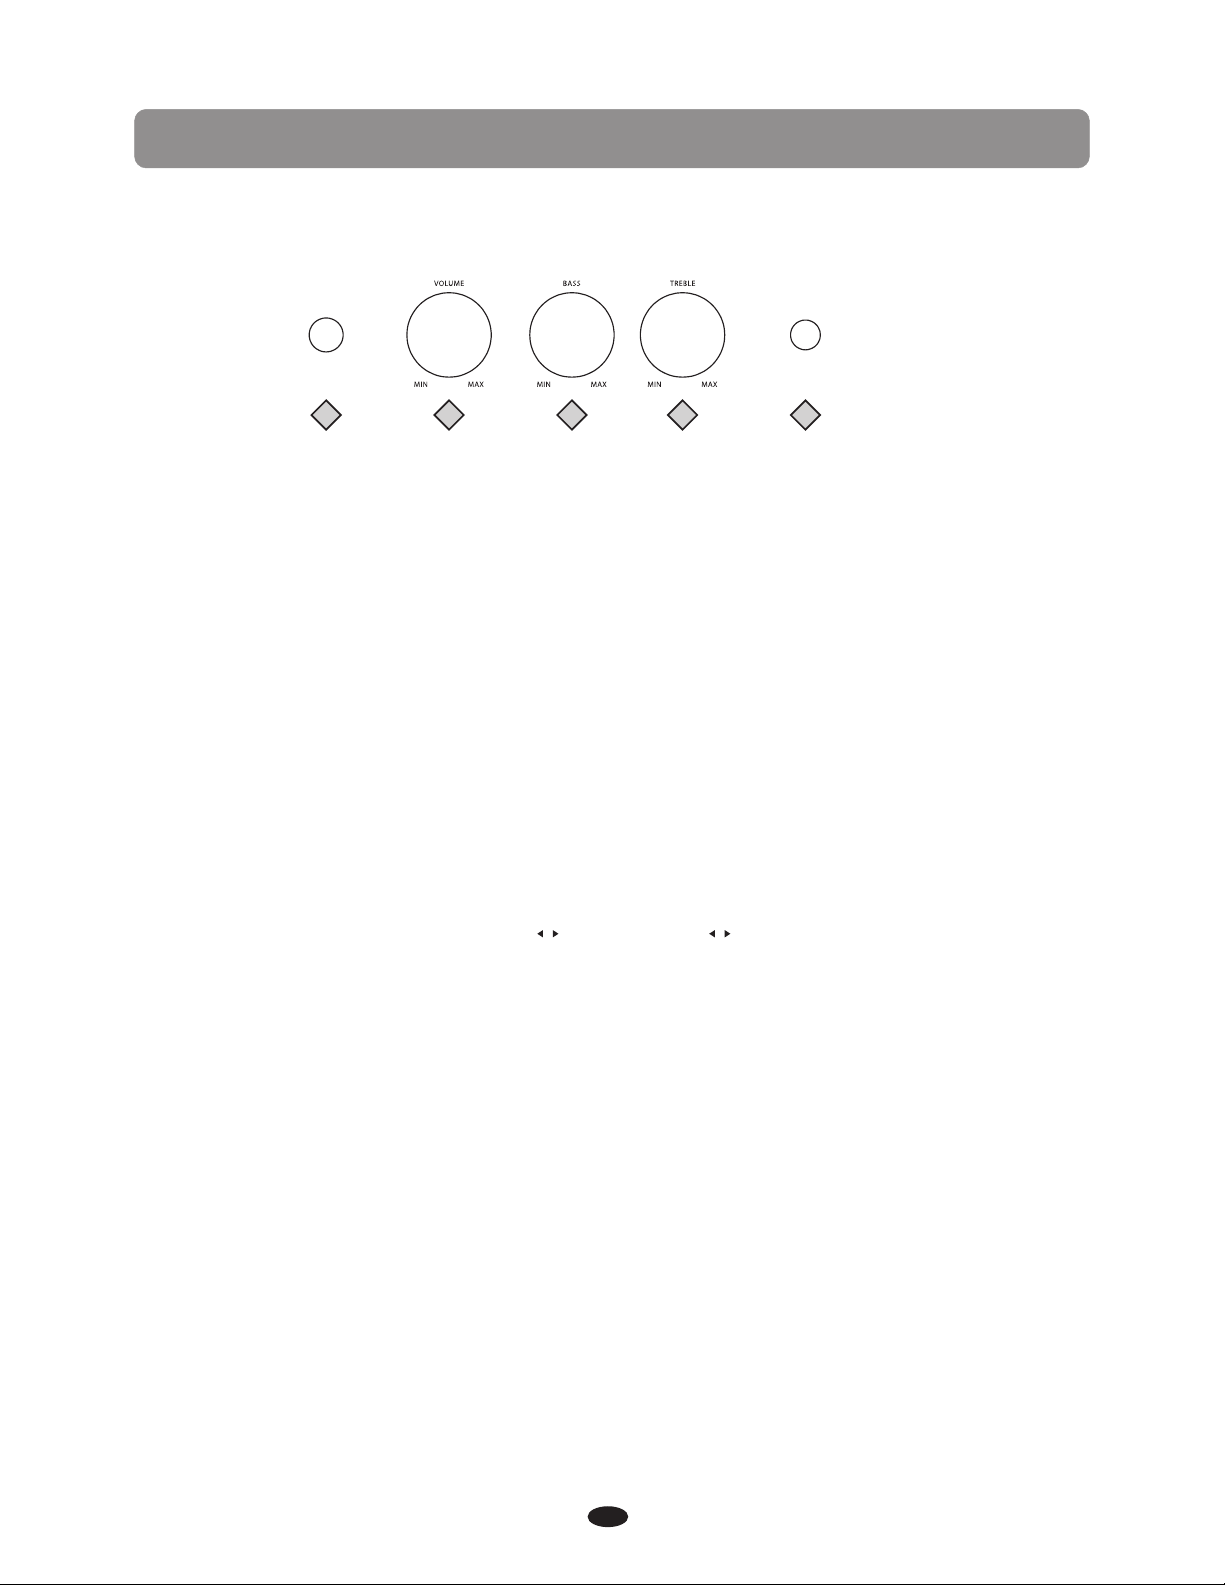
PANEL CONTROLS
The ele gant contr ol pa nel is divid ed in to seve ral dis tin ct section s. The follo win g is a
brief d escription of a ll the featu res located on th e control pa nel .
POWER /
STANDBY
1
2
3 4
DEMO
5
1.POWER / STAN DBY:
The pow er switch is loca ted to the lef t of the keys. P ress the but ton t o turn the pow er
on and of f. The LCD scre en, a nd the indic ator lights for t he start up se tti ngs, will li ght
up when t he power is tu rne d on.
This pi ano is equipped w ith an autom ati c power off fe ature, the p ian o will shut of f
autom atically afte r a set time of in activity. The defa ult time set tin g is off,the Au to
Power Off T ime c an be change d in the Funct ion m enu.
Pleas e see the Func tio n section of t his manual for mo re informa tio n.
Pleas e note, when y ou turn the po wer o ff, do not turn i t bac k on immedia tely. Wait at
least f ive second s to turn the po wer b ack on so that t he electro nic c ircuits ca n properly
reset .
2.VOLUME:
1 Use this button to adjust the overall master volume of the keybo ard to your desired
level. Turn to the right to increase the volume and turn to the left to decrease the volume.
Please note, at higher volumes there may be audio "clipping" or disto rtion depending on
the frequencies being played. Please reduce the volume if this occurs.
Please also note, the keyboard and accompaniment volumes can adjusted independently
from each other by using the KB.VOL and ACCOMP buttons.
/ /
3.BASS:
With th e bass tone kn ob you can adj ust the sound of your pian o to th e room or
accor ding to your p referenc es. A s a starting p oint, set bo th co ntrols to th eir n eutra l
12 o'cl ock position. I f you wan t more bass so und turn the bass c ontrol to th e rig ht and
if you want less b ass sound tu rn it t o the left.
4.TREBLE:
With th e treble ton e kno b you can a dju st the sound o f your pi ano t o the room or to y our
taste . As a startin g poi nt, set both c ontrols to thei r neutral 12 o'cloc k pos ition. If yo u
prefe r a brighter s oun d turn the tre ble control to th e right, if yo u prefer a mor e
"roun ded" tone tu rn th e treble con trol to the left.
5.DEMO:
Press t he DEMO butt on, t he indicat or turns on and the f irst of the te n different
demon strat ion songs will pl ay.
Pleas e see the Demo s ect ion of this ma nual for mor e inf ormation .
6
PANEL CONTROLS
6
ACCOMP KB.VO L TRAN S TEMPO METR O
SYNCH RO START/ STOP INTR O/END ING FILLIN 1 FILLI N2
6.ACCOMP :
Press t he ACCOMP bu tto ns to adjust t he volume of r hythm s tyle and the a uto
/
/
7 8
VARIATIO N
10
9
LAYER
REVE RB/
FUNC TION
CHORU S
ACCOMP
SPLIT
DUET
EQ
accom paniment o nly, the keyboard in strument v oice will no t be af fected.
7.KB.VOL :
Press t he KB.V OL bu ttons to adj ust the main volume, you c an also adju st the
/
/
split / layer / learn and USB son g volum e.
Pleas e see the ADJU STI NG THE KEYBO ARD VOICE VOLUM E.
8.TRANS :
Press t he TRANS but ton s to adjust th e trans pose.
/
/
Pleas e see the func tio n section of t he manual fo r mor e informat ion.
9.TEMPO :
Press t he TEMPO but ton s to select th e , the cur rent tempo value wi ll
/
/
tempo value
appea r on the displ ay.
10.METRO:
The met ronome is a co nveni ent f eature for p racti ce, and can al so pr ovide a s oli d
rhythmic guide wh en recordi ng. T he METRONO ME button toggl es the metro nom e
featu re on and off. Press t he metronome bu tton to hear t he te mpo & beat.
Use the M TT RO button an d the +/YES and the - /NO button s to se lect the bea t of
yo ur choice;1/4 , 2/4, 3/4, 4/ 4, 5/ 4, 6/4, 3/8, 6 /8,7/8,9 /8 or 12/8.
7
PANEL CONTROLS
ACCOMP KB.VO L TRAN S TEMPO METR O
SYNCH RO START/ STOP INTR O/END ING FILLIN 1 FILLI N2
11
12
13
14
VARIATIO N
15
ACCOMP
16
LAYER
SPLIT
REVE RB/
CHORU S
DUET
FUNC TION
EQ
11.SYNCHRO :
Sy nchroniz ed Start set s the a uto accomp animent in to st andby mode .
The rhythm sty le wi ll start as so on as you play on the lef t han d side of the keyboar d.
With au to accompa nim ent engage d the rhythm s tyle will st art as soon as y ou play on
the lef t hand side of t he keyboar d and the auto a cco mpanimen t wil l start with t he first
recog nized chor d playe d, depending on w hich finge rin g mode is sele cted.
Press ing the SYNC S TART button a gain will st op th e auto accom paniment a nd pu t the
ke yboard back on st andby mode .
12.START/S TOP:
The START/STOP bu tto n immediat ely starts or sto ps the selec ted r hythm s tyle.
The aut o accompan ime nt will star t wit h the first re cognized c hord played dependin g on
the fin gering mod e sel ected.
13.INTRO/E NDING:
Each of t he 100 rhyth m styles can b e started or f inished with a de tailed int rod uction
and/o r ending pat ter n.
When IN TRO/ENDING is e ngaged, an i ntr oduction o f rhythm pat tern will so und f ollowed
by the ma in pattern . When a rhyth m or accompa nim ent patter n is already p laying, th e
accom paniment will b e professi ona lly comple ted with an endin g pattern fr om the next
measu re by pressi ng th e INTRO/EN DING button.
14.FILL IN 1:
The fil l-in feature pr ovides the a ccompani men t with a short r hythm patt ern of one or
two mea sures for ea ch style.
Press t he FILL IN1 bu tto n at any ti me while the acco mpanimen t is pl aying t o add a fill.
If you holddown the F ILL IN1 butt on, the fill patt ern will rep eat u ntil the but ton i s
relea sed, and the n the m ainpatte rn will resume fr om the begin nin g of the next me asure.
The FIL L buttons ca n als o be usedto st art a rhythm s tyle.
15.FILL IN 2 VAR IATION:
The 100 r hythm s tyles and their c orrespon din g auto accom paniments all i nclude a
variation of t hat style an d accompan ime nt that can be h eard simply by en gaging the
FILL IN 2 VAR IATI ON button. P res s the FILL IN 2 VARI ATIO N button and t he fi ll vari ation
will pl ay followe d by the va riation of t he selected rhythm sty le. The FILL butt ons can also
be used t o start a rhyt hm style.
Press t he FILL IN 1 but ton a gain to dise ngage the variati on an d return to th e main
patte rn after the f ill .
16.ACCOMP:
Press t his button to clo se or open the c hord.
8
PANEL CONTROLS
ACCOMP KB.VO L TRAN S TEMPO METR O
SYNCH RO START/ STOP INTR O/END ING FILLIN 1 FILLI N2
VARIATIO N
ACCOMP
17
LAYER
SPLIT
20
18
REVE RB/
CHORU S
DUET
21 22
19
FUNC TION
EQ
17.LAYER:
Press ing the LAYER bu tton will pu t the keyboa rd in the layer or dual mode . Layer r efers
to an add itional vo ice that is to ne mi xed wit h the main sel ect ed keyb oar d voice . The
assig ned layer voice wil l be heard with the o riginal vo ice when the keys are played.
Pleas e see the Keyboa rd Voices s ection of th is ma nual for mor e informat ion .
18.REVERB/ CHORUS:
Press R EVERB/CHORU S enter the ef fect setting, t han press bu ttons to sel ect a S ub
inter face, use th e +YE S/-NO to cha nge the value.
Pleas e see the Func tio n section of t his manual for mo re informa tion.
19.FUNCTIO N:
The FUN CTION button is u sed to acces s the function me nu. The func tio n menu can be
used to a djust or cha nge t he valu es of a number o f settings .
Pleas e see the Func tio n section of t his manual for mo re informa tion.
20.SPLIT:
With th e split feat ure e ngaged the keyboard op erate s in the split o r low er mode.
In the sp lit mode the k eyboard is d ivi ded into two s ections. In the r ight hand se ction
the mai n or laye red voice wi ll sound, an d in th e left hand se ction a diff ere nt voice c an
be assi gned to soun d whe n the key s are played.
Pleas e see the Keyboa rd Voices s ection for m ore i nformati on.
21.DUET:
Wth the d uet featur e eng aged the keyboard i s div ided into tw o sec tions, lef t A1-C3 and
right C #3-C7 that have the exac t same notes . The two section s will share t he sa me
vo ice and volu me. This is a gr eat f eature for t eaching or w hen t wo people wa nt the play
the pia nosimultane ously.
Pleas e see the Keyboa rd Voices s ection for m ore i nformati on.
Pleas e note, enga gin g the DUET fea ture will disab le the Layer, the Split a nd th e Auto
Accom paniment m ode s.
22.EQ:
Press t his button ente r the equali zer interf ace .
Pleas e see the Equa lizer section f or more info rmation.
9

PANEL CONTROLS
GRAN D PIANO
E. PIAN O V IBES ORGA N N. GUITA R VOICE
26
+YES
23
-NO
24 25
R&B SWING BALLA D POP LATIN S TYLE
BASS
STRIN GS CHOI R BR ASS EFFE CT
GOSPE L
M1
DANCEM3TRADI TIONA LM4BOSA NO VA
WORLD
M2
STYLE H OLD
STORE/ BANK
REGIS TRATION
27
Note: this is the OK butt on
23.+YES/-N O:
Use the +/YES or-/NO buttons to access different options of selected features and functions.
24.
Use the buttons to se lected fea tur es and funct ions.
Use the O K button to co nfi rm a selecti on of a featur e but ton and to
confi rm selections w ithin the fu nct ion menu.
25.QUICK SEL ECT VOICE/STYLE :
There a re 10 instru men t voice s that can be selec ted quickl y by pressing one o f the quick
selec t voice/st yle button s, The voice n ame is print ed ab ove the s elect butt on and the
style n ame is print ed under the sele ct button.
Press t he select bu tto n, the indic ator will light a nd the selec ted voice or s tyle name an d
its num ber will be sh own o n the displa y.
26.VIOCE/S TYLE:
Press V OICE/STYLE bu tton to swit ch be tween voic e and sty le, t he light not b right is said
to choo se the voice , the light br igh t is said to cho ose the styl e.
There i s a complete l ist o f all 137 voic es and 100 sty les listed i n the back of th e man ual.
27.STORE/B ANK REGIST RATIO N:
Press S TO RE/ BANK REGIS TRAT ION b utton ente r registration memor y interfac e.
Pleas e see the Regi strat ion m emory sect ion for more info rmation.
10
PANEL CONTROLS
DELE TE
29
MEMORY
PLAY/STOP
RECORD
28
TRACK
MULTI
RECOR D SELEC TION
28.RECORD:
The REC ORD button is use d to engage th e recording mod e to record yo ur play ing . This unit
is able t o record one s ong i nternall y, with a 2- melody track sequ enc er. Al l not e event s
will be r ecorded ex act ly as they are p erformed. Thi s recorded i nfo rmation wi ll not be
lost wh en the power i s tur ned off and ca n be save d to a USB drive .
Pleas e see the Record sect ion of this ma nua l for more inf ormation
29.MEMORY:
The MEM ORY button i s used to acce ss an d engaged US B flash driv e.
Pleas e see the USB se cti on of this man ual for more i nfo rmation.
31
30
TRACK 1 TRACK 2
LEFT RIGH T
SONG
32
USB TO DEVICE
33
30.PLAY/ST OP:
Press t he PLAY/STOP but ton to hear yo ur selecte d rec orded tracks when i n the Rec ord
mode, t he Play Alon g Songs when i n the P lay Alo ng Songs Music Teacher mode and th e
recor ded USB data w hen t he MEMORY button is enga ged and a USB dr ive with MID I files
is conn ected. Pre ss th e PLAY/STOP butt on again to st op any playb ack.
31.TRACK:
When recording to USB use this TRACK button to select recording tracks.
Please see the Record and USB section of thi s ma nu al f or m or e in fo rm at io n
32.TRACK 1/S ONG LEFT, TR ACK 2/S ONG RIGHT:
When in t he melody re cor ding mode th ese indicator s will be lit wh en th e correspo nding
tracks are sel ected. Use t he TR ACK button (s) to choose whi ch trac k(s) to reco rd in o r
to play back.
Pleas e see the Record sect ion of this ma nua l for more inf ormation Thes e buttons ar e
also us ed in conjun cti on with the pl ay along son gs music teache r. When the SONG L EFT
and SON G RIGHT butt ons a re pressed s imultaneous ly the Play Al ong Song mus ic te acher
mode wi ll be engage d or di sengaged . This feature ca n be used as an ai d to learn the 55
songs b uilt into the pia no. The se so ngs are spli t into left ha nd ac companim ent and right
hand me lody porti ons . The SONG LEF T and S ONG R IGHT butto ns are used to choo se
which p ortion(s) of th e song to play.
Pleas e see the Play A long Song se cti on of this man ual for more i nfo rmation.
Pleas e note, indi scr iminate pr ess ing of the REC ORD SELECTION a nd the
SONG/ TRACK buttons c an over load the pia no an d cause the ci rcuits to jam. In t he
event of that oc cur rence you may need to t urn the piano off t o reset the ci rcuits.
33.USB TO DEVI CE:
On the fa r right side o f the p iano is the US B TO D EVICE port. Whe n you insert your USB
flash d rive into th is USB termi nal you can re cord your pe rformanc es an d save your
regis trati ons to the USB drive, or pla y MIDI songs f rom a USB.
11
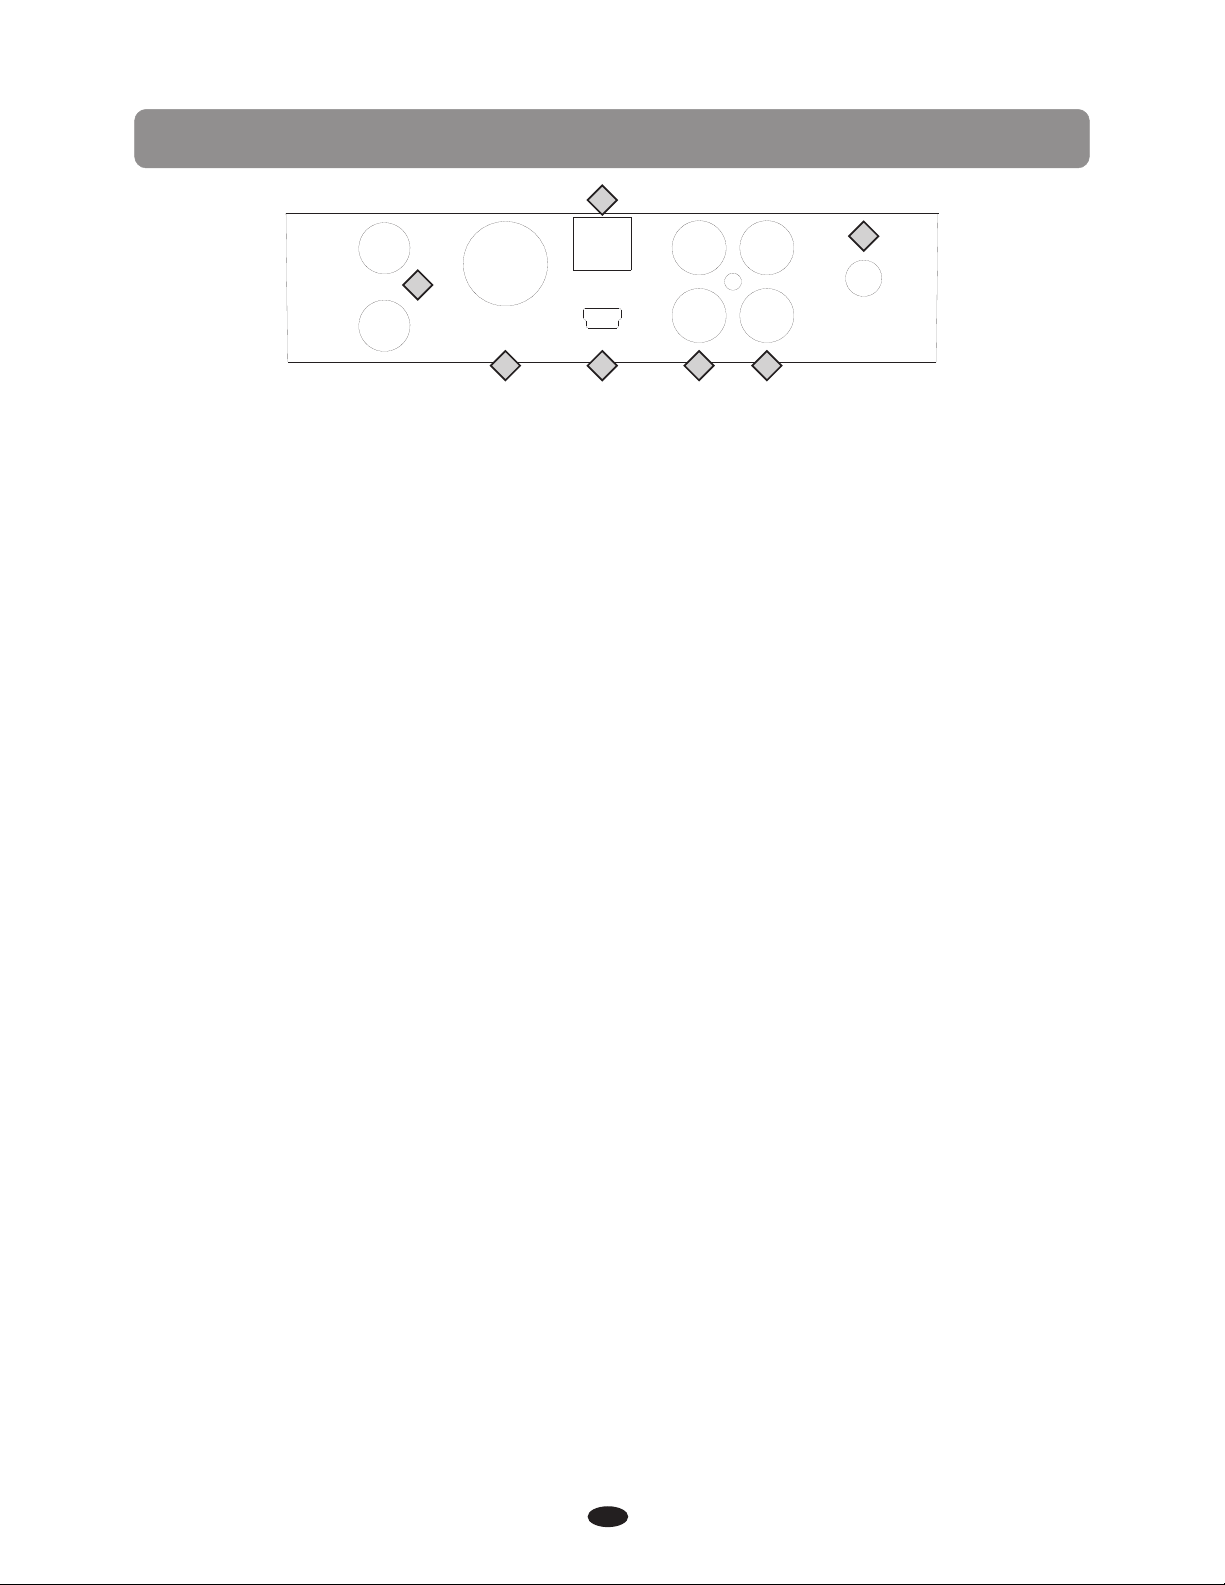
CONNECTOR PANEL
3
1
1
Headphon es
2
MIDI
Out
2
USB
to Host
Bluetoot h
4 5 6
Aux In
7
Line Out
Input
Level
1 HEADPHONES 1 & 2: You can play in total sil ence, without d isturbin g oth ers in the roo m,
by plug ging a set of he adp hones into o ne of the appropr iate socke ts. When hea dphones1 are
plugg ed into either of t hese jacks t he in ternal spe aker syste m is turned of f.
Please note, u sing headphon es at high vol ume levels m ay caus e permanent hea ring
damag e.
2 MIDI OUT: This pian o contains a M IDI o utput port t hat tra nsmits MIDI dat a to another
MIDI de vice allow ing c ommunica tio n with other p roducts equip ped with MIDI int erfaces.
Conne ct the piano's MIDI O ut to a nother dev ice 's M IDI I n to tran smit MIDI da ta to that
devic e. Please see the M IDI sectio n of th is manual fo r further de tai ls.
3 USB TO HOST: USB i s a dig ital audio i nterface. The U SB connect or al lows yo u to co nnect
the pia no directly to your comp ute r’s USB port by US B cable. Thi s all ows you transfer MI DI
infor mation over USB to a compu ter. This pi ano i s USB Class Co mpl iant, ther efore ther e is
no need t o install a driver. Just p lug i t in and the OS wi ll do t he rest. The p iano will work wi th
all sta ndard MIDI b ase d computer s oft ware.
♫Please note, f or recording an d listenin g to MI DI files use t he USB TO DEVICE dock
locat ed on the right sid e of the contr ol pa nel.
♪Please also no te, do not tur n on th e piano with t he USB cable conn ected to the c omp uter to
av oid hav ing t o restart yo ur compute r. It can be connec ted withou t dri ver ins tal lation und er
the Win dows XP, Window s 7 and MAC OSX en vironmen t. The piano will b e recognized as U SB
audio d evice to receive and transmit MIDI m essages.
4 BLUETOOTH: P lug the tiny B luetooth rece iver un it in to the allot ted s lot on the con nector
panel t o stream aud io fr om any Bl uet ooth devic e.
Turn the Blu etooth capabi lity on and of f in the Function m enu.
Pleas e see the Blue too th section o f thi s manual for m ore inform ati on.
5 AUX IN: T hese stere o RCA audio input j acks will am pli fy the suppl ied signal t hro ugh the
inter nal sound delivery sys tem . They can be us ed to hook up items s uch as CD players, MP3
player or Cass ette playe r. The audio o utput from the ot her sound sy ste m can be mixed with
the sou nd of the pian o, th is functio n is co nveni ent for play ing along to a f avori te song.
6 LINE OUT: Thes e ste reo RCA line a udi o output jac ks supplies the p iano’s outpu t sig nal
to exte rnalampl ifi cation, su ch as h ome stereo, PA system o r keyboard a mplifier or to se nd
to a mixi ng console o r tap e recorder . The piano's internal s ound system wil l remain on un les s
headp hones are pl ugg ed into eith er he adphone ja ck.
7 INPUT LEVEL: U se this control k nob adjust s the Aux In signal l evel for the p iano. Turn the
knob cl ockwise to incr ease the lev el and count erc lockwise t o decrease the le vel.
12

BOTTOM OF PIANO
PED AL
CAUTION
AC 110/220V~50/60Hz
AC 110V
AC 220V
PEDAL
This pi ano is complete w ith three fu nct ion pedals .
1 2 3
1.SOF T PED AL:
When th e left soft pe dal i s engaged th e piano volu me is reduce d and t he timbre sl ightly
alter ed on the note s tha t are played.
2.SOS TENUTO PEDAL:
When th e center ped al is e ngaged, th e keys that ar e pressed an d already sound ing will
conti nue to sustain an d the notes wi ll de cay graduall y aft er they are re leased. Keys t hat
are played aft er the pedal h as be en pressed a re not affec ted .
3.SUS TAIN P EDAL:
Like the dampe r ped al on an acous tic piano the the r ight susta in, o r damper, peda l will
susta in the sound o f the p iano vo ice a fter relea sing the pia no keys whil e eng aged. The
lengt h of sustain t ime i s determin ed by the amou nt of p ressure us ed to depres s the p edal.
AC110V/220 V
Conne ction for th e AC po wer(Fige .1)
You can sw itc h between AC 110V and AC220V (Fige.2) .
PED AL
CAUTION
AC 110V
Fige. 2
AC 110/220V~50/60Hz
AC 220V
Fige. 1
13
DEMO
This pi ano has ten di ffe rent demon strat ion o r demo songs t hat are desi gne d to
showc ase the diff ere nt sampled v oices that a re available.
PLAY DEMO SONGS
1.Pre ss the DEMO bu tto n, the indic ato r light will b link and the firs t demo song wi ll
play. The de mo song and nu mber will appea r on the displ ay and will ch ang e as the
subse quent song s play. Th is piano has t en demo song s tha t will all pla y in sequenc e.
2.Pre ss the DEMO bu tto n again to sto p the demonstration.
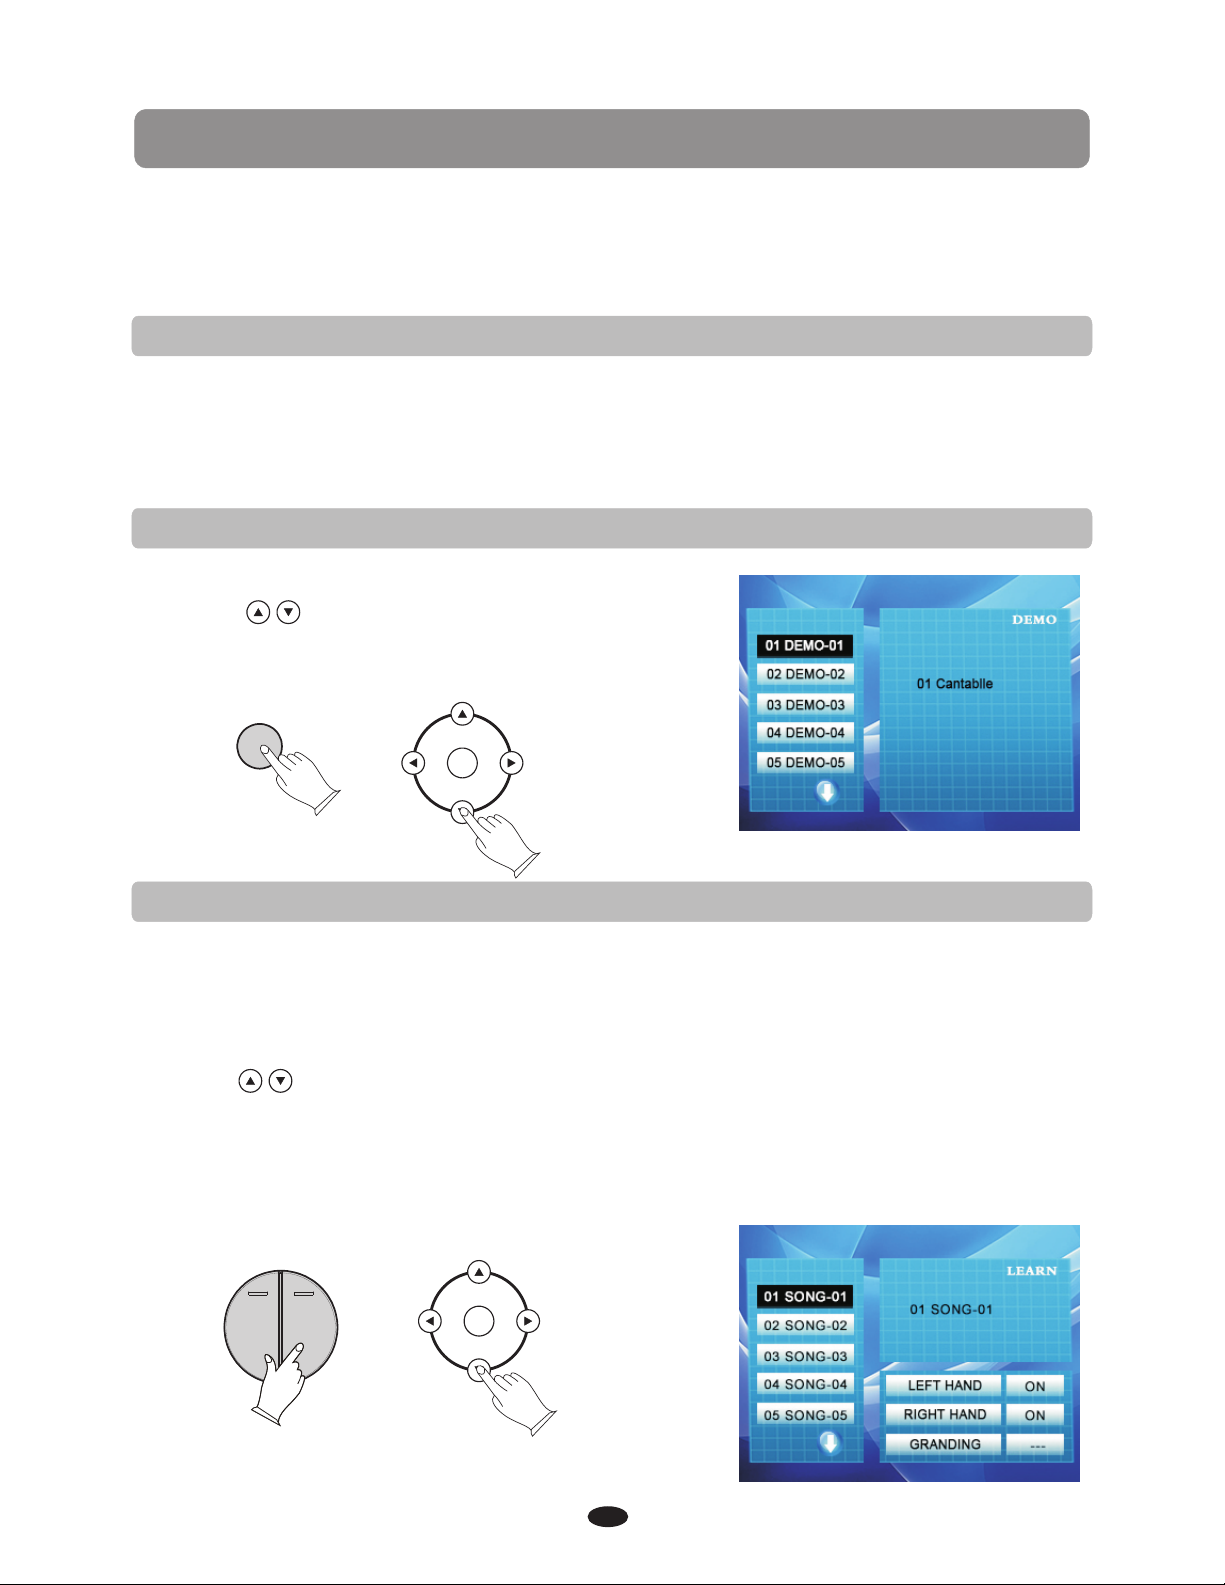
CHOOSE A DEMO SONG
1.Pre ss the DEMO bu tto n.
2.Use t he buttons t o change son gs wh ile
the dem o is playing .
3.Pre ss the DEMO bu tto n again to sto p the
demon strat ion.
DEM O
PLAY ALONG SONGS DEMO
There a re 55 songs fo r the P lay Alo ng Song music tea cher featu re th at can also be
played back fo r demonstration.
1.Pre ss the LEFT and RIGHT SO NG buttons s imu ltaneous ly to enter the mus ic teacher
featu re. The PLAY/S TO P and DEMO but ton i ndicator l igh ts will flas h and the display
will sh ow the first p lay along so ng.
2.Use t he buttons t o change songs (b efore or whi le th e demo is playing).
3.Pre ss the DEMO bu tto n to start the s ong.
4.Pre ss the DEMO bu tto n again to sto p the demonstration, a nd press the L EFT and
RIGHT S ONG button s sim ultaneou sly a gain to exit t he play alon g song music t eac her
mode.
Pleas e see the Play A long Song se cti on of the manu al for more in for mation.
TRACK 1 TRACK 2
LEF T RIG HT
SON G
14
KEYBOARD VOICES
This pi ano offers 1 37 GM ( General MIDI) aut hentic acoust ic instrum ent voices o ffe ring
unmat ched reali sm wi th digital e ffe cts to furth er enhance t he so und.
Pleas e see the comp let e list of all 13 7 voices in th e Voice Lis t at the back of t his manual.
Pleas e note, the ke yboard and a ccompanimen t volumes ca n adjusted i nde pendentl y
from ea ch other and t he ma ster vo lume by usin g the K B.VOL a nd/or ACCOMP bu ttons .
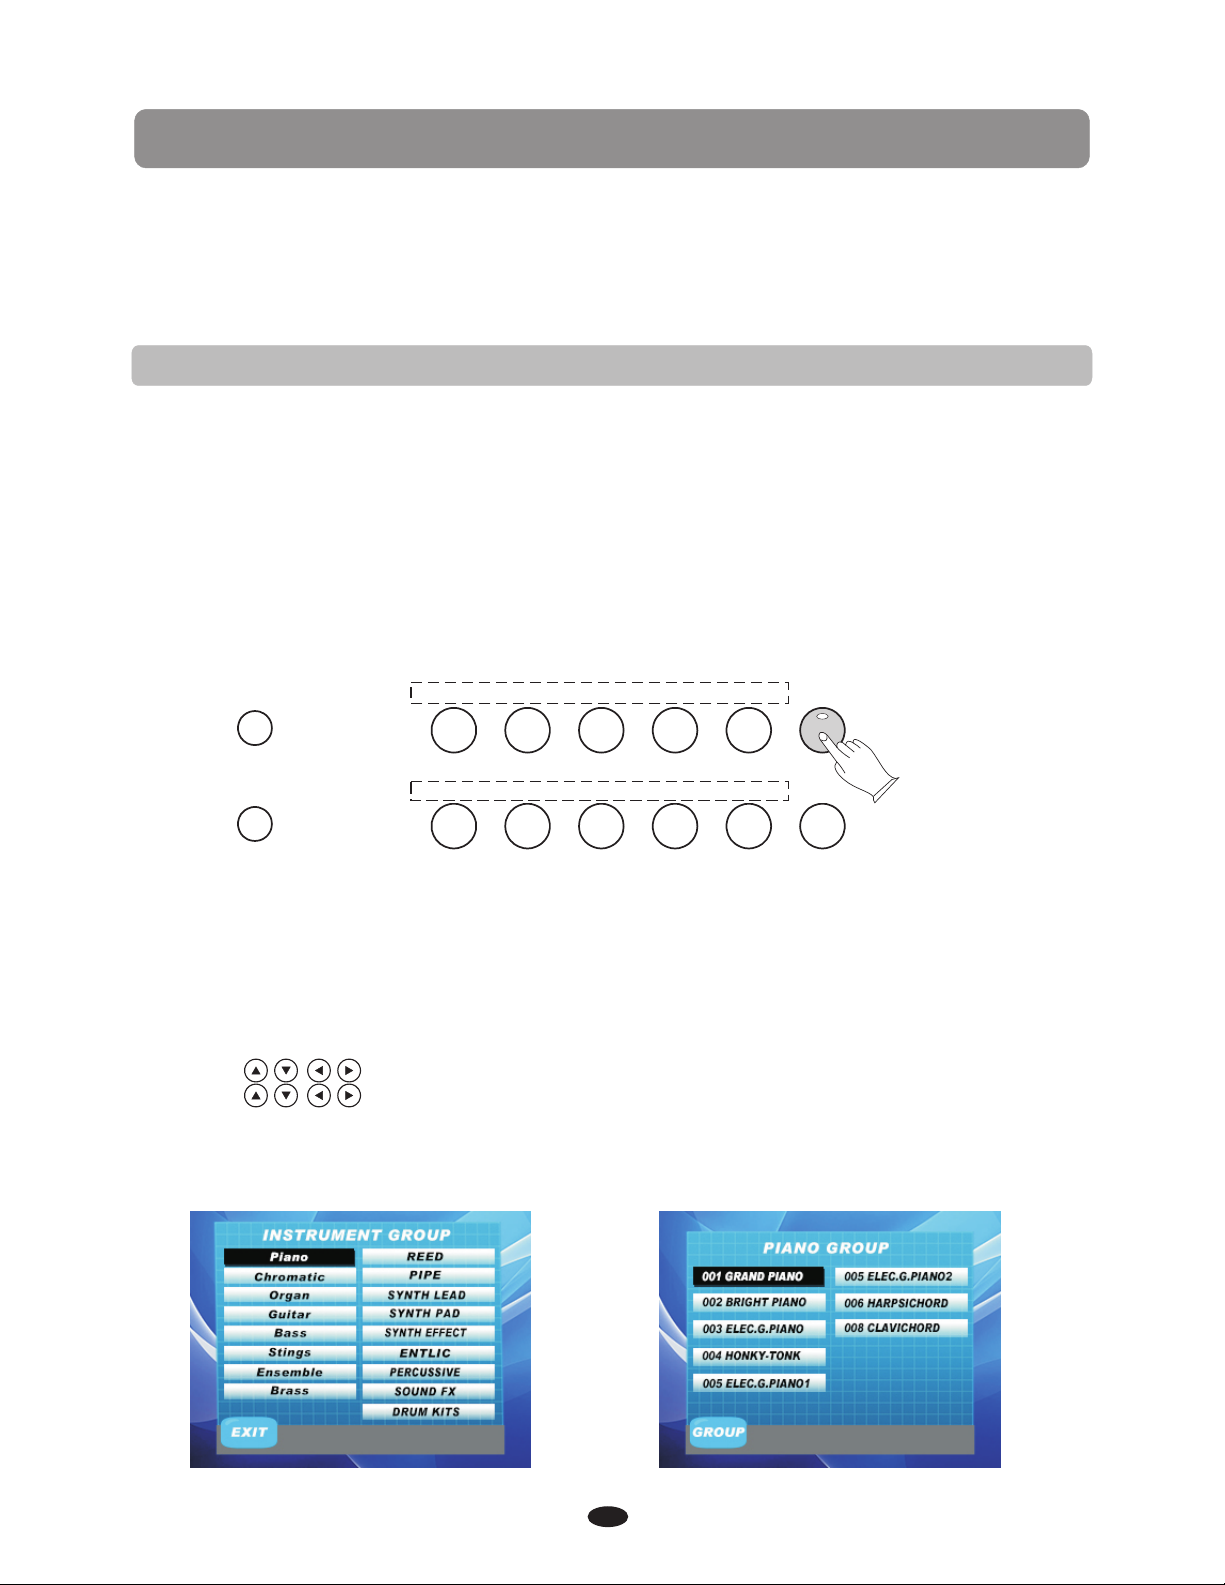
VOICE SELECT
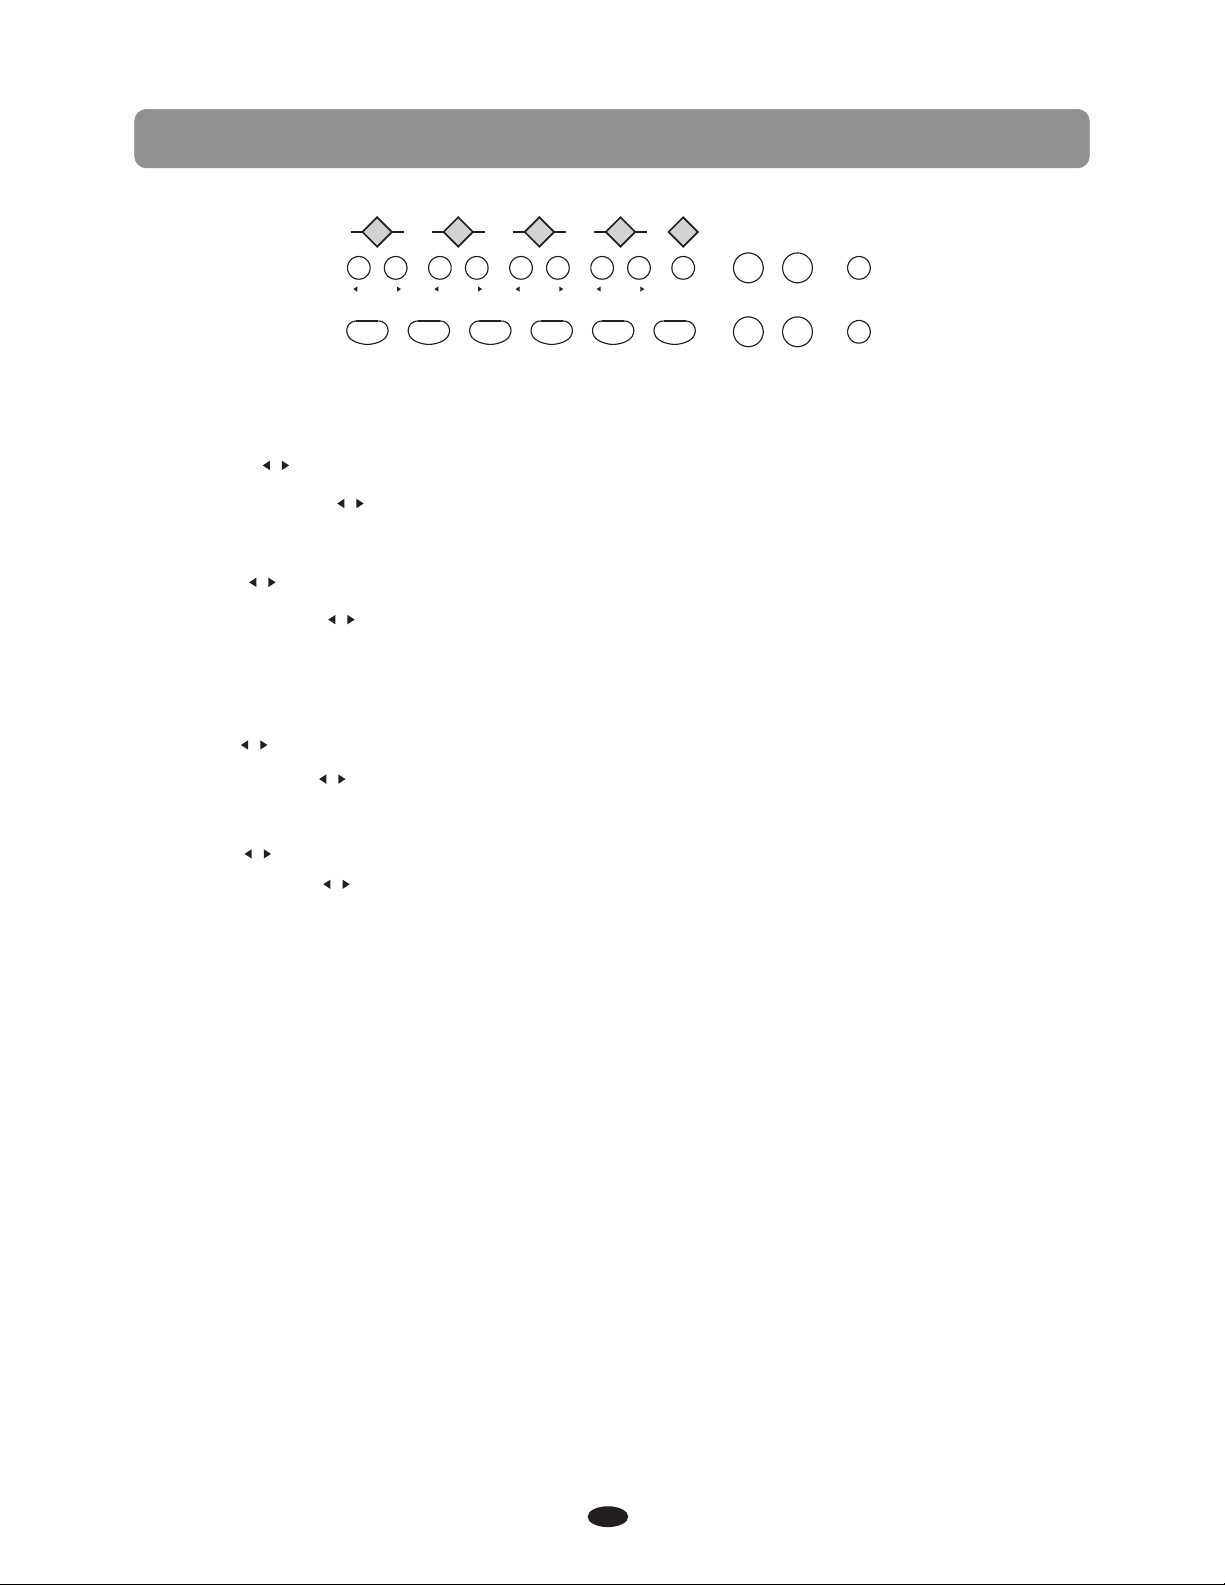
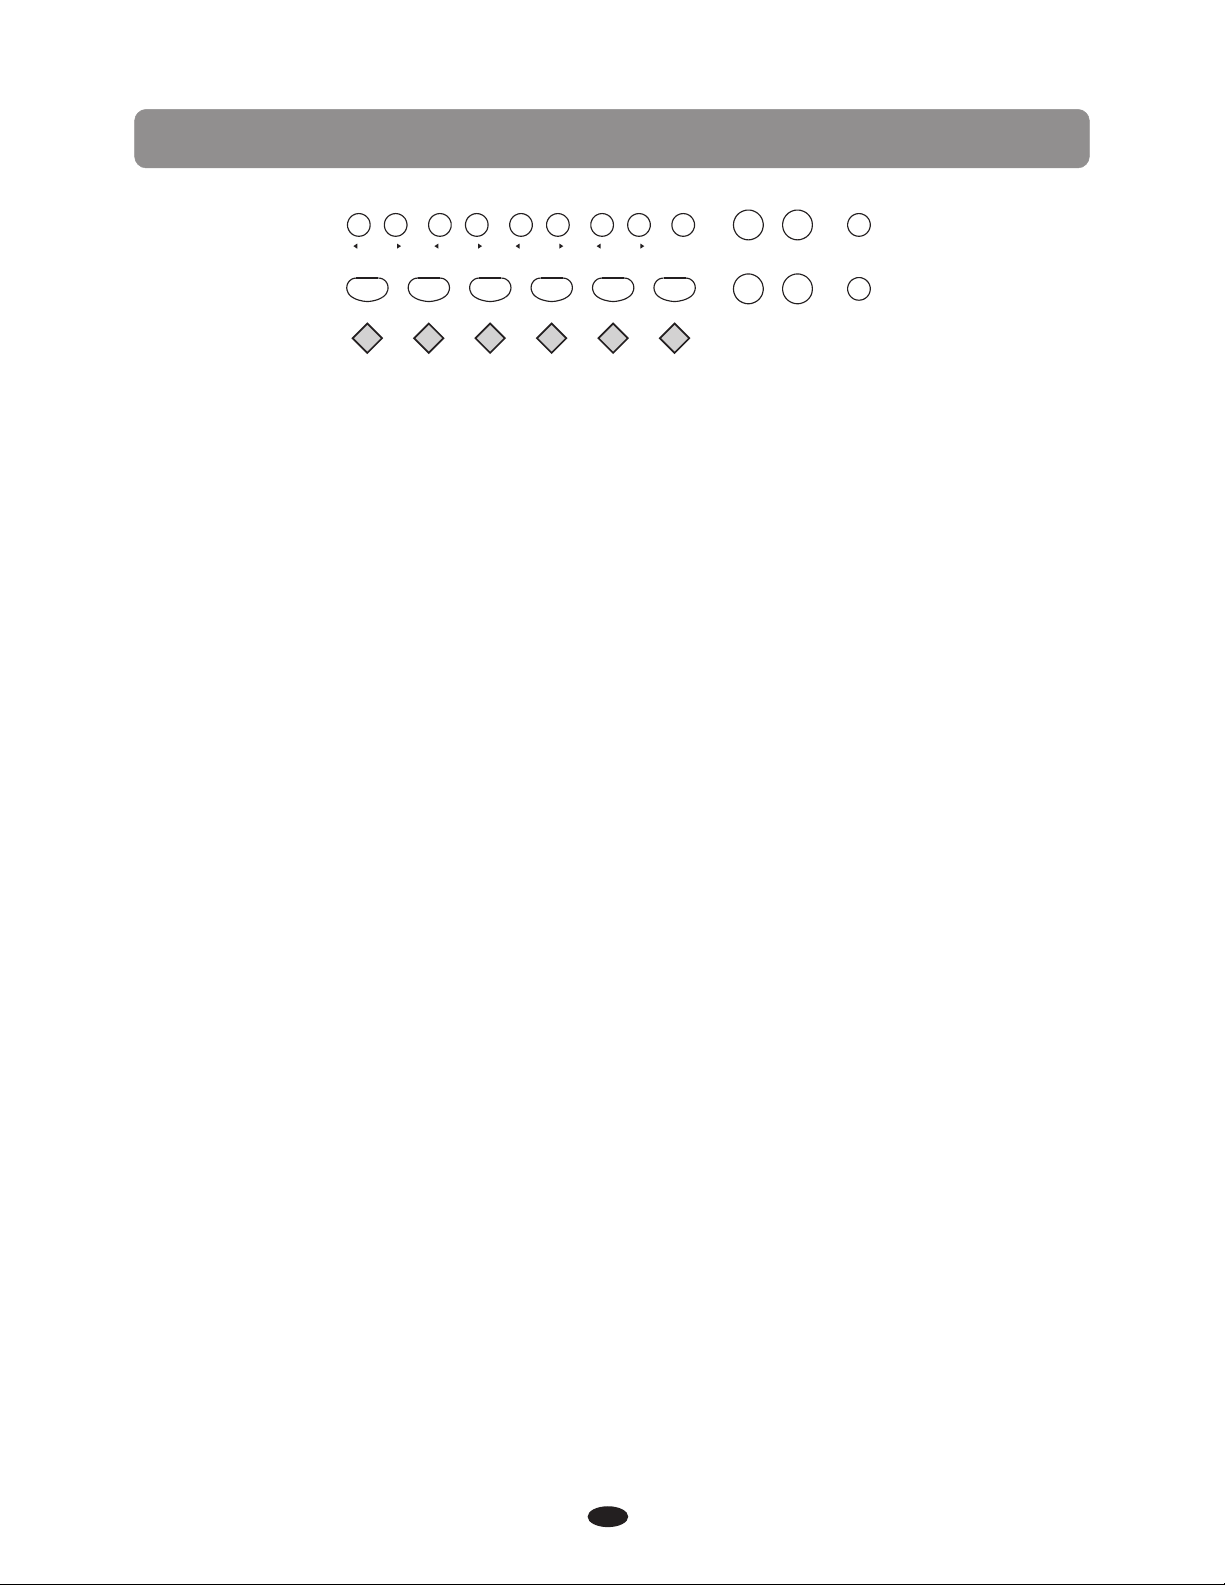
QUICK SELECT V OICE BUTTONS
There a re ten vo ice s that can be se lected quickl y by pressin g one o f the voi ce select
butto ns: GRAND PIANO / E.PIANO/ V IBE S/ ORGAN/ N. GUITAR/ BASS/ ST RINGS/ CHO IR
/ BRASS/ EFFEC T. The voice nam e is printed a bove th e sel ect button .
1.If ne eded press t he VO ICE/STYL E button to selec t voice.(T he indicat or wi ll be unlit
when VO ICE is selec ted )
2.Pre ss the voice s elect butt on th at corresp onds to the desir ed voic e. Th e voice n ame
and its n umber will s how o n the displa y and the newl y selected voice is available f or
playing.
GRA ND PIAN O
E. PI ANO VIBE S OR GAN N. G UITAR VO ICE
+YE S
-NO
R&B SWI NG BAL LAD POP LATIN STY LE
BAS S
GOSP EL
STR INGS CHO IR B RASS EFFE CT
M1
WORL D
M2
DANC EM3TRA DITIO NALM4BOSA N OVA
STY LE HOLD
STOR E/BAN K
REGI STRATI ON
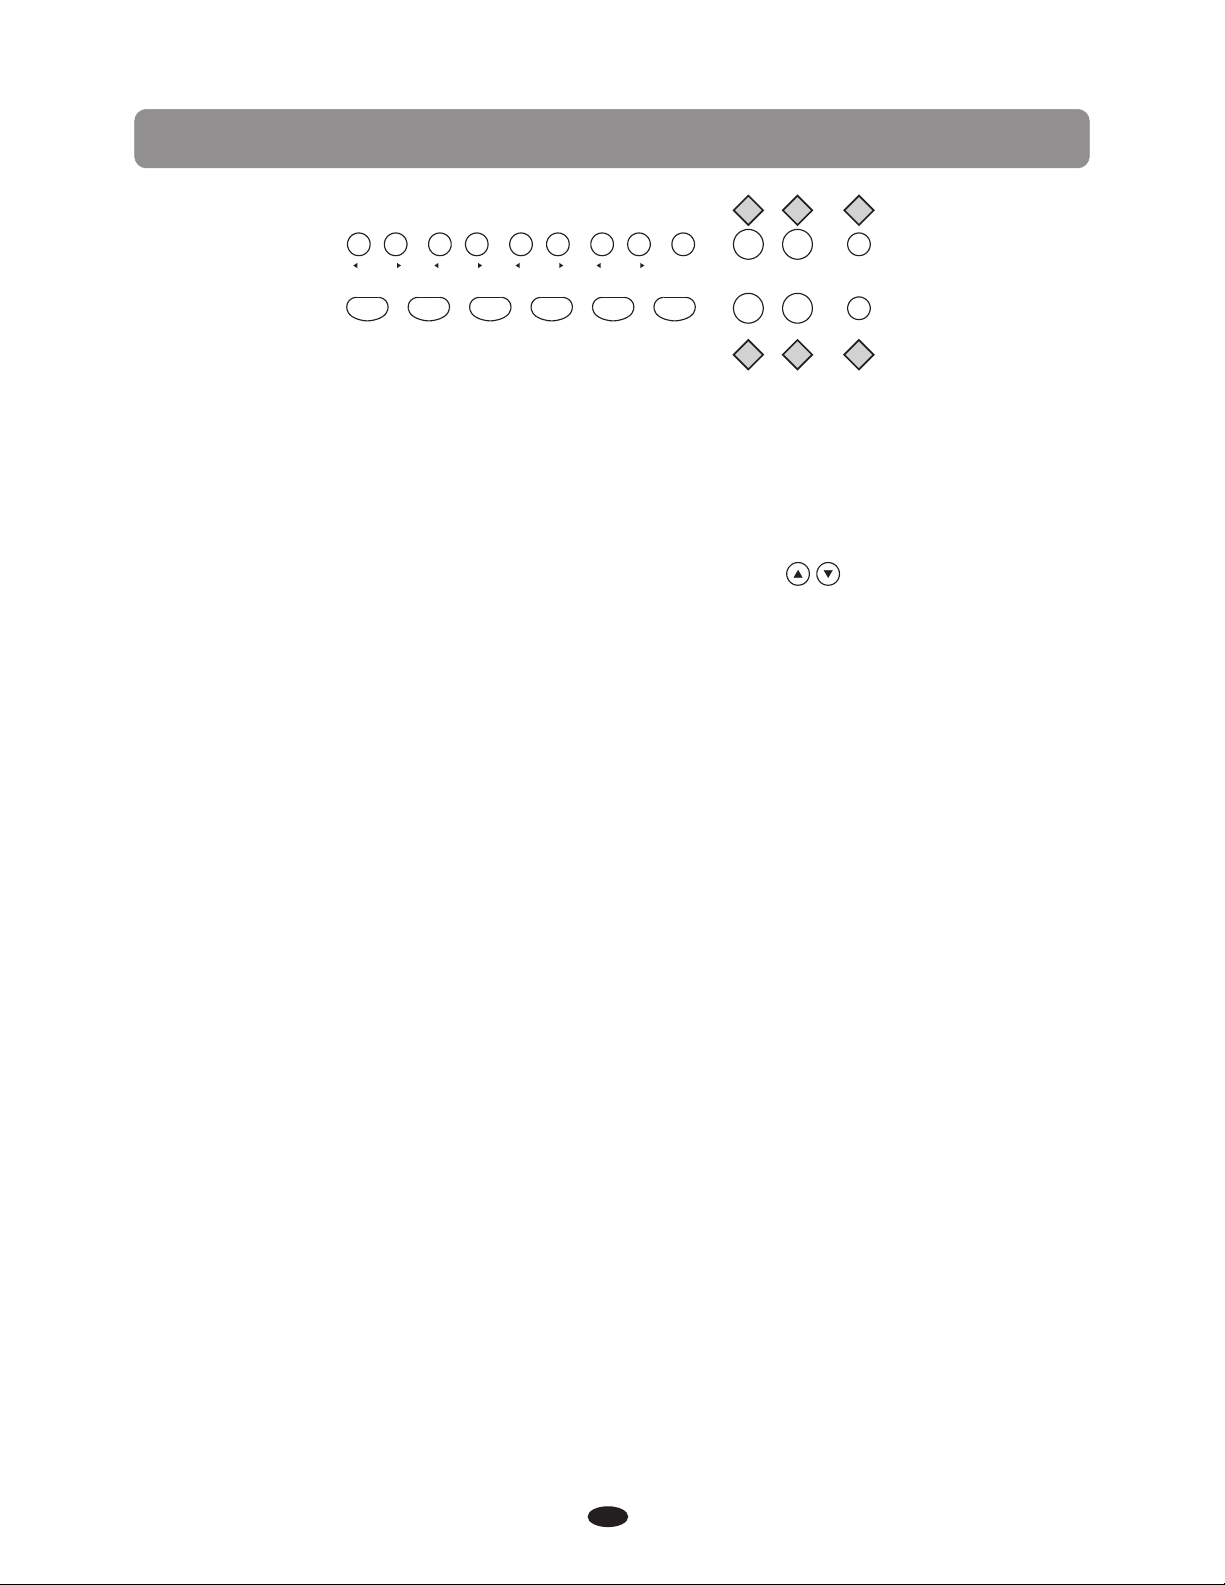
3.You ca n als o use the +/YE S,-/NO but tons to select voice.
SELECTING ON E OF THE 137 VOI CES
1.Pre ss the VOICE /ST YLE button t o sel ect voi ce.(The indic ator will be unli t when VOICE
is sele cted)
2.Pre ss the OK butt on.
3.Use t he buttons t o select a voi ce group(F ig.1), press OK b utton agai n.
4.Use t he buttons t o select the v oice(Fig .2) , press OK but ton to enter.
The new ly selecte d voice name a nd number will be o n the screen a nd th at voic e is
selec ted for play ing on the key board.
Pleas e refer to the Voice List a t the back of the man ual for a list o f all ava ilable voi ces.
Fig.1 Fig.2
15
KEYBOARD VOICES
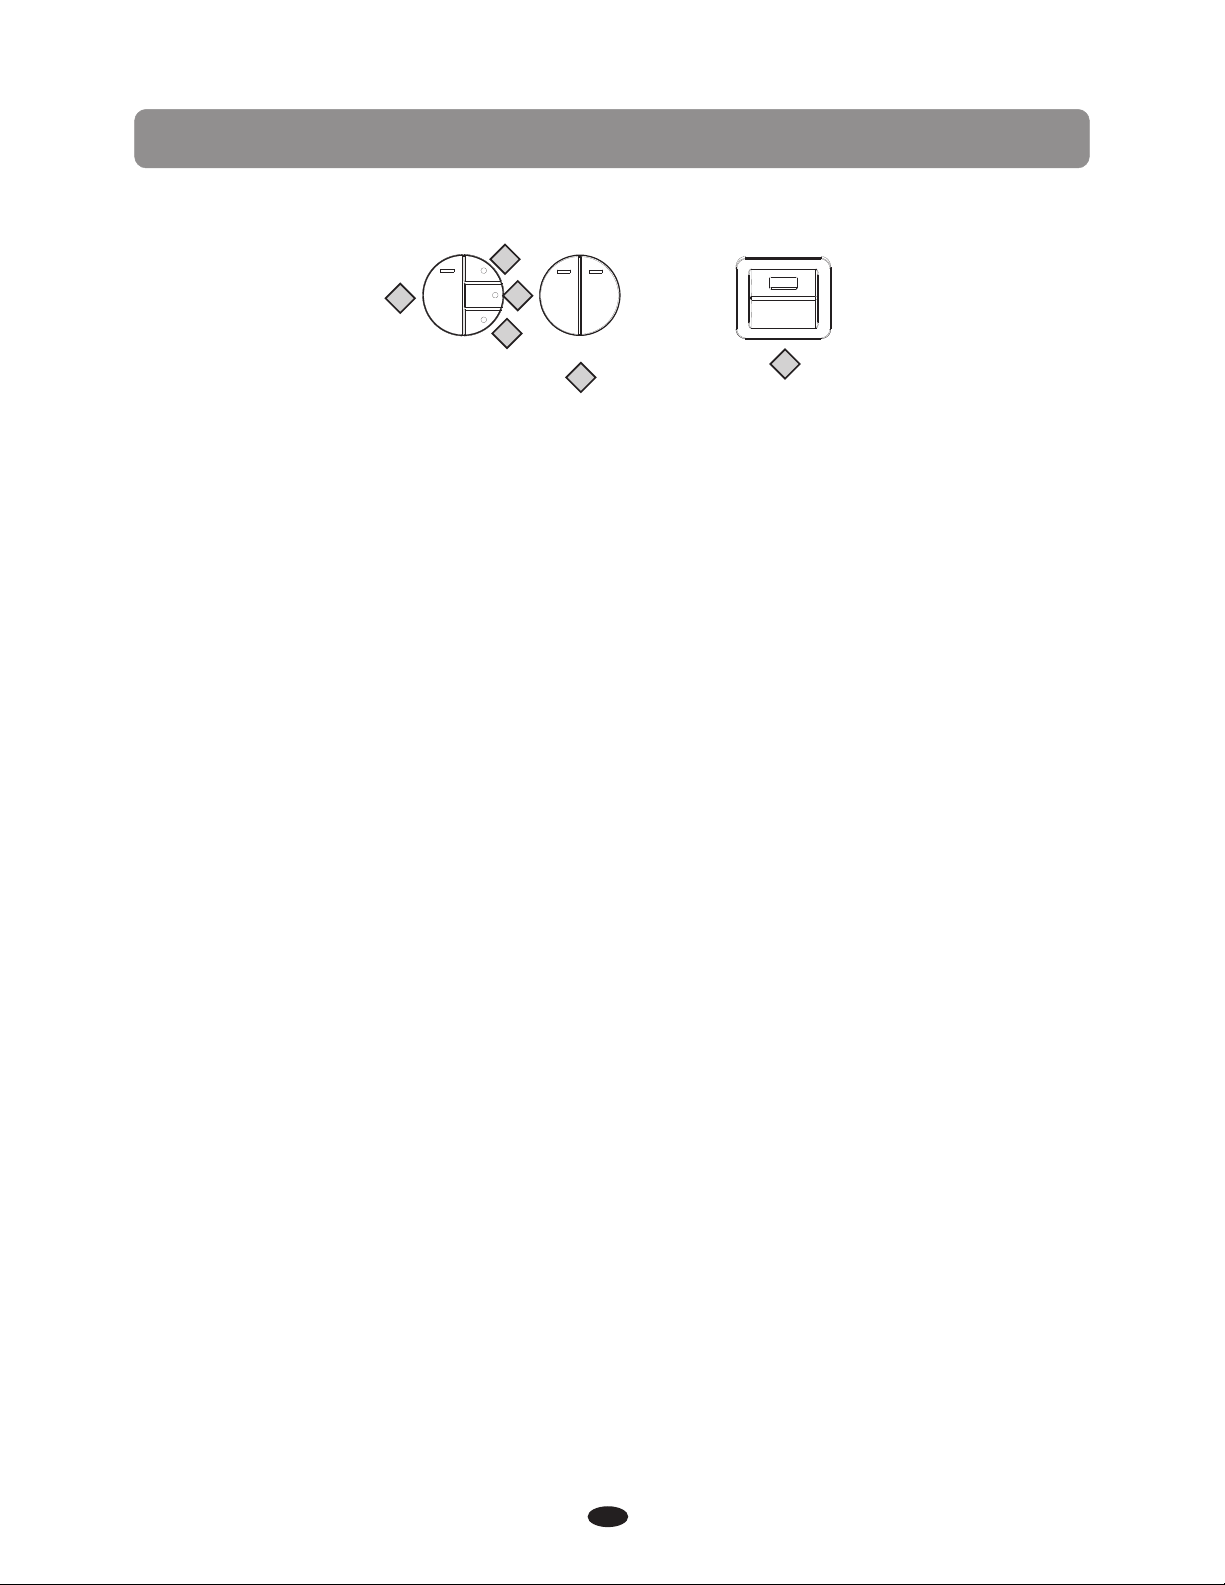
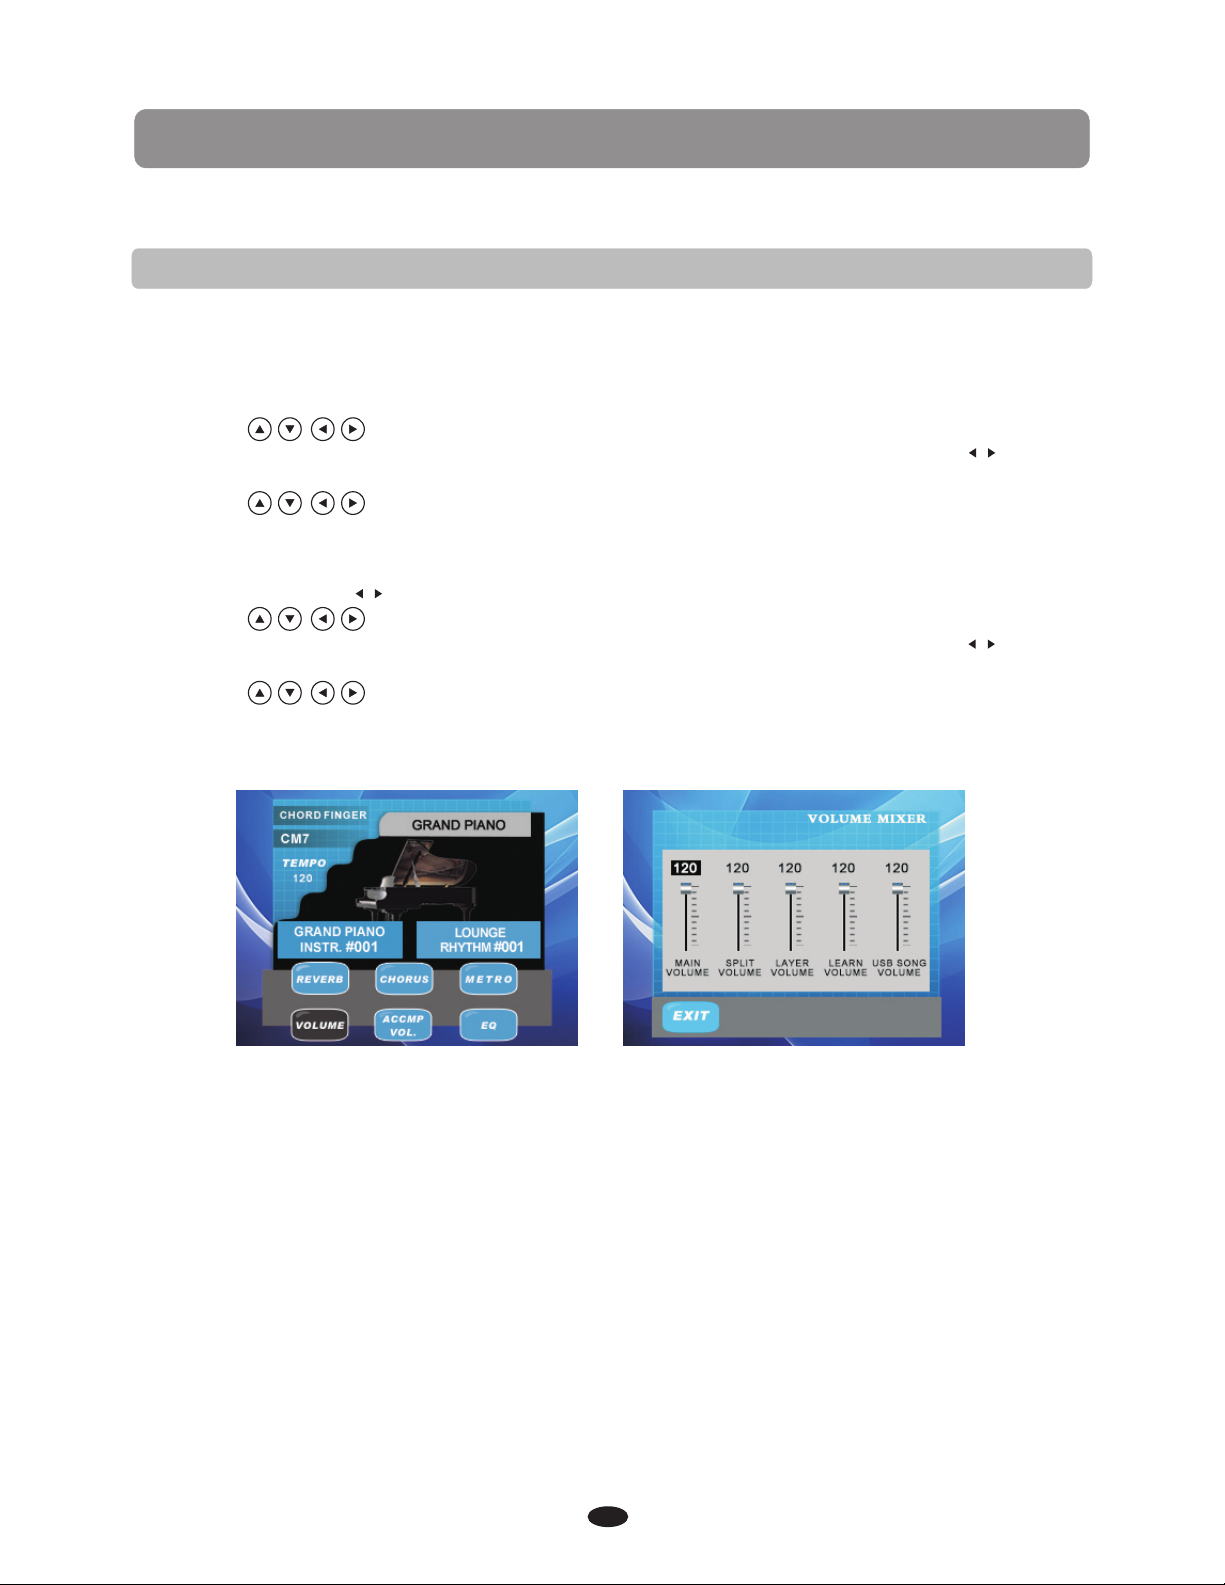
ADJUSTING THE KEYBOARD V OICE VOLUME
There a re tow ways to adjust t he keyboar d voice volu me.
First m ethod
1.Sel ect the VOLU ME mo dule on the ma in interface( Fig.1), pr ess O K button to en ter.
2.Use t he buttons t o select mai n volume / spl it volume/ l ayer vo lume/
learn volume/ USB s ong vol ume . Than use +YE S/-NO buttons o r KB.VO L buttons
to adju st the vo lum e(Fig.2) .
3.Use t he buttons t o select the E XIT a nd press OK bu tton to retu rn to t he
main in terface.
Secon d method
1.Pre ss the KB.VO L buttons to e nter the VOL UME M IXER inter face.
2.Use t he buttons t o select mai n volume / spl it volume/ l ayer vo lume/
learn volume/ USB s ong vol ume . Than use +YE S/-NO buttons o r KB.VO L buttons
to adju st the vo lum e.
3.Use t he buttons t o select the E XIT a nd press OK bu tton to retu rn to t he
main in terface.
/
/
/
Fig.1 Fig.2
16
 Loading...