

Artesia A10 Owner`s Manual
A-10
Owner s Manual
Virgin Musical Instruments


Digital Piano
Precaution
Thank you for purchasing this digital instrument. For perfect operation and security, please read the
manual carefully and keep it for future reference.
Safety Precautions
CAUT IO N
RISK OF ELECTRIC SHOCK
DO NOT OPEN
The lightning flash with arrowhead symbol within an equilateral triangle is in
Tended to alert the user to the presence of uninsulated “dangerous voltage”
within the product s enclosure that may be of sufficient magnitude to constitute a
risk of electric shock to persons.
The exclamation point within an equilateral triangle is intended to alert the user
to the presence of important operating and maintenance(servicing) instructions in
the literature accompanying the product.
Important Safety Instructions
’
1) Read these instructions.
2) Keep these instructions.
3) Heed all warnings.
4) Follow all instructions.
5) Do not use this apparatus near water.
6) Clean only with dry cloth.
7) Do not block any ventilation
openings, install in accordance with the
manufacturer s instructions.
8) Do not install near any heat sources such
as radiators, heat registers, stoves, or other
apparatus (including amplifiers) that produce heat.
9) Do not defeat the safety purpose of the
polarized or grounding-type plug. A polarized
plug hase two blades
with one wider than the other. A grounding
type plug has two blades and a third
grounding prong. The wide blade
or the third prong are provided for your
safety, if the provided plug does not fit into
your outlet. consult an electrician for
replacement of the obsolete outlet.
10) Protect the power cord from being walked
on or pinched particularly at plugs. convenience
receptacles, and the point where they exit from
the apparatus.
11) Only use attachments/accessories
specified by the manufacturer.
(Fi gure 1)
12) Use only with the cart, stand, tripod, bracket, or
table specified by the manufacturer, or sold with
the apparatus. When a cart is used, use caution
when moving the cart/apparatus combination to
avoid injury from tip-over (Figure 1).
13) Unplug this apparatus during lightning storms
or when unused for a long periods fo time.
14) Refer all servicing to qualified service
personnel. Servicing is required when the
apparatus has been damaged in any way, such as
power-supply cord or plug is damaged, liquid has
been spilled or objects have fallen into the
apparatus, the apparatus has been exposed to rain
or moisture, does not operate normally, or has been
dropped.
WARNING: To reduce the risk of fire or
electric shock, do not expose this
apparatus to rain or moisture.
CAUTION: Apparatus shall not be
exposed to dripping or splashing and no
objects filled with liquids, such as vases,
shall be placed on the apparatus.

Thank you for choosing the A-10 Digital Piano
We would like to express our appreciation and congratulate you for purchasing this Artesia
Contempory Digital Piano. This piano has been designed to, with proper care, provide you
with years of musical enjoyment.
Artesia's advanced state of the art electronics are combined with an elegant cabinet that
adds beauty and sophistication to any home environment.
This piano is feature packed and can also be used to integrate with your laptop, Tablet
(iPad) or Smartphones for a whole host of musical and entertainment options.
Listed below are just a few of the features that your new piano is equipped with:
● Artesia's acclaimed stereo 3D sound imaging
● 14 Instrument Voices Including a Stereo Grand Piano
● Acoustic instrument voices offering unmatched realism
● Digital effects to further enhance the instrument voices
● Elegant hand rubbed lacquer cabinet that fits any home decor
● Natural Balance Hammer Action Keyboard for Authentic Acoustic Piano Touch and Feel.
Teacher Recommended!
● Sustain, Soft and Sostenuto pedals
● Built-in Track Recorder to save you practice and performances
● Grading and 55 built in play-along songs
● Interface to Your Laptop, Tablet or Smartphone with On-Board MIDI and USB ports
● Never Needs Tuning
● Headphones to Practice in Private
● Metronome feature with variable tempo to facilitate practice
● Reverb and Chorus Effects
● Classical Half Sustain
● Programmable Auto Power Off
If you have any questions or comments please contact us directly at
info@virginmusicalinstruments.com or call us toll free at 800-854-1594.
Virgin Musical Instrument Company Inc
La Mesa, California 9 1943
www.virginmusicalinstruments.com

Contents
PANEL CONTROL
CONNECTOR PANEL
Using USB-Midi
1.
2. Midi In/Out
3. Line In/Out
DC 12V Input
4.
5.
Phones 1/Phones 2
6. Pedal
PANEL CONTROLS
Power/STANDBY
1.
2. Adjust The Volume
Adjusting The Sound
3.
4.
Demo Play
LCD Display
5.
6. [SETUP] Button
7. [
+ / YES] & [- / NO]
VOICE & FUNCTIONS
1. Selecting A Voice
2. Layer Mode
3. Split Mode
4. Duet
5. Reverb
6. Effects
7. Metronome
8.
Tempo
SETUP
Reverb Type
1.
2.
Chorus Type
Reverb Level
3.
Level
Chorus
4.
5.
Main Volume
Split V
6.
olume
...........................................
............................................
........................................
........................................
.........................................
................................................
..........................
........................
................................
................................
...........................
.......................
......................
.................................
..............................
........................
...............................
.................................
...............................
.............................
.............................
.............................
...........................
.............................
.............................
....................
.................
..................
.............
..............
.................
....................
2
3
3
3
3
3
4
4
5
5
5
5
5
6
6
6
7
7
8
8
10
11
11
12
12
13
13
13
14
15
15
15
7. Layer Volume
8. Load Memory
Save Memory
9.
10.
Metro Type
11. Metro Volume
12. Split Point
13. Touch
14. Transpose
15. Master Tune
16. Grading
17. Local
18. Reset
RECORD
Recording
1.
2. Playback
3.
Recording Over The Tracks
PLAY ALONG SONGS
1. Selecting A Song
2. Listening To The Entire Song
3. Practicing The Right Hand Of The
Selected Song
4. Practicing The Left Hand Of The
Selected Song
5. Practicing Both Hands Of The
Selected Song
MIDI FUNCTION
Local On/Off
APPENDIX
1. Voice List
2. MIDI Implementation Chart
3. Factory Reset
4. Specifications
.........................................
...........................................
.........................................
............................................
........................................
..............................
..............................
..............................
................................
..........................
.................................
.................................
.............................
.....................................
....................................
......................................
....
..................
......................
............................
............................
...........................
............................
....................................
....................................
.............................
............................
..
..
16
16
17
17
18
18
19
19
20
20
21
21
22
22
24
25
26
26
26
27
27
27
29
29
30
30
31
32
33
1
1

PANEL CONTROL
RIGHT
HAND
SONG
LEFT
HAND
DC 12V
PLAY/
STOP
LIN E OUT
LIN E IN
PED AL
MID I OUT
DC 12V
LINE OUT
LINE IN
PEDAL
MIDI OUT
MIDI IN
USB TO HOST
MID I IN
USB T O HOS T
RECORD
DUET TRACK 1
ROCK ORGAN
CHURCH ORGAN
VIBES
FM EP
E.PIANO 1
E.PIANO 2
BRIGHT PIANO
GRAND PIANO
TRACK 2
VARIATION
UPRIGHT BASS
ELECTRIC BASS
CHOIR
STRINGS
N.GUITAR
HARPSICHORD
RIGHT
HAND
SONG
LEFT
HAND
PLAY/
STOP
RECORD
TRACK 2
DUET TRACK 1
VARIATION
ROCK ORGAN
CHURCH ORGAN
VIBES
FM EP
UPRIGHT BASS
ELECTRIC BASS
CHOIR
STRINGS
E.PIANO 1
E.PIANO 2
N.GUITAR
BRIGHT PIANO
GRAND PIANO
HARPSICHORD
+ / YES - / NO
SETUP
LAYER
REVERB
TEMPO EFFECTS SPLIT
DEMO METRONOME
LAYER
REVERB
DEMO METRONOME
TEMPO EFFECTS SPLIT
+ / YES - / NO
BASS TREBLE
SETUP
1
2
VOLUME TONE
MIN MAX
POWER/
STANDBY
PHONES 2
PHONES 1

CONNECTOR PANEL
The connector jacks are located on the rear panel of the piano.
USB TO H OST
MID I IN
MID I OUT
PED AL
LIN E IN
LIN E OUT
DC 12V
1. Using USB-Midi
This product allows the transfer of MIDI information over USB to a laptop,
tablet or smartphone.
As complicated as this might sound, it's actually pretty straight forward.
This piano is USB Class Compliant; therefore there is no need to install a
driver to enable it to work with a computer. Simply just plug it in and the
computer's operating system will do the rest. This A-10 contemporary piano
will work with all standard MIDI based computer software.
2. Midi In/Out
The Piano provides MIDI IN and MIDI OUT ports. MIDI jacks allow
communication with other products equipped with MIDI interfaces.
3. Line In/Out
The audio output from another sound system connected to the LINE IN jack
on the back bottom panel, can be mixed with the sound of the piano. This
function is convenient when you want to play along with a favorite song.
The Line out jack can be used to deliver the output of the piano to a
keyboard amplifier, stereo sound system, mixing console or other power
speakers.
4. DC 12V Input
Connection for the included DC power adapter. please use only the provided
adapter.
3
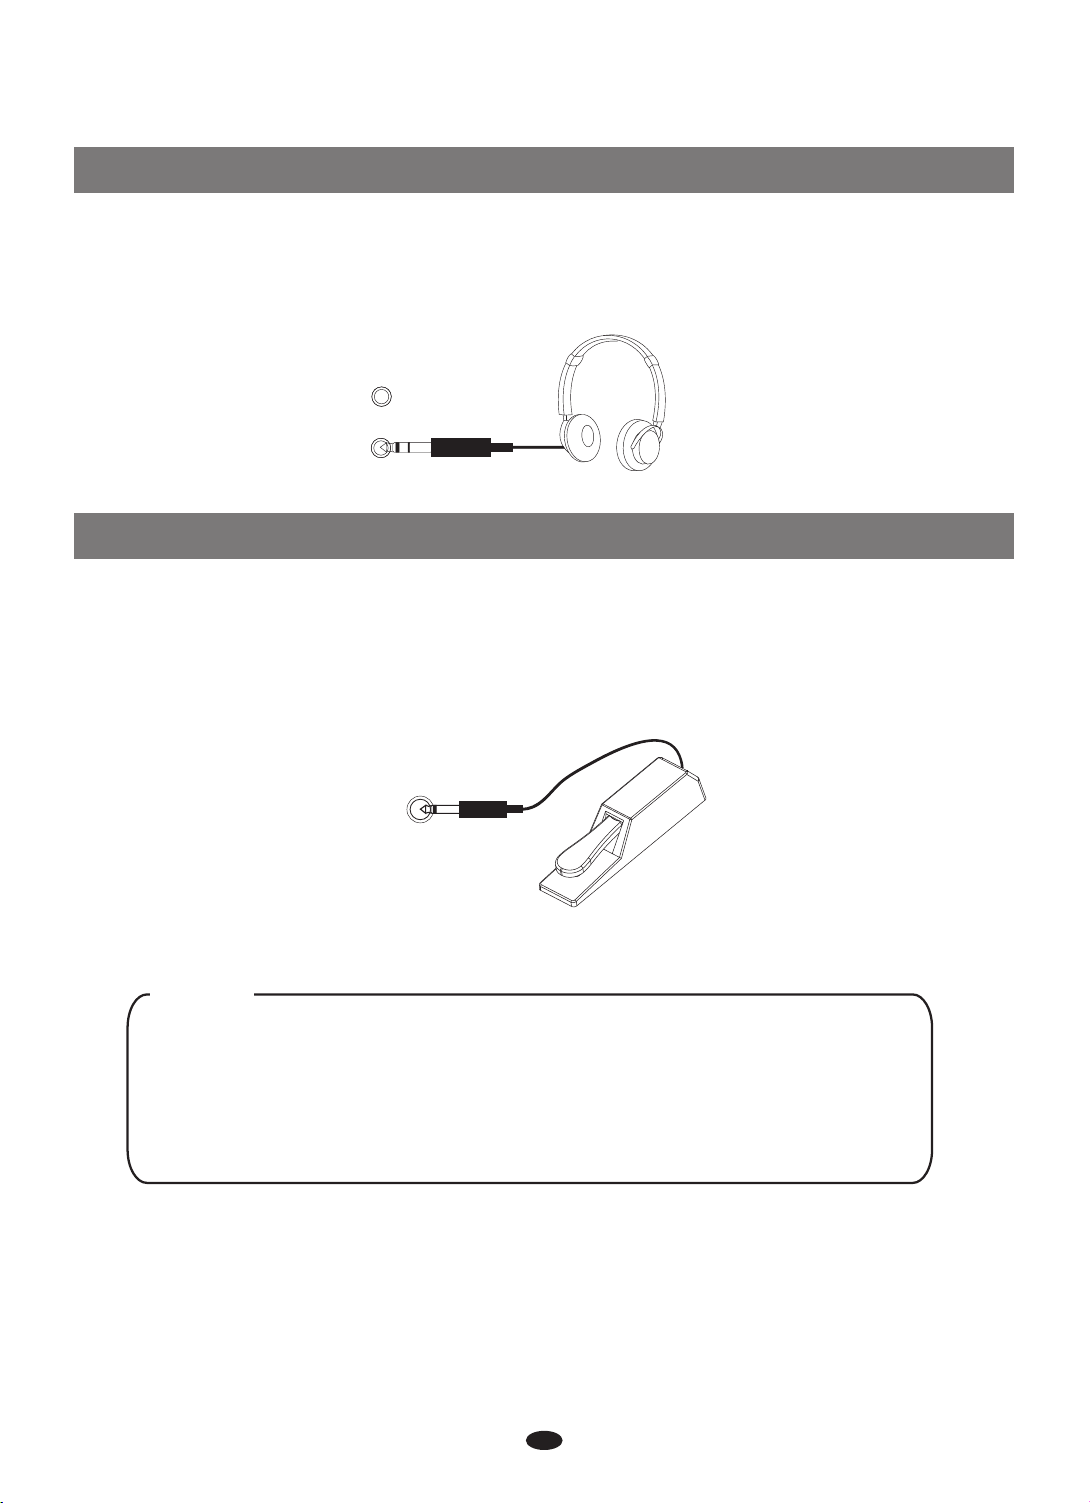
5.Phones 1/Phones 2
Two sets of standard stereo headphones can be plugged in here for private
practice or late-night playing. The internal speaker system is automatically
shut off when a pair of headphones is plugged into either jack.
PHONES 2
PHONES 1
6.Pedal
Sustain Pedal
This digital piano can be used with the Sustain Pedal. It will cause piano key
sounds to decay slowly as if they were being held down. A piano-style pedal
may optionally be used. The jack will auto-detect the polarity of the sustain
pedal.
PEDAL
NOTE
Ensure the piano is turned off before connecting the pedal.
Otherwise, it will affect the piano's sound.
By default, the pedal will sustain the notes being played while
pressed down. To sustain all notes until the pedal is pressed, hold
the pedal down during power up.
4
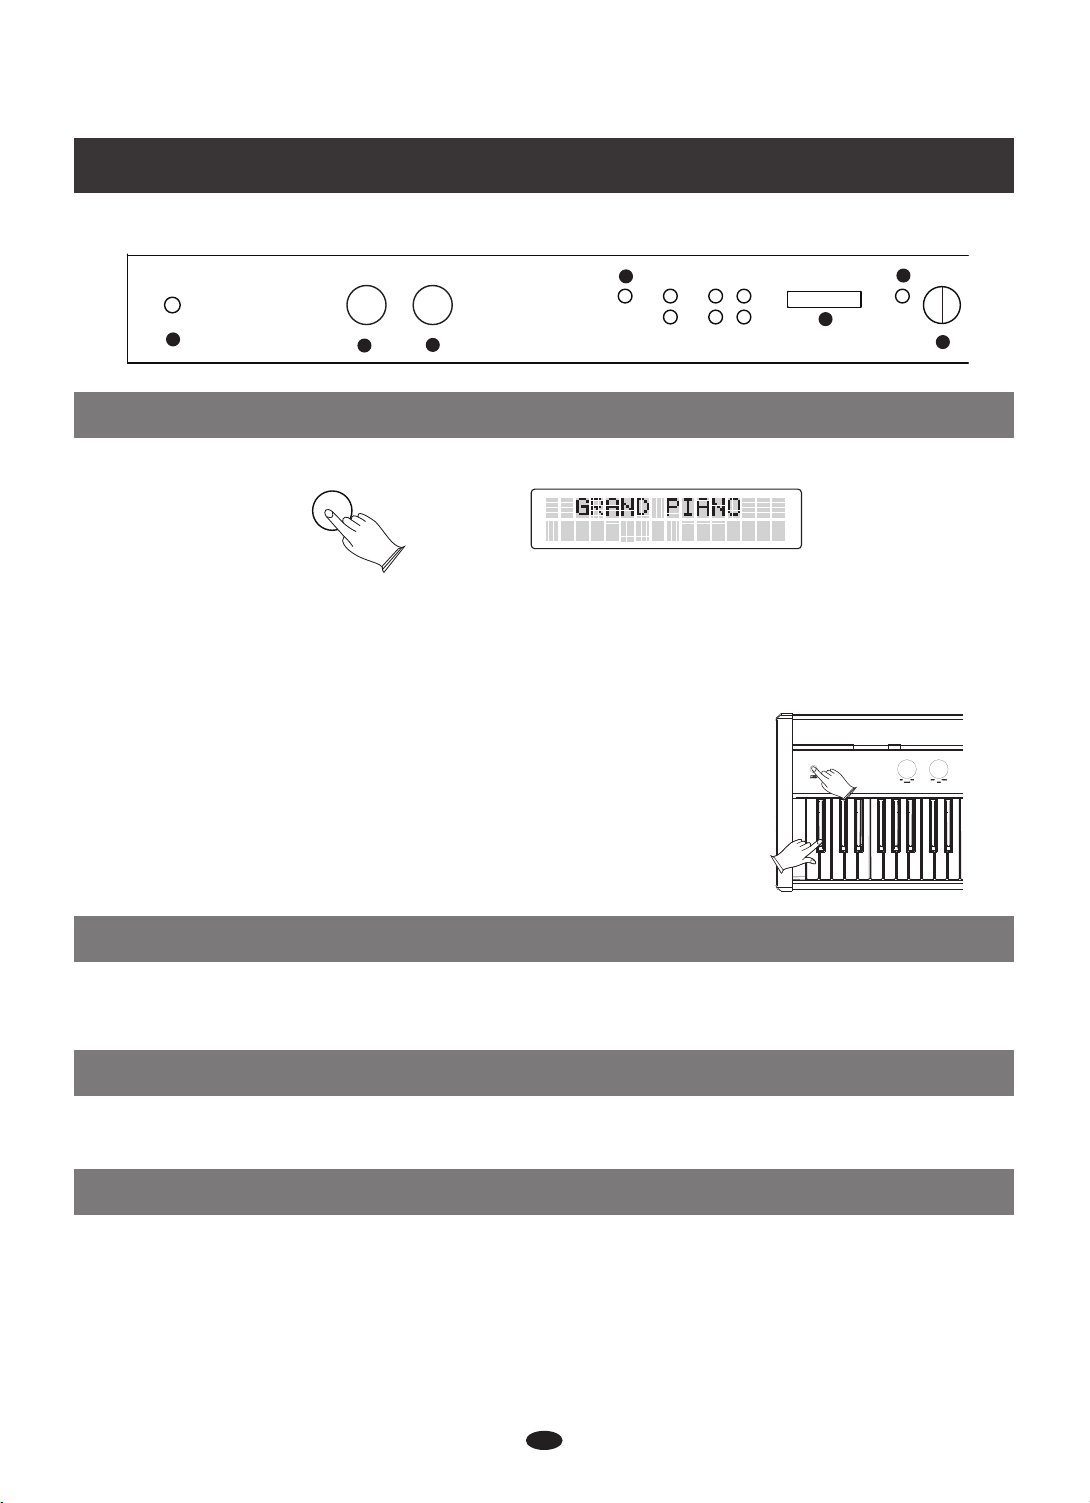
PANEL CONTROLS
4
POWER/
STANDBY
1
MIN MAX
VOLUME TONE
2
BASS TREBLE
3
DEMO METRONOME
REVERB
TEMPO EFFECTS SPLIT
LAYER
5
6
SETUP
+ / YES - / NO
7
1. Power/STANDBY
Turn the power on by pressing the [POWER] switch, the panel LCD display
will light up.
POWE R/
STANDB Y
AUTO STANDBY
If this product is not in use for 30 minutes it will automatically turn off. In
this case, press the [standby/on] button again to turn the power switch
back on.
Deactivate the AUTO STANDBY function
Hold the first white key and first black key on the left
side of the keyboard at the same time and then turn
on the unit to deactivate the AUTO STANDBY function.
2. Adjust The Volume
Use [MASTER VOLUME] control to adjust the volume to your desired level.
3. Adjusting The Sound
Use the [TONE] control to .adjust the sound of the piano
4. Demo Play
The piano comes pre-programmed with a selection of fourteen demo songs.
Each of the demo songs is designed to demonstrate one of the instrument
voices built into the piano.
5
To Start Demo Song Playback
Press the [DEMO] button to enter Demo Mode. The display
DEMO
will read DEMO, and a Voice Select button will begin flashing.
Press one of the Voice Select buttons to select a demo song. The selected
demo will play, and the corresponding Voice Select button will begin flashing.
If the Variation button is not lit, you will hear the Bank A voices (the top
row of voices including Grand Piano, E. Piano 1, Vibes, etc.).
If you want to hear demo songs featuring the Bank B voices (the bottom
row of voices including Bright Piano, E.Piano 2, FM EP, etc.), press the
Variation button. It's LED light will turn on. While in Demo Mode, as long as
the Variation button is lit, pressing a Voice Select button will cause the demo
song featuring that button's Bank B voice to play.
NOTE
When the selected demo song has finished playing, the next demo
song will play automatically (following the order of the Voice Select
buttons from left to right), and the corresponding Voice Select button
will flash.
When the last demo song of Bank A has ended, the first demo song
of Bank B will begin. When the final demo song of Bank B ends, the
first demo song of Bank A will begin again. The Main voice will
simultaneously change when the demo changes.
Pressing the [DEMO] button at any point will stop playback and return the
A-10 into Performance Mode, allowing you to play the piano normally.
5. LCD Display
The LCD will display the appropriate status, function, value, voice or the
current mode of operation.
6.[SETUP] Button
The SETUP button enables the modification of the parameters to many
features such as touch sensitivity, splits, layers and MIDI control, among
others.
7. [+ / YES] & [- / NO]
Parameter adjusting button.
6

VOICE & FUNCTION
1. Selecting A Voice
Your instrument has 14 built-in instrument voices, including several piano
voices and many other instruments. These digitally-sampled 3D musical
instrument sounds may be selected one at a time.
GRAND PIANO
BRIGHT PIANO
HARPSICHORD
N.GUITAR
PIANO 1
E.
E.PIANO 2
STRINGS
CHOIR
VIBES
FM EP
UPRIGHT BASS
ELECTRIC BASS
ROCK ORGAN
CHURCH ORGAN
VARIATION
To select a voice, press the appropriate Voice Select button on the right
side of the front panel.
NOTE
When the [VARIATION] button is not lit, the Voice Select
button will select the voice in the top line (Bank A).
When [VARIATION] button is lit, the Voice Select button will
select the voice in the bottom line.
GRAND PIANO
BRIGHT PIANO
E.PIANO 1
E.PIANO 2
VIBES
FM EP
ROCK ORGAN
CHURCH ORGAN
HARPSICHORD
N.GUITAR
STRINGS
CHOIR
UPRIGHT BASS
ELECTRIC BASS
7
VARIATION

2. Layer Mode
In Layer mode two voices may be played simultaneously, each at selected
volumes.
To enter Layer mode, press [LAYER] button and the LED will start flashing,
the
then press the appropriate voice button to select the second voice.
GRAND PIANO
BRIGHT PIANO
HARPSICHORD
When the [LAYER] button indicator LED is lit but not flashing,
button
to select the MAIN voice.
GRAND PIANO
BRIGHT PIANO
HARPSICHORD
N.GUITAR
N.GUITAR
E.PIANO 1
E.PIANO 2
STRINGS
CHOIR
E.PIANO 1
E.PIANO 2
STRINGS
CHOIR
VIBES
FM EP
UPRIGHT BASS
ELECTRIC BASS
VIBES
FM EP
UPRIGHT BASS
ELECTRIC BASS
ROCK ORGAN
CHURCH ORGAN
VARIATION
ROCK ORGAN
CHURCH ORGAN
VARIATION
press a voice
To adjust the volume of the Main voice and layer voice, please refer to the
[SETUP] function, see pages 15 and 16.
Press [LAYER] button again to exit layer mode.
3. Split Mode
Split Mode allows the keyboard to be divided into two sections so that
different voices may be played from each section.
The volume may be independently adjusted for each voice, the Split Point
8
 Loading...