

Page 1
Page 2
Powering
On & Off
NOTE:
If the STAR Dot Matrix Printer is being used, please
refer to the STAR Printer User’s Manual for printer
connection and operation.
Powering On
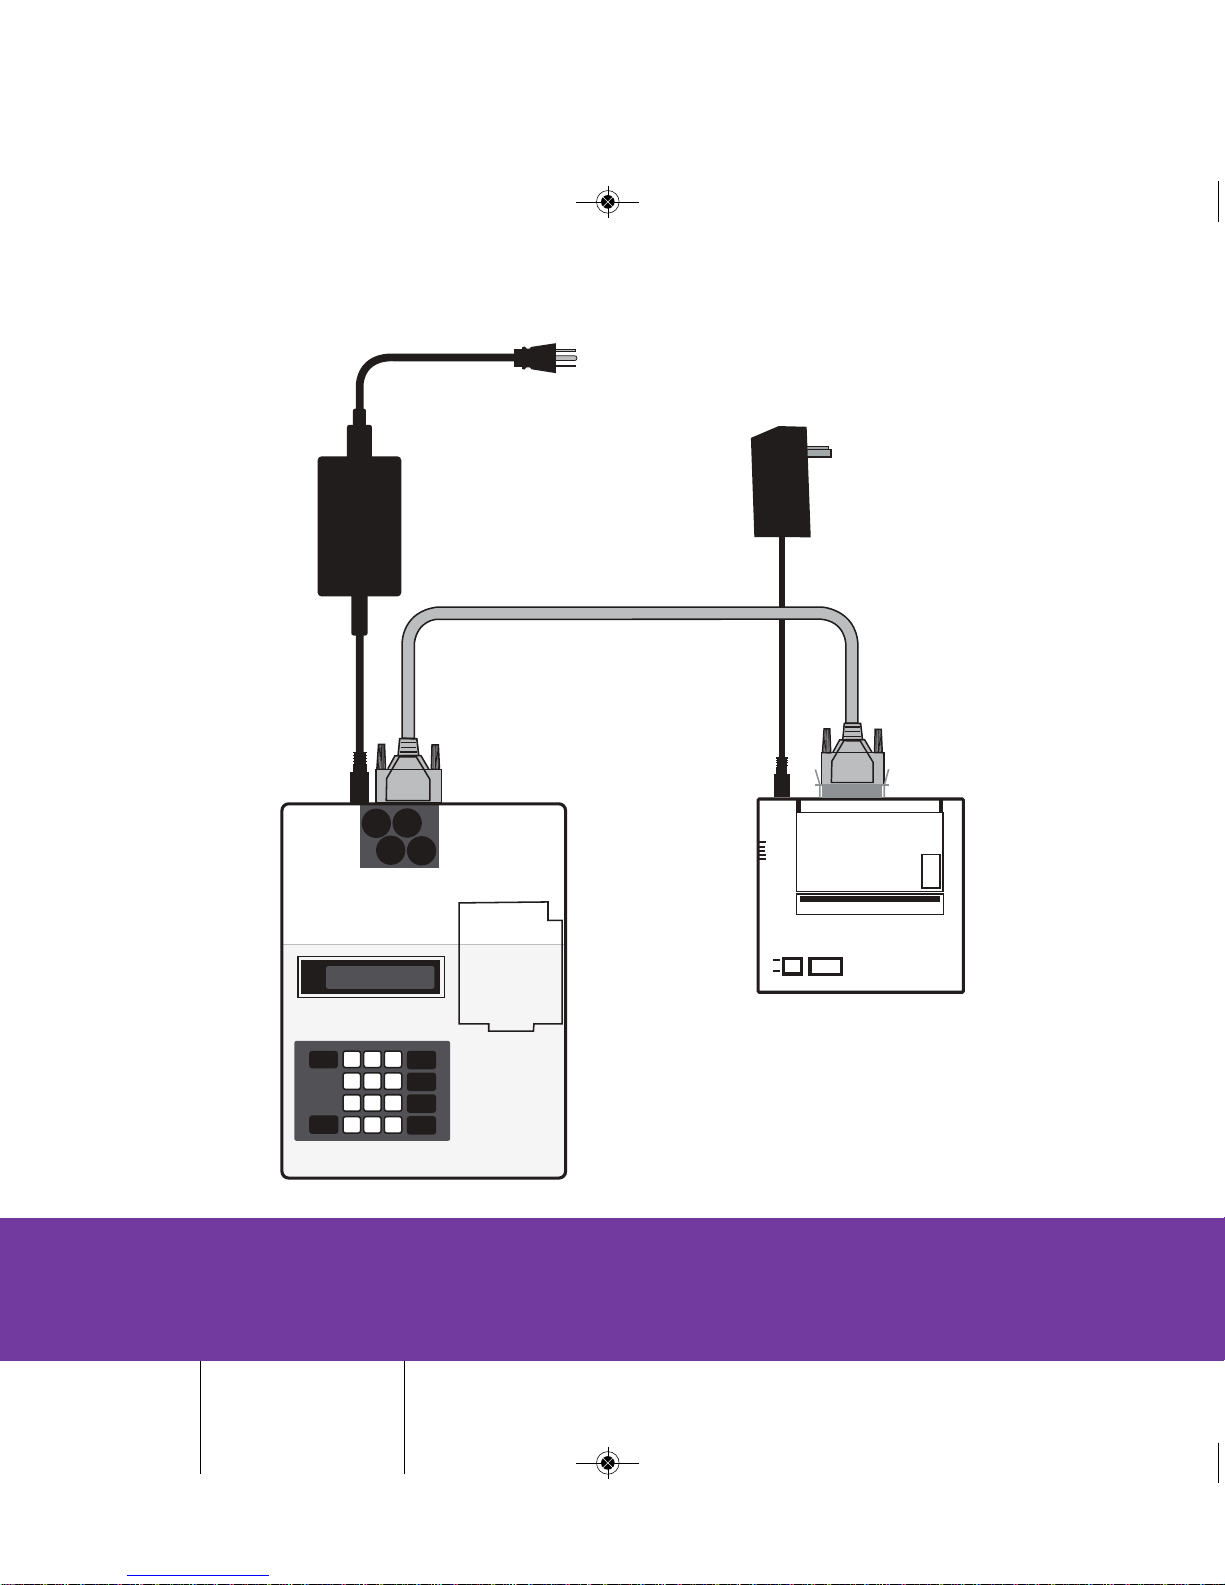
Connect system according to diagram below.
Before performing this procedure, ensure that the
Reagent Kit is at the same temperature as the
Instrument.
• Switch the Instrument and the printer to ON. (The
Instrument is on when the “I” on the rocker switch is
depressed.) The Instrument will perform a system test.
Be sure that the printer is ON LINE.
• Clean vials if necessary.
• Load CAL A and Blank vials into the vial block at the
back of the Instrument at least 15 minutes prior to use.
Powering Off
• Remove all vials from the Instrument.
• Switch the printer to OFF.
• Switch the Instrument to OFF.
• Store all reagents according to storage requirements.
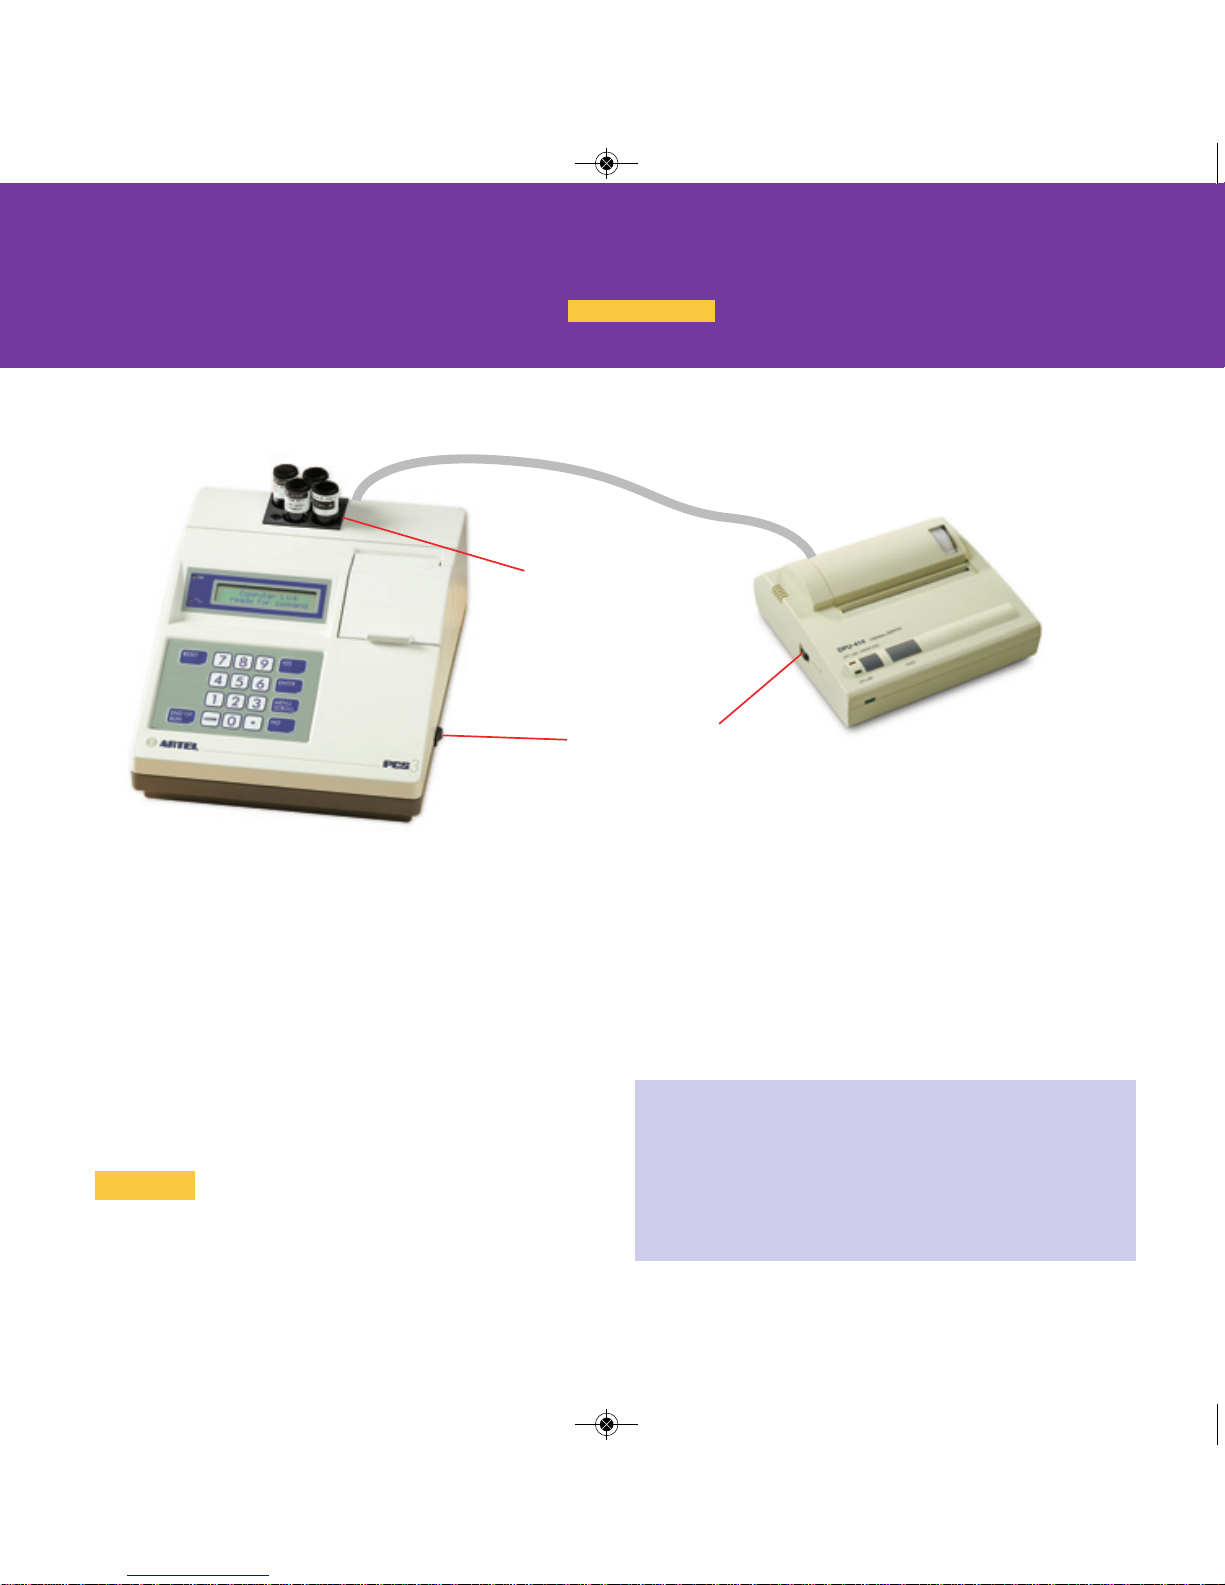
Power switch
Vial block
The color-coded bars within the text throughout this Guide indicate
the sections where specific instructions are given.
PCS Quickstart-15A3179_PCS Quickstart 15A3179 Rev 4/3/13 2:01 PM Page 2
Page 3
Always refer to the PCS Procedure Guide for further instruction
Powering
On & Off
PCS Quickstart-15A3179_PCS Quickstart 15A3179 Rev 4/3/13 2:01 PM Page 3
Page 4
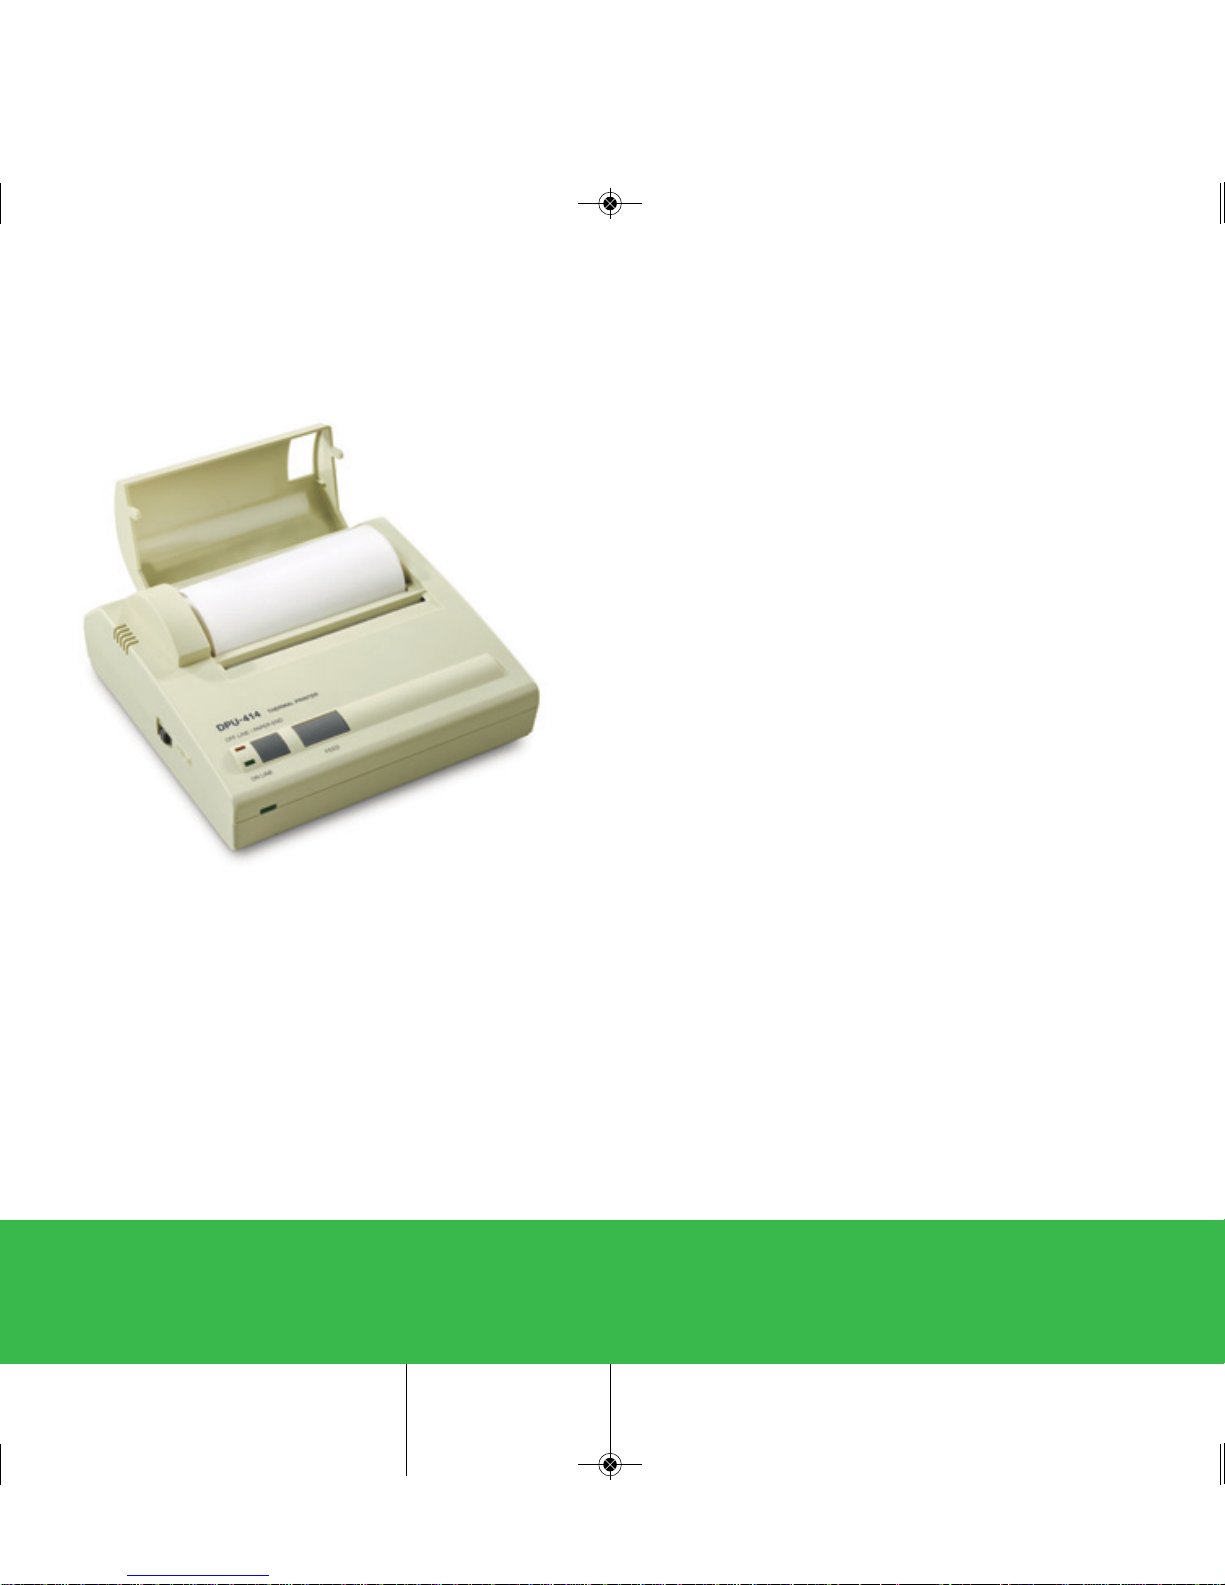
Seiko
Printer
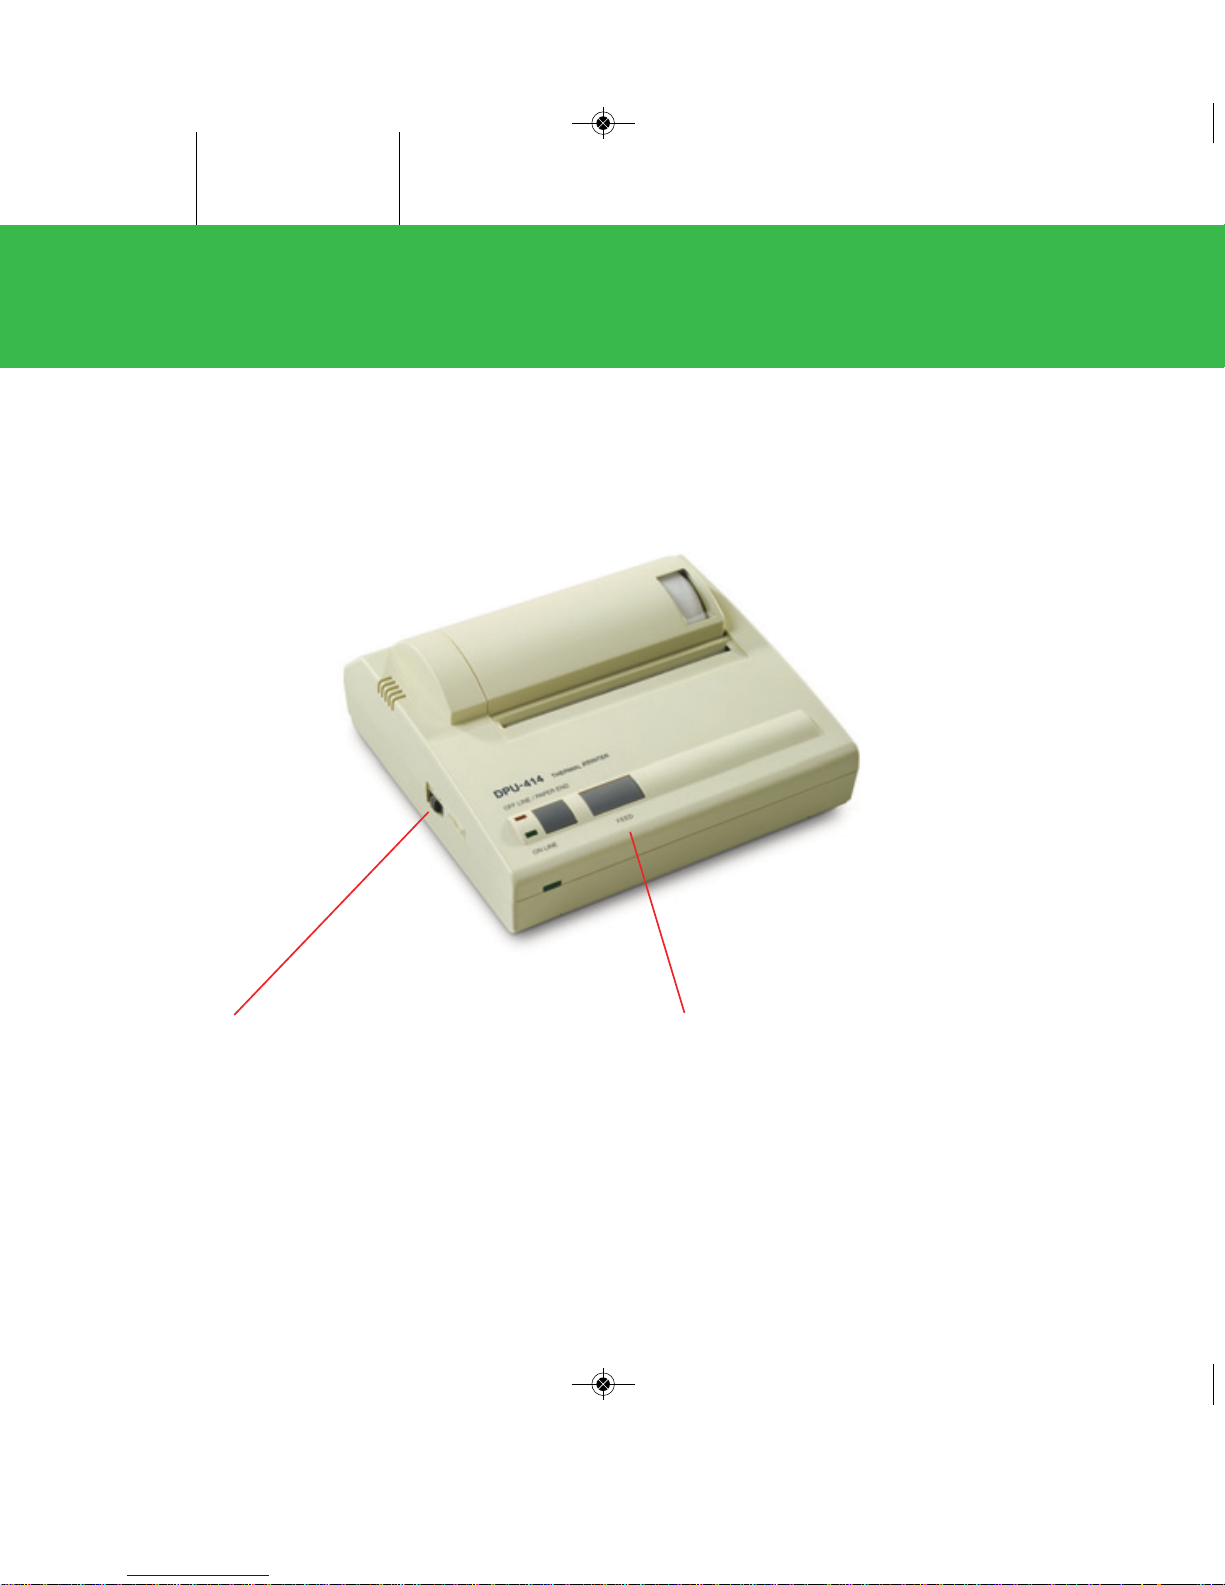
Controls and Indicators:
Paper Feed Switch: Pressing this switch feeds the
paper continuously. Paper feed will only work when
the OFF LINE indicator illuminates or flashes.
Power Switch: When the switch is in the ON position,
power is supplied to the printer and the POWER and
ON LINE indicators illuminate. When the printer is out
of paper, the OFF LINE indicator flashes.
PCS Quickstart-15A3179_PCS Quickstart 15A3179 Rev 4/3/13 2:01 PM Page 4
Page 5
Always refer to the PCS Procedure Guide for further instruction
Seiko
Printer
Loading the Printer Paper:
• Turn the power switch to the ON position.
• Open the paper cover located on the top, right side of the
printer.
• Cut the end of the paper roll cleanly and squarely.
• Insert the end of the paper into the inlet at the bottom of the
paper holder until the auto-loader catches it and feeds the
paper through.
• The outside of the roll is the printable surface for the
thermal paper roll.
• Close the paper cover.
PCS Quickstart-15A3179_PCS Quickstart 15A3179 Rev 4/3/13 2:01 PM Page 5
Page 6
Consumable
Components
Vial Cleaning
To ensure accurate results, all vials should be free
of fingerprints and smudges prior to placing in the
vial block for equilibration. All vials should be
cleaned prior to use.
• Holding the vial by the cap, immerse the lower
portion of the vial (about 2.5 cm) into clean
isopropyl alcohol.
• Remove the vial from the alcohol and gently
wipe the lower portion of the vial by rotating the
vial against a lint-free wipe.
Disposal
• All PCS reagents are non-hazardous and aqueous
based.
• Small quantities may be disposed of in sewer. Large
quantities should be disposed of in accordance with
local, state or federal regulations.
If Reagent Kit has been moved from another location,
depending on the difference in temperature between
the two locations, an hour may be required for
equilibration.
Removing the kit components from the box and
letting them stand in free air will hasten equilibration.
Storage
• The Reagent Kit should be stored at room temperature
(18-28° C).
• Avoid temperatures exceeding 32° C.
• Kits should be stored in the dark to the extent practical.
• Frozen reagents should be brought to room temperature
and inverted several times prior to use.
PCS Quickstart-15A3179_PCS Quickstart 15A3179 Rev 4/3/13 2:02 PM Page 6
Page 7
Always refer to the PCS Procedure Guide for further instruction
Consumable
Components
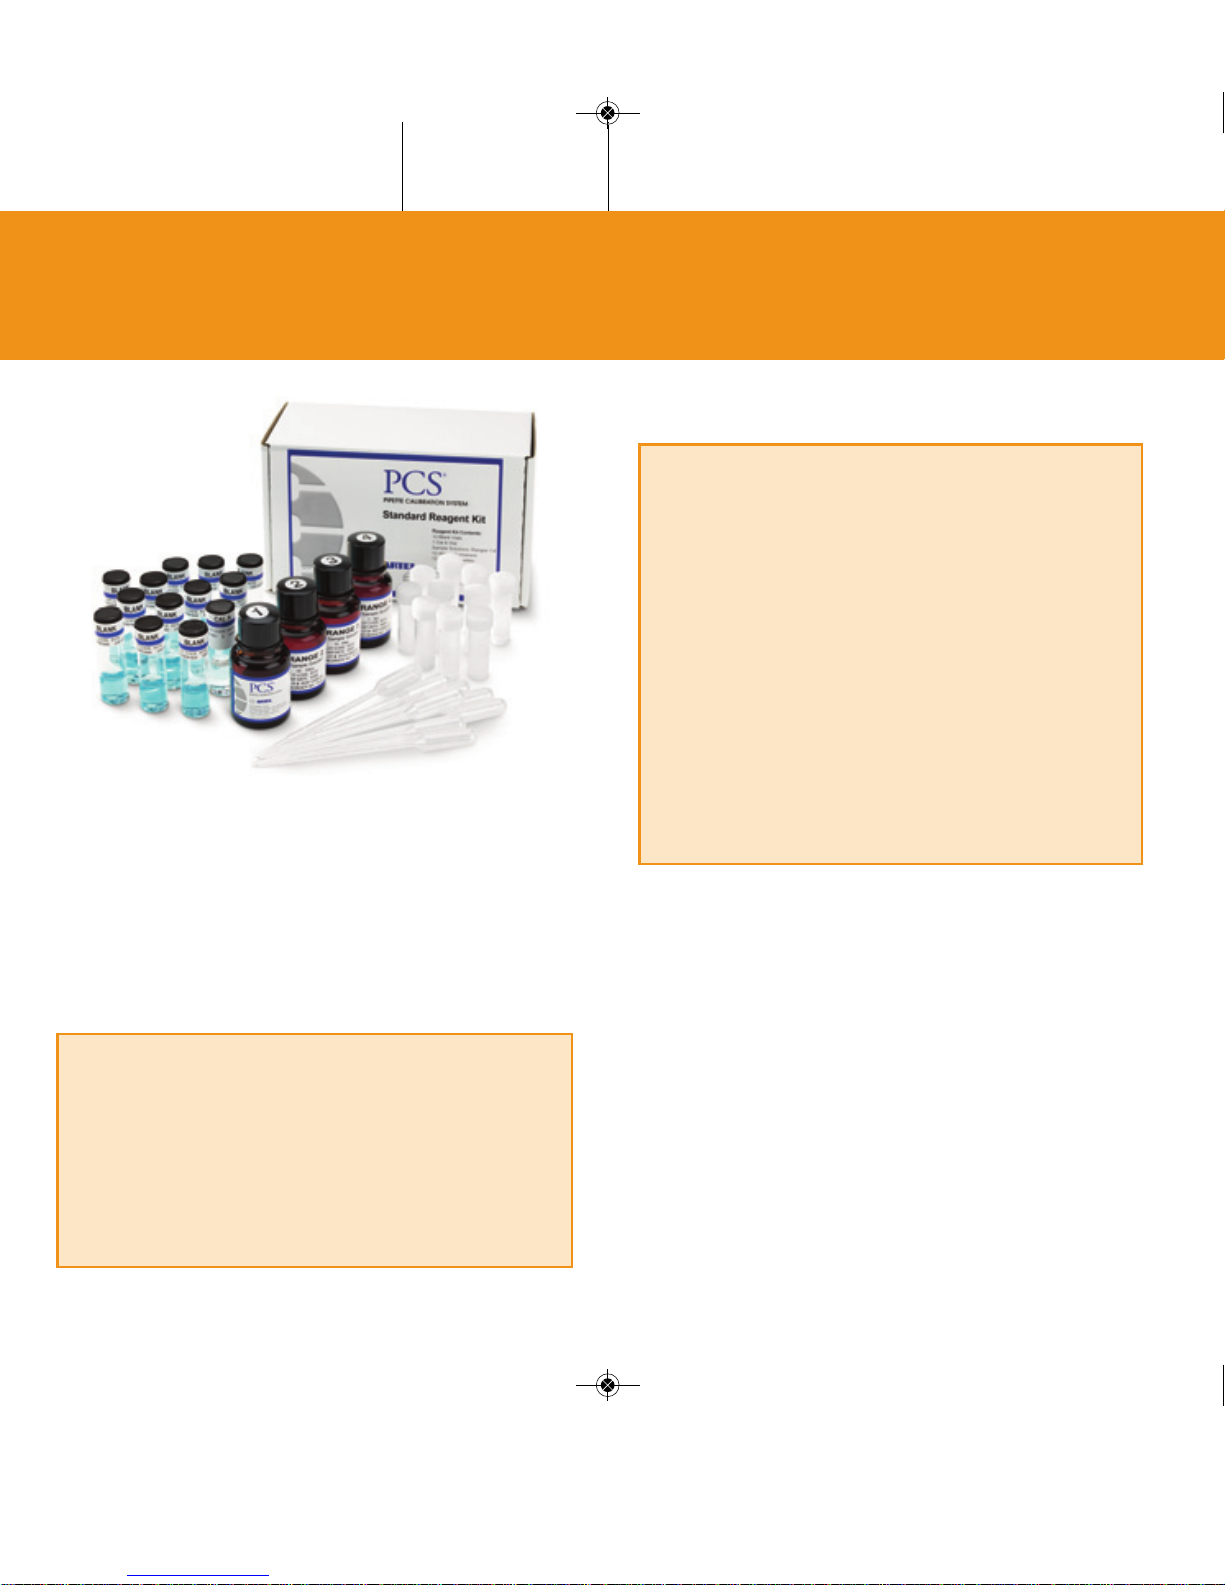
Reagent Kit
• Blank Reagent Vials:
Standard Reagent Kits contain 12 vials pre-filled with
Blank Solution.
Bulk Reagent Kits contain 50 vials pre-filled with Blank
Solution.
• Sample Solutions:
Range 1: For pipette volumes 200 – 5000 µL
Range 2: For pipette volumes 50 – 199 µL
Range 3: For pipette volumes 10 – 49 µL
Range 4: For pipette volumes 2 – 9 µL
Range 5*: For pipette volumes 0.5 – 1.9 µL
Range 6*: For pipette volumes 0.1 – 0.49 µL
• Sample Aliquot Containers:
Use aliquot containers to hold Sample Solutions used
during calibration to avoid contamination of Sample
Solution bottle.
• Transfer Pipettes:
Plastic transfer pipettes are used to transfer Sample
Solution from the reagent bottle to the aliquot container.
• Calibration Standard:
CAL A vial is used to collect a zero reading for the
Instrument.
• Kit Inserts:
Declaration of Traceability
*Range 5 and 6 are sold separately.
Lot code card
PCS Quickstart-15A3179_PCS Quickstart 15A3179 Rev 4/3/13 2:02 PM Page 7
Page 8

Pipette
Calibration
Setup
Starting a Pipette Calibration
• At the Main Menu prompt (Figure 1), press YES to
begin the pipette calibration procedure. The Instrument
will perform a temperature check.
• The Instrument will prompt for lot code (Figure 2). The
Instrument retains up to 6 previously entered lot codes.
If the entered code matches one previously entered,
press NO and re-enter the code.
• Press YES if entering a new lot code. Group numbers
found on the correct side of the lot code card must be
entered. Press ENTER after each group of digits is
entered.
• A confirmation prompt will be displayed (Figure 3).
Press YES.
• The Instrument will perform a brief self-calibration.
Immediately following the self-calibration the Instrument
will prompt to insert the CAL A vial (Figure 4).
• Open the vial holder cover and insert the CAL A vial
pressing down until it meets the bottom of the vial
holder.
• The Instrument will then perform a zero check and
prompt to remove the CAL A when the test is complete.
Return the CAL A vial to the Reagent Kit for future use.
Main Menu
Pipette Calibration?
Figure 1
Enter Reagent Lot Code:
Lot Code XXXXX
Correct? (Y/N)
Figure 2
Figure 3
Insert
Cal A Vial
Figure 4
PCS Quickstart-15A3179_PCS Quickstart 15A3179 Rev 4/3/13 2:02 PM Page 8
Page 9

Always refer to the PCS Procedure Guide for further instruction
Important Notes:
• Use the CAL A vial from the Reagent Kit and not from the Instrument Calibrator Kit.
• Never remove the cover of the CAL A vial.
• The label for the CAL A vial should face the front of the Instrument with the vertical line facing forward.
• Each Blank vial contains a predetermined volume of solution. Any spillage will reduce accuracy.
• The lower portion of the Blank vial must be free of smudges. Touching this area should be avoided.
• Once the Blank vial has been inserted into the Instrument, it must not be turned or moved until the calibration
procedure is complete for that vial.
• The Instrument will then prompt to insert a blue Blank
vial into the vial holder (Figure 5). Remove the Blank vial
from the vial block and remove the cap.
• Insert the open vial into the vial holder pressing down
until it contacts the bottom of the vial holder.
• Close the Instrument cover. The Instrument will read the
Blank vial.
Remove Cap and
Insert Blank
Figure 5
PCS Quickstart-15A3179_PCS Quickstart 15A3179 Rev 4/3/13 2:02 PM Page 9
Page 10

• The Instrument will prompt to enter an operator ID
(Figure 6). Enter a number (not exceeding 20 digits) to
identify the operator. For alpha character entry, refer to
Appendix E of the PCS Procedure Guide.
• Enter the pipette ID (Figure 7). Type in a number not
exceeding 20 digits and press ENTER. The printer will
print the calibration header information.
• Enter the volume (in microliters) to be dispensed and
press ENTER (Figure 8). The CLEAR key can be used
to correct any typing errors.
Enter Operator ID:
Enter Pipette ID:
Enter Pipette
Volume: ___ µL
Figure 6
Figure 7
Figure 8
PCS Quickstart-15A3179_PCS Quickstart 15A3179 Rev 4/3/13 2:02 PM Page 10
Page 11

Always refer to the PCS Procedure Guide for further instruction
Important Notes:
• The proper range of Sample Solution for the pipette volume to be tested must be used.
• Each Reagent Kit contains bottles of Sample Solution corresponding to various pipette volume ranges.
• If an improper Sample Solution has been dispensed into the Blank vial, the results obtained will not be valid and
the vial is no longer usable. It must be discarded.
• The number of samples that can be dispensed in this
vial, at the selected volume, will be displayed
(Figure 9).
• Press YES and the Instrument will display the
appropriate Sample Solution to use for the pipette
calibration.
• The Instrument will take a final reading of the Blank vial
and then prompt for the first dispense of the Sample
Solution with the pipette under test (Figure 10).
XX Left this Vial
Proceed? (Yes/No)
Range X
Pipette Sample #1
Figure 9
Figure 10
Pipette
Calibration
Setup
PCS Quickstart-15A3179_PCS Quickstart 15A3179 Rev 4/3/13 2:02 PM Page 11
Page 12
Aspirating and Dispensing
Sample Solution
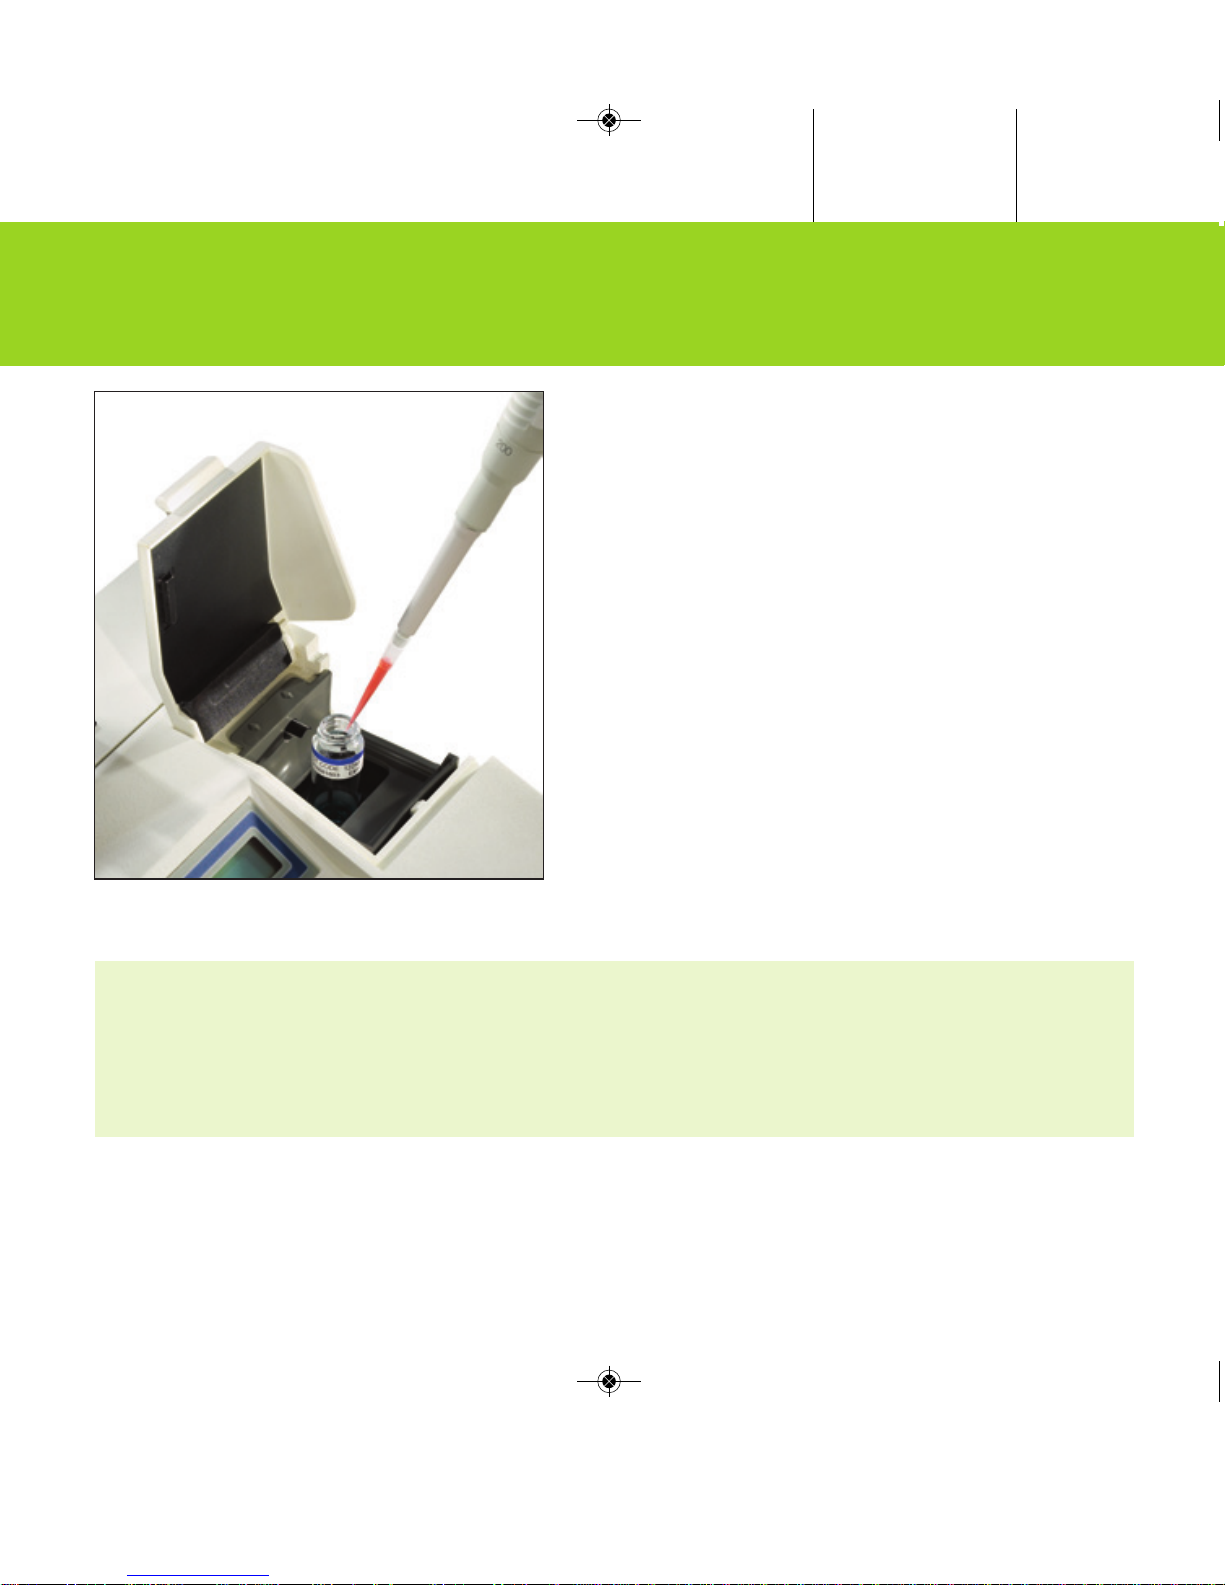
Using a plastic transfer pipette, transfer an aliquot of Sample
Solution into an aliquot container. Both items are located in
the Reagent Kit. Transfer only enough solution for half-hour
increments. The volume gradations on the transfer pipette
and the 1 mL mark on the aliquot container can be used as
a guide for the volume of solution transferred.
• Aspirate the Sample Solution from the aliquot container
with the pipette under test.
• Lift the vial holder cover and dispense the Sample Solution
into the Blank vial using standard pipetting technique.
Important Note:
The Sample Solution should be dispensed against the inside wall of the vial with the pipette tip placed above the
meniscus but below the shoulder of the Blank vial. The vortex mixing action will wash the solution from the inside
wall of the vial.
Pipette
Calibration
PCS Quickstart-15A3179_PCS Quickstart 15A3179 Rev 4/3/13 2:02 PM Page 12
Page 13
Always refer to the PCS Procedure Guide for further instruction
Mixing Sample #1
Please Wait
Reading Sample #1
Please Wait
Result #1 XXX.X
Pipette Sample #2
Rules for Adjustable Volume Pipettes:
• Calibration can be performed by starting at any volume.
• When the desired number of samples at the first volume have been dispensed, press ENTER.
• If a data point must be deleted, press YES at the reprint results prompt and follow the delete a data point instructions.
• Enter the next volume in the pipette’s range. This process can be repeated. Press END OF RUN when complete.
• In some cases, more than one Sample Solution will be required. Special attention should be paid to the screen
prompts to ensure usage of correct solution.
Reading the Sample
• Once the sample is dispensed, and the cover is closed, the
Instrument will mix the sample and display a prompt (Figure 11).
• The Instrument will then read the absorbance of the sample
and display a prompt (Figure 12).
• Finally, the result of the reading will be displayed on the screen
and the Instrument will prompt for the dispense of the next
sample (Figure 13).
• Follow the same steps listed on this page for the next sample
and every subsequent sample.
• When performing a single volume calibration and the desired
number of data points have been collected, press END OF
RUN. When performing a multi-volume calibration, press
ENTER (see shaded section below).
• The group statistics will be computed and the results printed.
Figure 11
Figure 12
Figure 13
Pipette
Calibration
PCS Quickstart-15A3179_PCS Quickstart 15A3179 Rev 4/3/13 2:02 PM Page 13
Page 14
Reprint Results?
(Yes/No)
Delete Data Points?
(Yes/No)
Enter Pt # to Delete
• If, at the end of the run, a second copy of the results is
desired, press YES at the next prompt (Figure 14).
• If it is determined that a given data point may be eliminated
from the statistical calculation, press YES at the next prompt
(Figure 15).
• Enter the sample # of the data point to be deleted at the next
prompt (Figure 16).
• At the next prompt to delete more data points, follow the
same steps until all appropriate data points are deleted.
• The correct statistics will be printed.
• For suggested tolerance limits, refer to section 4.13 of the
Procedure Guide.
Figure 14
Figure 15
Figure 16
Completing
Calibration
PCS Quickstart-15A3179_PCS Quickstart 15A3179 Rev 4/3/13 2:02 PM Page 14
Page 15

Always refer to the PCS Procedure Guide for further instruction
Another Cal w/Vial?
(Yes/No)
Use New Vial?
(Yes/No)
End of Vial
• The number of data points that can be collected in each Blank
vial is dependent on the sample volume and will range from 1
point to 40.
• Each time a pipette calibration run is completed, the
Instrument will display the remaining number of samples of the
selected volume that may be dispensed into the vial.
• In any one Blank vial, calibrations may be performed at the
same volume, at different volumes with the same Sample
Solution or at different volumes with different Sample
Solutions.
• To use the same vial after the completion of the first
calibration, press YES at the first prompt (Figure 17). The
calibration cycle will restart.
• When the maximum capacity of the vial has been reached,
alternating prompts will flash (Figures 18 & 19).
• If more data points are required, answer YES to the Use New
Vial prompt. The Instrument will prompt to remove the old vial
and insert a new one. This process may be repeated if
needed.
Figure 17
Figure 18
Figure 19
Completing
Calibration
PCS Quickstart-15A3179_PCS Quickstart 15A3179 Rev 4/3/13 2:02 PM Page 15
Page 16

Instrument
Calibration
Main Menu
Instr. Calibration?
Instrument Cal. Menu
Perform Instr. Cal.?
Calibrating the PCS:
• To access the Instrument Calibration Menu, press MENU
SCROLL until the Instrument Calibration prompt is displayed
(Figure 20).
• Press YES at the prompt.
• The Instrument Calibration Menu will open.
• Press YES at the Perform Instrument Calibration prompt
(Figure 21).
Important Notes:
• Minimally, the Instrument Calibration should be performed every 30 days or prior to the next use, whichever is
later.
• The Instrument is calibrated using the PCS Instrument Calibrator Kit, which contains 4 vials with calibrator
values: CAL A, B, C and D.
• The contents of the kit are subject to degradation with time, temperature and exposure to light.
Figure 20
Figure 21
PCS Quickstart-15A3179_PCS Quickstart 15A3179 Rev 4/3/13 2:02 PM Page 16
Page 17

Always refer to the PCS Procedure Guide for further instruction
Instrument
Calibration
CAL Lot Code XXXXX
New Lot? (Y/N)
Insert CAL A Vial
Insert CAL B Vial
• At the prompt, enter the Operator ID for the Instrument
calibration. For alpha character entry, see appendix E of the
Procedure Guide.
• The Instrument will prompt to enter the Calibrator Kit lot code.
This code is a four or five digit number found on the inside
label of the Instrument Calibrator Kit box lid.
• After entering the lot code, press ENTER. If this lot code
matches one previously entered, the next prompt will be to
insert the first Cal Vial.
• If the lot code is for a new kit, press YES when the Instrument
identifies it as new (Figure 22).
• The new calibrator values are found on the box label and must
be entered at the prompt.
• The leading zeros and the decimal points must be entered.
Press YES to confirm when the lot code is completely entered.
• After the lot code is successfully entered, the Instrument will
take a series of readings and then prompt for the first calibrator
vial (Figure 23).
• Use the CAL A vial in the Instrument Calibrator Kit.
• When the readings are complete, the Instrument will then
prompt for the next vial (Figure 24).
• The remainder of the calibrator vials must be inserted at the
sequential prompts. Results will be printed at conclusion.
• The entire process takes approximately 12 minutes to
complete.
Important Notes:
• If the calibration is successful, the date of the last
Instrument calibration check will change to the current
day.
• Never remove the caps of the calibrator vials.
• Printed results will include:
- Reading data
- Instrument accuracy data
- Instrument repeatability data
- Overall calibration result
Figure 22
Figure 23
Figure 24
PCS Quickstart-15A3179_PCS Quickstart 15A3179 Rev 4/3/13 2:02 PM Page 17
Page 18

15A6905A
artel-usa.com
25 Bradley Drive, Westbrook, Maine 04092
888-406-3463 | [email protected]
[email protected] | [email protected]
© 2016 Artel, Inc.
 Loading...