

Page 1
ARTEC
LEO
QUICK START
GUIDE
Page 2

Page 3

THANK YOU
FOR YOUR PURCHASE OF
ARTEC LEO
If you need assistance with your scanner, contact
your local reseller or the Artec support team:
[email protected].
Page 4
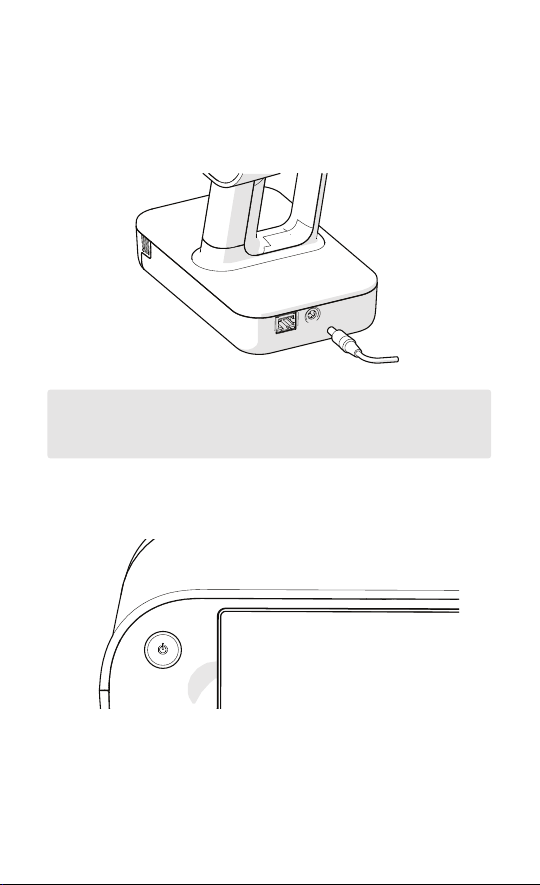
Charge & Turn On
To charge your Leo, plug in the power adapter.
Caution: Never use cables or adapters intended
for other scanners or devices.
Press the power button.
A greeting screen with the license agreement
will appear. Read it carefully and accept it.
Page 5
Internet Connection
The initial Leo activation requires an Internet
connection; aerwards, you can use the scanner
offline.
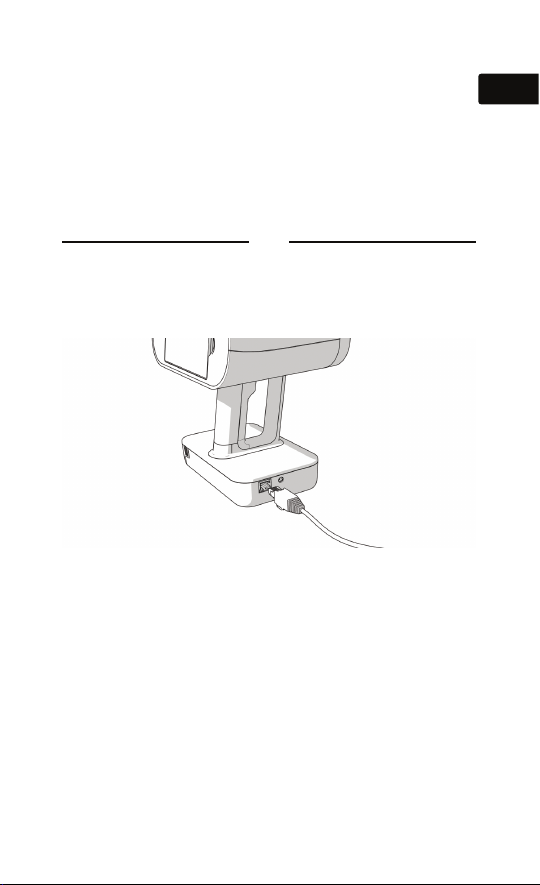
Wi-Fi Wired (Ethernet)
03
Select a Wi-Fi network
and specify the
password.
Plug in the cable. The
connection (DHCP) will
set up automatically.
Activate Leo
To activate your Leo, you need a valid account at
my.artec3d.com. Use the account your Artec
reseller registered for you, or create a new
account using either a mobile device or a
computer.
Once you’ve logged in, name your Leo and
you’re ready to go.
Page 6
How It Works
The scanner has two modes: Preview and
Recording. Preview mode is designed for users
to practice moving the device and holding it at
the optimal distance, and to adjust settings.
Pressing the red trigger button once will take
you to Preview mode. Pressing it again activates
Recording mode in which Leo records surfaces
to a project.
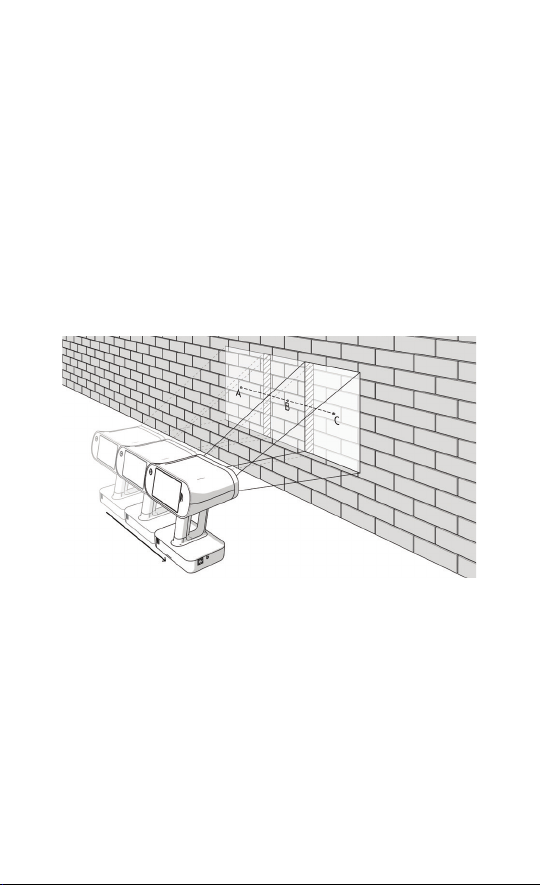
As you move the scanner, it captures a series of
frames. Leo uses features in overlapping areas of
these frames to automatically align them. This
process is called tracking. The scanner displays a
model built in real time and stores all frames to
a project. Using a color-quality indicator, you can
evaluate the captured area to determine which
parts of the object require additional scanning.
Page 7
TIPS: LEARNING TO SCAN
Objects
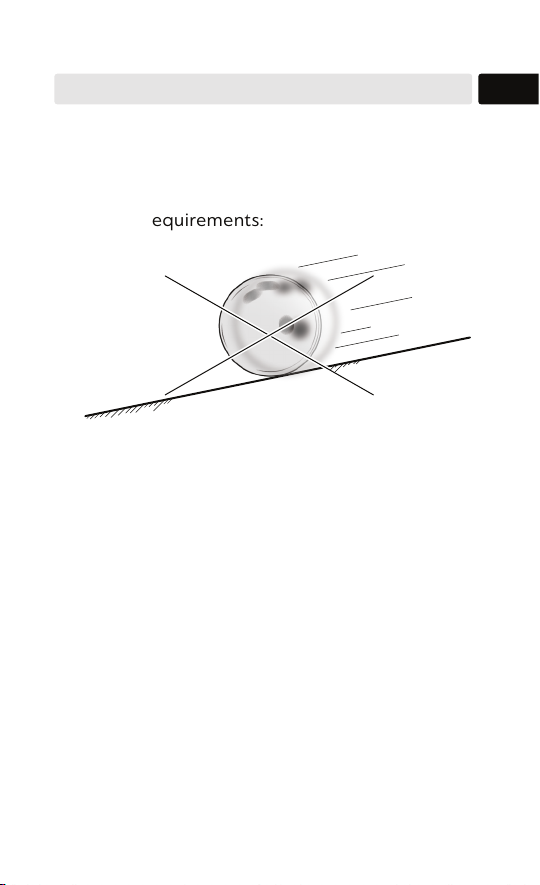
Before scanning, ensure the objects meet the
following requirements:
• They must be stationary.
• They should have geometry and/or
texture (color) features.
• They should have no black, transparent
or reflective surfaces.
Preparations
05
If the object doesn’t meet all the requirements,
you can still scan it, but it may need preparation.
Page 8
TIPS: LEARNING TO SCAN
Preparations
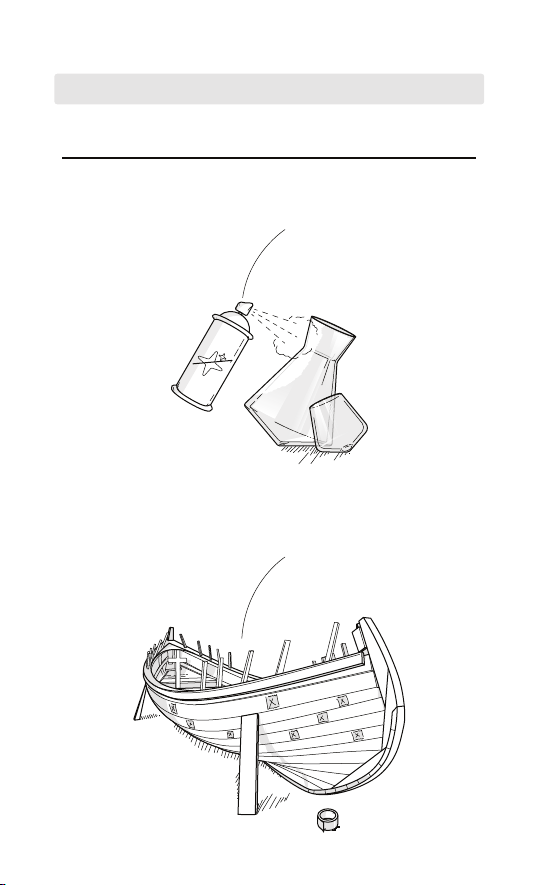
Surface type How to deal with it?
Black, transparent and
reflective surfaces
Dust with anti-glare
spray
Surface type How to deal with it?
Thin, flat or repetitive
features
Apply masking tape to
the background and/or
draw X’s on it
Page 9
TIPS: LEARNING TO SCAN
Focus on Display
& Be Flexible
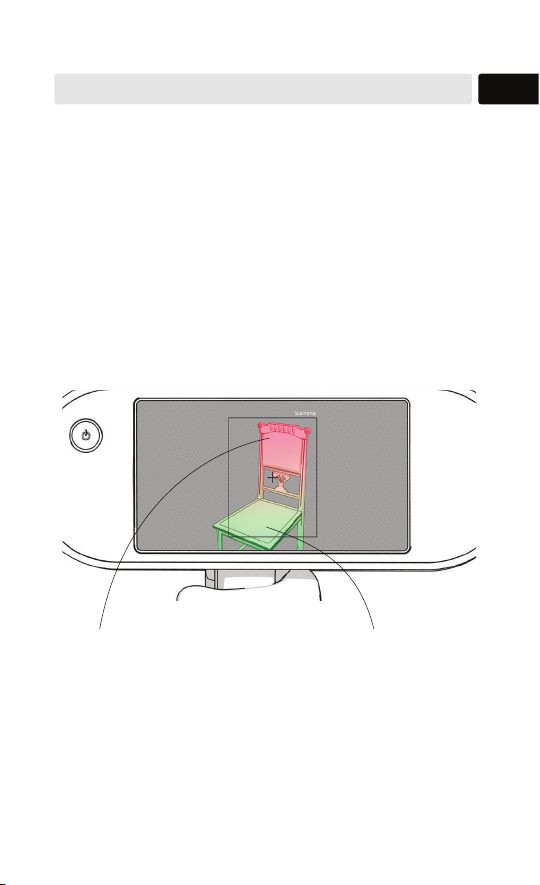
The scanner’s field of view must encompass a
sufficient surface area. To this end:
a. Pay closer attention to the object on the
screen than to the actual object.
07
RED — Area needs to be
scanned further, possibly
from a closer distance
b. Direct the scanner at the object from different
angles.
GREEN —
Scanned
sufficiently
Page 10
TIPS: LEARNING TO SCAN
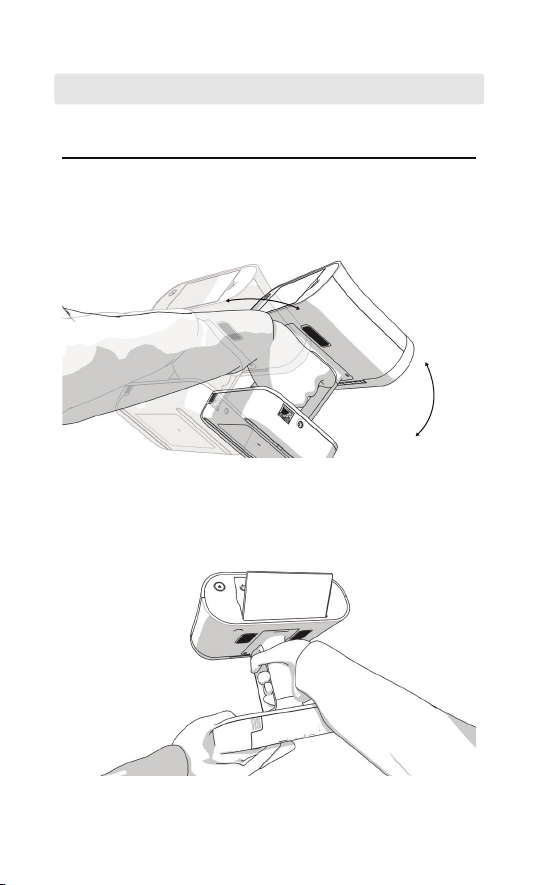
Focus on Display & Be Flexible
c. Move your wrist to turn and tilt the scanner, as
necessary.
d. Use the tiltable display.
Page 11
TIPS: LEARNING TO SCAN
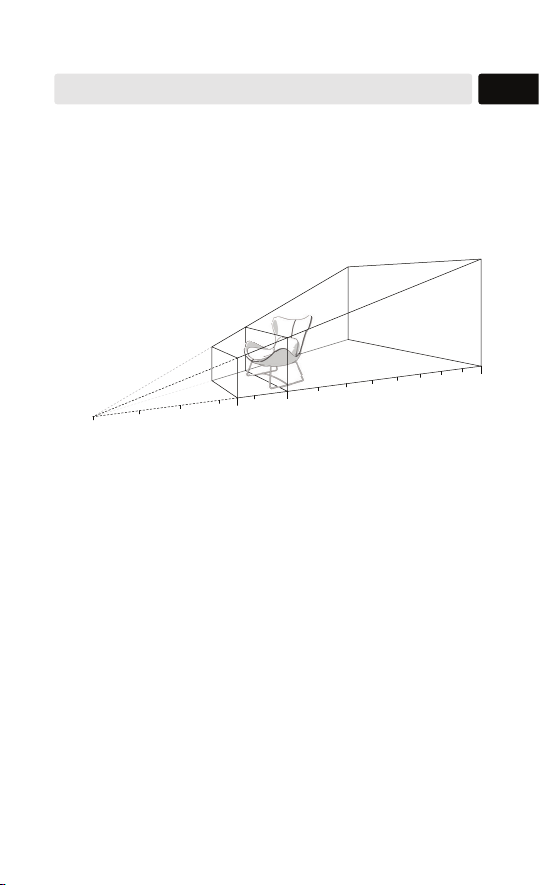
Optimal Distance
Maintain an average distance of about 0.5 m
(1.5 ) from the object.
09
Artec Leo
0.5
0. 35
Scan Background
Even though scanning extraneous surfaces
appears unhelpful, it may improve tracking
(alignment of sequentially captured frames).
1.2
Page 12
TIPS: LEARNING TO SCAN
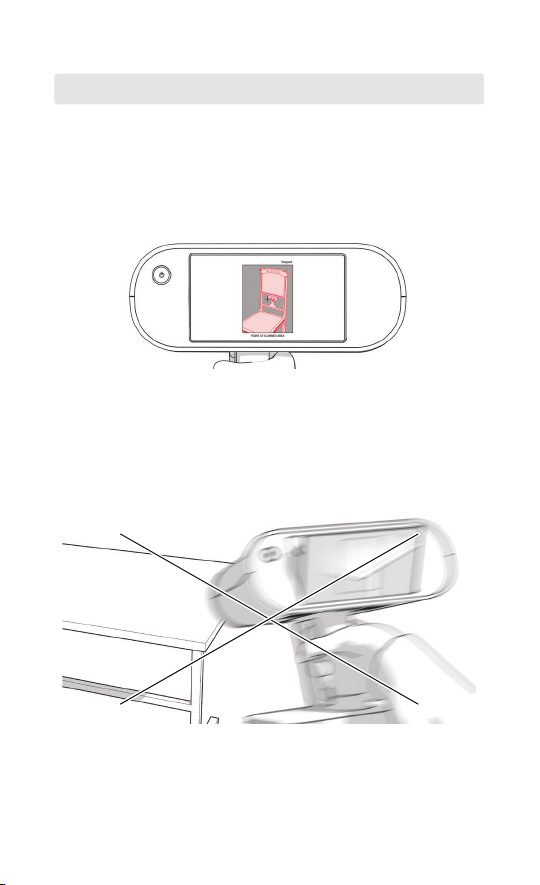
Troubleshooting
Lost Tracking
If Leo is unable to continue building an object
surface, it enters the Tracking Lost mode.
Avoid fast movement
Page 13
TIPS: LEARNING TO SCAN
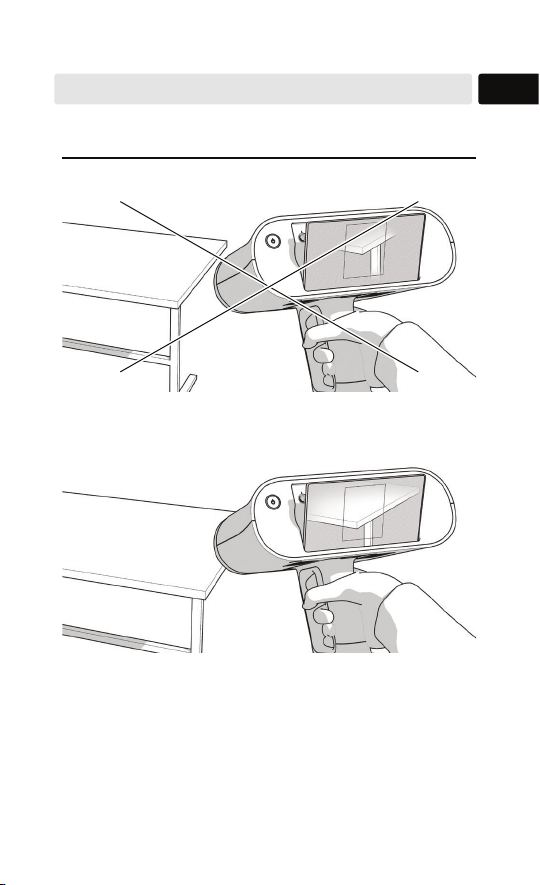
Troubleshooting Lost Tracking
Avoid insufficient surface area in the field of view
11
Keep sufficient surface area in the field of view at all times
To resume scanning, direct Leo at a region
you’ve already captured, maintaining the original
scanner orientation toward this region. Then,
once Leo recognizes it, press the red button.
Page 14
Scan
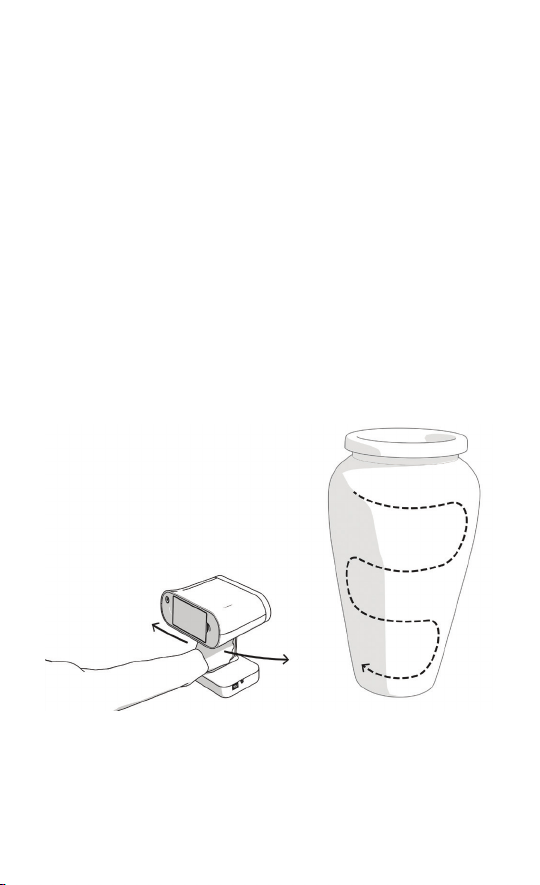
To begin scanning,
1. Press the red trigger button on the handle to
open a preview.
2. Direct the scanner at the object while
watching the screen.
3. Press the button once more to start recording.
4. Move the scanner over the surface. Gradually
“sweep” the entire object or its reachable
parts, ensuring the lack of missing spots.
5. Press the red button and either scan the
remaining surfaces or tap Close.
Page 15

Obtain Model
Once the scans are ready, you can process them
in Artec Studio by cropping them, creating a
model, simplifying its mesh structure and
texturing it. You can then measure and annotate
the model.
To import data from Leo to Artec Studio,
• Ensure that both Leo and your computer
are connected to the same network and
use the same my.artec3d.com account or
one from the Trusted accounts list.
• In Artec Studio, select File → Import → Leo
project (connect to scanner).
To obtain a model, use Autopilot. In complex
cases, manual processing may yield better
results.
13
Consult the Artec Studio User Guide for details
(docs.artec-group.com).
Page 16
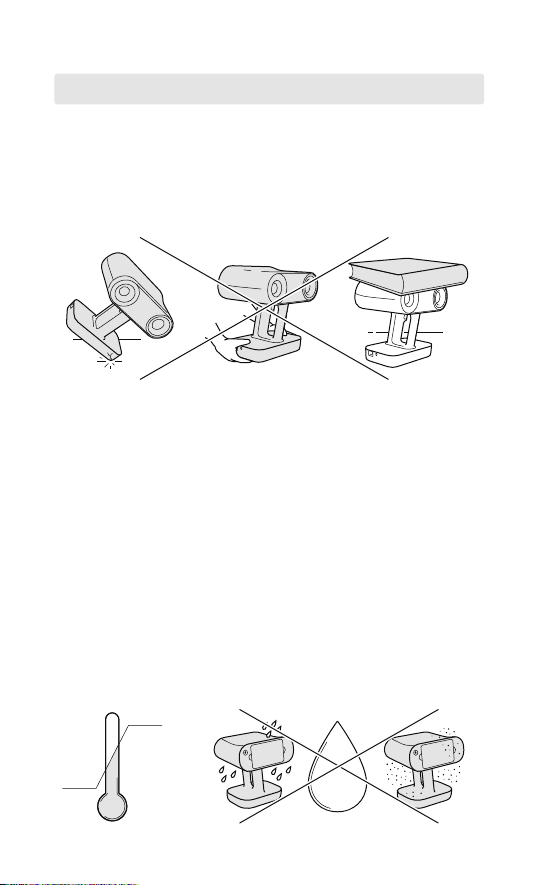
SAFETY AND HANDLING INFORMATION
Safe Handling
Avoid dropping, vibrating or applying pressure
to the scanner.
Always grip the scanner by its handle; use your
other hand for extra support when necessary.
Recommended Operating
Conditions
Leo is designed to function in ambient
temperatures between +15°С and +35°С (59°F
and 95°F) with humidity of up to 80%.
Avoid exposure to condensation, liquid or dust.
35 °C
15 °C
>80%
Page 17
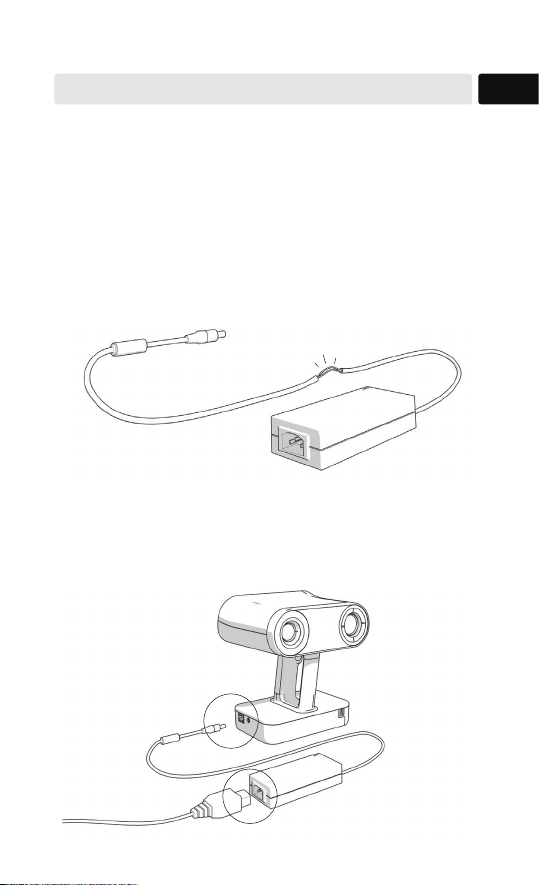
SAFETY AND HANDLING INFORMATION
Electrical Safety
Use only the standard power adapter that
comes with Leo. Protect the cables from being
stepped on or crushed. Always check cables for
damage before use. Never operate Leo with
damaged cables.
Before you plug in the power cable, check the
connection in the locations marked below.
15
Page 18
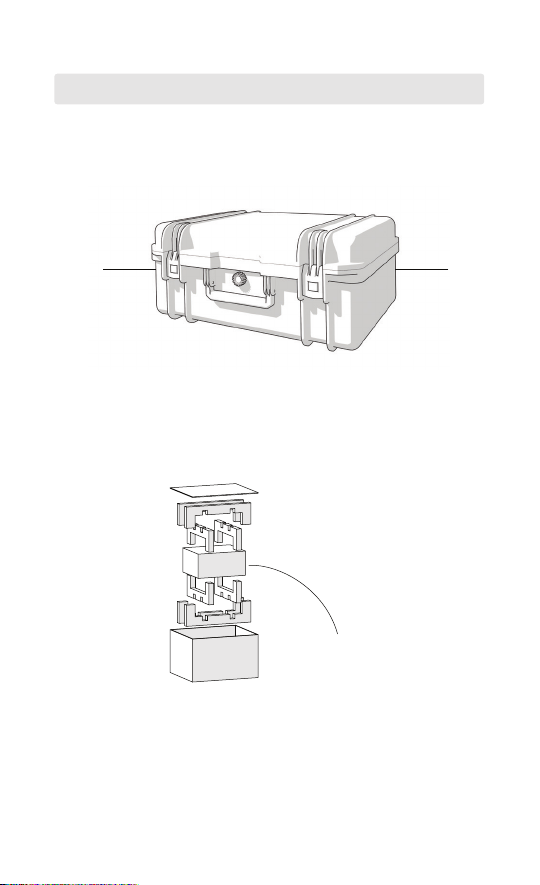
SAFETY AND HANDLING INFORMATION
Transportation
When transporting your Leo and its original
accessories, use the hard case. Don’t store any
extraneous items in this case. Don’t alter the
case or remove any foam sections.
Hard-case
packaging
For cargo shipping, we suggest using the original
wooden box your scanner arrived in. Before
putting the hard-case packaging in the box,
ensure all foam sections are correctly installed.
Safely store this box for future use.
Page 19
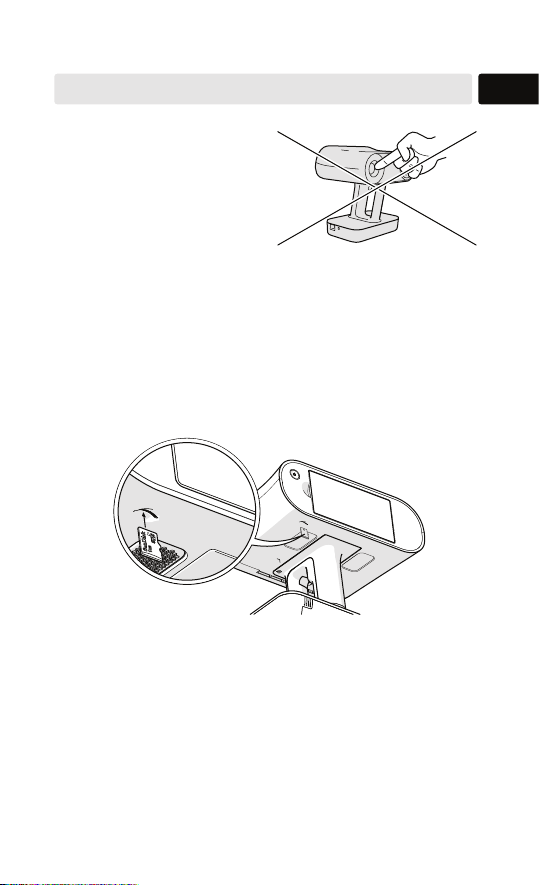
SAFETY AND HANDLING INFORMATION
Optics
Avoid touching the
scanner’s optical
components.
MicroSD Card Slot
Avoid using excessive force, and ensure the
microSD card is correctly oriented when inserting
it into the slot.
17
More Information
This guide provides only basic recommendations for
operating Leo. For additional information, consult the
comprehensive User Guide for Leo and other Artec
products (docs.artec-group.com), or visit the Support
Center (artecgroup.zendesk.com).
Page 20

Find more information:
docs.artec-group.com (manuals)
artecgroup.zendesk.com
(FAQs, videos and articles)
© 2019
Artec Europe Sarl
2, Rue Jean Engling
L-1466 Luxembourg
www.artec3d.com
19JL001
 Loading...