

Art2wave AP20 User Manual
AP20 Installation Guide
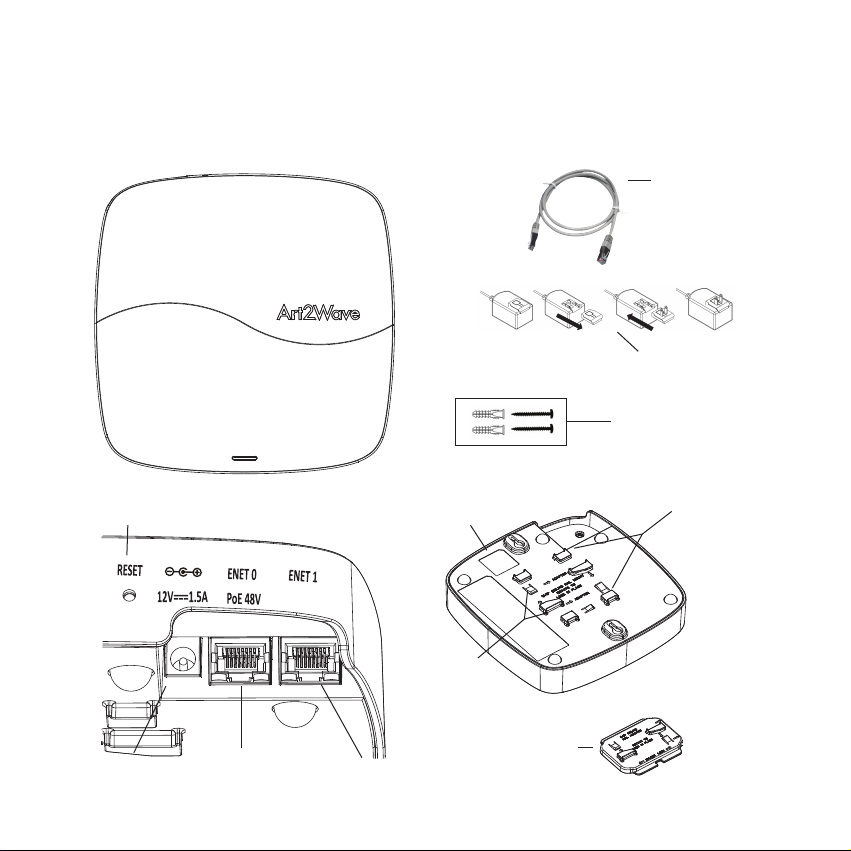
1 Contents of the box and important features:
Factory Reset Switch
Identity QR Code
Ethernet Cable
Power Adapter,
cover and prong
Wall Mount Installation
Kit:
2 Phillips Screws
2 Sinkers
Slots for 9/16” Ceiling
Rail Adapter
Power Port
ENET 0 (Uplink Ethernet
Port, Power-over-Ethernet
enabled)
15/16” Ceiling Rail
Mount
ENET 1 (Reserved
do not use)
9/16” Ceiling Rail Adapter

2 Setting up your AP20 Access Point
There are four steps to setting up an AP20 access point:
1. Linking the access point to your Art2Wave account
2. Connecting the access point to your network and power supply
3. Mounting the access point
4. Verifying connectivity
3 Linking the Access Point to your Art2Wave account
There are two ways to link your access point to your account: using your mobile device or using
the Art2Wave website.
3.1 Using your mobile device
By installing the Art2Wave mobile device app, you can scan the QR code on the back of the
access point and link it to your account. Information about the app is available at
http://art2wave.com. The mobile device app includes instructions for completing the process.
3.2 Using the Website
To link the access point to your account using the Website, sign into your account at
http://art2wave.com and follow the instructions in the Art2Wave web site to complete the
process.
4 Connecting the Access Point to your network and power supply
Connect the access point to your network by plugging an Ethernet cable into the ENET 0 port.
Do not connect to the ENET 1 port (this port is reserved for future use).
The Access point is powered either by connecting the supplied power adapter to an AC wall
outlet or by connecting the ENET 0 port to a device that provides 802.3af Power-overEthernet. If using the supplied power adapter, remove the cover and insert the prong as shown
in Section 1.
5 Mounting the Access Point
Note: Do not mount the access point until it is linked to your Art2Wave account.
You can mount the AP20 in the following ways:
• Ceiling mounting (with 15/16” or 9/16” rails)
• Wall mounting
• Desk mounting

5.1 Tips for selecting a location
The best location for your access point is at the center of your wireless coverage area, within
line of sight of all wireless devices. To get the best performance, consider the following:
• Mount the access point as high as possible above any obstructions
• Do not mount the access point next to building support columns or any other
physical obstructions that may cause dead zones
• Do not mount the access point near any material that may absorb or reflect Wi-Fi
signals
Warning
This unit must be installed indoors. The unit, AC power adapter, and its
cables are not designed for outdoor use.
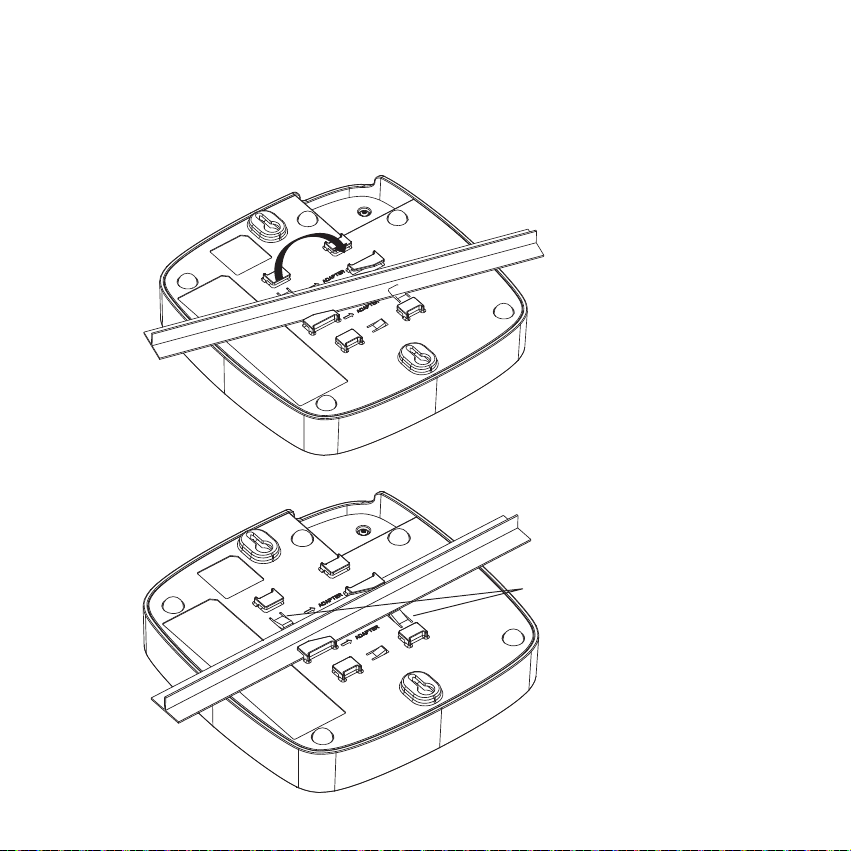
5.2 Ceiling mounting to a 15/16” rail
The figure below shows you how to clip the access point to a 15/16” ceiling rail. Printed
instructions on the back of the unit explain which clips to use.
Slide the Access point diagonally
over the rail and rotate until the
unit clicks into place.
Press thess clips in and turn to
dismount the Access Point
 Loading...