

Aroma ARC-930SB User Manual
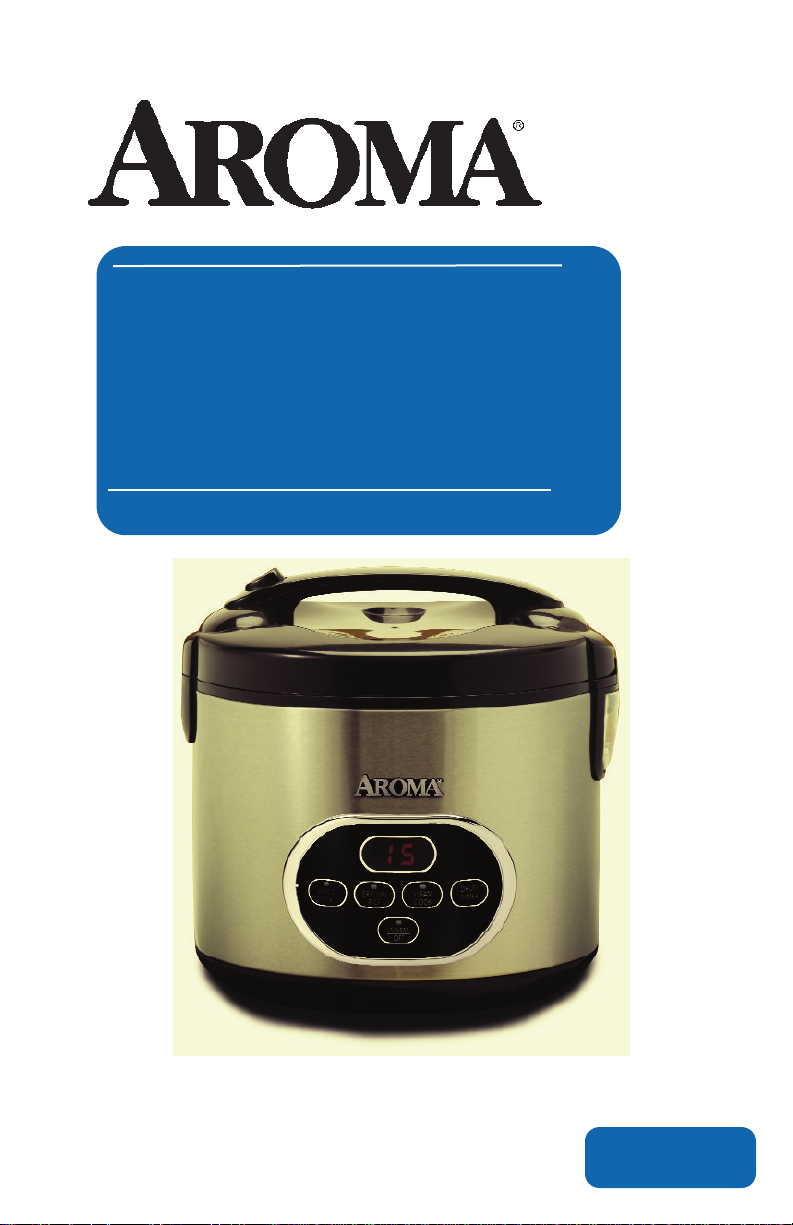
10-Cup Digital Rice
Cooker & Food Steamer
Instruction Manual
www.AromaCo.com
ARC-930SB

Congratulations on your purchase of the Aroma®Sensor Logic 10Cup Digital Rice Cooker. In no time at all, you’ll be making fantastic,
restaurant-quality rice at the touch of a button! Whether long, medium or
short grain, this machine is specially calibrated to cook all varieties of rice,
including tough-to-cook brown rice, to fluffy perfection.
In addition to rice, your new Aroma®Rice Cooker is ideal for
healthy, one-pot meals for the whole family. The convenient steam tray
inserts directly over the rice, allowing you to cook moist, fresh meats and
vegetables at the same time, in the same pot. Steaming foods locks in
their natural flavor and nutrients (which are often lost with other methods
of cooking) without added oil or fat, for meals that are as nutritious and
low-calorie as they are easy.
But it doesn’t end there. Your new rice cooker is also great for
soups, stews, stocks, gumbos, jambalaya, breakfast frittatas, dips and
even desserts! Several delicious recipes are included at the back of this
manual.
This manual contains instructions for using your rice cooker and its
convenient pre-programmed digital settings, as well as all of the
accessories included. Also included are helpful measurement charts for
cooking rice and steaming. For more information on your Sensor Logic
rice cooker, or for product service, recipes and other home appliance
solutions, please visit us online at www.AromaCo.com.
Published By:
Aroma Housewares Co.
6469 Flanders Drive
San Diego, CA 92121
U.S.A.
1-800-276-6286
www.aromaco.com
© 2008 Aroma Housewares Company All rights reserved.

IMPORTANT SAFEGUARDS
Basic safety precautions should always be followed when using electrical
appliances, including the following:
1. Important:Read all instructions
carefullybeforefirstuse.
2. Donottouch hot surfaces. Use the
handles or knobs.
3. Use onlyon a level,dryandheat-
resistantsurface.
4. Toprotect againstelectrical shock,
do not immersecord, plug or the
appliancein water or any other
liquid.
5. Close supervisionis necessary when
theapplianceis used by or near
children.
6. Unplug fromoutletwhennotin use
andbeforecleaning. Allow unitto
cool before putting on or taking off
parts and before cleaning the
appliance.
7. Donotoperate any appliance with
a damaged cordor plug or after
theappliancemalfunctionsor has
been damaged in any manner.
Returntheapplianceto the nearest
authorized servicefacility for
examination, repairor adjustment.
8. The use of accessory attachments
notrecommendedby the
appliancemanufacturer may result
in fire,electrical shockor injury.
9. Donotuseoutdoors.
10. Do not let cord touchhotsurfaces
or hangovertheedgeof a counter
or table.
11. Do not placeon or neara hot
burneror in aheatedoven.
12. Do not use the appliance for other
than its intendeduse.
13. Extreme cautionmustbe used when
movingtheappliancecontaining
hotwater or other liquids.
14. Do not touch, coveror obstruct the
steam venton the top of the rice
cookeras it is extremely hot and
maycause scalding.
15. Useonlywith a 120V AC power
outlet.
16. Alwaysunplugfrom the baseof the
wall outlet. Never pull on the cord.
17. Therice cookershouldbe operated
on a separateelectrical circuitfrom
other operatingappliances. If the
electrical circuitis overloadedwith
other appliances, the appliance
maynotoperateproperly.
18. Alwaysmake sure the outside of the
inner cookingpotis dry priorto use.
If the cookingpot is returned to
cookerwhen wet, it may damage
or causetheproduct to
malfunction.
19. Useextreme caution whenopening
thelidduringor aftercooking. Hot
steam willescapeand may cause
burns.
20. Rice should not be left in the ricepot
with the keep warm function on for
more than 12 hours.
21. To preventdamageor deformation,
do not use the innerpot on a
stovetopor burner.
22. To disconnect, turn any controlto
“OFF”,then remove plug from wall
outlet.
23. To reduce the risk of electrical shock,
cook only in the removable
containerprovided.
SAVE THESE INSTRUCTIONS
1
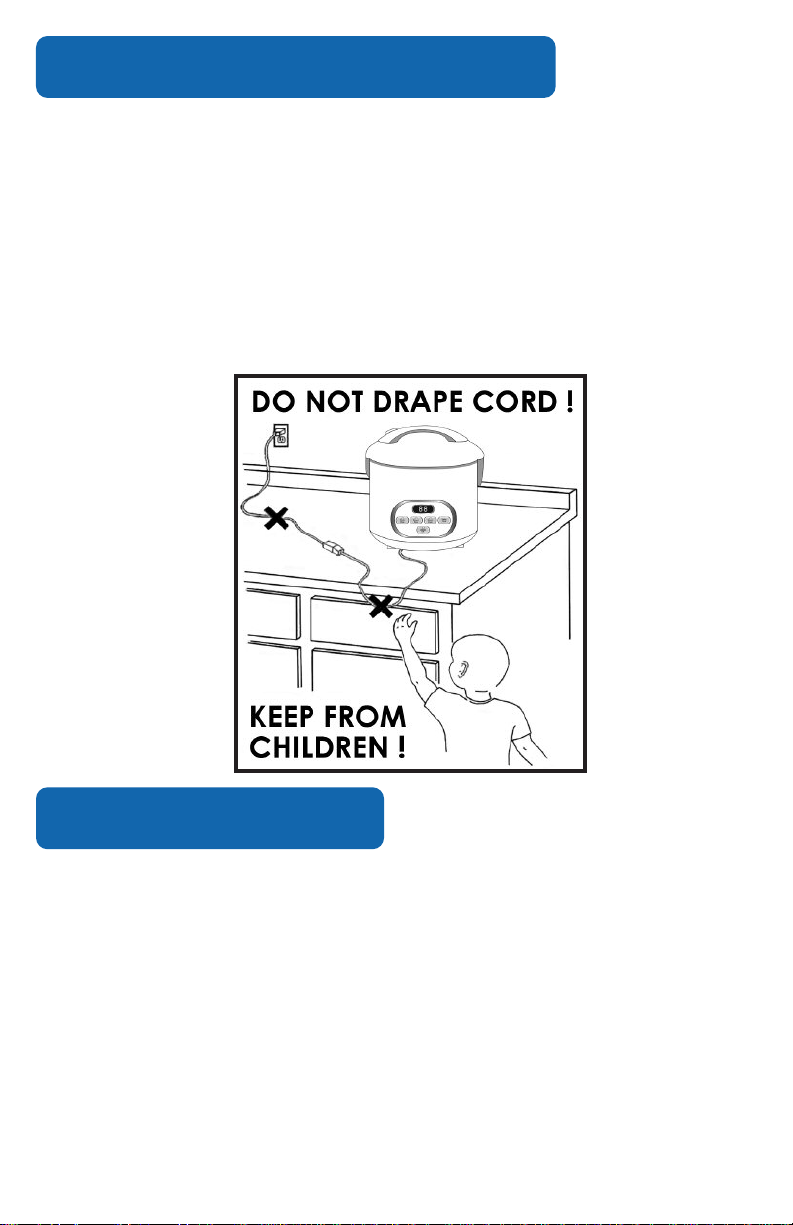
SHORT CORD INSTRUCTIONS
1. A short power-supply cord is provided to reduce the risks resulting from
becoming entangled in or tripping over a longer cord.
2. Longer extension cords are available and may be used if care is exercised in
their use.
3. If a longer extension cord is used:
a. The marked electrical rating of the extension cord should be at least as
great as the electrical rating of the appliance.
b. The longer cord should be arranged so that it will not drape over the
counter top or tabletop where it can be pulled by children or tripped over
unintentionally.
POLARIZED PLUG
This appliance has a polarized plug (one blade is wider than the other); follow
the instructions below:
To reduce the risk of electric shock, this plug is intended to fit into a polarized
outlet only one way. If the plug does not fit fully into the outlet, reverse the
plug. If it still does not fit, contact a qualified electrician. Do not attempt to
modify the plug in any way.
If the supply cord is damaged, it must be replaced by the manufacturer, its
service agent or a similarly qualified person in order to avoid a hazard.
This appliance is for household use only.
2
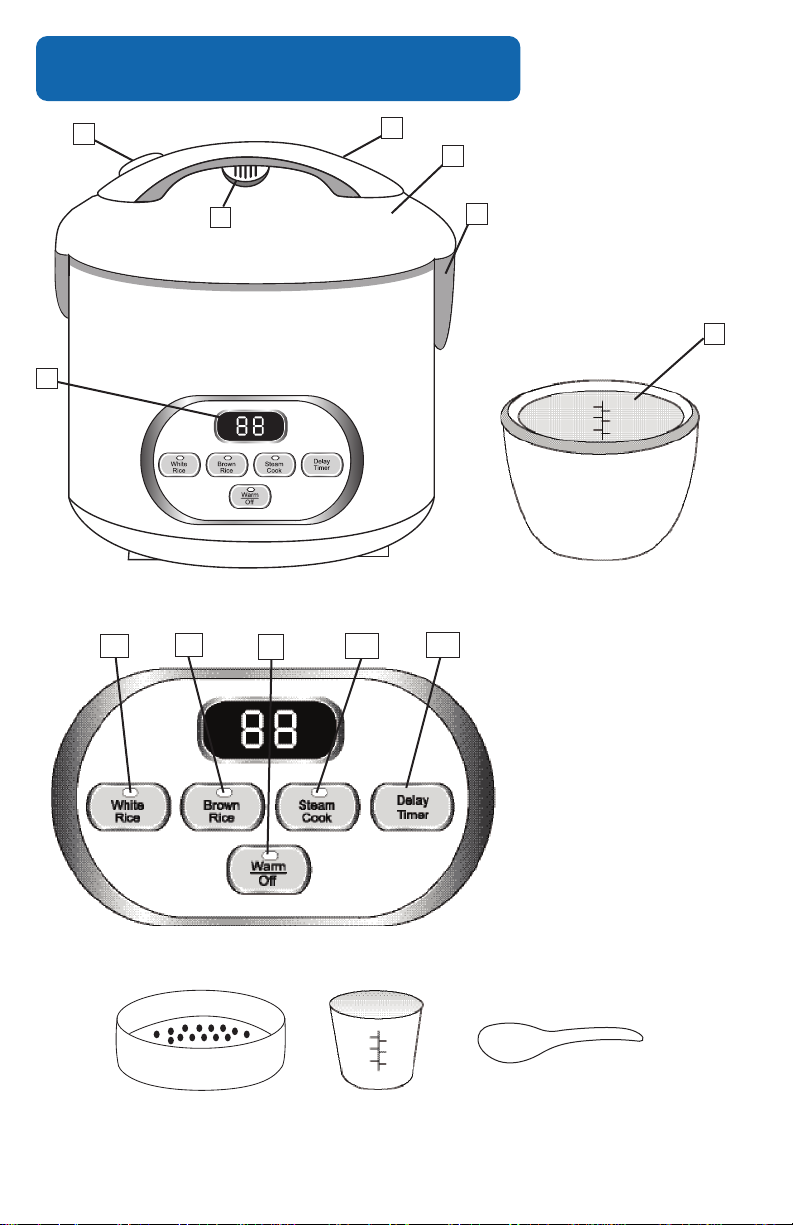
PARTS IDENTIFICATION
1
2
4
3
1. Lid Release
Button
2. Handle
3. Steam Vent
5
4. Lid
5. Condensation
Collector
6. Digital Display
7. Inner Pot
7
6
Control Panel
8
9
10
11
12
8. White Rice Button/
Indicator Light
9. Brown Rice Button/
Indicator Light
10. Warm/Off Button/
Indicator Light
11. Steam/Cook
Button/
Indicator Light
12. Delay Timer Button
Steam Tray
Measuring Cup
3
Rice Paddle

USING YOUR RICE COOKER
Before First Use:
1. Read all instructions and important safeguards.
2. Remove all packaging materials and make sure items are received in good
condition.
3. Tear up all plastic bags as they can pose a risk to children.
4. Wash lid, steam vent and accessories in warm, soapy water. Rinse and dry
thoroughly.
5. Remove inner pot from rice cooker and clean with warm, soapy water. Rinse
and dry thoroughly before returning to cooker.
6. Wipe body clean with a damp cloth.
• Do not use abrasive cleaners or scouring pads.
• Do not immerse the rice cooker base, cord or plug in water at any time.
To Cook Rice:
1. Using the measuring cup provided, measure out the desired amount of rice.
One full, level cup of uncooked rice will yield 2 cups of cooked rice. The
measuring cup provided adheres to rice industry standards (180mL) and is not
equal to one U.S. cup (240 mL).
2. Rinse rice in a separate container until the water becomes relatively clear;
drain.
3. Place rinsed rice in the inner pot.
4. Using the measuring cup provided or the water measurement lines located
inside the inner pot, add the appropriate amount of water. If you are making
brown rice, follow the rice/water measuring guide for brown rice located on
page 9 of this manual. Do not use the water measurement lines inside the inner
pot for brown rice, they are intended for white rice only.
5. For softer rice, allow rice to soak for 10-20 minutes prior to cooking.
6. Making sure that the exterior of the inner pot is clean, dry and free of debris; set
the inner pot in the rice cooker. Snap the lid closed and plug the power cord
into a wall outlet.
* To avoid loss of steam and longer cooking times, do not open the lid at
any point during the cooking process.
7. To begin cooking, press the "WHITE RICE" or "BROWN RICE" button, depending
on the type of rice to be cooked. The cooking mode indicator light will
illuminate. Once cooking is complete, the rice cooker will automatically switch
to keep warm mode.
8. After cooking, openthelid and usethe rice paddle to stirthe rice. This will release
excess moisture and give the rice a fluffier texture. Then, close the lid and allow
the unit to remain on warm mode for 5-10 minutes. This will ensure optimal rice
texture and moisture level.
9. Press the "WARM/OFF" button to turn off the rice cooker. If the “WARM/OFF”
button is not pressed, the rice cooker will remain in keep warm mode. It is not
recommended to leave rice on keep warm mode for more than 12 hours.
4
USING YOUR RICE COOKER
* It is important that the outside surface of the inner pot is completely clean and dry
before it is placed into the rice cooker. Water, food or other substances on the pot will
come into contact with the heating element and may cause damage to the product.
To Use Delay Timer:
1. Press the “DELAY TIMER” button (in 1-hour increments) until it displays the
number of hours in which you would like your rice to be finished cooking
2. Press “WHITE RICE” or “BROWN RICE” after you have made your choice.
3. Press the “WARM/OFF” button to cancel your choice and reset.
4. When cooking has completed, the rice cooker will automatically switch to
keep warm mode.
5. The rice cooker will remain on keep warm mode until it is unplugged. Be sure
to unplug the cord from the wall outlet when not in use.
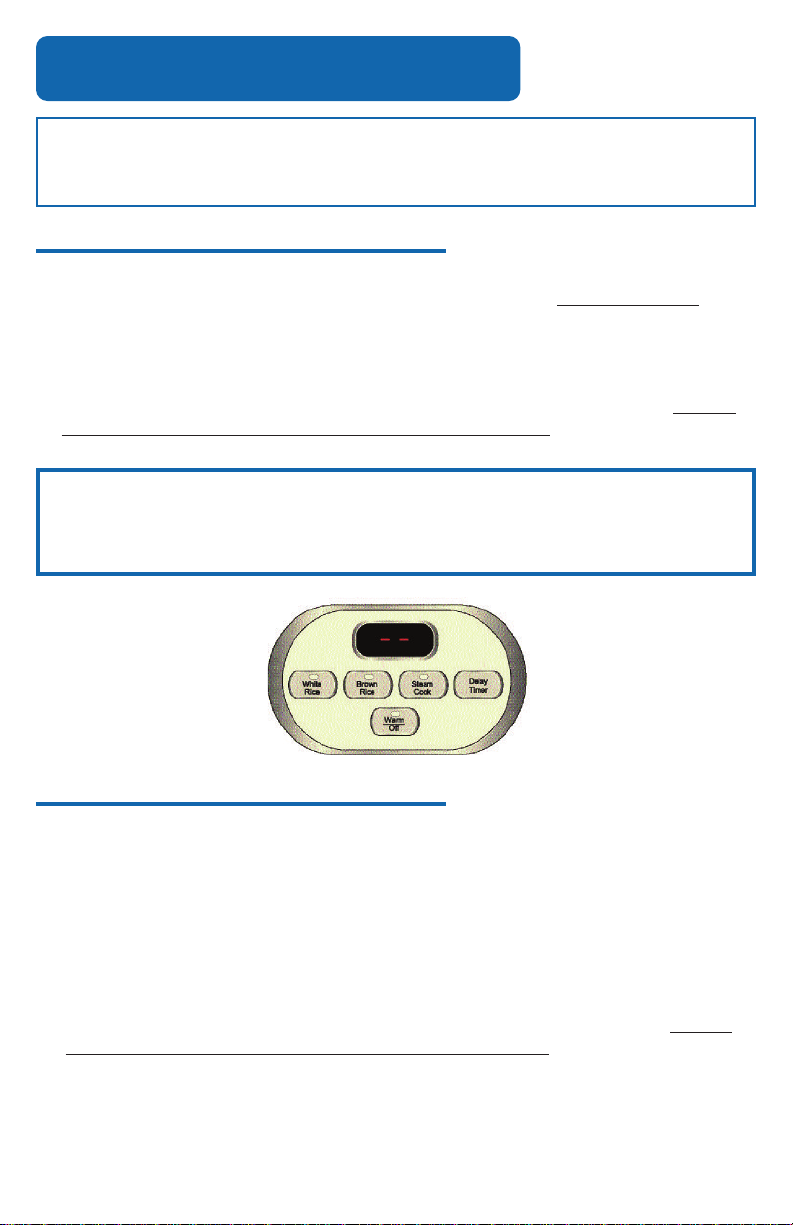
NOTE
The digital display on this unit is for the delay timer function only. When using
cooking or warming mode, the display will show two red lines (See illustration
below).
.
To Steam Food:
1. Add the desired amount of water to the inner pot. A convenient steaming
guide has been included on page 11 for vegetables and page 12 for meat.
2. Place steam tray inside rice cooker.
3. Place food on steam tray and close the lid.
4. Press the “STEAM COOK” button.
5. When steaming is complete, the rice cooker will automatically switch to keep
warm mode.
6. Remove food immediately after cooking process has completed. Leaving it in
the rice cooker may cause food to over cook.
7. The rice cooker will remain on keep warm mode until it is unplugged. Be sure
to unplug the cord from the wall outlet when not in use.
SEE PAGE 6 FOR INSTRUCTIONS ON COOKING RICE
AND STEAMING SIMULTANEOUSLY.
5

USING YOUR RICE COOKER
CAUTION:
• Open the lid only when necessary.
• If cooking pot is returned to cooker when wet it will damage this product,
causing it to malfunction.
To Steam Food And Cook Rice Simultaneously:
One of the most convenient features of this rice cooker is the ability to both cook
rice and steam food simultaneously, ideal for creating delicious all-in-one meals.
1. Place the desired amount of rice and appropriate amount of water into the
inner pot. See “To Cook Rice” on page 4 for details. Do not attempt to cook
more than 8 cups (uncooked) of rice if trying to use the steam tray
simultaneously. The steam tray will not fit.
2. Place the inner pot into the unit and begin to cook the rice.
3. Refer to the steaming guides for vegetables (page 11) or meat (page 12) for
hints and approximate steaming times. It is best to insert the food to be
steamed toward the end of the rice cooking cycle so that your meal is fresh
and warm all at once. See the cooking time chart included on Page 10 for
approximate rice cooking times.
4. Place your choice of vegetables or meat into the steam tray. Open the lid,
using caution as steam escaping will be extremely hot, and place steam tray
into the rice cooker.
5. Close the lid and allow the cooker to resume cooking.
6. Once food has been steamed for the appropriate time open the lid. Use
caution when opening lid as steam escaping will be extremely hot. Remove
the steam tray and check food to be sure it has been thoroughly cooked.
Exercise caution when removing the steam tray as well, as it will be hot.
7. If the rice has not finished cooking, close the lid of the rice cooker and allow
rice to continue to cook until done. Once the rice is finished, the rice cooker
will automatically switch to keep warm mode.
8. The rice cooker will remain on keep warm mode until it is unplugged. Be sure
to unplug the cord from the wall outlet when not in use.
NOTE
It is possible to steam at any point during the rice cooking cycle.
However, it is recommended that you steam during the end of the
cycle so that steamed food does not grow cold or become soggy
before the rice is ready.
6

USING YOUR RICE COOKER
To Cook Soups and Stews:
1. Add ingredients to inner pot.
Making sure that the exterior of the inner pot is clean, dry and free of debris;
2.
set the inner pot into the rice cooker. Close the lid and plug the power cord
into a wall outlet.
Press the “STEAM/COOK” button. The “STEAM/COOK” indicator light will
3.
illuminate.
4. Allow soup to cook until ready, stirring often.
5. When soup is finished cooking, press the “WARM/OFF” button. The cooker will
then switch to keep warm mode.
6. The rice cooker will remain in keep warm mode until it is unplugged. Be sure
to unplug the unit from the wall outlet when it is not in use.
HELPFUL HINTS
1. Rinse rice before placing it into the inner pot to remove excess bran and
starch. This will help reduce browning and sticking to the bottom of the
pot.
2. If you have experienced any sticking with the type of rice you are using,
try adding a light coating of vegetable oil or non-stick spray to the
bottom of the inner pot before adding rice.
3. As there are many different kinds of rice available (see About Rice on
page 14), rice/water measurements may vary slightly.
4. For softer rice, allow it to soak for 10-20 minutes prior to cooking.
7

HOW TO CLEAN
Always unplug unit and allow to cool completely before cleaning.
1. Remove the inner cooking pot. Wash it in warm, soapy water using a sponge
or dishcloth.
2. Rinse and dry thoroughly.
3. Repeat process with steam tray and other provided accessories.
4. Wipe the underside of the lid with a warm, damp cloth. Dry with a soft cloth.
5. Wipe the body of the rice cooker and the underside of the lid clean with a
damp cloth.
6. To clean the steam vent (clean after each use):
• Pull out the steam vent as shown in Diagram 1.
• Empty and wash the steam vent in warm, soapy
water. Rinse thoroughly.
• Dry the steam vent with a soft cloth.
• Reinsert the steam vent for next use.
• Do not use harsh abrasive cleaners, scouring pads or products that are not
considered safe to use on non-stick coatings.
• This appliance is NOT
dishwasher safe.
• Always make sure the outside of the inner pot is dry prior to use. If the inner
cooking pot is returned to the rice cooker when wet, it may damage this
product, causing it to malfunction.
dishwasher safe. Inner pot and accessories are NOT
Diagram 1
8

COOKING GUIDE
White Rice/Water Measurement Chart:
WHITE RICE
UNCOOKED
RICE
2 Cups 2-1/2 Cups Line 2 4 Cups
3 Cups 3-1/2 Cups Line 3 6 Cups
4 Cups 4-1/2 Cups Line 4 8 Cups
5 Cups 5-1/2 Cups Line 5 10 Cups
6 Cups 6-1/2 Cups Line 6 12 Cups
7 Cups 7-1/2 Cups Line 7 14 Cups
8 Cups 8-1/2 Cups Line 8 16 Cups
9 Cups 9-1/2 Cups Line 9 18 Cups
10 Cups 10-1/2 Cups Line 10 20 Cups
WATER WITH
MEASURING CUP
WHITE RICE
WATERLINE
INSIDE POT
Brown Rice/Water Measurement Chart:
BROWN RICE
UNCOOKED
RICE
2 Cups
3 Cups
4 Cups
5 Cups
6 Cups
7 Cups
8 Cups
WATER WITH MEASURING
CUP
3 Cups
4-1/4 Cups
5-1/2 Cups
6-3/4 Cups
8 Cups
9-1/4 Cups
10-1/2 Cups
APPROX COOKED RICE YIELD
APPROX COOKED
RICE YIELD
4 Cups
6 Cups
8 Cups
10 Cups
12 Cups
14 Cups
16 Cups
* Due to the extra water needed to cook brown rice, the maximum amount
of brown rice that may be cooked at one time is 8 cups.
SPECIAL INSTRUCTIONS
• Brown rice, wild rice and rice mixes vary in their make-up. Some
variations may require longer cooking times and/or additional water in
order to achieve optimum results. Refer to the individual package
instructions for cooking suggestions.
• The measuring cup included adheres to rice industry standards (180mL)
and is not equal to one U.S. cup (240mL). The chart above refers to cups
of rice/water according to the measuring cup provided.
• Do not place more than 10 cups of uncooked rice (8 cups if brown rice)
into this appliance at one time. The maximum capacity of this unit is 10
cups raw rice (8 cups if brown rice) which yields 20 cups of cooked rice
(16 cups brown rice).
9
 Loading...