

Aroma ARC-856 User Manual
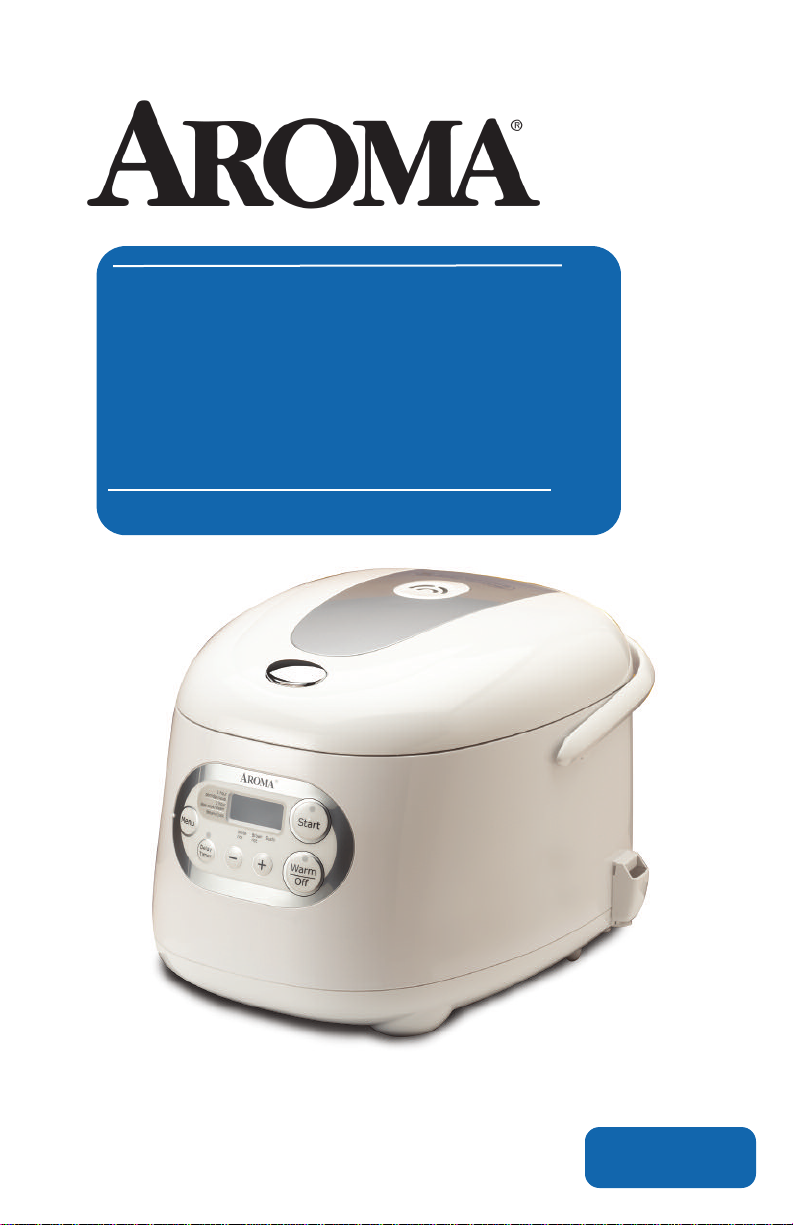
6-Cup Sensor Logic™
Rice Cooker and Food
Steamer
Instruction Manual
www.AromaCo.com
ARC-856

Congratulations on your purchase of the 6-Cup Digital Rice Cooker
and Food Steamer.
Aroma has master the art of cooking perfect, fluffy rice, so you don’t have to.
Just add rice, water and turn the rice cooker on. The machine will automatically
switch to warming mode when the rice is done. It also comes equipped with
pre-programmed functions to prepare soup, porridge and slow cooked meals in
addition to functions for white, sushi and brown rice.
The specialized brown rice function easily prepares tough-to-cook brown rice at
the touch of a button. Now you can enjoy the great taste and nutritional
benefits of brown rice, without the hassles of traditional preparation methods.
This rice cooker also comes equipped with a steam tray. Ideal for preparing
nutritious, well-balanced meals, steaming locks in food’s natural flavor, moisture
and nutrients without the use of added oils or fats. Included in this instruction
manual is a handy steaming reference to guide you through the preparation of
nearly all your favorite vegetables and meats. Steam vegetables or meat while
simultaneously cooking rice to make a complete, healthy meal with ease in your
rice cooker!
This manual contains instructions for the use of your new rice cooker as well as
some additional information about rice. For recipe suggestions or more kitchen
solution ideas, please visit us online at www.AromaCo.com.
Please read all the instructions before first use.
Published By:
Aroma Housewares Co.
6469 Flanders Drive
San Diego, CA 92121
U.S.A.
1-800-276-6286
www.aromaco.com
© 2007 Aroma Housewares Company All rights reserved.

IMPORTANT SAFEGUARDS
Basic safety precautions should always be followed when using electrical
appliances, including the following:
1. Important:Read allinstructions
carefully beforefirstuse.
2. Do nottouchhot surfaces. Use the
handles or knobs.
3. Useonly on a level,dry and heatresistant surface.
4. To protect againstelectrical shock,
do notimmerse cord, plug or the
appliance inwaterorany other
liquid.
5. Close supervision is necessary when
theappliance is usedbyornear
children.
6. Unplugfrom outletwhen notinuse
andbefore cleaning. Allowunit to
cool before puttingon or taking off
parts,and before cleaning the
appliance.
7. Do notoperate anyappliance with
a damagedcord or plug or after
theappliance malfunctions or has
been damagedinany manner.
Returnthe appliance to thenearest
authorizedservice facility for
examination, repairoradjustment.
8. Theuse of accessory attachments
notrecommended bythe
appliance manufacturermay result
in fire, electricalshockor injury.
9. Do notuse outdoors.
10. Do notlet cordtouchhot surfaces
or hang overthe edgeof a counter
or table.
11. Do notplaceonor near a hot
burnerorinaheatedoven.
12. Do notuse theappliancefor other
that its intended use.
13. Extreme caution must be used when
movingthe appliance containing
hotwaterorotherliquids.
14. Do nottouch, cover or obstruct the
steam valve on thetop of therice
cookerasitisextremely hot and
maycausescalding.
15. Useonly with a 120VACpower
outlet.
16. Alwaysunplugfromthe baseofthe
wall outlet. Never pullonthe cord.
17. Therice cookershould be operated
on a separate electricalcircuit from
other operating appliances. Ifthe
electricalcircuit is overloaded with
other appliances, the appliance
maynot operateproperly.
18. Alwaysmake sure the outside of the
inner cookingpot is drypriortouse.
If cooking pot is returned to cooker
when wet,itmay damage orcause
theproduct to malfunction.
19. Useextreme cautionwhenopening
thelid during or after cooking. Hot
steam will escape andmay cause
burns.
20. Rice should notbeleft inthe ricepot
with the keep warmfunctiononfor
more than12hours.
21. To prevent damage or deformation,
do notuse theinnerpot on a
stovetop or burner.
22. To disconnect, turnany controlto
“OFF”,then removeplug from wall
outlet.
23. To reducethe riskofelectrical shock,
cook onlyinthe provided
removable container.
SAVE THESE INSTRUCTIONS
1

SHORT CORD INSTRUCTIONS
1. A short power-supply cord is provided to reduce the risks resulting from
becoming entangled in or tripping over a longer cord.
2. Longer extension cords are available and may be used if care is exercised in
their use.
3. If a longer extension cord is used:
a. The marked electrical rating of the extension cord should be at least as
great as the electrical rating of the appliance.
b. The longer cord should be arranged so that it will not drape over the
counter top or tabletop where it can be pulled by children or tripped over
unintentionally.
DO NOT DRAPE CORD!
KEEP AWAY
FROM CHILDREN!
POLARIZED PLUG
This appliance has a polarized plug (one blade is wider than the other); follow
the instructions below:
To reduce the risk of electric shock, this plug is intended to fit into a polarized
outlet only one way. If the plug does not fit fully into the outlet, reverse the
plug. If it still does not fit, contact a qualified electrician. Do not attempt to
modify the plug in any way.
If the supply cord is damaged, it must be replaced by the manufacturer, its
service agent or a similarly qualified person in order to avoid a hazard.
This appliance is for household use only.
2
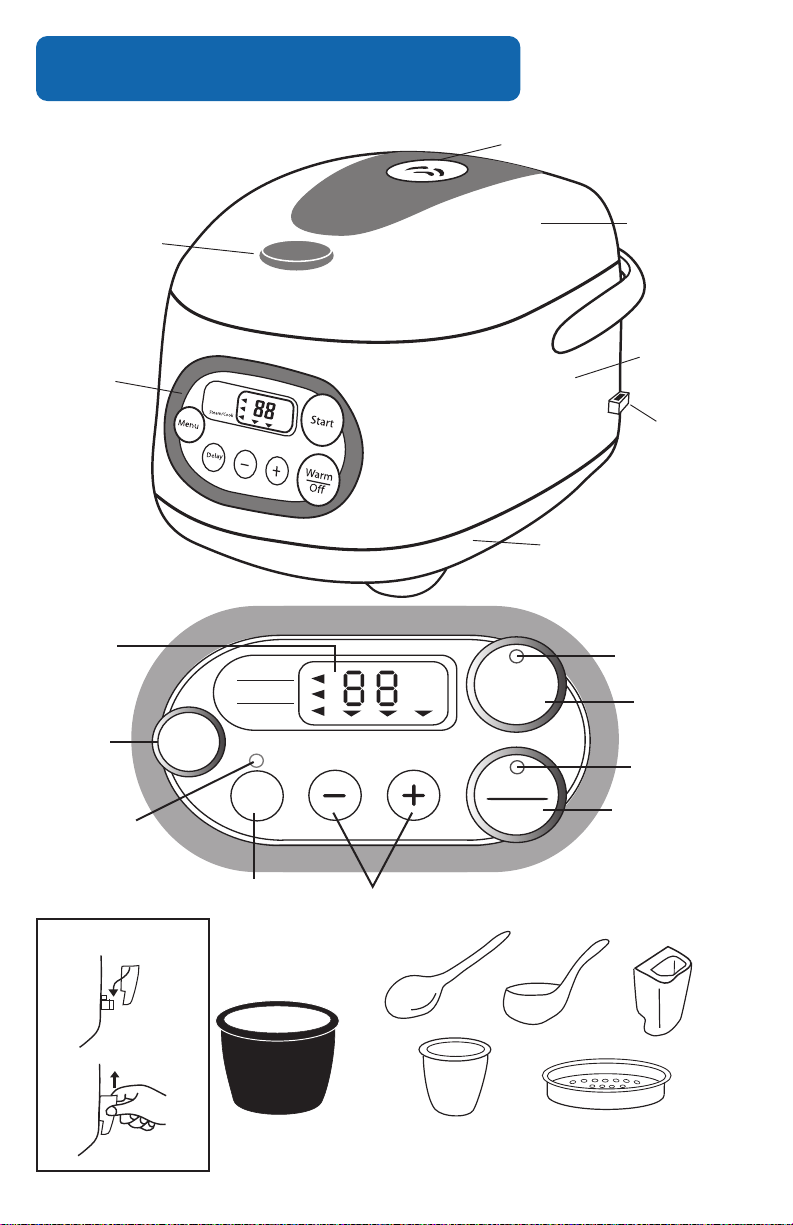
PARTS IDENTIFICATION
Cover
Cover Button
Cooker Body
Control Panel
Steam Valve
Base
Spoon Shelf
Spoon Soup Ladle Spoon Shelf
Measuring Cup Steam Tray
Menu
Start
Warm
Off
MIN
HR
1 hour
2 hour
porridge/soup
slow cook
steam/cook
Delay
Timer
White
Rice
Brown
Rice
Sushi
LCD display
"Delay Timer"
button
"Menu"
button
"Delay Timer"
indicator
"Start" indicator
"Start"
button
"Warm/Off"
indicator
"Warm/Off"
button
Timer (hrs)
Spoon Holder Diagram
Inner Pot
3
Accessories

USING YOUR RICE COOKER
Before First Use:
1. Read all instructions and important safeguards.
2. Remove all packaging materials and make sure items are received in good
condition.
3. Tear up all plastic bags as they can pose a risk to children.
4. Wash lid and accessories in warm, soapy water. Rinse and dry thoroughly.
5. Remove inner pot from rice cooker and clean with warm, soapy water. Rinse and
dry thoroughly before returning to cooker.
6. Wipe body clean with a damp cloth.
7. Wash the steam vent. See page 12 for detailed instructions.
• Do not use abrasive cleaners or scouring pads.
• Do not immerse the rice cooker base, cord or plug in water at any time.
To Cook Rice:
1. Using the measuring cup provided, measure out the desired amount of rice. One
cup refers to one full, level cup. The measuring cup provided adheres to rice
industry standards (180mL) and is not equal to one U.S. cup.
2. Rinse rice in a mesh strainer or other separate container (do not rinse rice in the
inner pot) until the water becomes relatively clear. Drain; then place rinsed rice
into the inner pot.
3. Using the measuring cup provided or the measurement lines inside the inner
pot, add the appropriate amount of water to the inner pot. A helpful rice/water
measurement guide is included on page 8. Smooth over the top of the rice with
the rice paddle so that rice surface is level to ensure even cooking.
TIP: For softer rice, allow the rice to soak for 10-20 minutes prior to beginning the
cooking cycle.
4. Place the inner pot in the rice cooker. Close the lid, making sure that it locks into
place, and plug power cord into a wall outlet. The ‘START’ light will flash.
5. Press the “MENU” button until the arrow is pointing to the desired setting.
Choose from white rice, brown rice, or sushi rice.
6. Press “START” button. The indicator light will illuminate.
7. As the cook cycle nears completion, a countdown will appear on the digital
display to count down the last 12 minutes. Once the countdown reaches 0,
the rice is finished cooking.
8. After cooking, the rice cooker will automatically switch to keep-warm mode and
the WARM indicator light will illuminate. Allow rice to stand on keep-warm mode
for 5-10 minutes without removing the lid. This will ensure that the rice is cooked
thoroughly.
9. The rice cooker will remain in warm mode until it is unplugged and the digital
display will indicate the number of hours rice has been warming. Unplug the cord
from the wall outlet when not in use.
* It is important that the outside surface of the inner pot is completely clean and dry
before it is placed into the rice cooker. Water, food, or other substances on the pot will
come into contact with the heating element and may cause damage to the product.
 Loading...