

Page 1
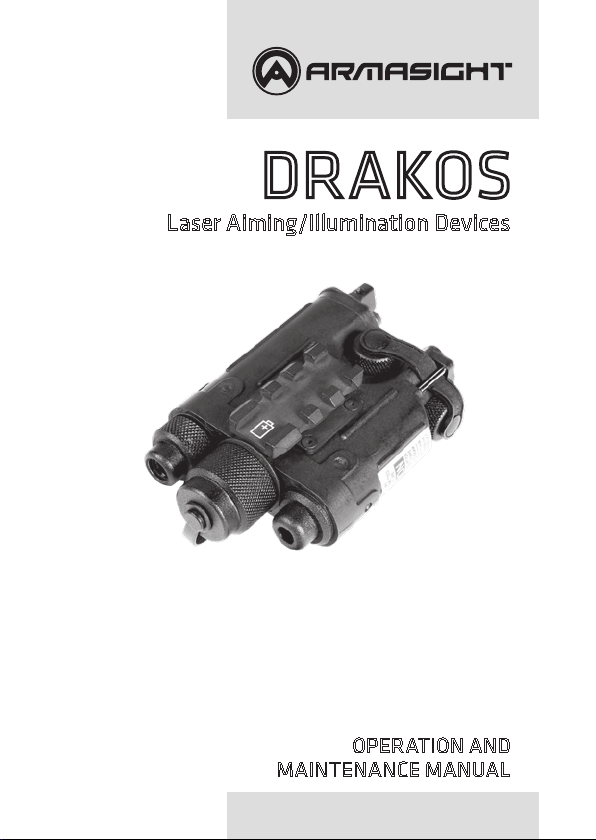
DRAKOS
Laser Aiming/Illumination Devices
DRAKOS IR LASER POINTER
DRAKOSI IR LASER POINTER & IR LED ILLUMINATOR
DRAKOSII IR LASER POINTER & VISIBLE RED LASER POINTER
OPERATION AND
MAINTENANCE MANUAL
Page 2

SAFETY SUMMARY
Before operating this product, carefully study this Operation and
Maintenance Manual.
The Drakos Laser Aiming Device (LAD) is a precision electro-optical instrument, and requires careful handling. To avoid physical danger or equipment
damage when operating the Drakos, follow all WARNINGS, CAUTIONS and
NOTES.
Below you will nd denitions of the following alerts that appear throughout this manual:
WARN ING — Identies a clear danger to the person operating the equipment.
CAUTI ON — Identies risk of damage to the equipment.
NOTE — Serves to highlight essential procedures, conditions, state-
ments, or convey important instructional data to the user.
We provide the informatio n in this manual for introductor y and instruc tional purposes
only; the conte nts may undergo fur ther changes with no comm itment by Armasight
to notif y customers of those c hanges.
Armasight assumes no res ponsibility f or any misprints or other mist akes that may be
containe d in this manual.
©2013 Armasight. All rights rese rved.
2
Page 3

WARNING:
Remember to reinstall the safet y lock screw after you have complet-•
ed operation.
The light from the equipment’s IR laser emitter(s) is invisible to the •
naked eye. However, the light can be detected by all night vision devices (NVD). To reduce the risk of detection, avoid prolonged activation of the IR laser(s).
The IR light is more detectable by other NVDs when used in smoke, •
fog and rain. Avoid prolonged activation of the IR laser(s) in these
conditions.
WARNING:
When installing the equipment on a weapon, be sure the weapon is •
CLEAR and that the SAFETY is on before proceeding.
Take note of the laser safety warning label sticker located near the •
laser emission aperture. NEVER REMOVE this sticker, which identies
laser wavelengths, laser output power sources, and the safety class
of the equipment according to the IEC 60825-1:2007 standard.
NEVER LOOK INTO THE LASER BEAM.•
DO NOT leave the Drakos activated when not in active use.•
When adjusting the equipment boresight, beware of reections •
from optical surfaces.
CAUTION:
Do not dismantle the equipment.•
Keep the equipment clean. Protect it from moisture, dramatic tem-•
perature changes, and electric shocks.
DO NOT drop or hit the equipment.•
DO NOT force the equipment controls past their stopping points.•
Do not store the equipment with the battery still installed.•
Thoroughly clean and dry each item before replacing them in the •
storage carton.
3
Page 4

NOTES:
Remember to zero your weapon prior to installing the Drakos or ad-•
justing the boresight.
To operate the Drakos’ IR channel(s), you will need to wear night vi-•
sion goggles (NVG).
4
Page 5

LIST OF CONTENTS
TITLE PAGE
Safety Summary 2
List of Contents 5
List of Figures 6
List of Tables 7
How to Use This Manual 7
Chapter 1. INTRODUCTION 8
1.1 General Information 8
1.1.1 Type of Manual 8
1.1.2 Equipment Name and Let ter Designation 8
1.1.3 Purpose of Equipment 8
1.1.4 Reporting Equipment Improvement Recommendations 9
1.2 Warranty Information and Registration 9
1.3 List of Abbreviations 12
Chapter 2. DESCRIPTION AND DATA 13
2.1 System Description 13
2.2 Specications 16
2.3 Standard Components 17
2.4 Key Features 18
Chapter 3. OPERATING INSTRUCTIONS 19
3.1 Installation and Mounting 19
3.1.1 Battery Installation 19
3.1.2 Mounting the LAD on a Picatinny/Weaver Weapon Rail 20
3.1.3 Clamping Device Adjustment 21
3.1.4 Fastening a Remote Control Unit to a Weapon 21
3.2 Controls 22
3.3 Operating Procedures 24
3.3.1 Boresight Adjustment Procedure 24
3.3.2 Operating Procedure 25
3.3.3 LAD Shut-Down 26
5
Page 6

Chapter 4. PREVENTIVE MAINTENANCE AND TROUBLESHOOTING 27
4.1 Preventive Maintenance Checks and Services 27
4.2 Operator Troubleshooting 30
4.3 Maintenance 31
4.3.1 General 31
4.3.2 Cleaning Procedures 31
4.3.3 Boresight Testing 32
4.3.4 Battery Removal and Replacement 32
APPENDIX A. Product Warranty Registration Card 34
APPENDIX B. List of Spare Parts 35
LIST OF FIGURES
FIGURE TI TLE PAGE
2-1a Laser Aiming Device. Drakos 14
2-1b Laser Aiming Device. Drakos-I 14
2-1c Laser Aiming Device. Drakos-II 14
2-1d Laser Aiming Device 15
2-2 Standard Components 17
3-1 Battery Installation 19
3-2 Positions of the Adapter in the Bat tery Cap 19
3-3 LAD Installed on a Picatinny Weapon Rail 20
3-4 Mount. Cam Lever 20
3-5 Mount. Underside View 21
3-6 Remote Control Unit 21
3-7 Controls 22
4-1 Remote Control Unit. Battery Installation 32
B-1 Spare Parts 35
6
Page 7

LIST OF TABLES
TABLE TITLE PAGE
1-1 Drakos Series. Function Denition 8
2-1 System Description 15
2-2 Mechanical Data 16
2-3 Optical Data 16
2-4 Electrical Data 17
2-5 Environmental Data 17
2-6 Standard Components 18
3-1 Controls 22
3-2 Operation Modes 23
4-1 Preventive Maintenance Checks and Services 28
4-2 Operator Troubleshooting 30
B-1 Spare Parts List 35
HOW TO USE THIS MANUAL
USAGE
You must familiarize yourself with the entire manual before operating the
equipment. Before performing any kind of maintenance on your device,
read the section on maintenance in its entirety. Follow all WARNINGS, CAUTIONS, and NOTES.
MANUAL OVERVIEW
This manual contains sections on operating and maintaining the Drakos series laser aiming devices.
Throughout this manual, the Drakos Laser Aiming Device will be referred to
as the LAD, “the device” or “the equipment”.
The Product Warranty Registration Card is located in Appendix A.
The List of Spare Parts appears in Appendix B.
7
Page 8

1
INTRODUCTION
1.1 GENERAL INFORMATION
1.1.1 TYPE OF MANUAL
Operation and Maintenance (including a List of Spare Par ts).
1.1.2 MODEL NUMBER AND EQUIPMENT NAME
Drakos Laser Aiming Device. IR Laser Pointer Class I with Quick-Release
Mount (QRM) and Wireless Remote Control.
Drakos-I Laser Aiming Device. Dual Channel: IR 850 Laser Pointer Class I &
IR LED 850 Illuminator with QRM and Wireless Remote Control.
Drakos-II Laser Aiming Device. Dual Channel: IR 850 Laser Pointer Class I &
Visible Red Laser Pointer Class II with QRM and Wireless Remote Control.
1.1.3 PURPOSE OF EQUIPMENT
The Drakos series LAD is a versatile laser aiming system intended for using on
weapons equipped with a Picatinny MIL-STD-1913 or Weaver rail.
The equipment is available with a red or infrared aiming laser, as well as in
two-channel versions that combine two aiming lasers or an aiming laser with
an IR illuminator. For a detailed list of the LAD’s functions, see Table 1-1.
TABLE 11. DRAKOS SER IES. FUNCTIO N DEFINITION
MODEL
Drakos 1 IR Laser Pointer (4 output levels)
Drakos-I 2
Drakos-II 2
NUMBER O F
LASER CHANNELS
1 - IR Laser Pointer (2 output levels)
2 - IR LED Illuminator (2 output levels)
1 - IR Laser Pointer (2 output levels)
2 - Visible Red Laser Pointer (2 output levels)
FUNCTION
8
Page 9

The adjustable laser output ensures easy and accurate aiming in a wide
range of ambient light.
The IR aiming channel is intended for use at night (under moonlight, starlight conditions, etc.), in poor visibilit y, and in changing light conditions. The
long-range IR illuminator should be used when there is little-to-no ambient
light.
Night vision goggles are required when using the IR channels.
The LAD is adjustable for elevation and windage and may be removed and
reinstalled on the weapon without readjusting the boresight.
The device is powered by a single AA or CR123A battery and equipped with
a wireless remote control.
1.1.4 REPORTING EQUIPMENT IMPROVEMENT
RECOMMENDATIONS
Recommendations from the user for improvements to the device are encouraged.
Mail your comments to:
Armasight Inc.
815 Dubuque Avenue
South San Francisco, CA 94080, USA.
Or, send an email to service@armasight.com.
1.2 WARRANTY INFORMATION AND
REGISTRATION
1.2.1 WARRANTY INFORMATION
This product is guaranteed to be free from manufacturing defects in material and workmanship under normal use for a period of two (2) years from
the date of purchase. In the event that a defect covered by the below warranty occurs during the applicable period stated above, Armasight, at its
discretion, will either repair or replace the product; such action on the part
of A rmasi ght sh all b e the f ull ex tent of Arm asigh t’s li abil ity, a nd the Custo mer’s sole and exclusive reparation. This warranty does not cover a product if
it has (a) been used in ways other than its normal and customar y manner;
(b) subjected to misuse; (c) subjected to alterations, modications or repairs
by the Customer or by any party other than Armasight without prior written
consent of Armasight; (d) special order or “close-out” merchandise or mercha ndise sold “a s-is” by eit her Ar masig ht or the A rmasi ght de aler; or (e) me r-
9
Page 10

chandise that has been discontinued by the manufacturer and either parts
or replacement units are not available due to reasons beyond the control of
Armasight. Armasight shall not be responsible for any defects or damage
that in Armasight’s view are a result from the mishandling, abuse, misuse,
improper storage or improper operation of the device, including use in
conjunction with equipment that is electrically or mechanically incompatible with, or of inferior quality to, the product, as well as failure to maintain
the environmental conditions specied by the manufacturer. CUSTOMER IS
HEREBY NOTIFIED THAT OPERATION OF THE EQUIPMENT DURING DAYLIGHT
HOURS OR UNDER ANY EXCESSIVE LIGHT CONDITIONS MAY PERMANENTLY
DAMAGE THE INTERNAL COMPONENTS OF THE UNIT AND SAID DAMAGE
WILL NOT BE COVERED UNDER THIS WARRANTY. This warranty is extended
only to the original purchaser. Any breach of this warranty shall be enforced
unless the Customer noties Armasight at the address noted below within
the applicable warranty period.
The Customer understands and agrees that except for the foregoing warranty, no other warranties written or oral, statutory, expressed or implied,
including any implied warranty of merchantability or tness for a particular
purpose, shall apply to the product. All such implied warranties are hereby
and expressly disclaimed.
1.2.2 LIMITATION OF LIABILITY
Armasight will not be liable for any claims, actions, suits, proceedings, costs,
expenses, damages or liabilities arising out of the use of this product. Operation and use of the product are the sole responsibility of the Customer.
Armasight’s sole undertaking is limited to providing the products and services outlined herein in accordance with the terms and conditions of this
Agreement. The provision of products sold and services performed by Armasight to the Customer shall not be interpreted, construed, or regarded,
ei the r ex pres sly or i mpl ied , as b ein g fo r the ben et of o r cre ati ng a ny ob lig ation toward any third party of legal entity outside Armasight and the Customer; Armasight’s obligations under this Agreement extend solely to the
Customer. Armasight’s liability hereunder for damages, regardless of the
form or action, shall not exceed the fees or other charges paid to Armasight
by the Customer or Customer’s dealer. Armasight shall not, in any event, be
liable for special, indirect, incidental, or consequential damages, including,
but not limited to, lost income, lost revenue, or lost prot, whether such
damages were foreseeable or not at the time of purchase, and whether or
not such damages arise out of a breach of warranty, a breach of agreement,
negligence, strict liability or any other theory of liability.
10
Page 11

1.2.3 PRODUCT WARRANTY REGISTRATION
In order to validate the warranty on your product, Armasight must receive a
co mple ted Pro duc t War rant y Re gis tra tio n Car d fo r eac h uni t, o r the Cus tom er can complete a warranty registration on our website, at www.armasight.
com. Please complete the included form (Appendix C) and immediately mail
it to our Service Center:
Armasight Inc.
815 Dubuque Avenue
South San Francisco, CA 94080
USA
1.2.4 OBTAINING WARRANTY SERVICE
To obtain warranty service on your unit, the End-user (Customer) must notify the Armasight service department via email. Send any requests to service@armasight.com to receive a Return Merchandise Authorization number (RMA). When returning any device, please take in the product to your
retailer, or send the product, postage paid and with a copy of your sales receipt, to Armasight Corporation’s service center at the address listed above.
All merchandise must be fully insured with the correct postage; Armasight
will not be responsible for improper postage or merchandise that becomes
lost or damaged during shipment. When sending product back, please
clearly write the RMA# on the outside of the shipping box. Please include
a letter that indicates your RMA#, the Customer’s Name, a Return Address,
reason for the return, Contact information (valid telephone numbers and/
or an e-mail address), and proof of purchase that will help us to establish
the valid start date of the warranty. Product merchandise returns that do
not have an RMA# listed may be refused, or a signicant delay in processing
may occur. Estimated Warranty service time is 10-20 business days. The Enduser/ Customer is responsible for postage to Armasight for any warranty
service. Armasight will cover return postage/ shipping after warranty repair
to the End-user/ Customer only if the product is covered by the aforementioned warranty. Armasight will return the product after warranty service
by domestic UPS Ground service and/ or domestic mail. Should any other
requested, required or international shipping methods be necessar y, the
postage/ shipping fee will be the responsibility of the End-user/ Customer.
11
Page 12

1.3 LIST OF ABBREVIATIONS
C Celsius (Centigrade)
cm centimeter
CW clockwise
CCW counterclockwise
F Fahrenheit
H Height
hr hour
Illum Illumination
kg kilogram
L Length
LAD Laser Aiming Device
m meter
max maximum
mils milliradians
min minimum
mm millimeter
MOA Minute Of Angle
MPI Mean Point of Impact
mW milliwatt
nm nanometer
NO. Number
NVD Night Vision Device
NVG Night Vision Goggles
PMCS Preventive Maintenance Checks and Services
SEQ sequence
V Vo lt
W Width
12
Page 13

2
DESCRIPTION AND DATA
2 .1. SYSTEM DESCRIPTION
The LAD is a weapon aiming system that uses a laser to indicate the point
of impact. The equipment is available in ve functionally dierent versions,
which are presented in Table 1-1 of this manual.
The LAD uses continuous diode lasers, which produce both visible and invisible radiation; both are potentially hazardous to your eyes. You will nd
the laser safety classication of your device on the warning label(s) near the
laser emission aperture(s).
The laser(s) and boresight adjustment mechanisms are mounted in a lightweight but durable, high-impact plastic body.
The LAD mount system is designed to t any Picatinny MIL-STD-1913 or
Weaver weapon rail. Manufactured from aluminum alloy, it is lightweight
and robust. An adjustable lever-cam clamping device ensures quick, easy,
and reliable mounting and disassembly.
Figure 2-1a shows a single-channel LAD (Drakos).
Figure 2-1b shows a two-channel LAD with an IR LED illuminator (Drakos- I).
Figure 2-1c shows the LAD with two aiming channels (Drakos-II).
These gures indicate the design dierences that exist between the vari-
ous LADs. To learn which individual features these devices share, see Figure
2-1d .
The ITEM NO. column in Table 2-1 indicates the number used to identify
items in Figures 2-1 (a-d).
13
Page 14

2
FIGURE 2-1a. LASER AIMING DEVICE. DRAKOS
4
3
FIGURE 2-1b. LASER AIMING DEVICE. DRAKOSI
1
2
1
1
5
14
FIGURE 2-1c. LASER AIMING DEVICE. DRAKOSII
Page 15

6 7 8
91610 12
11
1314
FIGURE 2-1d. LASER AIMING DEVICE
TABLE 21. SYSTEM DES CRIPTION
ITEM
NO.
Output Aperture of IR Aiming Laser
1
(closed with a Cap)
DESCRIPTION NOTE
15
2 Battery Cap with Adapter Drakos and Drakos-II
3 Battery Cap Drakos-I only
Output Aperture of IR LED Illuminator (closed
4
with a Cap)
Output Aperture of Visible Red Aiming Laser
5
(closed with a Cap)
Drakos-I only
Drakos-II only
6 Windage Adjustment Screw (closed with a Cap)
7 ON Button
8 Elevation Adjustment Screw (closed with a Cap)
9 Safety Lock Screw
10 Mode Select Switch
11 Picatinny/Weaver Rail
12 Plastic Body
13 Cam Lever
14 Lever Holder
15 Clamp
16 Mount
15
Page 16

2.2 SPECIFICATIONS
TABLE 22. MECH ANICAL DATA
ITEM
Elevation/Windage Adjustment
Range (MOA, min)
Elevation/Windage Adjustment
Increment (mils)
Boresight Accuracy af ter 1000
Shots Fired from a Weapon (mils)
DRAKOS DRAKOSI DRAKOSII
±90 ±90 ±90
0.5±0.05 (5cm
at a distance
of 100m)
0.5* 0. 5* 0. 5*
Boresight Accuracy af ter 100
Reinstallations of the L AD on
1.0 * 1.0 * 1. 0*
a Picatinny Rail (mils)
Overall Dimensions (mm)
110 × 67 ×4 3 104×67×43 110 ×6 7 ×4 3
Weight without Batter y (g) 19 8 210 220
Weapon Mount Type
* Reference data
Wavelength
(nm)
Output Power
(mW, max)
Operating Distance
(m)
TABLE 23. OPT ICAL DATA
ITEM
Red Dot — — 650
IR Dot 850 850 850
IR Illum — 850 —
Red Dot — — 0.9
IR Dot 0.7 0.7 0.7
IR Illum — 250 —
Red Dot — — 200
IR Dot 800 800 800
Picatinny MIL STD 1913 / Weaver Rail
Red Dot (mils) — — 0.5
Divergence
IR Dot (mils) 0.5 0.5 0.5
IR Illum (°, min) — 22 —
Aiming Dot Size
IR Illuminator Eective
Range in Total Darkness
DATA
0.5±0.05 (5cm
at a distance
of 100m)
DRAKOS DRAKOSI DR AKOSII
0.5±0.05 (5cm
at a distance of
100 m)
DATA
25mm at a distance of 50m
50mm at a distance of 100m
— 100 m —
16
Page 17

TABLE 24. E LECTRICAL DATA
ITEM
Battery
Batter y Life at 20°C/
68°F (hr, min)
DRAKOS DRAKOSI DRAKOSII
Single CR123A
Lithium (3V) or A A
Alkaline (1.5V)*
42 2 27
DATA
Single CR123A
Lithium (3V)**
Single CR123A
Lithium (3V) or A A
Alkaline (1.5V)*
* Any AA or CR123 type rechargeable batteries with voltage from 1.2V to 3.2V can
be used
** Any CR123 type rechargeable batteries with voltage 3.2V can be used
TABLE 25. EN VIRONMENTAL DATA
ITEM DATA
Operating Temperature -20 to +40°C (-4 to +104°F)
Storage Temperature - 40 to +55°C (-40 to +131°F)
Immersion
10m for 2 hr
2.3 STANDARD COMPONENTS
LAD standard components are shown in Figure 2-2 and listed in Table 2-6.
The ITEM NO. column indicates the number used to identify items in Figure
2-2.
1 2 3 4
FIGURE 2-2. STANDARD COMPONENTS
17
Page 18

TABLE 26. STANDARD COMP ONENTS
ITEM
NO.
Laser Aiming Device
A laser aiming system equipped with a Picatinny quick-detach
1
mount.
CR123A Lithium Bat tery
2
A single, CR123A (3V) batter y used to power the LAD.
Remote Control Unit
Wireless control used to operate the LAD in short-time activation
3
mode. Ensures quick and silent activation/deactivation of the
device. Delivered with CR2032 (3 V) battery installed.
Operation and Maintenance Manual
Provides safety information, equipment description, mounting
4
procedures, operating instructions, and preventive maintenance
checks and services (including a List of Spare Parts).
Carton
Packing box used for storage/transportation of the L AD and its
accessories.
2.4 KEY FEATURES
Fast and easy target acquisition
–
No need to close one eye
–
Operational versatility
–
Lightweight but durable high-impact plastic body
–
Adjustable laser output
–
IR LED illuminator (only in Drakos-I version)
–
Clicking mechanisms for boresight adjustment
–
Wireless remote control
–
Powered by a single AA or CR123A battery
–
Fits any Picatinny MIL-STD-1913 and Weaver rail with an adjustable
–
quick-detach mount
Waterproof
DESCRIPTION QTY
–
1
1
1
1
1
18
Page 19

3
OPERATING INSTRUCTIONS
3.1. INSTALLATION AND MOUNTING
3.1.1 BATTERY INSTALLATION
CAUTION:
Verify that the device is OFF before installing a battery.
Install the battery as follows (refer to Figure 3-1):
1. Unscrew the battery cap (A).
2. Check the position of the adapter (B) (only Drakos and Drakos-II). See
Figure 3-2 for the correct positioning of the threaded adapter, which
changes depending on the battery being installed. If necessary, change
the adapter position in the cap.
3. Install the battery (C) into the battery compar tment (D). Align the battery
with the battery symbols (E).
4. Replace the battery cap (A).
E
D
C
B
A
BATTERY CAP
ADAPTER
FIGURE 3-1.
BATTERY INSTALL ATION
FIGURE 3-2.
POSITIONS OF THE ADAPTER
IN THE BATTERY CAP
19
Page 20

3.1.2 MOUNTING THE LAD ON A PICATINNY/WEAVER
WEAPON RAIL
NOTE:
Remember to zero your weapon prior to installing the LAD or adjusting the boresight.
WARNING:
When installing the equipment on a weapon, be sure the weapon is
CLEAR and that the SAFETY is on before proceeding.
Figure 3-3 shows a single-channel LAD installed on a Picatinny weapon rail.
FIGURE 3-3. LAD INSTALLED ON A PICATINNY WEAPON RAIL
Install the LAD on a Picatinny/ Weaver rail as follows (refer to Figure 3- 4):
1. Unlock the LAD mount’s clamping device by pushing down on the dog
(A) and turning the cam lever (B) towards the arrow (backwards).
2. Install the LAD on the Picatinny/ Weaver rail so that the stop (B, see Figure
3-5) slides into one of the rail’s transverse slots.
3. Ax the LAD to the rail by locking the clamping device.
4. Verify that the clamping device is rmly holding the LAD. If necessary,
adjust the clamping device as detailed in Part 3.1.3: Clamping Device Adjustment.
20
A B
FIGURE 3-4. MOUNT. CAM LEVER
Page 21

B
A
FIGURE 3-5. MOUNT. UNDERSIDE VIEW
C
3.1.3 CLAMPING DEVICE ADJUSTMENT
Adjust the mount clamping device as follows (refer to Figure 3-5):
1. Unlock the clamping device and remove the LAD from the weapon.
2. To tighten/loosen the clamping device, push the cam (C) towards the arrow (which will cause the nut (A) to slide out of the hole) and turn the
nut (A) CW/CCW, respectively, in one-two increments (see note below).
Much like when the cam (C) is released, the backward-moving springs
will cause the nut (A) to slide back into the hole.
NOTE:
The eight-sided nut of the clamping device must be turned in increments equal to the turn angle of 360o/8 in order to properly t into
the hole.
3. Verify that the adjusted clamping device is rmly holding the LAD.
3.1.4 FASTENING A REMOTE CONTROL UNIT TO A WEAPON
Using Velcro tape, fasten the remote control unit (Figure 3-6) to your weapon in an easily accessible place (e.g., on the front of the rie stock).
FIGURE 3-6. REMOTE CONTROL UNIT
21
Page 22

3.2. CONTROLS
The LAD controls are shown in Figure 3-7 and dened in Table 3-1. The ITEM
NO. column indicates the number used to identify items in Figure 3-7.
2 3
1
FIGURE 3-7. CONTROLS
TABLE 31. CONTROLS
ITEM
CONTROL FUNCTION
NO.
Activates the laser(s) after the required operation
1 ON Button
mode has been selec ted with the switch.
When the LAD is activated, this activates standby
mode.
Mode Select
2
Switch
Switches between the four dened operation modes:
“Low 1”, “Low 2”, “Hi 1”, and “Hi 2”.
For operating parameters, see Table 3-2.
When turned OFF, deactivates the LAD as shown in
Figure 3-7.
Prevents the mode select switch from being inad-
vertently turned to high-power positions (“Hi 1” and
Safety Lock
Screw
3
(with redcolored head)
“Hi 2”).
NOTE:
The both “Hi 1” and “Hi 2” positions can only be
entered when the switch is unlocked. You will
need to unscrew the lock screw to operate with
high-power levels.
4
5
22
Page 23

TABLE 31. CONTINU ED
ITEM
CONTROL FUNCTION
NO.
Elevation
4
Adjustment
Screws
Windage
5
Adjustment
Screws
Remote Control
Button
MODEL
DRAKOS
DRAKOSI
DRAKOSII
OFF
Turned o
Turned o
Turned o
Adjust the laser(s) boresight.
NOTE:
When turning the screws, adjustment mechanisms
click in increments corresponding to the minimum
boresight correction value 0.5 mils (5cm at a
distance of 100m).
The circular scales are indexed in 0.5 mils adjustment
increments.
Elevation and windage adjustment ranges are covered in approximately 4 turns of the screws.
NOTE:
If using one of the two-channel devices, remember
that the screws adjust the boresight of both lasers
concurrently.
Activates/deactivates the laser(s) in standby when
held down/released.
TABLE 32. OPER ATION MO DES
OPERATING PARAMETERS
LOWPOW ER OPERATION H IGHPOWE R OPERATION
“LOW 1” “ LOW 2” “HI 1” “H I 2”
IR Dot
Level 1
0.1 mW
IR Dot
Level 1
0.2 mW
IR Dot
Level 1
0.1 mW
IR Dot
Level 2
0.2 mW
IR Dot
Level 1
0.2 mW &
IR Illum
Level 1
125 mW
Red Dot
Level 1
0.3 mW
IR Dot
Level 3
0.3 mW
IR Dot
Level 2
0.9 mW
IR Dot
Level 2
0.6 mW
IR Dot
Level 4
0.7 mW
IR Dot
Level 2
0.9 mW &
IR Illum
Level 2
250 mW
Red Dot
Level 2
0.9 mW
23
Page 24

3.3. OPERATING PROCEDURES
NOTE:
When operating the LAD’s IR channel(s), you must wear night vision
goggles.
CAUTION:
DO NOT force the equipment controls past their stopping points.
3.3.1 BORESIGHT ADJUSTMENT PROCEDURE
NOTE:
Bef ore adju sting th e LAD bo resight for the rst tim e, re ap proxima tely 10 shots from the weapon with the device installed, in order to stabilize the adjustment mechanisms under applied shocks.
NOTE:
When adjusting the equipment boresight, beware of reections from
optical surfaces.
To adjust the boresight:
1. Locate a target at the re adjustment range (100m).
2. Take aim at the center of the target using the weapon’s iron sight; secure
the weapon in the aiming rest.
3. Unscrew the caps from the adjustment screws.
4. Remove the cap from the output aperture of the aiming laser.
5. Turn the switch to the required position, and activate the LAD (push
ON).
6. Using a screwdriver
To shift the aiming dot to the right, turn the windage adjustment screw
CCW. To shift it to the left, turn the screw CW.
To shift the aiming dot down, turn the elevation adjustment screw
CCW. To shift it up, turn the screw CW.
7. Fire a series of shots.
24
Page 25

8. Work out the values of the elevation and windage corrections required
to compensate for the measured deviation of the mean point of impact
(MPI) from the center of the target. The minimum correction value of 0.5
mils (5 cm at a distance of 100 m) corresponds to one click of the adjustment mechanisms.
9. Adjust the equipment boresight by turning the adjustment screws and
counting out a denite number of clicks (or reading the scales).
NOTE:
To shift the MPI to the right, turn the windage adjustment screw CW.
To shift the MPI to the left, turn the screw CCW.
To shift the MPI down, turn the elevation adjustment screw CW. To
shift the MPI up, turn the screw CCW.
10. To check the equipment boresight, use the laser dot to take aim at the
center of the target and re a series of shots.
11. After completing the boresight adjustment procedure, turn the device
OFF and re place th e cap(s) on the l aser out put ape rture(s) and the a djustment screws.
3.3.2 OPERATING PROCEDURE
To operate the LAD:
1. If you are operating the device using high-power levels, use a 2mm hex
key to unscrew the safety lock.
2. Remove the cap(s) from the laser output aper ture(s).
3. Turn the switch to the required position.
4. Activate the LAD (push ON).
5. To go to standby, push ON a second time. To activate/deactivate the LAD
while in standby mode, hold down/release the remote control button.
6. To align the barrel of the weapon, center the aiming dot on the desired
target. To allow for the bullet travel (i.e. bullet drop, windage, distance
between the direction of the beam and the axis of the barrel and the target mobility), use the clicking adjustment mechanisms.
WARNING:
DO NOT leave the LAD activated when it ’s not in use.
25
Page 26

WARNING:
The IR light from the equipment’s IR laser(s) is invisible to the naked
eye. However, the light can be detected by all night vision devices.
To reduce the risk of detection, avoid prolonged activation of the IR
laser(s).
NOTE:
To switch the ac tivated equipment to another operation mode, turn
the switch to the desired position and reactivate the laser(s) by pushing ON.
3.3.3 LAD SHUTDOWN
To shut down the LAD:
1. Turn the switch to OFF.
2. Replace the cap(s) on the laser output aper ture(s).
3. Remove the equipment from the weapon rail.
4. Reinstall the safety lock screw (if removed).
WARNING:
Remember to reinstall the safety lock screw after you have completed
any high-output operation.
5. Remove the battery.
CAUTION:
Do not store the equipment with the battery still installed.
6. Store the LAD and all accessories in the carton.
26
Page 27

4
PREVENTIVE
MAINTENANCE AND
TROUBLESHOOTING
4.1. PREVENTIVE MAINTENANCE CHECKS
AND SERVICES PMCS
Table 4-1: Preventive Maintenance Checks and Services has been provided
so that you can keep your equipment operable and in good condition.
Perform all functional tests in the order listed in Table 4-1.
Operating Procedures are detailed in Chapter 3.
Always obser ve any WARNINGS and CAUTIONS that appear in the table.
Explanation of Table Entries:
— SEQ NO. column. Sequence numbers are for reference and appear in the
order required to perform checks and ser vices.
— LOCATION/ ITEM TO INSPECTION/ CHECK/ SERVICE column. Indicates
the location and the item to be checked or serviced.
— PROCEDURE column. Details the checking/ servicing procedure.
— NOT FULLY MISSION CAPABLE IF… column. Indicates what faults will
prevent your equipment from operating successfully.
27
Page 28

TABLE 41. PREVE NTIVE MAINTEN ANCE CHECKS AND S ERVICES
LOCATION/
SEQ
NO.
INSPEC T/ CHECK/
ITEM TO
SERVICE
PROCEDURE
BEFORE OPERATION CHECKS
Inventory items by comparing
1 Completeness
them with the data specied in this
manual.
Inspect for dirt, cracks, or damage.
Scratches and gouges are OK if
2 Body
operation is not aected. Inspect
for missing parts (safety lock screw,
caps, etc.).
Clean as required.
Laser Aperture
3
Cap(s)
Inspect for dirt or damage. Inspect
for retainer breaks.
Clean as required.
Verify that the batter y adapter
and O-ring are present. Inspect for
Batter y Com-
4
partment/ Cap
with Adapter
corrosion, moisture, corroded or
defective contacts. Inspect for cap
damage or retaining loop breaks.
Inspect O-ring for cuts or damage.
Clean as required.
Adjustment
5
Screw Caps
Mode Select
6
Switch
Laser Aperture
7
Protective
Glass(es)
Remote Control
8
Unit
Inspect for dirt, damage. Inspect for
retaining strap break s.
Clean as required.
Check for operation (without battery).
Inspect for cleanliness, scratches,
chips, or cracks.
Clean as required.
Check for damage.
Check Velcro tape for wear.
Inspect for dirt, damage, corrosion,
9 Mount
or missing parts. Check for proper
operation.
Clean as required.
NOT FULLY MISSI ON
CAPABLE IF...
Items are missing.
Cracked or damaged. Missing
parts.
Cap is damaged.
Retainer is broken.
Contacts are damaged or corroded.
Retaining loop
is broken. Cap,
O-ring or adapter
is damaged or
missing.
Caps are damaged.
Retaining strap is
broken.
Switch is inoperative.
Scratches, chips or
cracks are present.
Damaged. Unit or
tape is missing.
Mount is damaged.
Missing par ts.
Clamping device is
inoperative.
28
Page 29

TABLE 41. CONTINUED
SEQ
NO.
INSPEC T/ CHECK/
LOCATION/
ITEM TO
SERVICE
PROCEDURE
NOT FULLY MISSI ON
CAPABLE IF...
OPERATIONAL CHECKS
WARN INGS:
NEVER LOOK INTO THE LASER BEAM.
When per forming operational checks, beware of reections from optical
surfaces.
NOTE:
You must wear NVG when checking IR channel(s).
Install the battery. Turn the switch
to the position corresponding
to the minimum laser output of
the aiming channel. Push the ON
10 Aiming Laser(s)
button down to activate the laser.
Direct the radiated beam at a wall
No aiming dot.
from a distance of about 5m. A red
(infrared) dot should appear on the
wall. To see an infrared dot, look
through the NVG.
Push the ON but ton down again to
Remote
11
Control Unit
actuate standby mode. Push the
remote control button down to activate the laser. A red (infrared) dot
No aiming dot.
should appear on the wall.
Turn the switch to the position
corresponding to the minimum
12 IR Illuminator
laser output of the IR illuminator.
Activate the laser. Direct the radiated beam at a wall from a distance
No light appears
on the wall.
of about 5m. Look through the NVG.
A spot of light should appear on
the wall.
13 Boresight
Perform boresight testing as per
Part 4.3.3.
Adjustment
mechanisms are
inoperative.
29
Page 30

TABLE 41. CONTINUED
SEQ
NO.
INSPEC T/ CHECK/
LOCATION/
ITEM TO
SERVICE
PROCEDURE
NOT FULLY MISSI ON
CAPABLE IF...
AFTER CHECKING PROCEDURES
Turn the switch to OFF.
Replace the cap(s) on the laser
output aperture(s).
14
Remove the battery.
Return the equipment and all accessories to the storage/carrying
carton.
4.2. OPERATOR TROUBLESHOOTING
The purpose of troubleshooting is to identify the most commonly occurring
equipment malfunctions, their probable causes, and the corrective actions
required to x them.
Table 4-2 lists common malfunctions that may occur during the operation
or maintenance of the LAD. Per form the tests, inspections, and corrective
actions in the order listed in the table.
This table cannot list all of the malfunctions that may occur with your LAD,
or a ll of th e test s and corr ecti ve act ions that may b e nece ssar y. If yo u expe rience an equipment malfunction that is not listed, or is not xed by the corrective actions listed in the table, please contact the
TABLE 42. OPE RATOR TROUBLESH OOTING
MALFUNCTION
PROBABLE C AUSE/ TEST/
INSPECTION
Batter y is dead, missing or
improperly installed.
LAD fails to activate
(no aiming dot, no IR
illumination).
Batter y contact surfaces or
contact springs are dir ty or
corroded.
Laser diode is faulty.
Boresight adjustment
screws do not adjust for
aiming dot position.
Adjustment mechanisms
are faulty.
Customer Support.
CORREC TIVE ACTION
Replace battery or
install it correctly.
Clean as per Part 4.3. 2.
Please contact the
Customer Support.
Please contact the
Customer Support.
30
Page 31

TABLE 42. CONT INUED
MALFUNCTION
Remote control does
not work.
PROBABLE C AUSE/ TEST/
INSPECTION
Batter y is missing or improperly installed.
CORREC TIVE ACTION
Insert battery or install
correctly.
Batter y is dead. Replace the battery.
Batter y surfaces or contacts
are dirty or corroded.
Clean the contact
surfaces with a pencil
eraser and/or alcohol
and cotton swabs.
Batter y adapter dicult
to remove (Drakos and
Drakos-II only).
Hindered rotation of
the battery cap.
Remote control unit is
damaged.
Inspect for damaged battery adapter and battery
cap.
Dirty cap thread. Clean the thread.
Damaged cap thread. Please contact the
Please contact Cus-
tomer Support.
Please contact the
Customer Support.
Customer Support.
4.3. MAINTENANCE
4.3.1 GENERAL
The LAD operator maintenance consists of operational tests, inspections
for the equipment serviceability, cleaning and mounting procedures, corrective actions (troubleshooting and replacement of a limited number of
parts). Maintenance instructions covered elsewhere in this manual (PMCS,
troubleshooting, etc.) are not repeated in this section.
CAUTION:
The LAD is a precision electro-optical instrument and must be handled
carefully at all times to prevent damage.
CAUTION:
DO NOT dismantle the equipment.
31
Page 32

4.3.2 CLEANING PROCEDURES
Clean the LAD as follows:
1. Gently brush o any dirt from the equipment using a clean, soft cloth.
2. Moisten the cloth with fresh water and gently wipe down the external
surfaces (except for glass surfaces).
3. Dry any wet sur faces (except for glass surfaces) with another dry, clean,
soft cloth.
4. Using a lens brush, carefully remove all loose dirt from the surface(s) of
the laser aperture protective glass(es).
5. Slightly dampen a cotton swab with ethanol and gently, slowly wipe
down the glass surface(s). Clean the glass surface(s) using circular movements. Change the cotton swab after each circular stroke. Repeat until
the glass surfaces are clean.
6. Clean the battery contact surfaces and contacts in the battery compartment with a pencil eraser and/or alcohol-dampened cotton swabs.
CAUTION:
Thoroughly dry each item before placing them into the storage carton.
4.3.3 BORESIGHT TESTING
Perform boresight testing:
— When the LAD is mounted to a weapon for the rst time;
— After repair of the LAD/weapon;
— As the need arises (in case of systematic inaccuracy or missing the tar-
get).
Test the LAD boresight as per Part 3.3.1.
4.3.4 BATTERY REMOVAL AND REPLACEMENT
Refer to Part 3.1.1 for the LAD battery installation procedure.
Replace the remote control battery as follows:
1. Using a screwdriver, unscrew the four screws (A, Figure 4 -1) that ax the
cover to the bottom of the unit. Remove the cover.
2. Replace the battery with new one (CR2032, 3V). Inser t the batter y in
alignment with the positive (+)/negative (-) symbols.
3. Replace the cover and retighten the screws (A).
32
Page 33

A
FIGURE 4-1. REMOTE CONTROL UNIT. BATTERY INSTALLATION
33
Page 34

APPENDIX A
ARMASIGHT PRODUCT WARRANTY REGISTRATION CARD
PRODUCT INFORMATION
CUSTOMER INFORMATION
Product Name
Purchase Date
Name
Purchased Form
Product Serial #
Address
City
Day Phone #
E-mail address
Country Zip
Home Phone #
Customer Signature Required
PRODUCT WARRANTY REGISTRATION CARD
In order to validate the warranty on your product, Armasight must receive
a completed Product Warranty Registration Card for each unit, or the user
must complete a warranty registration form, which can be found on our
website at www.armasight.com. Please complete the included form and immediately mail it to our Ser vice Center:
Armasight Inc.
815 Dubuque Avenue
South San Francisco, CA 94080
USA
34
Page 35

APPENDIX B
LIST OF SPARE PARTS
The parts authorized in the below list of spare parts, common to all versions
of the LAD, are required for operator maintenance. This list includes parts
that must be removed in order to replace any authorized parts.
The ITEM NO. column in Table B-1 indicates the number used to identify
items in Figure B-1.
The PART NO. column indicates the primary number used by the manufacturer to identify an item.
11
6
5
8
10
3
1
3
4
2
FIGURE B-1. SPARE PARTS
TABLE B1. SPARE PARTS LIST
ITEM NO. DESCRIPTION PART NO.
9
7
5
1 Battery Cap OH-2.01.35.000
2 Battery Adapter O H-2.01.35.002
3 Laser Output Aperture Cap PL-03.01.00.015
4 Retaining Loop MH-01.01.05.003
5 Adjustment Screw Cap PL-03.01.00.006
6 Safety Lock Screw DIN912 M3x4
7 Retaining Strap PL-03.01.00.014
8 Switch PL-03.01.00.017
9 ON Button Pusher PL-03.01.50.002
10 ON Button PL-03.01.00.013
11 Picatinny/Weaver Rail PL-03.01.00.016
V42 0140 42 8
35
Page 36

Armasight Inc.
815 Dubuque Avenue
South San Francisco, CA 94080
Phone: (888)959-2259
Fax: (888)959-2260
Intl Phone/Fax: (650)492-7755
info@armasight.com
www.armasight.com
 Loading...