

Page 1
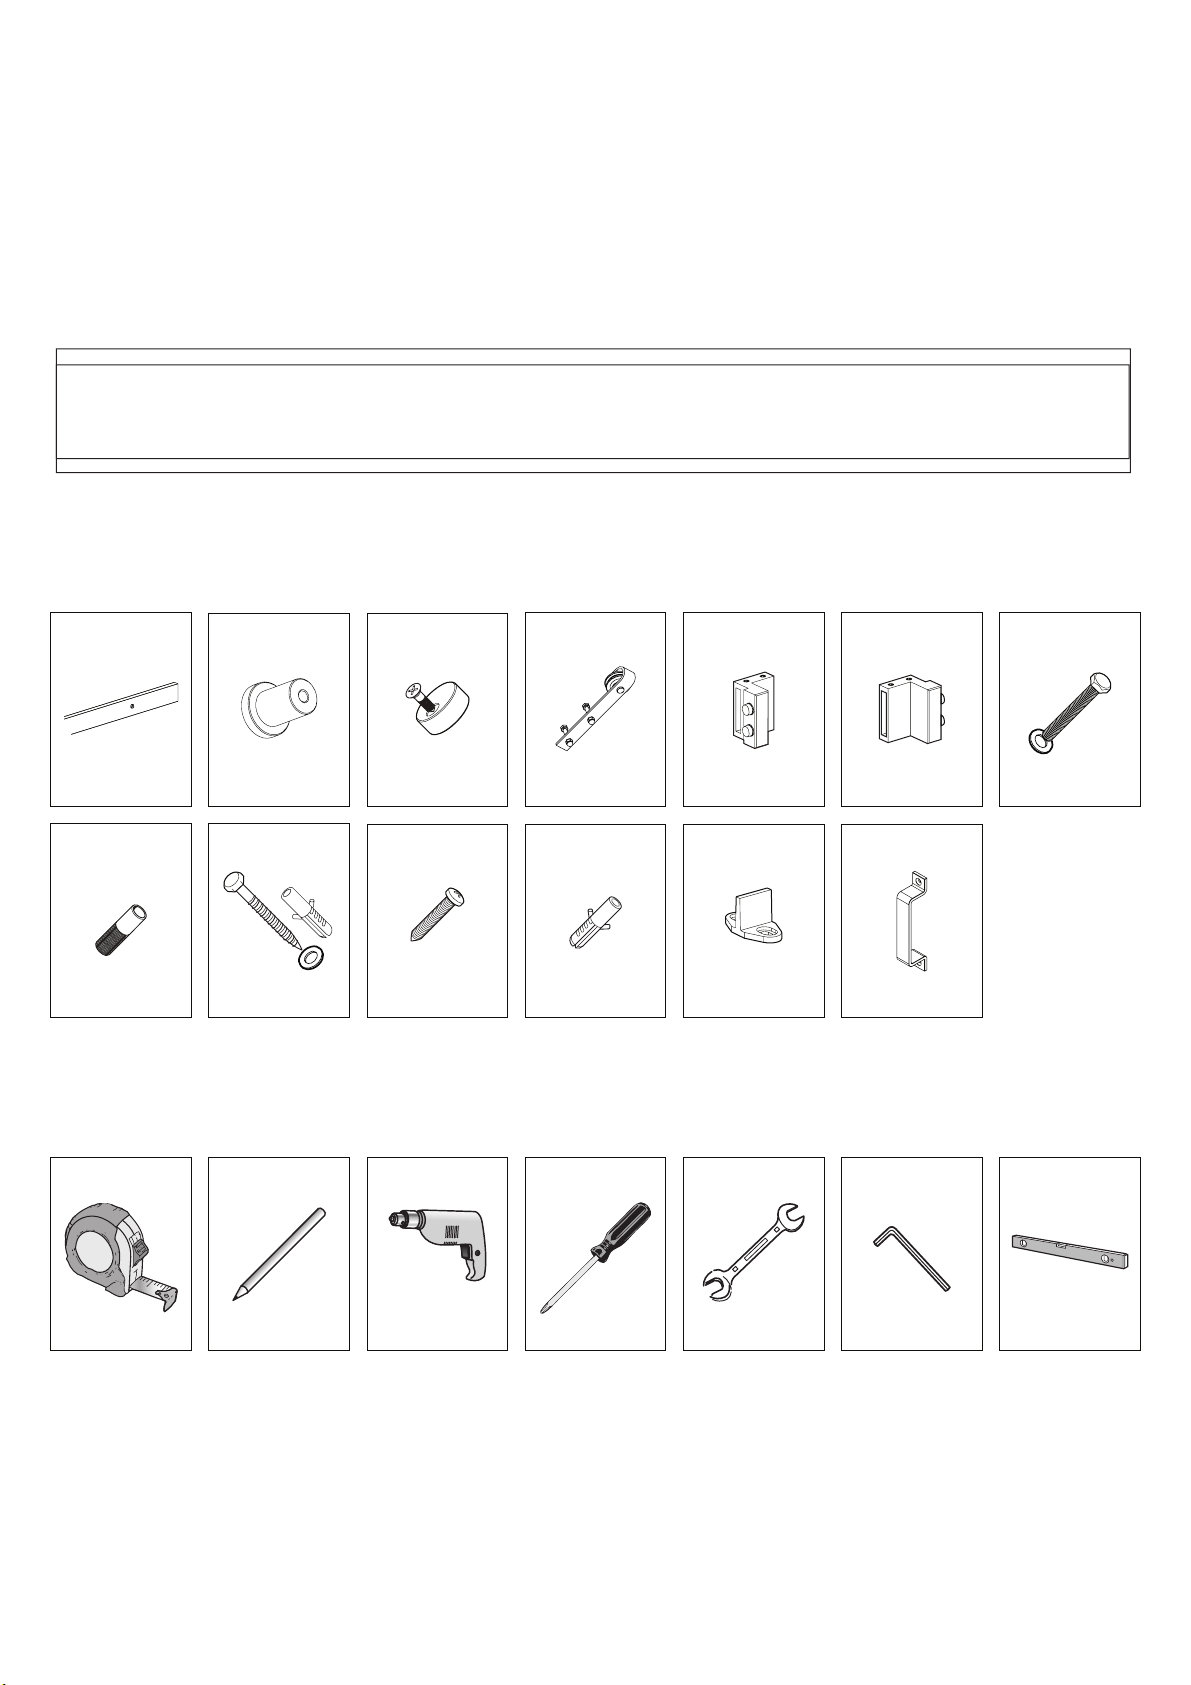
Kit Components
Tools Required
x1 Track x2 Str aight St rap x5 5/16 (8mm x 60 mm)
Carri age Bol t
x2 #8 (4.2mm x 25mm)
Floor Screws
Tape Measure Pencil Cordless Drill Phillips Screwdriver Wrench Allen Key Level
x5 Wall Spacer x1 Right Stopper
x5 5/16 (8mm x25mm)
Anchor
x2 1/4 (6mm) Floor
Anchor
x2 An ti-jump Bl ock x1 Left Stopper
x5 5/16 (8mm x 90mm)
Wall Screw
x1 Internal Floor-
Mounted Door Guide
x1 Door Handle
(Pre-mounted
to Carriage Bolt)
BARN DOOR HARDWARE INSTRUCTIONS
Page 2
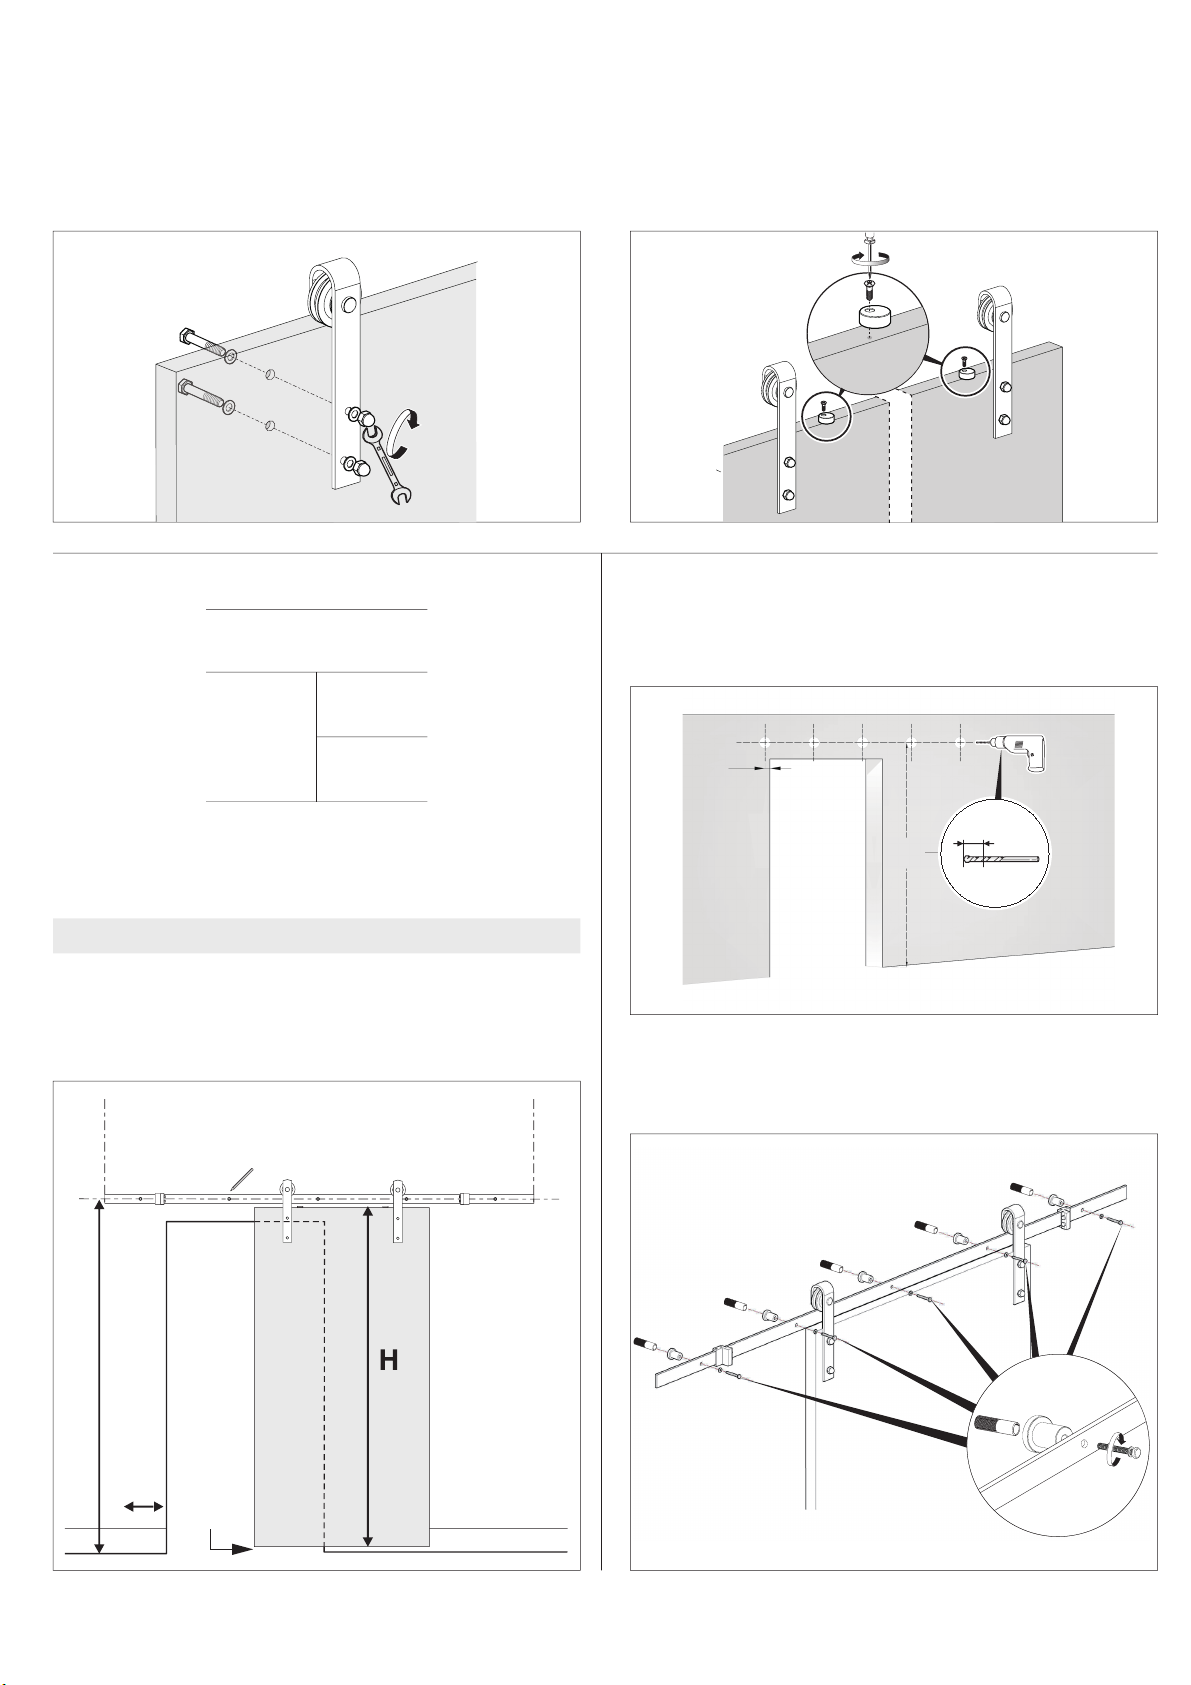
Door Preparation - Strap and Anti-jump block
Your Barn Door arrives with holes for the hanging straps pre-drilled.
Use the included carriage bolts to attach the straps to the door.
Next, position each anti-jump bumper at least 2" in from the edge of the straps.
Tighten slightly to secure in place
Step 2. CONCRETE Wall Preparation
1
3
2
4
Use your guide marks to position the track in place, ensuring that it is level.
Mark the mounting holes on the track using a pencil. Then, pre-drill 5/16"
holes into the concrete according to your marks.
1"
Step1. CONCRETE Wall Preparation
FOR DRYWALL INSTALLATION – PLEASE PROCEED TO STEP 4.
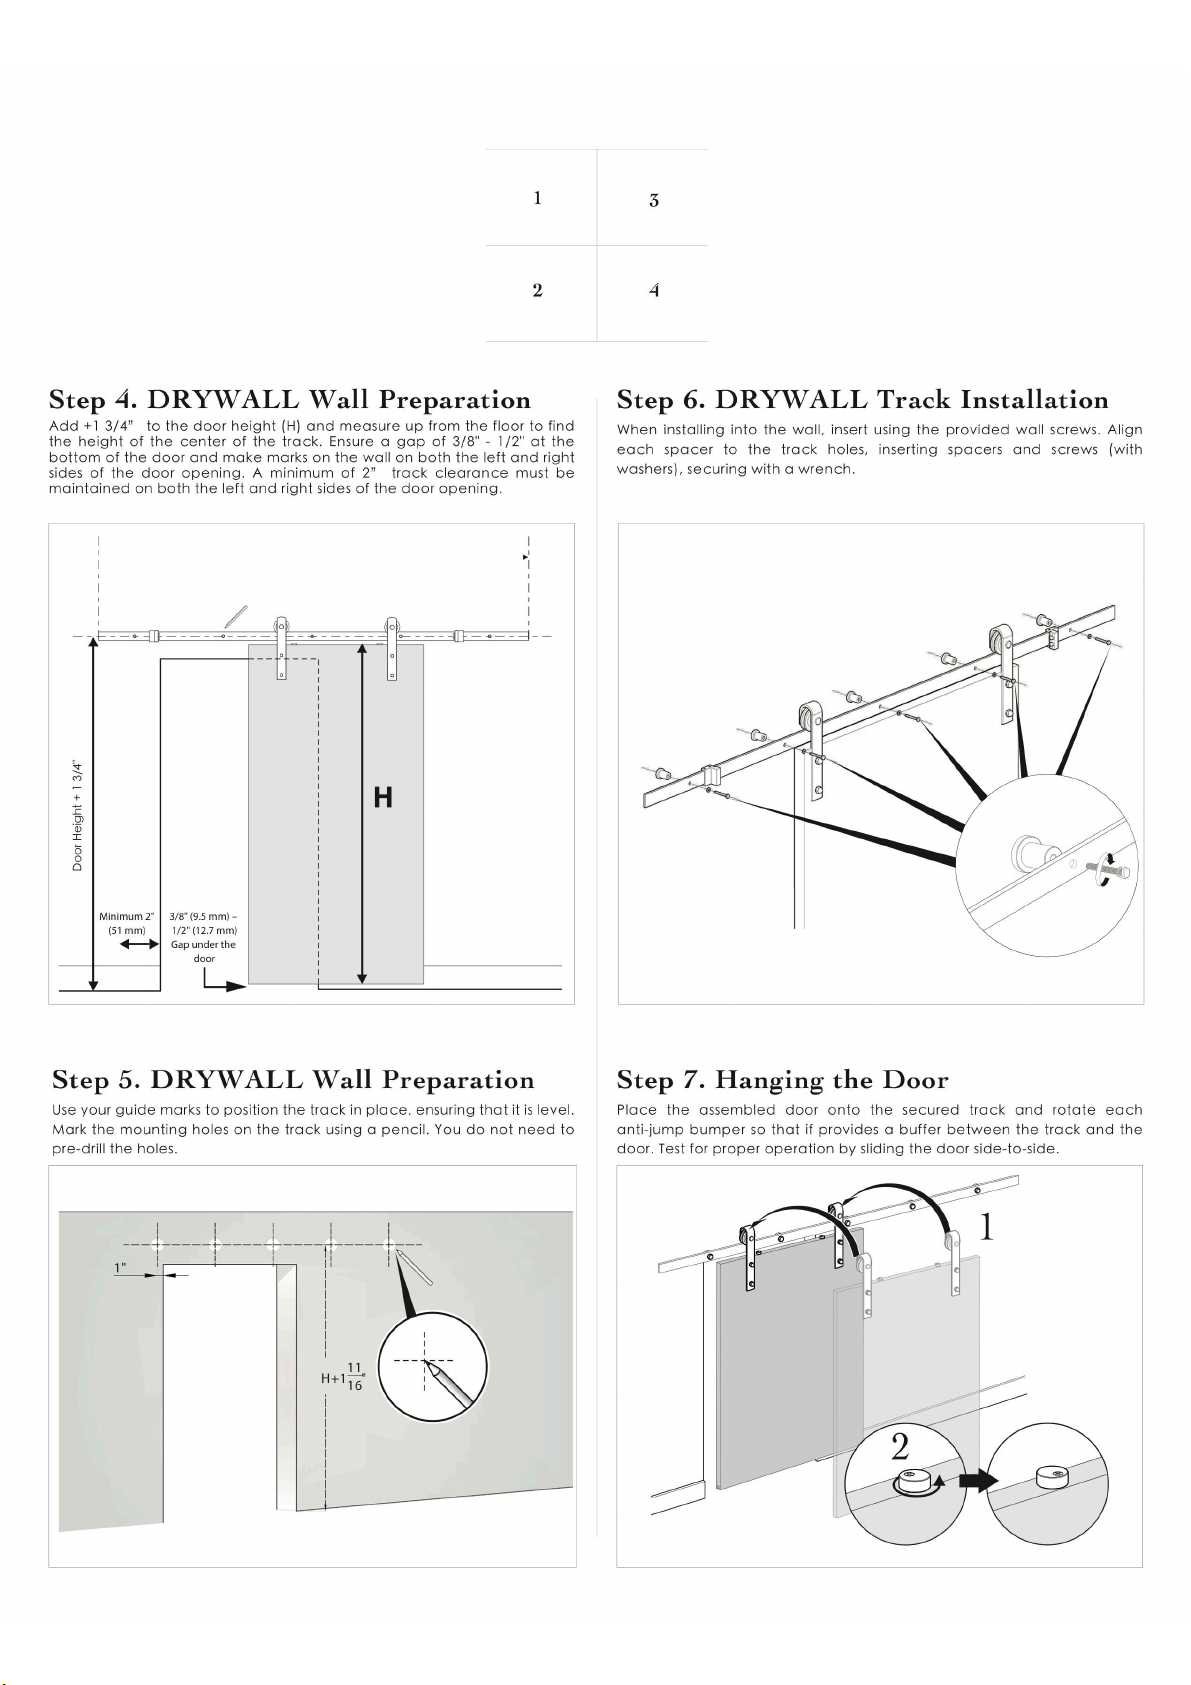
Add +1 3/4” to the door height (H) and measure up from the floor to find
the height of the center of the track. Ensure a gap of 3/8" - 1/2" at the
bottom of the door and make marks on the wall on both the left and right
sides of the door opening. A minimum of 2” track clearance must be
maintained on both the left and right sides of the door opening.
1 3/8" (30mm)
11
H+1 "
16
5/16" (8mm)
Step 3. CONCRETE Track Installation
Insert the provided anchors and carriage bolts (with washers). Unscrew and
separate the carriage bolts and anchors, and take care to install correctly,
securing with a wrench.
Door Height + 1 3/4"
Minimum 2”
(51 mm)
3/8" (9.5 mm) –
1/2" (12.7 mm)
Gap under the
door
Page 3
Page 4
1 3/16" (30mm)
1/4" (8mm)
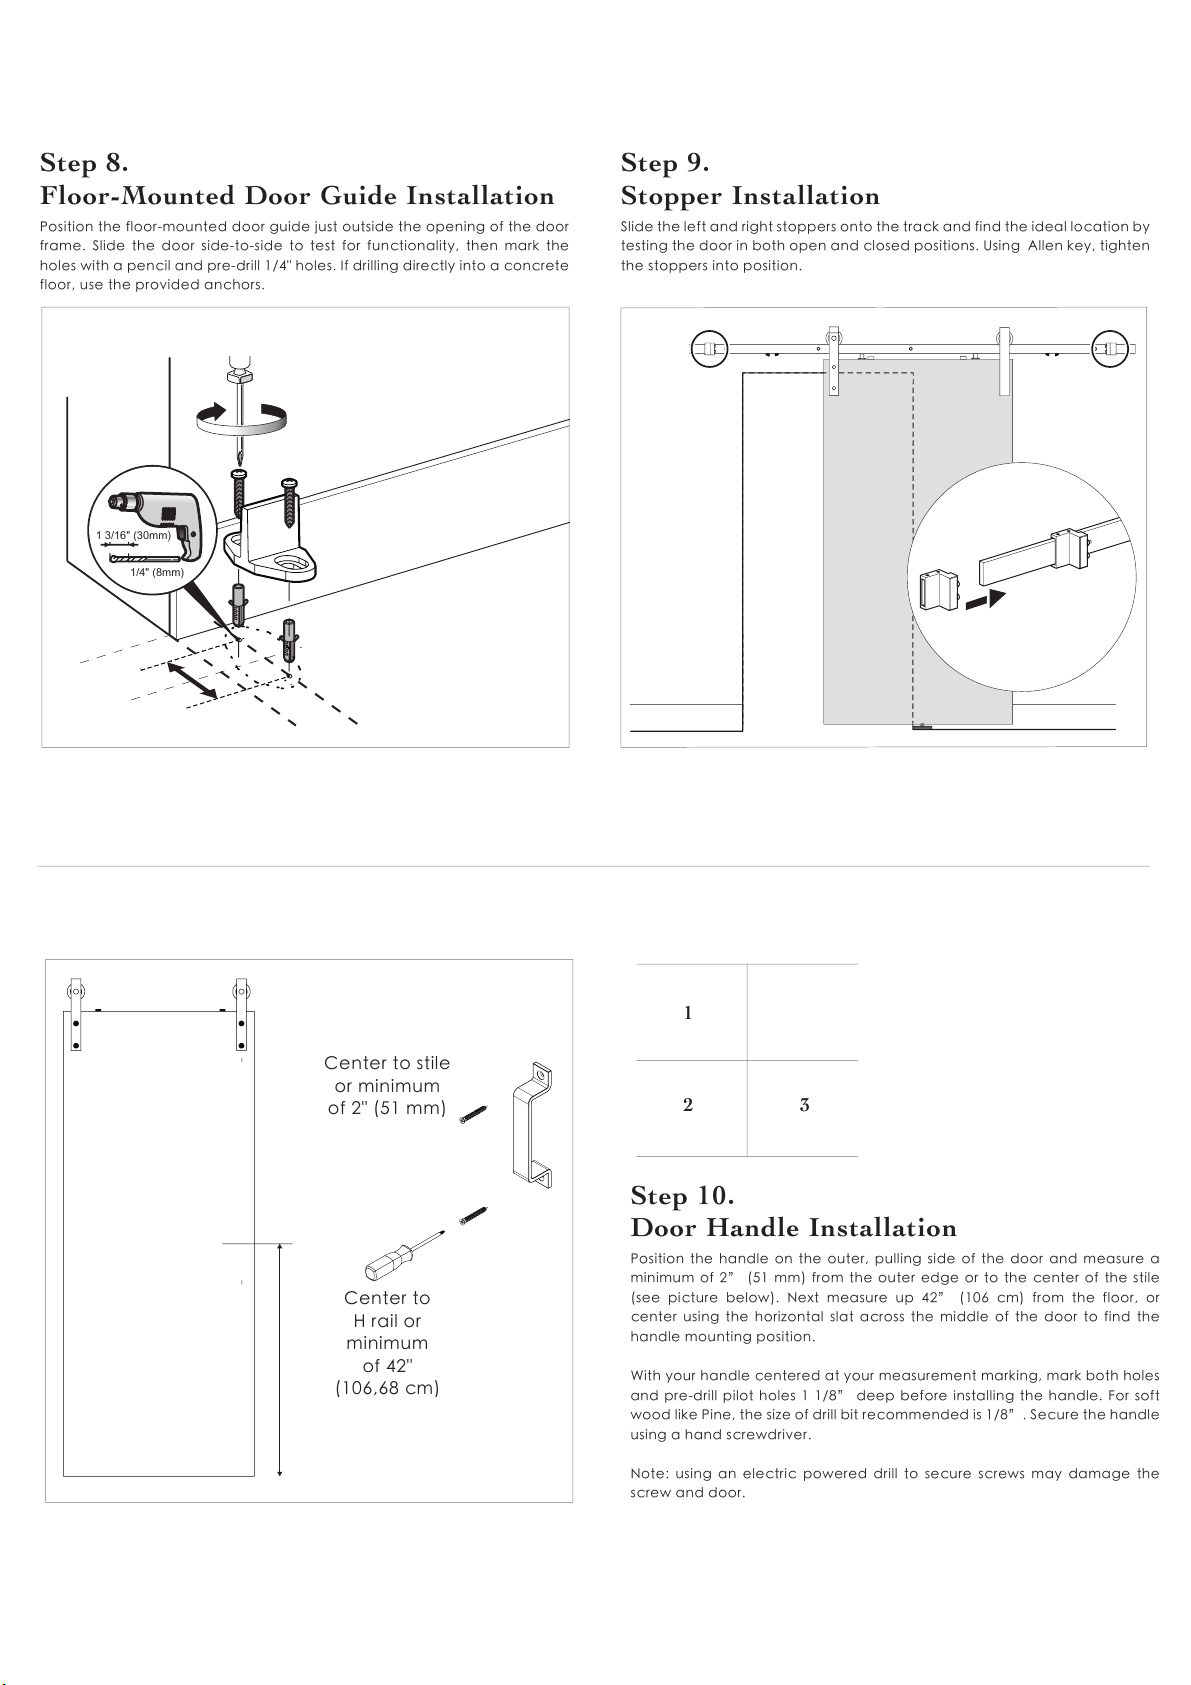
Step 8.
Floor-Mounted Door Guide Installation
Position the floor-mounted door guide just outside the opening of the door
frame. Slide the door side-to-side to test for functionality, then mark the
holes with a pencil and pre-drill 1/4" holes. If drilling directly into a concrete
floor, use the provided anchors.
Center to stile
or minimum
of 2" (51 mm)
Center to
H rail or
minimum
of 42"
(106,68 cm)
Step 10.
Door Handle Installation
Position the handle on the outer, pulling side of the door and measure a
minimum of 2” (51 mm) from the outer edge or to the center of the stile
(see picture below). Next measure up 42” (106 cm) from the floor, or
center using the horizontal slat across the middle of the door to find the
handle mounting position.
With your handle centered at your measurement marking, mark both holes
and pre-drill pilot holes 1 1/8” deep before installing the handle. For soft
wood like Pine, the size of drill bit recommended is 1/8”. Secure the handle
using a hand screwdriver.
Note: using an electric powered drill to secure screws may damage the
screw and door.
Step 9.
Stopper Installation
Slide the left and right stoppers onto the track and find the ideal location by
testing the door in both open and closed positions. Using Allen key, tighten
the stoppers into position.
1
2 3
 Loading...