

Page 1
S
mart
TM
36” x 84” K-Barn Door Installation Instruction
Please visit www.smartstandard.com/k36n2 to watch our step-by-step installation video
S
tandard
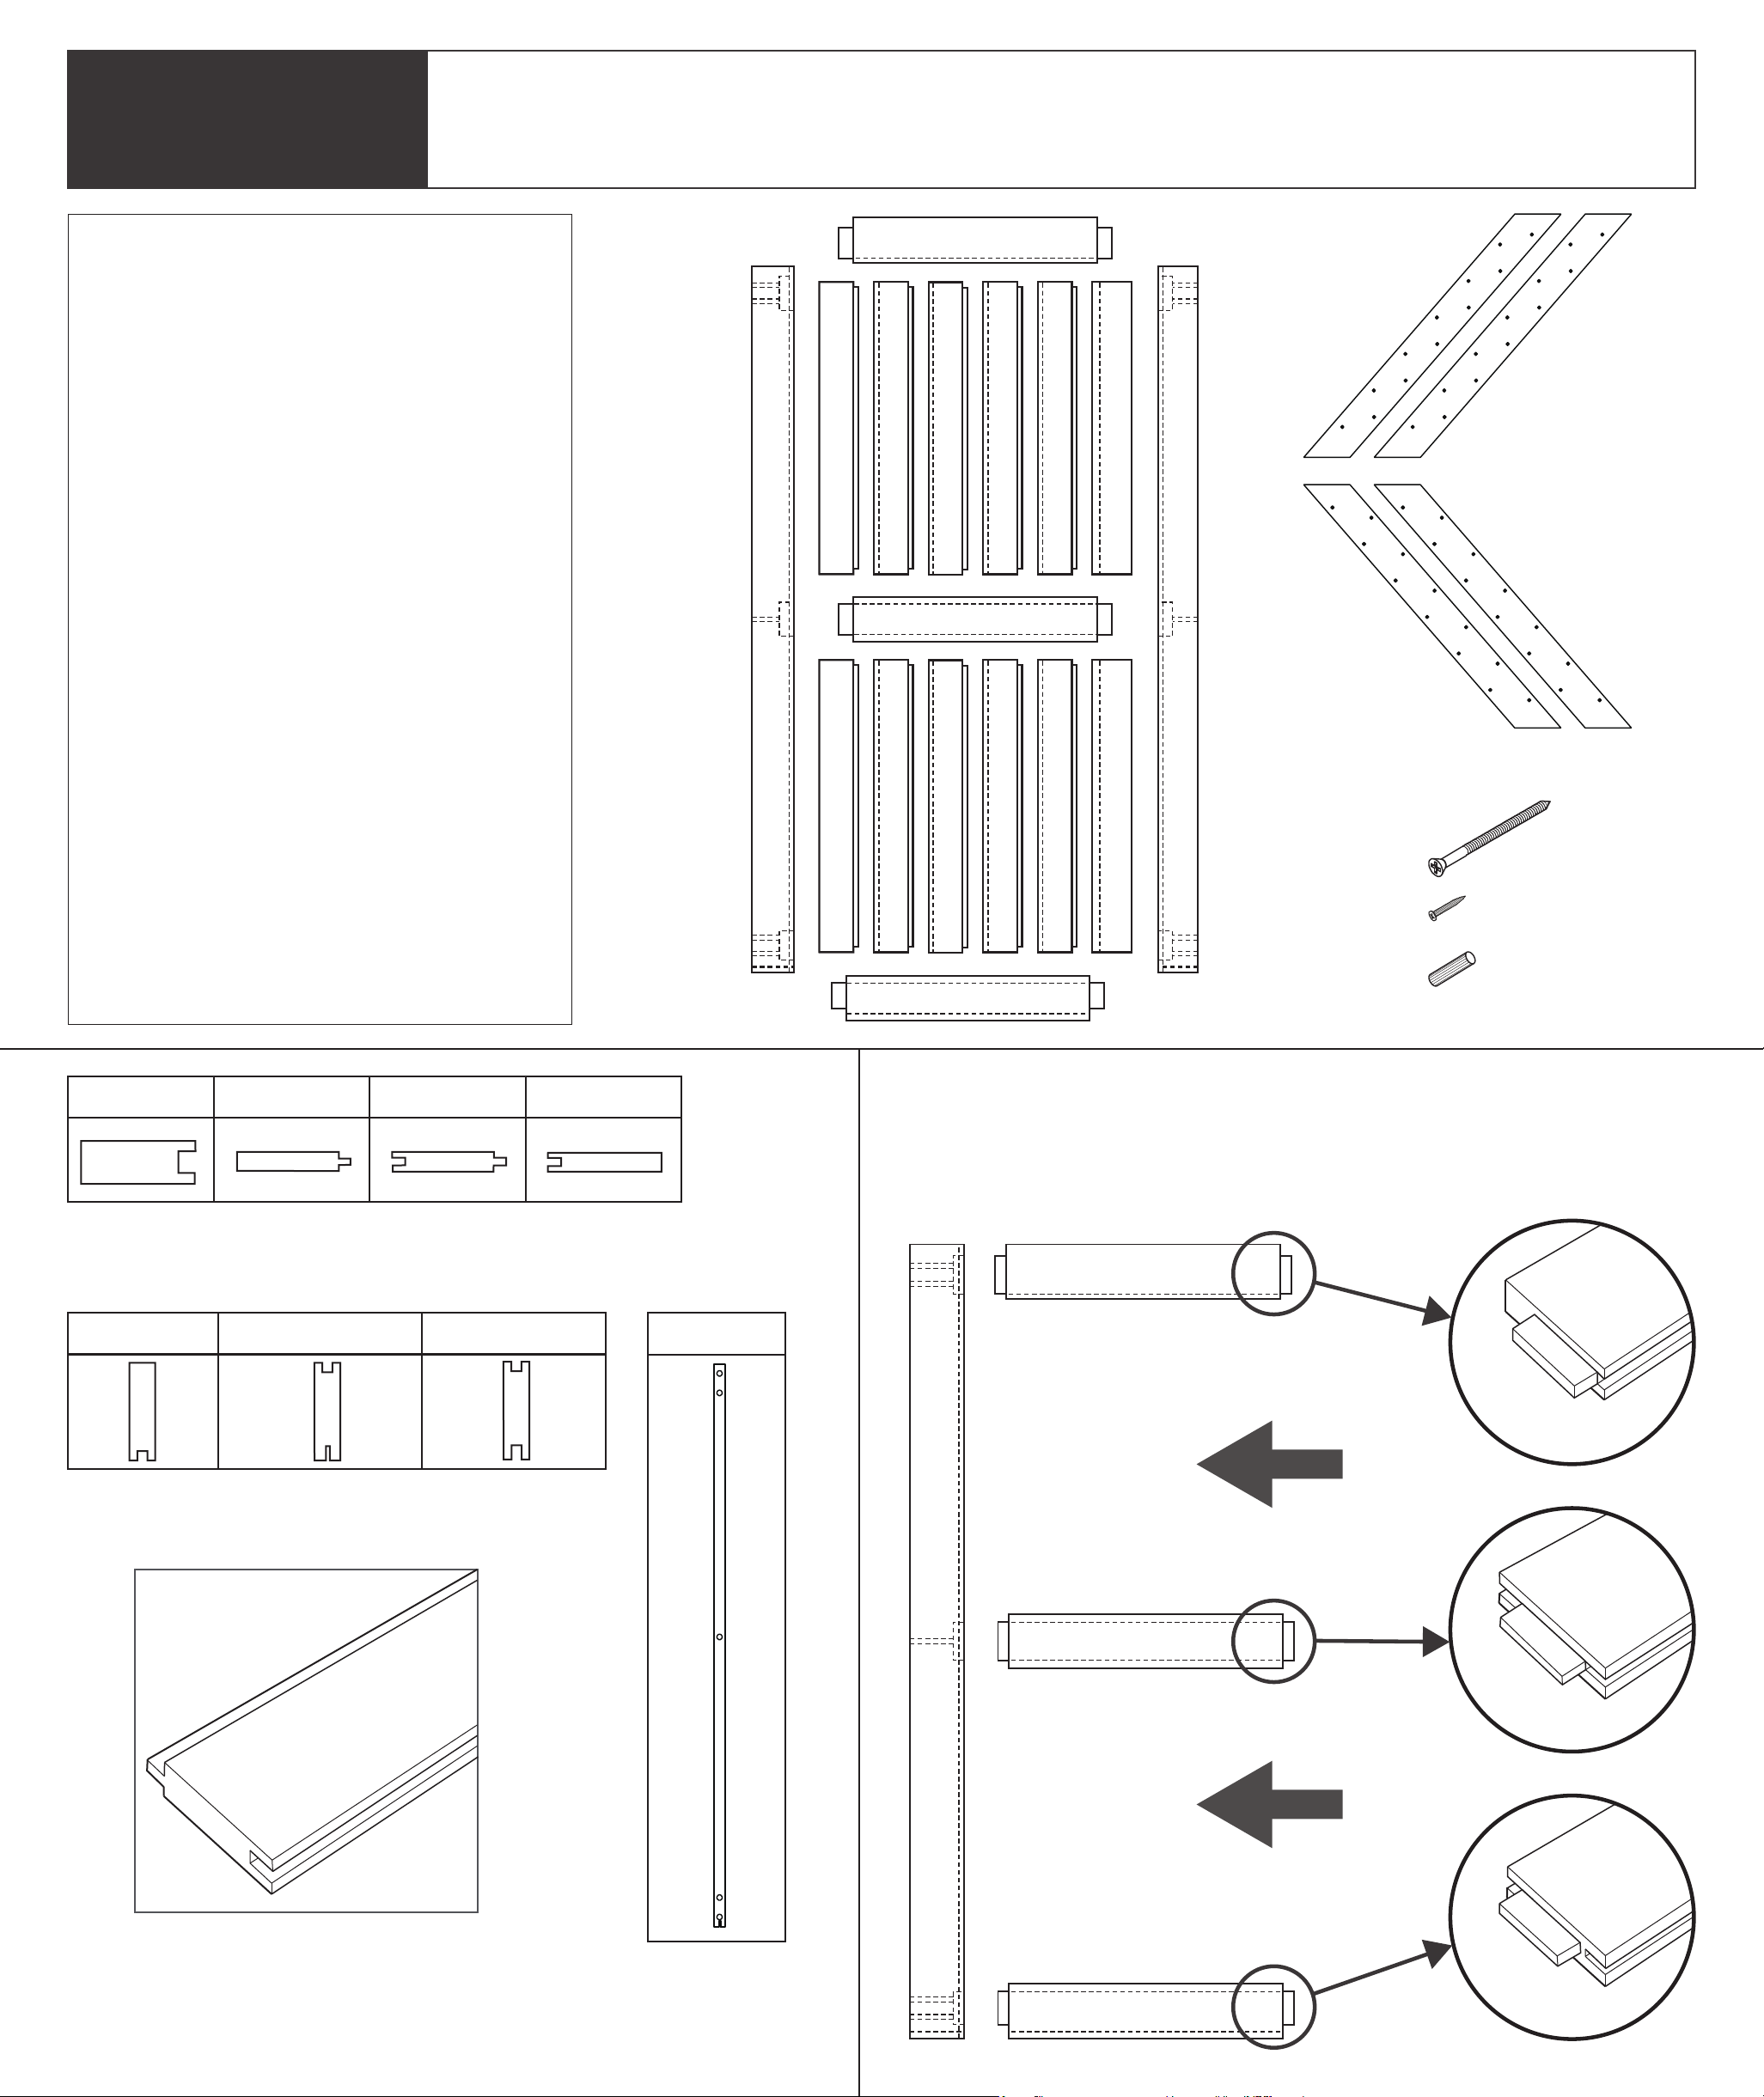
PARTS QTY
A Side Stile
B1
B2
B3
C1
C2
Top Rail
Bottom Rail
Middle Rail
Left Side Slat
Middle Slats
Email: [email protected]
2
1
1
1
2
8
B1
C2 C2 C2 C2C1 C3
A A
B3
D1 D1
D2 D2
C3
D1
D2
A Stile C1 Slat C2 Slat C3 Slat
Right Side Slat
Diagonal Overlay
Diagonal Overlay
3⁹⁄₁₆” Lag ScrewsE 10
¹³⁄₁₆” Lag ScrewsF 40
Wood PlugG 10
2
2
2
C2 C2 C2 C2C1 C3
B2
On a flat, clean surface, lay out one side stile (A) with the groove
1.
facing to the right.
Assemble top rail (B1) , middle rail (B3) and bottom rail (B2) to
E
F
G
Stile and Slat End Views
B1 Top Rail B2 Bottom Rail B3 Middle Rail
Rail Side Views
A Stile
A1 by fitting the tongue into the groove of A.
B1
A
B3
B1
B3
Tongue
Groove
Tongue refers to the ridge extending beyond
the mail portaioon of the slat or stile.
Groove refers to the slot cut int the other side
of the slat or stile.
B2
Stile Side Views
B2
Page 2
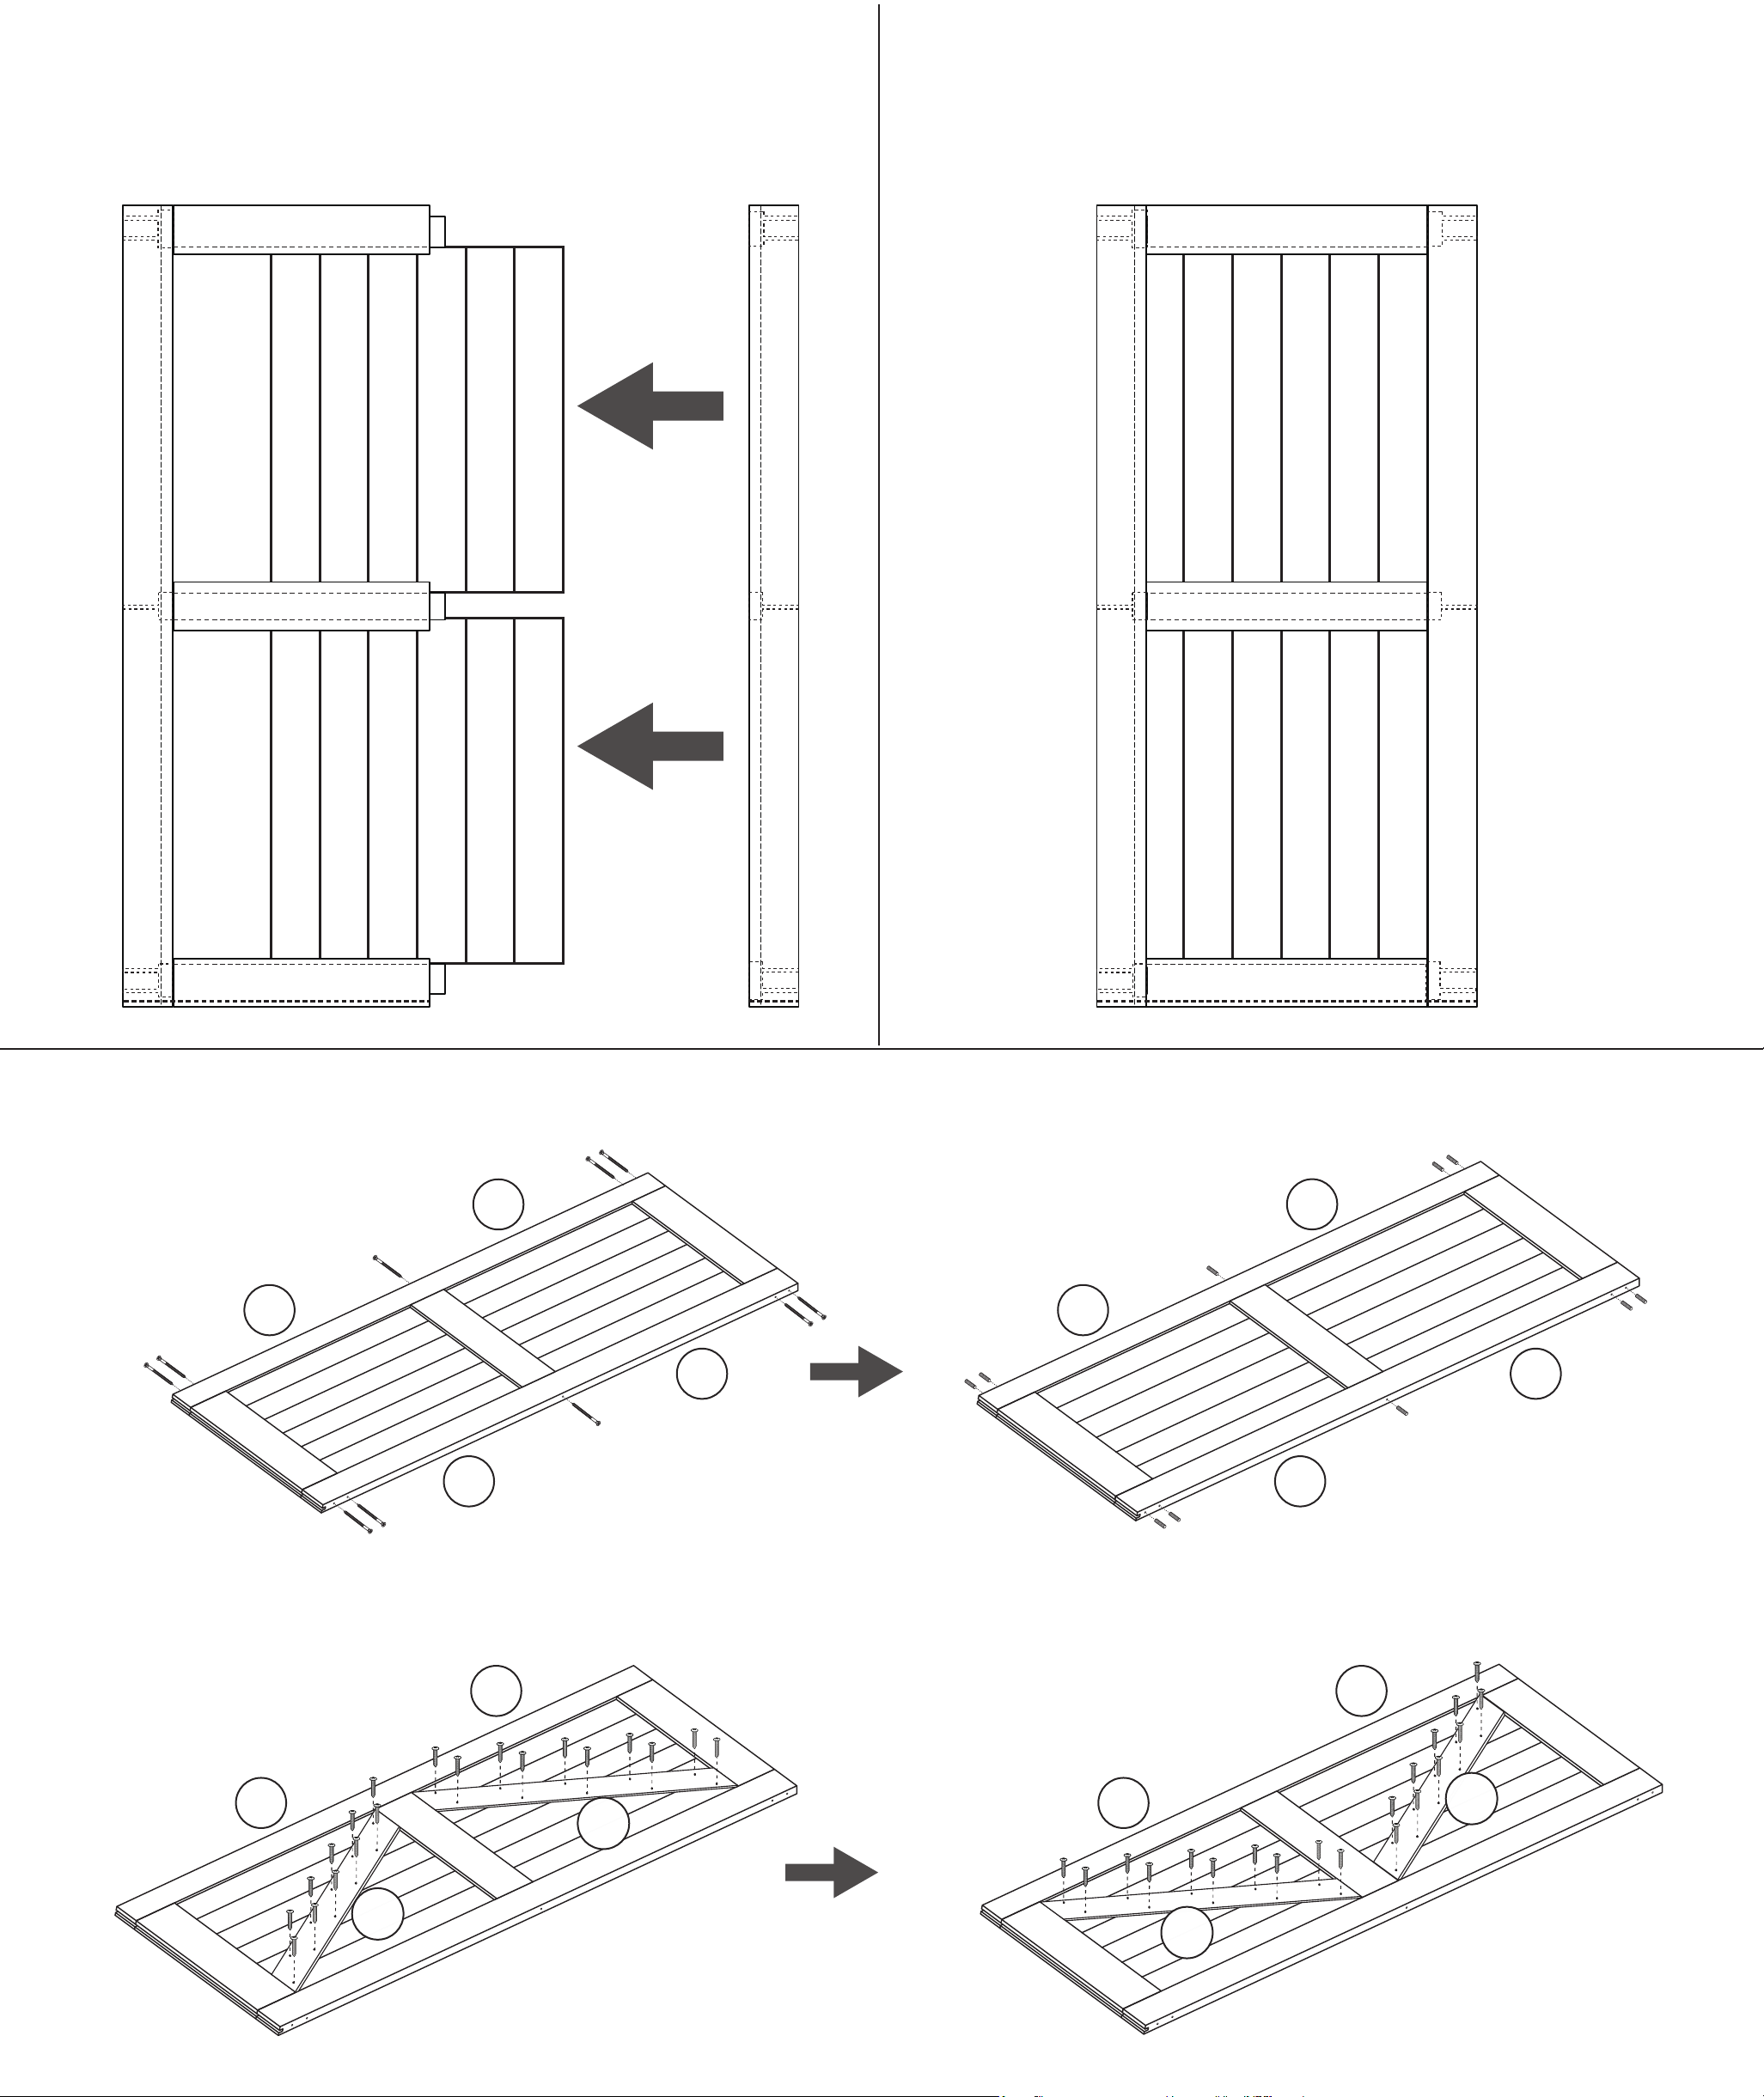
Assemble the left side slat (C1) with the tongue facing right.
2. 3.
Place the other side stile (A) beside the assembled slats and
Lay all middle slats (C2) next to C1 with the tongue facing right.
Lay the right side slat (C3) to the right of the last C2 with the
groove facing left.
B1
C1 C2 C2 C2C2 C3
A A
A
rails with groove facing left. Slide to the left to cover the top
and bottom rail tongues and the edge of the slat assembly.
B1
C1 C2 C2 C2C2 C3
A
4.
Insert
B3
C1 C2 C2 C2C2 C3
B2
3⁹⁄₁₆
” lag bolts (E) into holes on the side of side stile (A), use phillips screwdriver to fasten lag bolts to B1,B3 and B2.
C1 C2 C2 C2C2 C3
B3
B2
Insert wood plugs (G)
into holes on the side of side stile (A)
to complete the installation.
E
E
E
E
Install the diagonal overlays (D1) by using ¹³⁄₁₆” lag bolts (F) on the assembled door surface.
5.
Turn the door over, Repeat the former step to install D2 on the other side.
G
G
G
G
F
D1
F
D1
F
F
D2
D2
 Loading...