

Page 1
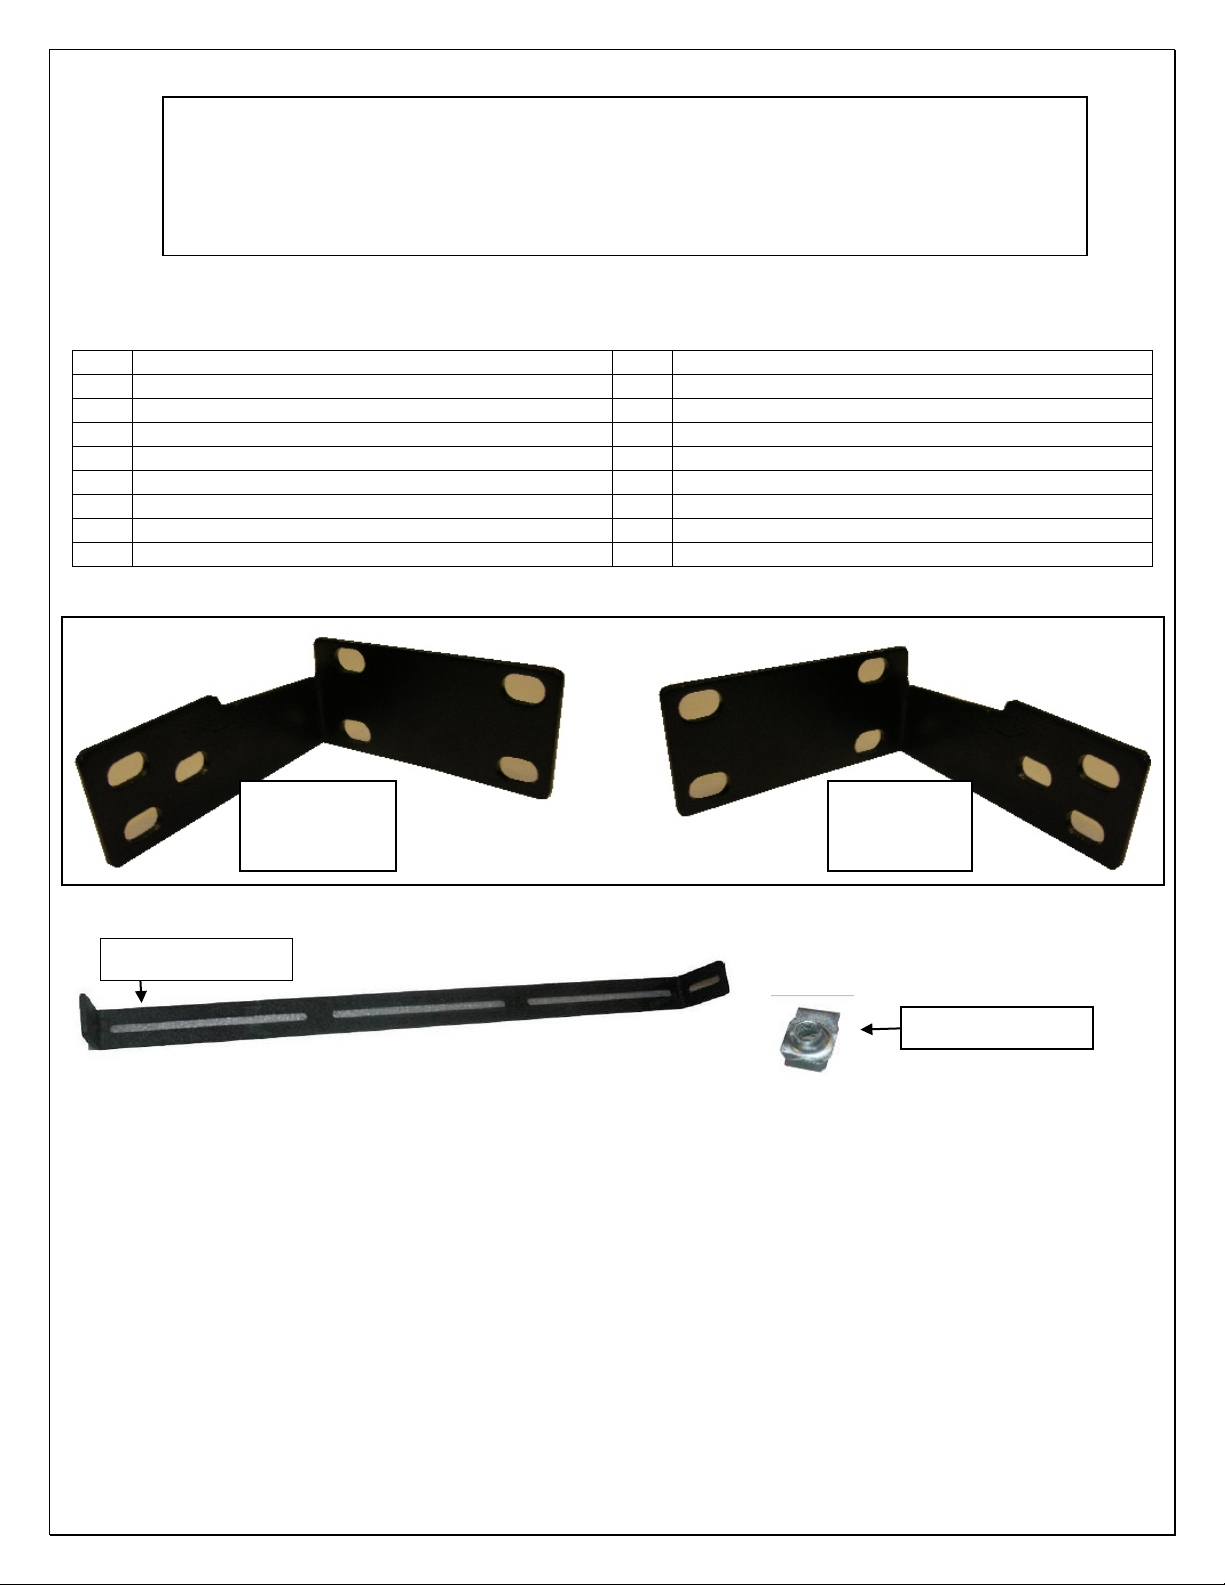
Qty
Description
Qty
Description
1
Grill Guard Bar
6
12mm x 30mm Hex Bolt
1
Driver/Left Mounting Bracket
12
12mm Flat washer
1
Passenger/Right Mounti ng Brac ket
6
12mm Lock Washer
8
10mm x 60mm Hex Bolt
6
12mm Nut
16
10mm Flat Washers
2
8mm Nut clips
8
10mm Lock Washers
2
8mm hex bolts
1
Support flange
2
8mm Flat washers
8
10mm Nut
2
8mm Lock washers
INSTALLATIO N IN S T R UCTIONS
PART # P5056
Passenger/right
Driver/left side
Support Flange
(2) 8mm Nut Clips
2010-14 Dodge Ram Crew / Mega 2500/3500 2/4WD
NOTE: (tow hooks will not be re-attached)
PARTS LIST:
side mounting
bracket
mounting
bracket
PROCEDURE:
1. REMOVE CONTENTS FROM BOX. VERIFY ALL PARTS ARE PRESENT. READ
INSTRUCTIONS CAREFULLY BEFO RE STARTING INSTALLATION.
2. Start by Selecting your LED light (Sold Separately) mounting hardware & brackets, you will
need to first attached the hardware to the support flange, (Example of LED light attached Fig
1) NOTE: if you have your own LED light, LED Manufactures will have similar but
different mounting styles or brackets, once you determine you mounting options attach
it to the support flange as seen in (Fig1)
Page 1 of 3 10/29/2013
Page 2
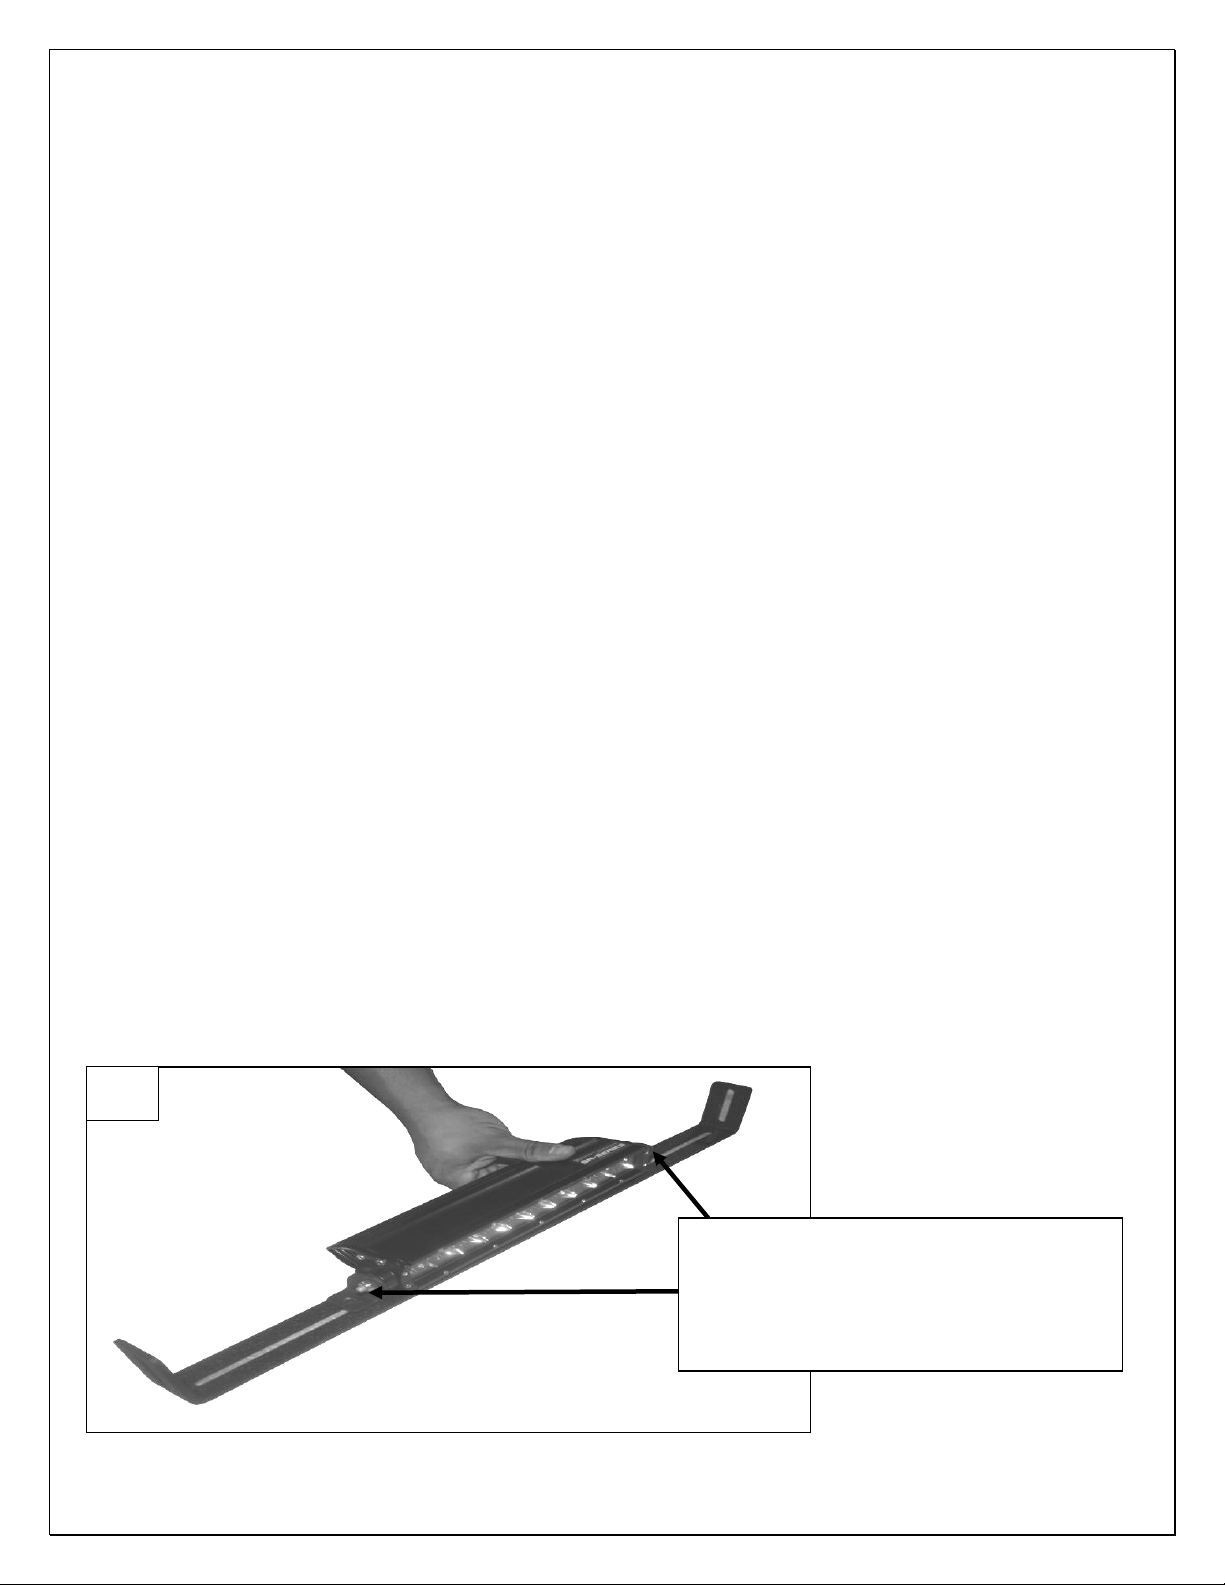
Fig 1
LED light attached to support flange.
3. With the LED light attached to the support flange select the (2) 8mm nut clips place each nut
clip into the slotted holes on either side of the support flange, as seen in (Fig 2) with the
support flange prepare you will need to lay the grill guard face down to install the support
flange NOTE: (it is recommended to lay out some of the cardboard your grill guard came in or
a blanket to protect the grill guard finish). place the grill guard face down with this done place
the support flange with the LED attached into the Center flange attach each side of the support
flange to the inner brackets inside the center flange of the grill guard with (2) 8mm hex bolts,
(2) 8mm flat washers, & (2) 8mm lock washers as seen in (Fig 3) Snug but do not tighten at
this time.
4. Next proceed with your install by removing the factory tow hook of the vehicle Passenger side
(Note: tow hook will not be reattached), attach the mounting bracket in place of the tow hook
and secure the mount bracket with the supplied (4) 10mm x 60mm hex bolt, (8) 10mm flat
washers (4) 10mm lock washers (4) 10mm nut (Fig 4) shows mount bracket attached. Snug
but do not tighten hardw ar e at this time. Repeat this step for the driver/Left side installation.
5. With help begin to install Grille Guard, move the Passenger/Right side and Driver/Left side
Mounting Brackets in as far as possible, and (loosen hardware slightly if necessary). Position
the Grille Guard up to the Outer side of the Passenger/Right side Mounting Bracket and line up
the mounting holes in the Mounting Bracket with the holes in the Gri l le Gu ar d, bolt together
with the included (3) 12mm x 30mm Hex bolts (6) 12 mm flat Washer, (3) 12mm lock washers
and (3) 12mm Hex Nut, Repeat this step for the Driver/left side. (Fig 5) shows grill guard
attached to mount brackets, Snug but do not tighten hardware at this time.
6. Adjust the Grille Guard as required for alignment. Tighten all mounting hardware, your install of
the grill guard is now completed.
7. For the Led lights wiring please refer to the manufactures installation.
8. Do periodic inspections to the installation to make sure all hardware is secure and tight.
To protect your investment, wax this product after installing. Regular waxing is recommended to
add a protective layer over the finish. Do not use any type of polish or wax that may contain abrasives
that could damage the finis h.
NOTE:
but different mounting styles or brackets,
once you determine you mounting options
attach it to the support flange as seen.
LED Manufactures will have similar
Page 2 of 3 10/29/2013
Page 3

Fig 5
(4) 10mm x 60mm Hex Bolt
(6) 12mm x 30mm Hex Bolt
8mm nut clip
Fig 2
Support flange
Secure support flange into center flange with
Per side.
Fig 3
Led Light
Fig 4
attached (1) per side
(8) 10mm flat washer
(4) 10mm lock washer
(4) 10mm nuts
(1) 8mm Hex head bolt
(1) 8mm Flat Washers
(1) 8mm Lock washer
(12) 12mm flat washer
(6) 12mm lock washer
(6) 12mm nuts
Page 3 of 3 10/29/2013
 Loading...