


Aries Automotive 7010 User Manual
INSTALLATION INSTRUCTIONS
FRONT BAR PART #7010
2001-05 HYUNDAI SANTA FE
PARTS LIST
1- FRONT BAR 4- M8 FLAT WASHERS
4- M8 LOCK WASHERS 2- ¼ X ¾ SCREWS
2- ¼ HEX NUTS 2- FRAME MOUNTING BRACKETS
2- TOP MOUNTING BRACKETS 6- 7/16 X 1 ¼ HEX BOLTS
6- 7/16 X 1 1/4 HEX BOLTS 12- 7/16 FLAT WASHERS
4- M8 X 30 MM HEX BOLTS 2- 5/16 X ¾ HEX BOLTS
2- 5/16 HEX NUTS 2- NUT PLATES
INSTALLING FRONT BAR FOR 2001-03 MODEL
1. Remove existing bolts from bottom of frame rail
2. Using the M8 x 30 MM hex bolts, M8 flat washers, and M8 lock washers, attach passenger and driver
3. Open hood to expose plastic trim rivets along bumper flange.
4. Locate and remove the plastic rivets from the head light area.
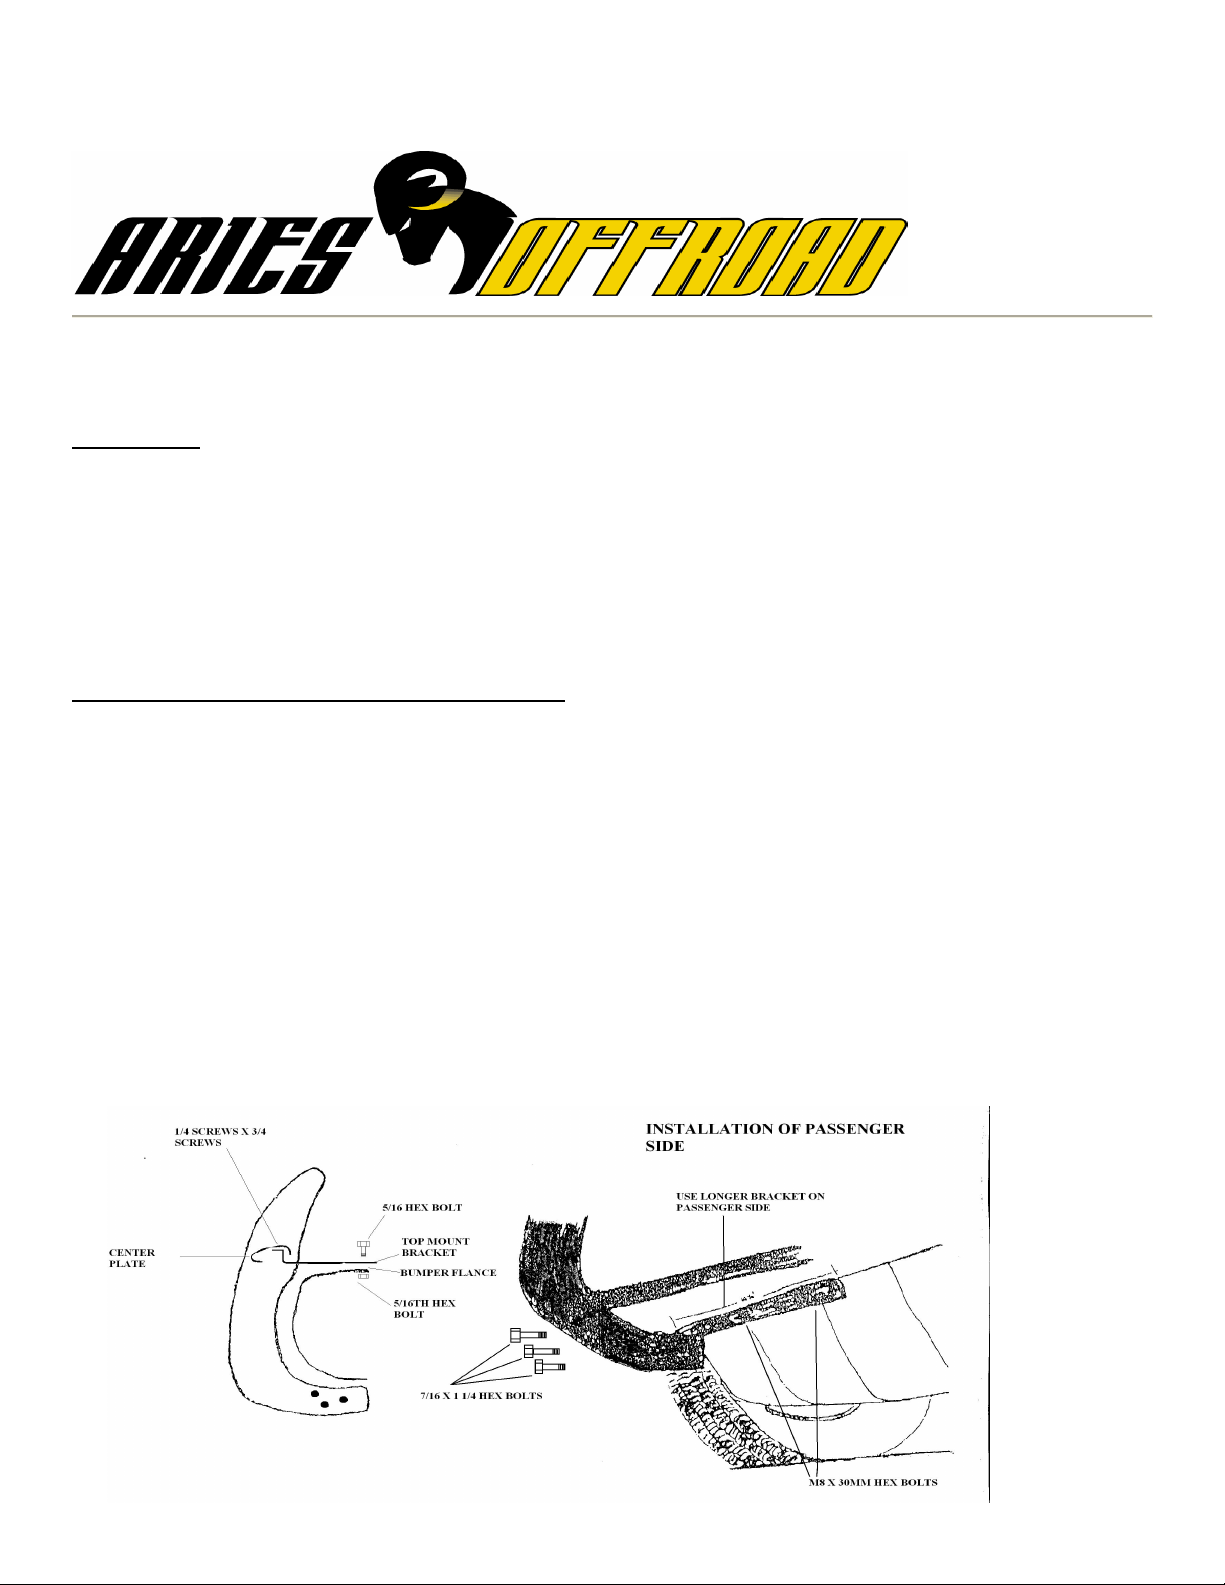
5. Attach top brackets to bumper the flange using the 5/16 x ¾ hex bolts and 5/16 hex nuts. Do not
6. Attach the front bar assembly to the outside of lower frame brackets using 7/16 x 1 ¼ hex bolts, 7/16
7. Align front bar assembly with front of the vehicle and secure all bolts and nuts.
FIGURE A
side frame brackets to bottom of the frame rail. (Note that one hole on each bracket will not be used for
this installation, so do not be alarmed to see an vacant hole. Use the one oval and round hole on
bracket). Leave Loose.
secure.
hex nuts and 7/16 flat washers and the center to top brackets using ¼ x ¾ screws and ¼ hex nuts. Do
not secure.
INSTALLING FRONT BAR FOR 2004-05 MODEL
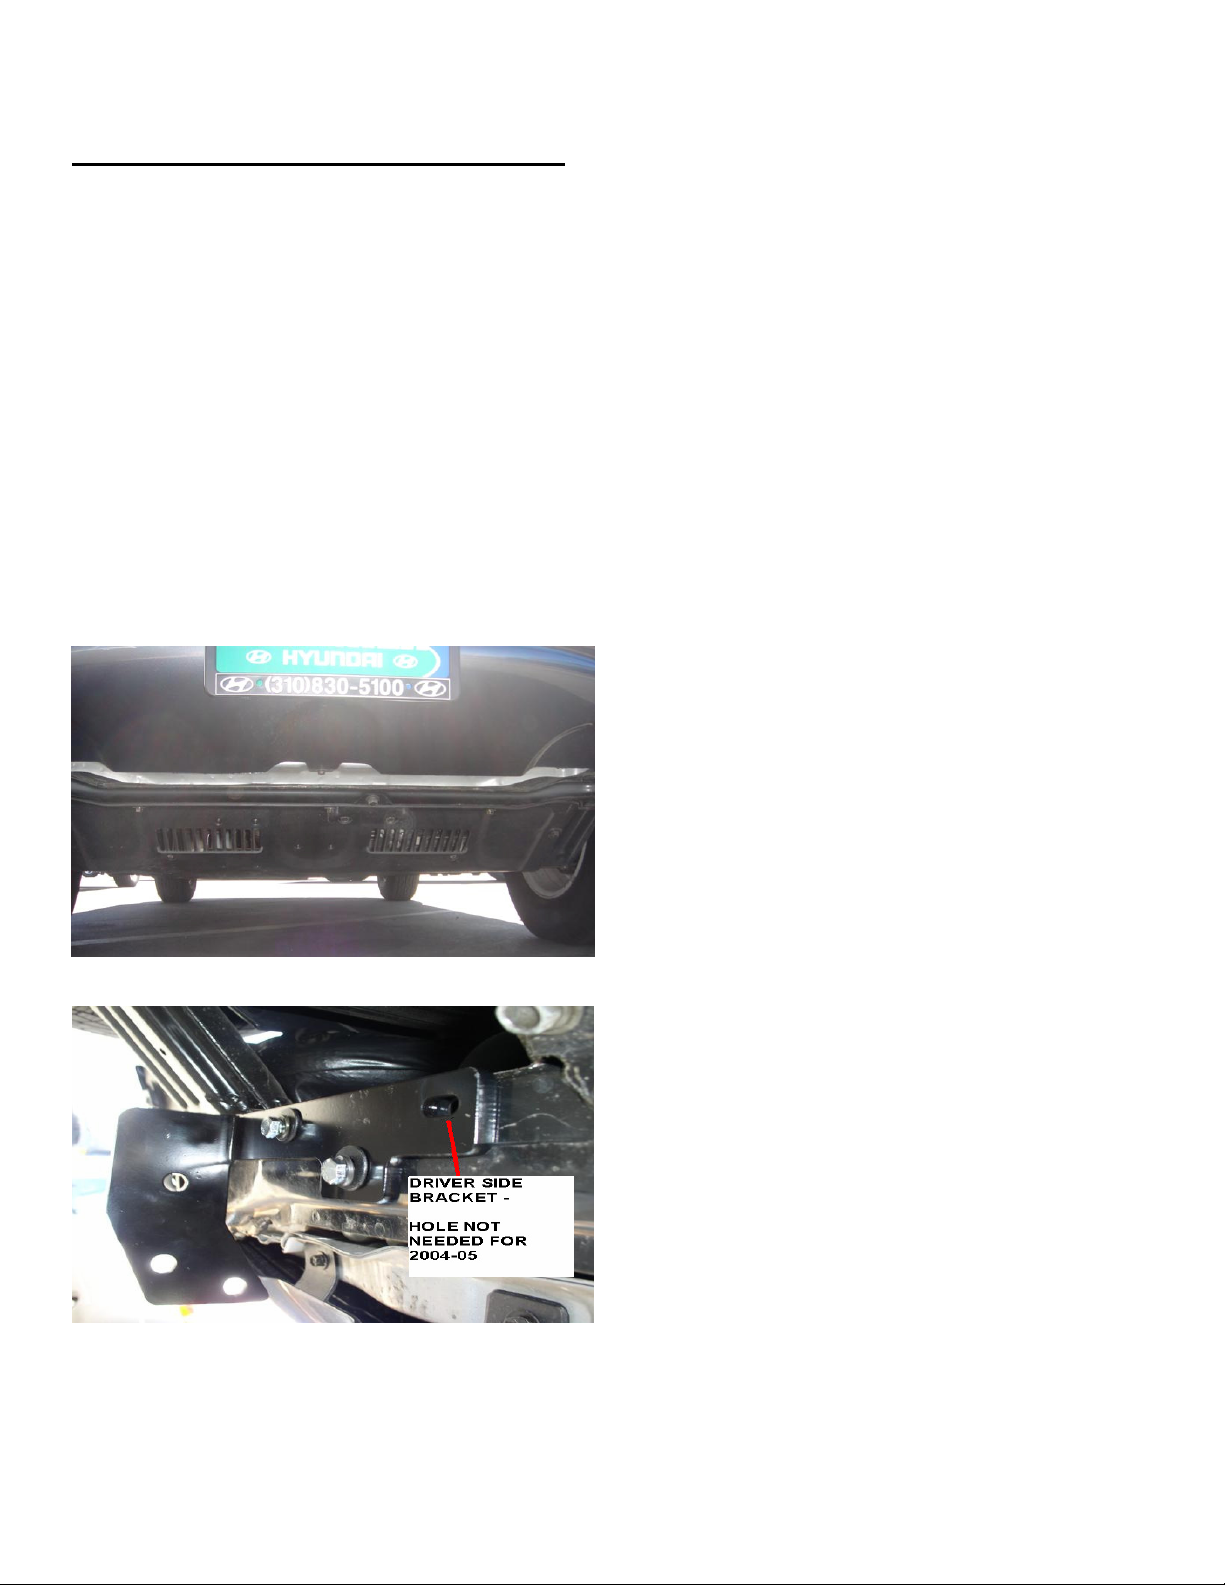
1. Locate bottom frame rail holes where grill/brush guard brackets are to be attached. The skid plate will
need to be removed in order to accomplish (this can be done by removing surrounding bolts. SEE
FIGURE 1.
2. Using the M8 x 30 MM hex bolts, M8 flat washers, and M8 lock washers (you will need two with one nut
plate per bracket) attach passenger and driver side frame brackets to bottom of the frame rail (Longer
of the two brackets is passenger side). Leave loose. (Note that one hole on each bracket will not be
used for this installation, so do not be alarmed to see an vacant hole). SEE FIGURE 2 & 3.
3. Open hood to expose plastic trim rivets along bumper flange. SEE FIGURE 4.
4. Locate and remove the plastic rivets from the headlight area. SEE FIGURE 5.
5. Attach top brackets to bumper flange using the 5/16 x ¾ hex bolts and 5/16 hex nuts. Leave loose.
6. Attach the front bar assembly to the outside of lower frame brackets using 7/16 x 1 ¼ hex bolts, 7/16
hex nuts and 7/16 flat washers and the center to top brackets using ¼ x ¾ screws and ¼ hex nuts. Do
not secure.
7. Align front bar assembly with front of the vehicle and secure all bolts and nuts.
8. Re-attach skid plate to vehicle.
FIGURE 1.
FIGURE 2