

Page 1
INSTALLATION INSTRUCTIONS
2012-2013 HONDA PILOT
PART # 6056 / 6056-2
PARTS LIST:
Qty Description Qty Description
1 Grille Guard 4 12mm Lock Washers
1 Driver/Left Frame Mounting Bracket 6 12mm Lock Nuts
1 Passenger/Right Frame Mounting Bracket 2 6mm x 25mm Philips Pan Head Bolt
1 Driver/Left Upper brace bracket 4 6mm x 17mm OD x 1.5mm Flat Washer
1 Passenger/Right Upper brace bracket 2 6mm Lock Washers
1 Driver/Left Top Mounting Bracket 2 6mm Hex Nuts
1 Passenger/Right Top Mounting Bracket 2 8-1.25mm x 20mm Hex Bolts
6 12mm x 35mm Hex Bolts 2 8mm x 24mm OD x 2mm Flat Washers
16 12mm x 32mm OD x 3mm Flat Washers 2 8mm Lock Washers
4 12-1.25mm x 40mm Hex Bolts
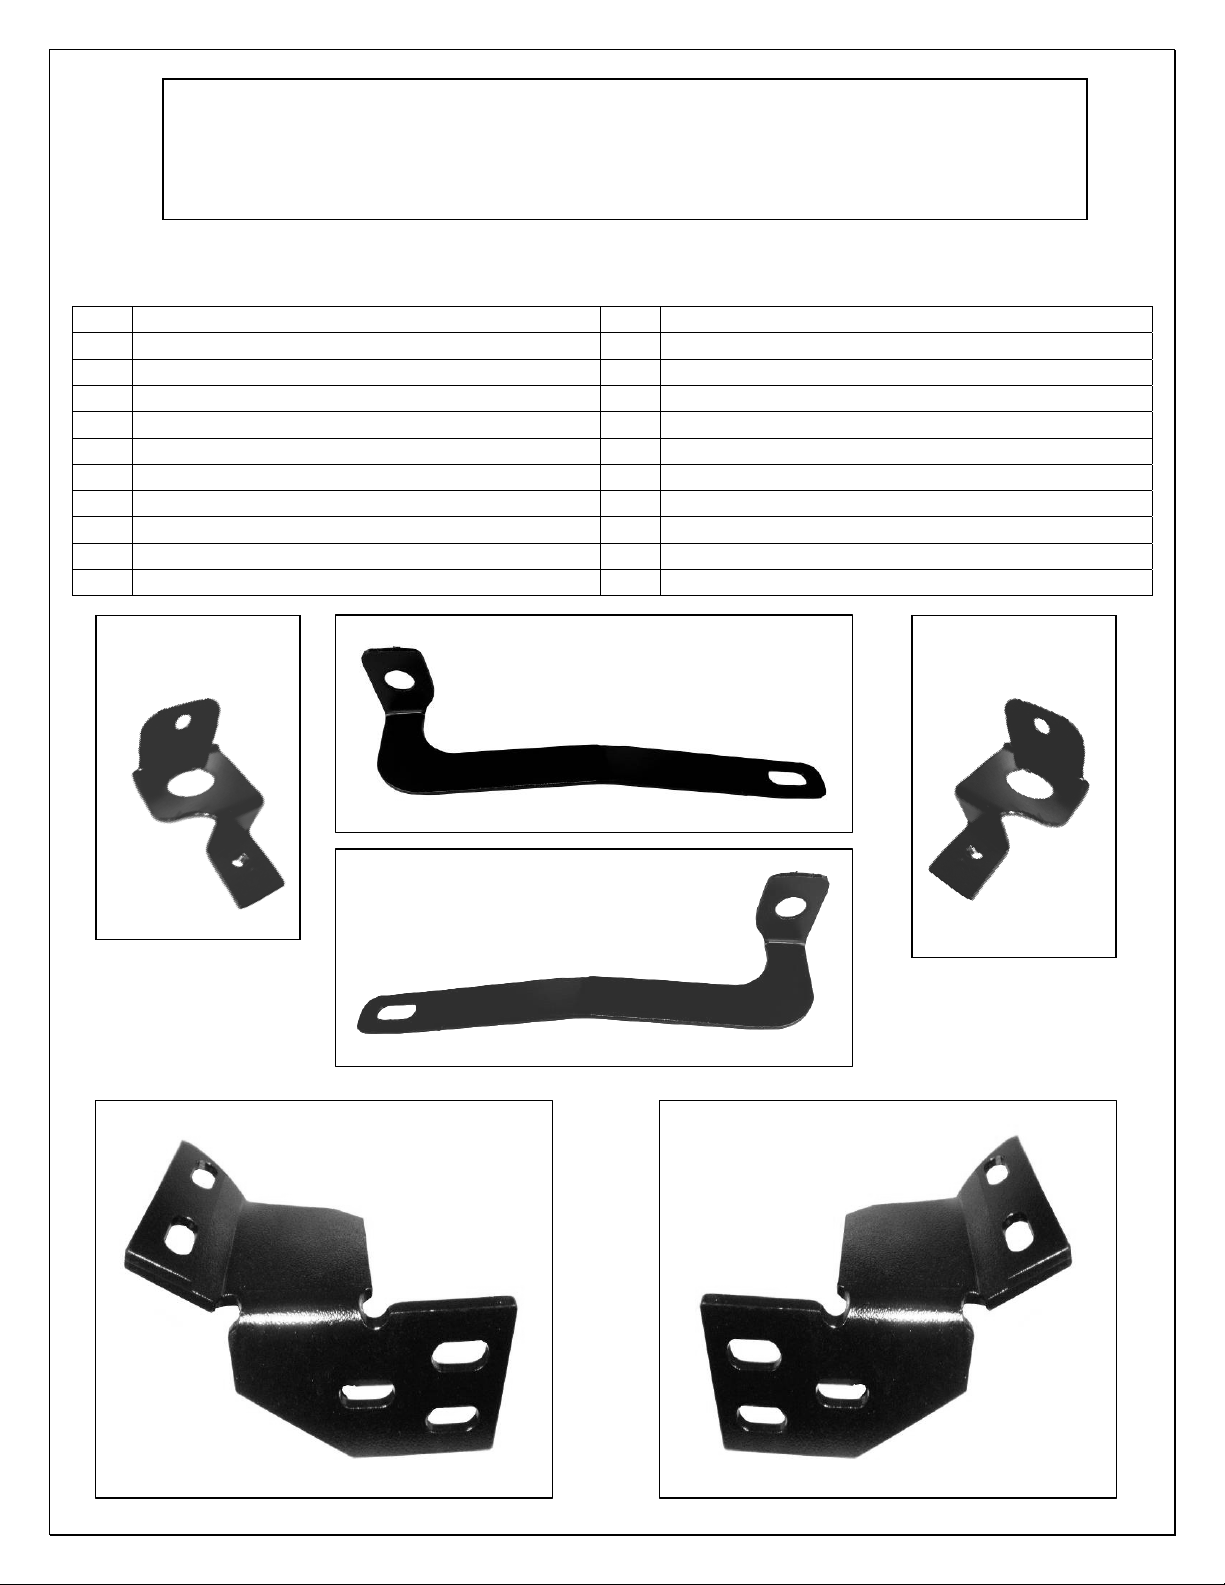
Passenger/right
side Top Mounting
Bracket
Passenger/right side Upper brace Bracket
Driver/left side Upper brace Bracket
Passenger/right side Frame
Mounting Bracket
Driver/left side Frame
Mounting Bracket
Page 1 of 4 12/12/11
Driver/left side Top
Mounting Bracket
Page 2

PROCEDURE:
1. REMOVE CONTENTS FROM BOX. VERIFY ALL PARTS ARE PRESENT. READ INSTRUCTIONS
CAREFULLY. ASSISTANCE IS RECOMMENDED. CUTTING IS REQUIRED.
2. Starting under the front bumper, carefully remove the center plastic splash guard, NOTE: Depending on
the year and model of vehicle, there may be several two-piece plastic push-in clips holding the splash
guard up to the vehicle. Pry the center pin of the clip up with a small flat blade screwdriver to release
and remove the entire clip. Pay close attention to the type and location of all factory hardware for
reinstallation. Remove the splash guard after all clips have been removed.
3. Once splash guard has been removed, starting on the Driver side of the vehicle, locate and remove the
two factory bolts securing the frame bracket to the front cross member (these will not be reused). As
seen in (Fig 1) Once done loosen the rear hex bolt securing the frame bracket to the suspension,
(NOTE: 1-2 full turns only), as seen in (Fig 2). Select the Driver side bracket from the list above & place
it over top of the frame bracket and line up the 2 holes of the bracket to the cross member holes, once
done mark out the plastic trim as you will need to create a slit in the plastic where the bracket needs to
go through the lower plastic trim of the bumper. (Fig 3) shows bracket attached with out the plastic trim
for reference.
4. Now gently pull down on the bracket just enough to slide the driver side Mounting Bracket through the
slit you just created & place it between the frame bracket and the cross member, (Fig 3) shows bracket
attached. NOTE: Do not pull too hard or you may bend the frame bracket. If more room is required to
insert the Mounting Bracket, loosen but do not remove the hex bolt at the end of the frame bracket.
Align the mounting holes in the Mounting Bracket with the holes in the frame bracket and secure it with
the supplied (2) 12mm-1.25mm x 40mm Hex Bolts, (2) 12mm Flat Washers & (2) 12mm Lock Washers.
Snug but do not tighten all hardware at this time.
5. Repeat step 3 & 4 for the passenger side lower Mounting Bracket installation.
6. With assistance, mount the Grille Guard to the outside of the Mounting Brackets. Use the included (6)
12-1.75mm x 35mm Hex Bolts, (12) 12mm Flat Washers, and (6) 12mm Lock Nuts to attach the Grille
Guard to both mounting brackets, as seen in (Fig 4). Snug but do not tighten hardware at this time.
7. Next, open the front hood of vehicle & remove the plastic cover between the radiator support and the
plastic grille, (Fig 5) shows 9 push pins to be removed. With the plastic cover removed locate and
remove the top driver side radiator mount, (Fig 6). Carefully remove the rubber bushing from the mount
and insert it into the new Driver side Top Mounting Bracket, (Figure 6A). Repeat this step to install the
passenger side Top Mounting Bracket. Secure the new radiator support bracket into place as seen in
(Fig 7) Repeat step for Passenger side.
8. Insert the driver side Upper Brace Bracket through the opening in the plastic grill; see in (Fig 8). Attach
the Upper Brace Bracket to the radiator bracket with (1) 8mm Hex Bolt, (1) 8mm Flat Washer & (1)
8mm Lock washer Snug but do not tighten at this time. As seen in (Fig 9). Repeat this step for the
passenger side next secure the upper brace bracket to the grill guard using (1) 6mm Philips Pan Head
bolt, (2) 6mm Flat Washers, (1) 6mm Lock washer & (1) 6mm Hex Nut as seen in (Fig 10) Snug but do
not tighten at this time. Repeat this step for Passenger side.
9. Next adjust & level the grill guard, tighten all hardware. Re-attach the plastic grille and reinstall the
plastic cover between the radiator support and the plastic grille. Re-install the lower splash guard using
the factory hardware.
10. Do periodic inspection
s to the installation to make sure that all hardware is secure and tight.
Page 2 of 4 12/12/11
Page 3

To protect your investment, wax this product after installing. Regular waxing is recommended to add a
protective layer over the finish. Do not use any type of polish or wax that may contain abrasives that could
damage the finish.
For stainless steel: Aluminum polish may be used to polish small scratches and scuffs on the finish. Mild
soap may be used also to clean the Grille Guard.
For gloss black finishes: Mild soap may be used to clean the Grille Guard.
DRIVER SIDE INSTALLATION PICTURED
Fig 1
Fig 2
Remove these factory bolts from
the cross member
Loosen but do not remove this
factory bolt from the frame mount
Fig 3
(2) 12-125mm x 40mm Hex Bolts
(2) 12mm Flat Washers
(2) 12mm Lock Nuts
Lower plastic trim removed for reference
Fig 4
Attach to Grill Guard with
(3) 12mm x 35mm Hex Bolts
(6) 12mm Flat Washers
(3) 12mm Lock Nuts
Insert Mounting Bracket between
frame support and cross member
DRIVER SIDE INSTALLATION PICTURED
Fig 5 Fig 6
Remove the plastic push pins & cover
Remove factory
radiator top mount
Front
Page 3 of 4 12/12/11
Page 4

DRIVER SIDE INSTALLATION PICTURED
Fig 6A
Front
Plastic
grille
Fig 8 Fig 9
Insert through opening in grille
Upper Brace
Bracket
Fig 10
(1) 6mm Philips Bolt
(2) 6mm Flat Washers
(1) 6mm Lock washer
(1) 6mm Hex Nut
Fig 7
New radiator top
mount installed
Front
(1) 8mm x 25mm Hex
Bolt
(1) 8mm Flat Washer
(1) 8mm Lock Washer
Page 4 of 4 12/12/11
 Loading...