

Page 1
INSTALLATION INSTRUCTIONS
2012-13 FIAT SPORT SIDERAIL
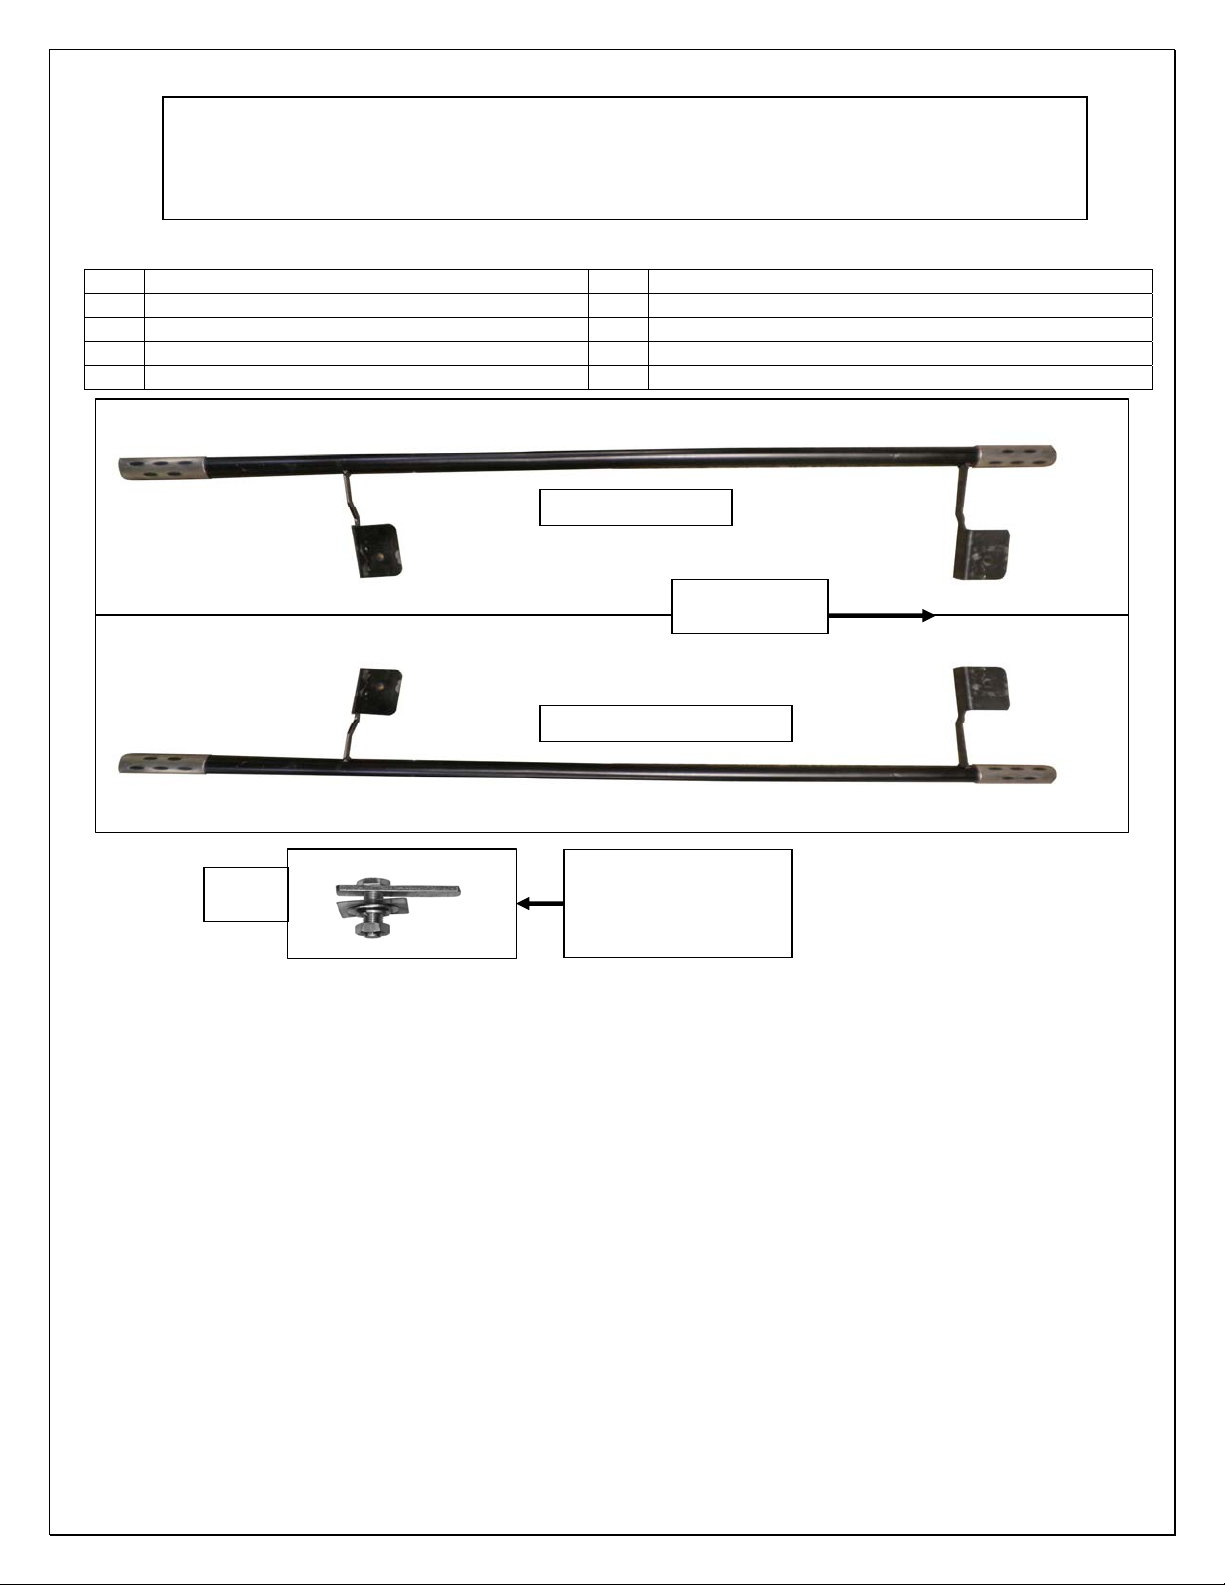
PARTS LIST:
Qty Description Qty Description
1 Driver/Left Side Rail 4 10mm Flat Washer
1 Passenger/Right Side Rail 4 10mm Lock Washer
4 10mm x 38mm Bolt Plate 4 10mm Hex Nuts
4 Plastic retainers
Fig 1A
PROCEDURE:
REMOVE CONTENTS FROM BOX. VERIFY ALL PARTS ARE PRESENT. READ
1.
INSTRUCTIONS CAREFULLY BEFORE STARTING INSTALLATION.
2. Starting by partially threading a Plastic Retainer onto the threaded end of (2) Bolt Plates, (Fig
1A) above shows one example.
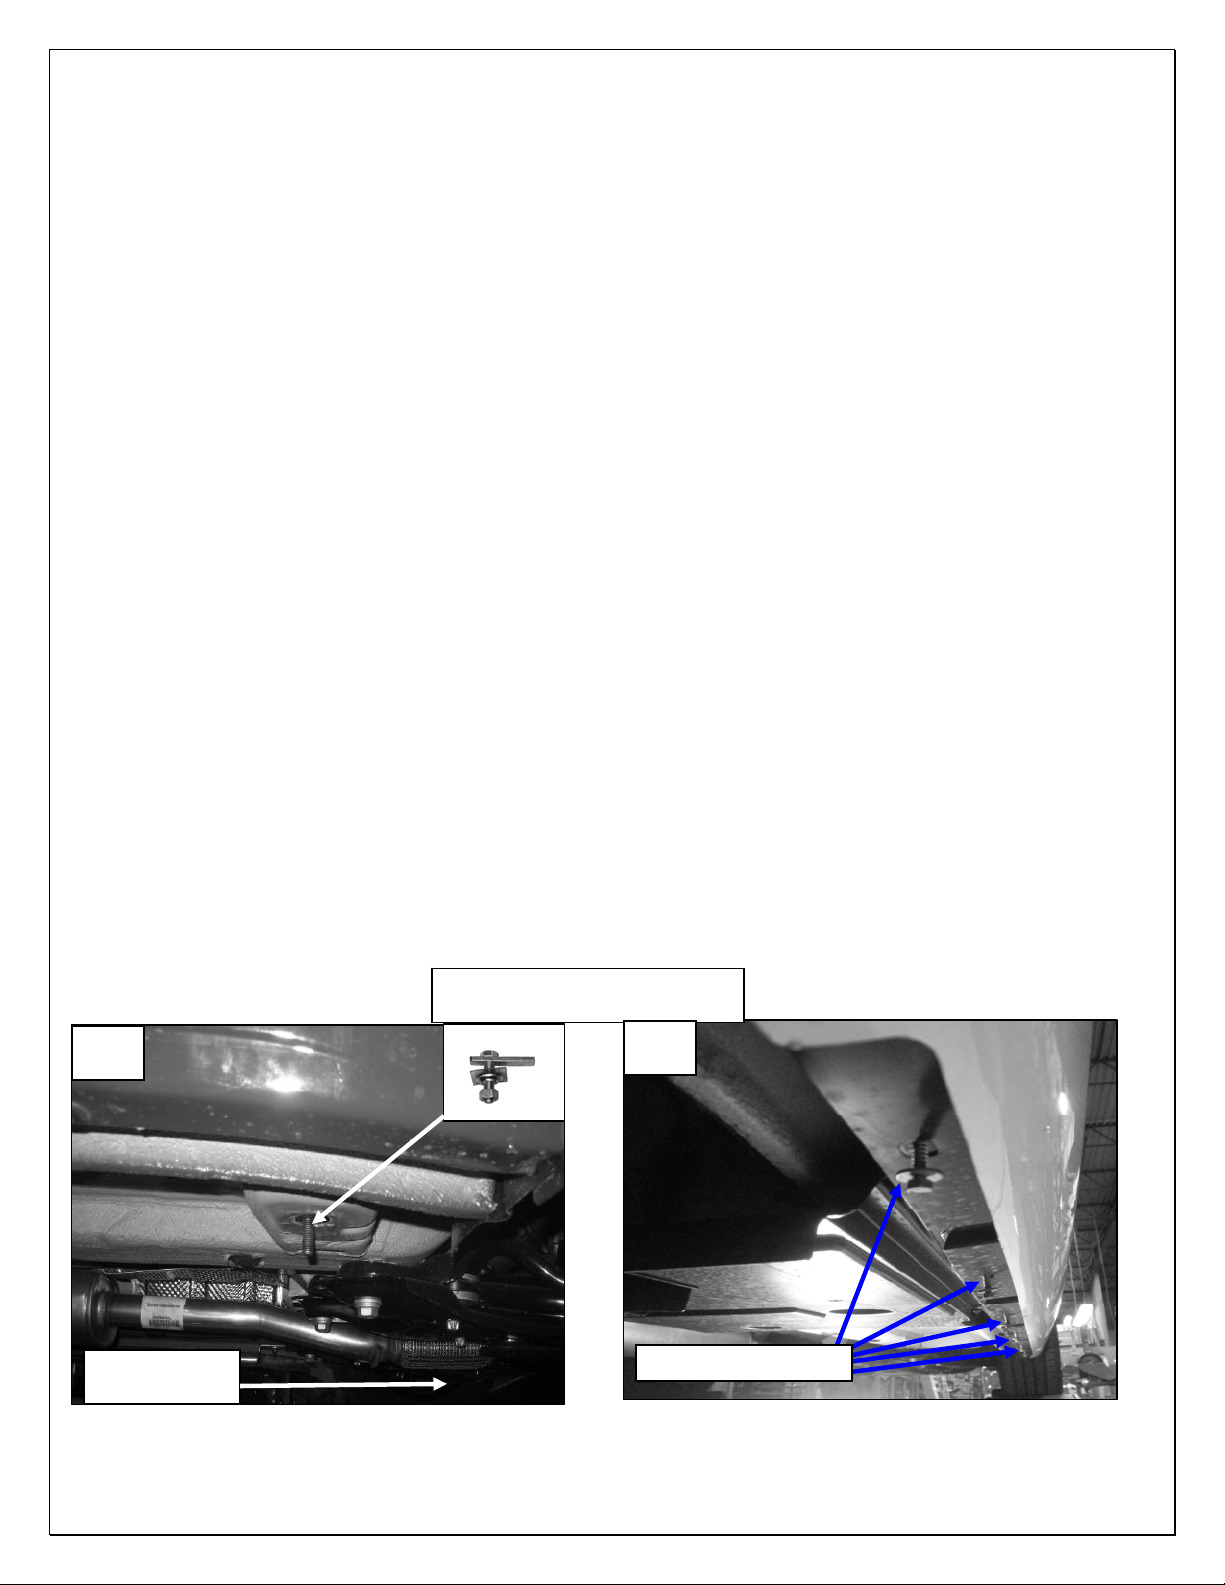
3. With the bolt plates ready, Starting on the Passenger/right side front Insert the Bolt Plate into
the factory floorboard hole, located just under vehicles floor board behind front tire, Once the
Bolt Plate is inserted, hold the Bolt end with one hand and tighten the Plastic Retainer with
your other hand, NOTE: Tighten the Plastic Retainer until it reaches the floor panel. (Fig 2)
Shows Bolt Plate installed with out plastic retainer for view.
4. Next proceed with the passengers/right side rear you will need to first remove the (5) Hex bolts
holding the bottom lip of the plastic body kit along the rocker panel edge so you can bend it
down slightly to expose the (3) Philips head screws holding the black plastic panel, covering
the mounting hole, (Fig 3) shows location of hex bolts. NOTE: do not remove body kit.
PART# B505555 / 505555
Driver left Side rail
Passenger right Side rail
Front of Vehicle
10mm x 38mm Bolt Plate
(pictured with Plastic
Retainer installed for
example)
Page 1 of 3 12/19/2011)
Page 2
5. Remove the (3) Philips screws along the edge of the rocker panel remove these first followed
by the (2) plastic push pins at the rear of this plastic panel, next (1) Philips head screw towards
the front of the panel and 1 plastic nut towards the front middle (Fig 3A) shows location of
screws, push pins & Nut to be removed. NOTE: the model shown is with out the body kit to
show location of screws.
6. With the plastic panel removed locate the rubber plug as seen in (Fig 4), remove this plug and
place the Bolt plate threw the hole Once the Bolt Plate is inserted, hold the Bolt end with one
hand and tighten the Plastic Retainer with your other hand, NOTE: Tighten the Plastic Retainer
until it reaches the floor panel. (Fig 5) Shows Bolt Plate installed with out plastic retainer for
view.
7. Next with the bolt plate in place hold the plastic panel up to where it comes in contact with the
bolt plate and trim a section of it off so the bolt plate will slide through the plastic panel (only
trim what is needed) re install the plastic panel with the factory screws, plastic nut and push
pins, as well as the (5) hex bolts securing the bottom of the body kit to the bottom along the
rocker panel.
8. Select the Passengers/right side rail and begin to install it to the bolt plates by attaching it to
front bolt plate, with (1) 10mm Flat Washer (1) 10mm Lock Washer and (1) 10mm Nut, as
shown in (Fig 6) next install the rear mounting bracket to the rear bolt plate, with (1) 10mm Flat
Washer (1) 10mm Lock Washer and (1) 10mm Nut, Snug but do not tighten hardware at this
time. (Fig 7) shows installation without the plastic panel for view.
9. Align Side rail to the desired location; then tighten all hardware.
10. Repeat steps 2-8 for Driver/left Side rail.
11. Do periodic inspections to the installation to make sure all hardware is secure and tight.
To protect your investment, wax this product after installing. Regular waxing is recommended to
add a protective layer over the finish. Do not use any type of polish or wax that may contain abrasives
that could damage the finish.
For stainless steel: Aluminum polish may be used to polish small scratches and scuffs on the finish.
Mild soap may be used also to clean the Product.
For gloss black finishes: Mild soap may be used to clean the Product.
Passenger/right side shown
Fig 2
Fig 3
Front of Vehicle
Remove Philips screws
Page 2 of 3 12/19/2011)
Page 3

g
r
/rig
r
Fig 3A
Fig 5
Fig 7
Remove Philips screws
Remove plastic nut
Remove push pins
Passenge
Attach with
10mm Flat washer
10mm Lock washer
10mm Nut
ht side rea
Shown without body kit
Fig 4
Fig 6
Remove rubber plu
Passenger/right side front
Attach with
10mm Flat washer
10mm Lock washer
10mm Nut
Installation complete
Page 3 of 3 12/19/2011)
 Loading...