

Page 1
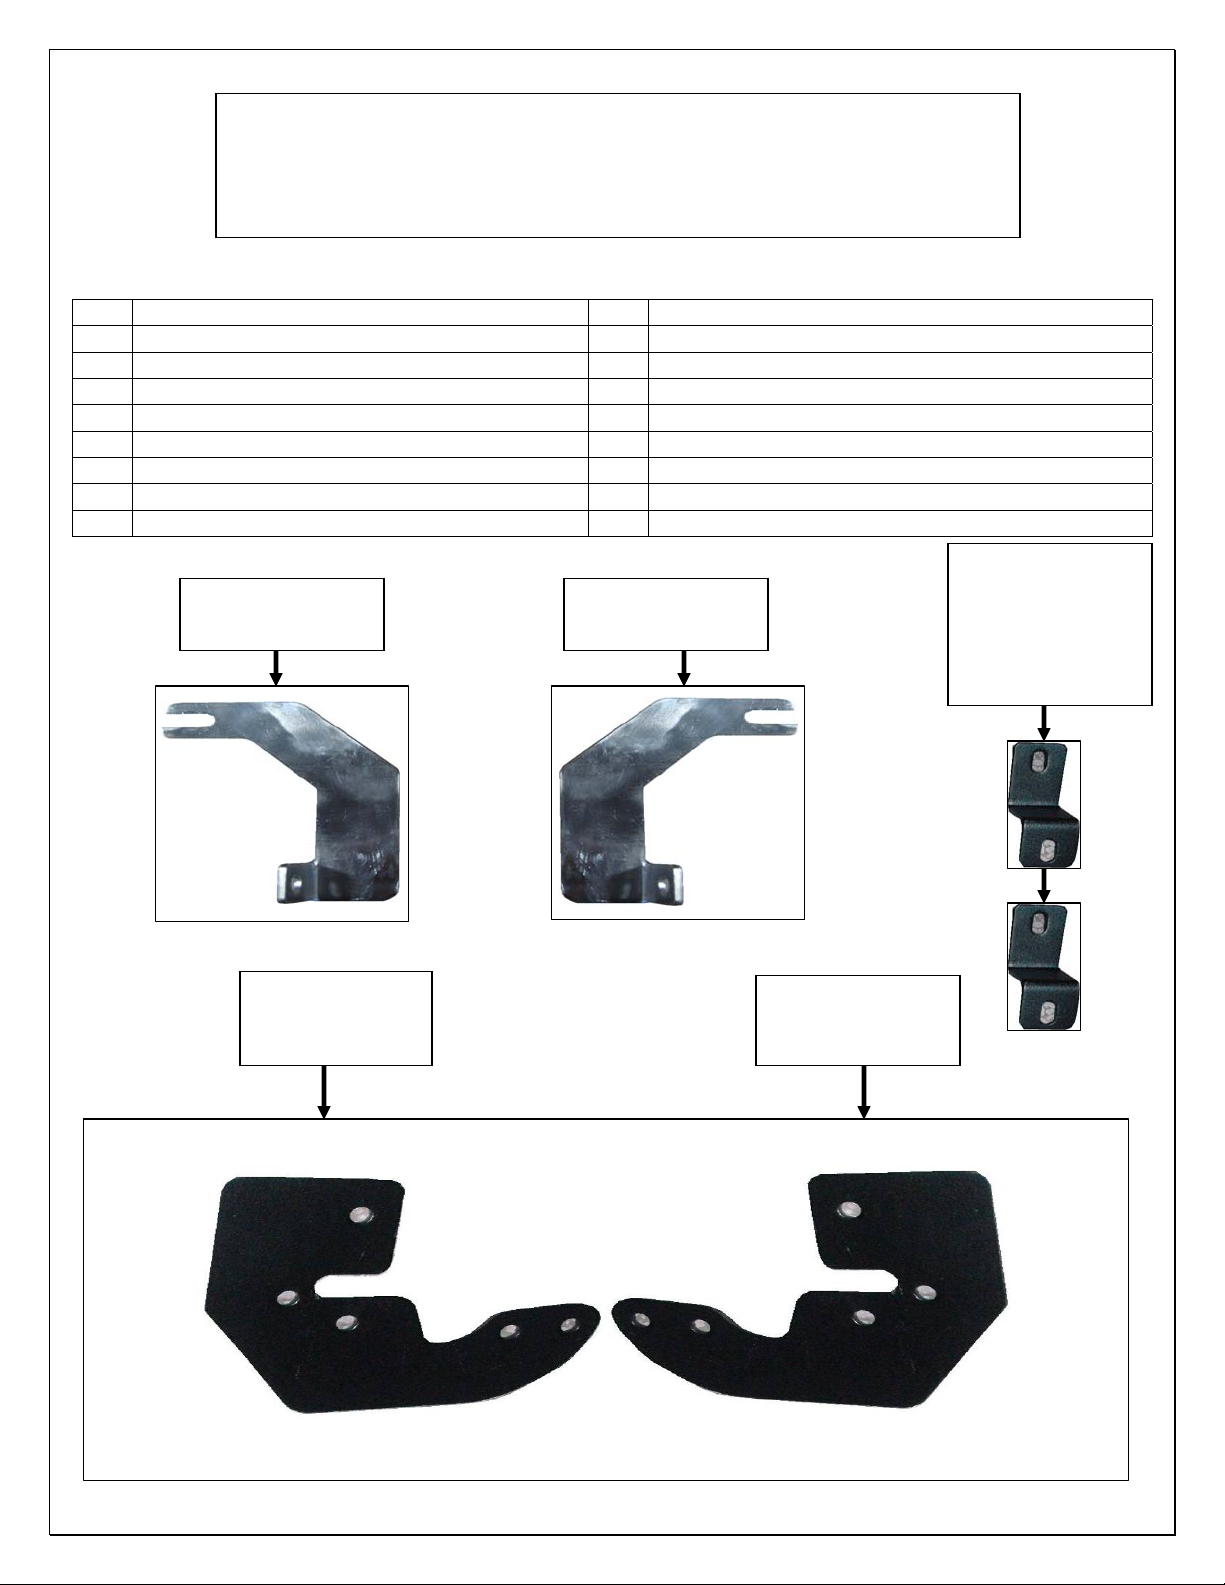
INSTALLATION INSTRUCTIONS
r
/
GRILL GUARD
PARTS LIST:
Qty Description Qty Description
1 Grill Guard 16
1 Driver/Left mounting bracket 8
1 Passenger/Right mounting bracket 2 10mm x 30mm Button head bolts
1 Driver/Left brace bracket 4
1 Passenger/Right brace bracket 8
12mm x 100mm Hex Bolts
4
12mm x 40mm Hex Bolts
4
12mm Lock Washers
8
2004-10 CHEVY COLORADO / GMC CANYON 2WD & 4WD
PART # 4080 / 4080-2
12mm Flat Washers
12mm Hex Nuts
10mm Lock Washers
10mm Flat Washers
10mm Hex Nuts
4
10mm x 40mm Hex Bolts
2
Passenger/right
upper brace bracket
Driver/left brace
upper bracket
Passenger/Right
Side Mounting
Bracket
Drive
Left
Side Mounting
Bracket
Passenger & Driver
lower brace
brackets
Used with none
suspension
package
Page 1 of 3 12/05/08 Rev1
Page 2

PROCEDURE:
1. REMOVE CONTENTS FROM BOX. VERIFY ALL PARTS ARE PRESENT. READ
INSTRUCTIONS CAREFULLY BEFORE STARTING INSTALLATION. CUTTING IS REQUIRED.
ASSISTANCE IS RECOMMENDED.
2. Start by removing plastic lower valance from the lower bumper remove the two pushpins one on each side
of the fender well and using a flat tip screwdriver, pry the tabs out from the valance and remove. NOTE: If
the lower valance is to be installed, it will need to be trimmed where it interferes with the Grill Guard
brackets.
3. Once plastic valance is removed, locate and remove the plastic splash guard.
4. NOTE: Depending on the model of truck, (Z71 or Offroad Package) your vehicle maybe equipped with a
metal cross bar. If this is the case you will need to remove it as well (Fig 1). This will not be reattached
after mount brackets are installed. Select the Driver/left side mounting brackets from the list of parts
above. Position Mounting Bracket to the inside of the frame rail (Fig 2) showing mounting holes in frame
and insert (2) 12mm x 100mm Hex Bolts, (2) 12mm flat washers, (2) 12mm Flat Washers, (2) 12mm Lock
Washers and (2) 12mm Hex Nuts as shown in (Fig 2A) Snug but do not tighten hardware.
5. For vehicles with out Z71, Offroad package,
parts above, place Mounting Bracket to the inside of the frame and Small Mounting Bracket to the outside
of the frame. Line up upper holes on the brackets with holes on the frame and secure them together with
the included (1)12mm x 100mm hex bolt, (1) 12mm nut, (2) 12mm flat washers. Line up bottom holes on
the Brackets and secure them together with included (1) 10mm x 40mm hex bolt, (1) 10mm nut, and (2)
10mm flat washers (Fig 3). shows Driver/Left side mounting bracket attached
6. Select the driver/left side upper brace bracket from the list of parts above, located between the grill and the
top of the factory bumper is the bumpers mounting bolt (Fig 4) shows location of bolts, loosen just enough
to slip the bracket between the bolt, Snug but do not tighten hardware.
7. Repeat steps 2-6 for Passenger/right side of vehicle. Snug but do not tighten hardware.
8. With help, position the Grill guard to the lower mounting brackets, and secure using the included (4) 12mm
x 40mm hex bolts, (4) 12mm lock washers, (8) 12mm flat washers and (4) 12mm nuts, (Fig 5 shows
location of bolts). Once done secure the top upper brace brackets with the (2) 10mm Button head bolts,
(4) 10mm flat washers, (2) 10mm lock washers and (2) 10mm nuts (Fig 5A) shows location of bolts
attached to guard, Level and adjust the Grill guard and tighten all hardware.
9. Hold the splash guard up to the mounting points. Mark the splash guard where the mount brackets interfere
with the Mounting Brackets double check the location marked to cut, when satisfied with your marks trim off
the access plastic with a utility knife (Fig 6) shows area to trim off.
10. Do periodic inspections to the installation to make sure that all hardware is secure and tight.
Select the Driver/left side mounting brackets from the list of
To protect your investment, wax this product after installing. Regular waxing is recommended to
add a protective layer over the finish. Do not use any type of polish or wax that may contain abrasives
that could damage the finish.
For stainless steel: Aluminum polish may be used to polish small scratches and scuffs on the finish.
Mild soap may be used also to clean the Grill Guard.
For gloss black finishes: Mild soap may be used to clean the Grill Guard.
Page 2 of 3 12/05/08 Rev1
Page 3

Fig 1
Remove right & left side
factory bolts holding
crossbar on.
Fig 2A
Secure brackets with
(2) 12mm x 100mm Hex bolt
(4) 12mm flat washers
(2) 12mm lock washer
(2) 12mm nut
Fig 4
Location of bumper bolts for upper
brace brackets; loosen bolts to allow
brackets to slip in-between
Fig 6
Splash guard area to trim off
Fig 2
Fig 3
Secure brackets with
(1) 12mm x 10mm Hex bolt
(2) 12mm flat washers
(1) 12mm lock washer
(1) 12mm nut
Fig 5
Secure brackets with
(2) 12mm x 40mm Hex bolt
(4) 12mm flat washers
(2) 12mm lock washer
(2) 12mm nut
Hold the splash guard up to the mounting
area and mark location for cutting to clear
brackets. Cut only what is needed to allow
brackets to clear the splash guard.
Driver/left side
shown
Splash guard area to trim off
Bottom mounting points
for brackets cross bar
removed
Driver/Left side
shown
Secure brackets with
(1) 10mm x 40mm Hex bolt
(1) 10mm flat washer
(1) 10mm lock washer
(1) 10mm nut
Fig 5A
Driver/left side
shown
Secure upper brace brackets with
(1) 10mm Button head bolt
(2) 10mm flat washers
(1) 10mm lock washer
(1) 10mm nut
Page 3 of 3 12/05/08 Rev1
 Loading...