

Aries Automotive 4069-2 User Manual
INSTALLATION INSTRUCTIONS
GRILLE GUARD
PARTS LIST:
1 Grille Guard 6 12-1.75mm x 30m Hex Head Bolts
Driver/Left Mounting Bracket (A)
1
Passenger/Right Mounting Bracket (B)
1
Driver/Left Top Bracket (C)
1
Passenger/Right Top Bracket (D)
1
PROCEDURE:
1. REMOVE CONTENTS FROM BOX. VERIFY ALL PARTS ARE PRESENT. READ INSTRUCTIONS
CAREFULLY BEFORE STARTING INSTALLATION.
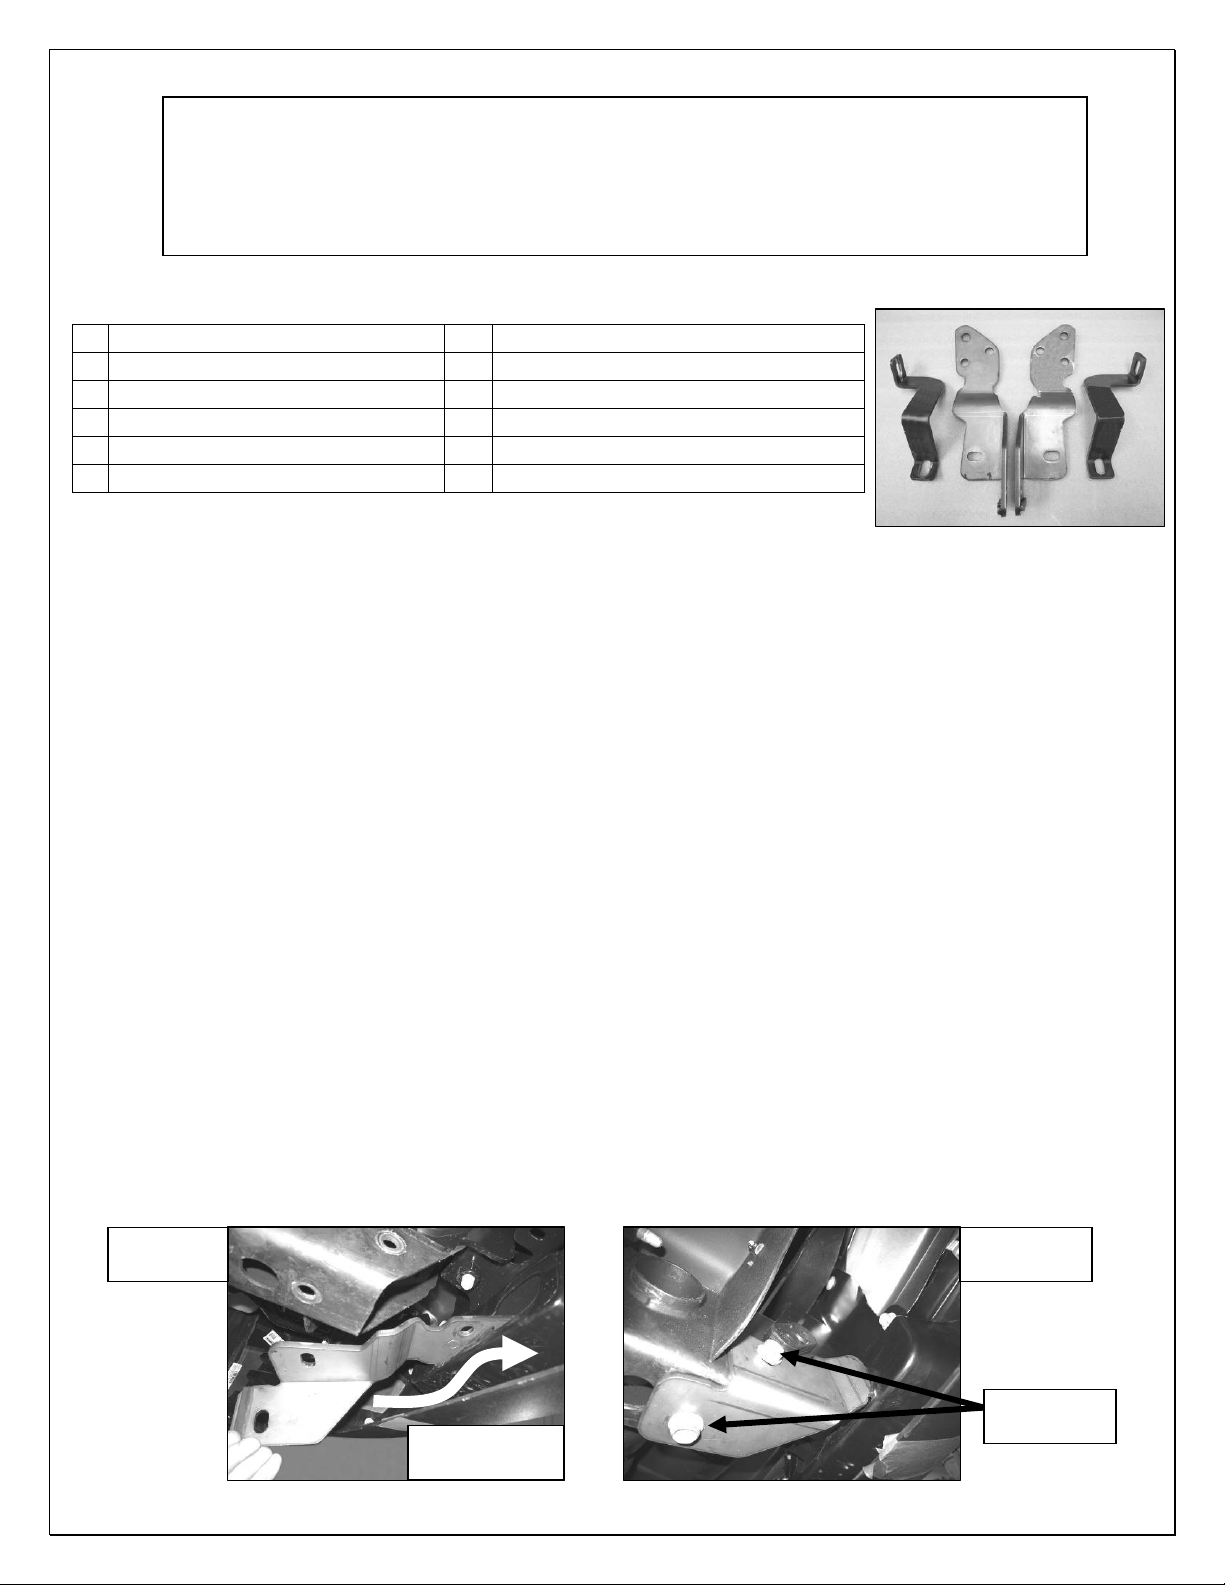
2. From underside of vehicle, remove the two bolts holding the passenger factory tow hook, then remove tow hook
from vehicle and set aside.
3. Determine driver and passenger side Mounting Brackets. From behind of factory bumper, slide passenger side
Mounting Bracket through factory tow hook cavity (Fig 1). NOTE: Refer to Figure above for bracket configuration.
4. Insert factory tow hook back into frame. Secure Passenger Mounting Bracket to frame using the same bolts to
install the tow hook (Fig 2). Do not tighten at this time.
5. Repeat step 2-4 for driver side Mounting Bracket.
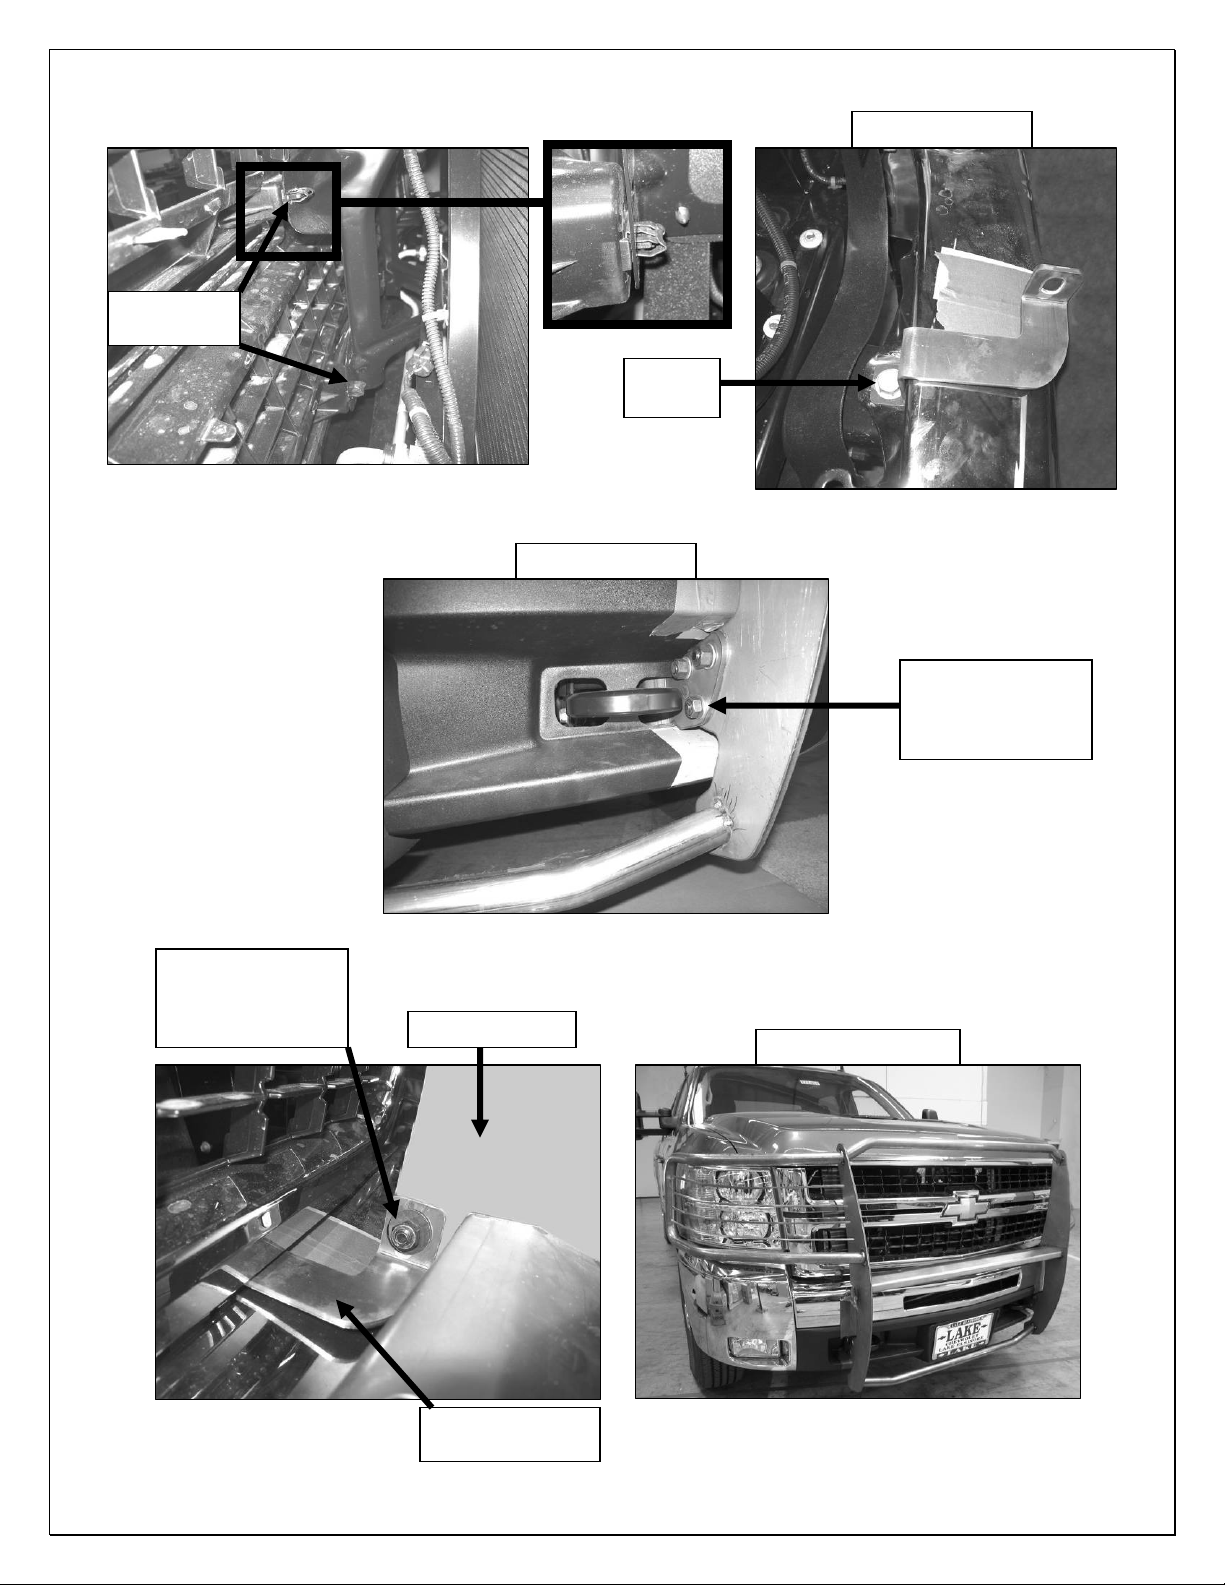
6. Open the hood and using a flat screw driver remove the eight fasteners from plastic shroud located on top of the
radiator. Remove plastic shroud and set aside.
7. Remove the four screws across the top of grille shell, and then using a pair of “needle nose” pliers squ eeze the
six grille mounting clips behind grille shell. Begin from one end of the grille shell and insert a small screwdriver
into the clips to prevent them from popping back into place (Fig 3). Remove the grille by pulling on it gently and
evenly forward. Set grille shell aside.
8. Locate the two top existing frame bolts and remove them from vehicle. Position Top Brackets onto frame and
secure them using the previously removed frame bolts (Fig 4). Do not tighten at this time.
9. Re-install grille shell by reversing step 7.
10. With help position Grille Guard on the outer side of Mounting Brackets. Align holes on the Mounting Brackets with
holes on the Grille Guard.
11. Attach Grille Guard to Mounting Bracket using the included (6) 12mm x 30mm Hex Head Bolts, (6) 12mm Nylock
Nuts, and (12) 12mm Flat Washers (Fig 5). Do not tighten at this time.
12. Attach Grille Guard to Top Brackets using the included (2) 10mm x 30mm Button Allen Head Bolts, (2) 10mm
Nylock Nuts, and (2) 10mm Flat Washers (Fig 6). NOTE: Insert Button Head bolt from the outer side of plate. Do
not tighten at this time.
13. Level and adjust Grille Guard, then tighten all hardware at this time.
14. Reinstall the plastic shroud back onto vehicle.
15. Do periodic inspections to the installation to make sure that all hardware is secure and tight.
Driver Side
Shown
Page 1 of 2
07-10 CHEVY SILVERADO 2500 HD
6 12mm Nylock Nut
12 12mm ID x 30mm OD x 3mm Flat Washers
2 10-1.50mm x 30mm Button Allen Head Bolts
2 10mm Nylock Nuts
10mm ID x 26mm OD x 3mm Flat Washers
2
Insert Bracket
through here
4069/4069-2
(A) (B)
(C) (D)
Passenger
Side Shown
Factory tow
hook bolts
Figure 2
g
g
g
Unclip these
fasteners
10mm x 30mm Hex
10mm Flat Washer,
10mm Nylock Nut
ure 6 Figure 7
Fi
Figure 3
Head Bolt,
Driver Side Shown
Grille Guard Plate
Driver Side Top
Bracket Shown
Fi
ure 5
Factory
Bolt
Driver Side Shown
Fi
ure 4
12mm x 30mm Hex
12mm Nylock Nuts,
12mm Flat Washers
Installation Complete
Head Bolts,
Page 2 of 2
 Loading...