

Aries Automotive 2052 User Manual
2003 Toyota Tundra 2/4WD Part # 2052
Installation Instructions
Parts List
1 – front bar 2 – Top brackets
2 – Frame brackets 2 – 3/8 x 1 Button bolts
2 – 3/8 hex nuts 2 – 3/8 Flat Washers
6 – 7/16 x 1 ¼ Hex bolts 6 – 7/16 Hex Nuts
12 – 7/16 Flat Washers
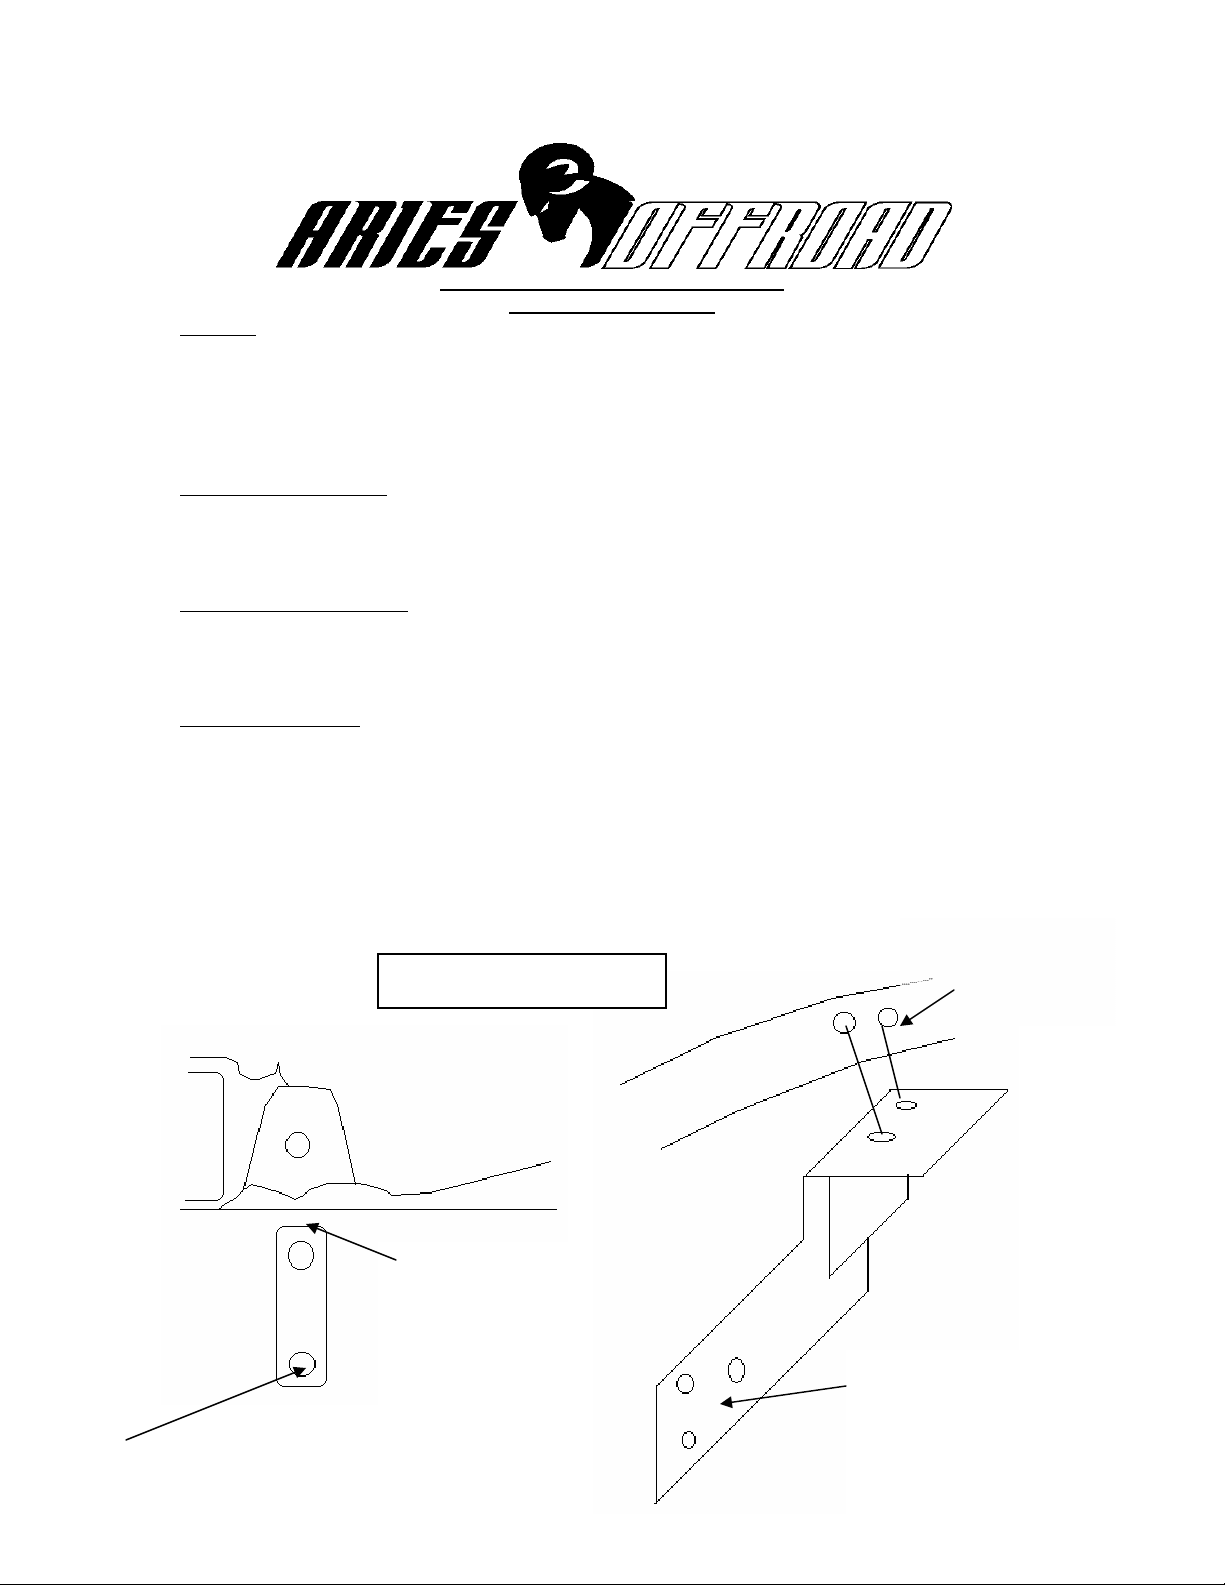
Installing the top brackets
Open the vehicle hood to get to the existing hex nuts (located top left and top right). The bolt pattern on the
top brackets will be positioned in the manner shown in illustration (passenger side shown). Attach top
brackets using the existing factory hex nut. Hand-tighten as you may have to move brackets around.
Installing the frame brackets
Remove factory tow hooks (but do not discard the factory bolts). The bolt pattern on the frame mounting
brackets will be positioned in manner shown in illustration (passenger side shown). Attach frame brackets
using the factory bolts.
Installing the front bar
Line up the three holes on the lower portion of the front bar with the three holes on the frame brackets
(inner edge). Use the 7/16 x 1 ¼ hex bolts, 7/16 hex nuts and 7/16 flat washers to fasten the front bar to the
frame brackets. Top portion of the front bar will line up with the hole on the top brackets (outer edge).
Use the 3/8 x 1 button bolts, 3/8 hex nuts and 3/8 flat washers to fasten the front bar.
Once the front bar is attached to all mounting brackets, align the left and right side of the front bar to the
bumper and tighten all fasteners.
NOTE: It is advisable to re-check all fasteners for tightness after one week.
Use existing hex bolts
on vehicle
Passenger Side Shown
Attach Using the
existing hex nut on
vehicle (under hood)
Attach using the 3/8 x 1 button bolts
(Align to the inner edge of front bar side plate)
Align front bar between
frame brackets
 Loading...