

Aries Automotive 204045 User Manual

INSTALLATION INSTRUCTIONS
3" SIDEBARS
ROCKER PANEL MOUNT
07-14 1500-2500-3500 SILVERADO/SIERRA CREW CAB
EXCLUDES DIESEL W/DEF
3" SIDEBARS
g
r
ROCKER PANEL MOUNT
07-14 1500-2500-3500 SILVERADO/SIERRA CREW CAB
EXCLUDES DIESEL W/DEF
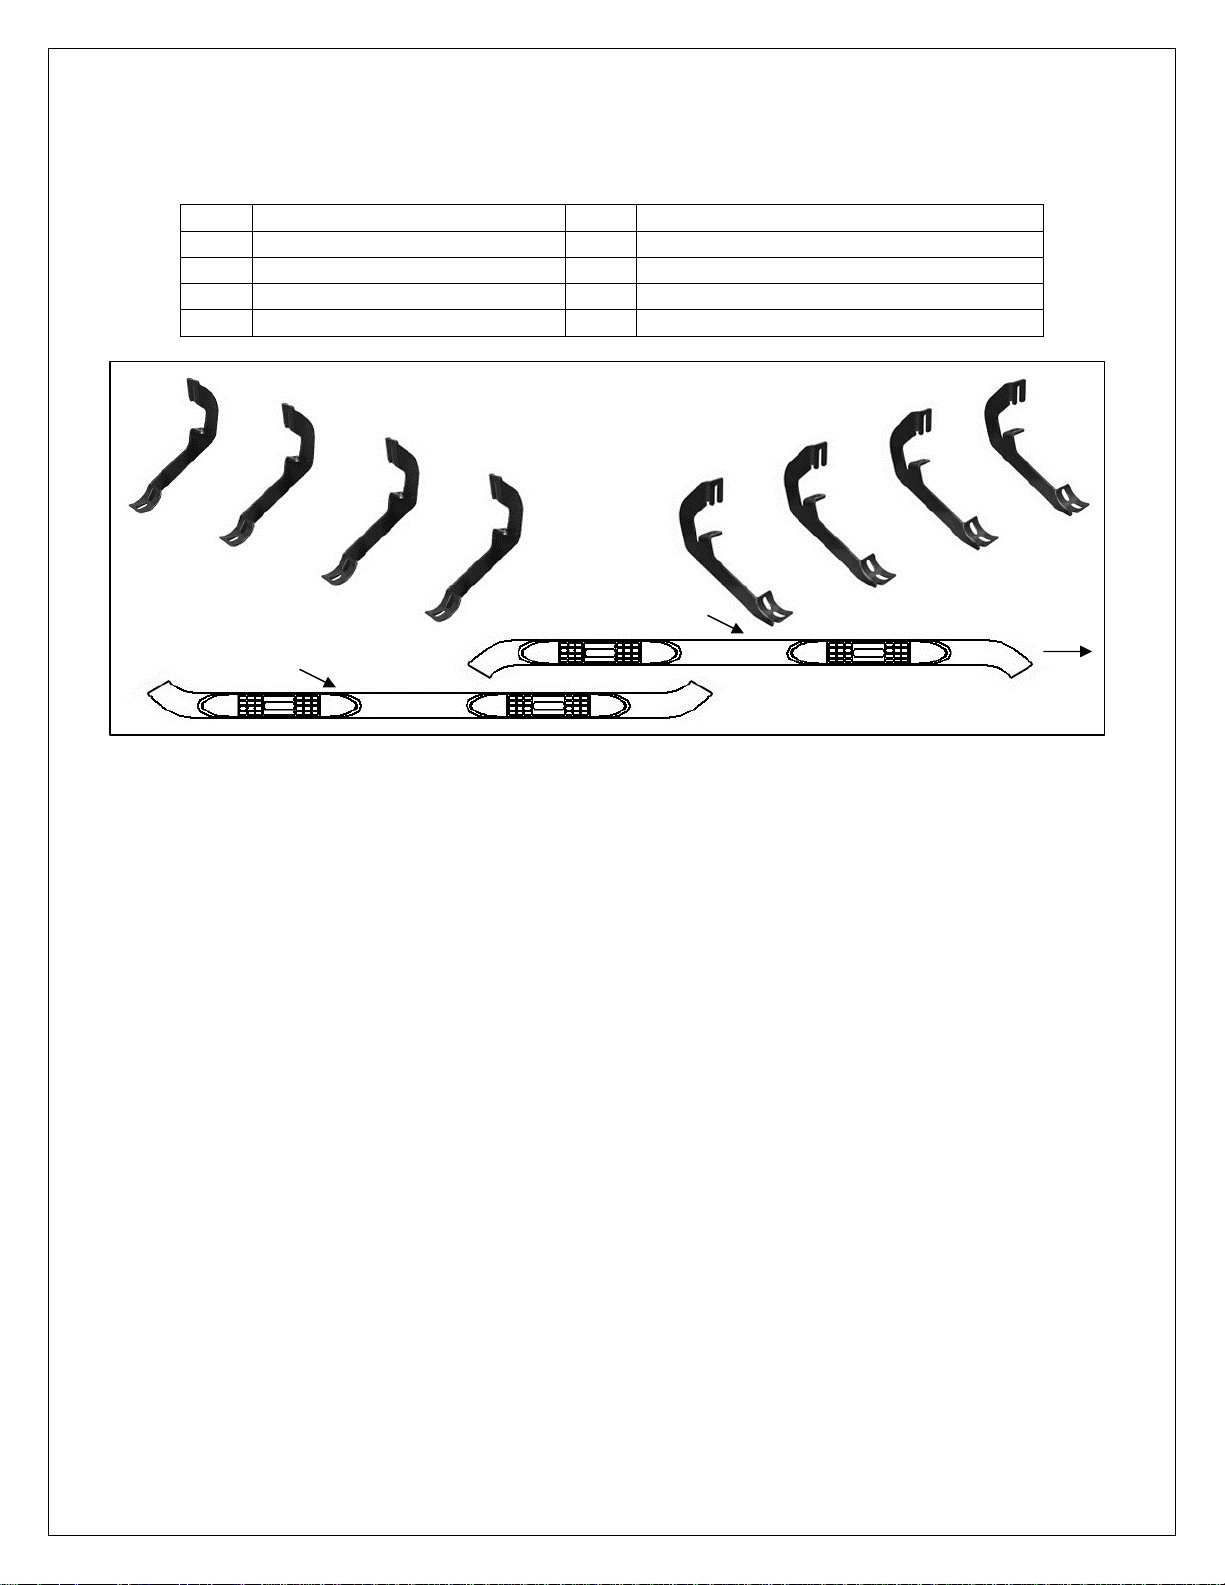
PARTS LIST:
Qty Description Qty Description
1 Driver/Left Sidebar 32 8-1.25mm x 25mm Hex Bolt
1 Passenger/Right Sidebar 32 8mm x 24mm OD x 2mm Flat Washer
8 3” Sidebar Brackets 32 8mm Lock Washer
12 8-1.25mm Clip-On Nuts
(8) Universal Mounting Brackets (NOTE: same
bracket used for left or right side installation)
Passen
er/right sidebar
Driver/left sideba
Front
Note: Front step pad is farther back
from end of tube than rear step pad
PROCEDURE:
REMOVE CONTENTS FROM BOX. VERIFY ALL PARTS ARE PRESENT. READ INSTALLATION
INSTRUCTIONS CAREFULLY BEFORE STARTING INSTALLATION.
1. Start the installation under the driver side of the vehicle. Locate the (5) tabs with holes along the bottom
edge of the body, (Figure 1). IMPORTANT: Installation will use the 1st, 2nd, 4th and 5th mounting tabs
only.
2. Select (1) 8mm Clip Nut. Slide the Clip Nut over the first tab with the nut facing up behind the tab,
(Figure 2). Line up the threaded nut with the hole in the tab. Next, locate the threaded hole in the inner
body panel directly above the Clip Nut, (Figure 2).
3. Select (1) Mounting Bracket. NOTE: Brackets are universal and will fit left or right side. Bolt the
Mounting Bracket to the Clip Nut and the factory threaded hole with (2) 8mm Hex Bolts, (2) 8mm Lock
Washers and (2) 8mm Flat Washers, (Figure 3). Snug but do not fully tighten the hardware at this time.
4. Repeat Steps 1 – 3 to install the next Bracket in the 2nd location along the body, (Figure 2).
5. Continue past the 3rd tab and locate the 4th tab along bottom of the body, (Figure 1). Remove the
rubber plug from the larger hole, (Figure 4). Slide (1) 8mm Clip Nut over the tab as previously
described in Step 2. Slide (1) 8mm Clip Nut into the large hole and line it up over the smaller hole,
(Figure 5). Repeat Step 3 to bolt the Mounting Bracket to the location, (Figure 6).
6. Repeat Step 5 to install the last Bracket at the back of the cab, (Figure 7).
7. Carefully position the Driver Sidebar onto the (4) Mounting Brackets. Attach the Sidebar to the
Mounting Brackets with (8) 8mm x 25mm Hex Bolts, (8) 8mm Lock Washers and (8) 8mm Flat
Washers, (Figures 7 & 8). Do not tighten hardware at this time.
8. Level and adjust the Sidebar and tighten all hardware.
9. Repeat Steps 2 – 8 for passenger Sidebar installation. NOTE: cradles on Brackets installed on
passenger side will face forward.
10. Do periodic inspections to the installation to make sure that all hardware is secure and tight.
Page 1 of 3 5/20/13 (DP)
 Loading...