

Page 1

INSTALLATION INSTRUCTIONS
2007-10 CHEVROLET SUBURBAN 1500 2/4WD
2007-10 GMC YUKON XL 1500 2/4WD
PART # 204004 / 204004-2
Read the instructions completely before you begin the installation. NOTE: Pictures
are for reference only, actual brackets may be different. Installation is the same
PARTS LIST
(2) SIDE TUBES WITH STEPS (4) ½” x 2” HEX HEAD BOLTS
(2) FRONT MOUNT BRACKETS (4) ½” FLAT WASHERS
(2) REAR MOUNT BRACKETS (4) ½” SPLIT LOCK WASHERS
(2) CENTER MOUNT BRACES (2)
(6) M12 – 1.75 x 120mm HEX HEAD BOLTS(ONLY FOR 00-06 MODEL)
(4)
(2)
PROCEDURE
1. Begin installation by working on driver side of the vehicle (see Figures 1.1 – 1.4).
2. From underneath truck, loosen and remove body mount bolts that run upward through mounts into
3. Attach and secure Rear Mount Bracket to underside of vehicles rear body mount as shown in Figure
4. Attach Side Tube to Front and Rear Brackets using (1) ½” x 2” bolt, (1) ½” lock washer and (1) ½” flat
5. Repeat process for passenger side of vehicle to complete installation.
FLAT WASHERS
5/16”
5/16”
SPLIT LOCK WASHERS
floorboard. Attach and secure Front Mount Bracket to underside of vehicles front body mount (see
Figure 1.2) with (1) M12 – 1.75 x 120mm bolt ( For 07 Model, use the factory bolt on the vehicle),
(1) ½” split lock washer, and (1) ½” flat washer. Hand Tighten.
1.4, in same manner as the front. Repeat for Center Brace,(see Figure 1.3).
washer for each bracket, and hand tighten. Fasten Center Brace to Side Tube using (1)
bolt,(1)5/16’’ Flat washer and (2)
and tighten all bolts to complete the driver-side assembly.
flat washer. Adjust Side Tube so that it is level and centered,
5/16”
x 1” HEX HEAD BOLTS
5/16”
5/16”
x 1”
Page 2
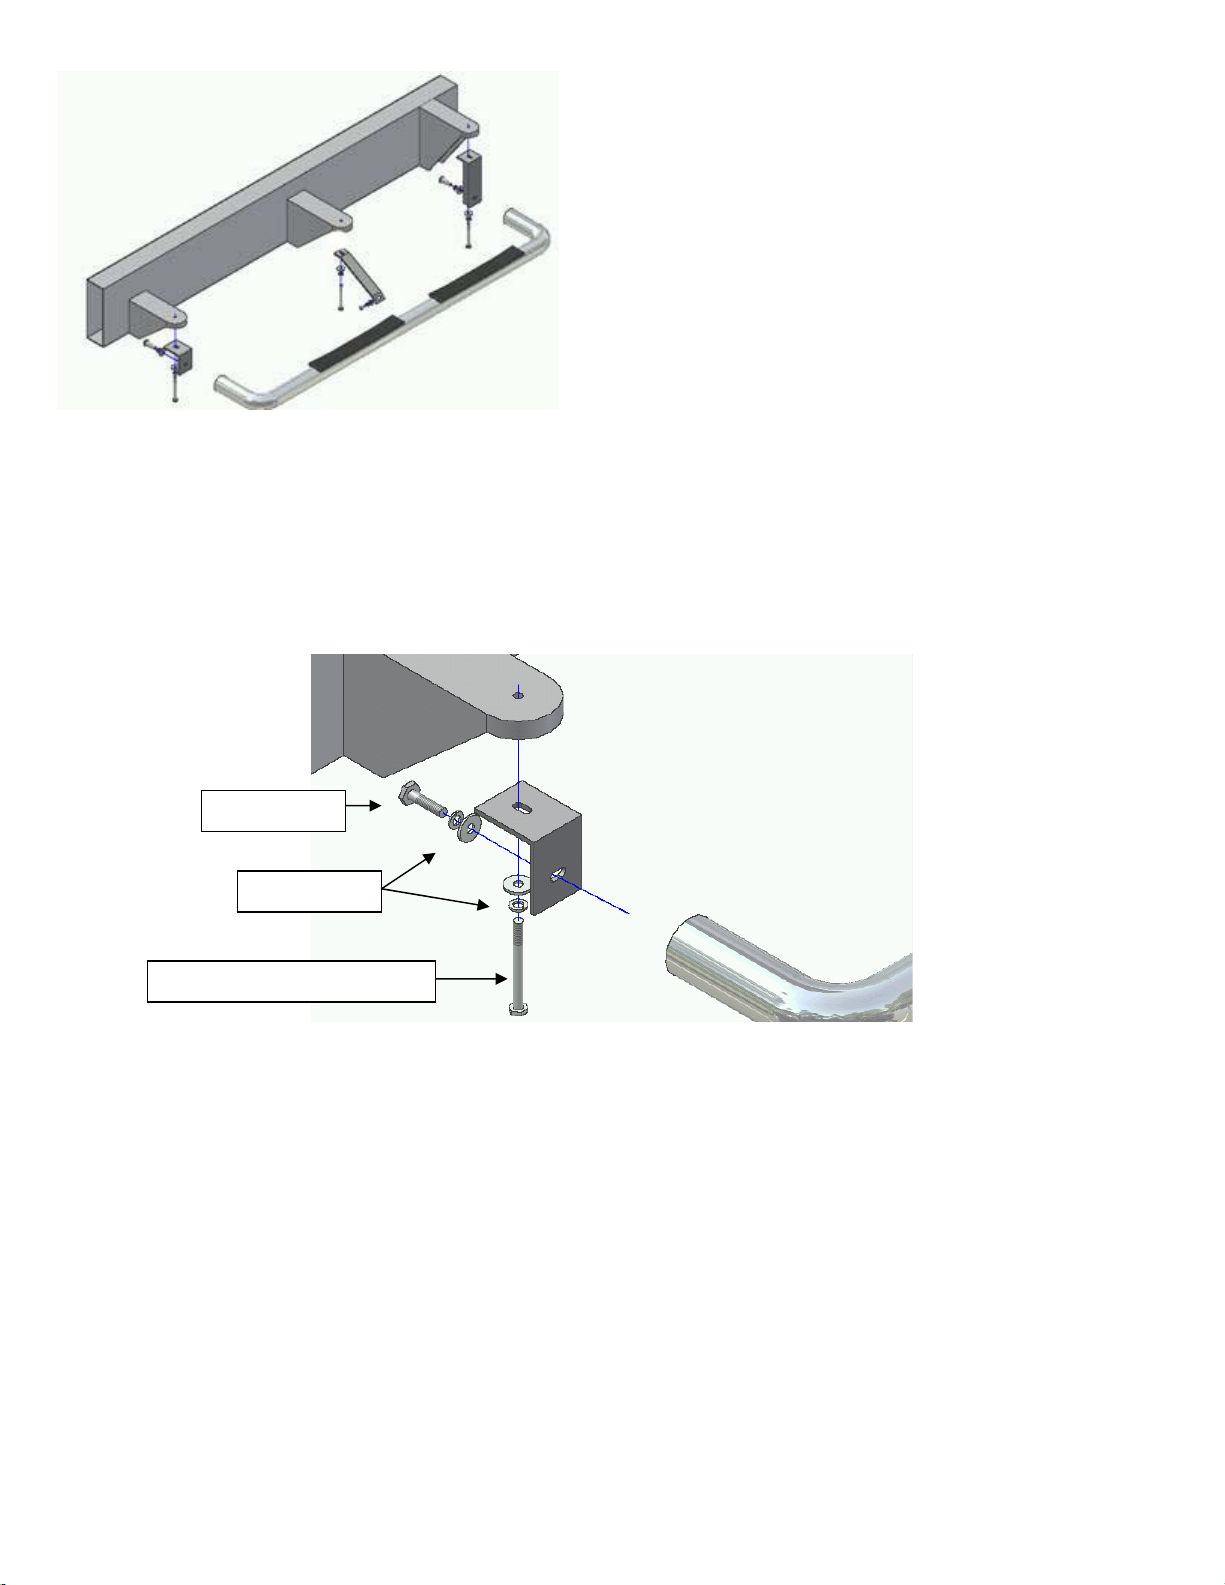
Figure 1.1 – Driver-Side Full Assembly View
½” x 2” Bolt
½” Washers
M12 – 1.75 x 120mm Bolt
Figure 1.2 – Front Bracket
Page 3

Figure 1.3 – Center Brace
Figure 1.4 – Rear Bracket
5/16” Hardware
Page 4

INSTALLTION ALERT
General Motors has made changes to their late model 2010 and 20 12 Chevrolet Silverado and
GMC Sierra Light Duty and Heavy Duty Trucks and these changes affect the installation of our
Side Bars.
Currently, all Side Bars manufactured for GM trucks use the factory body mount bolts to attach
the bars and brackets to the truck. In years past, GM used a fixed nut that was welded in place to
the chassis of the truck. Starting late 2010, GM has now gone to a loose nut that is surrounded by
a "Cage Nut" which has two tabs on either side of the nut to keep it from loosening. Along with
this cage nut, GM is also using Heavy Duty Loc-tite on the Body Mount Bolts for added
protection.
Due to this change, Aries is recommending EXTREME CARE when removing the factory body
mount bolts from these trucks. Loosen and re-tighten all body mount bolts by hand! DO NOT
use Impact Tools of any kind! If bolts become increasingly tight as you are loosening them you
may need to retighten & loosen the bolt several times to clear the loc-tite from the threads Failure
to follow this instruction could cause the body mount bolts to seize and the tabs of the 'Cage Nut'
to bend allowing the nut to spin freely inside Chassis floor board!
Most of clients have been installing the existing side bar applications on these new trucks with no
issues, but please be sure to follow our recommendation to prevent any installation issues. If you
have any questions, please feel free to call our Customer Service Department at 888-800-2743.
Example of the General Motors Body Bolts
 Loading...