

Ariel CO1037 Installation Manual
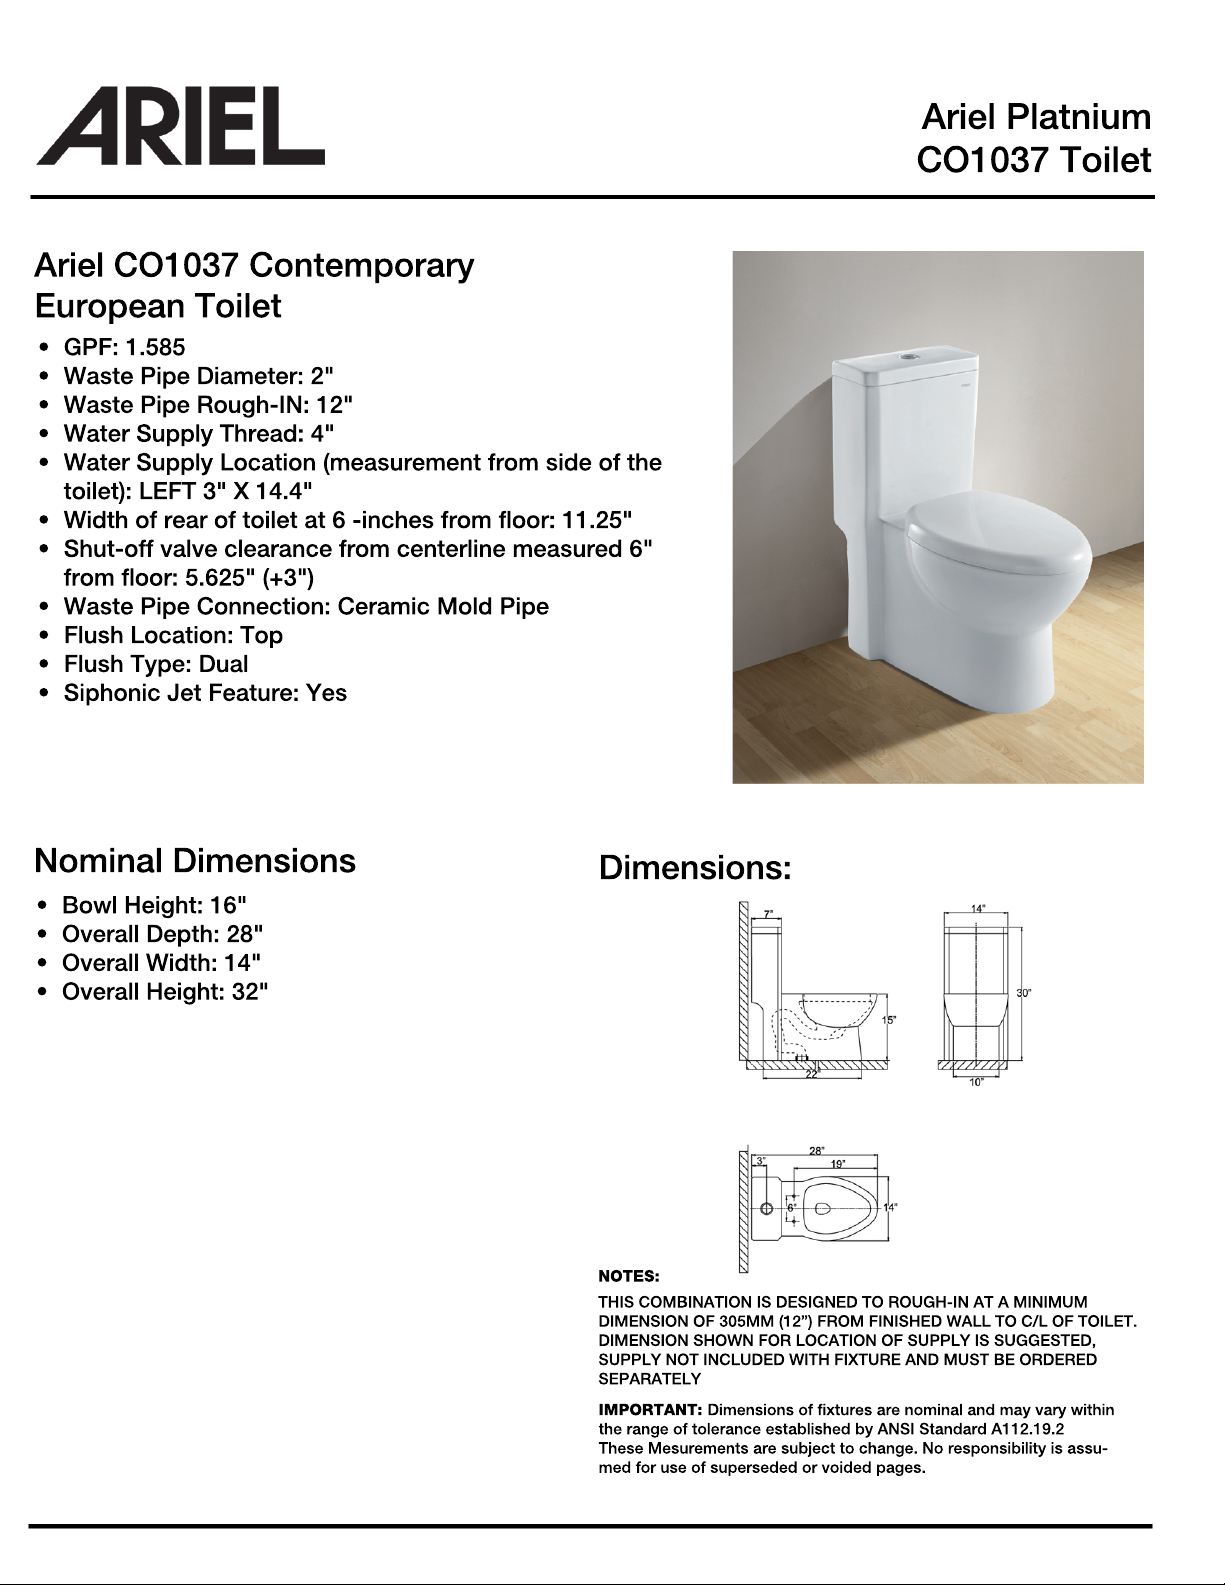
Ariel CO1037 Contemporary
European Toilet
• GPF: 1.585
• Waste Pipe Diameter: 2"
• Waste Pipe Rough-IN: 12"
• Water Supply Thread: 4"
• Water Supply Location (measurement from side of the
toilet): LEFT 3" X 14.4"
•• Width of rear of toilet at 6 -inches from oor: 11.25"
• Shut-off valve clearance from centerline measured 6"
from oor: 5.625" (+3")
• Waste Pipe Connection: Ceramic Mold Pipe
• Flush Location: Top
• Flush Type: Dual
• Siphonic Jet Feature: Yes
Ariel Platnium
CO1037 Toilet
Nominal Dimensions
• Bowl Height: 16"
• Overall Depth: 28"
• Overall Width: 14"
• Overall Height: 32"
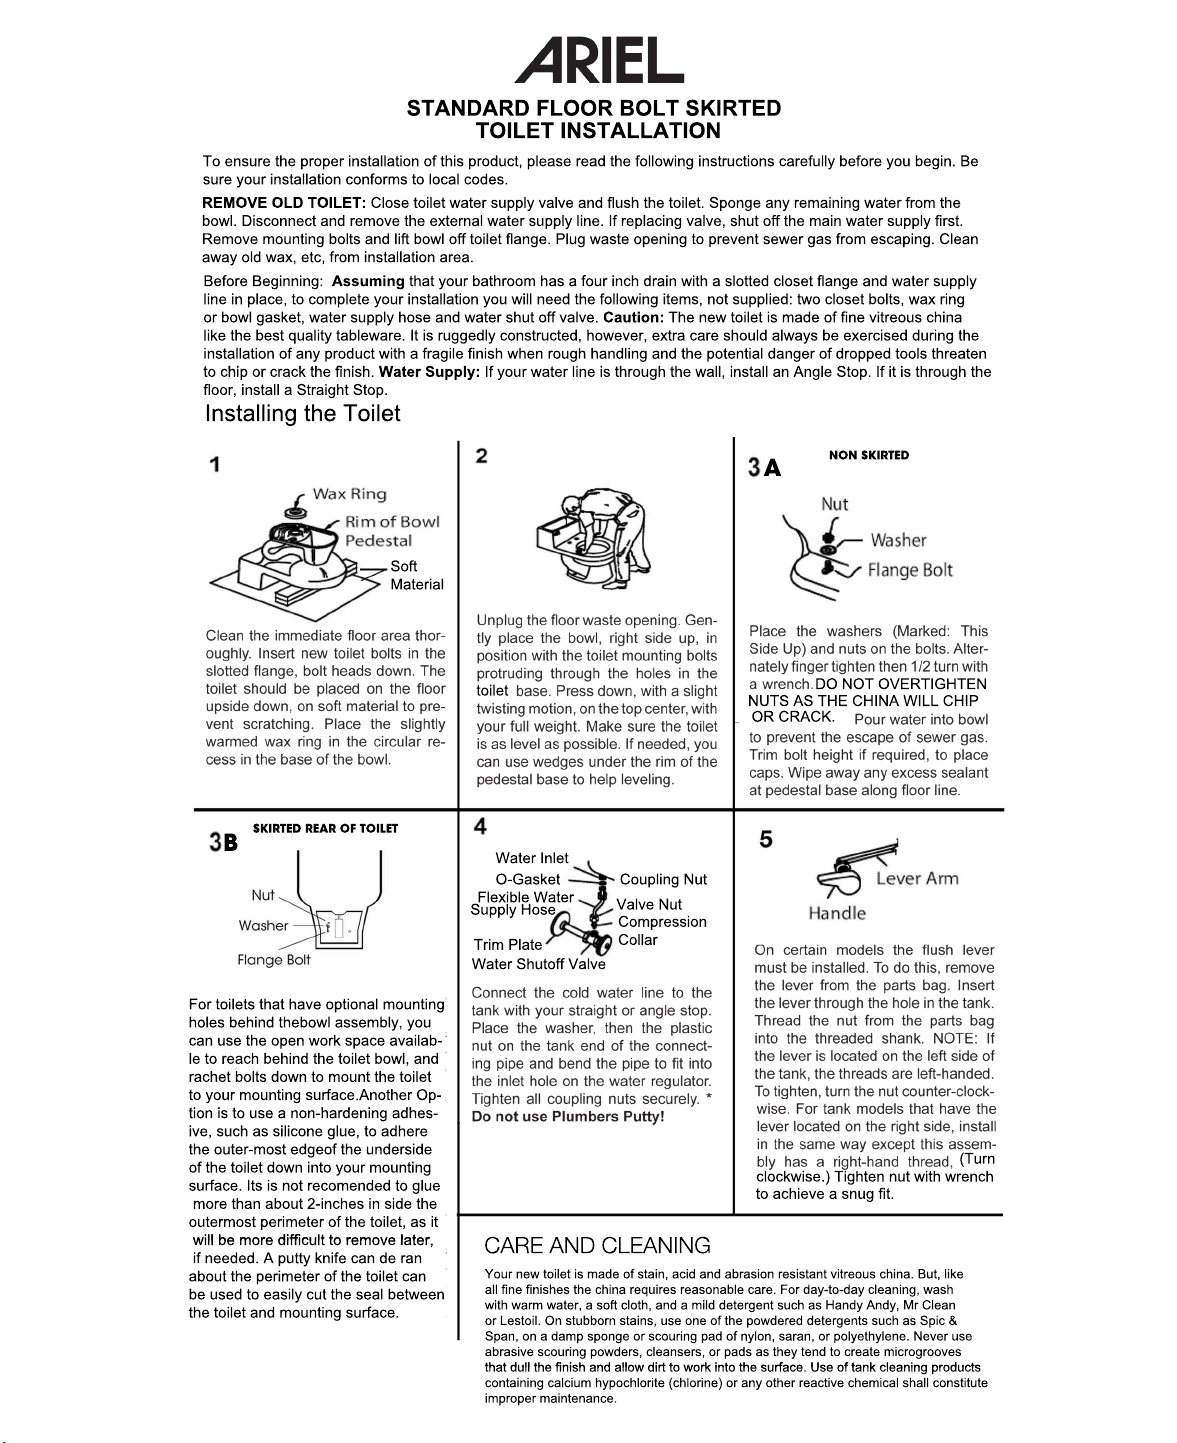
Dimensions:
NOTES:
THIS COMBINATION IS DESIGNED TO ROUGH-IN AT A MINIMUM
DIMENSION OF 305MM (12”) FROM FINISHED WALL TO C/L OF TOILET.
DIMENSION SHOWN FOR LOCATION OF SUPPLY IS SUGGESTED,
SUPPLY NOT INCLUDED WITH FIXTURE AND MUST BE ORDERED
SEPARATELY
IMPORTANT: Dimensions of xtures are nominal and may vary within
the range of tolerance established by ANSI Standard A112.19.2
These Mesurements are subject to change. No responsibility is assu-
med for use of superseded or voided pages.
STANDARD FLOOR BOLT SKIRTED
TOILET INSTALLATION
To ensure the proper installation of this product, please read the following instructions carefully before you begin. Be
sure your installation conforms to local codes.
REMOVE OLD TOILET: Close toilet water supply valve and flush the toilet. Sponge any remaining water from the
bowl. Disconnect and remove the external water supply line. If replacing valve, shut off the main water supply first.
Remove mounting bolts and lift bowl off toilet flange. Plug waste opening to prevent sewer gas from escaping. Clean
away old wax, etc, from installation area.
Before Beginning: Assuming that your bathroom has a four inch drain with a slotted closet flange and water supply
line in place, to complete your installation you will need the following items, not supplied: two closet bolts, wax ring
or bowl gasket, water supply hose and water shut off valve. Caution: The new toilet is made of fine vitreous china
like the best quality tableware. It is ruggedly constructed, however, extra care should always be exercised during the
installation of any product with a fragile finish when rough handling and the potential danger of dropped tools threaten
to chip or crack the finish. to chip or crack the finish. Water Supply: If your water line is through the wall, install an Angle Stop. If it is through the
floor, install a Straight Stop.
Installing the Toilet
Soft
Material
SKIRTED REAR OF TOILET
B
For toilets that have optional mounting
holes behind thebowl assembly, you
can use the open work space availab-
le to reach behind the toilet bowl, and
rachet bolts down to mount the toilet
to your mounting surface.Another Op-
tion is to use a non-hardening adhes-tion is to use a non-hardening adhes-
ive, such as silicone glue, to adhere
the outer-most edgeof the underside
of the toilet down into your mounting
surface. Its is not recomended to glue
more than about 2-inches in side the
outermost perimeter of the toilet, as it
will be more difficult to remove later, will be more difficult to remove later,
if needed. A putty knife can de ran
about the perimeter of the toilet can
be used to easily cut the seal between
the toilet and mounting surface.
A
NON SKIRTED
toilet
Water Inlet
O-Gasket
Flexible Water
Supply Hose
Trim Plate
Water Shutoff Valve
Coupling Nut
Valve Nut
Compression
Collar
NUTS AS THE CHINA WILL CHIP
OR CRACK.
DO NOT OVERTIGHTEN
clockwise.) Tighten nut with wrench
to achieve a snug fit.
CARE AND CLEANING
Your new toilet is made of stain, acid and abrasion resistant vitreous china. But, like
all fine finishes the china requires reasonable care. For day-to-day cleaning, wash
with warm water, a soft cloth, and a mild detergent such as Handy Andy, Mr Clean
or Lestoil. On stubborn stains, use one of the powdered detergents such as Spic &
Span, on a damp sponge or scouring pad of nylon, saran, or polyethylene. Never use
abrasive scouring powders, cleansers, or pads as they tend to create microgrooves
that dull the finish and allow dirt to work into the surface. Use of tank cleaning productsthat dull the finish and allow dirt to work into the surface. Use of tank cleaning products
containing calcium hypochlorite (chlorine) or any other reactive chemical shall constitute
improper maintenance.
(Turn
 Loading...