

Page 1
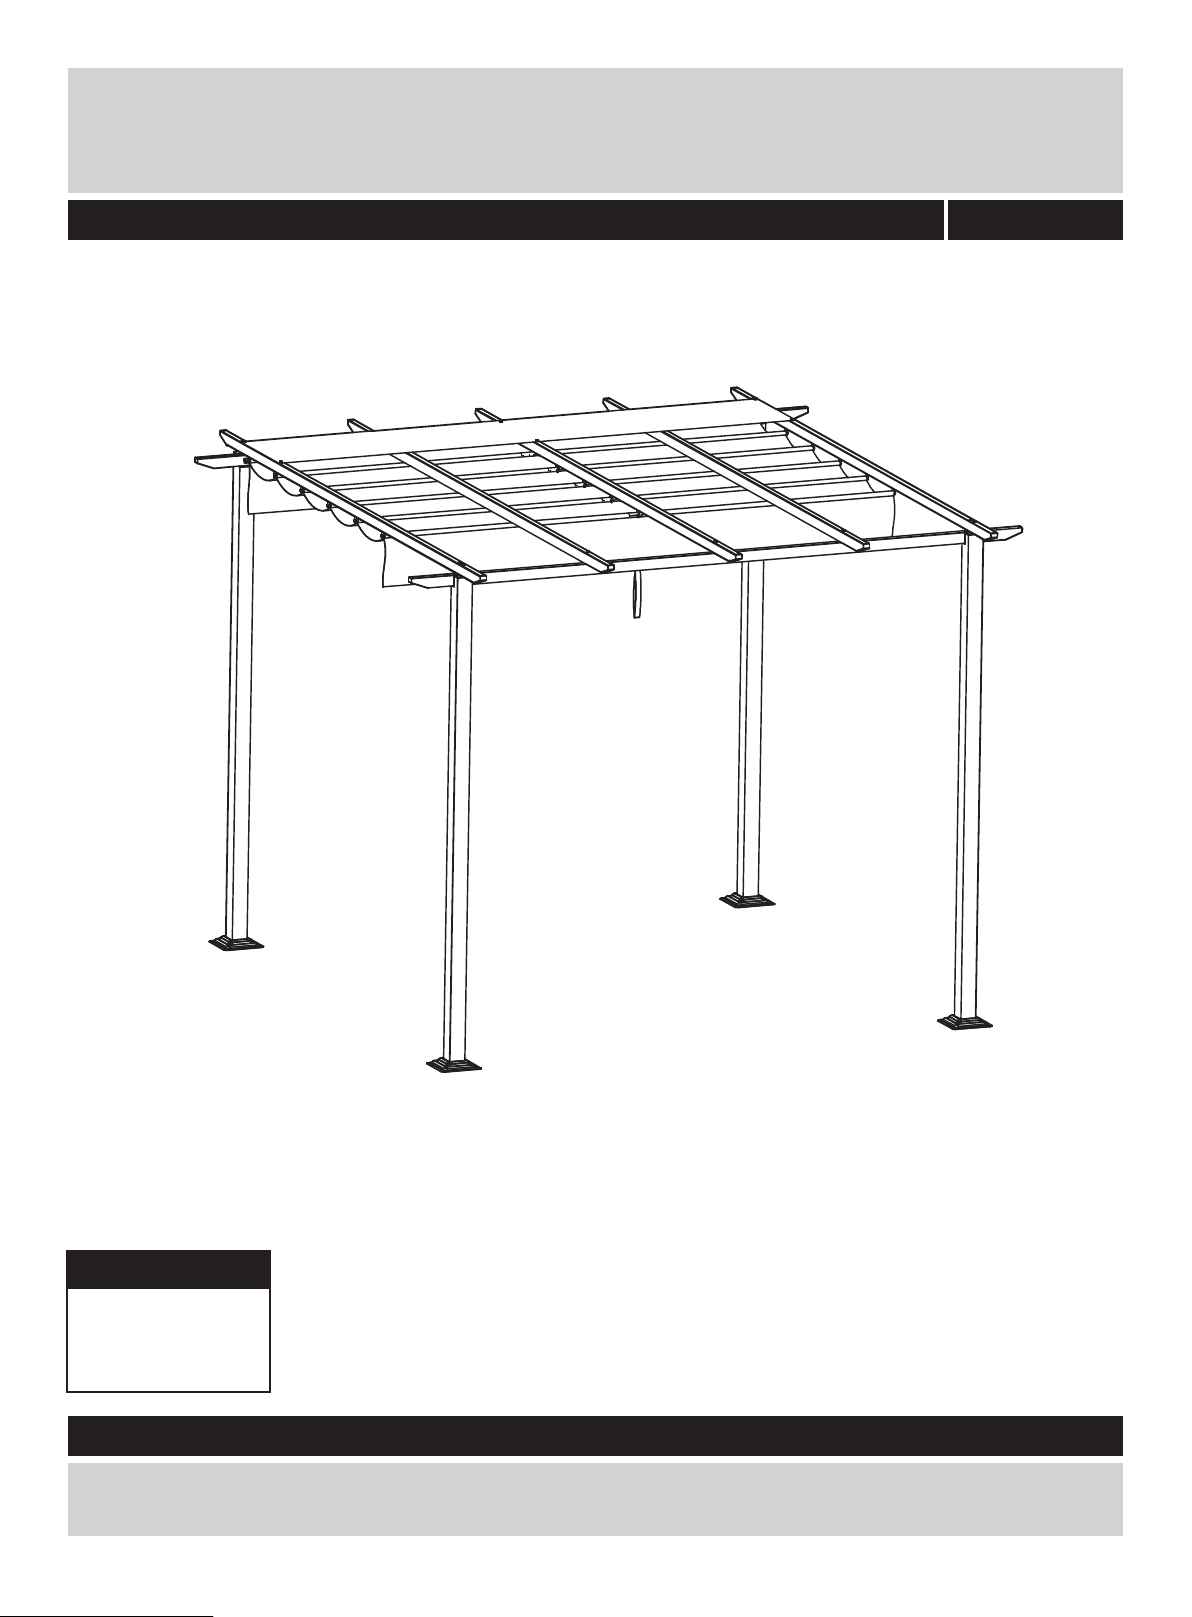
Sliding Gazebo
Assembly Instructions -
Please keep for future reference
803/3914
Dimensions
Width - 300cm
Depth - 300cm
Height - 232cm
Important –
If you need help or have damaged or missing parts, call the Customer Helpline: 03456 400 800
Please read these instructions fully before starting assembly
Issue 1 - 26/05/10
Page 2

Safety and Care Ad vice
Important – Please read these instructions fully befor e starting assembly
• Check you have all the
components and tools listed on
pages 2 & 3.
•
plastic bags and separate them
into their groups.
• Keep children and animals
away from the work area, small
parts could choke if swallowed.
• Make sure you have enough
space to layout the parts before
starting.
• Do not stand or put weight on
the product during assembly,
this could cause damage.
Care and mainte nanc e
•Only clean using a damp cloth
and mild detergent, do not use
bleach or abrasive cleaners.
• Assemble the item as close
room) as possible.
• Assemble on a soft level
surface to avoid damaging the
arbour or your floor.
• Parts of the assembly will be
easier with 4 people.
• Dispose of all packaging
car
efully and responsibly.
•Weight: kgs.
Please lift with care.
•From time to time check that
there are no loose screws on
this arbour.
58
We do not
•
recommend the
use of power
drill/drivers for
inserting screws ,
as this could damage the unit.
Only use hand screwdrivers.
Warning:
•
operating or moving the unit.
•To prolong the life of this
unit, we recommend it is stored
inside during winter or extended
periods of bad weather.
Take care when
•Make sure each screw
matches the corresponding
figure to ensure correct
assembly.
•This product should not be
discarded with household
waste. Take to your local
authority waste disposal centre.
1
Page 3
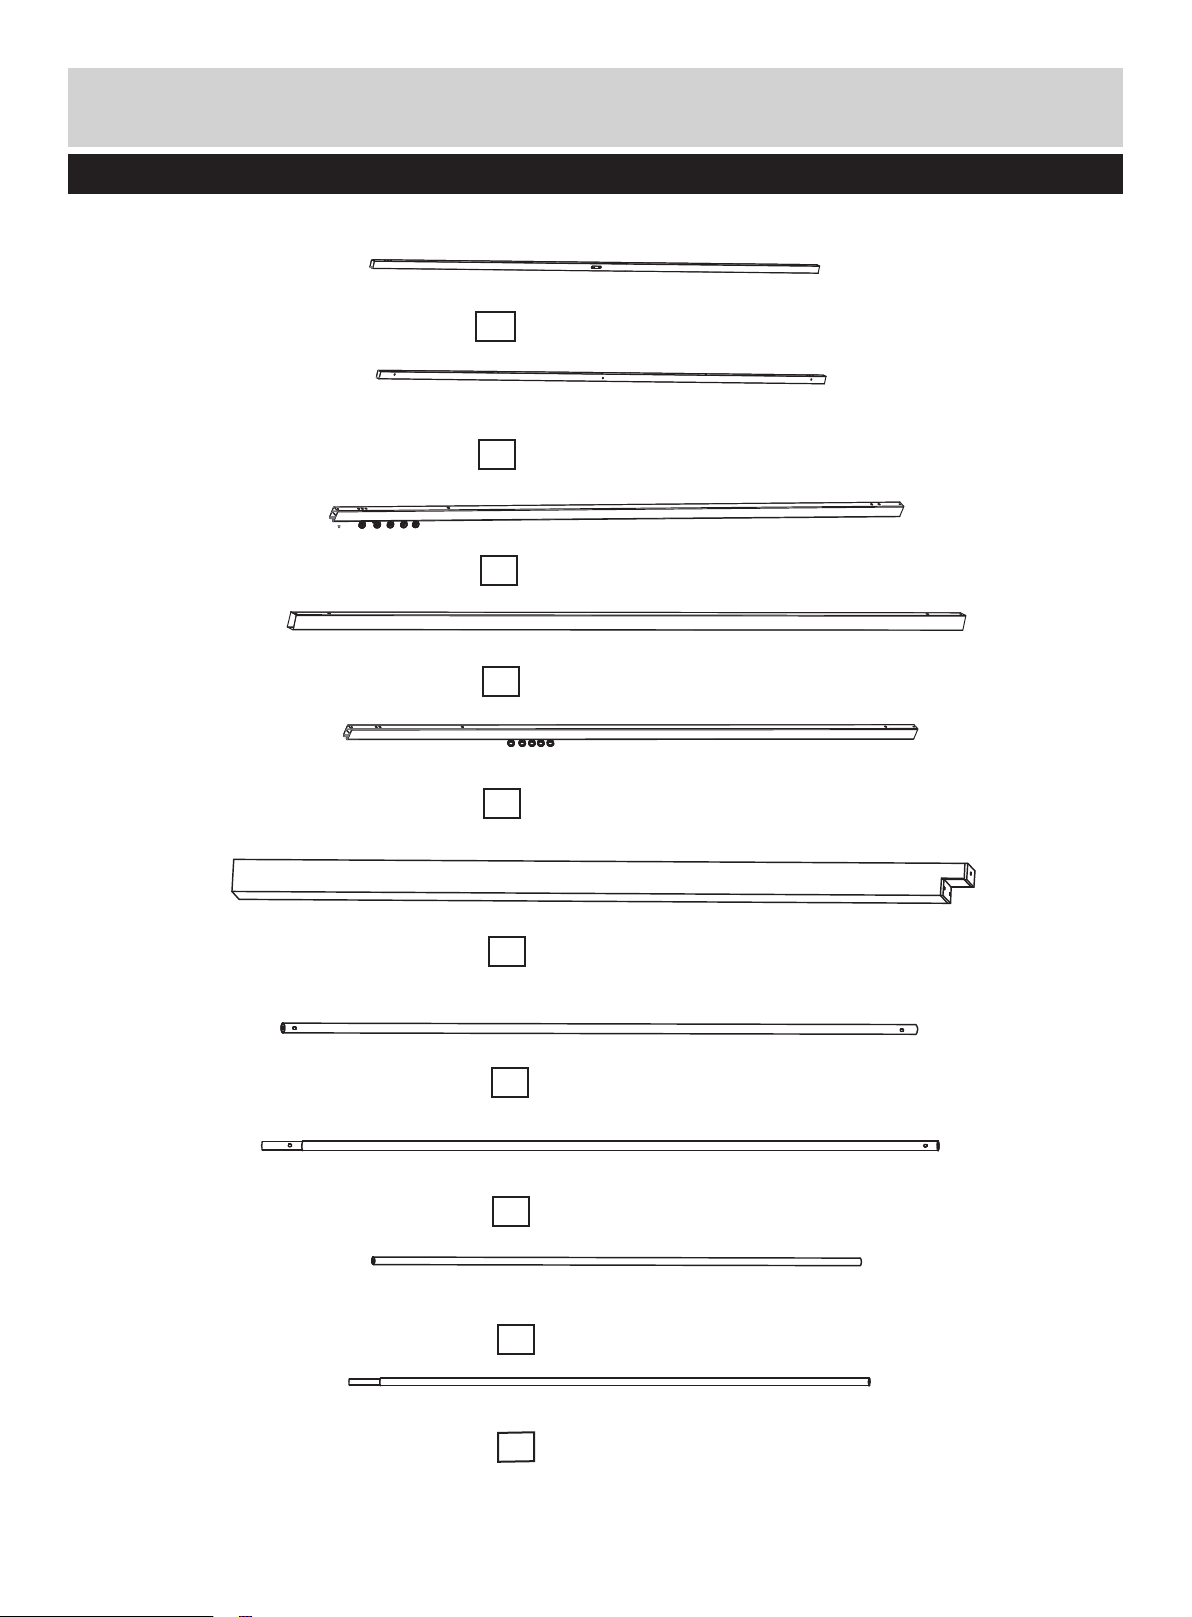
Components - Parts
Please check you have all the parts listed below
Front horizontal tube x1
1
2
Back horizontal tube x1
3
Sliding top tube on two sides x2
4
Top tube x2
Sliding top tube in the middle x1
5
Leg tube x4
6
Left hanging fabric tube x1
7
8
Right hanging fabric tube x1
9
Left fabric tube x5
Right fabric tube x5
10
2
Page 4

Components - Parts
Please check you have all the parts listed below
Protection cover x1
11
12
Roof Cover x1
Footstand x4
13
Components - Fittings
Please check you have all the fittings listed below
Note:
The quantities
A
15mm Screw x 14
D
62mm Screw x 22
G H
Plastic cap x 10
J
Tube cap x 8
below are the correct amount to complete the assembly.
B
15mm Screw x 10
E
Metal washer x 39
Plastic cap x 39
K
Tube cap x 6
C
32mm Screw x 3
F
Ground pins x 16
I
13mm Screw x 14
L
Allen key x 2
M
l required
Spanner x 1
Ruler - Use this ruler to help correctly identify the screws
3
Page 5

Assembly Instructions
Step 1
Assembly frame
Suggest to complete this
product assembly by four
persons.
13
.
plastic
A
E
,
A
Use 16 mm screw
and metal washer
to fix footstand
to leg tube
Tighten the screw
then seal it
cap .
6
with
H
Step 2
Take the protective foams
away from two sides of
sliding top tube
5 3
&
6
6
E
A
13
H
3
.
5
3
5
4
Page 6

Assembly Instructions
Step 3
Insert tube cap to the
sliding top tube
use 13 mm screw to
fix it.
K
3
5
&
I
Step 4
Insert tube cap to the
horizontal tube
13 mm screw to
J
,
1
use
I
fix it.
K
K
,
3
K
I
3
5
5
J
1
J
Step 5
Insert tube cap to the
horizontal tube
13 mm screw to
J
,
use
2
I
fix it.
J
J
J
I
1
J
2
I
2
5
Page 7

Assembly Instructions
Step 6
,
4
use
to fix it.
J
13 mm
Insert tube cap to the
top tube
screw
I
Step 7
Use 62mm screw
metal washer
sliding top tube
1
&
4
2
top
tube
tubes
D
E
to fix
&
3
on
horizontal
.
and
5
H
4
I
J
4
E
4
3
D
&
&
5
H
E
Tighten all the screw
and seal them with
H
plastic cap
.
D
2
4
3
5
4
3
&
5
&
2
1
3
4
1
D
6
Page 8

Assembly Instructions
Step 6
Use
62mm screw
and metal washer
to fix sliding top tube
on
leg tube .
62mm screw
Use
and metal washer
to fix horizontal
1 2 6
&
Tighten the screw
then seal it
cap .
H
6
tube
on leg tube
plastic
with
D
E
3
H
D
D
E
.
,
D
2
E
E
3
6
.
H
3
D
E
1
6
7
Page 9

Assembly Instructions
Step 9
&
&
7
Put fabric tube
into roof cover
&
9 10
as
Figure 4, Figure 5,
,
12
Figure 6, Figure 7.
Connect
fabric tube
as Figure 3.
Use 32mm screw
metal washer
E
hanging fabric tube
to back horizontal tube
Figure 4, Figure 5.
as
8
7
&
C
and
to fix
7 8
&
2
Figure 4
8
,
2
Figure 1
7
,
12
12
Figure 5
E
C
8
H
Figure 3
2
E
C
2
H
7
7
2
8
E
C
H
8
Tighten
all the screw
and seal them with
cap
.
H
Connect fabric tube
C
plastic
&
9
10
through sliding top tube in
, as Figure 8
the middle
Figure 9 and
Use 15mm screw
to fix fabric tube
5
Figure 10.
B
9 10
&
on sliding top tube on two
3
sides
, as Figure 11,
Figure 12.
Tighten all the screw
B
and seal them with
G
plastic cap
.
9
3
12
Figure 12
12
Figure 6
B
&
9
10
Figure 2
5
9
9
10
12
12
10
Figure 8
9
3
G
G
B
Figure 9
&
9
10
9
10
Figure 7
10
Figure 10
Figure 11
8
Page 10

Assembly Instructions
Step 10
A
to fix
11
&
and
on
.
Use 15mm screw
metal washer
protection cover
sliding top tube
E
3 5
11
F
A
to fix
Tighten all the screw
and seal them
cap
Use ground pins
footstand
if you want to firm this arbou
H
.
13
with plastic
into ground
.
r
H
13
A
11
E
Assembly is complete.
If you need help or have damaged or missing p
For further assistance please visit http://www.argos-support.co.uk/
Argos Limited
489-499 Avebury Boulevard Saxon Gate West Central Milton Keynes Bucks,MK9 2NW
arts, call the Customer Helpline: 03456 400800
F
9
 Loading...