

Page 1
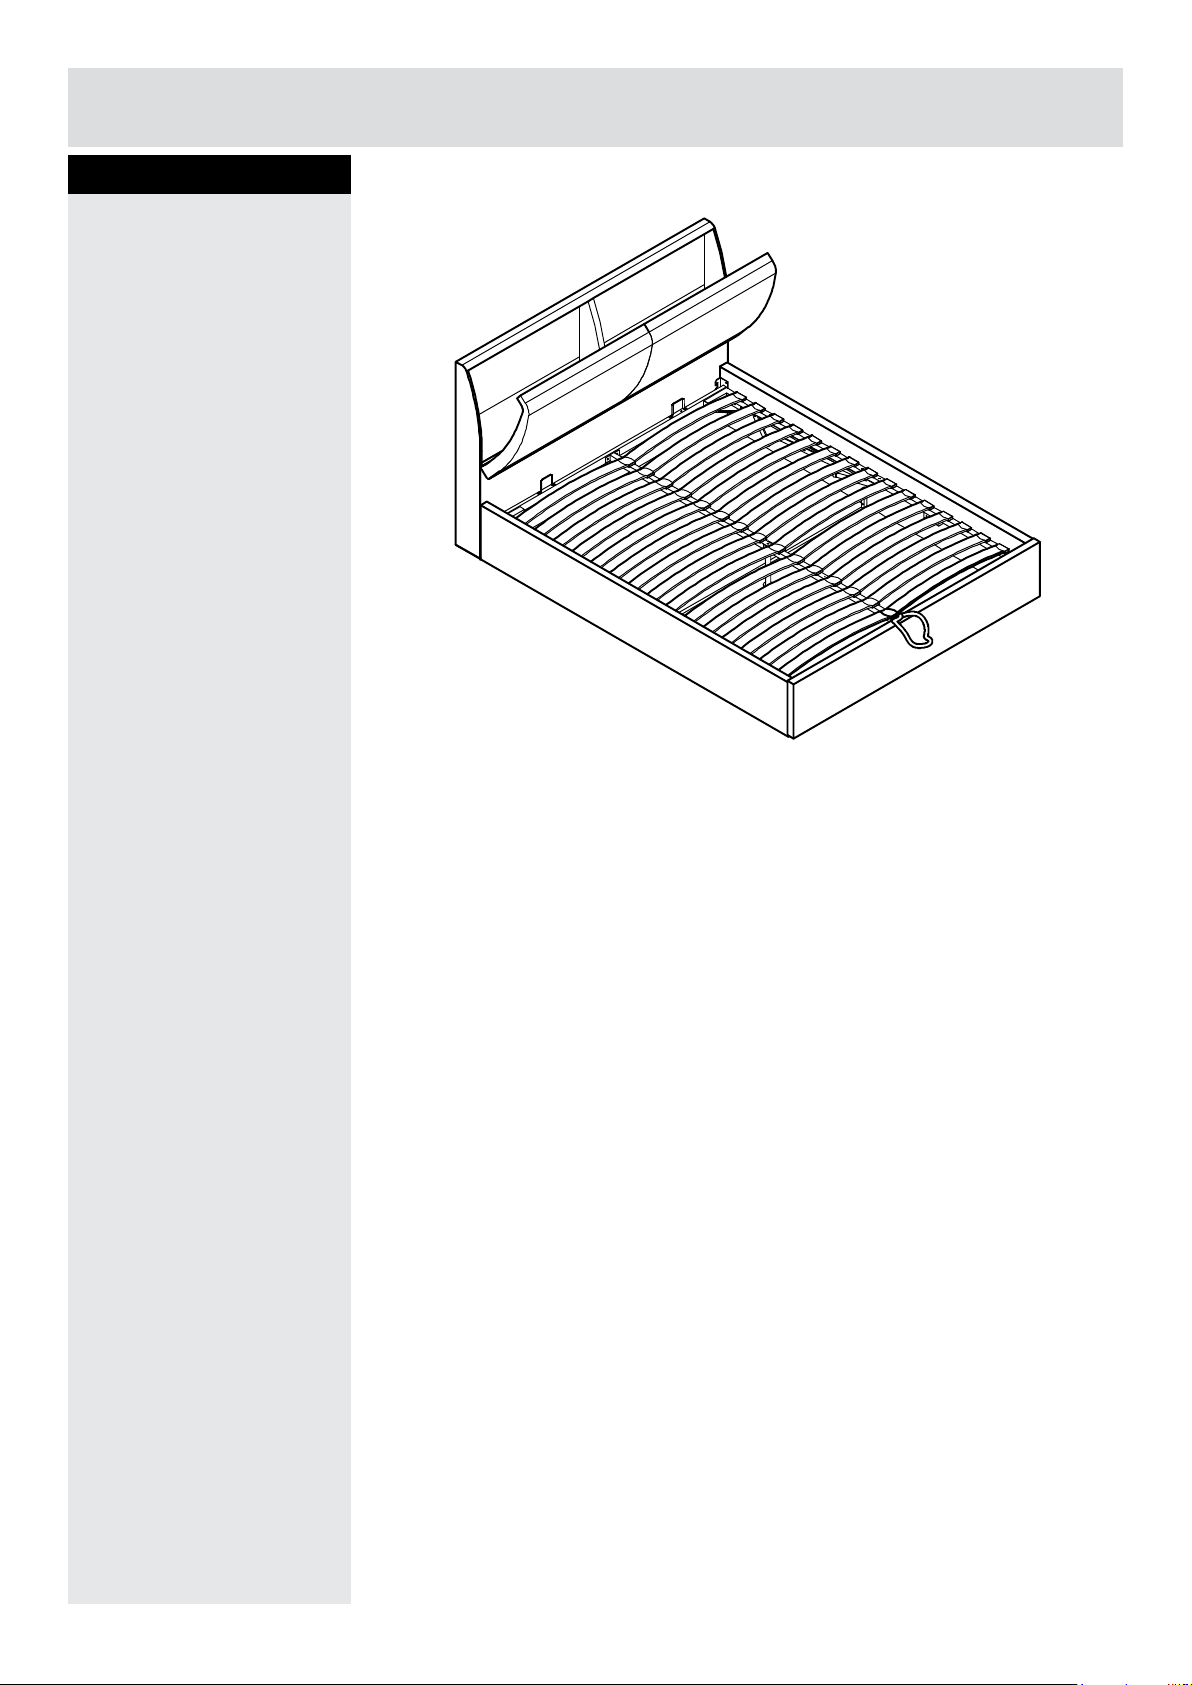
Vince Ottoman Bed Frame
Assembly Instructions - Please keep for future reference
355/4845
330/7281
Dimensions
Depth x Width x Height
213cm x 148cm x 111cm (Double)
223cm x 163cm x 111cm (King)
Important – Please read these instructions fully before starting assembly
eht llac ,s trap gnissim ro degamad evah ro pleh deen uoy fI Customer Helpline:
Argos = 0345 6400800
Issue 1 - 01/12/14
Page 2

Safety and Care Advice
Important – Please read these instructions fully before starting assembly
• Check you have all the
components and tools listed on
the following pages.
• Remove all fi ttings from the
plastic bags and separate them
into their groups.
• Keep children and animals
away from the work area, small
parts could choke if swallowed.
• Make sure you have enough
space to layout the parts before
starting.
Care and maintenance
• Only clean using a damp cloth
and mild detergent, do no use
bleach or abrasive cleaners.
• Assemble the item as close
to its fi nal position (in the same
room) as possible.
• Assemble on a soft level
surface to avoid damaging the
unit or your fl oor.
• Assembly requires 2 people.
• Do not fully tighten bolts until
the whole bed is assembled.
• Do not overtighten the nuts to
avoid causing damage to the
threads.
• From time to time check that
there are no loose screws on
this unit.
• To reduce
the likelihood of
damaging your
product please
ensure that your
power drill is set on a low torque
setting.
• Recommended thickness of
mattress:16-22cm.
• This product should not be
discarded with household waste.
Take to your local authority
waste disposal centre.
Caution
• Please ensure children and
pets do not play in the storage
area or try to lift up the metal
frame.
• Once assembled, put mattress
on frame before pushing it down
and only lift up or push down the
metal frame with mattress on top.
• Only use the handle to lift
and lower the bed frame to
avoid trapping fingers.
1
Page 3
If you have damaged or missing components, call the
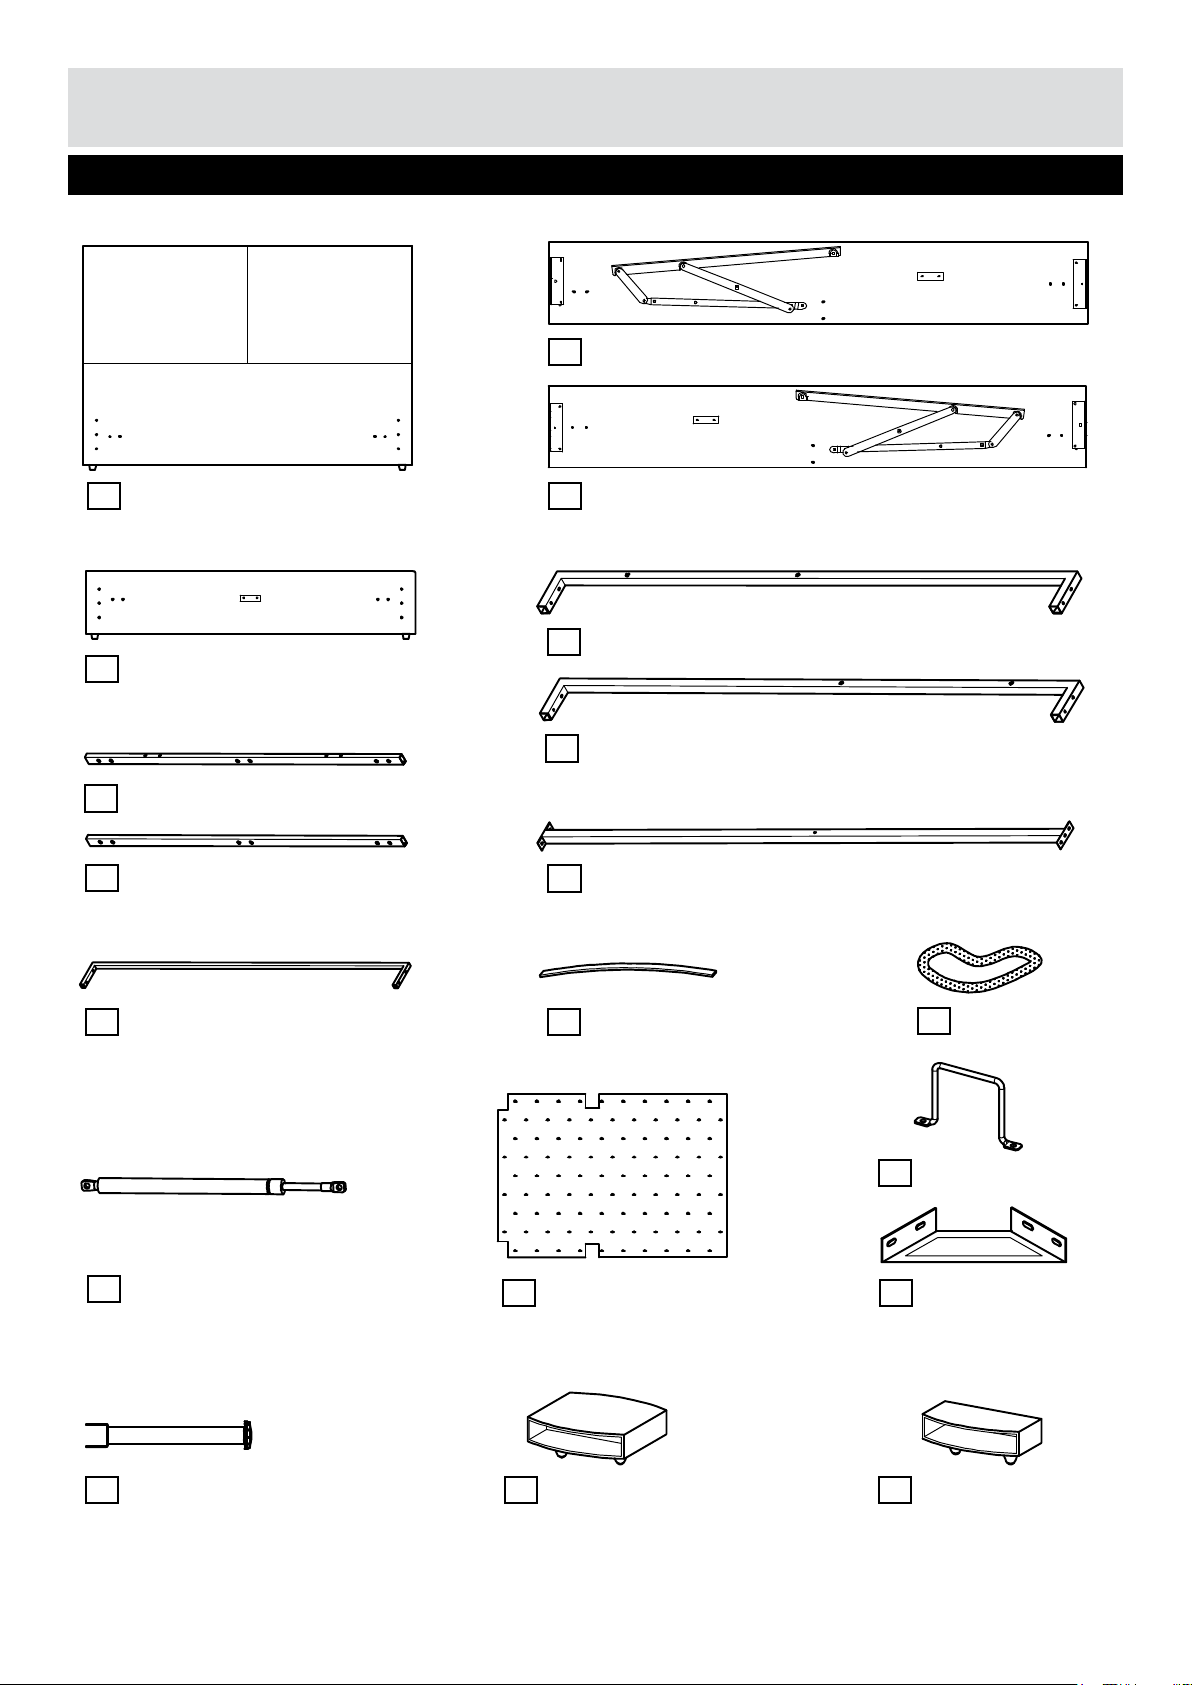
Components - Panels
Customer Helpline: Argos = 0345 6400800
Please check you have all the panels listed below
2
Right side rail
1
Headboard
4
Footboard
Front bar
7
Rear bar
8
Bottom support bar
10
3
Left side rail
5
Left side bar
Right side bar
6
Middle bar
9
Slat x 26 (double)
11
or x 30 (King)
12
Strap
13
17
Leg
Piston x 2
Mattress stopper x 2
15
Non-woven fabric
14
(in the headboard storage) (2 pcs for headboard)
Slat cap x 13 (Double)
18
or x 15 (King)
Corner bracket x 4
16
(2 pcs for footboard)
Slat cap x 26 (Double)
19
or x 30 (King)
2
Page 4
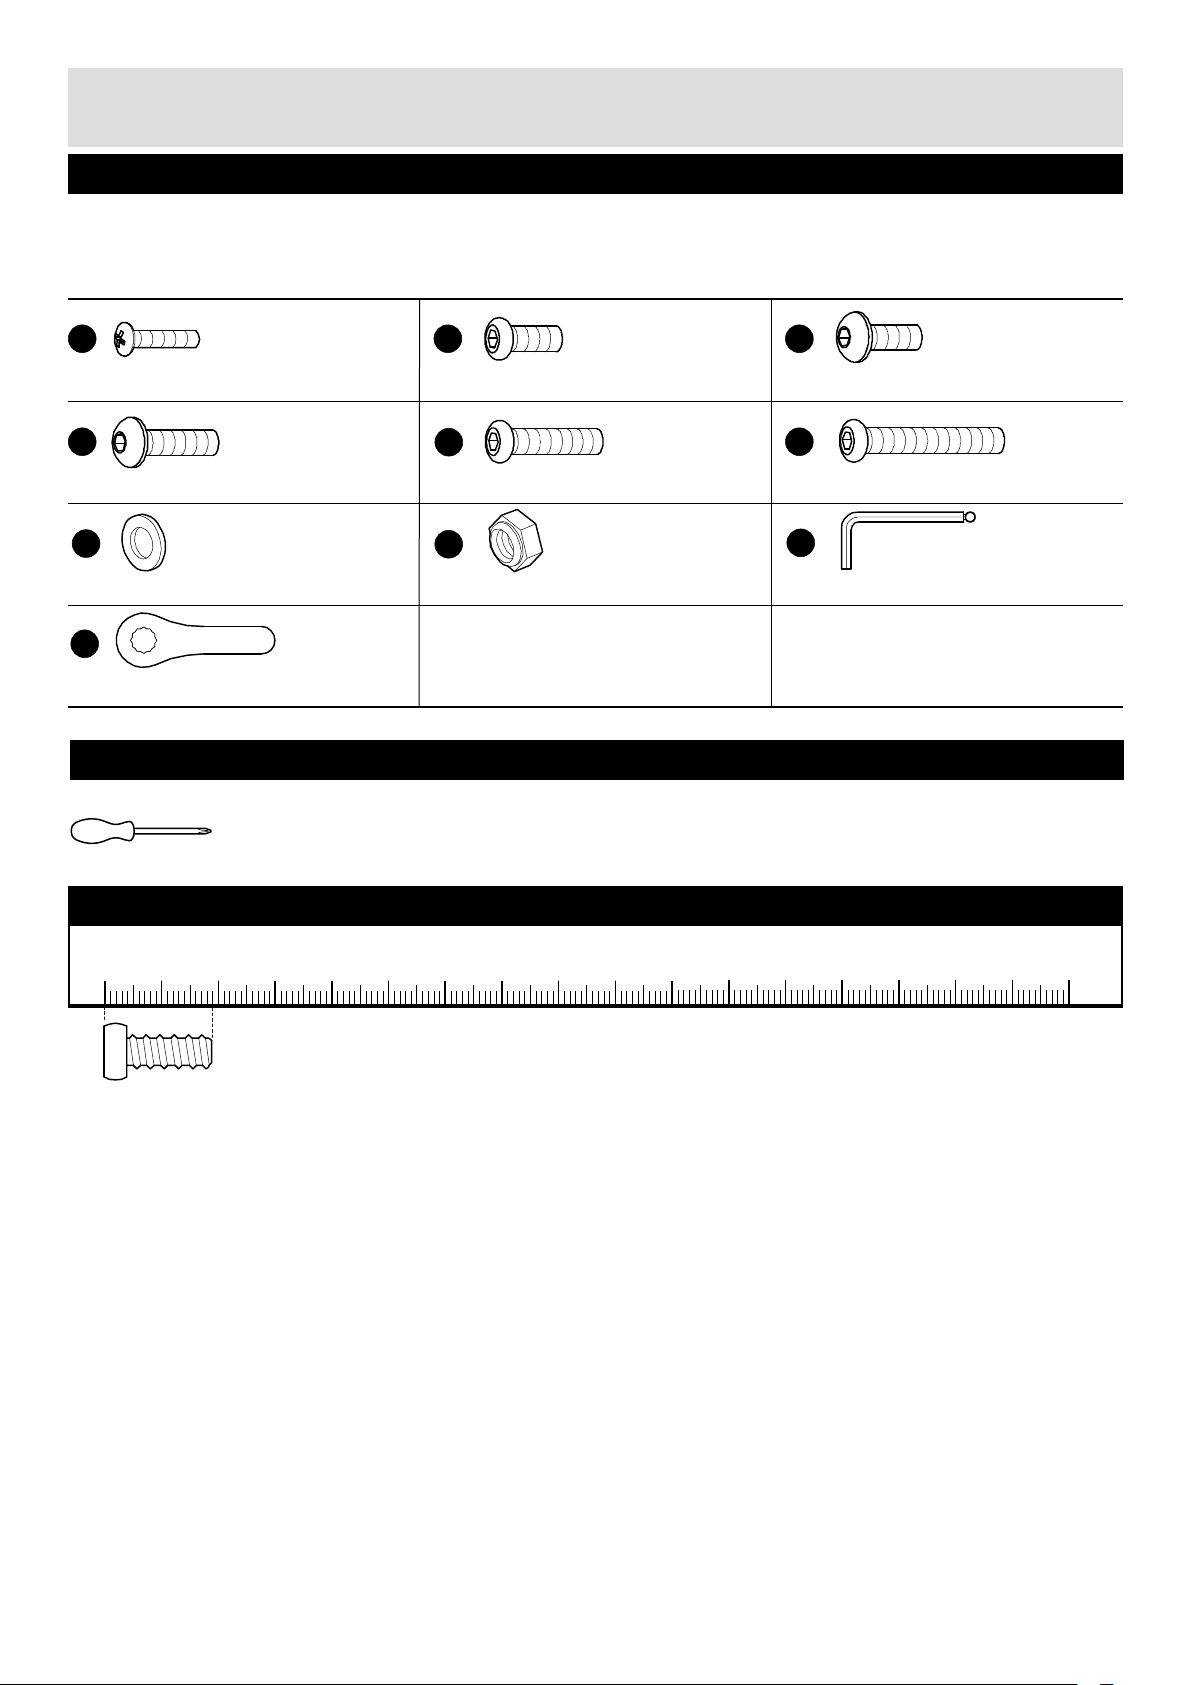
Components - Fittings
Please check you have all the fittings listed below
Note: The quantities below are the correct amount to complete the assembly. In some cases more fittings
may be supplied than are required.
A
12mm Bolt x 4
29MM Bolt x 12
G
Plain washer x 4
J
Wrench x 1
B
19mm Bolt x 8
E
34mm Bolt x 4
H
Nut x 4
Tools required
Phillips screwdriver
Ruler - Use this ruler to help correctly identify the screws
C
19mm Bolt x 16
FD
44mm Bolt x 9
I
Hex key x 1
0 5 10 15 20 25 30 35 40 45 50 55 60 65 70 75 80 85 90 95 100
The bolts length is measured from the head to the point (19mm bolt sho
105
110 115 120 125 130 135 140 145 150 155 160 165 170
wn
).
3
Page 5

Assembly Instructions
Step 1
Assemble slat frame
5
a: Fix side bars & ,
to front bar and rear
8
bar using bolts .
7
6
F
B
Fix middle bar to front
7
bar and rear bar
using bolts
9
8
B
Note: Make sure the
arrows on side bars &
middle bar are pointed
to the front bar.
b: Fix mattress stoppers
15
onto front bar
using bolts .
A
7
a:
B
7
6
9
5
8
F
F
b:
15
A
A
7
4
Page 6

Assembly Instructions
Step 2
2
& to
Fix side rails
headboard and
footboard using bolts
D
.
Follow step A-B-C.
1
4
Important note:
3
A
1
3
D
D
D
B
2
4
C
Do not fully tighten
bolts at this stage.
Step 3
Fix bottom support bar
10
to side rails using
E
bolts .
E
E
10
5
Page 7

Assembly Instructions
Step 4
Fix pistons to the
lifting mechanism using
nuts .
H
Note: Make sure the
the pistons are placed
as the figure shown.
13
13
H
H
Step 5
Place the assembled unit
as shown.
Fix corner brackets
a:
to headboard and side
rails using bolts as
shown.
Continued on next page.
C
16
a:
16
C
C
C
C
Important note:
Make sure the side
with label faces top.
6
Page 8

Assembly Instructions
Step 5 - continued
Fix corner brackets
b:
to footboard and side
rails using bolts as
shown.
C
16
b:
C
16
C
C
C
Important note:
Make sure the side
with label faces top.
Step 6
Attach non-woven fabric
14
on the bottom of the
bed as shown.
Important note: After all the parts are positioned, you
can now fully tighten all bolts fixed on previous steps.
14
7
Page 9
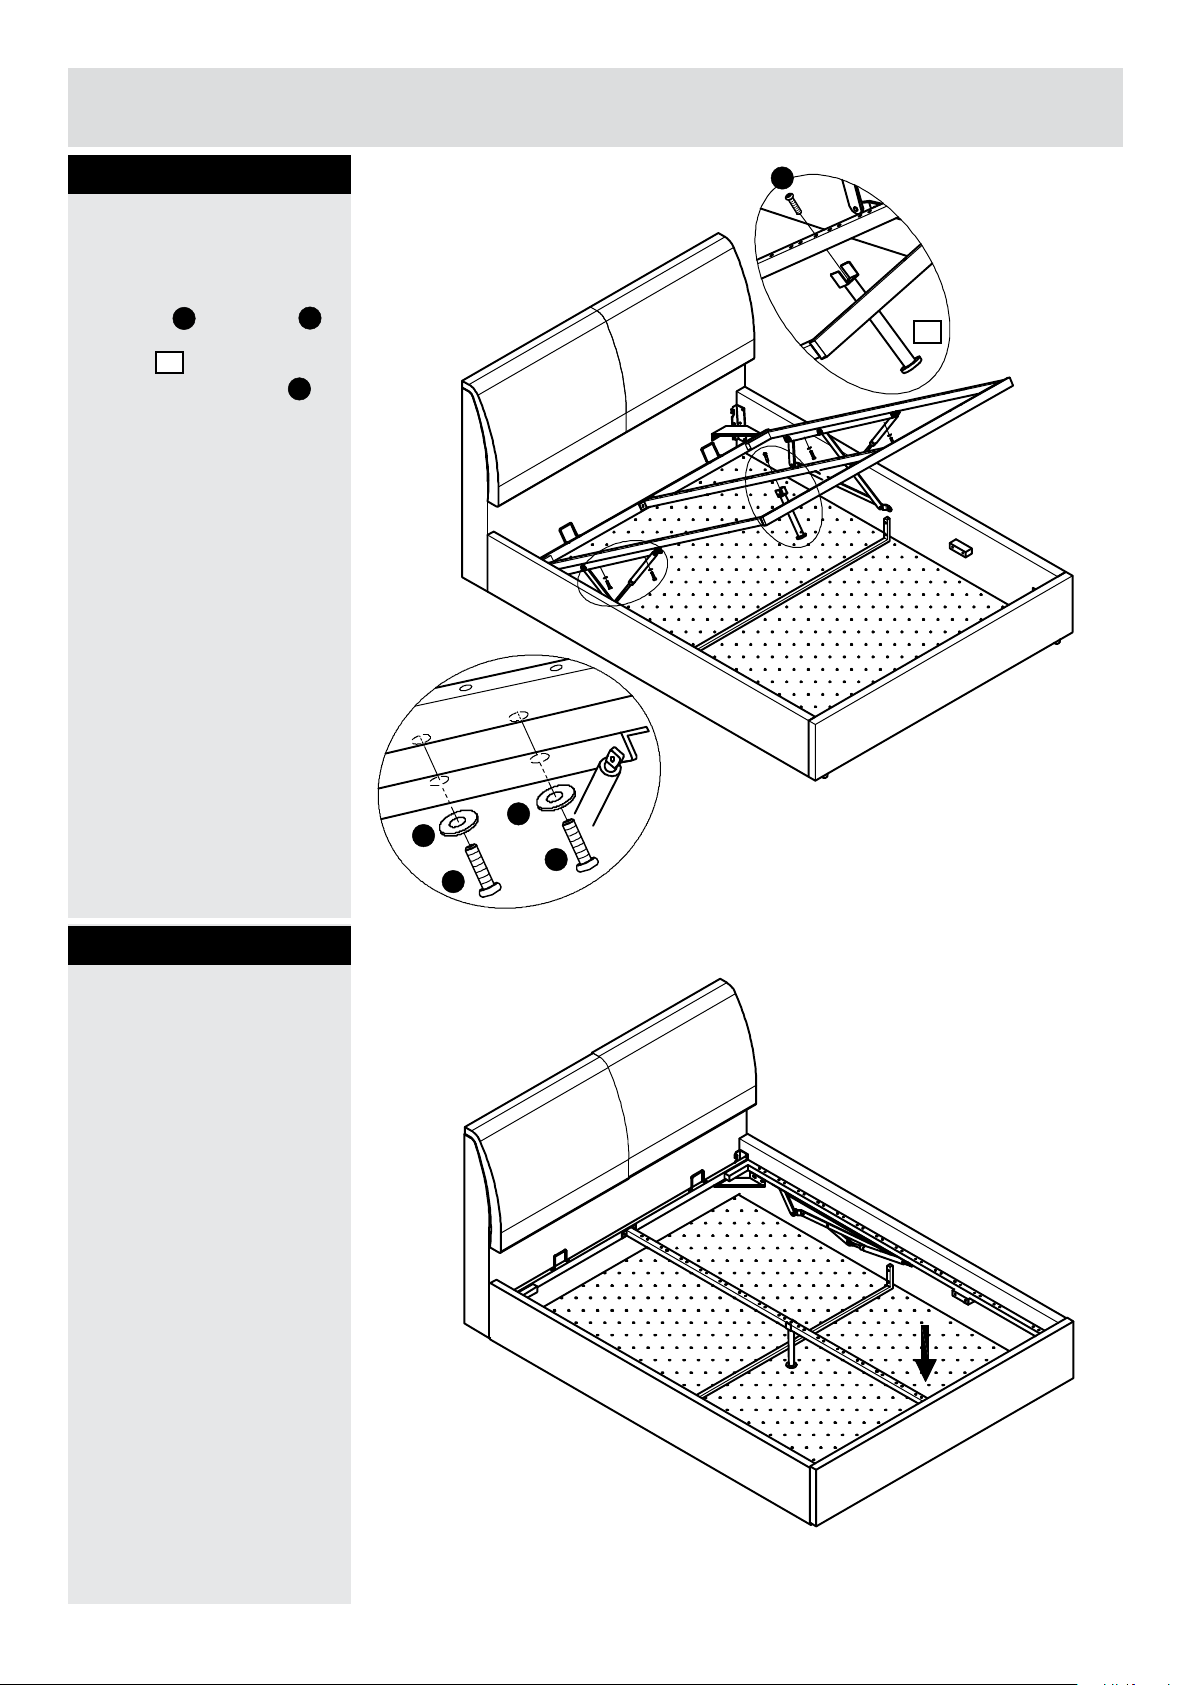
Assembly Instructions
Step 7
Fix the assembled slat
frame onto the lifting
mechanism using plain
washers and bolts .
Fix leg under the
millde bar using bolt .
G
17
B
F
F
17
Step 8
a: Push the slat frame
down.
G
G
B
B
a:
Continued on next page.
8
Page 10

Assembly Instructions
Step 8 - continued
18
11
19
b:
18
b: Slot the slats to
the slat caps &
then insert it to the slat
frame
19
11
11
Step 9
Tie the strap to the
end of the middle bar
as shown.
12
11
12
Assembly is complete.
9
Page 11
Assembly Instructions
Additional information
The headboard can be
opened for storage.
10
Page 12

Important Ottoman Safety Warnings
• Caution. This bed uses a pressurised mechanism.
• Use caution when operating - Always use two hands at arm’s length,
and only where illustrated on the product.
• You must ensure the mattress is on the bed frame before lifting the
mechanism - Failure to do so may result in injury.
• Please ensure Children and Pets are kept away from the bed when
operating the bed mechanism.
• If removing the mattress, make sure that the frame is secured as it
could flip open.
• Only use the storage compartment when the frame is fully raised in
the ‘up’ position.
• No children or animals are left unattended when the frame is in the
‘up’ position.
• Do not remain on the bed whilst the lifting mechanism is in use.
• Beware of Entrapment – Keep both hands clear of mechanism when
operating the mechanism.
• When lifting the bed remove all bedding – Except the fitted sheet.
DON’T LIFT WITHOUT MATTRESS
ENSURE MATTRESS IS ON
BEFORE LIFTING
If you need help or have damaged or missing parts, call the Customer Helpline:
Argos = 0345 6400800
 Loading...