

Page 1
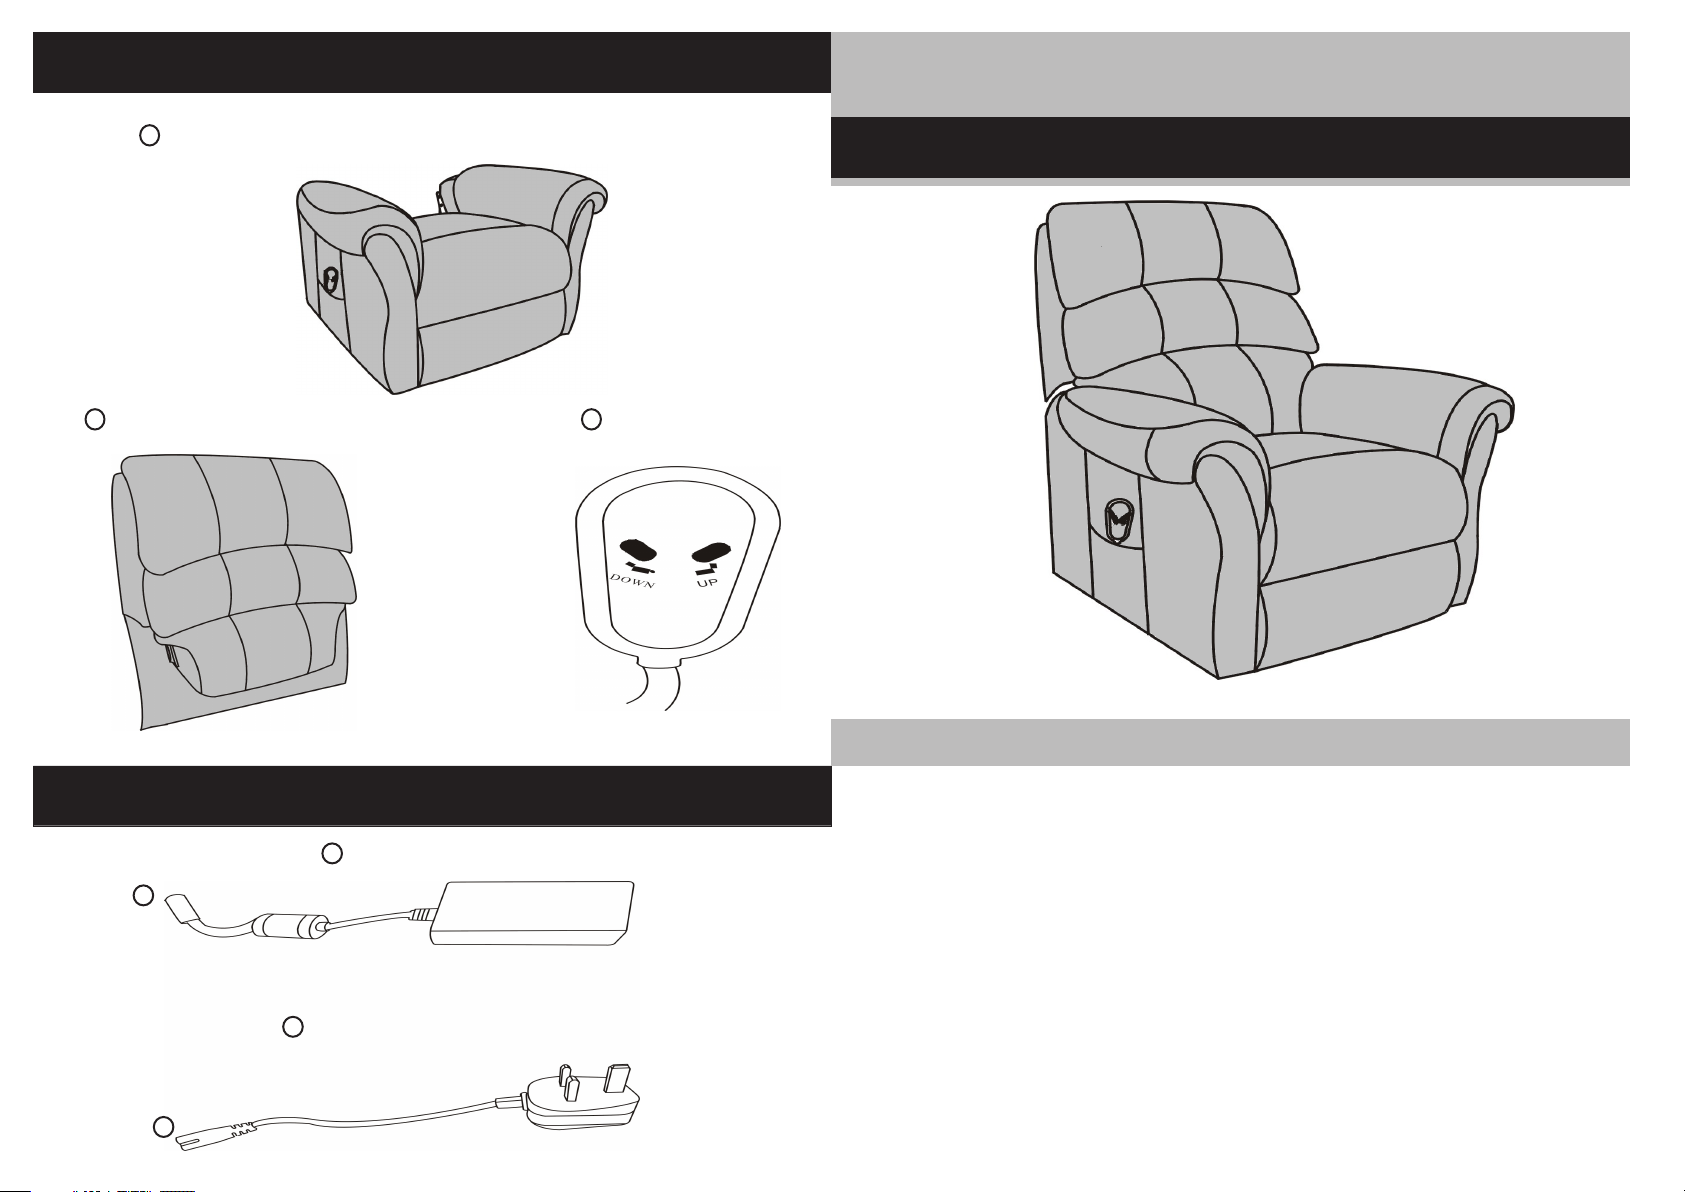
Components
A
eat Unit
1xS
Warwick H9950C Power Recliner
Simple Assembly Instructions - Please keep f or future r efence
6905941
6911265
B
1xBack Rest
Fittings
F
G
Transformer
1x
E
D
1x
Mains Electricity Supply Plug Cable
C
1xRemote Control
IMPORTAN T
1.Read these instr u cti on ca refully and
familiarise yo ur se lf with the proce dure
before assembling the unit.
2.Check that yo u have all the co mponen t
parts following the list on the back
cove r and familiarise yo urse lf with
each part before proce eding.
3.Take al l the fittings out of the pl ast ic
bag and sepa rat e them into thei r groups .
4.Ensur e you have enough spac e to lay
out al l the par ts bef or e ass em bl y.
5.To avoi d scrat chi ng it is recom mended
that you ass em bl e the uni t on a sof t
level surface.
Page 2
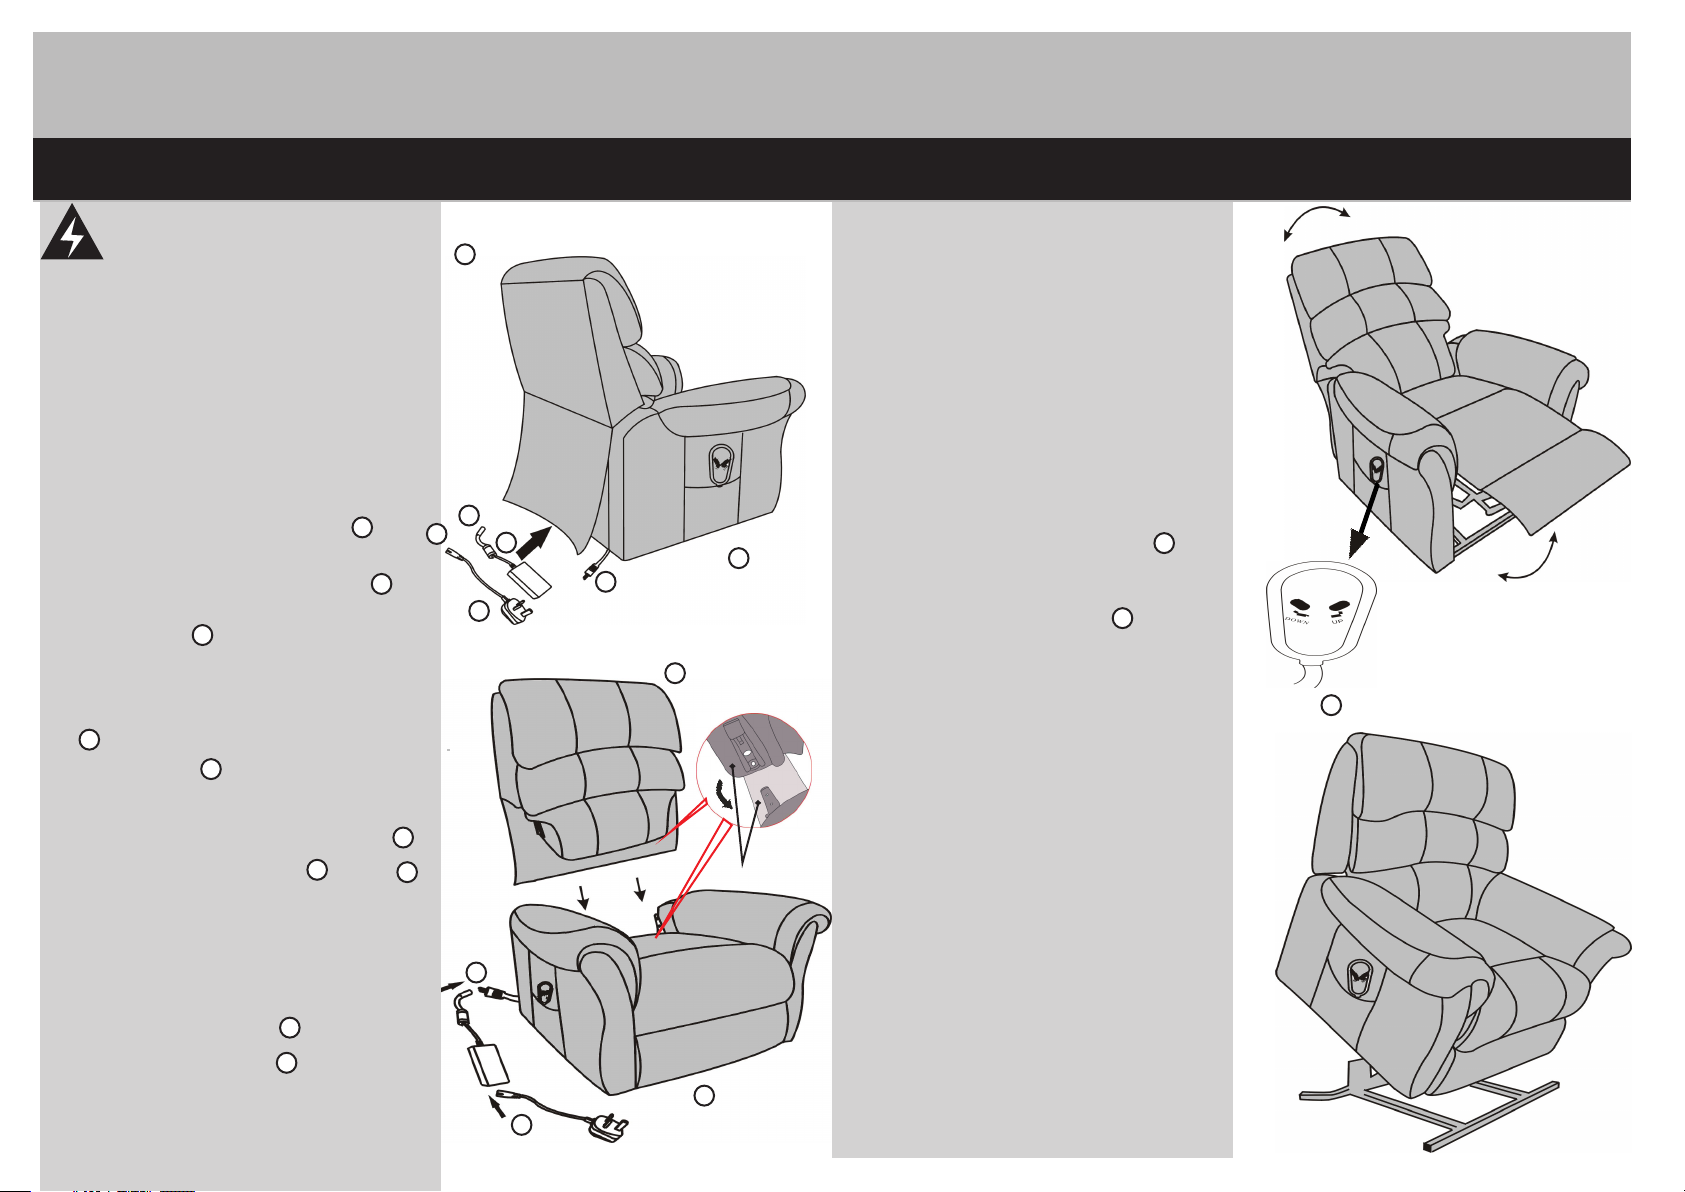
Assembly Instructions Assembly Instructions
Stage 1 - Fiting the unit Stage 2 - Adjusting the unit
WARNING:If the suppl y
cord is damaged,it must b e
replaced by the manufac turer,
its service agent or simi larly
qualified persons in or der to
avoid a hazard.
NOTE :It woul d be use ful to ask
s om eone to he lp you at t hi s
stage.
See fig.
1.Remove and unpack the fittings which
are stored under the Seat Unit
1.
A
See fig. 1.
2.Connect the Mains Plug Cable
socket(labelled G in fig 1) into the
Transformer .
E
See fig. 2.
3.Please to find the Electric Motor Cable
which is fasted to the metal frame of
H
the Seat Unit .
.
A
Please do not untie the
wire on the metal frame.
4.Connect the Electric Motor Cable
to the Transformer Cable at point .
E
See fig. 2.
B
NOTE :Connect the adapt or to the
mai ns sock et .
Back and Fo ot Rest Adjust ment
Thi s chair features a electronic
.
D
F
G
E
H
D
A
fig.1
recl ining and raised foot
rest .You need to use the
to it.
1.
Remove the Remote Control from the
storage pocket
B
2.
Push the "DOWN" button which will recliner
the chair and raise the footrest
See fi
3.
Push the "UP" button which will lower the
ustadj
g.
function
3.
remote
C
C
fig.3
C
footrest and move the chair to its normal
position or incline it forward.
H
F
Met al Lock
See fig. 4.See fig.
5.See fig 2 for the completed wiring
connections.
6.Insert the Back Rest into the Metal
Locks of the Seat Unit .Ensure they
lock into place by fully pushing them
down.
B
A
See fig. 2.
F
A
fig.
G
2
fig.4
Page 3

Assembly Instructions Assembly Instructions
Stag Stage 4 - Finishing the Unit
1.The Warwick is fitted with 3 Pressure Pad Strips
on the underside of the frame at the back and
sides of the Chair .The diagram shows the
locations
2. These are fitted for your safety to
prevent entrapment by stopping the
chair from any further motion should
an object become trapped on the
underside of the chair .When the
pressure pad strip comes into contact
with anything the chair will stop.The
e 3 -
Safety Power Pressure Pads
-Beware o f en tr apment. K eep hands and f in gers clear of
mechani sm
-Ensure t ha t ch ildren or p et s ar e not playing o r ly ing in the
-Preven t ch il dren from p la yi ng on the furni tu re or with the co nt rols.
-Ensure t ha t th e cable bet we en t he transfor me r and the plug
-This app li an ce is not int en de d for use by pers on s(includi ng
Pressure Pad Strips
-Childr en s ho uld be superv is ed to ensure th at t hey do not
!
CAUTI ON :
when oper at in g the contr ol s.
way when th e me ch anism is oper at ed.
is kept cle ar o f th e mechani sm u nd er the chair.
childre n) w it h reduced phy si cal,senso ry o r mental capa bi li ties,
or lack of ex pe ri ence and kn ow le dge,unles s th ey have
been give n su pe rvision or in st ruction con ce rning
use of the ap pl ia nce by a pers on r es ponsible fo r th eir safety.
play with t he a pp liance.
obstruction should then be removed to
enable the chair to function normally.
3.It is important to ensure that
there pressure pads are Kept
clear of obstructions.
4.Finally always make sure that
there are no obstructions under
the chair before or during
operation Children and Pets should
A
fig.5
NOTE:It w ou ld b e useful to a sk
someone t o he lp y ou at this
Stage.
1.Final ly c ar efully pl ac e th e unit in
the desir ed l oc ation.
See fig.6 .
WAS TE EL ECT RI CA L PR OD UC TS
SH OU LD NO T BE DI SP OS ED OF
WI TH HO US E HO LD WAS TE. PL E-
AS E RE CY CL E WHE RE FAC I LI TI ES E XI ST .CH E CK WI TH YO UR
LOC AL AUTH OR I TY FOR RECYAL
ING AD VI CE .
always be kept away from the
underside of the chair.
Care and Ma intenance
fig.
7
.
fig.6
Safety
To avoid any risk of suffocation to animals or children di spose of the plastic
bags immediately.
Cleaning
As with all surfaces clean with a damp cloth and mild detergent ,do not use
bleach or abrasive products.
Fitting
From time to time please ensure there are no loose screws on the product.
 Loading...