

Page 1
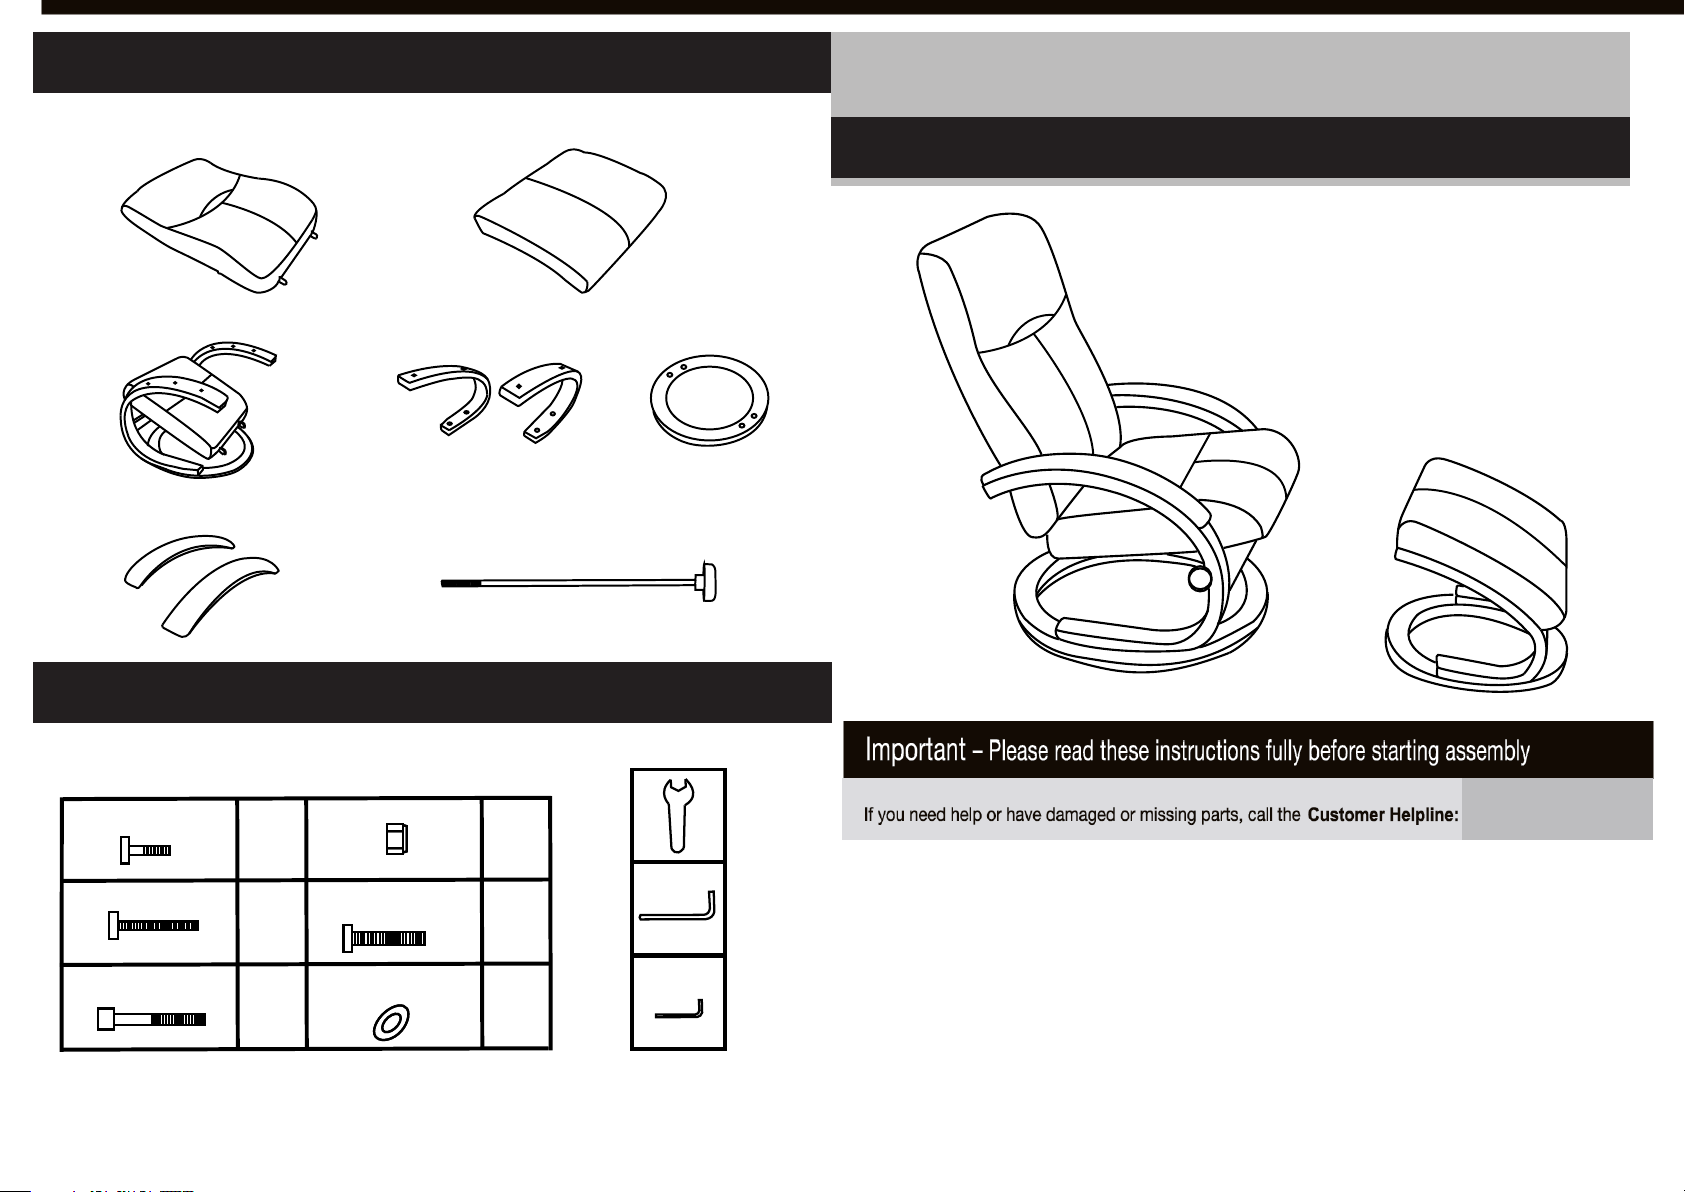
Components
Franklin Recliner Chair And Foot stool
(01)
(02)
(03)
Fittings
X Back cushion
X Seat
X Arm-pad
(04)
(05)
(07)
X Ottoman seat cushion
X Wood brace
X Hand wheel
(06)
X Wood base
Simple Assembly Instructions - Pl ease keep for f uture ref ence
2493567
2448172
A
B
C
(8X25)
(6X40)
(8X70)
X2
X10
X2
D
D
(8X45)
(8X45)
E
E
(8*22*2mm)
(8*22*2mm)
F
F
X2
X2
X4
X4
X4
X4
(M8)
(M6)
1.Read these instruction carefully and
familiarise yourself with the procedure
before assembling the unit.
2.Check that you have all the componen t
parts following the list on the ba ck
cover and familiarise yourself wi th
each part before proceeding.
0345 640 0800
3.Take all the fittings out of the plastic
bag and separate them into their g roups.
4.Ensure you have enough space to lay
out all the parts before assembly.
5.To avoid scratching it is re commended
that you assemble the unit on a soft
level surface.
Page 2
Assembly Instructions Assembly Instructions
Step 1 - Assemble the Chair
1
.Fix the Arm-pad with
crews and wrench to Seat .
s
Assemble arm-pad with the right
arrow direction.
Ensure the Arm-pad is fitted to seat
with correct orientation.
See fig.1.
B
(03)
(M6)
(02)
(03)
(02)
(B)
(M6)
fig.1
3.
Fix the back cushion
w
ith screws , and wrench
to seat .
See fig.3.
A
(02)
(01)
D
(M6)
(01)
(D)
(A)
(M6)
(02)
fig.3
2.Insert hand wheel into the hole.
See fig.2.
(07)
(07)
(02)
fig.2
4.Fix Armrest with screws and
wernch to back cushion .
See fig.4.
(M8)
C
(01)
(C)
(M8)
fig.
4
Page 3

Assembly Instructions Assembly Instructions
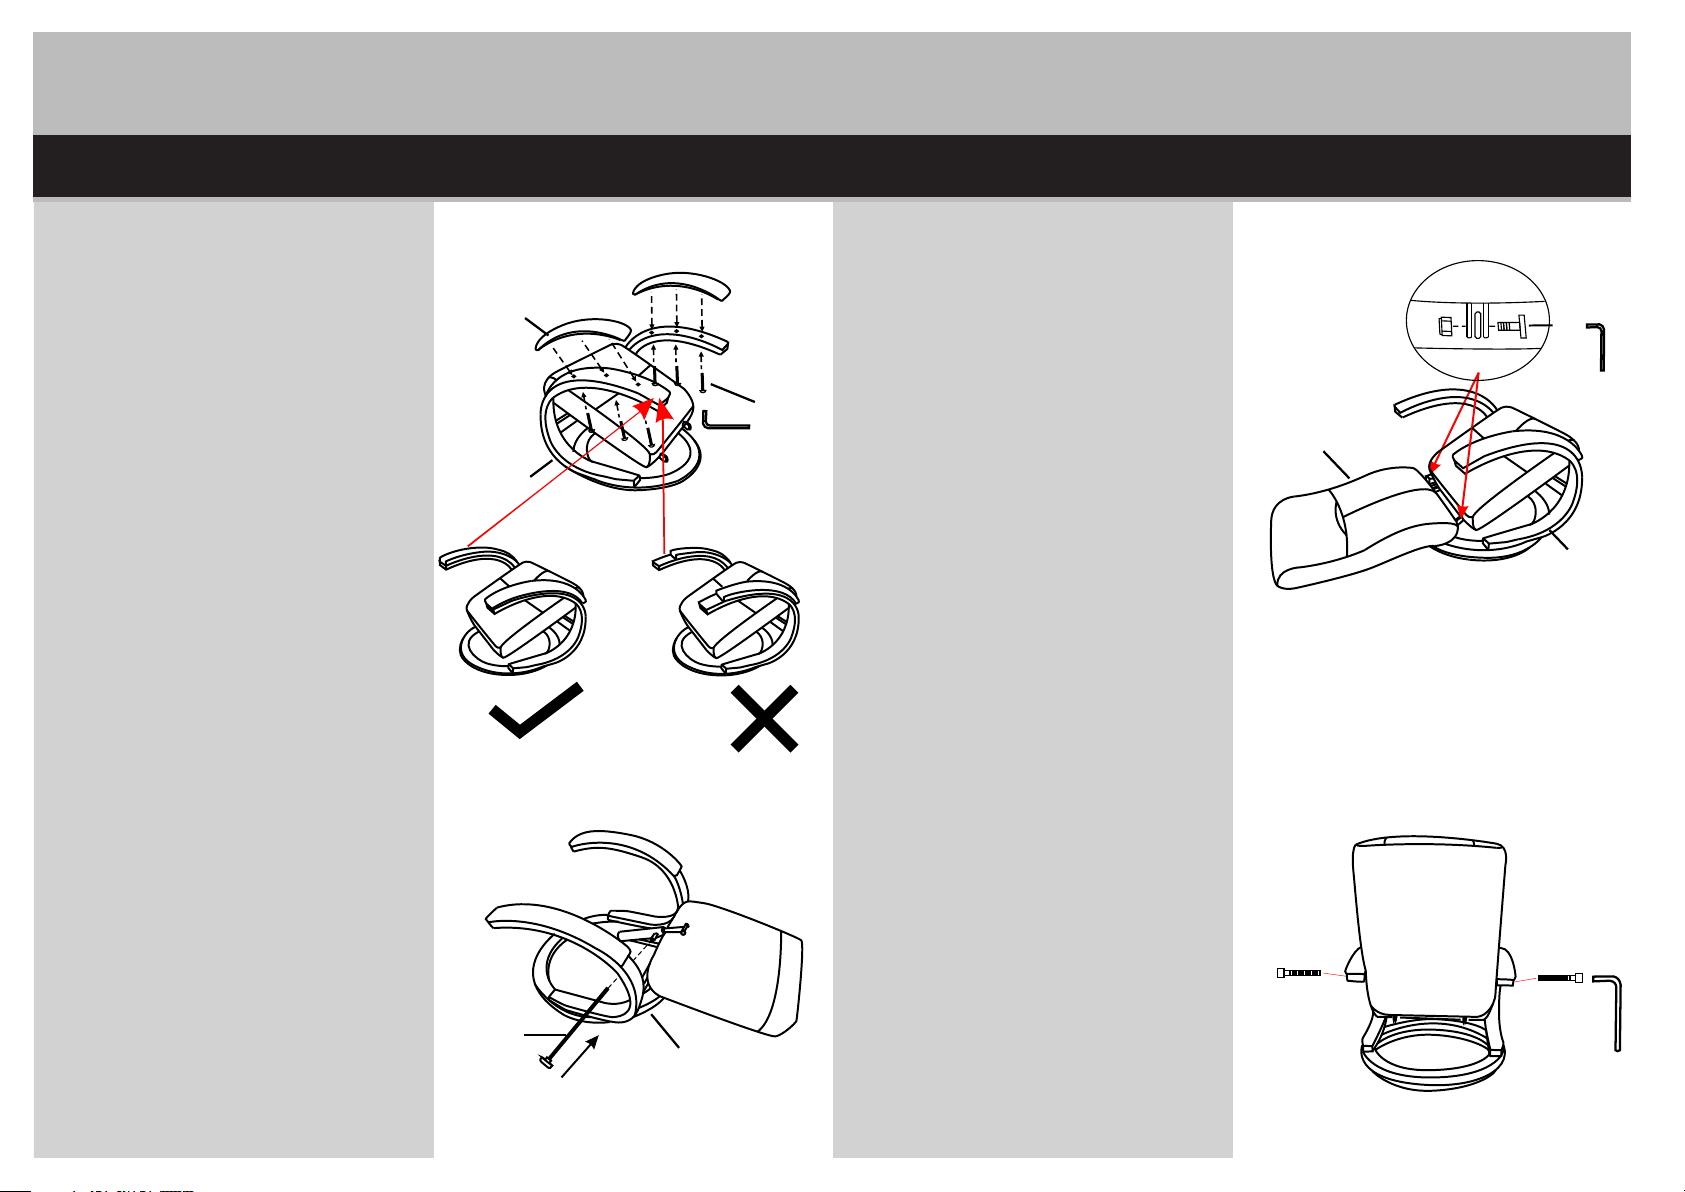
Step 2 - Assemble the Foot stool
1.Fix the wood brac
screws
wrench to wood base .
See fig.5.
E
and w s
asher
(M6)
e
(05)
with
and
F
(06)
(05)
(05)
2.
.Fix the w
with screws
to ottoman seat cushion .
See fig.6.
ood barce
B
(05)
and wrench
(M6)
(04)
(M6)
(B)
(06)
(F)
(E
)
(
M
6
)
fig.6
(04)
fig.5
Page 4

Assembly Instructions Assembly Instructions
Step 3 - Back Rest Adjustment Step 4 - Finishing the Unit
This chair features a manual
reclining back rest.You need
to be sitting in the chair t o
activate the features.
(07)
1.Adjust the knob
clockwise,then gently lean back
to choose a comfortable angle,then
adjust the knob in clockwise to
lock it.
See fig. .
7
in counter
(07)
(01)
fig.
7
1.Adjust the recliner to your
own requirements.
2.Finally carefully place th e
unit in the desired location.
See fig. .
9
(07)
in clockwise
2. the knob Adjust
and lean forward.Then adjust the
(07)
kno n clockwise to lock it.
b i
See fig.8.
fig.
(07)
(07)
fig.
9
Care and Ma intenance
Safety
To avoid any risk of suffocation to animals or children dispose of the plastic
bags immediately.
Cleaning
As with all surfaces clean with a da mp cloth and mild detergent ,do not use
bleach or abrasive products.
8
Fitting
From time to time please ensure th ere are no loose screws on the product.
If you need help or have damaged or missing parts,call the Customer Helpline:
0345 640 0800
489-499 Avebury Boulevard Milton Keynes MK9 2NW,Argos Limited
 Loading...