

Page 1
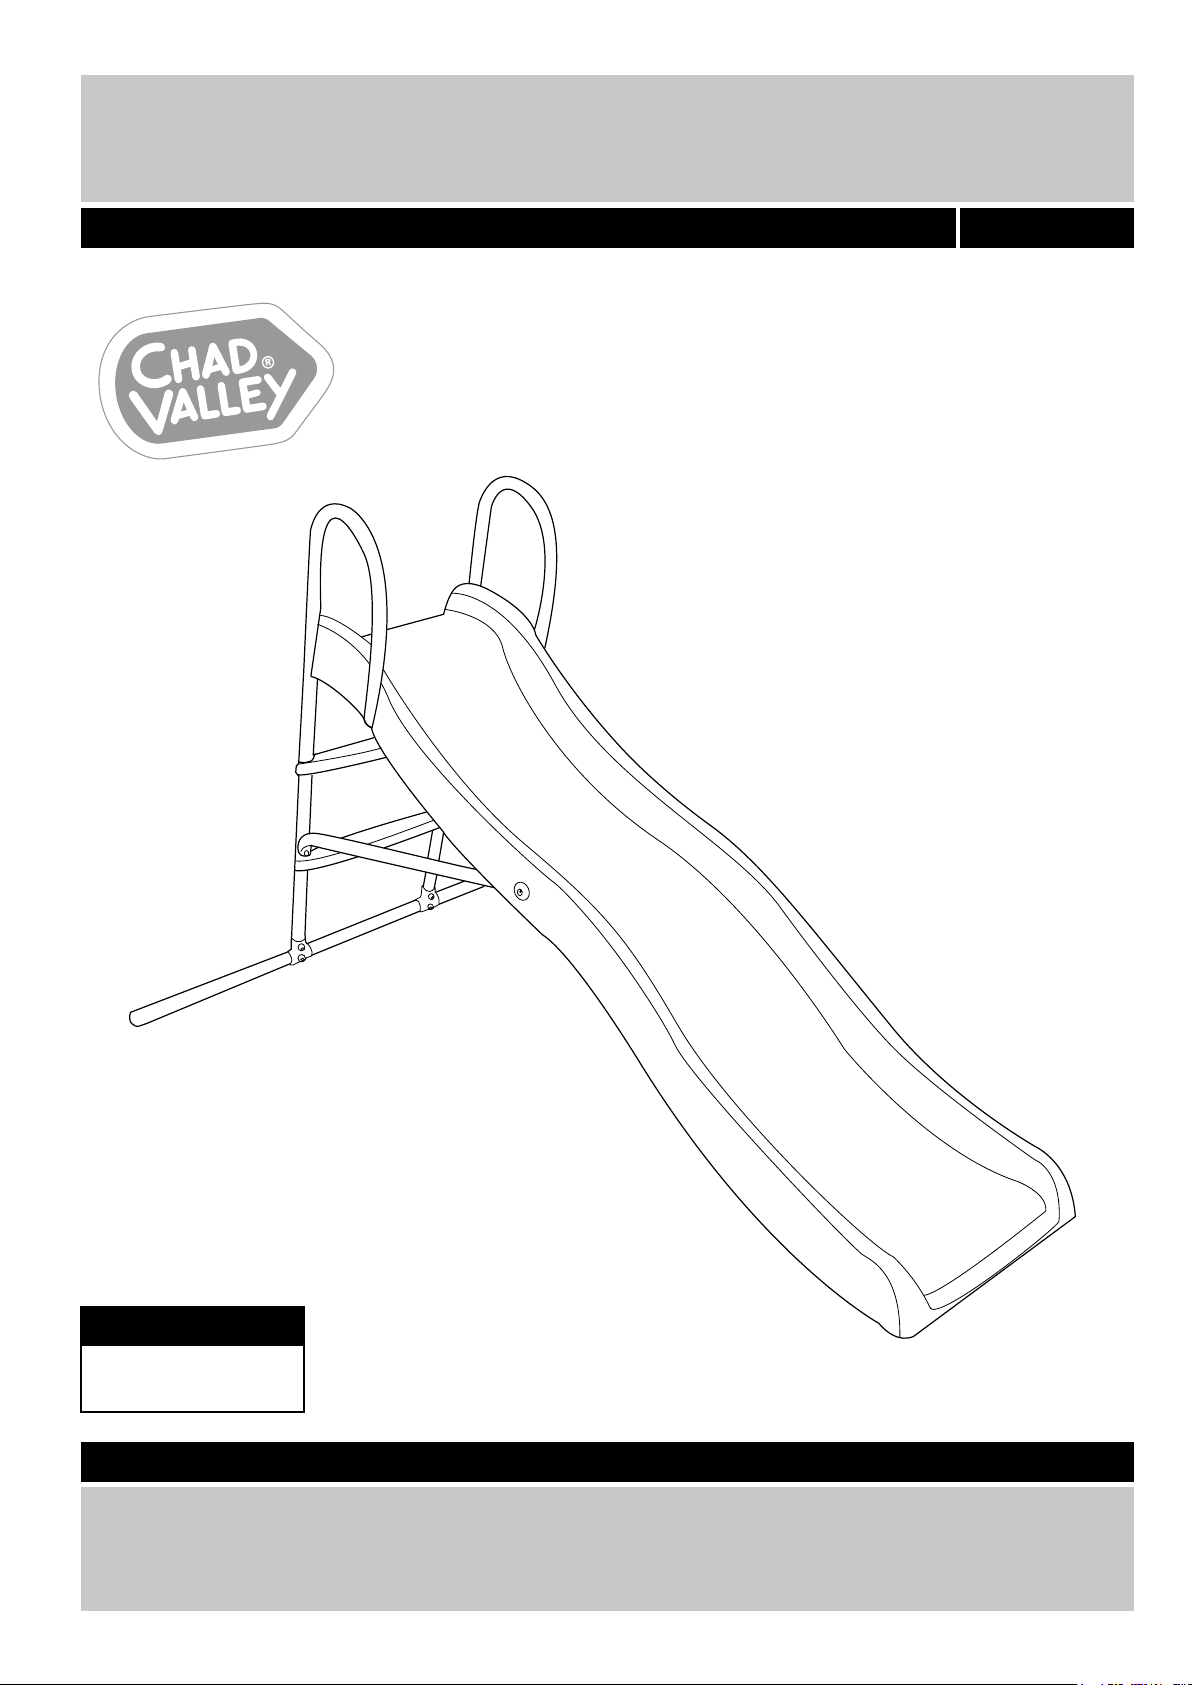
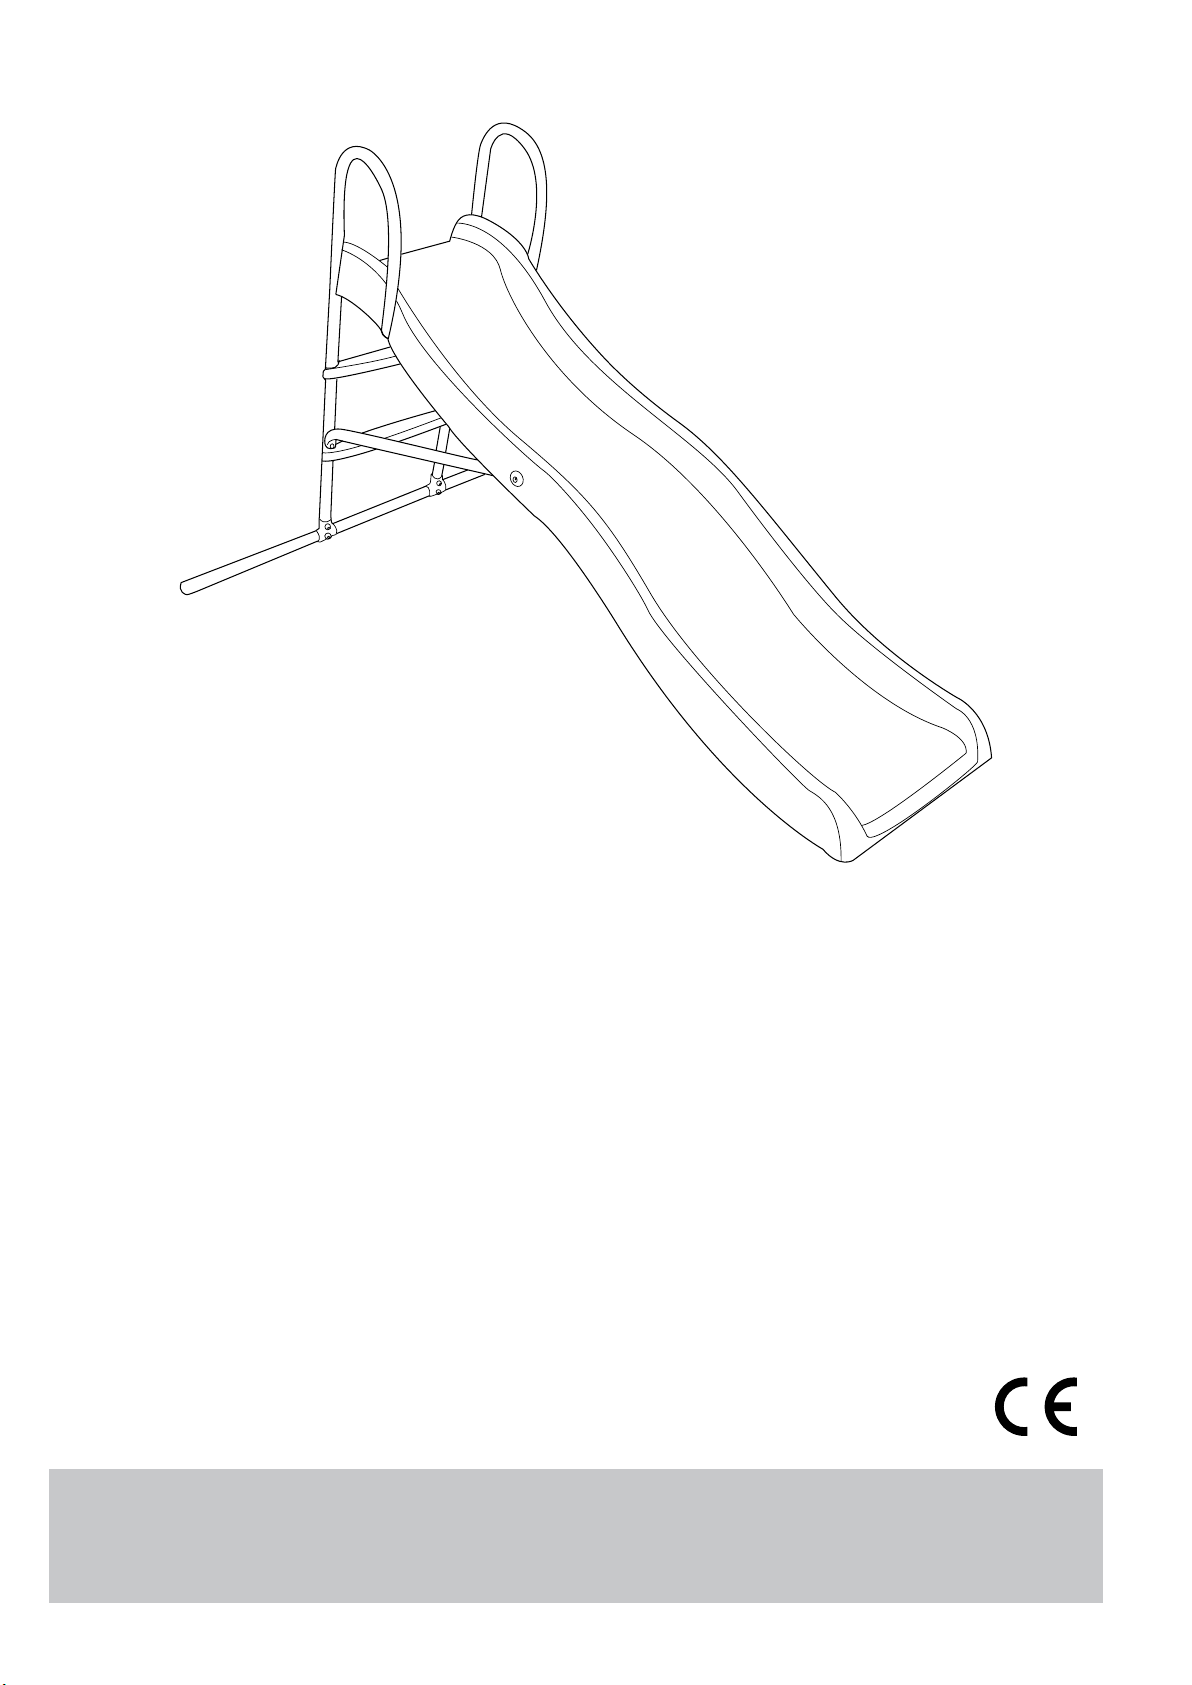
Wavy Slide
Assembly & User Instructions - Please keep for future reference
9108408
Warning
Age: 3+ years
Important - Please read these instructions fully before assembly or use
These instructions contain important information which will help you get the best from your
product and ensure safe and correct assembly, use and maintenance.
If you need help or have damaged or missing parts, call the Customer Helpline: 01291 650581
Page 2

Contents
Contents
Parts
Assembly Instructions
Steps 1-3
Steps 4-6
Steps 7-9
Steps 10-12
Steps 13-15
4
5
6
7
8
9
3
Page 3
Parts
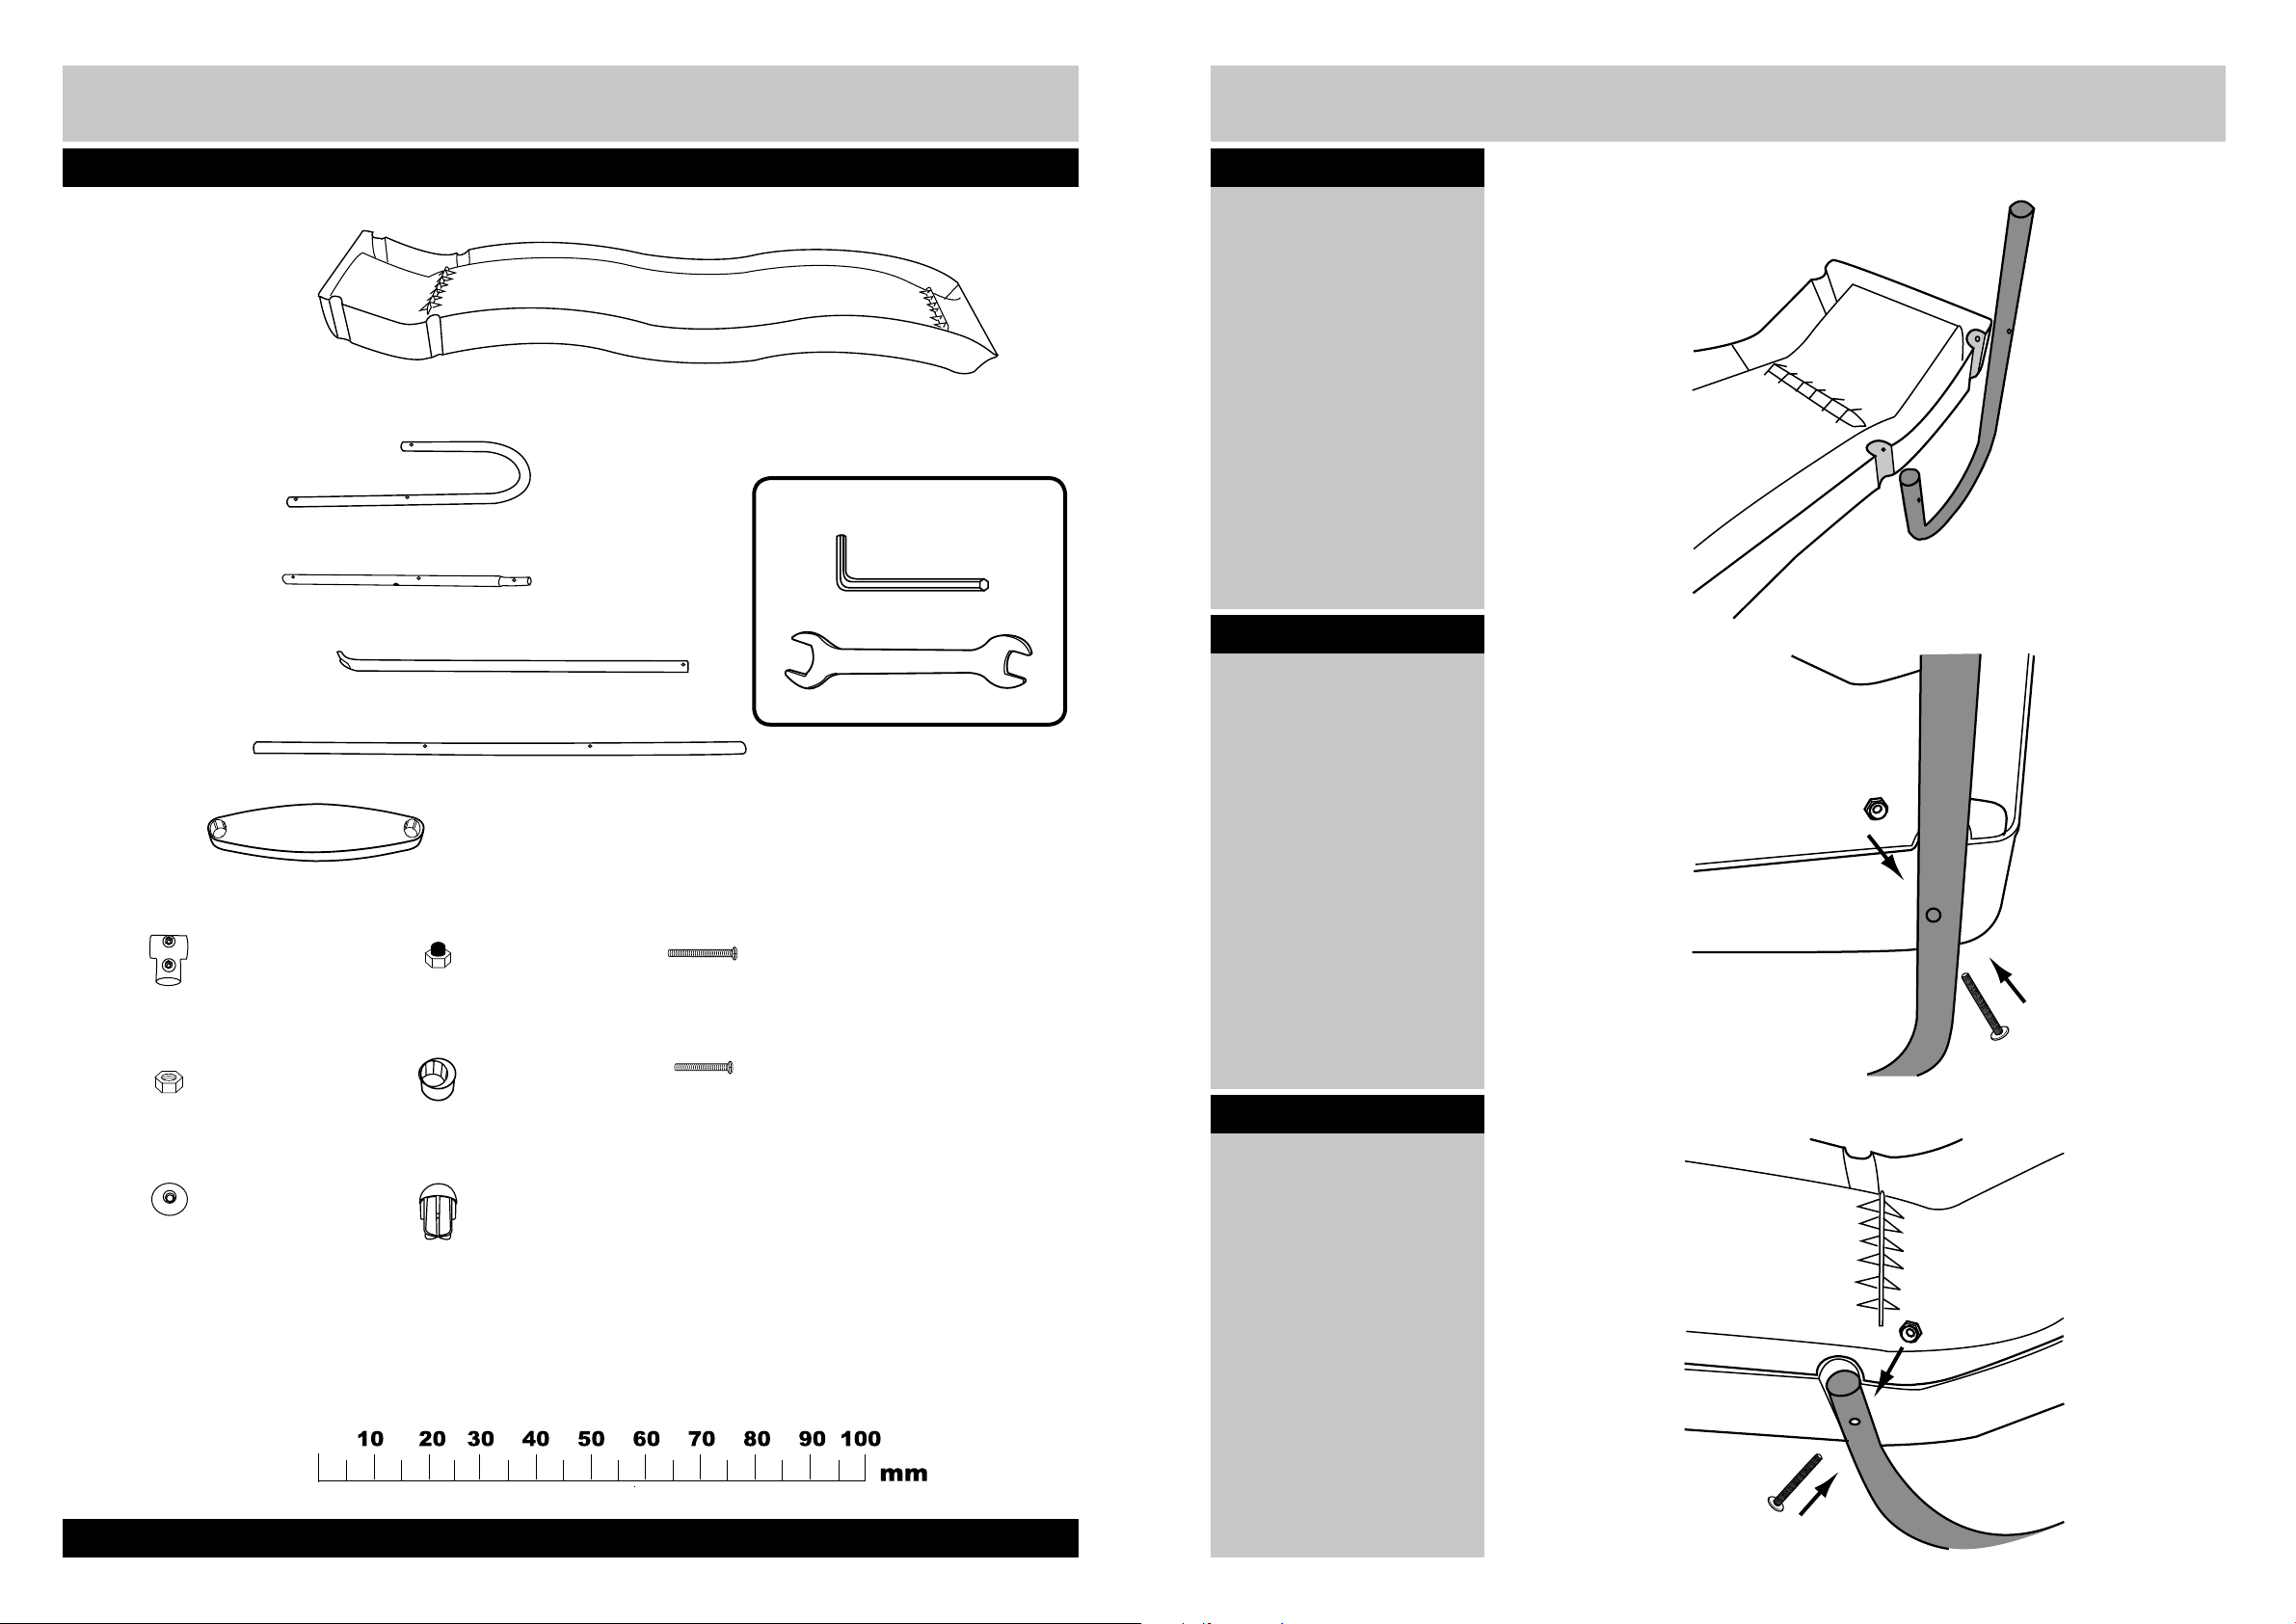
A Slide x1
1-01-984
if you have damaged or missing parts,
call the Customer Helpline: 01291 650581
Assembly Instructions
Step 1
Insert Handle Bars
B
Insert handle bar (B) into
the grooves on slide (A).
B Handle Bars x2
C Stiles x2
D Connector Tubes x2
E Base Tube x1
F Steps x2
G Base Connectors x2
3-11-982
H Nuts x14
2-04-984
vpt 000451
vpt 000452
vpt 000453
vpt 000454
J Cap Nut x2
K End Caps x2
M Screw x8
45 mm
N Screw x8
40 mm
Includes:
Allen Key
10mm Fix Key
Step 2
Assemble Handle Bar
Fix rear hole with screw
(N) and nut (H).
A
B
3-01-984
I Plastic Washers x2
2-11-982 1-11-982
*Some tubes may contain another tube inside them. Please check all tubes before assembly.
4
L Plastic Plug x2
Step 3
Assemble Handle Bar
Fix front hole with screw
(N) and nut (H).
A
B
5
Page 4
Assembly Instructions
Assembly Instructions
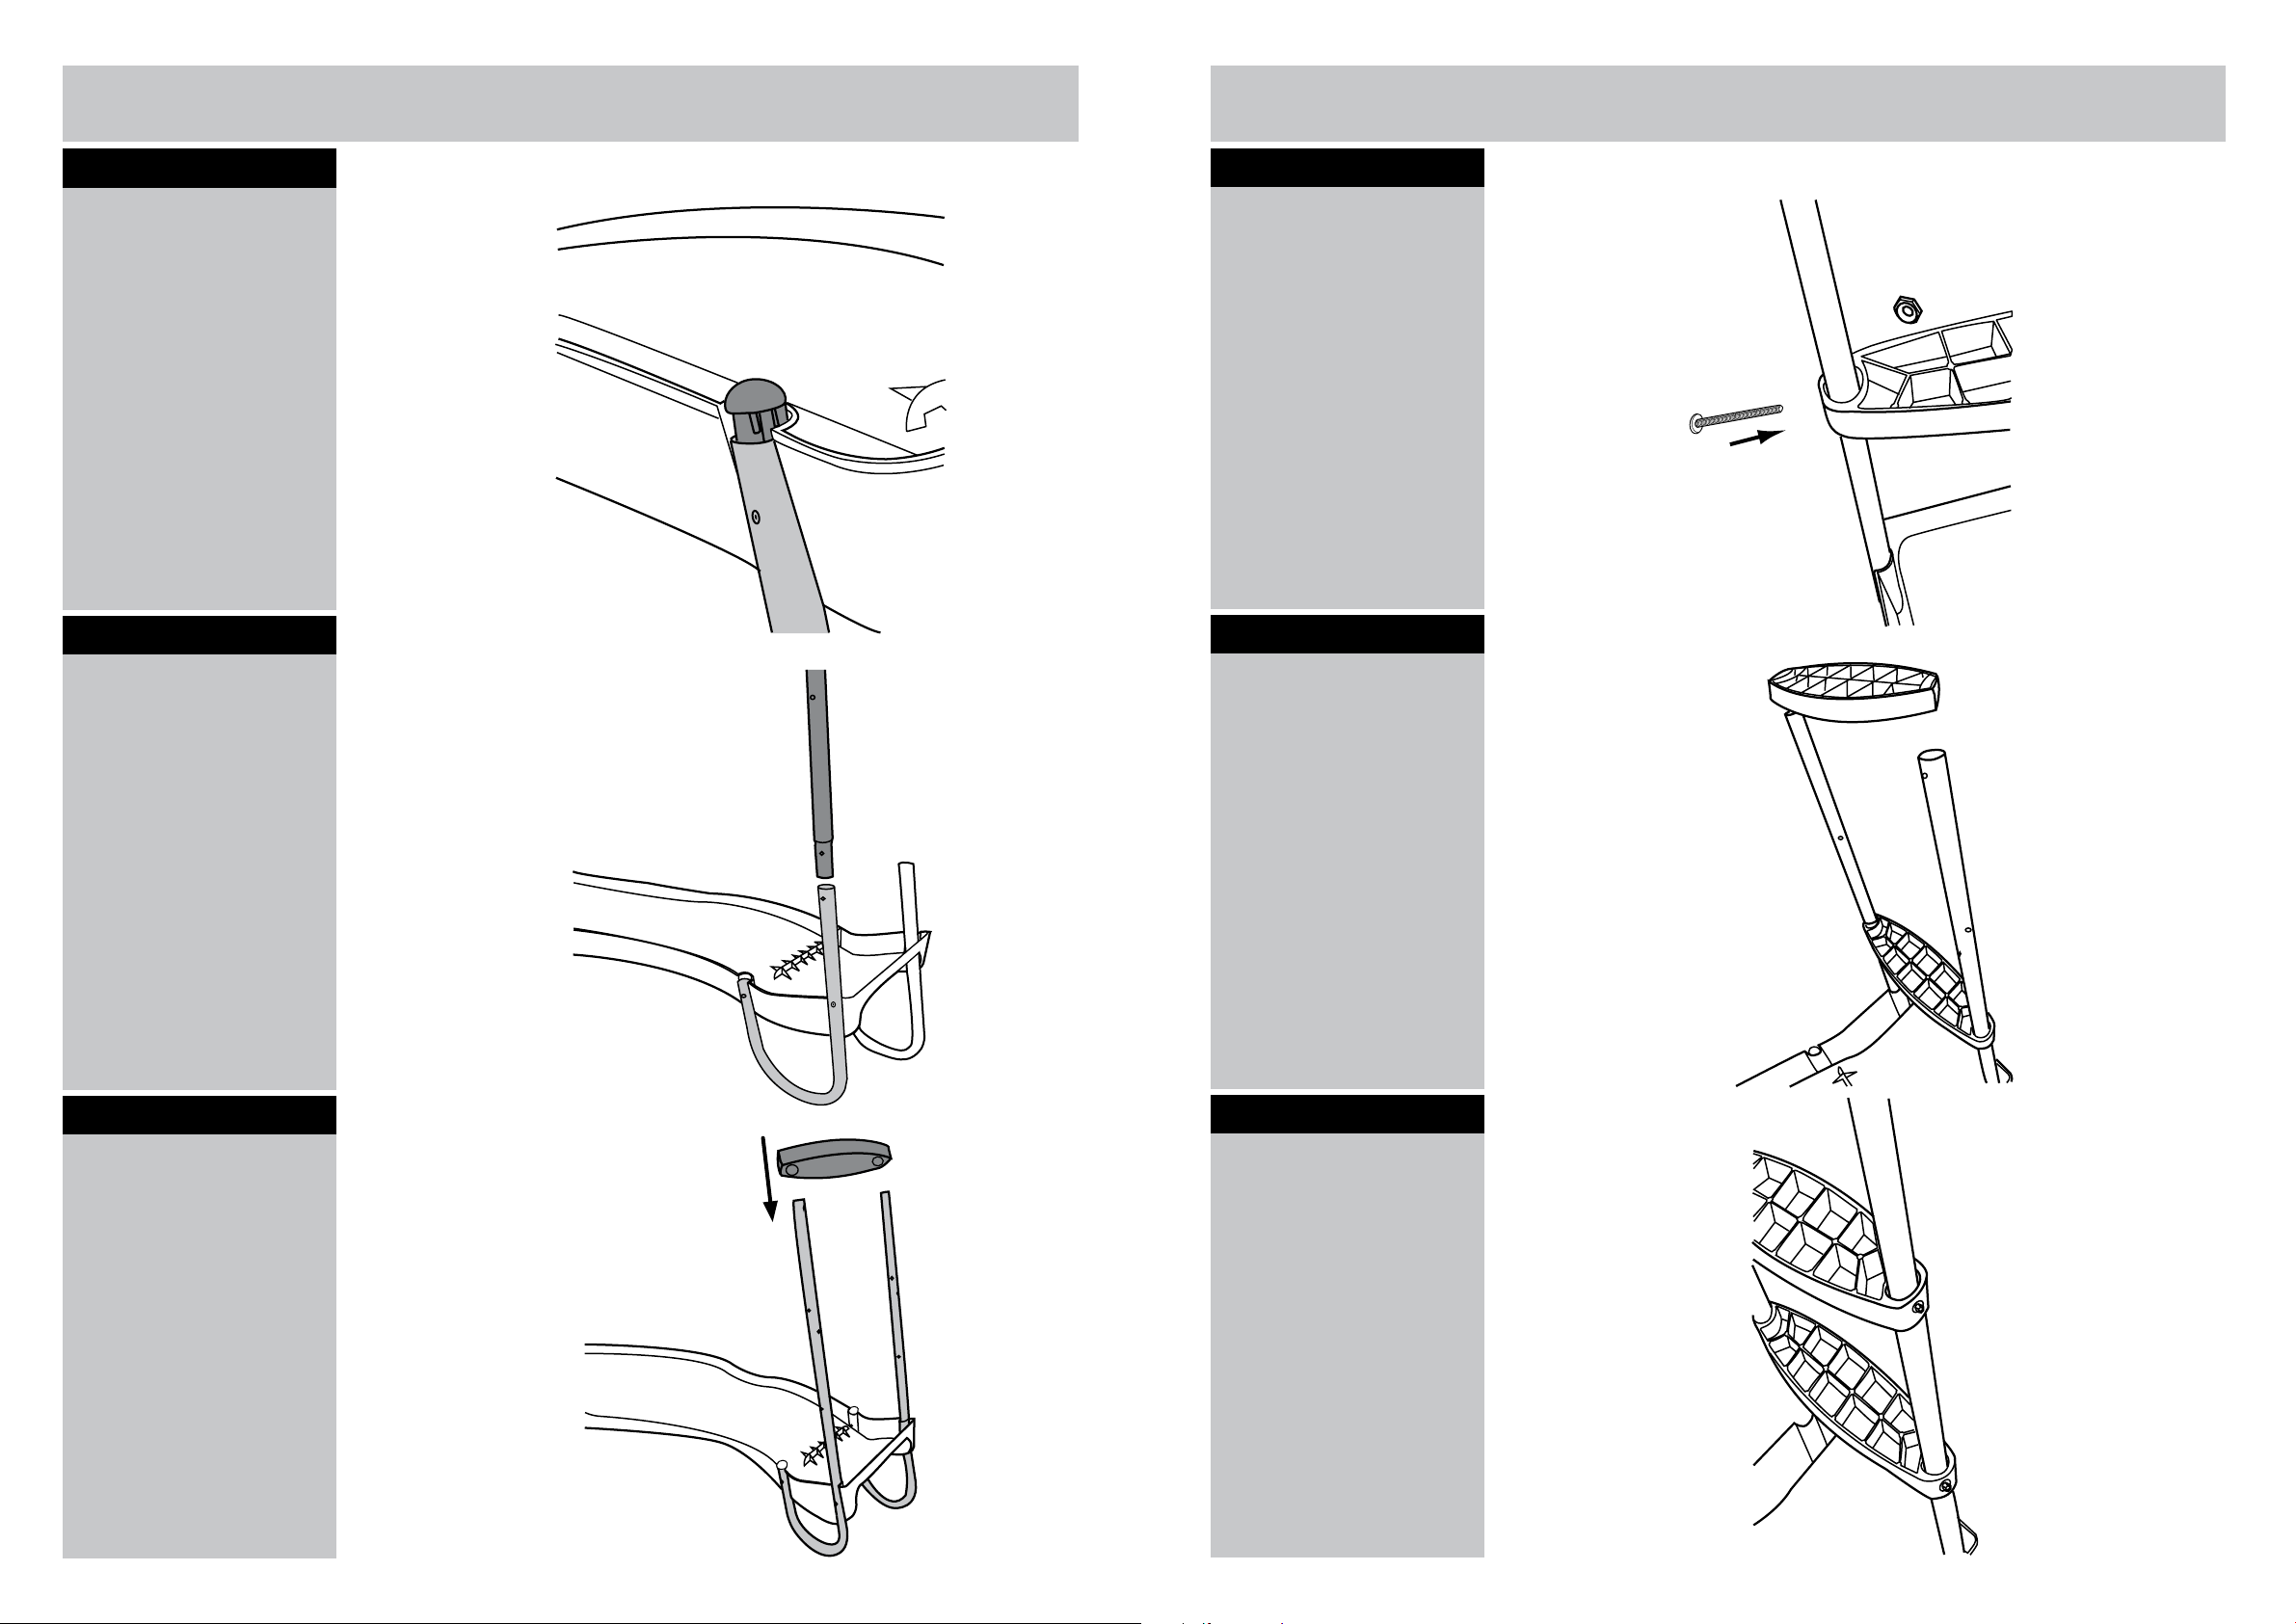
Step 4
Assemble Plug
Insert plug (L) and repeat
all operations on the other
side.
Step 5
Assemble Stiles
B
Step 7
Fix Step
Fix upper step (F) with
screw (M) and nut (H) on
both sides.
L
F
Step 8
Assemble Steps
F
Insert stiles (C). On both
handle bars.
Be aware to set holes
of both parts in correct
lineup position.
Step 6
Assemble First Step
Insert upper step (F).
Insert midde and lower
steps (F).
C
Step 9
F
Fix steps
F
Fix the steps (F) on
both ends with screw
(M) and nut (H).
6
7
Page 5
Assembly Instructions
Assembly Instructions
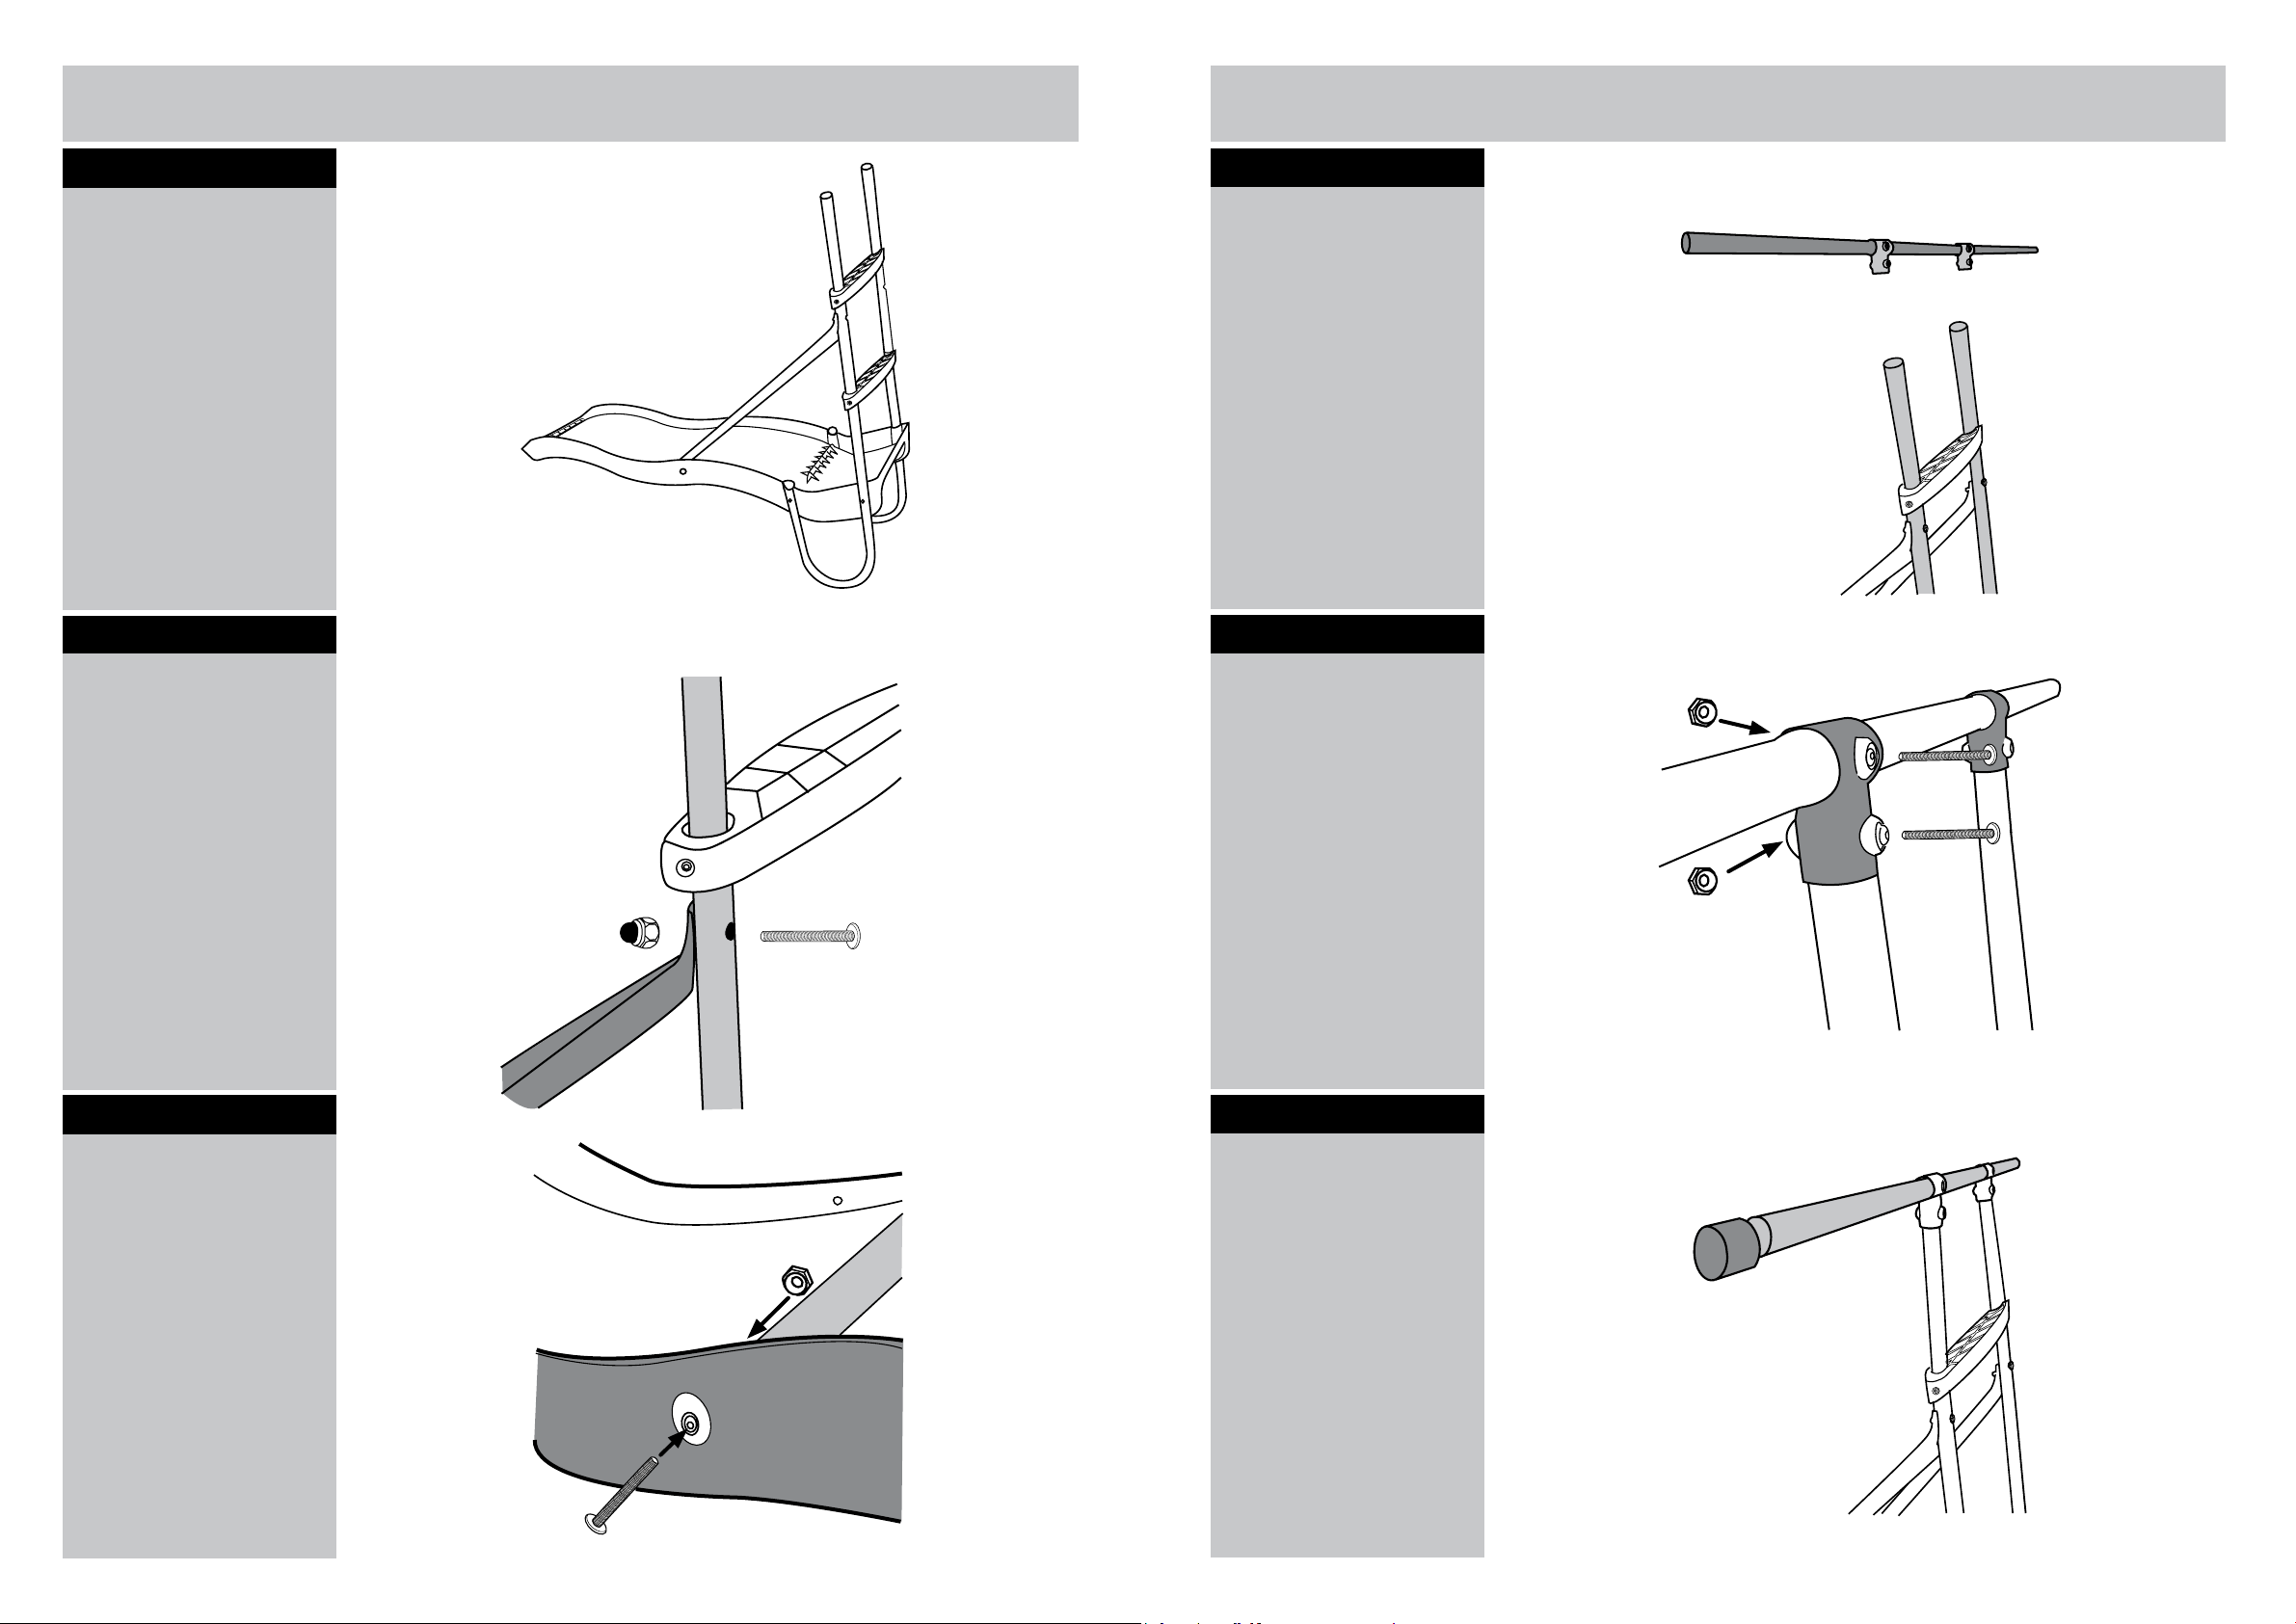
Step 10
Step 1
Assemble Connector
Tube
Place connector tube (D)
in position.
Step 11
Fix Connector Tube
Assemble legs
D
Step 1
Step 13
Assemble Base
Fit base connectors (G)
on base tube (E) and t
assembly on stiles (C).
Step 14
Fix Base
E
G
C
E
Fix connector tube (D)
Insert all 4 legs bla
on stile (C) with screw (N)
and cap nut (J).
Important: gegeg
egegegege gegef
Step 12
Step 2
Assemble legs
Fix Connector Tube
Insert all 4 legs bla
Fix connector tube (D)
on stile (C) with plastic
washer (I), screw (N) and
nut (H) and repeat step
10-12 on the other side.
D
C
C
Fix assembly with screws
(M) and nuts (H). to both
sides.
C
Step 15
E
Assemble End Caps
Assemble end cups (K)
in both sides of base
tube (E).
K
Important: gegeg
egegegege gegef
8
D
9
Page 6

Page 7
• WARNING! For domestic use only.
• WARNING! For indoor / outdoor use.
• WARNING! Max load 50 kg.
• WARNING! Recommended age of use: 3 years and above.
• Remove all packaging materials such as: bags, bands & cartons.
• Side bars are not for standing or climbing on.
• Place the toy on a level surface at least 2 m from any structure or obstruction, such as fence,
garage, house, overhanging branches, laundry lines or electrical wires.
• The toy shall not be installed over concrete, asphalt or any other hard surface.
• Do not face slide-shute directly towards the sun when in use.
• Check regularly the toy before use.
• Check connections regularly for continued security and for any evidence of deterioration or hazards.
• Replace, if required, with suitable & new parts.
• Failure to do so may result in an injury or fall.
• Adult assembly required.
• Adult supervision is required at all times
• Please keep this instruction sheet for future reference.
If you need help or have damaged or missing parts, call the Customer Helpline: 01291 650581
Produced for Chad Valley Toys. Country of origin: Israel.
Address: 488 - 499 Avebury Boulevard, Central Milton Keynes, MK9 2NW. www.argos.co.uk
15519
 Loading...