

Page 1
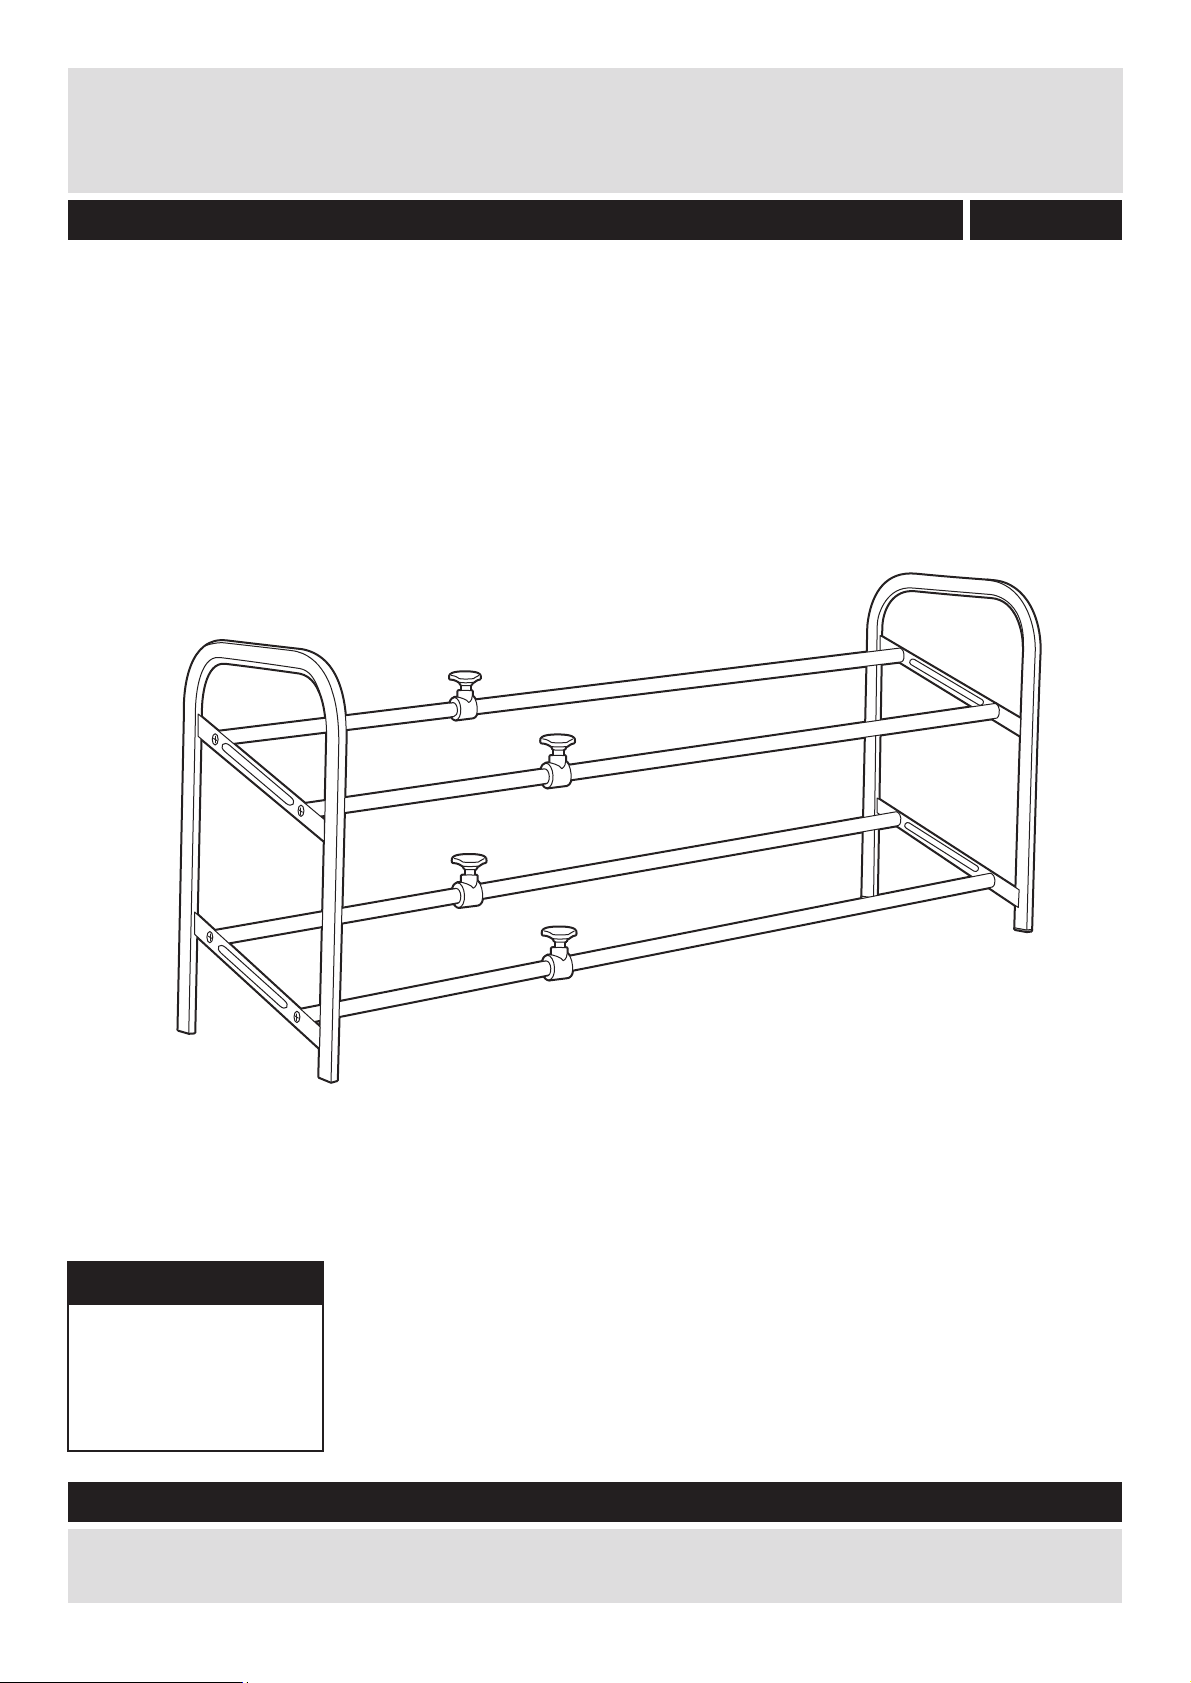
2 Tier Chrome Shoe Rack
Assembly Instructions - Please keep for future reference
875/4334
Dimensions
Width - 62/111.5cm
Depth - 24cm
Height - 37cm
Important - Please read these instructions fully before starting assembly
If you need help or have damaged or missing parts, call the Customer Helpline: 08456 400800
Page 2
Safety and Care Advice
Important - Please read these instructions fully before starting assembly
• Check you have all the
components and tools listed on
pages 2 and 3.
• Remove all fittings from the
plastic bags and separate them
into their groups.
Care and maintenance
• Only clean using a damp cloth
and mild detergent, do no use
bleach or abrasive cleaners.
• Keep children and animals
away from the work area, small
parts are a choking hazard.
• Make sure you have enough
space to layout the parts before
starting.
• From time to time check that
there are no loose screws on
this unit.
• Assemble on a pad to
avoid damaging the unit
or your floor.
•Dispose of all packaging
carefully and responsibly.
• This product should not be
discarded with household waste.
Take to your local authority
waste disposal centre.
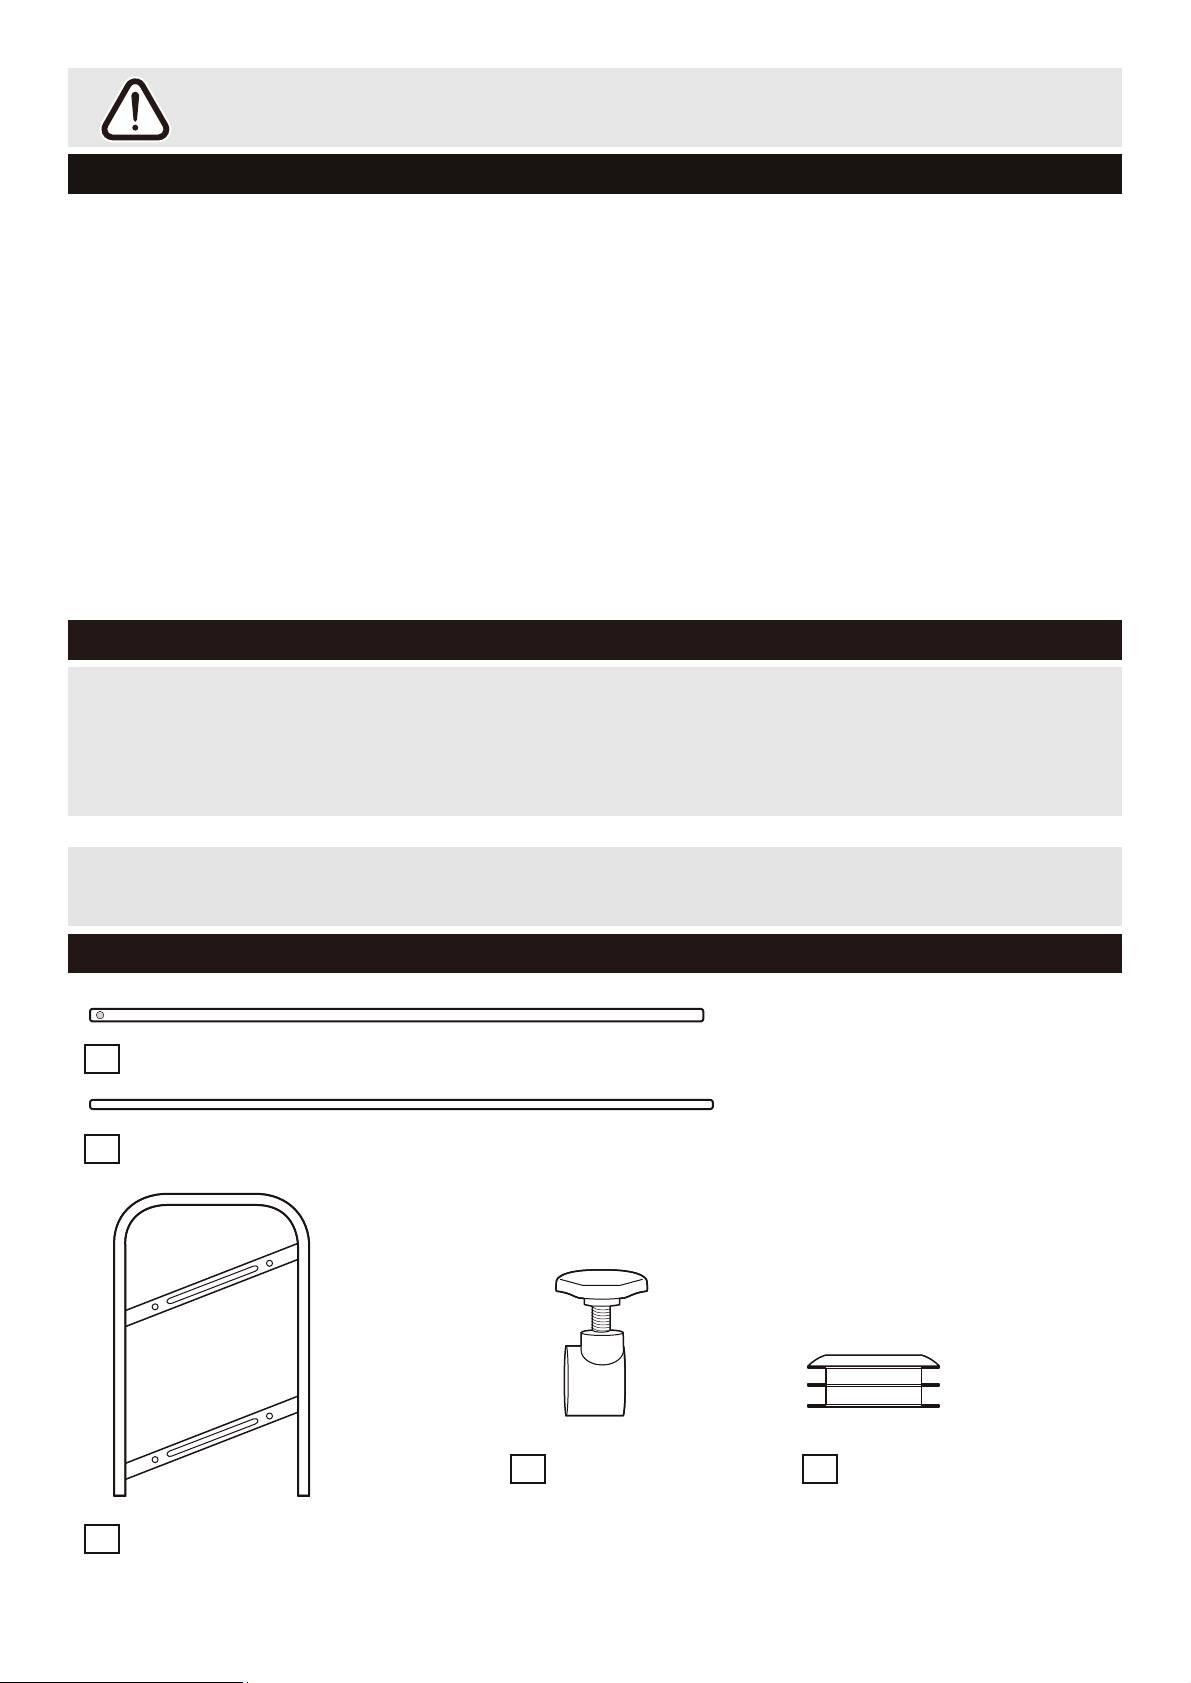
Components - Panels
Please check you have all the panels listed below
Tube x 4 (60cm)
1
Tube x 4
2
(60cm)
Tube clamp x 4
4
End cap x 4
5
Side x 2 (24x37cm)
3
1
Page 3
Components - Fittings
If you have damaged or missing components,
call the Customer Helpline: 08456 400800
Please check you have all the fittings listed below
Note: The quantities below are the correct amount to complete the assembly. In some cases more fittings
may be supplied than are required.
A
26mm Screw x 8
Tools required
Phillips screwdriver
(medium & large)
Assembly Instructions
Step 1
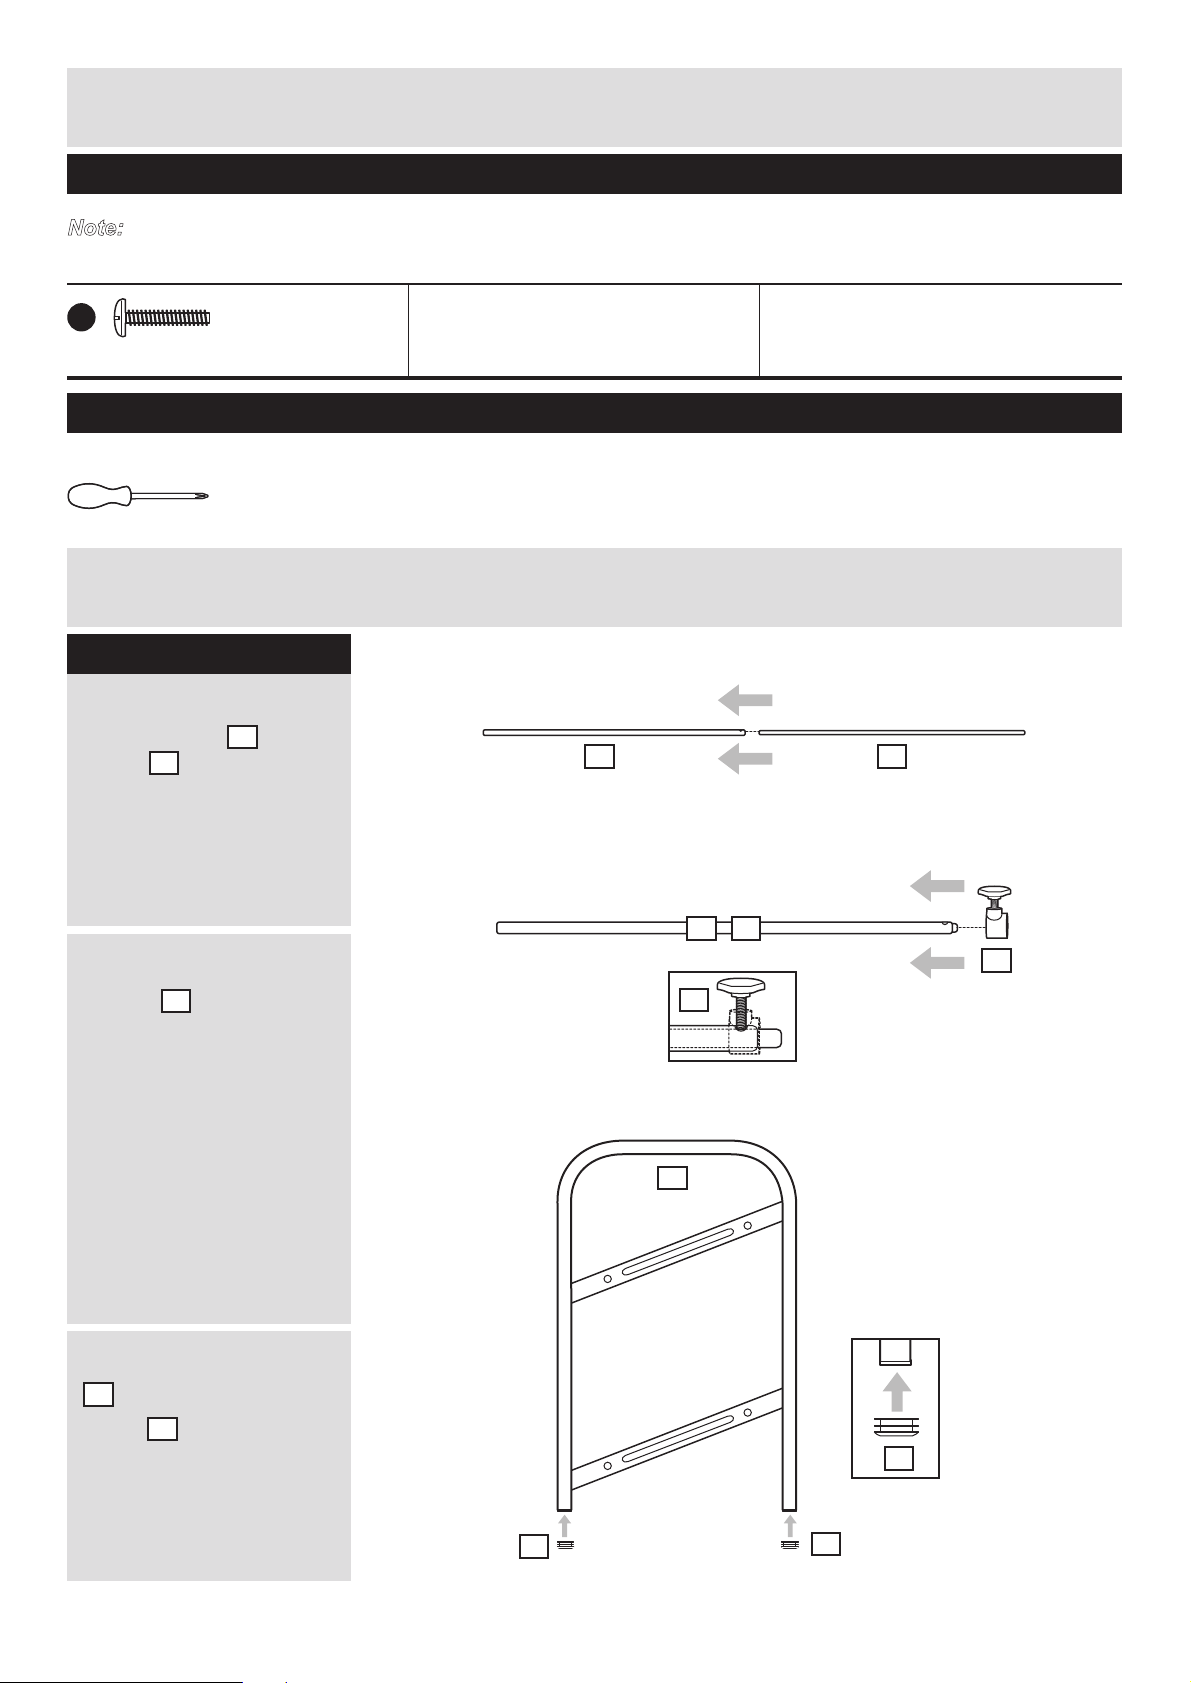
a:
Finishing the Tubes
a: Slide tubes into
Tubes
1
2
.
1
2
b: Carefullyfitthe Tube
clamps onto the ends
of assembled Tubes.
Align the screw with the
hole in the tube, then
tighten the clamp enough
to hold it in position,
while still allowing the
inner tube to slide.
4
c: Firmly insert End caps
5
into the ends of the
Sides .
3
b:
c:
1
2
1
4
3
5
5
5
2
Page 4
Assembly Instructions
Step 2
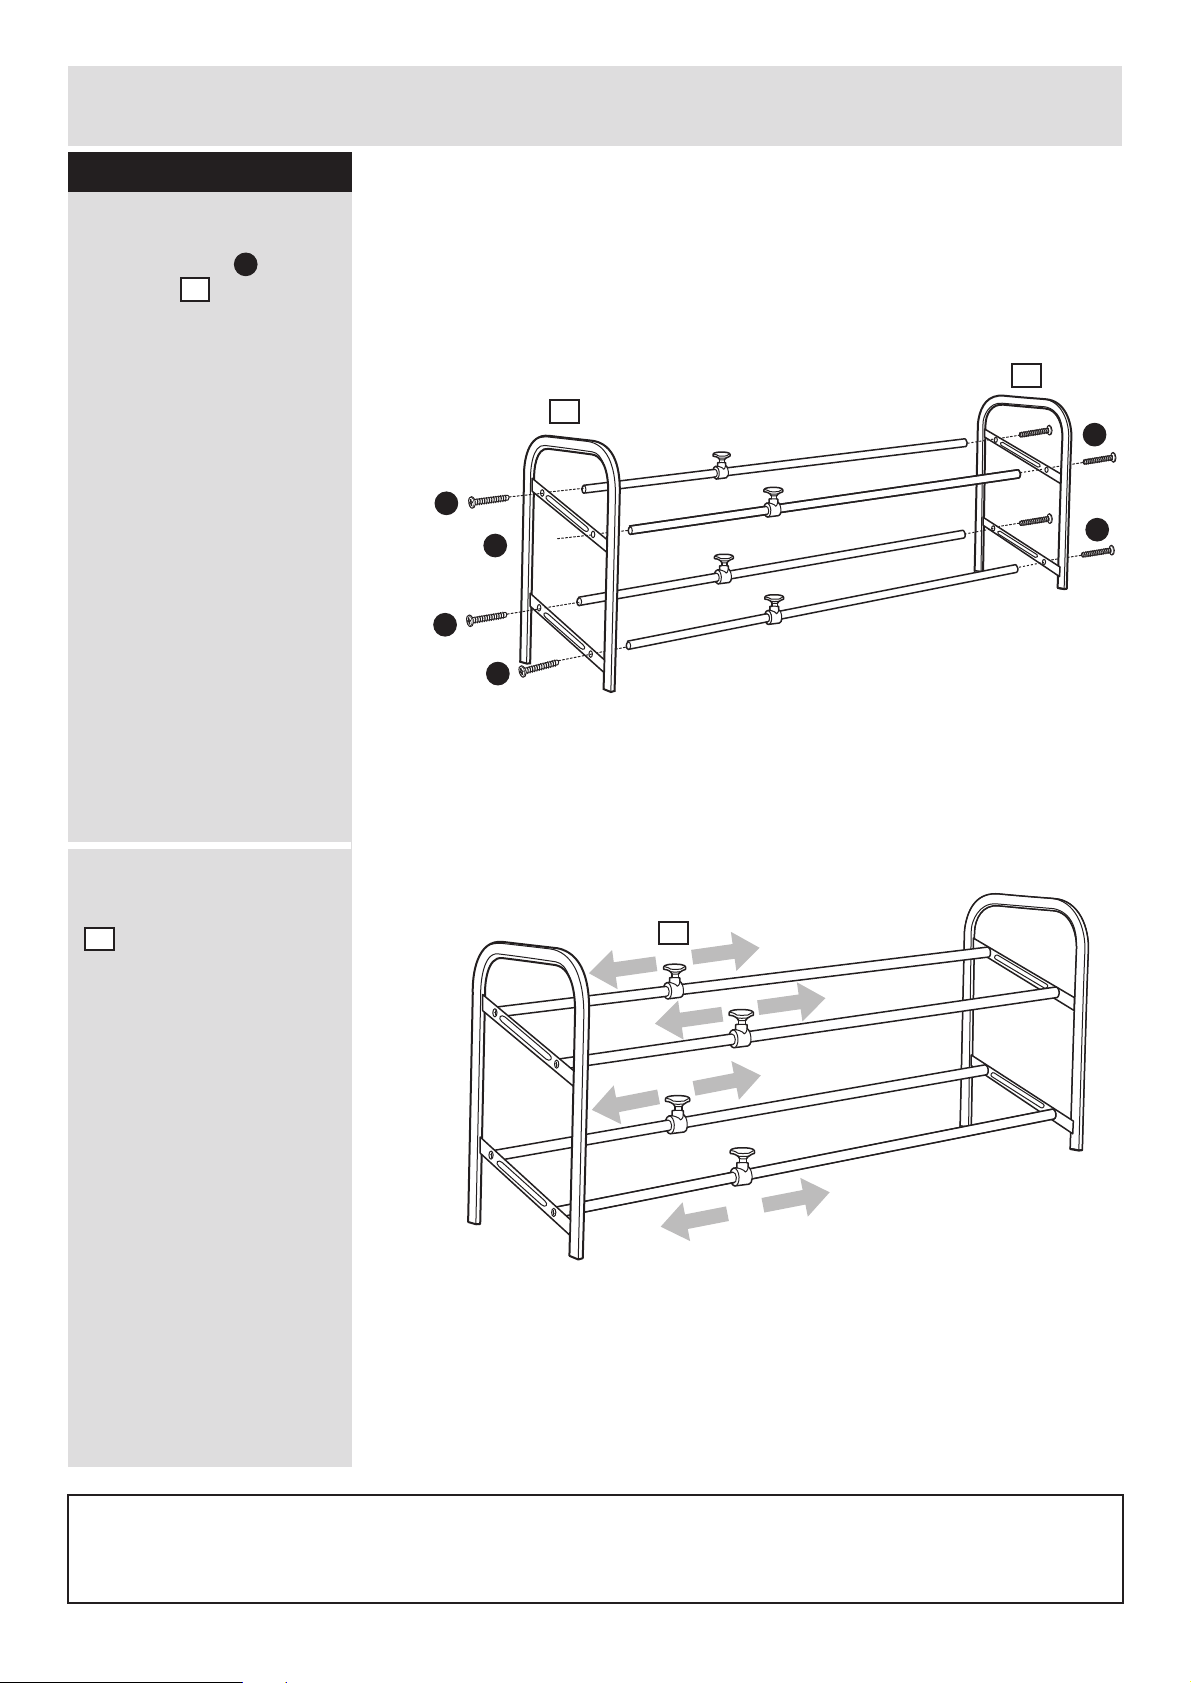
Finishing the Unit
A
a: Use Screws to fix
the Sides onto the
Tubes. With help, place
the unit in the intended
position.
A
3
a:
A
A
A
A
A
A
A
A
3
3
A
A
A
A
b: Set the width of the unit
using the Tube clamps
. Loosen all 4 clamps.
4
Slide the tubes to the
desired width and tighten
the clamps to fix in
position.
Adjustment Range:
62-111.5cm.
b:
4
Assembly is complete.
If you need help or have damaged or missing parts, call the Customer Helpline: 08456 400800
 Loading...