

Page 1
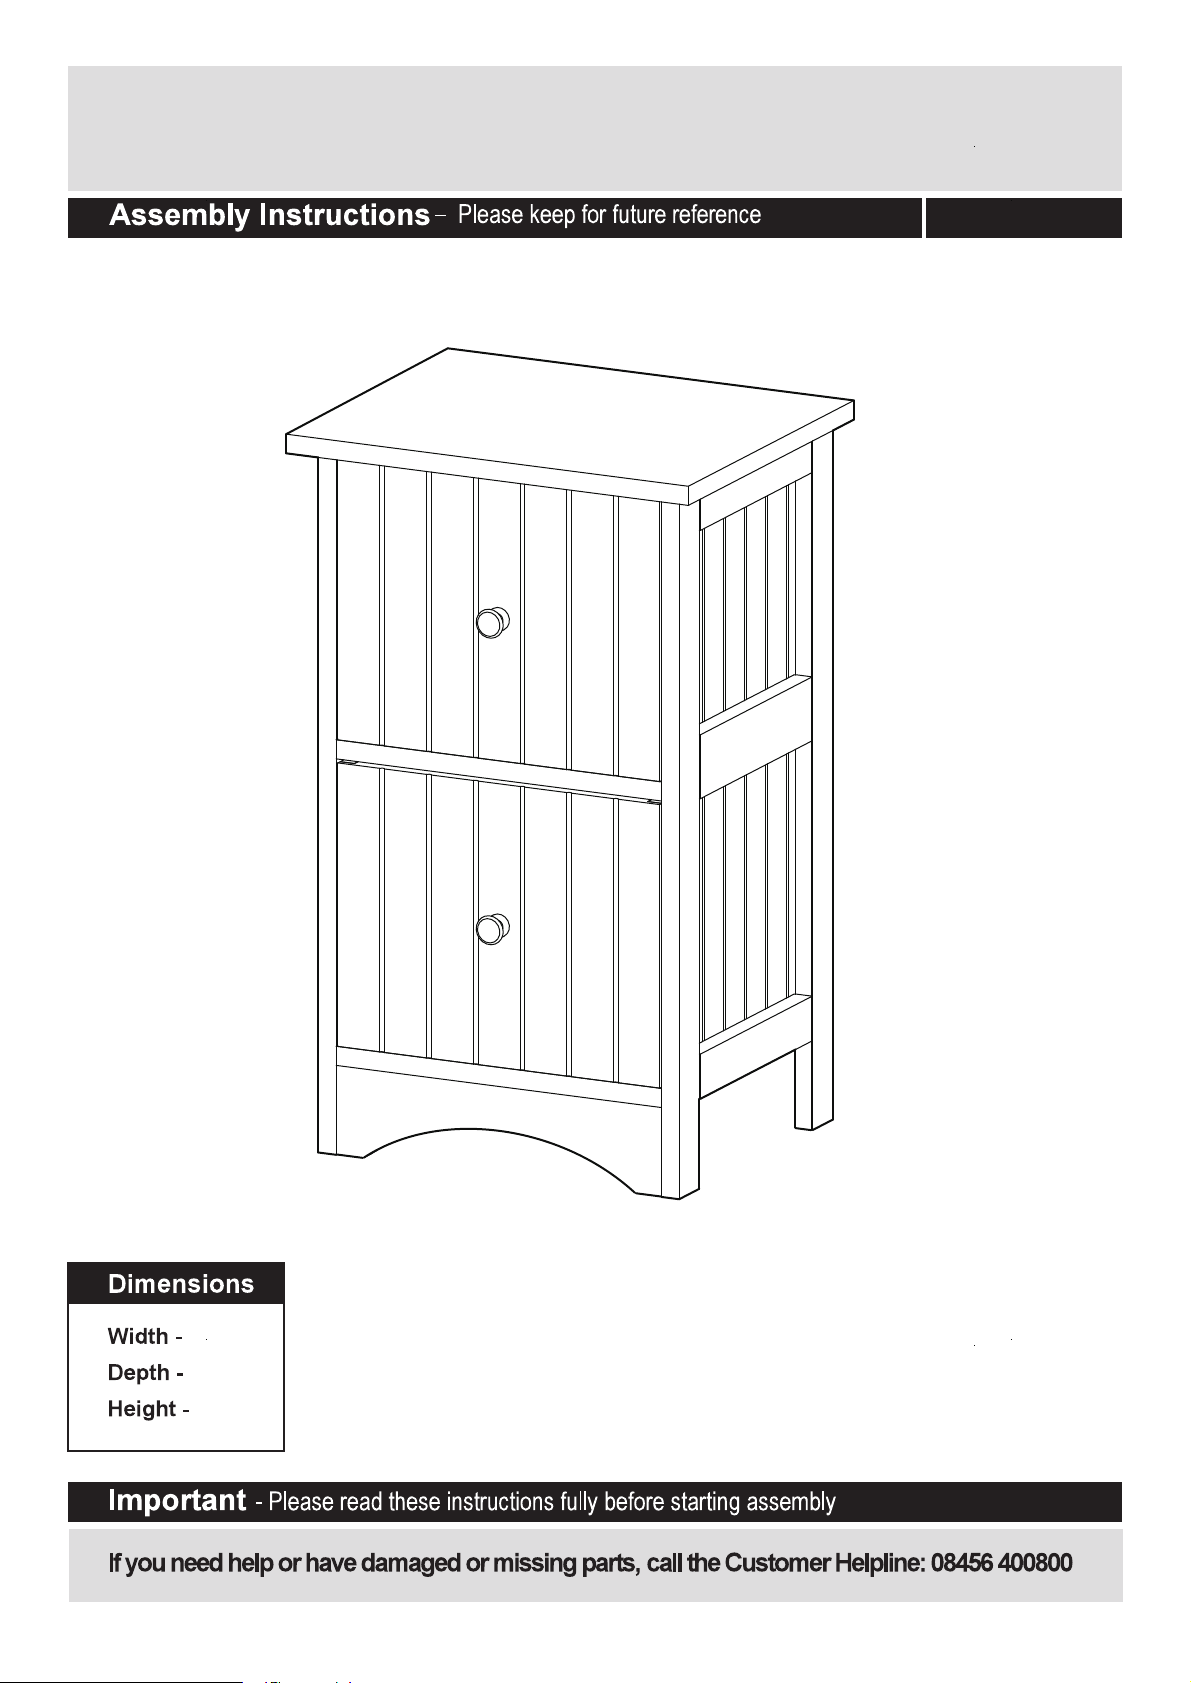
White Tongue & Groove 2 Drawer Unit
832/9408
34cm
28cm
56.3cm
Issue 5 - 8/20/12
Page 2
Page 3
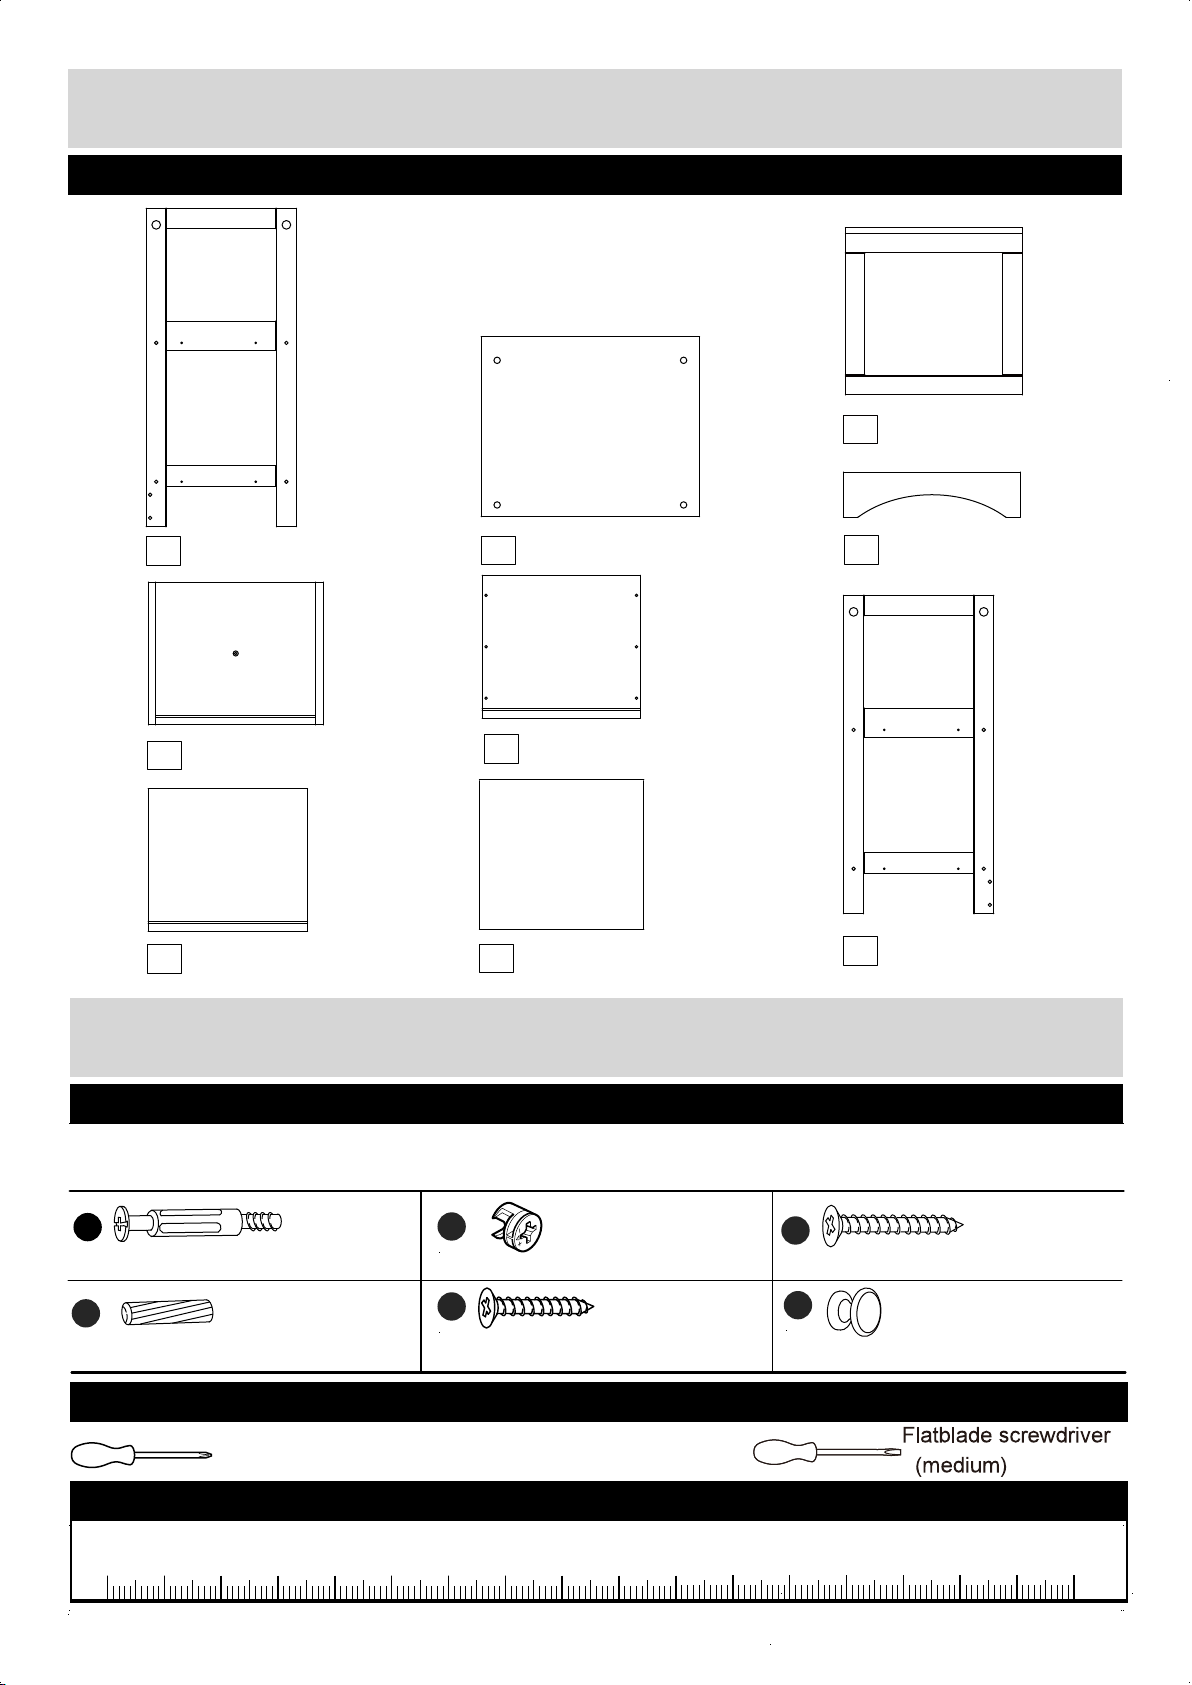
Components - Panels
Please check you have all the panels listed below
If you have damaged or missing components,
call the Customer Helpline:08456 400800
3
Support x 2
2
1
Left side Panel
5
Drawer Front x 2
6
Drawer Back x 2
Top Panel
7
Drawer Side x 4
8
Drawer Bottom x 2
Components - Fittings
Please check you have all the fittings listed below
4
Front Panel
9
Right side Panel
Note:The quantities below are the correct amount to c
fittings may be supplied than are required.
A
D
Wooden Dowel x 12
Tools required
Ruler - Use this ruler to help correctly identify the screws
2
Phillips screwdriver
(medium & large)
0 5 10 15 20 25 30 35 40 45 50 55 60 65 70 75 80 85 90 95 100
B
Locking Nut x 4Locking Pin x 4
E
30mm Screw x 26
omplete the assembly .In some cases more
C
40mm Screw x 8
F
Knob x 2
105
110 115 120 125 130 135 140 145 150 155 160 165 170
Page 4
Assembly Instructions
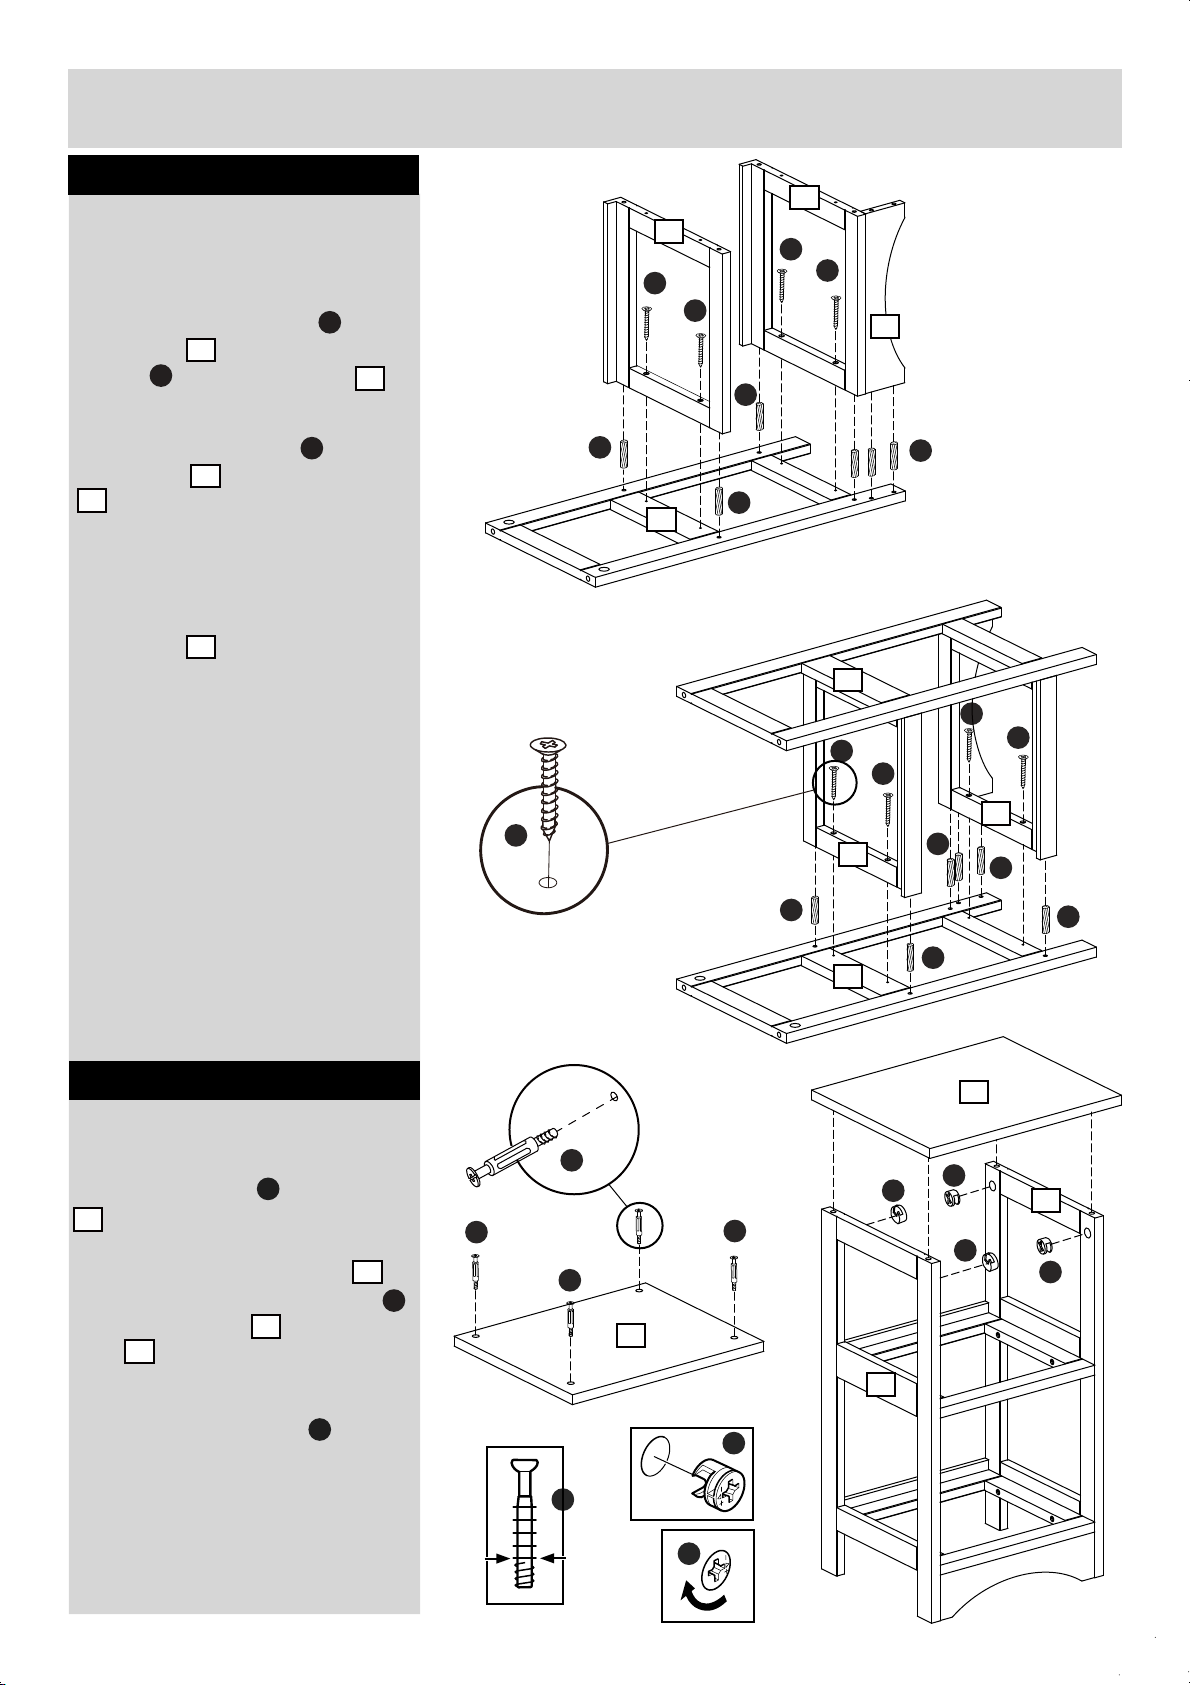
Step 1
Assembling side panels
NOTE:It would be useful to ask
someone to help you at this stage.
a: Insert wooden dowels into left
side panel and use 40mm
screws to fix the supports on
1
C
the left side panel .
Insert wooden dowels into left
side panel and fix front panel
4
on the left side panel.
1
b: Repeat same step to attach right
side panel to the unit.
9
D
3
D
a:
3
3
C
C
D
1
C
C
4
D
D
D
b:
1
C
C
C
C
Step 2
Assembling top panel
Screw locking pins into top panel
.
2
Carefully place the top panel
onto the unit.Insert locking nuts
into left side panel and right side
panel .
9
A
2
B
1
3
C
D
A
A
A
2
A
3
9
D
D
D
D
2
B
1
B
9
B
B
Tighten the locking nuts to
B
secure the unit.
3
B
A
B
Page 5
Assembly Instructions
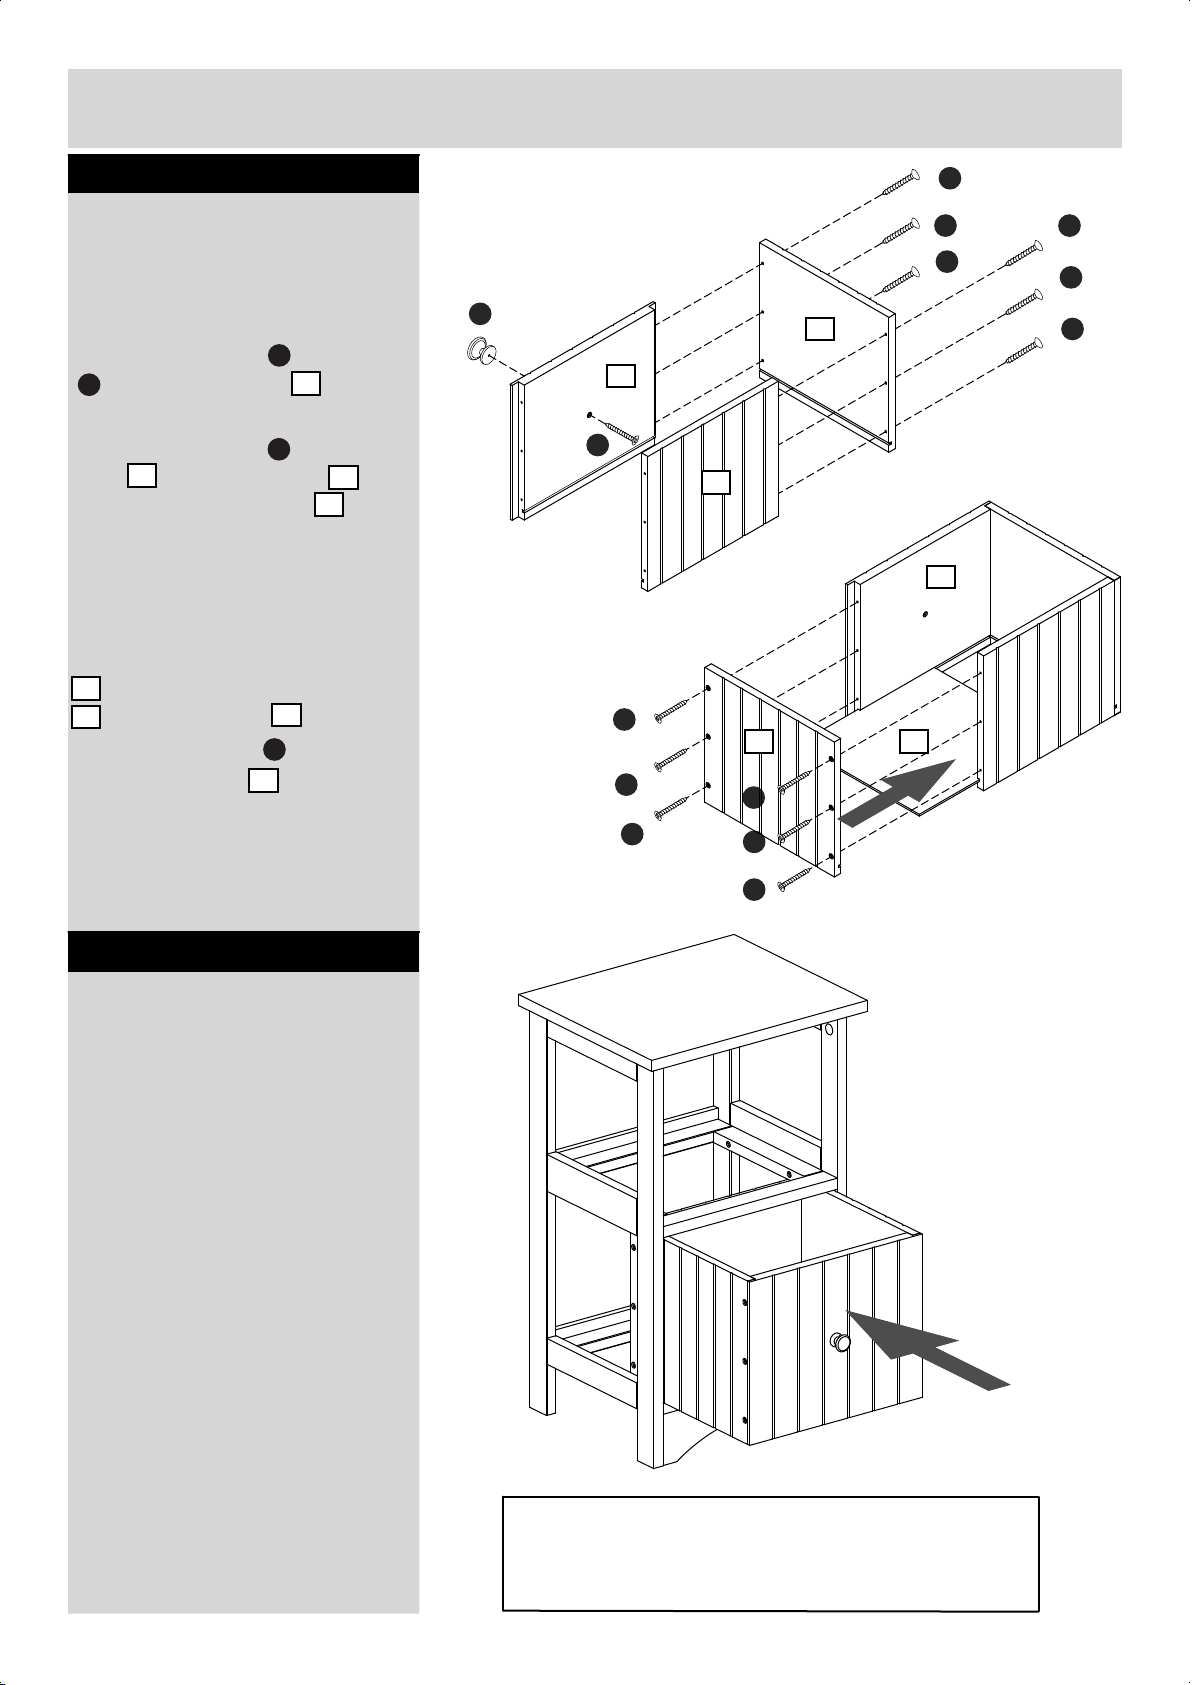
Step 3
Assembling the Drawers
NOTE:It would be useful to ask
someone to help you at this stage.
a:Use 30mm screw to fix knob
onto drawer front .
F
Use 30mm screws to fix drawer
front and drawer back onto
5
one of the drawer sides .
b:Carefully slide the drawer bottom
8
into the grooves of drawer front
and drawer back .
5
Use 30mm screws to fix the
other drawer side onto the unit.
E
5
E
6
7
6
E
7
E
a:
F
5
E
6
7
E
E
5
E
E
E
b:
E
7
E
E
8
Repeat same step to assemble the
second drawer.
Step 4
Finishing the unit
NOTE:It would be useful to ask
someone to help you at this stage.
Carefully slide the two drawers into
the unit.
With help,place the unit in the
intended position.
NOTE: Please make sure the unit
is secure before use.
E
E
E
The assembly is now complete
4
NOTE:If you have damaged or missing components,
call the Customer Helpline:08456 400800
Argos LTD,489-499 Avebury Boulevard,
Central Milton Keynes, MK9 2NW
 Loading...