

Page 1
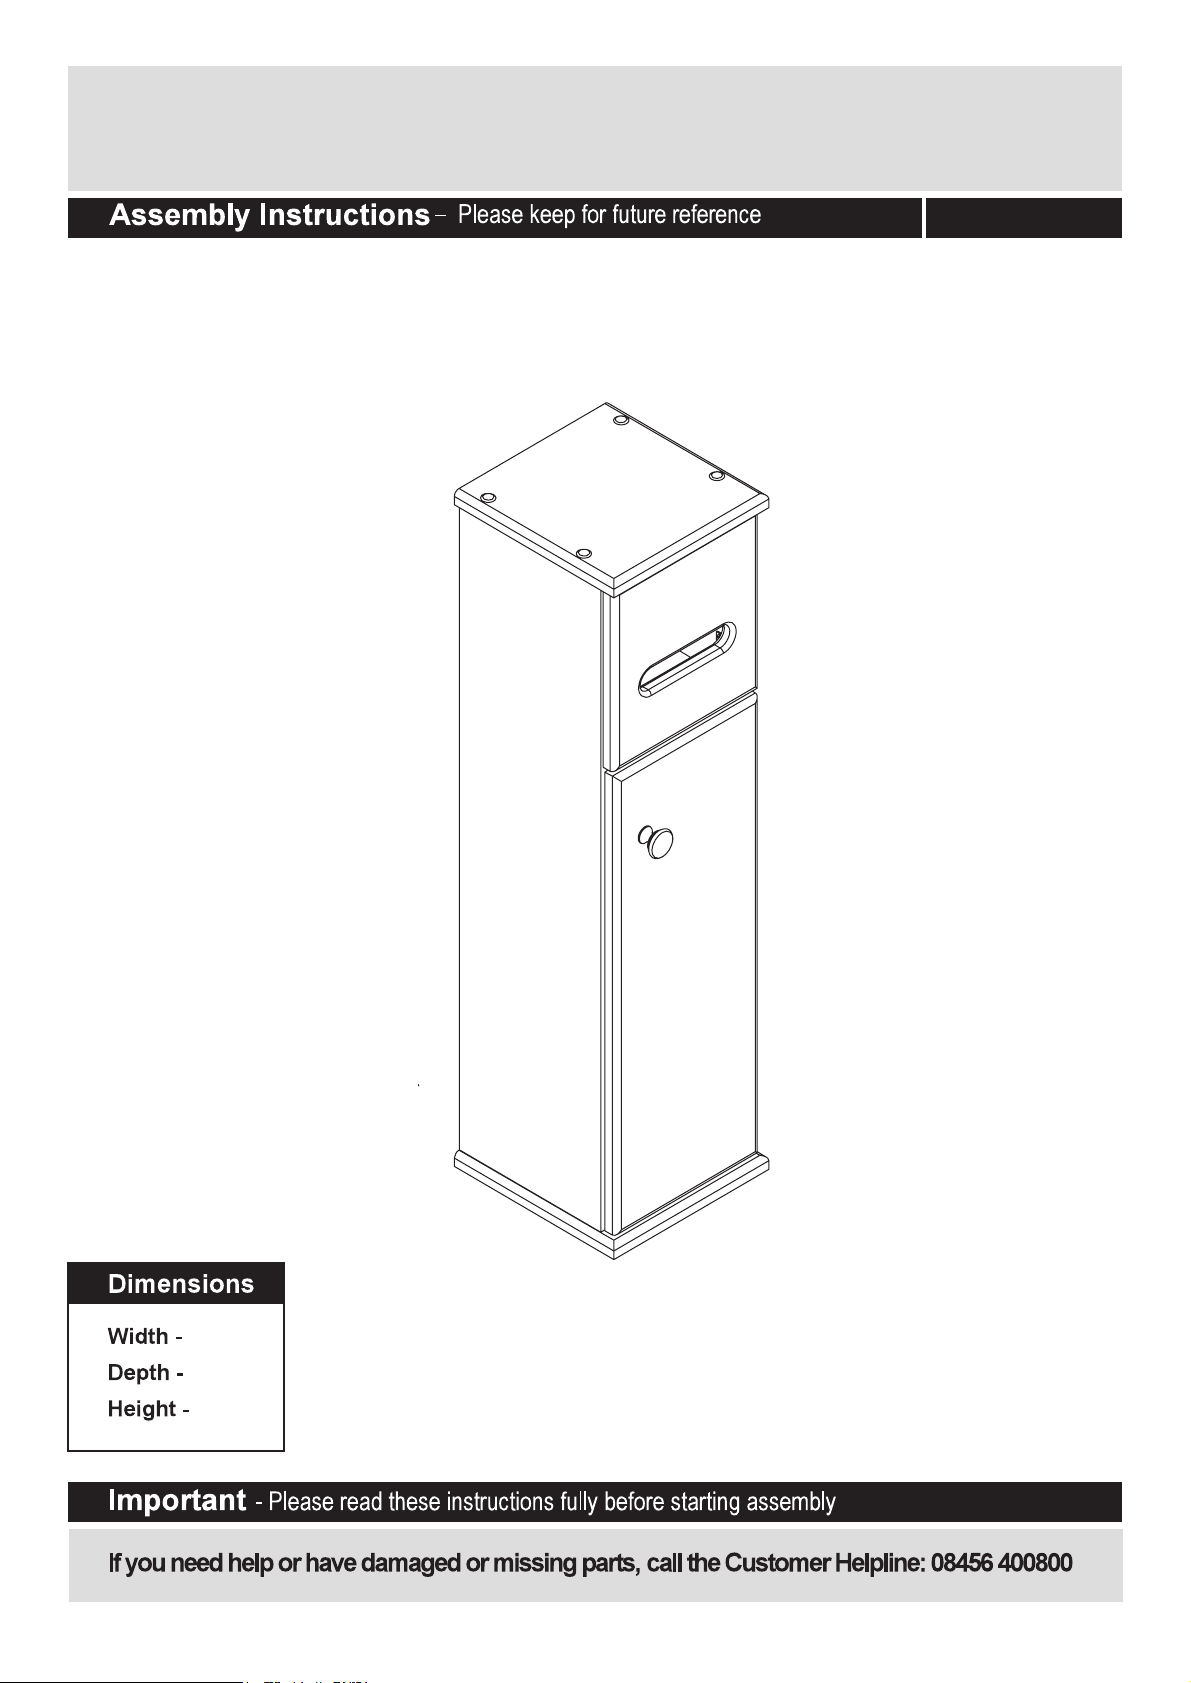
White Tidy Cupboard
830/1732
17cm
17.5cm
63.5cm
Issue 3 - 12/07/12
Page 2
Page 3
Components - Panels
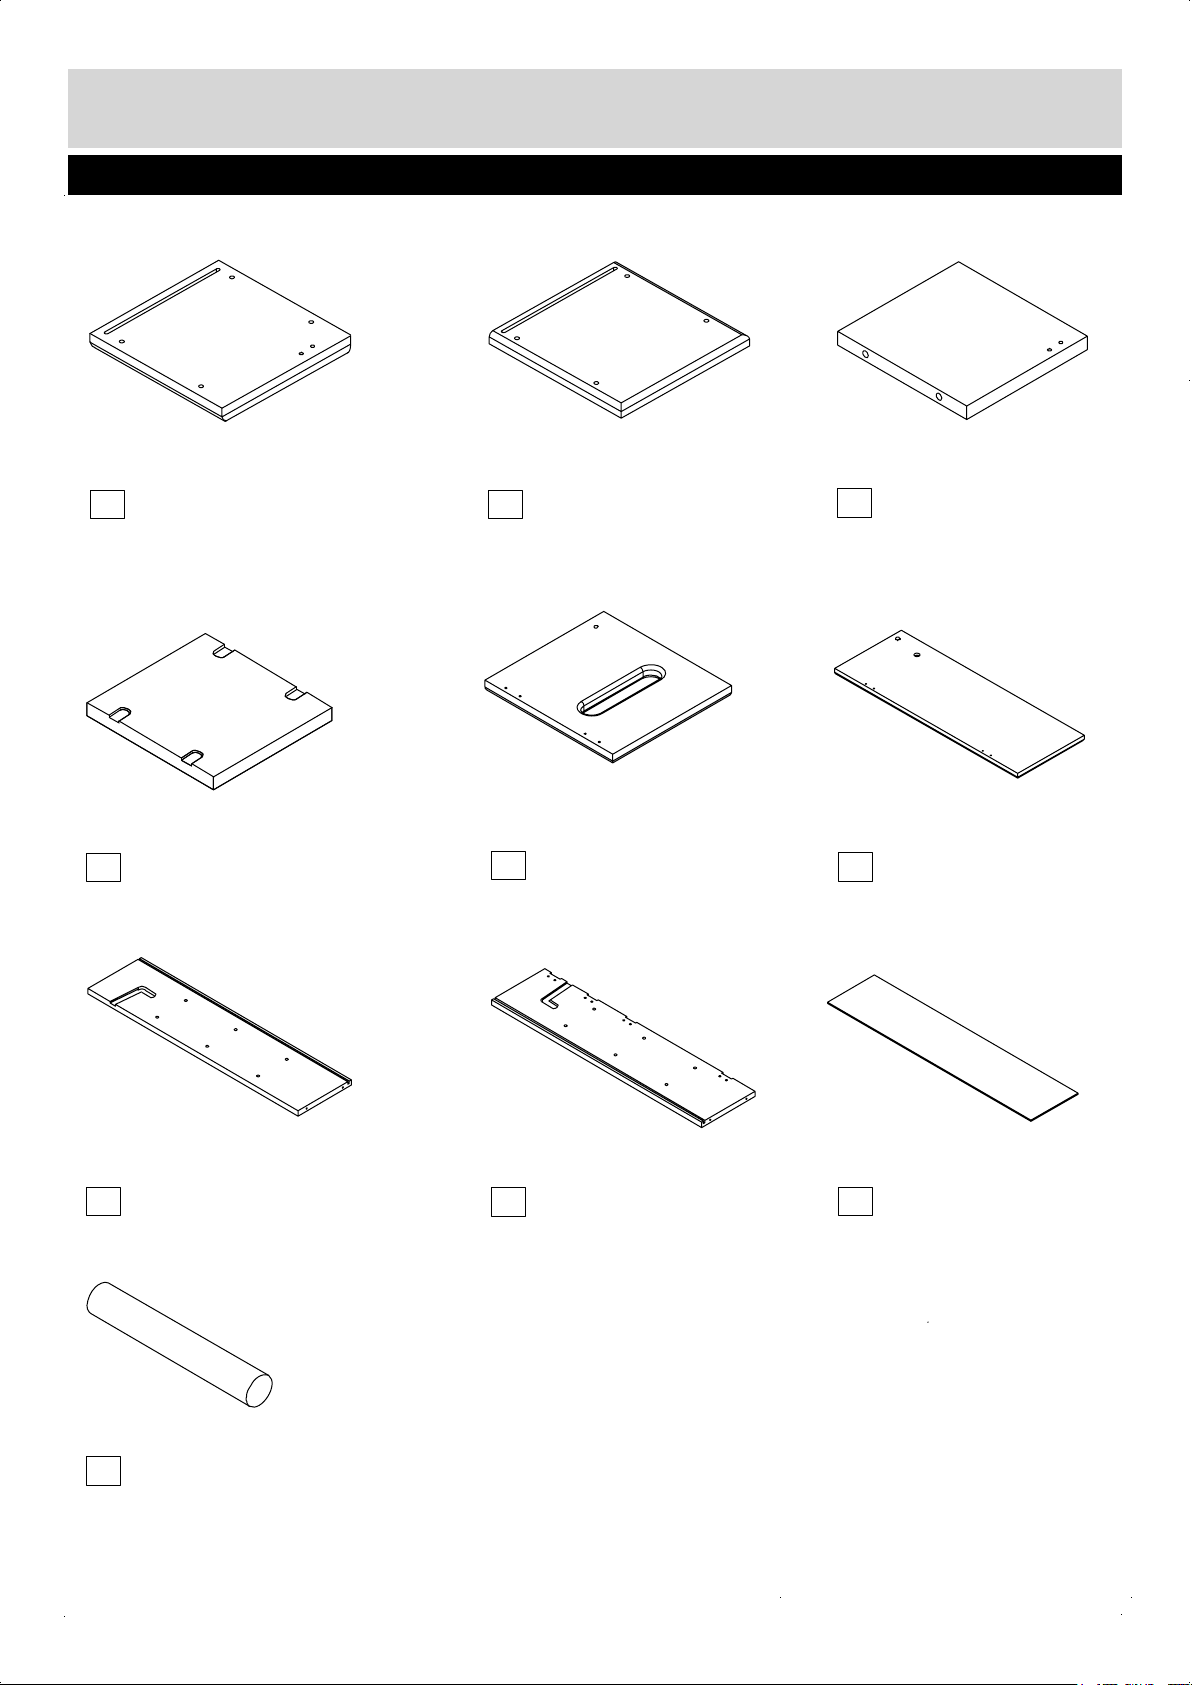
Please check you have all the panels listed below
1
Top Panel x 1
2
Bottom Panel x 1
If you have damaged or missing components,
call the Customer Helpline:08456 400800
Fixed Shelf x 1
3
4
Adjustable Shelf x 2
Left Side Panel x 1
7
Upper Door x 1
5
Right Side Panel x 1
8
Lower Door x 1
6
Back Panel x 1
9
Paper Holder x 1
10
2
Page 4
Components - Fittings
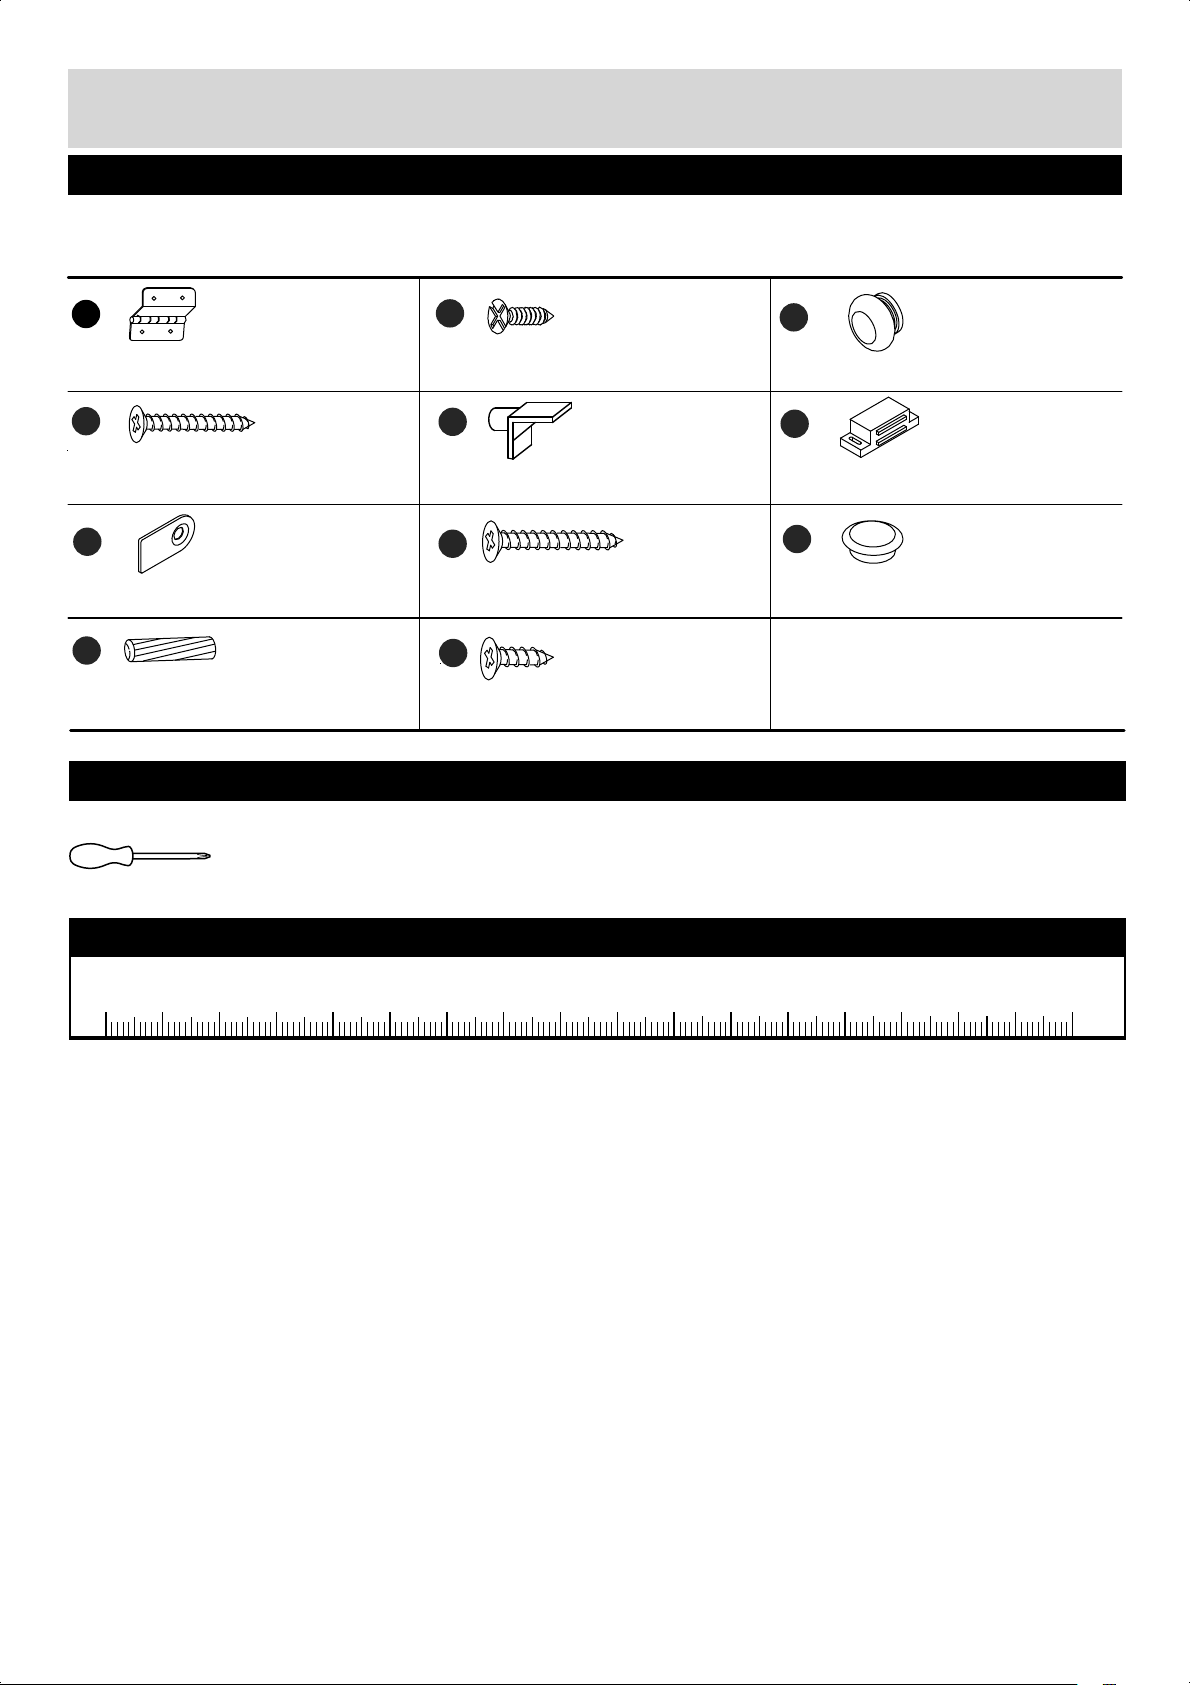
Please check you have all the fittings listed below
Note:The quantities below are the correct amount to complete the assembly .In some cases more
fittings may be supplied than are required.
A
Hinge x 4
D
25mm Screw x 1
G
Catch Plate x 2
J
Wooden Dowel x 4
Tools required
Phillips screwdriver
(medium & large)
B
12mm Screw x 4
E
Plastic Support x 8
H
30mm Screw x 8
K
10mm Screw x 18
C
Door Knob x 1
F
Magnetic Catch x 2
I
Screw Cap x 8
Ruler - Use this ruler to help correctly identify the screws
0 5 10 15 20 25 30 35 40 45 50 55 60 65 70 75 80 85 90 95 100
105
110 115 120 125 130 135 140 145 150 155 160 165 170
3
Page 5
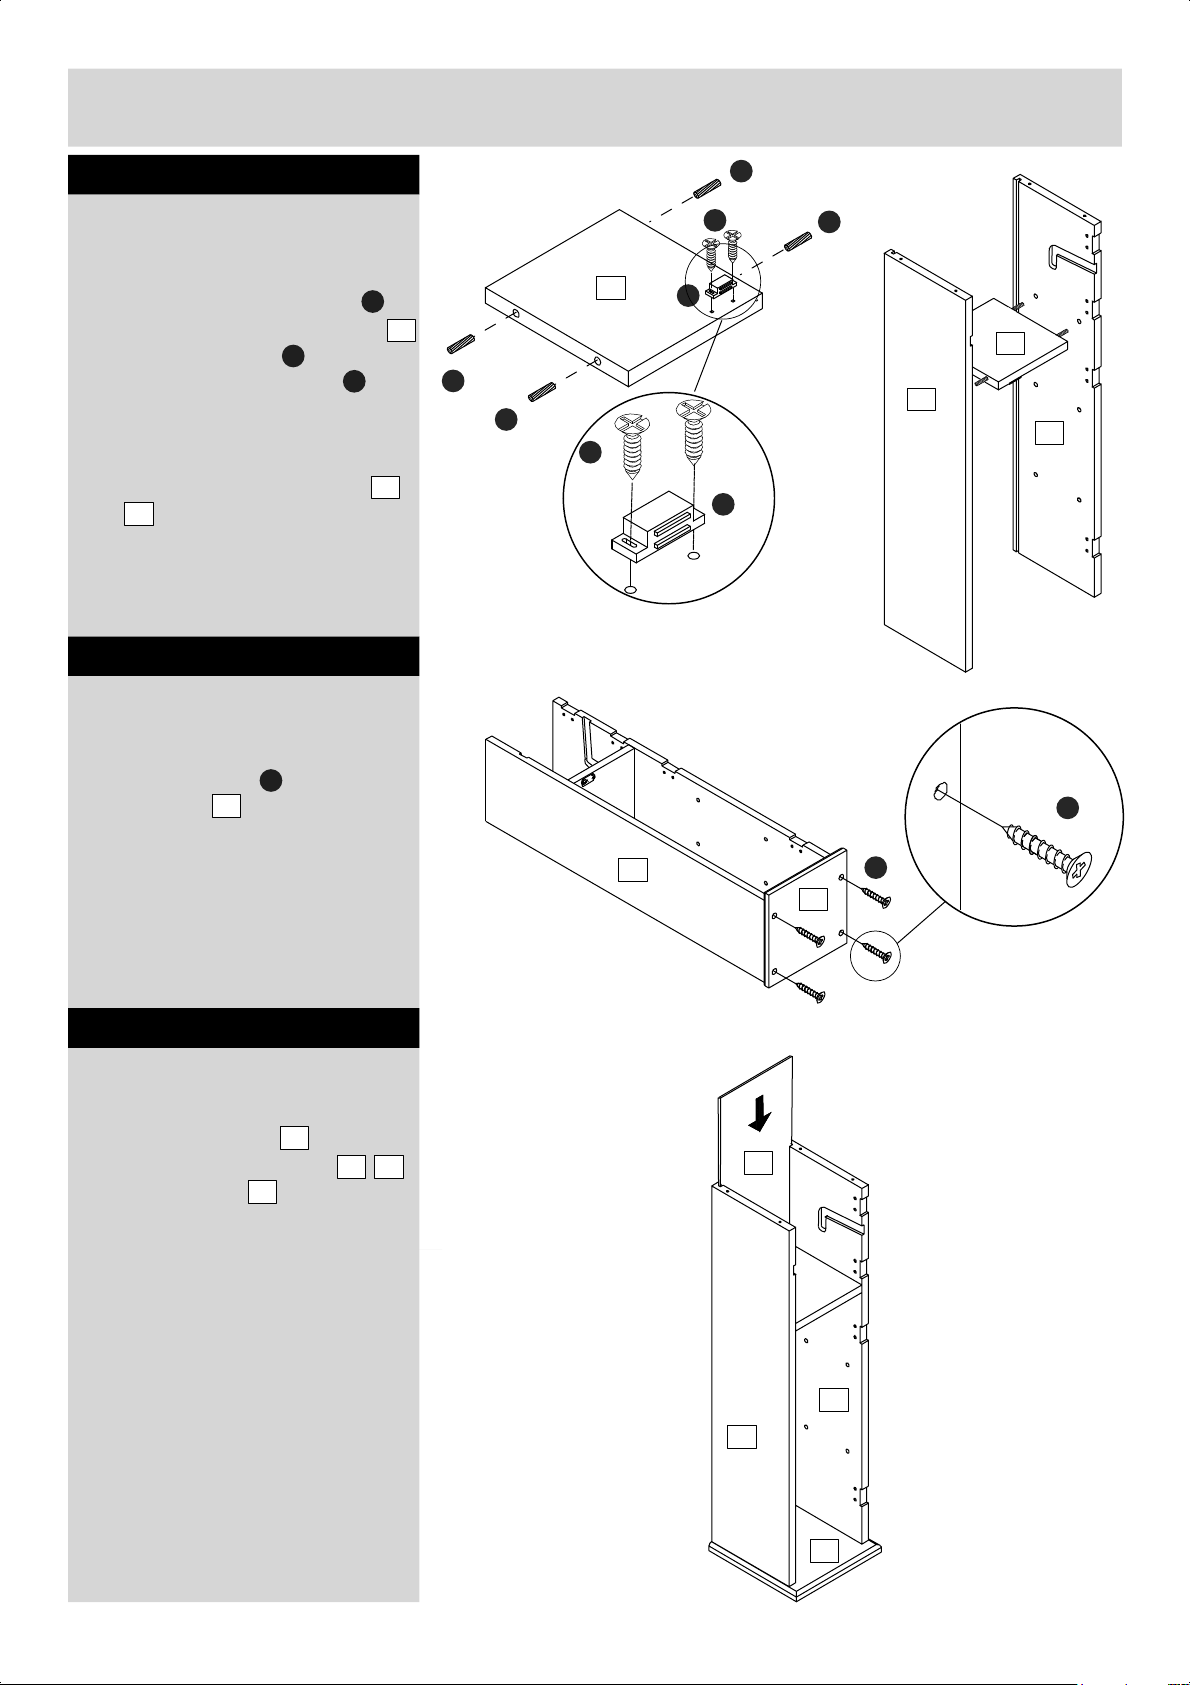
Assembly Instructions
Step 1
Assembling the fixed shelf
NOTE:It would be useful to ask
someone to help you at this stage.
a:Attach the magnetic catch to
the underside of the fixed shelf
using 12mm screws
B
Insert the wooden dowels into
F
3
J
the holes of fixed shelf.
b:Use the wooden dowel to fit the
fixed shelf to the side panels
8
and .The shelf should attach to
7
the upper set of the holes.This may
be a tight fit.
Step 2
Assembling bottom panel
J
a:
J
b:
B
3
J
B
F
F
J
3
7
8
Lay the cupboard on its back and
use 30mm screws to attach the
bottom panel .
H
2
Step 3
Assembling back panel
Slide the back panel into the
grooves of the side panels
and bottom panel .
9
788
2
H
7
2
9
H
7
2
4
Page 6
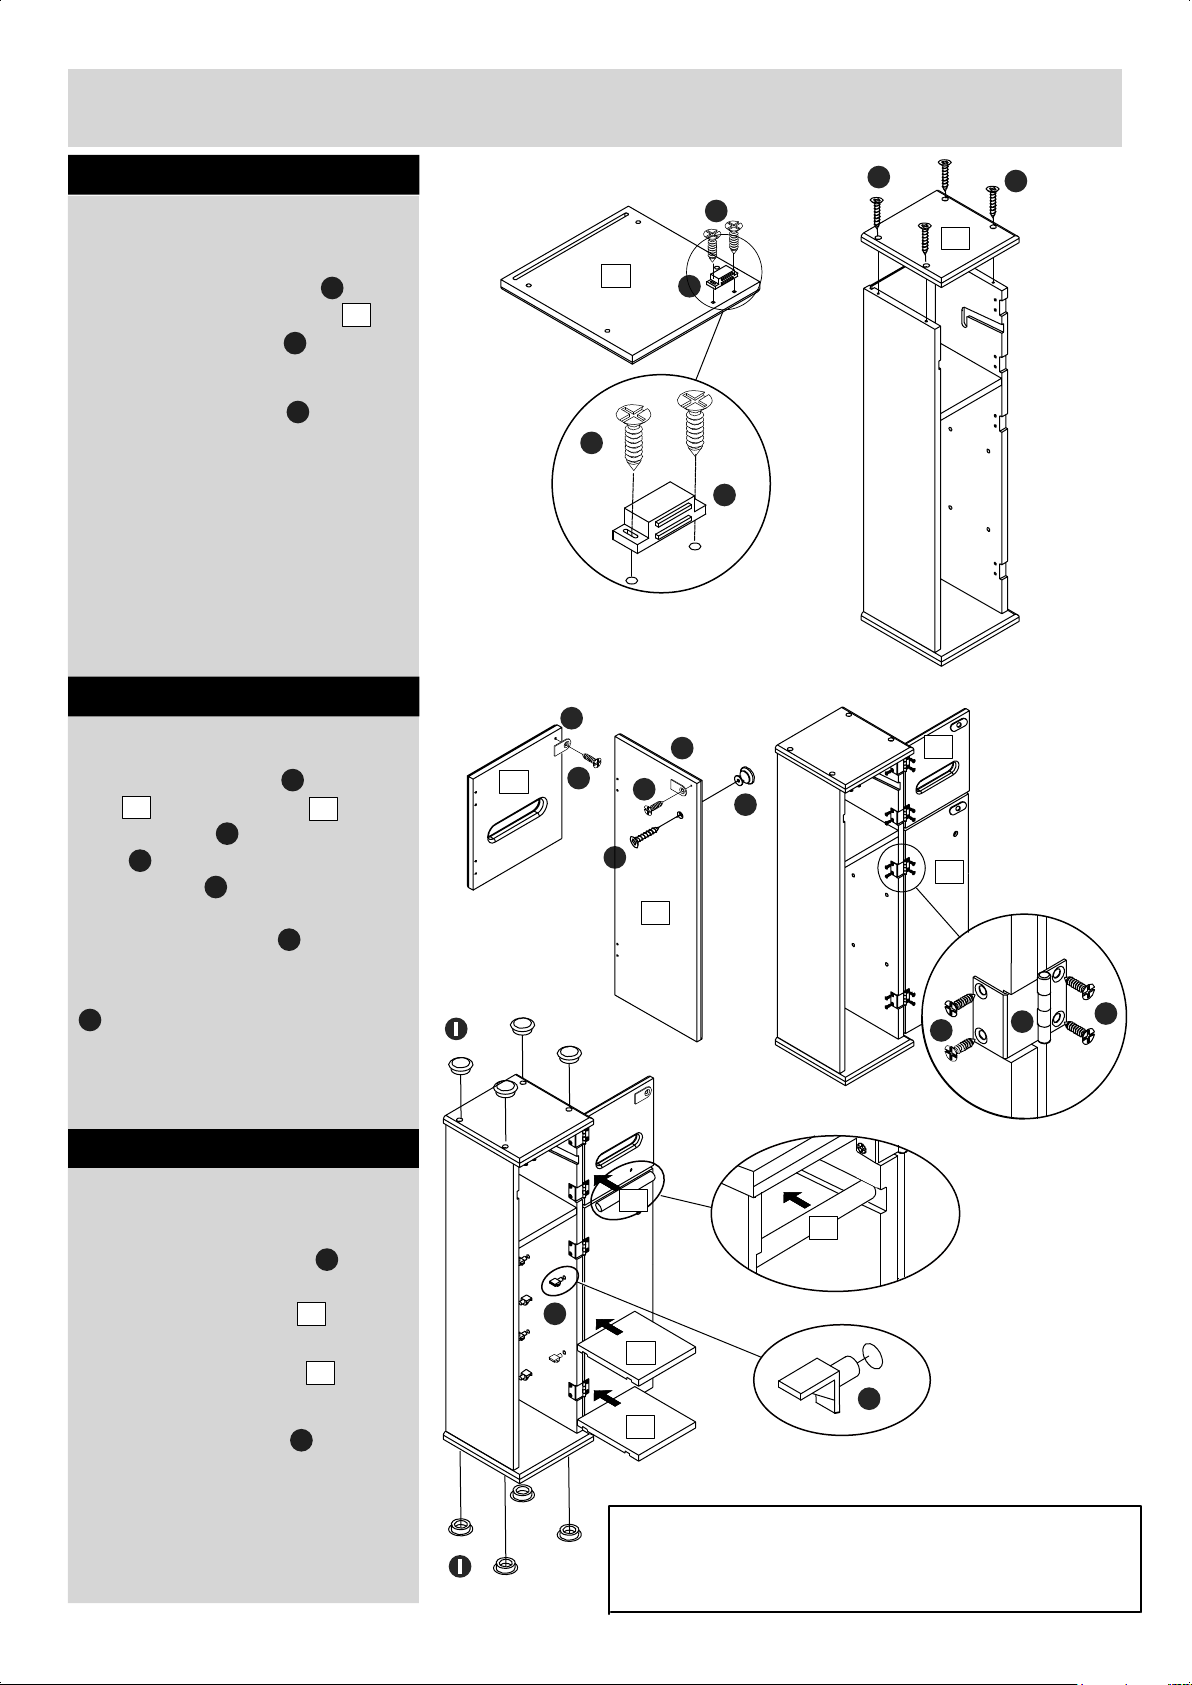
Assembly Instructions
Step 4
Assembling top panel
a:Attach magnetic catch to the
underside of the top panel
using 12mm screws
F
1
B
b:Use 30mm screws to fix the
H
top panel to the unit.
Step 5
Assembling doors
a:Attach catch plates to the upper
5
door and lower door using
10mm screws .Also attach the
C
knob to the lower door with
25mm screw
K
D
b:Attach door hinges to the upper
and lower door and the main body
of the cupboard with 10mm screws
K
G
6
A
a:
B
1
B
a:
G
5
I
K
D
F
F
b:
G
K
6
C
b:
H
5
6
K
H
1
A
K
Step 6
Assembling abjustable shelf
Insert the shelf supports into the
holes in the side panels,and put
the abjustable shelves onto the
shelf support.
Insert the paper holder
To finish the assembly of the unit,
insert the screw caps over the
screw holes on the outside.
NOTE: Please make sure the
unit is secure before use
The assembly is now complete
5
E
4
10
I
10
10
E
4
E
4
NOTE:If you have damaged or missing components,
call the Customer Helpline:08456 400800
I
Argos LTD,489-499
Avebury Boulevard,
Central Milton Keynes, MK9 2NW
 Loading...