

Page 1
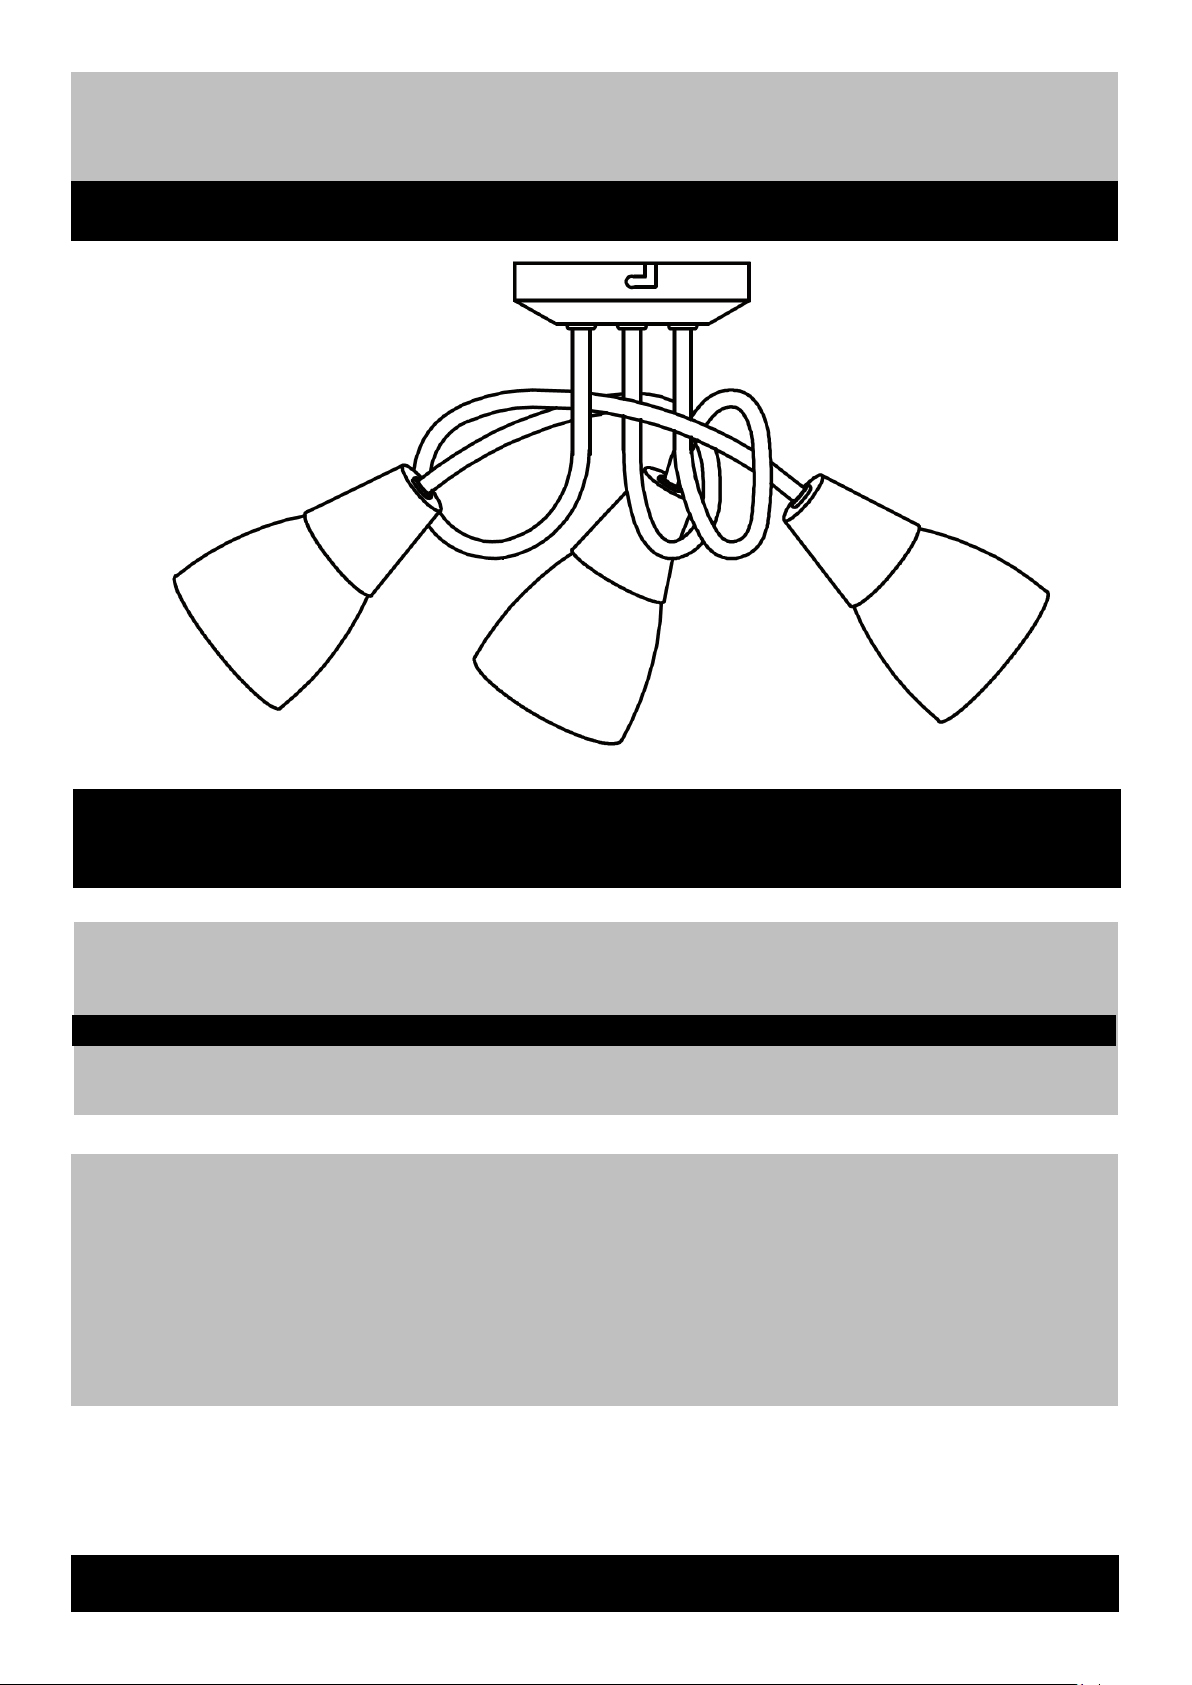
HM CURICO 3 LIGHT CEILING FLUSH CHROME GLASS OPAL
8030209
Installation and User Instructions—Please Keep for Future Reference
Important –Please read these instructions fully before using
If you need help please call our Customer Services on 0345 640 3030
Contents
Section Page
Parts and Component list 2
Safety Information 3
Maintenance 3
Installation 4
Produced for Argos, 489-499 Avebury Boulevard, Central Milton Keynes, MK9 2NW
1 Customer Helpline 0345 640 3030
Page 2
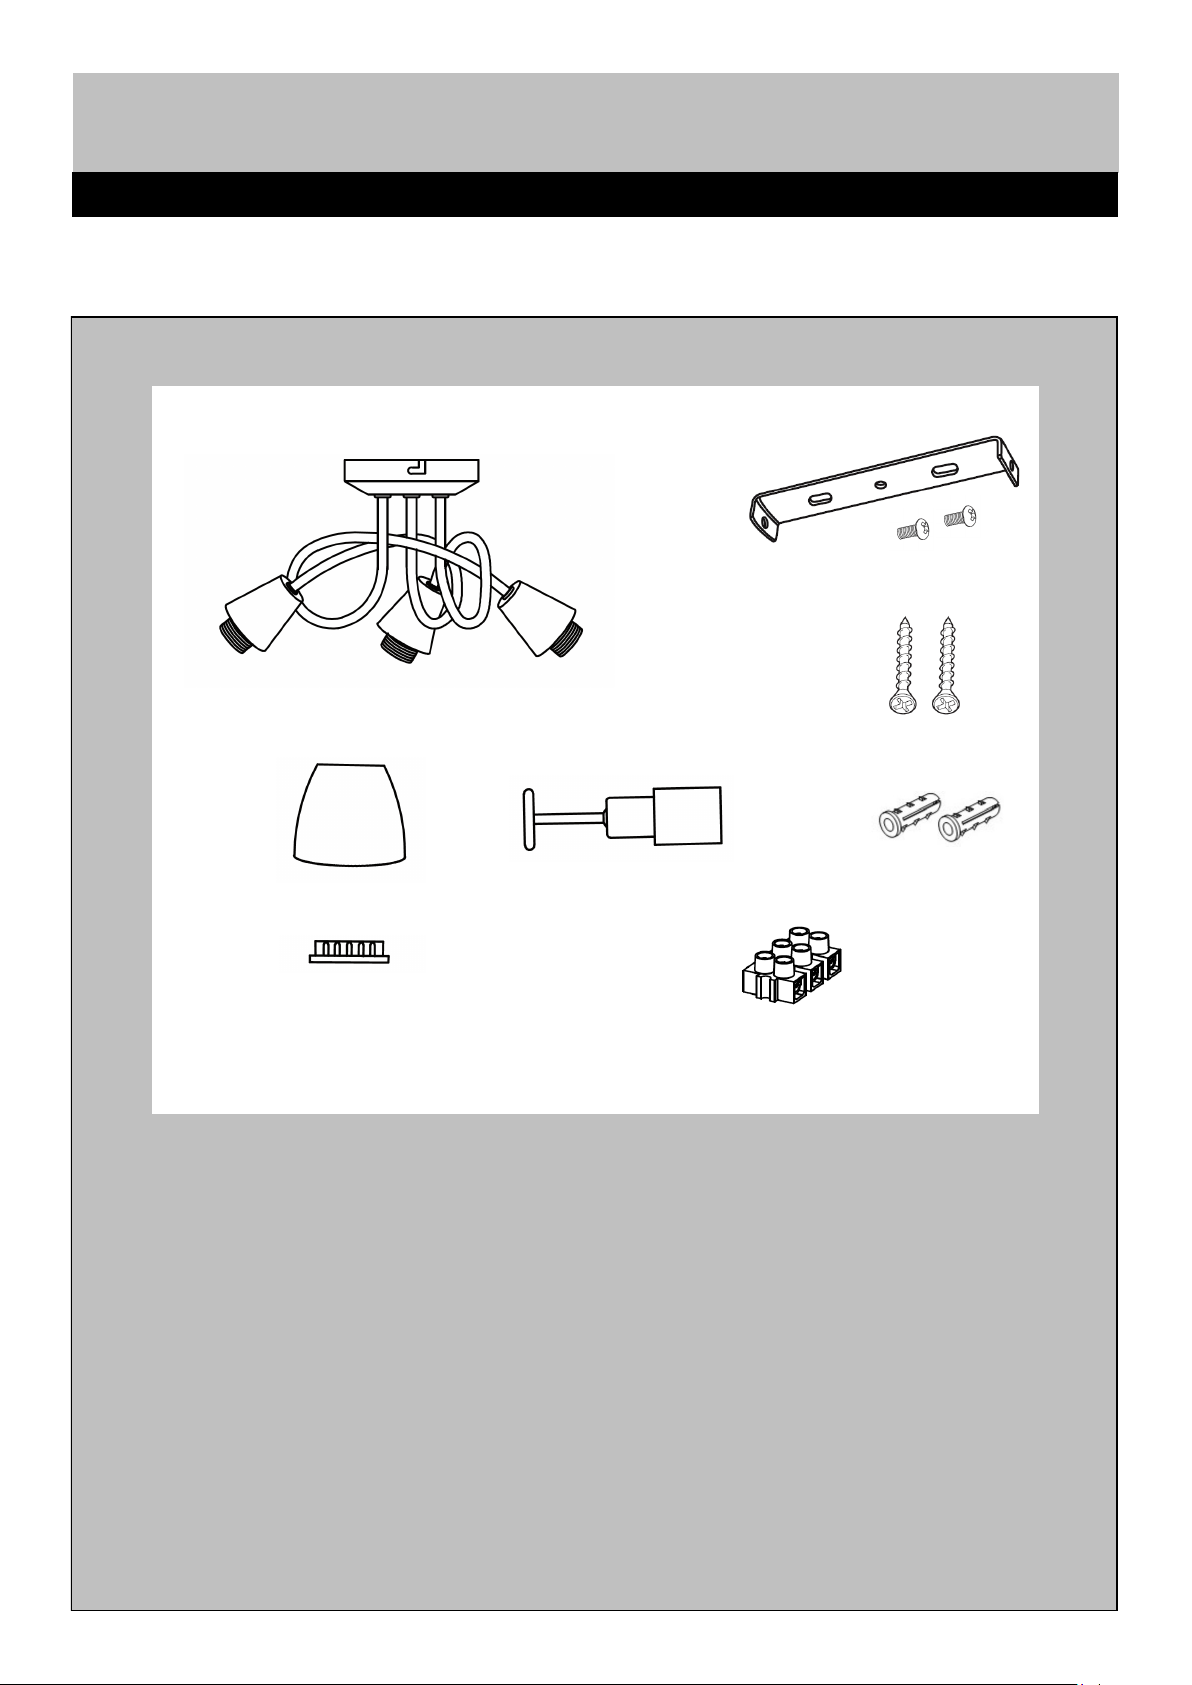
Parts and Components Listing
A
E
B
C
A: Fitting (Pre-wired) x 1
B: Glass Shade x 3
C: Shade ring x 3
D: Shade ring tool x 1
F
D
G
H
E: Fixing bracket including 2 screws x 1 (fitted on ceiling plate)
F: Fixing screws x 2
G: Ceiling plugs x 2
H: Connector block x 1
2 Customer Helpline 0345 640 3030
Page 3
Safety Information
IMPORTANT – Please read these instructions fully before installation and keep for future reference
Your product is produced in conformity with all relevant
safety regulations relating to electrical appliances. If in
doubt about fitting this product, please consult a
qualified electrician.
IMPORTANT -This product has been designed for
non-professional, domestic use only.
IMPORTANT - Carefully unpack and examine the
product for any damage. If you think there is a defect,
do not use the pro duct an d contact our custom er
services on : 0345 640 3030.
IMPORTANT - Dispose of all packaging correctly and
responsibly and in accordance with all local laws and
regulations. Never leave packaging components within
reach of children as they can be a source of danger.
IMPORTANT - Electrical connections must be carried
out by a suitably qualified person and in accordance
with all relevant local building and installation
regulations. If in doubt consult a qualified electrician.
IMPORTANT – This fitting must be permanently wired
into electricity supply.
IMPORTANT – Before inserting or replacing bulb(s)
ensure the power is switched off and the bulb(s) have
cooled down..
WARNING – Do not modify or alter any product before
or after installation. This may render the product un-safe.
WARNING - This product is not intended for use by
persons (including children) with reduced physical,
sensory and mental capabilities, or lack of experience and
knowledge, unless they have been given supervision or
instruction concerning use of the product by persons
responsible for their safety.
WARNING - Children should be supervised to ensure that
they do not play with the product.
WARNING - Do not mount this fitting in a damp
atmosphere.
WARNING – The lum inaire should be positioned s o
that prolonged staring into the luminaire at distance closer
than 0.2m is not expected.
CAUTION - Ensure the power is switched off before
cleaning or carrying out any maintenance.
APPROVED
Q.C
07/09/2017
ISSUE 1
WARNING – This is a Class I product and requires an
earth connection. This fitting must be permanently
wired into the electric system.
WARNING – Always shut off power to the circuit before
starting installation work.
WARNING - Accessible parts become hot during use,
young children must be kept away.
Maintenance
Maintenance
CAUTION! Alw ays dis connect power supply w hen serv icing or cleaning.
Cleaning
- Use a clean dry soft or slightly damp cloth.
- Do not use abrasive cloths or polishes as this may cause damage to the product.
Changing the bulb
IMPORTANT! Ensu re that th e bulb h as cool ed down before replacing .
Ensure that the power supply has been disconnected.
3 Customer Helpline 0345 640 3030
Page 4
Installation
Installation
IMPORTANT ! - Electrical co nnections mu st
be carried out by a suitably qualified person and
in accordance with all relevant local building and
installation regulations. If in doubt consult a
qualified electrician.
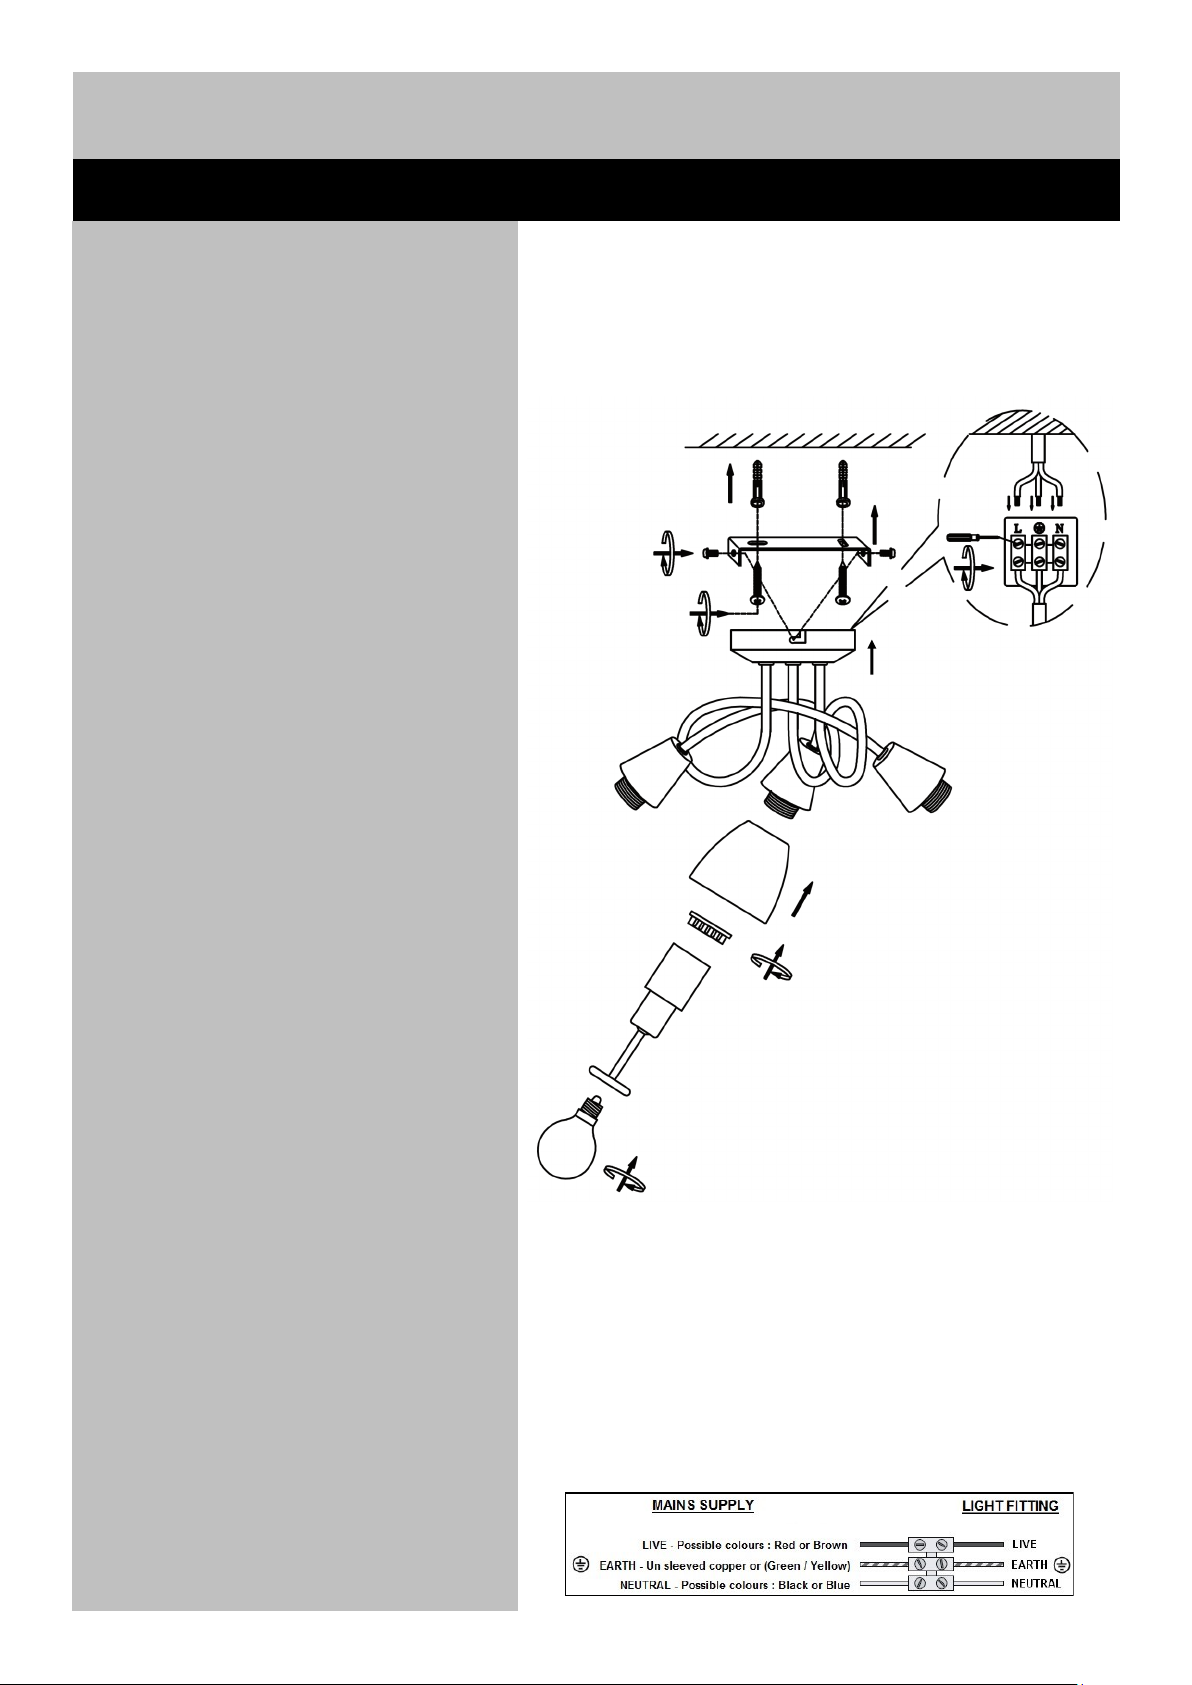
Installation
1. Remove the fixing bracket from the ceiling
can, using as template mark two holes on the
ceiling, using a drill, drill the holes previously
marked and insert suitable ceiling plugs.
2. Place the fixing bracket over the holes.
3. Use the two fixing screws provided to secure
fixing bracket to the ceiling joist.
4. Connect the supply wires to the terminal
block, opposite the corresponding wires from
the fitting (Dia.1). (Ensure that connections
are tight and no loose strands of wire are left
out of the connector block).
5. Place the fitting over the fixing bracket.
6. Screw the fitting onto the fixing bracket using
the side screws provided.
7. Place the glass shades over each lamp
holder.
8. Secure Glass shades in place screwing
shade rings onto the lamp holders with shade
tool provided.
6
3
1
4
2
5
7
8
9. Screw bulbs (not supplied) into the lamp
holders. (Wattage & bulb type stated on the
fitting).
Switch on the mains supply and test the fitting.
REPLACEMENT LAMP
We recommend LED lamps only.
(Ensure same lamp brand and specification for
each lamp holder)
Maximum wattage – See lamp holder
Light bulb shape - See lamp holder
4 Customer Helpline 0345 640 3030
Dia. 1
9
 Loading...