

Page 1
4 Tier Mini Greenhouse-Components
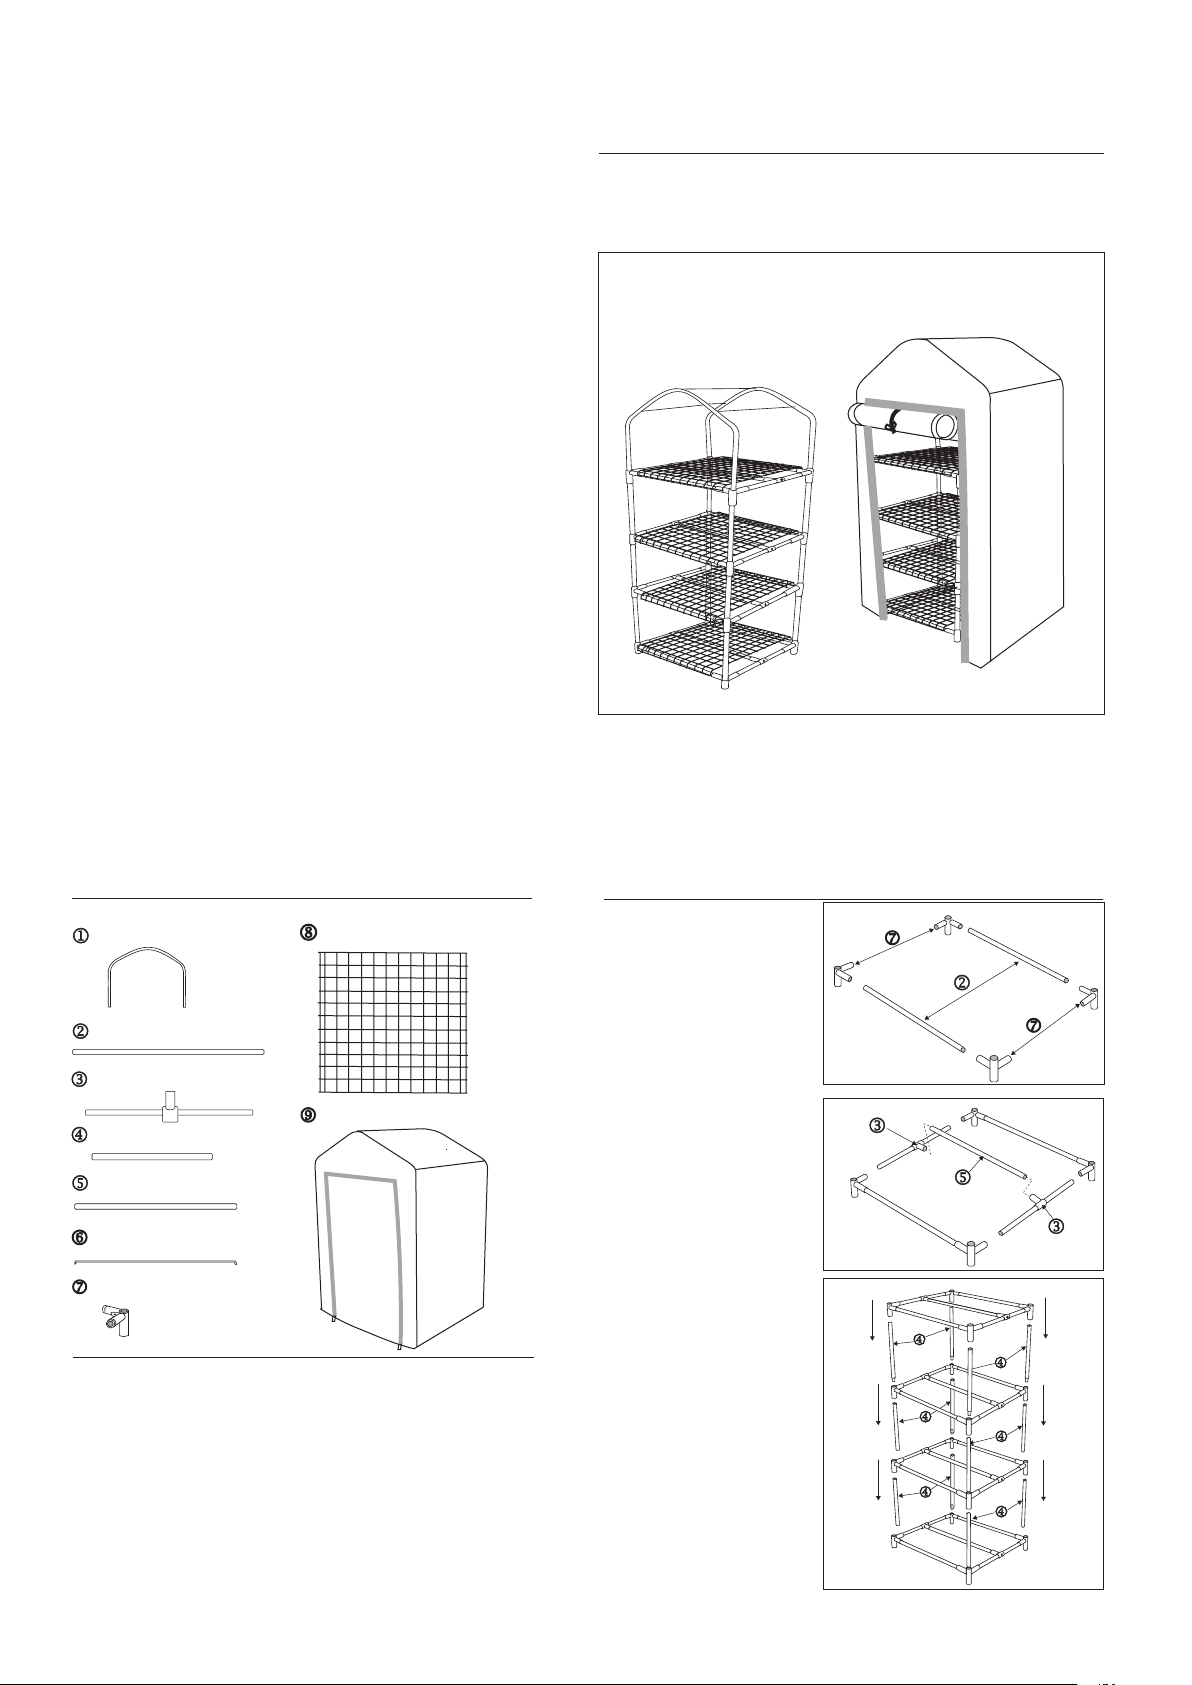
1. COMPONENT LIST
4 Tier Mini Greenhouse - Assembly Instructions
3. ASSEMBLY INSTRUCTIONS
Stage 1- Fitting the frame
2 x Top Frame(Approx.1760mm)
4 x Mesh Grill (Approx. 815 x 495mm)
NOTE: There are many different kinds
of Tubes. Ensure you check before
assembly.
1. Insert four plastic connector(7) into
the ends of two long Tubes(2).
See Dia 1.
2. Insert two T-Tubes(3) into the end
of Medium Tube(5). Then insert
the plastic connector(7) into the ends
of T-Tubes(3). See Dia 2.
Dia 1
Dia 2
Dia 3
-2- -3-
3. Follow the same method in Dia 1 and
Dia 2 to produce another three frames.
4. Insert eight Short Tubes(4) into the
plastic connector(7). See Dia 3.
1 x Cover
8 x Long Tube(Approx. 850mm)
8 x T-Tube(Approx. 455mm)
12 x Short Tube(Approx. 333mm)
4 x Medium Tube(Approx. 840mm)
16 x Plastic Connector
2. FITTINGS
IMPORTANT
1.Read these instructions carefully and familiarise yourself with the procedure before
assembling the unit.
2. Check that you have all the component parts following the list above and familiarise
yourself with each part before proceeding.
3. Take all the fittings out of the plastic bag and separate them into their groups.
4. Ensure you have enough space to lay out all the parts before assembly.
5. To avoid scratching it is recommend that you assemble the unit on a soft level surface.
6. Please unzip front door before adding cover to frame
7. Not suitable for using heater inside or near this product.
3 x Roof rib connecting wire
(Approx. 475mm,dia 3.8mm)
Issue2 J.W. 11/05
4 Tier Mini Greenhouse
7201833
ARGOS
ARGOS
489-499.Avebury Boulevard
Saxon Gate West
Central Milton Keynes
Bucks
MK9 2NW
9 of 12
720-1833
Page 2
4 Tier Mini Greenhouse - Assembly Instructions
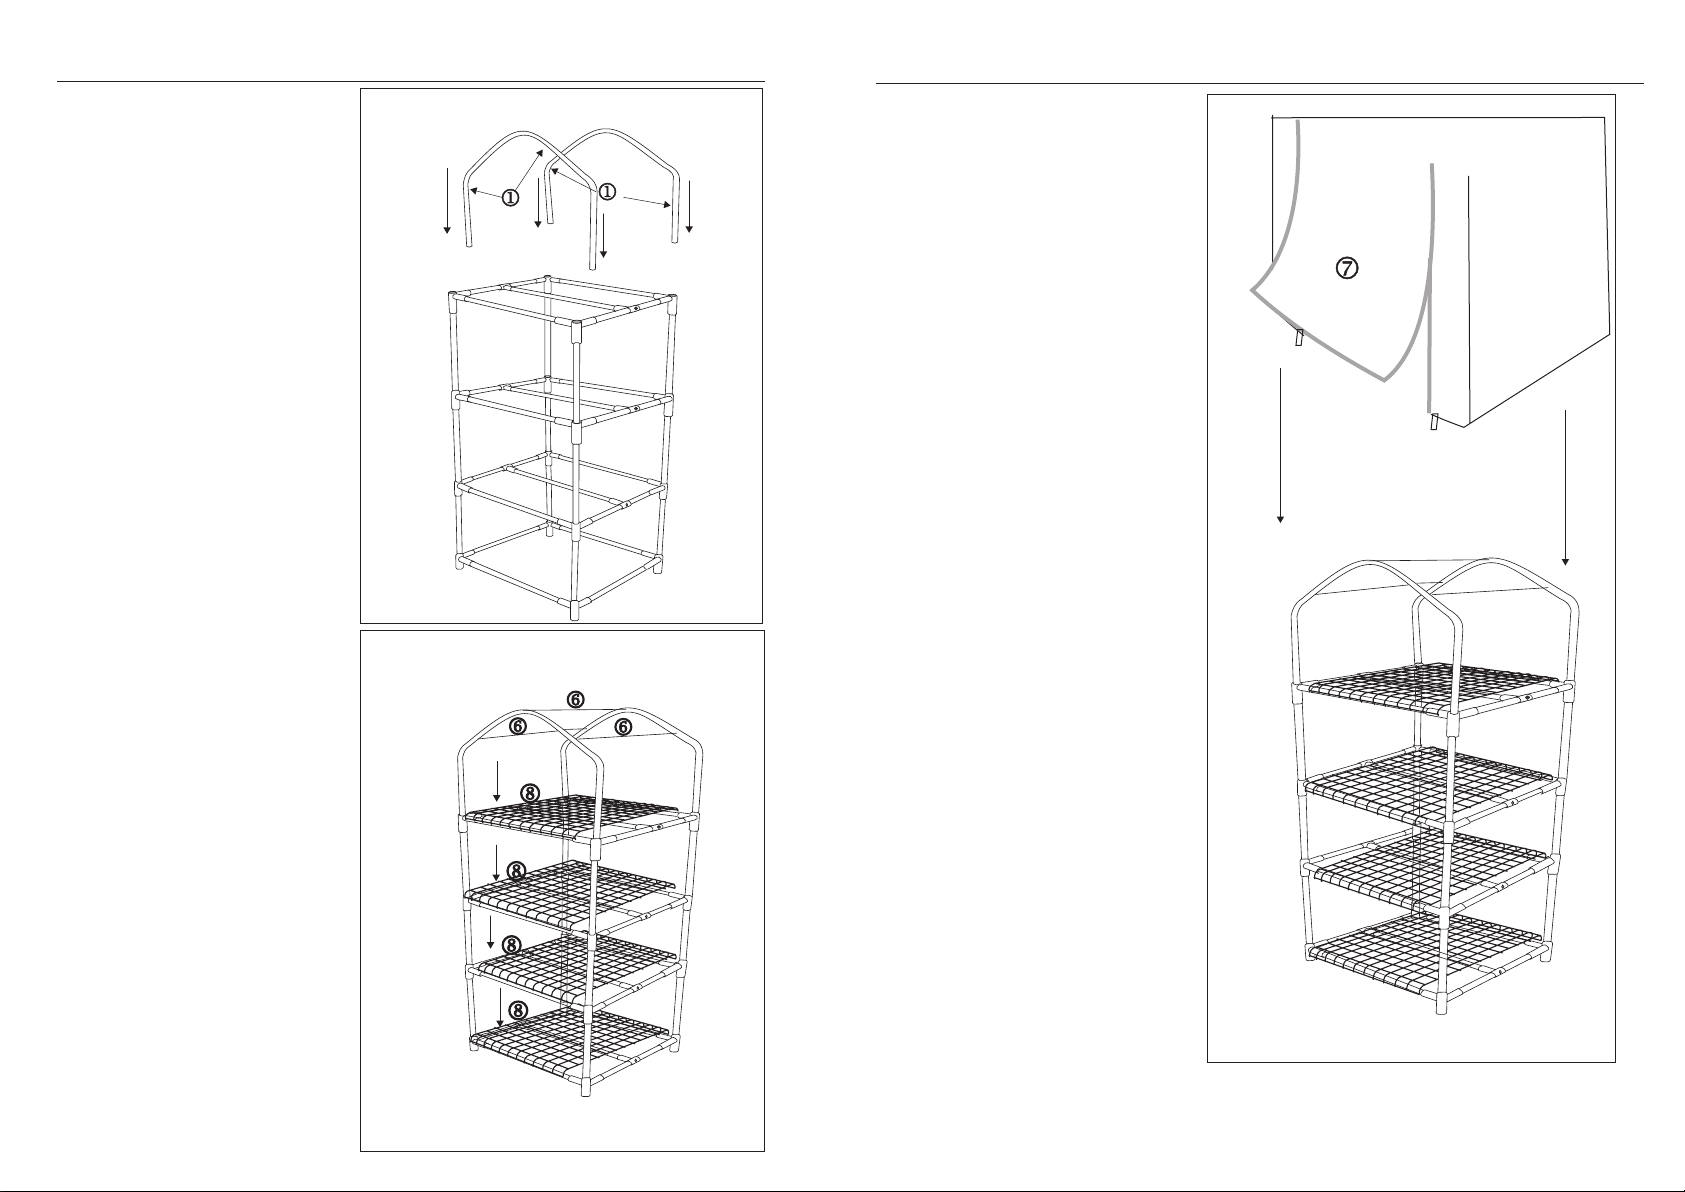
Stage 2 - Fitting Top Frames
& Shelf s
1. Insert the Top Frames(1) onto the
unit. See Dia 4.
4 Tier Mini Greenhouse - Assembly Instructions
Stage 3 - Fitting the Cover
NOTE: Locate the unit on flat ground
free from obstruction.
Please unzip before adding
cover to frame.
IMPORTANT: The unit is light weight
and should be located in a sheltered
place away from wind and heavy rain.
1. Place the Cover(7) onto the frame.
See Dia 7.
2. Locate the grills(8) onto the unit.
See Dia 5.
3. Fit the Roof rib connecting wire (6)
to the Top Frames. See Dia 5
NOTE: You have to spring out the top
frames to fit the roof rib
connecting wire(6).
Dia 4
Dia 7
Dia 5
-4- -5-
10 of 12
720-1833
Page 3

-6-
4 Tier Mini Greenhouse - Assembly Instructions
Stage 4 - Finishing the Unit
1. The front flap can be zipped open
and tied up if required.(Dia 8)
The cover can be attached to the
frame by four ties at the base.
Then place the unit in the desired
location.(Dia 8)
Care and Maintenance
Safety
To avoid the risk of suffocation to animals or children dispose of the plastic bags immediately.
Cleaning
Clean all surfaces with a damp cloth and mild detergent, do not use bleach or abrasive
products.
Dia 8
11 of 12
720-1833
Page 4

 Loading...