

Page 1
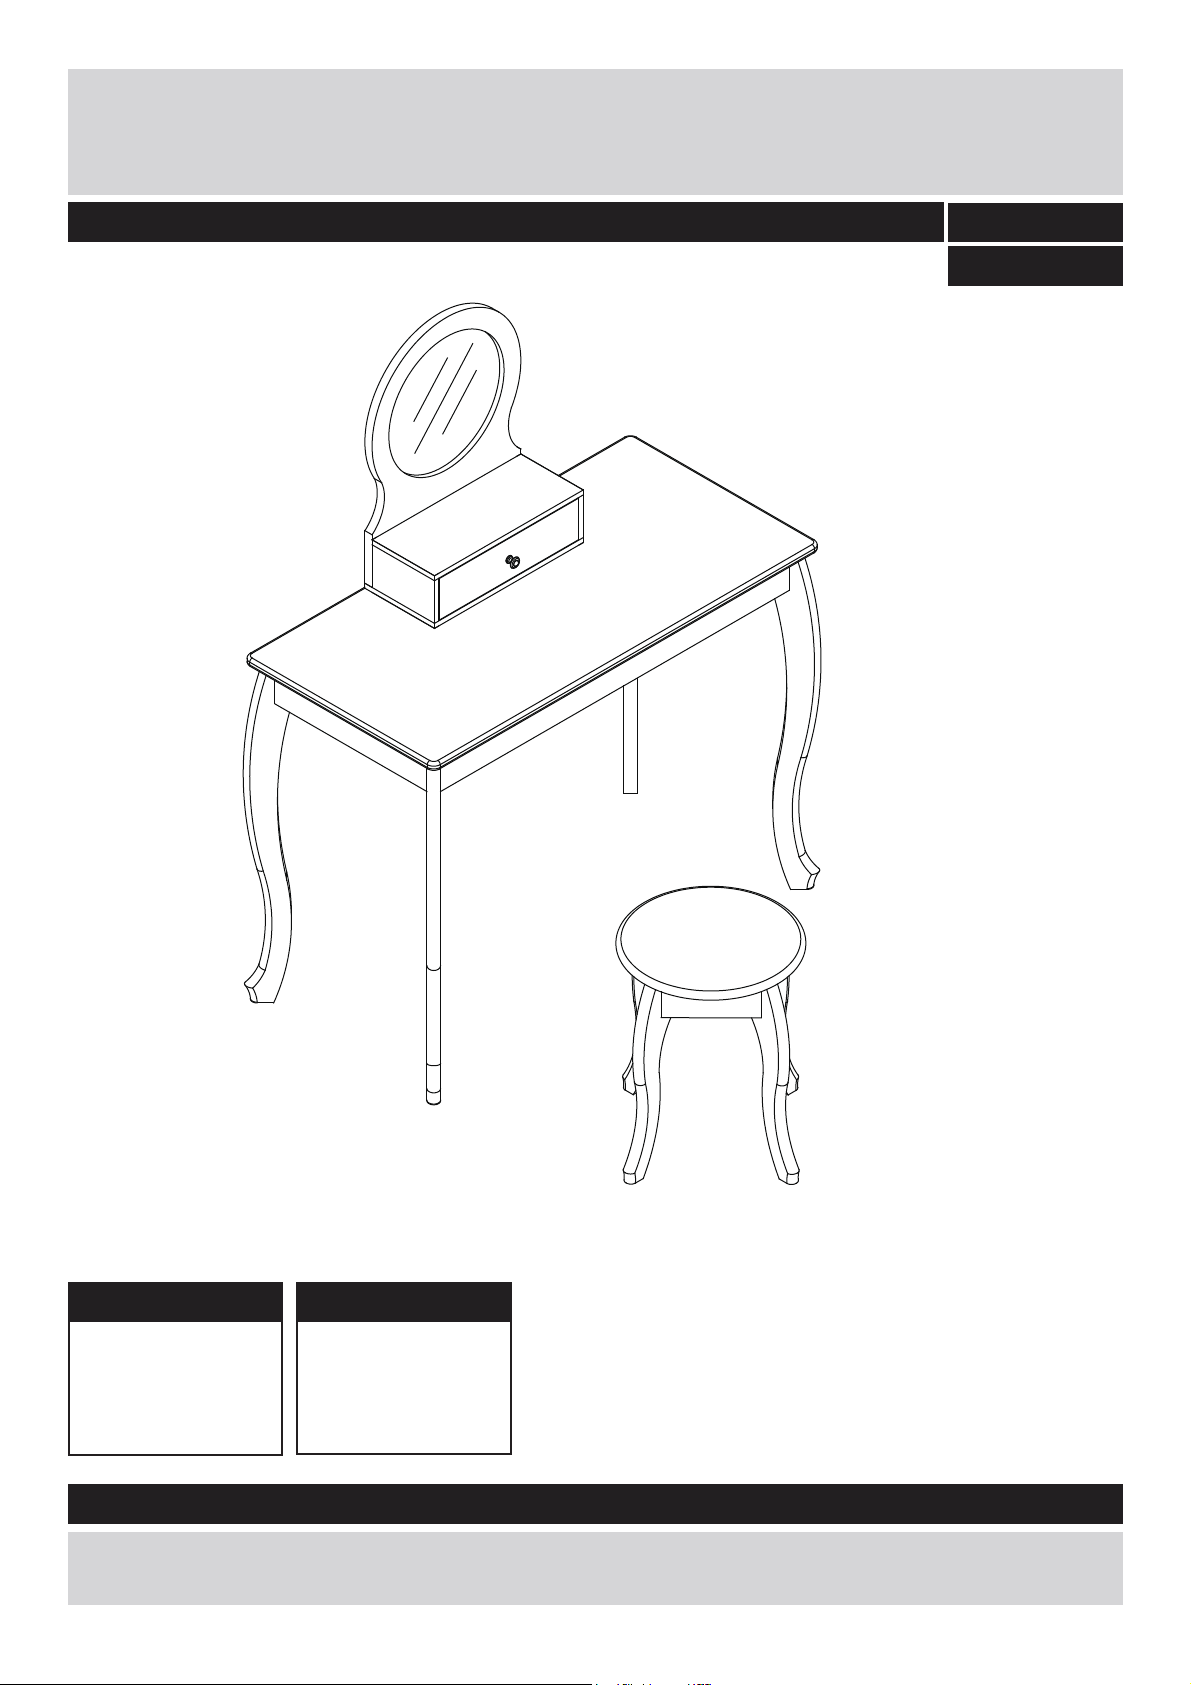
Ashley Dressing Table And Stool
Assembly Instructions - Please keep for future reference
719/1792
719/3161
Dimensions
Width - 80cm
Depth - 39cm
Height - 62.7cm
Dimensions
Width - 30cm
Depth - 30cm
Height - 36cm
Important - Please read these instructions fully before starting assembly
If you need help or have damaged or missing parts, call the Customer Helpline: 08456 400800
Issue 1 - 19/04/11
Page 2
Safety and Care Advice
Important – Please read these instructions fully before starting assembly
• Check you have all the
components and tools listed on
pages 2.
• Remove all fittings from the
plastic bags and separate them
into their groups.
• Keep children and animals
away from the work area, small
parts could choke if swallowed.
• Make sure you have enough
space to layout the parts before
starting.
Safety Warning Information
• Do not place very hot or very
cold items against or in close
proximity to glass surface unless
an adequately thick insulating
material is used to prevent such
items from coming into contact
with the mirror.
• Do not stand or put weight on
the product, this could cause
damage.
• Assemble the item as close
to its final position (in the same
room) as possible.
• Assemble on a soft level
surface to avoid damaging the
unit or your floor.
• Do not strike the mirror with
hard or pointed items.
• Do not sit or stand upon
horizontal mirror surfaces.
• When cleaning glass panels
or mirrors use a damp or leather
with washing up liquid or soft
• We do not
recommend the
use of power
drill/drivers for
inserting screws,
as this could damage the unit.
Only use hand screwdrivers.
• Dispose of all packaging
carefully and responsibly.
soap if necessary; do not use
washing powders or any other
substance containing abrasive
since these substances scratch
glass.
BS7449 : 1991
Catalogue Number:
Manufacture date:
Retailer: Argos
Retailer address: MK9 2NW
• This unit contains film backed
mirror of nominal thickness of
3mm, which is not required to be
classified to BS6206.
• If a glass is chipped or broken
replace with mirror of the type
described on this label. Consult
the manufacturer, retailer, or
agent with regard to obtaining a
manufacturing specification and
shape for replacement mirror
quoting the model number,
and batch number or date of
manufacture.
Care and maintenance
• Only clean using a damp cloth
and mild detergent, do no use
bleach or abrasive cleaners.
• Assembly to be carried out by
the competent adult only.
• From time to time check that
there are no loose screws on
this unit.
• During assembly children
should be kept away from the
product due to the potential risk of
injury.
• This product should not be
discarded with household
waste. Take to your local
authority waste disposal centre.
• Do not use this item if any
components are missing or
damaged.
• “IMPORTANT: RETAIN THESE INSTRUCTIONS FOR
FUTURE REFERENCE”.
• This product is suitable for
children in the age of 6 or above
1
• The maximum weight of the
children user: 30kgs.
• Regularly check all fastenings
to ensure that they are properly
tightened.
Page 3
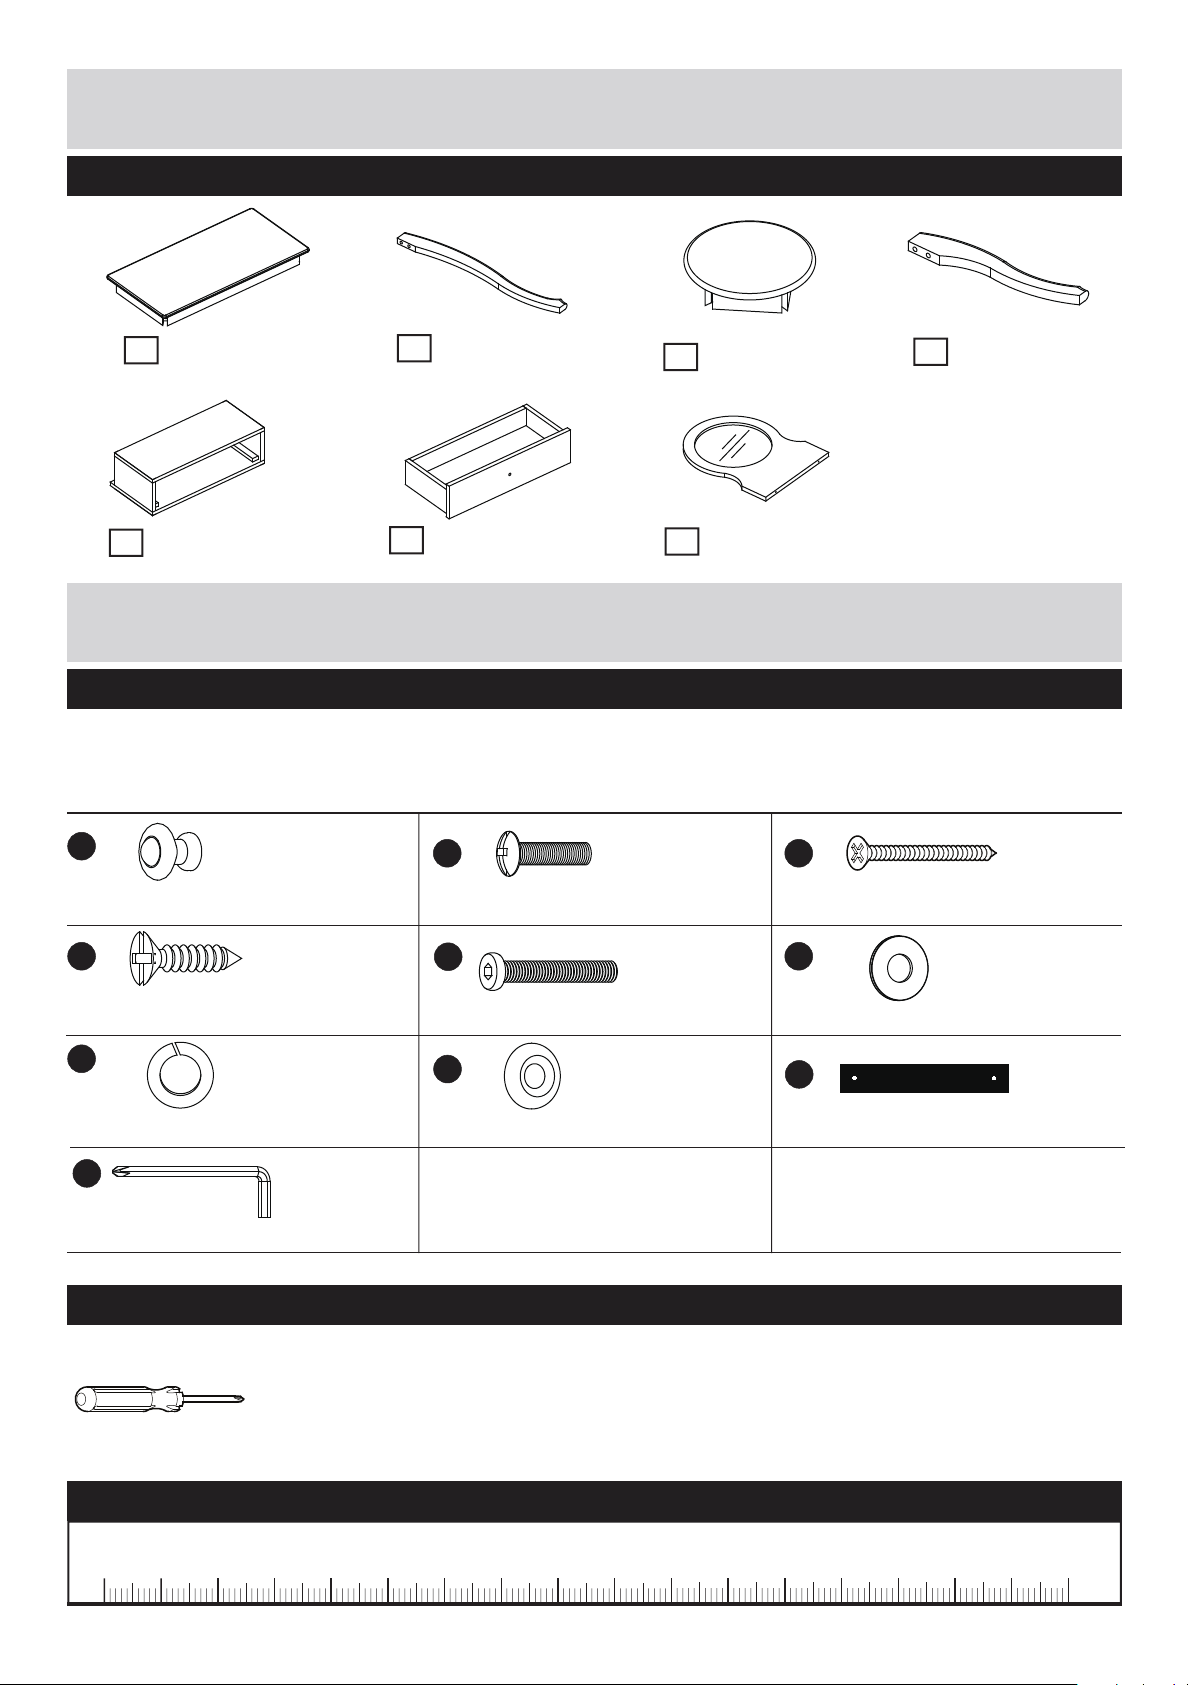
Components - Panels
Please check you have all the panels listed below
Table leg x 4
1
Table top
(80 x39cm)
2
(61.2 x 6.5cm)
If you have damaged or missing components,
call the Customer Helpline: 08456 400800
Stool leg x 4
3
Seat
(30 x 30cm)
4
(34.5 x 6cm)
Open box
5
(31.2 x 14.5cm)
Components - Fittings
6
Small drawer
(29.1 x 13cm)
Framed mirror
7
(41 x 31cm)
Please check you have all the fittings listed below
Note: The quantities below are the correct amount to complete the assembly. In some cases more fittings
may be supplied than are required.
A
Knob x 1
D
14mm screw x 2
G
B
12mm Bolt x 1
E
32mm Bolt x 16
H
C
32mm Screw x 2
F
Flat washer x 16
I
Spring washer x 16
Bracket x 2
J
Allen key x 1
Tools required
Phillips screwdriver
(medium)
Ruler - Use this ruler to help correctly identify the screws
0 5 10
40
15
20
35
30
25
50
55
45
70
60
65
75
80
85 90 95 100
105
110 115 120 125 130
Strap x 1
140
135
145
150
155 160
165 170
2
Page 4
Assembly Instructions
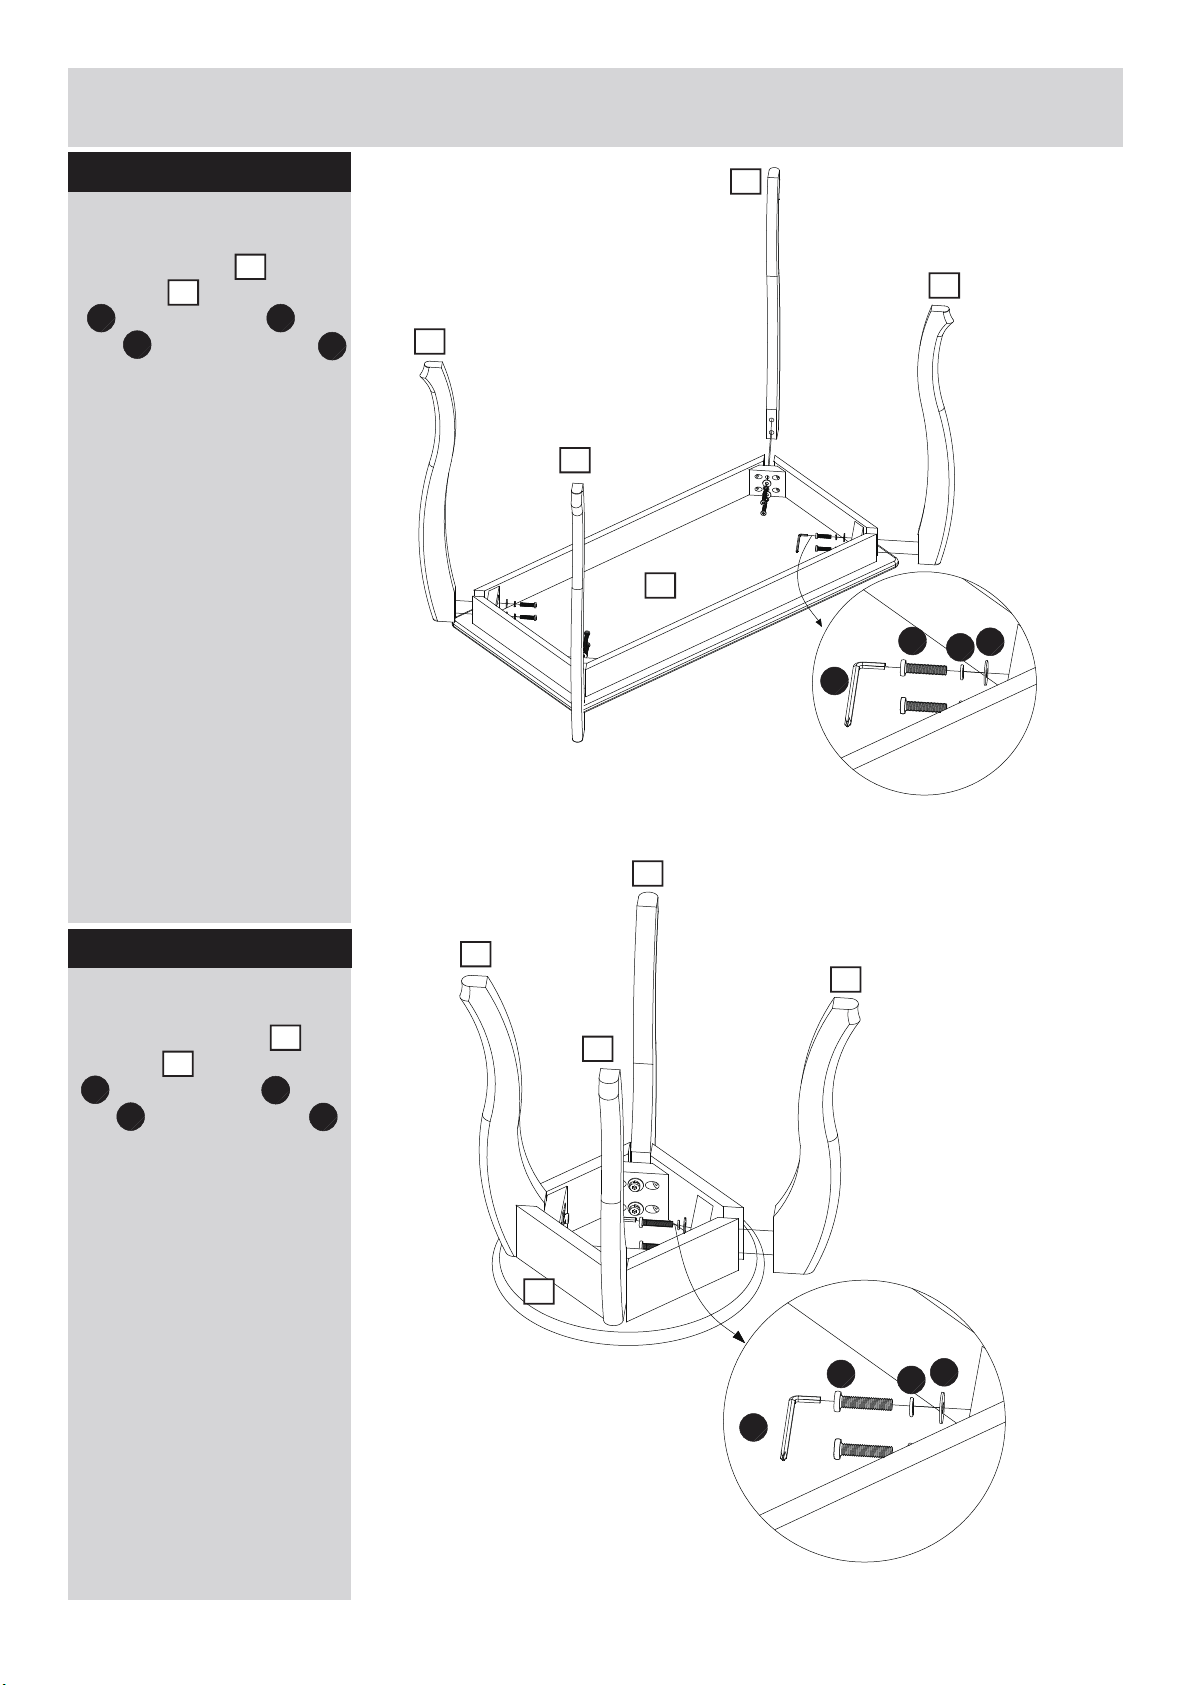
Step 1
Attaching table leg
Attach table leg to the
table top with flat washer
, spring washer and
F G
bolt . Using allen key
to tight the bolts.
1
E
2
J
2
2
2
2
1
E
J
G
F
Step 2
Attaching stool leg
Attach the stool leg to
the seat with flat washer
, spring washer and
F
bolt . Using allen key
to tight the bolts.
3
E
4
G
J
4
4
4
4
3
E
J
G
F
3
Page 5
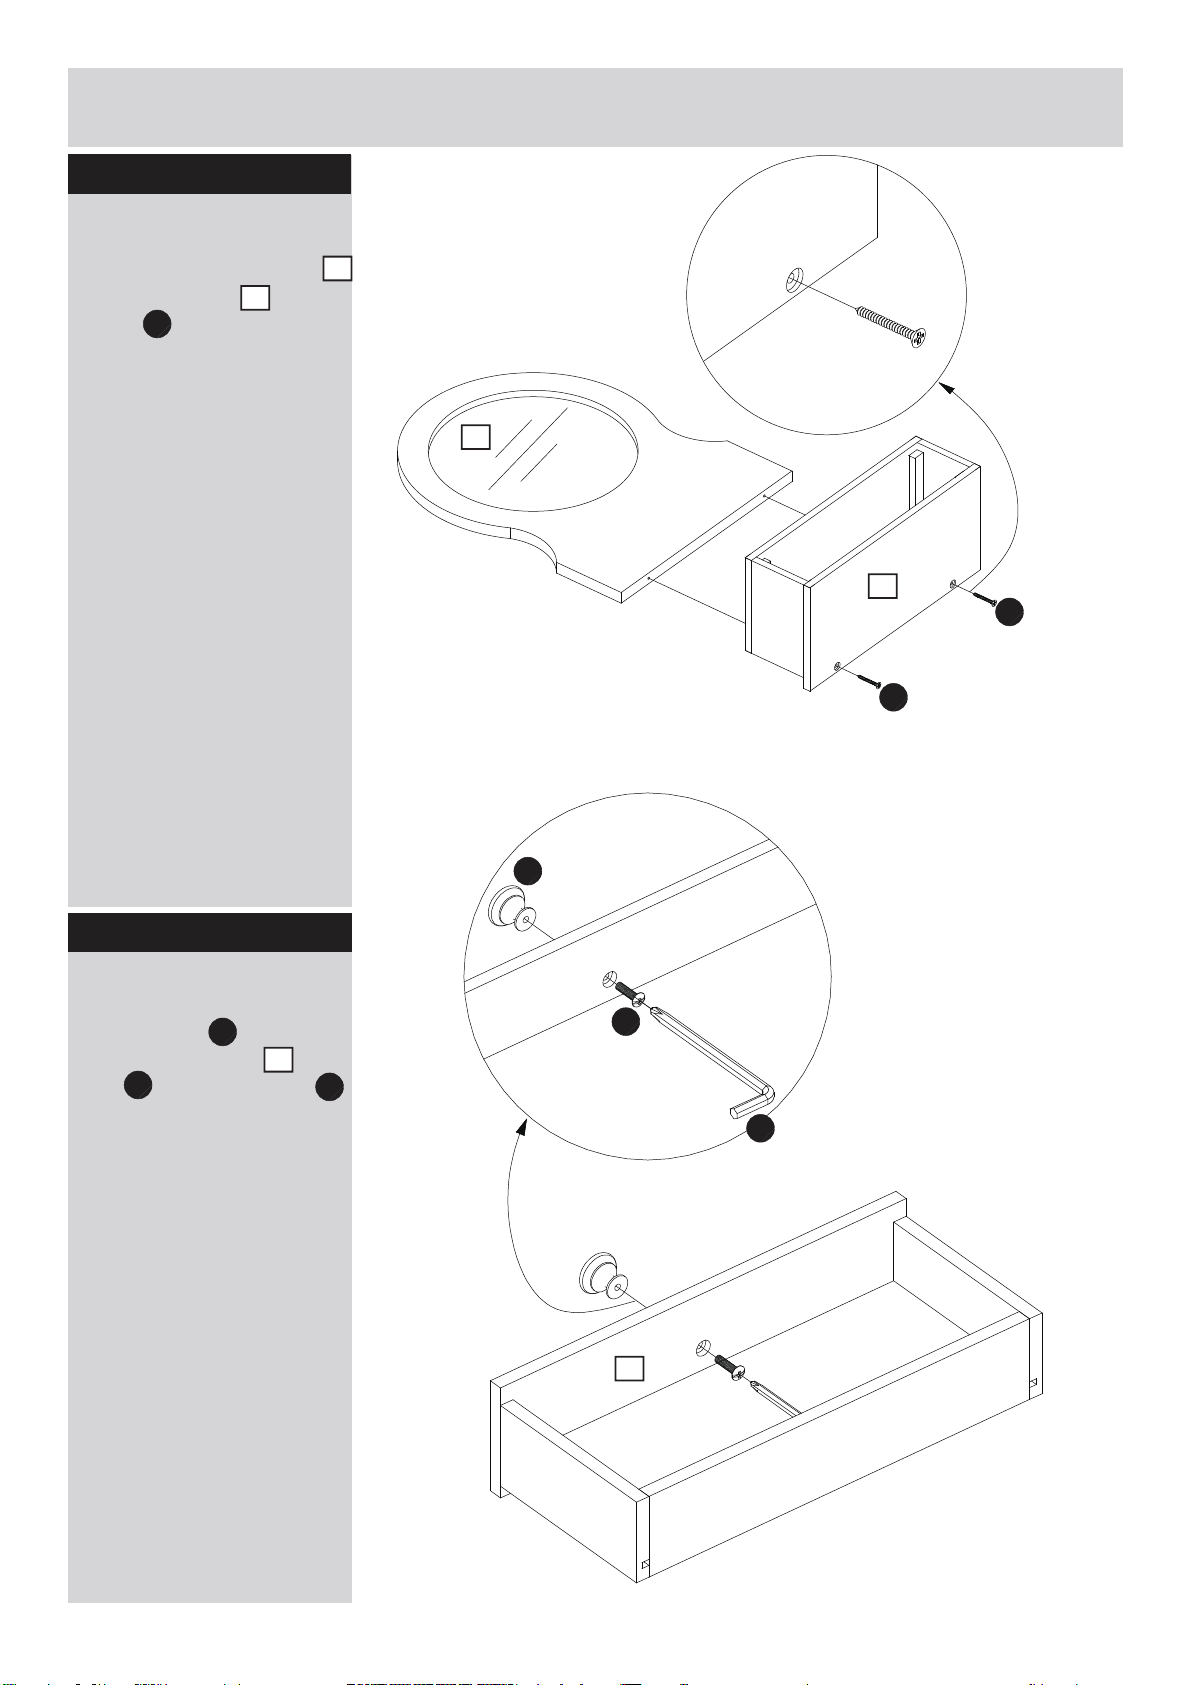
Assembly Instructions
Step 3
Attaching the mirror
Attach the framed mirror
to the open box with
screw .
C
5
7
7
5
C
C
Step 4
Fixing knob
Fix the knob to the
drawer front panel with
B
bolt , using allen key
to tight the bolt.
A
6
J
A
B
J
6
4
Page 6
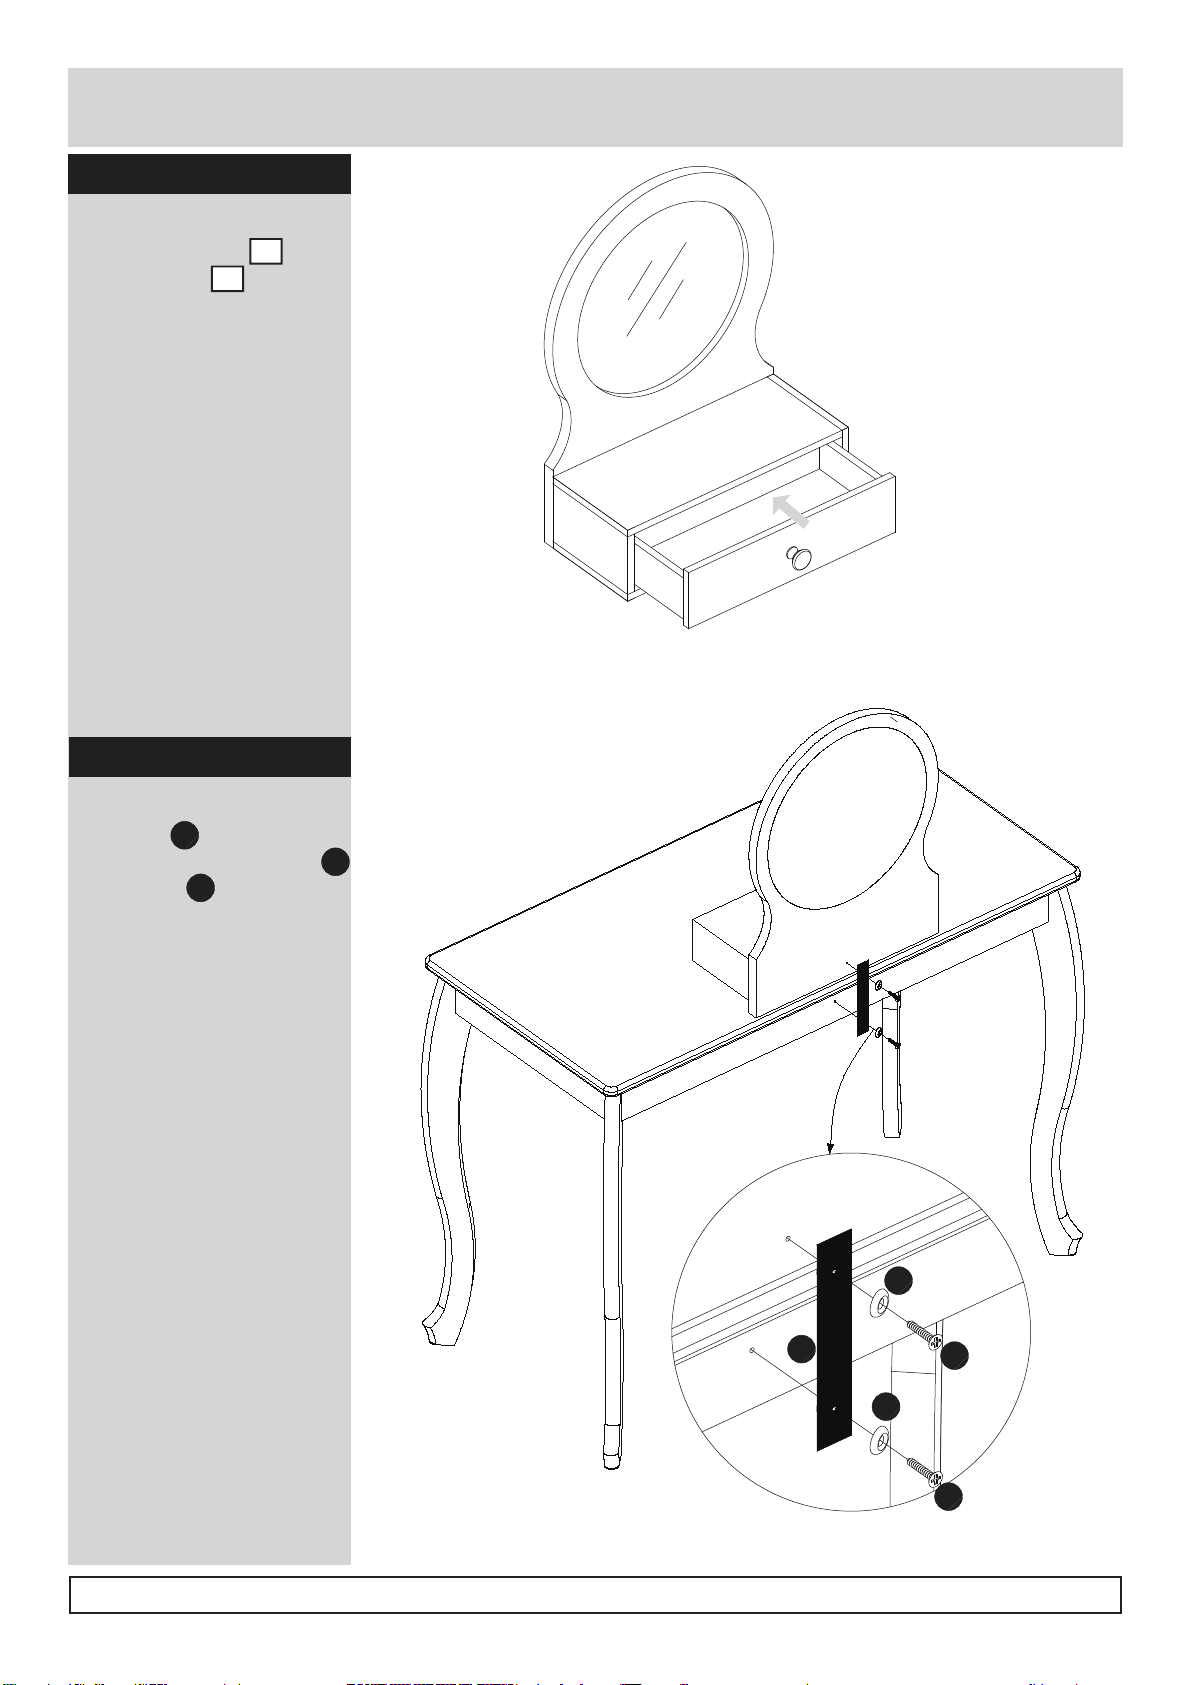
Assembly Instructions
Step 5
Inserting drawer
Insert the drawer into
the open box .
6
5
Step 6
Fixing strap
Fix strap to the desk and
mirror back with bracket
and screw .
I
H
D
H
I
H
If you need help or have damaged or missing parts, call the Customer Helpline: 08456 400800
D
D
5
 Loading...