

Page 1
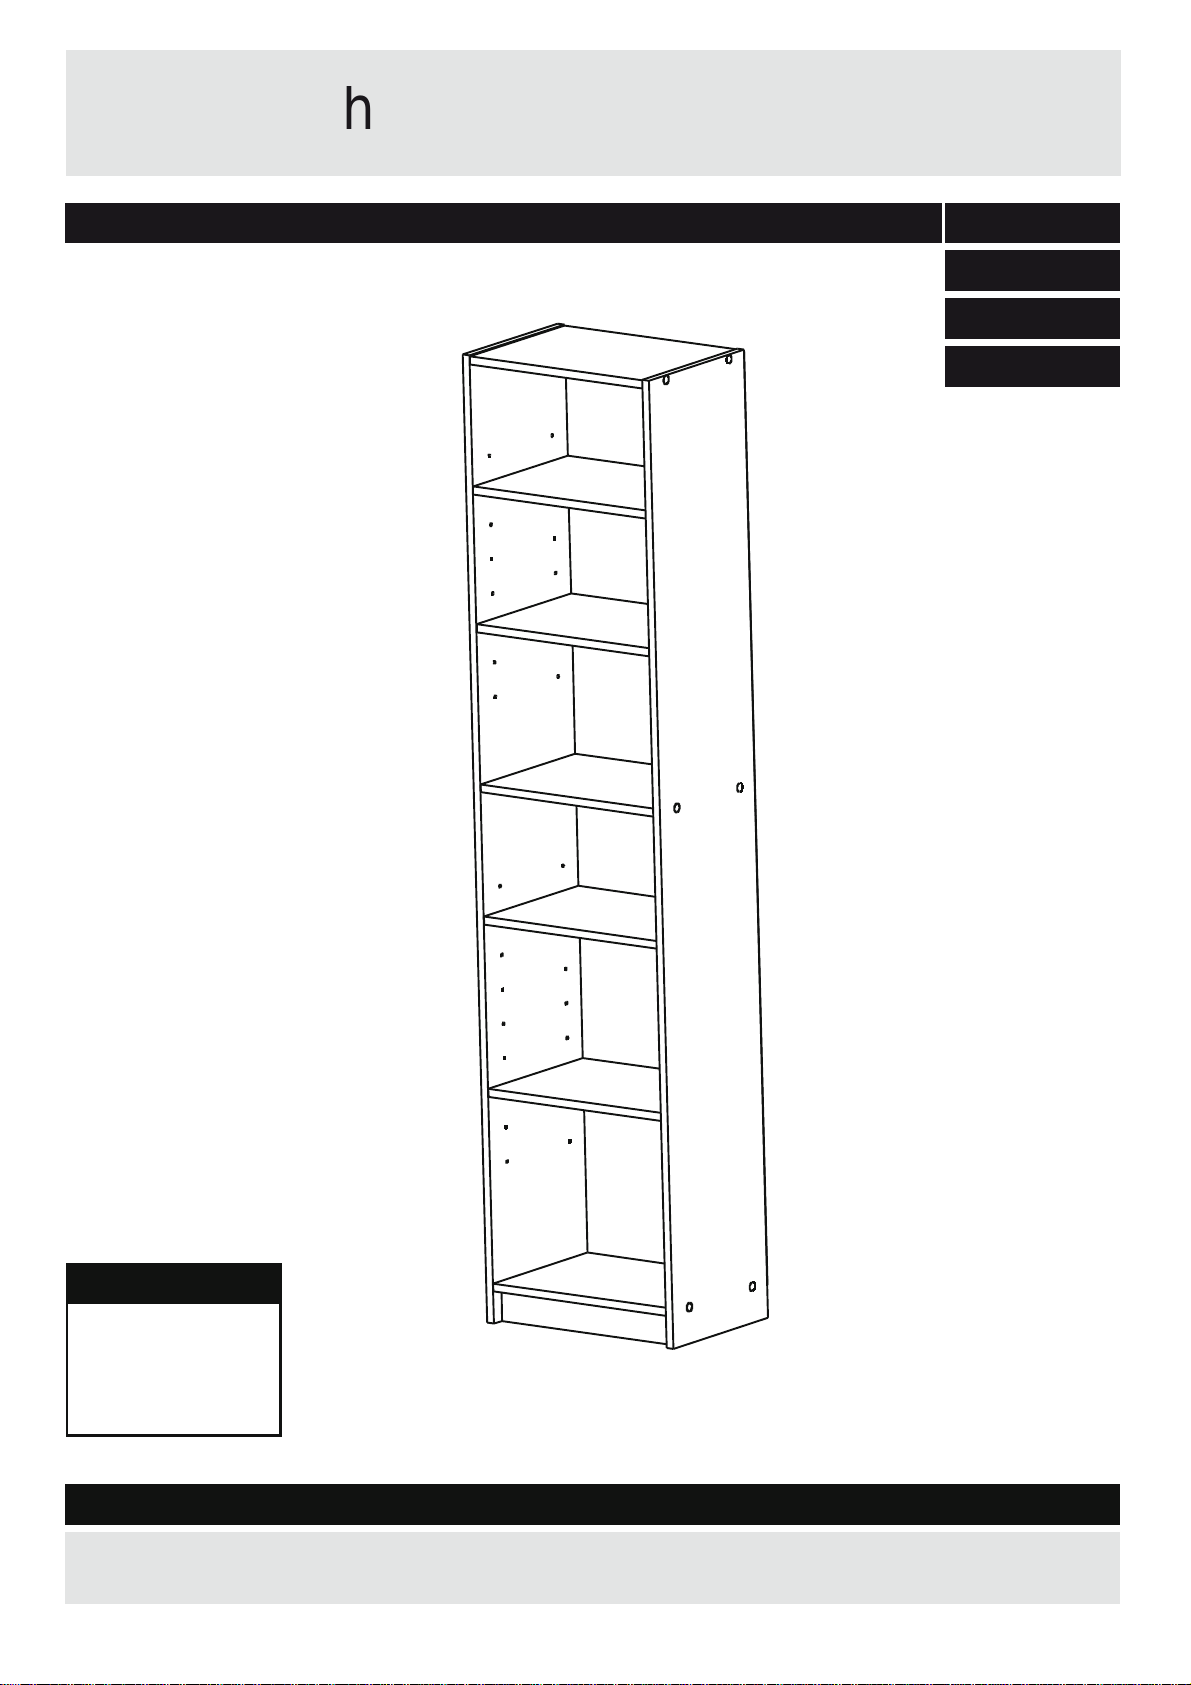
Assembly Instructions - Please keep for future reference 609/2218
f W
t
T
Ext
B
609/2249
609/2232
609/2225
Dimensions
Width - 42cm
Depth - 29cm
Height - 180cm
Important - Please read these instructions fully before starting assembly
If you need help or have damaged or missing parts, call the Customer Helpline:
08456 400 800
Date : 01/11/10
Page 2
Note:
as reference throughout the
assembly. Keep this page with
these instructions for future
and mild detergent, do no use
e check that
there are no loo
s
e screws on
this unit.
discarded with household
waste. Take to your local
authority waste disposal centre.
components and tools listed on
away from the work area, small
space to layout the parts before
starting.
the product, this could cause
damage.
to its final position (in the same
surface to avoid damaging the
easier with 2 people.
drill/drivers
inserting screws
as this could damage the unit.
Only use hand screwdrivers.
• Dispose of all packaging
carefully and responsibly.
f
ty A
Important – Please read these instructions fully before starting assembly
Care and maintenance
Page 3
ts
P
call the
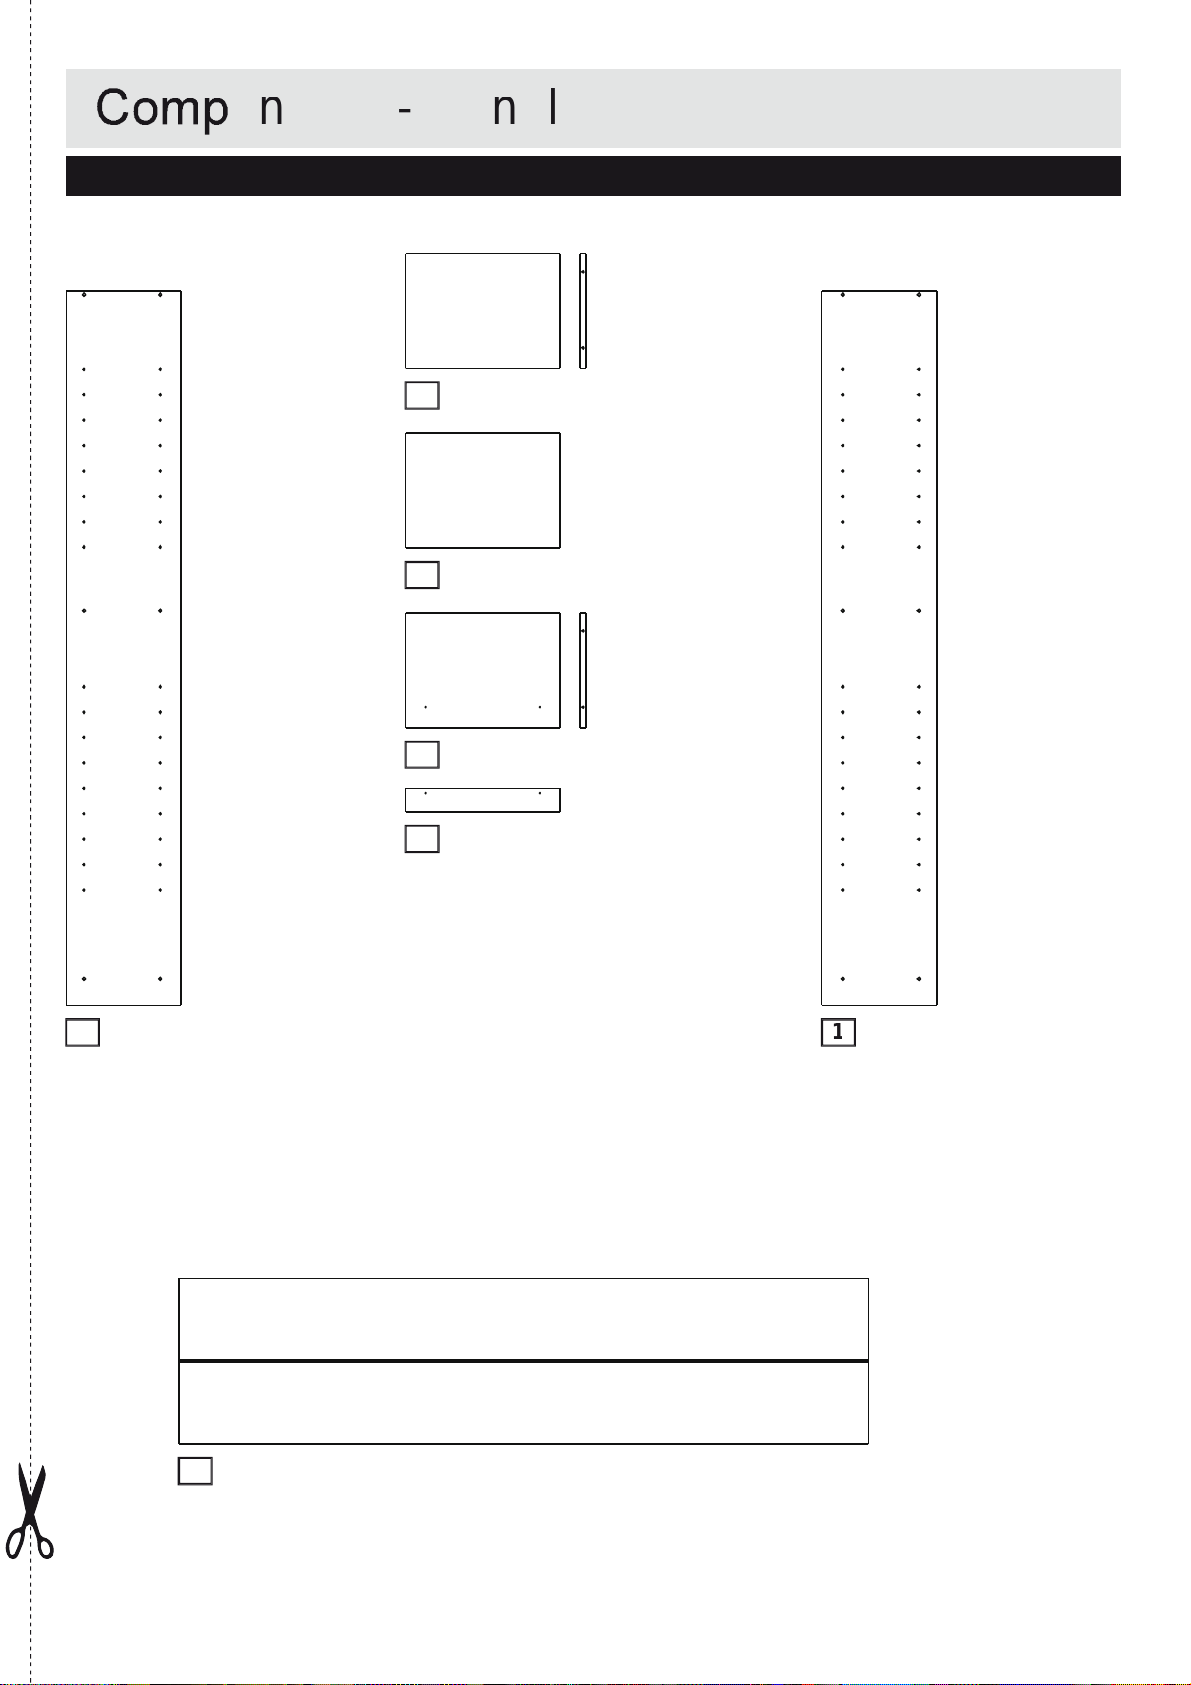
Please check you have all the panels listed below
224
Page 4
05202530354045505560657075808590
95
sscwdve
/t
ap
e
syetesaor
glue
102030405060708090100110120
130
140
150
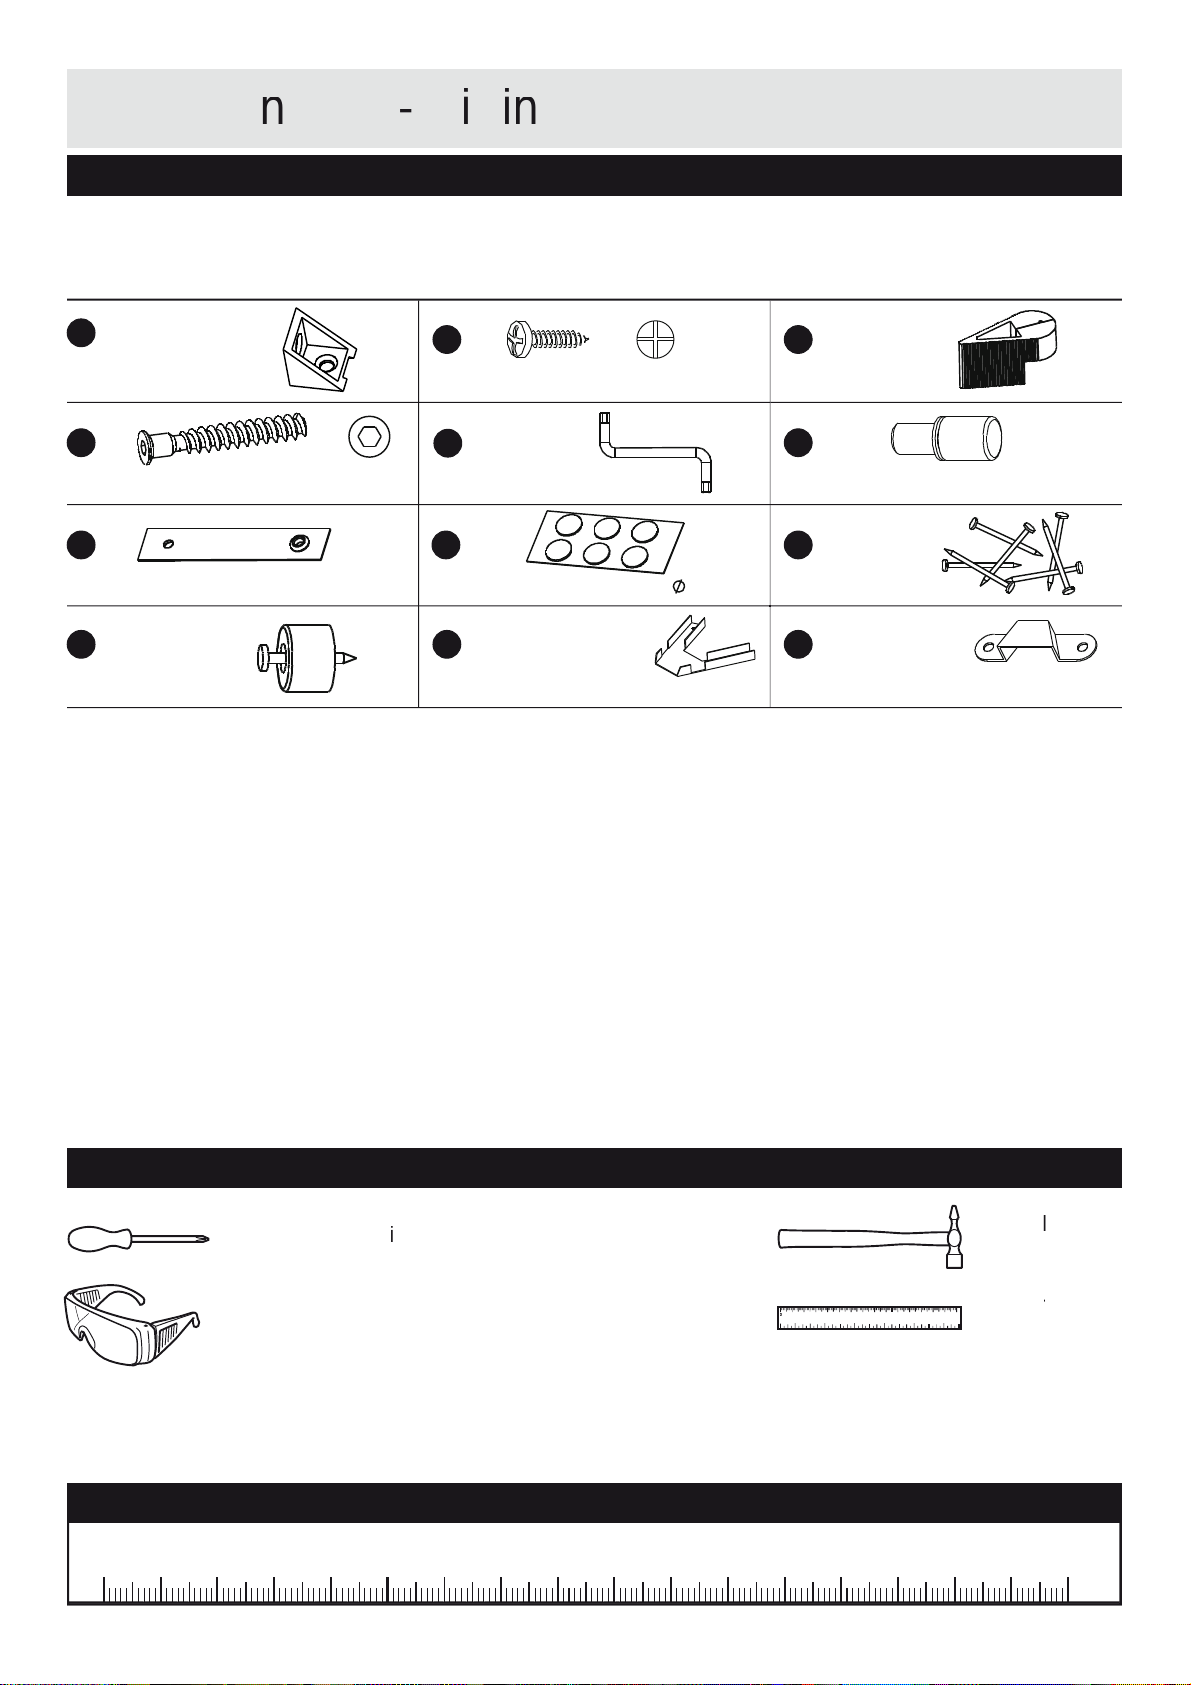
50mm Screw x 12
Allen Key x 1
Wall Strap x 1
Lower Corner Bracket x 1
Upper Corner Bracket x 1
6 Covering Stickers x 2
ts
t
Please check you have all the fittings listed below
The quantities below are the correct amount to c
o
3
A
G
B
E
H
J
K L
C
FD
I
Tools required
Ruler - Use this ruler to help correctly identify the screws
0 1 2 3 4 5 6
Page 5
Ass
y
4
4
5B4
5
4
4
to fix
the Bottom Panel
onto
4
5
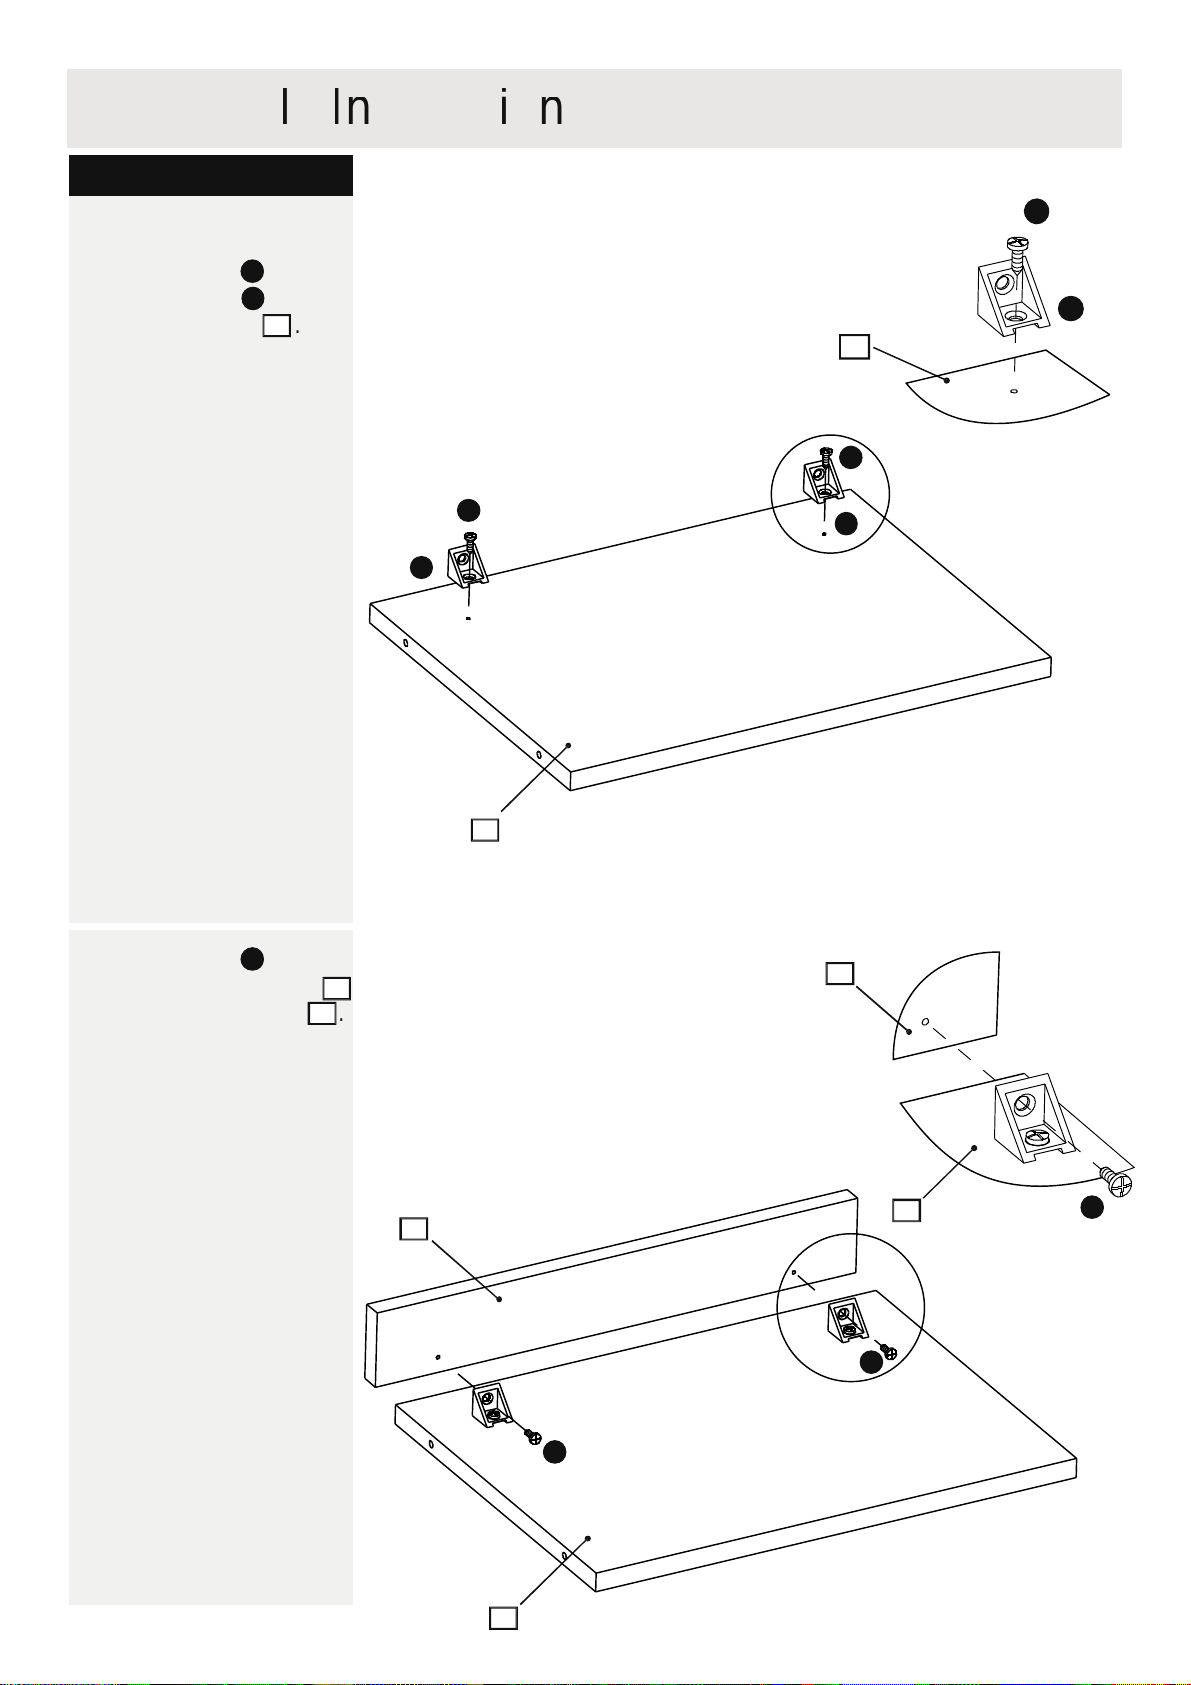
Step 1
Attaching bottom panel
Use Screws
to
onto the Bottom Panel
4
Use Screws
B
B
A
B
A
B
A
B
A
B
B
Page 6
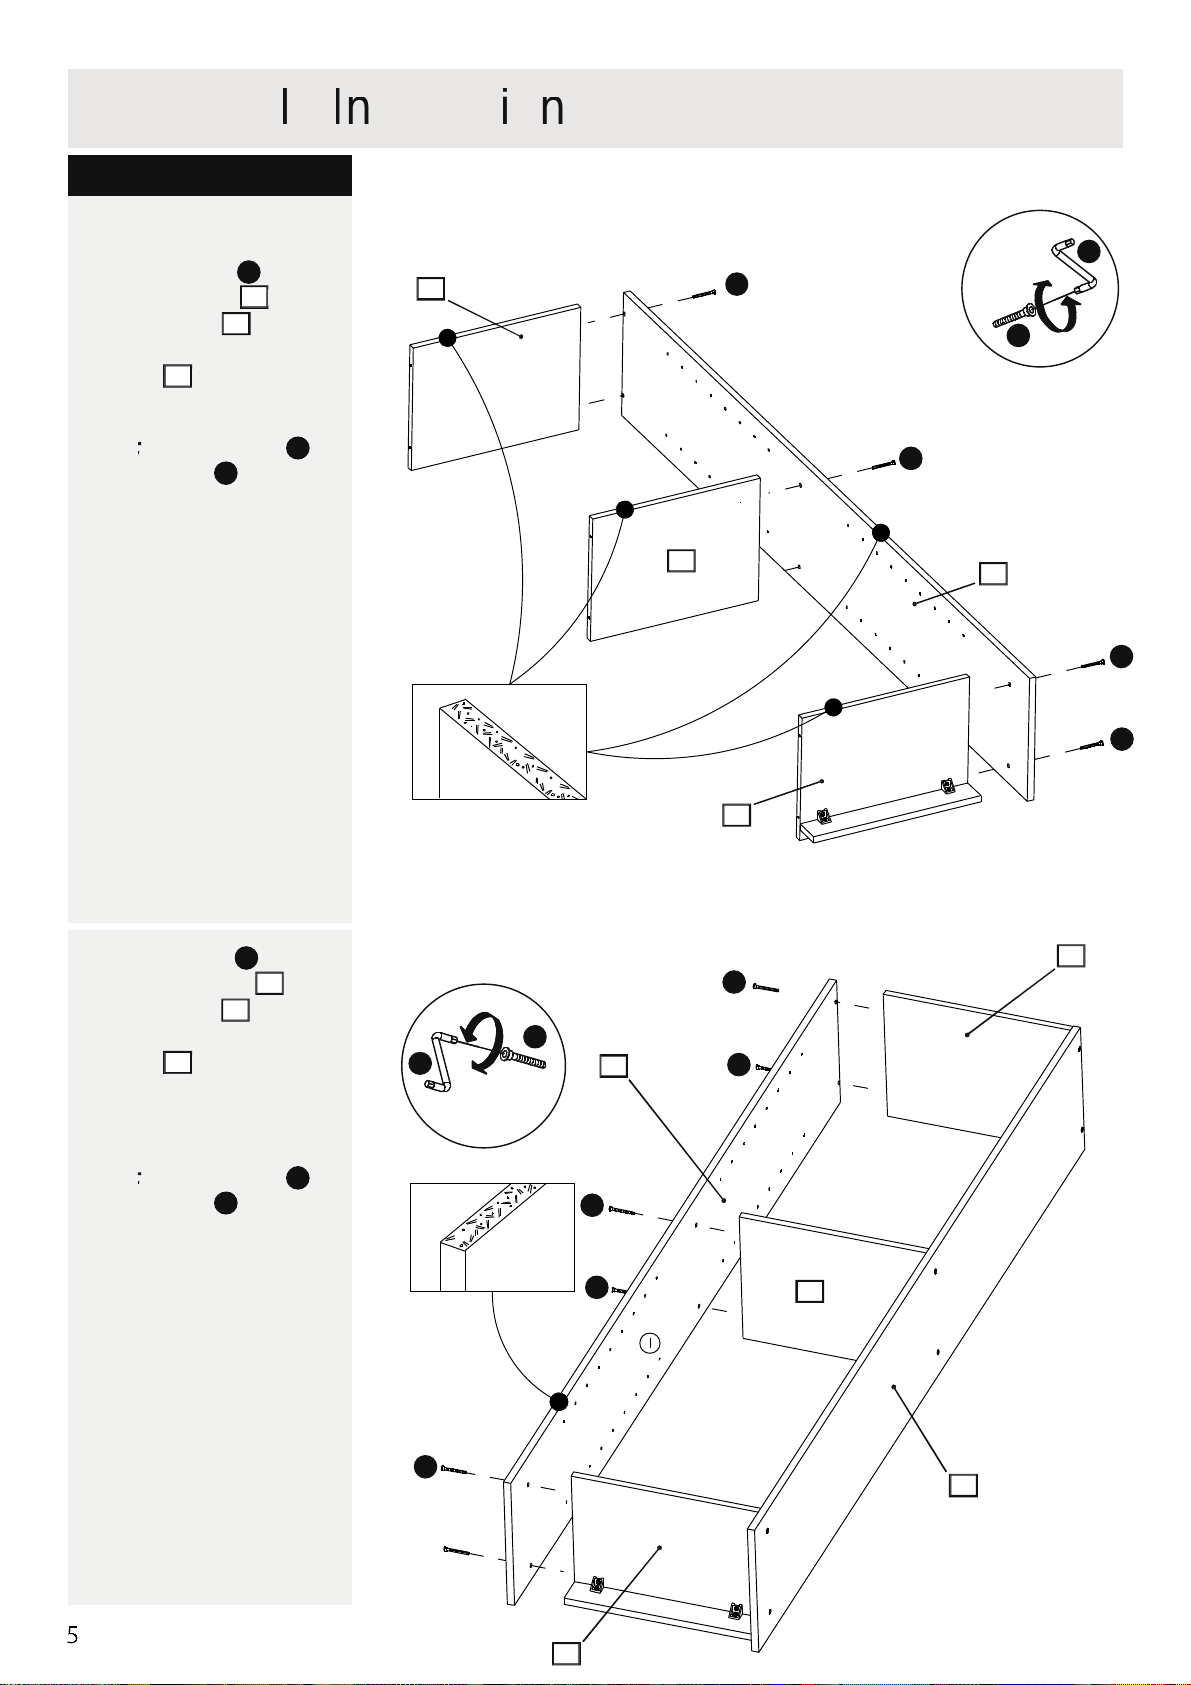
Step 2
Attaching side panel
Use Allen Key
to fix the
and the
two Panels (Bottom and
and the
two Panels (Bottom and
to fix Screws .
to fix the
Use Allen Key
to fix Screws .
4
Ass
y
4
2
23333D42334
E
D
D
E
D
D
D
D
D
D
D
E
E
D
D
D
D
D
Page 7
Ass
7
7
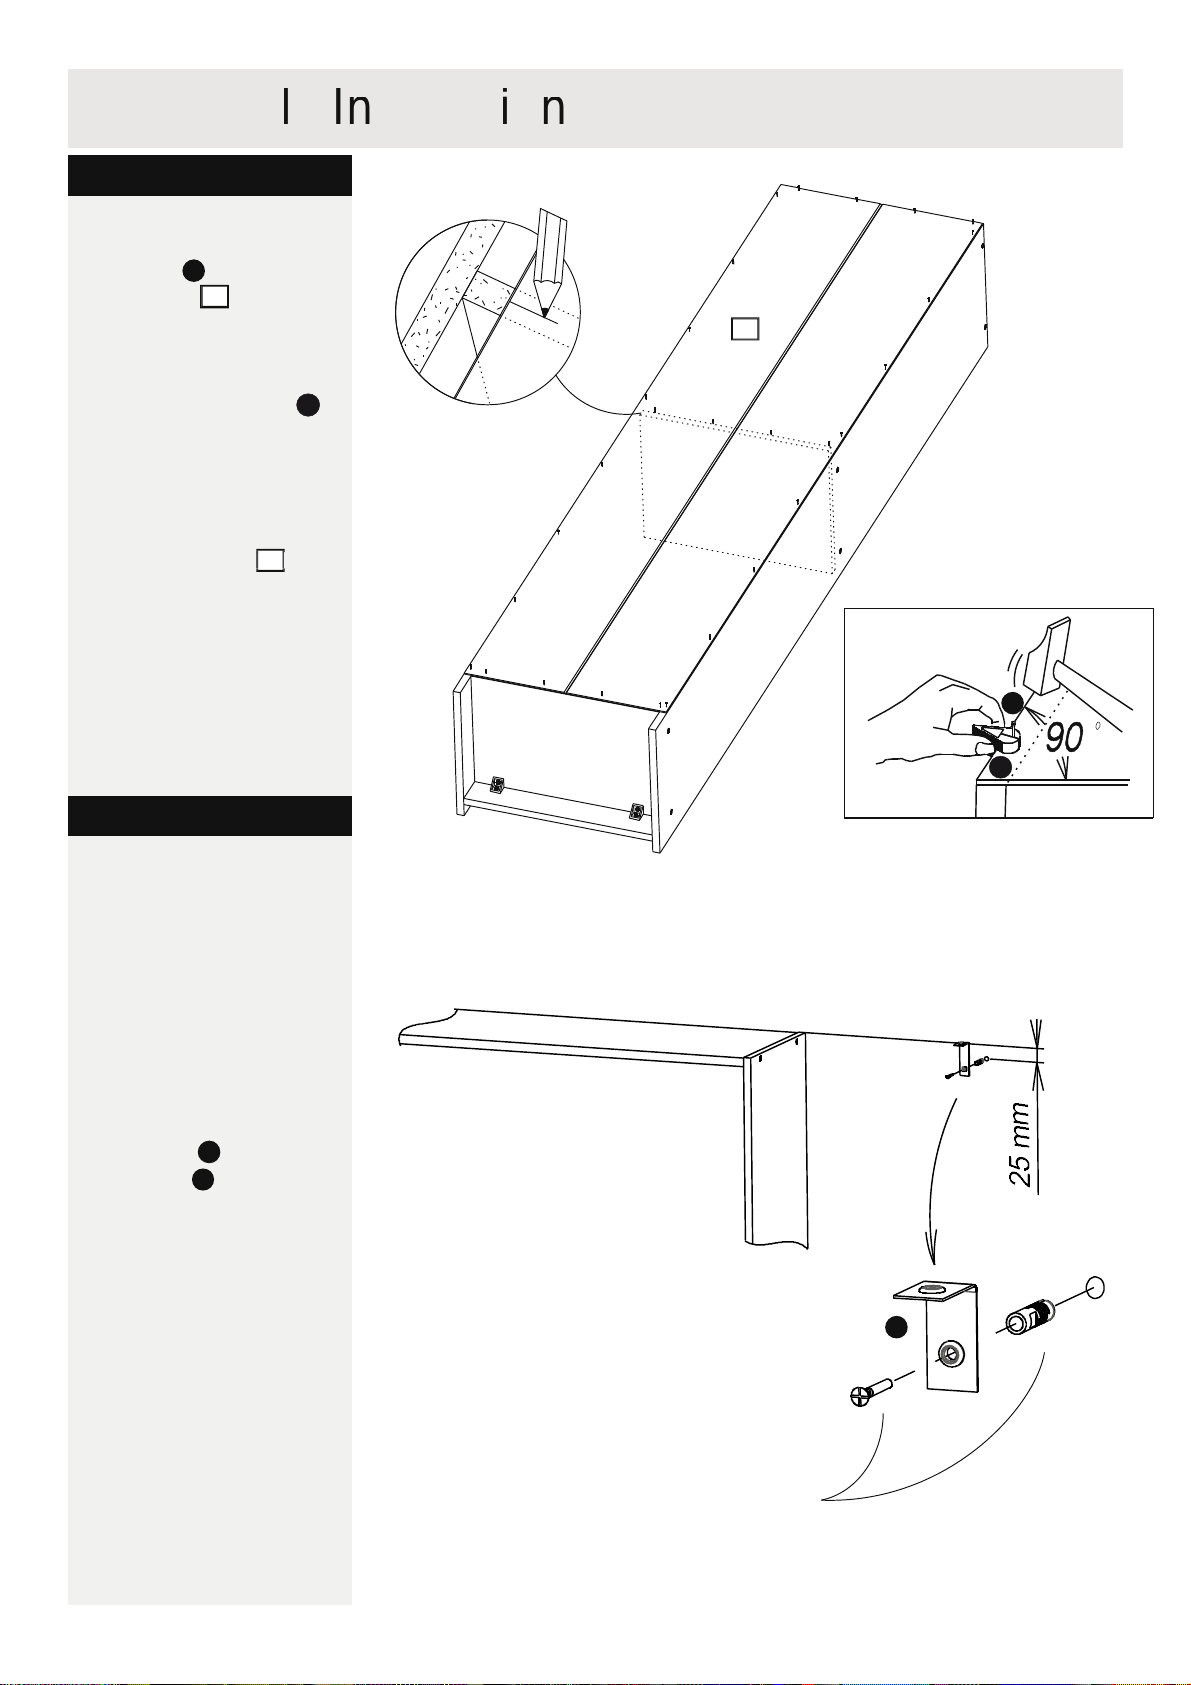
Step 3
Use Nails
Use Nail Guide to
to fix the
from the edge.
Note:
7
Join marks with ruler
to guide position for nails
onto the
6
Wall Screw and Wall
wall.
See Wall Fixing Guidelines
at the end of these
Assembly Instructions
Wall Strap
of the panel.
onto the Top
to fix the
I
C
I
Step 4
C
B
G
G
Page 8
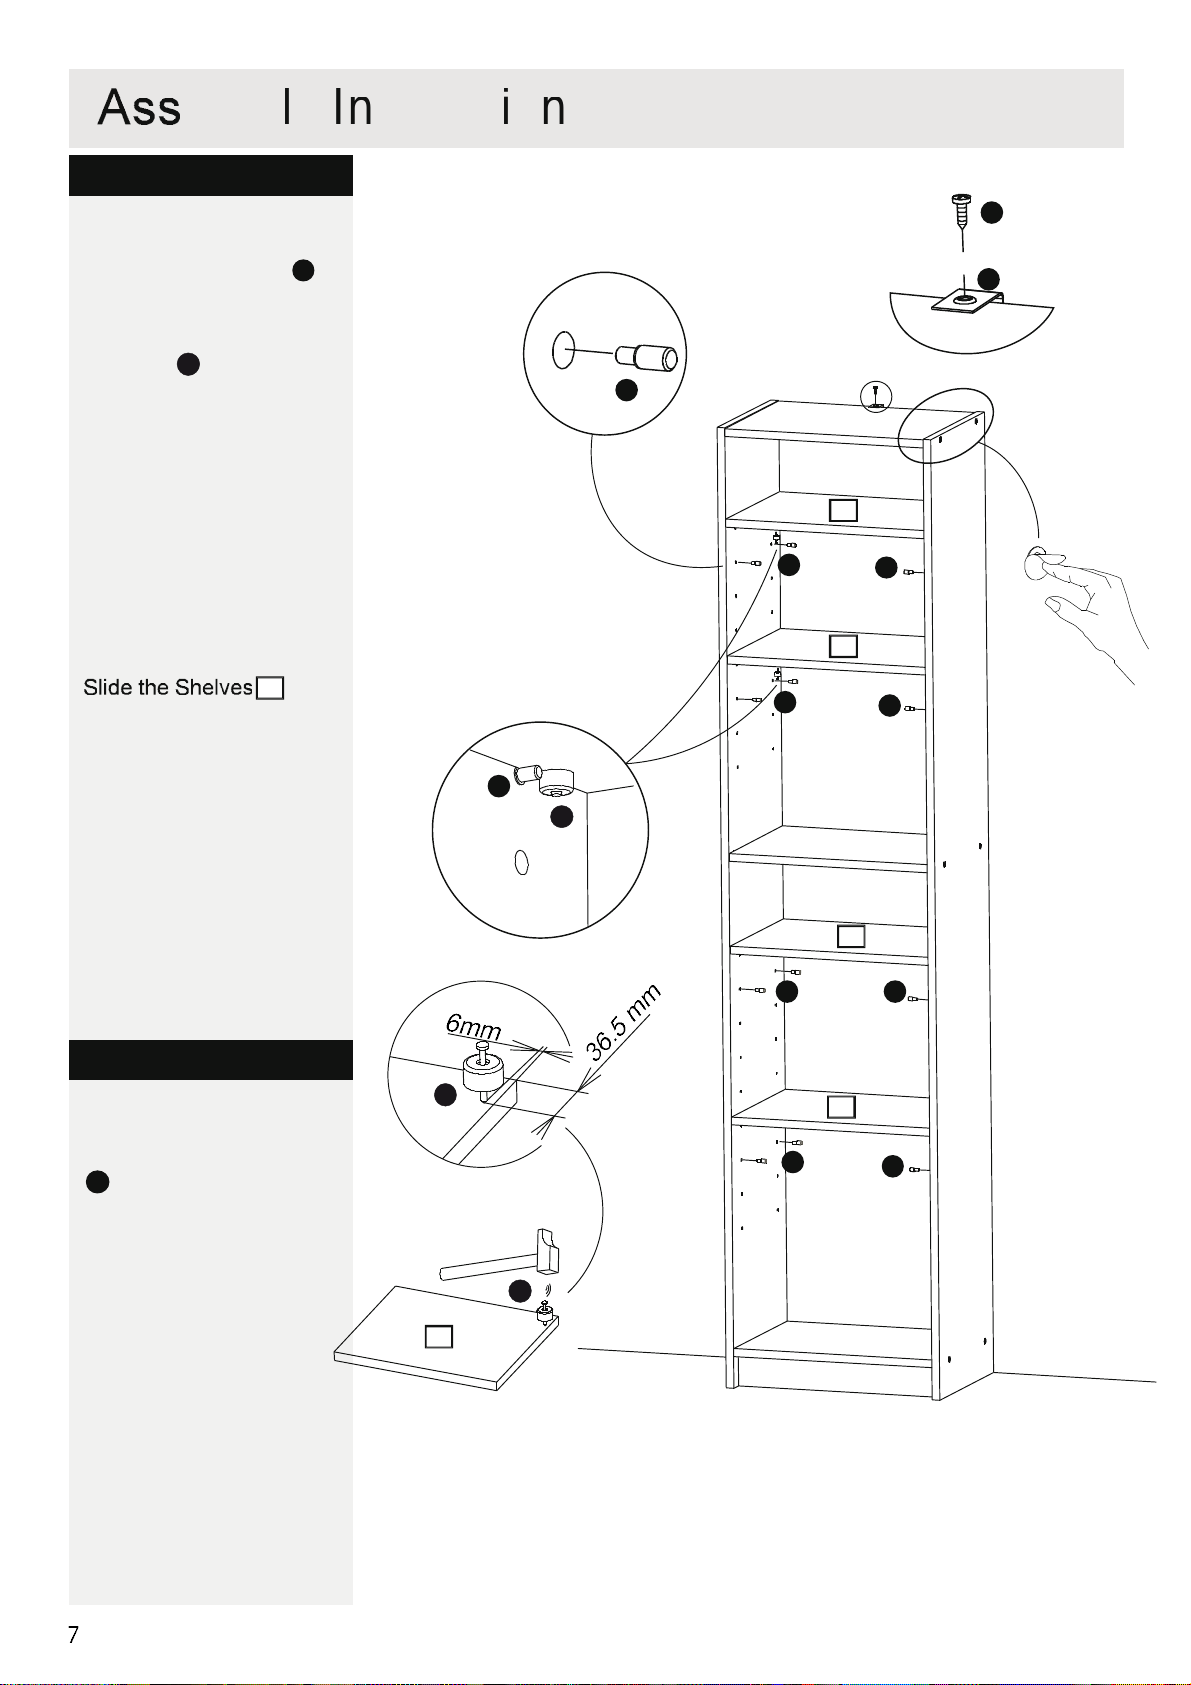
Step 5
y
Attaching Shelf Panel
as the drawing.
Set the shelf
supports to the desired
Note:
66666
6
Covering Sticker
to cover the Screw
B
F
J
F
F
F
F
J
F
F
G
Step 6
H
F F
J
F
J
F
Page 9
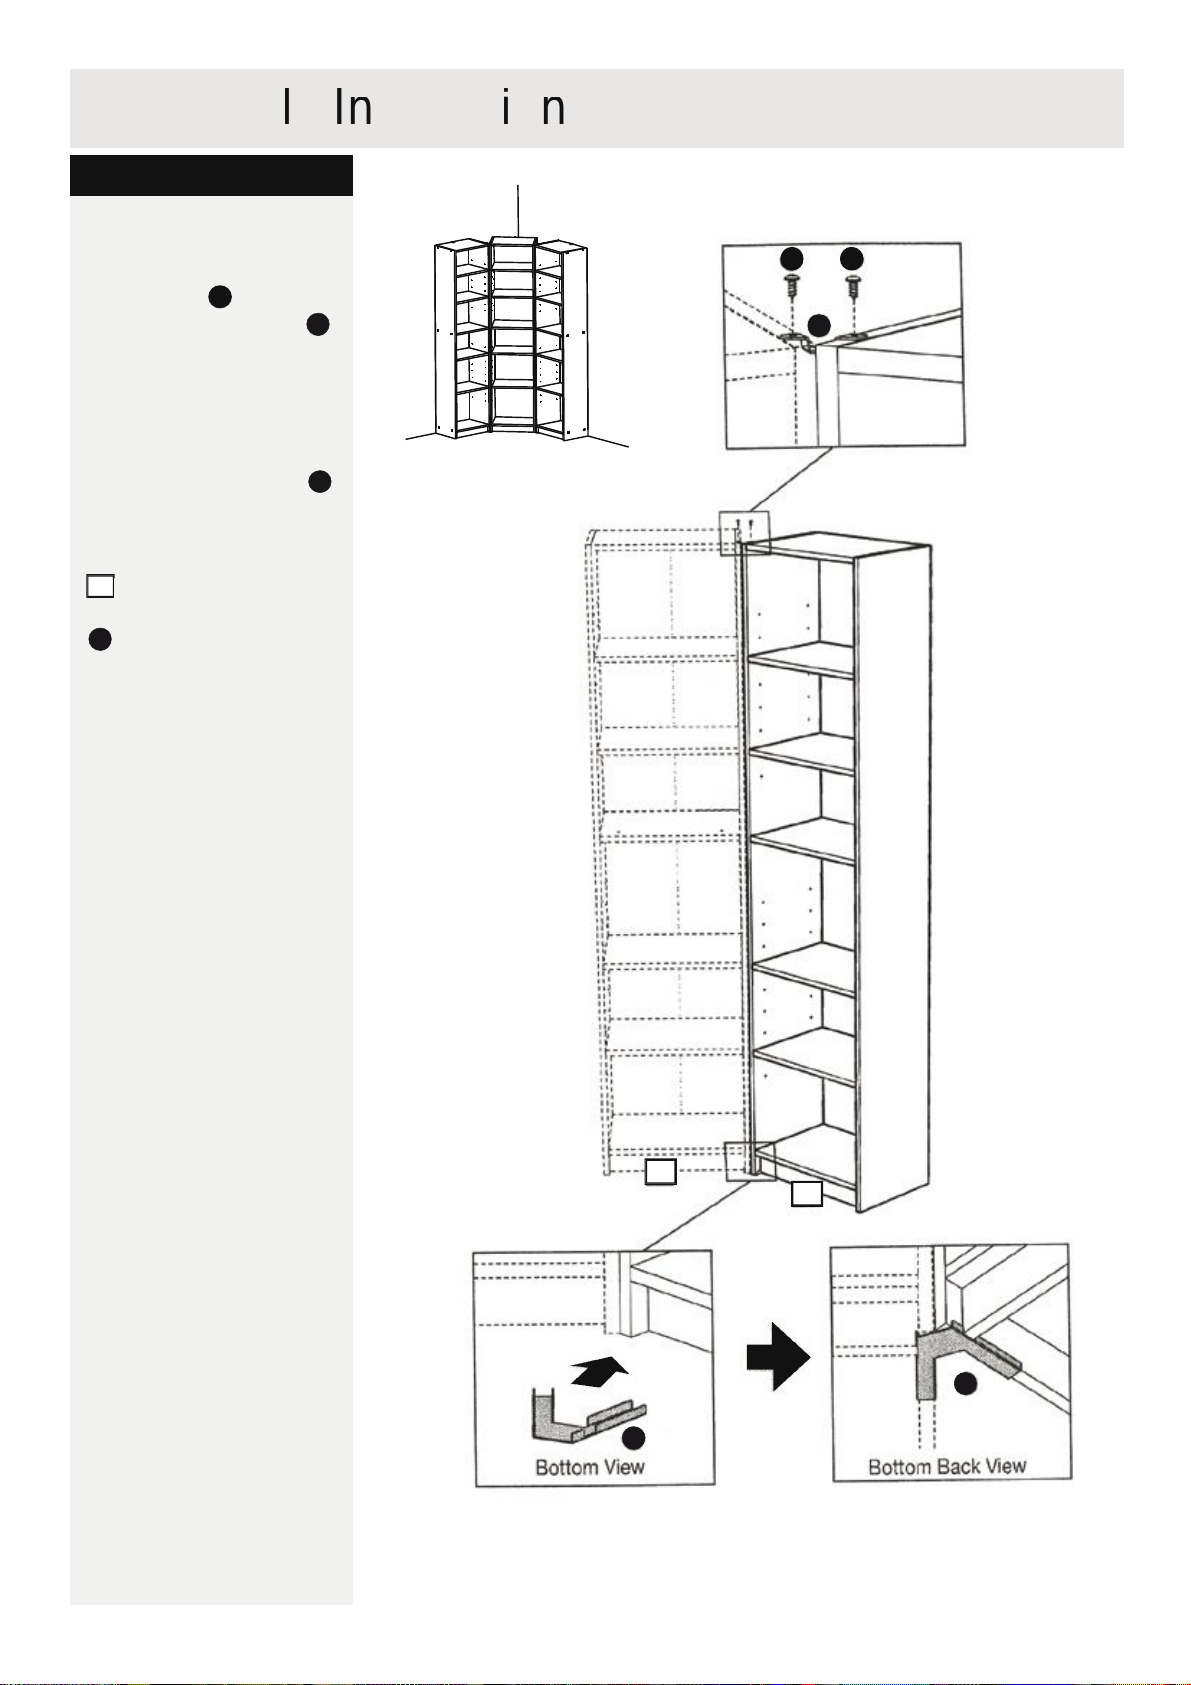
8
onto the front top edge
of the panel.
of side panel into the
is positioned in the gap
is positioned in the gap
is positioned in the gap
is positioned in the gap
5
of Lawer Corner Bracket
.
Step 7
Construct a corner
configuration
Ass
y
K
B B
B
L
K
L
K
K
Page 10
are supplied with your
e
d
tradesperson if you are unsure.
Always use a larger screw and w
a
if you are not sure.
2:
Ensure you use the recommended drill bit to match the wall
plug and hole size.
e
drill or
enlarge the hole.
4:
Take extra care when drilling high walls, ceilings and
ceramic
tiles. Ensure wall plugs are inserted beyond the thick
ess of
the ceramic tiles to avoid the tiles spltting or cracking.
t
drilled hole.
- there are only suitable for
the correct wall plugs for
your wall, seek professional
advice.
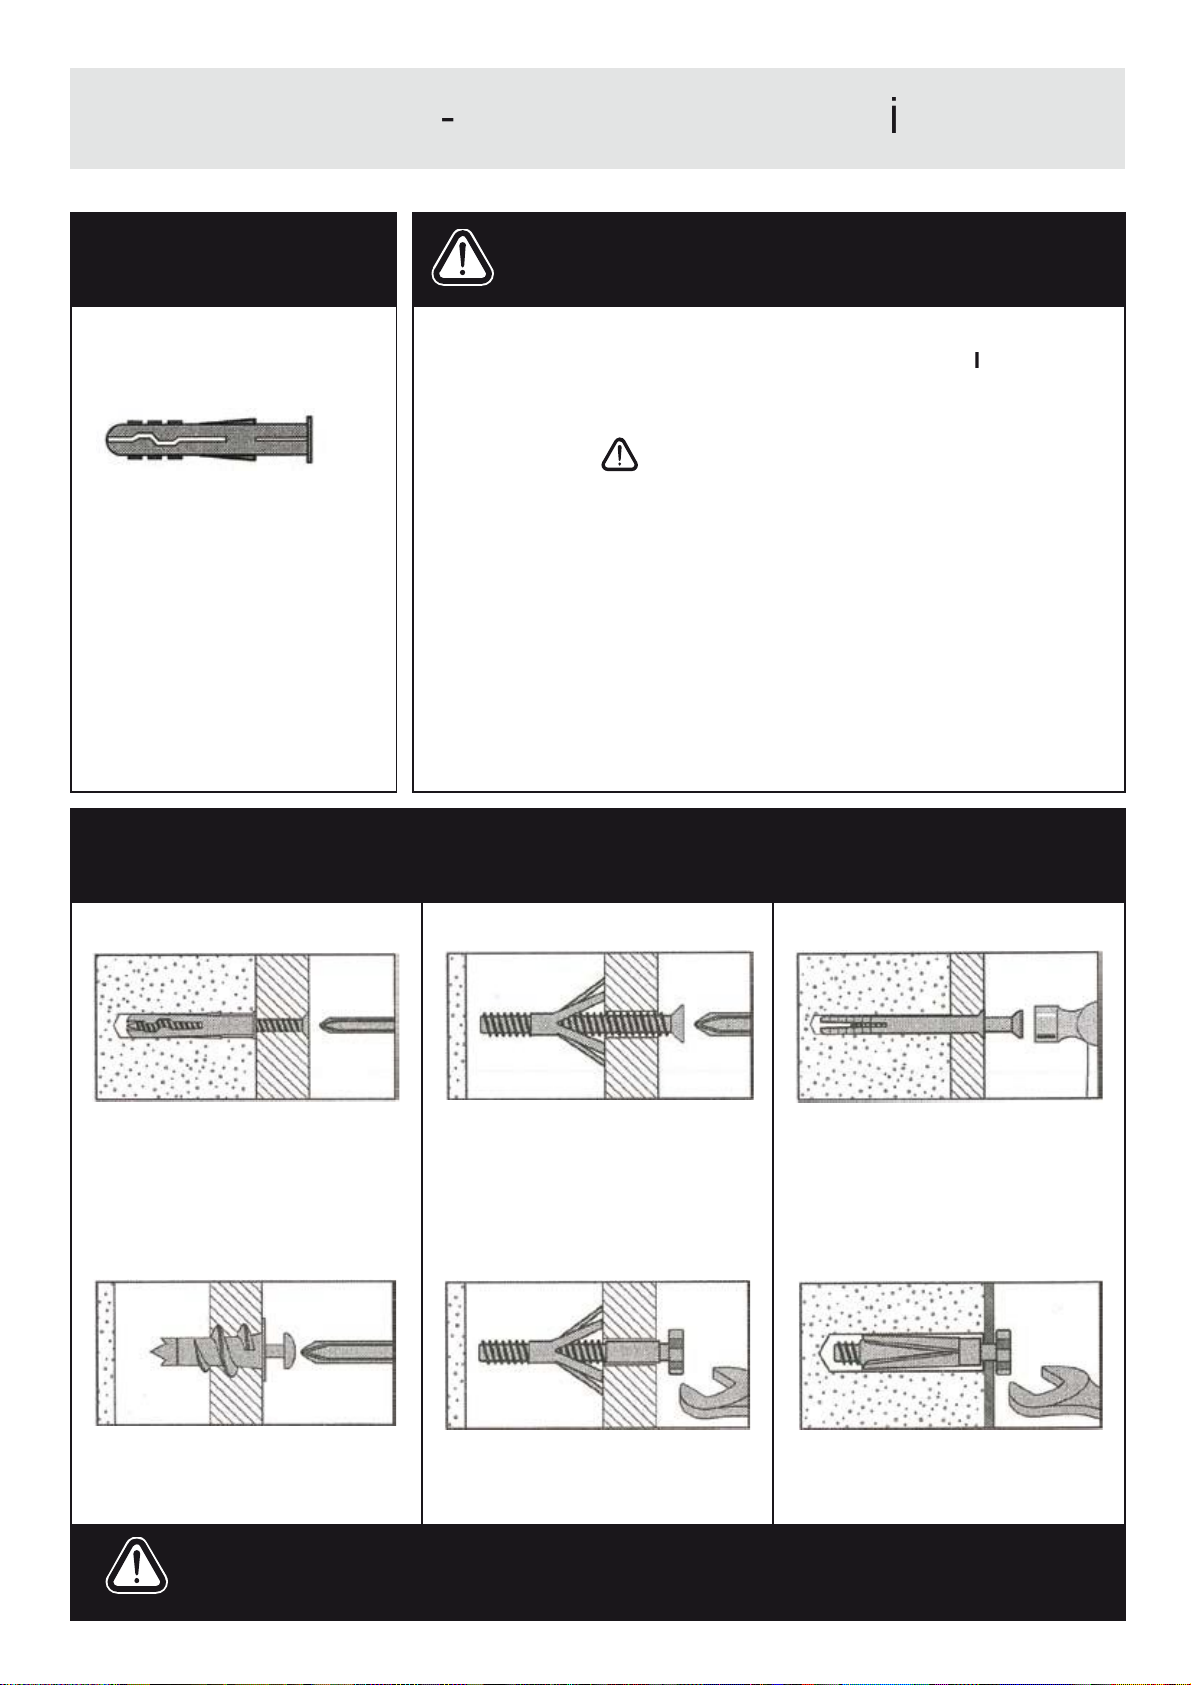
"Hammer Fixing" wall plug
"Shield Anchor" wall plug
Heavy loads
wall plug
a specialist fitting in this case. For light
& HiFi speakers and satelite dishes etc.
cabinets and coat racks.
to plasterboard partitions.
A G
t
W
t
& F
x
Important note:
Important: When drilling into walls always
check that there are no hidden wires or pipes etc.
Types of walls
You can use one of the following types of wall plug if your walls are made
of brick, breeze block, concrete, stone or wood.
Care &
Maintenance
Safety: Always check the fitting
and location to ensure your safety
in and around the home.
Fitting: From time to time check
the fitting to ensure the wall plugs
or screws do not become loose.
 Loading...