

Page 1
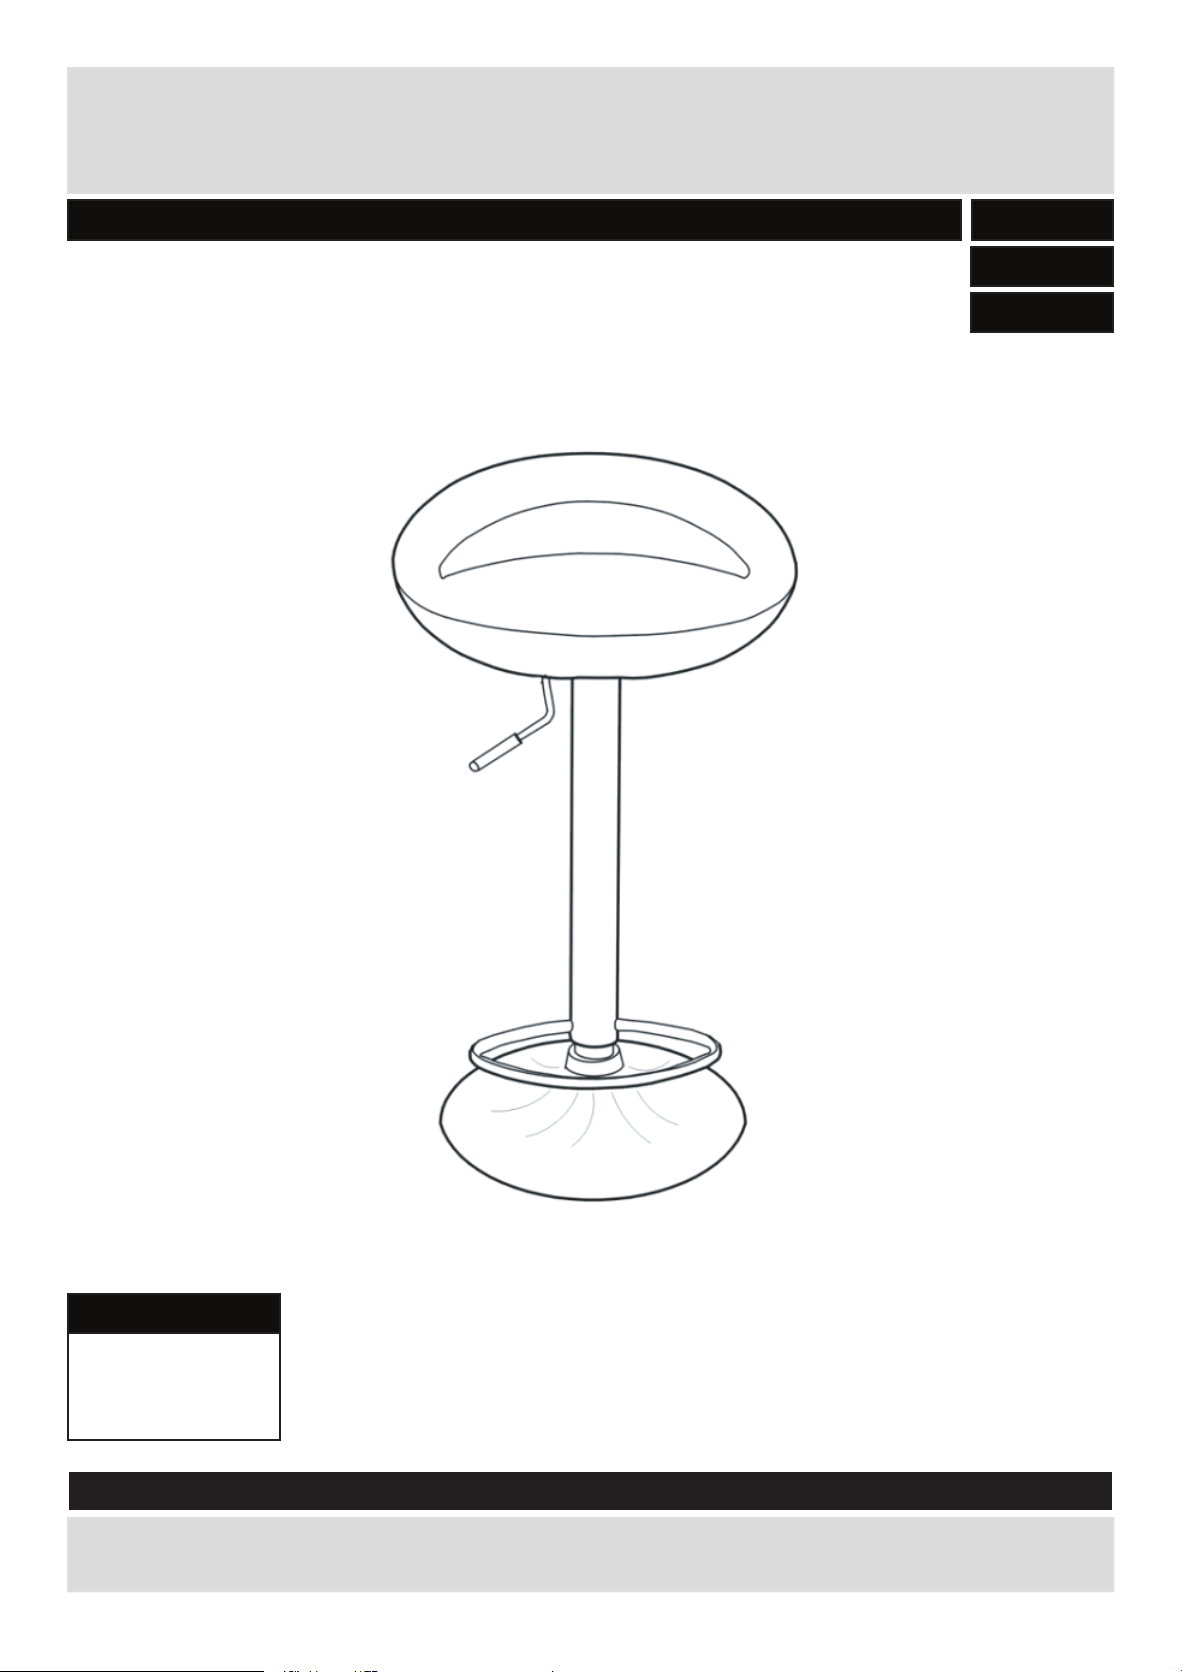
Ottawa Bar Stool
Assembly Instructions - Please keep for future reference
600/0444
600/0468
600/1429
Dimensions
Width - 46.5cm
Depth - 39.5cm
Height - 98.5cm
Important - Please read these instructions fully before starting assembly
If you need help or have damaged or missing parts, call the Customer Helpline:08456 400800
Issue 1 - 28/11/09
Page 2
Safety and Care Advice
Important
Check you have all the
components and tools listed on
pages 2 and 3.
Keep these instructions for
future use.
-
Please read these instructions fully before starting assembly
Care and maintenance
Clean using a damp cloth or a
proprietary domestic furniture
polish. Do not use abrasive
cleaners.
Dispose of all packaging
carefully and responsibly.
Place the product on flat and
steady surface during use.
This product should not be
discarded
Take to your local authority waste
disposal only.
with household waste.
Keep children and animals
away from the work area, small
parts could choke if swallowed.
From time to time check that
there are no loose screws on
this unit.
1
Page 3
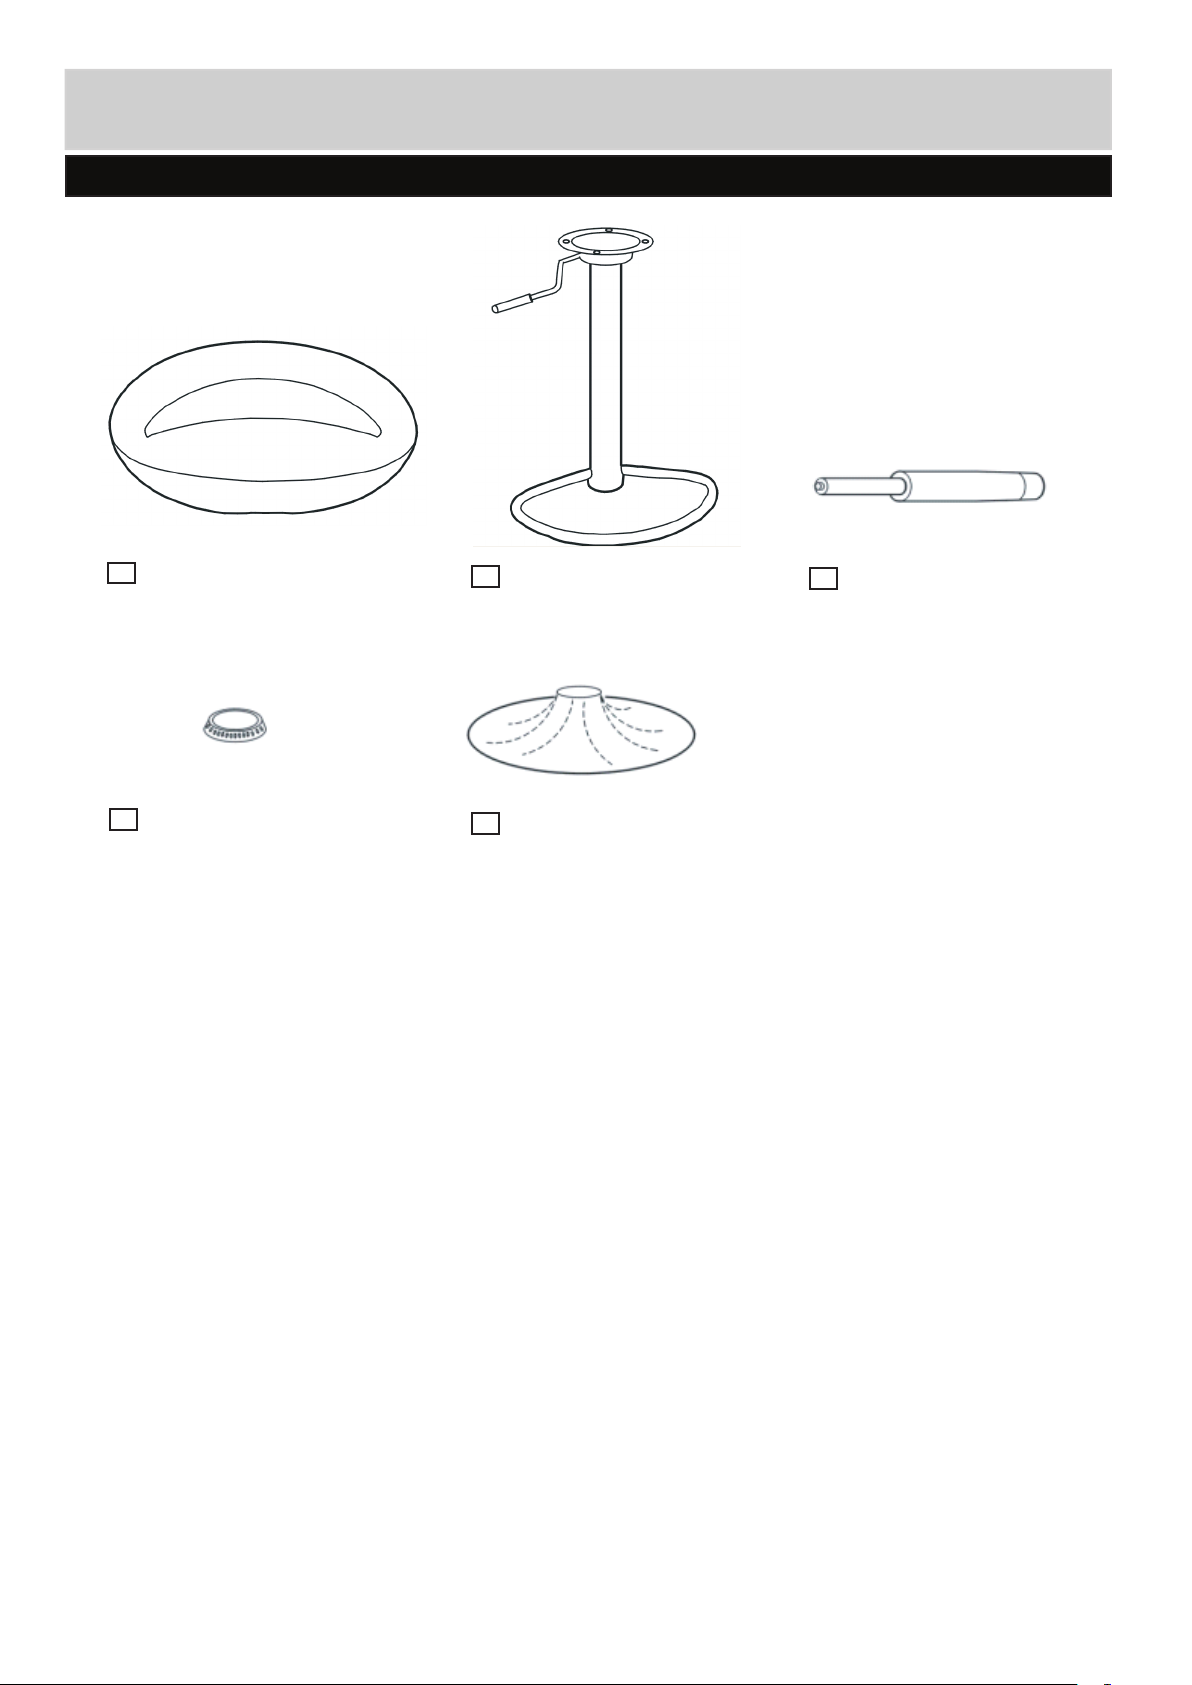
Components - Parts
Please check you have all the parts listed below
1
Seat pad (46x17cm)
2
Stem (42x30cm)
3
Piston (52x5.8cm)
4
Collar (7.5x2cm)
5
Base (38x8cm)
2
Page 4
If you have damaged or missing components,
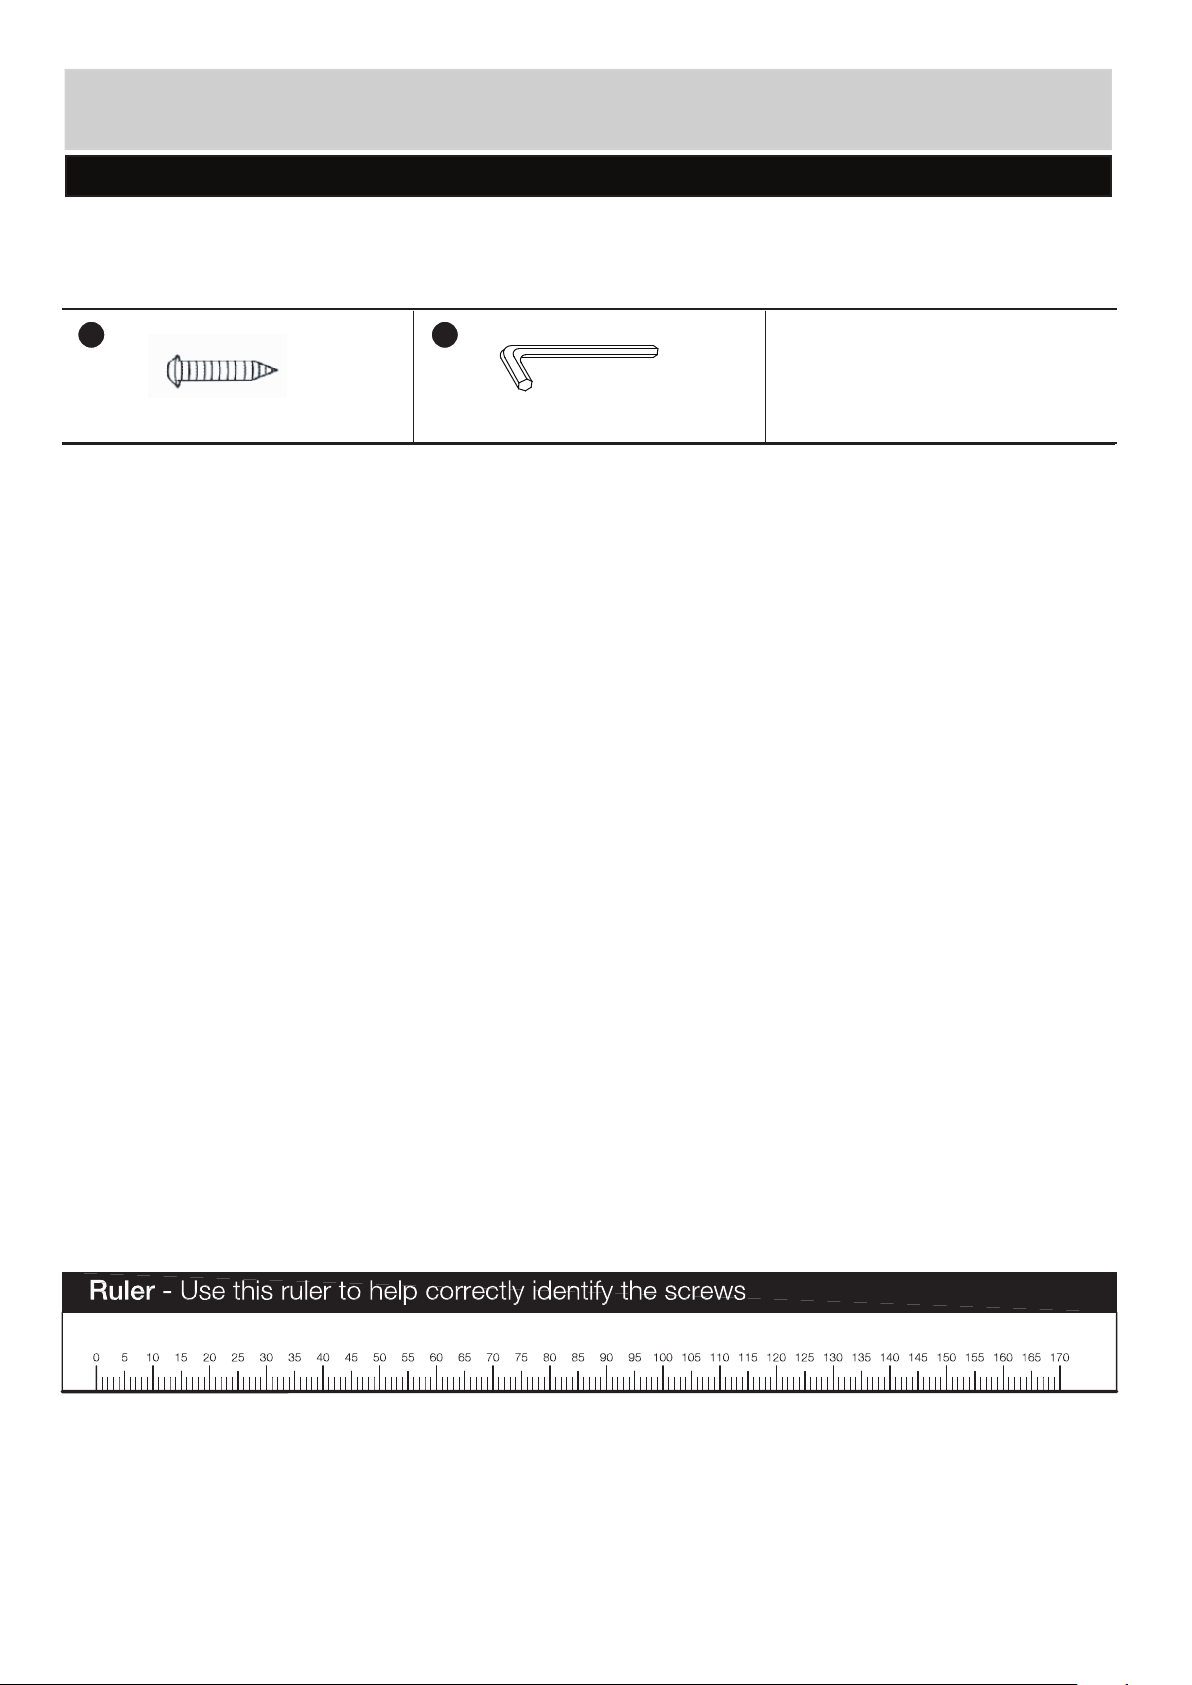
Components - Fittings
call the Customer Helpline: 08456 400800
Please check you have all the fittings listed below
Note: The quantities below are the correct amount to complete the assembly. In some cases more
fittings may be supplied than are required.
A B
Allen screw x 4
Allen key x 1
3
Page 5
Assembly Instructions
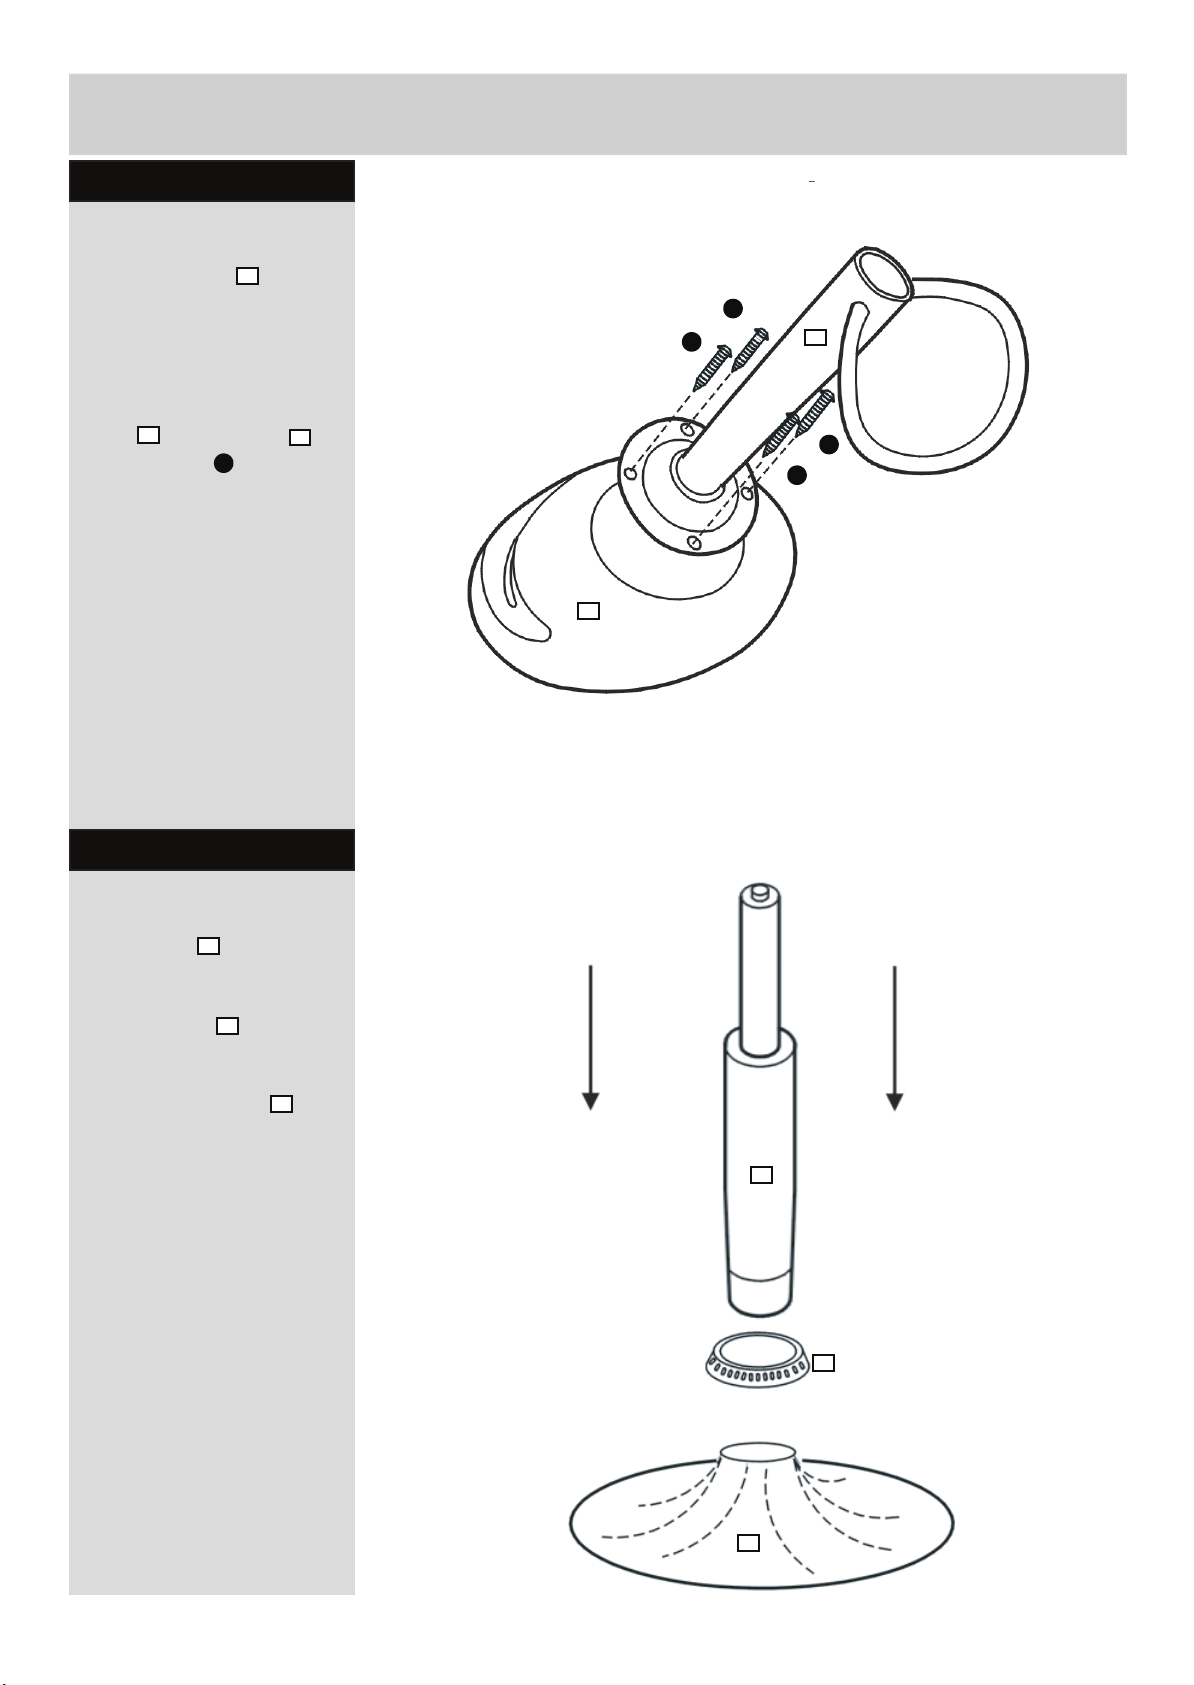
Step 1
Attaching seat frame
Place seat pad upside
down onto a clean flat
surface.
Ensuring the foot rest is at
the front, assemble main
stem to seat pad
using fixings .
2
1
1
A
Step 2
Back
A
A
1
2
Front
A
A
Front
Attaching base frame
Place base onto the
floor.
Locate collar onto the
base.
Firmly push piston into
the base.
5
4
3
3
3
4
5
4
Page 6
Assembly Instructions
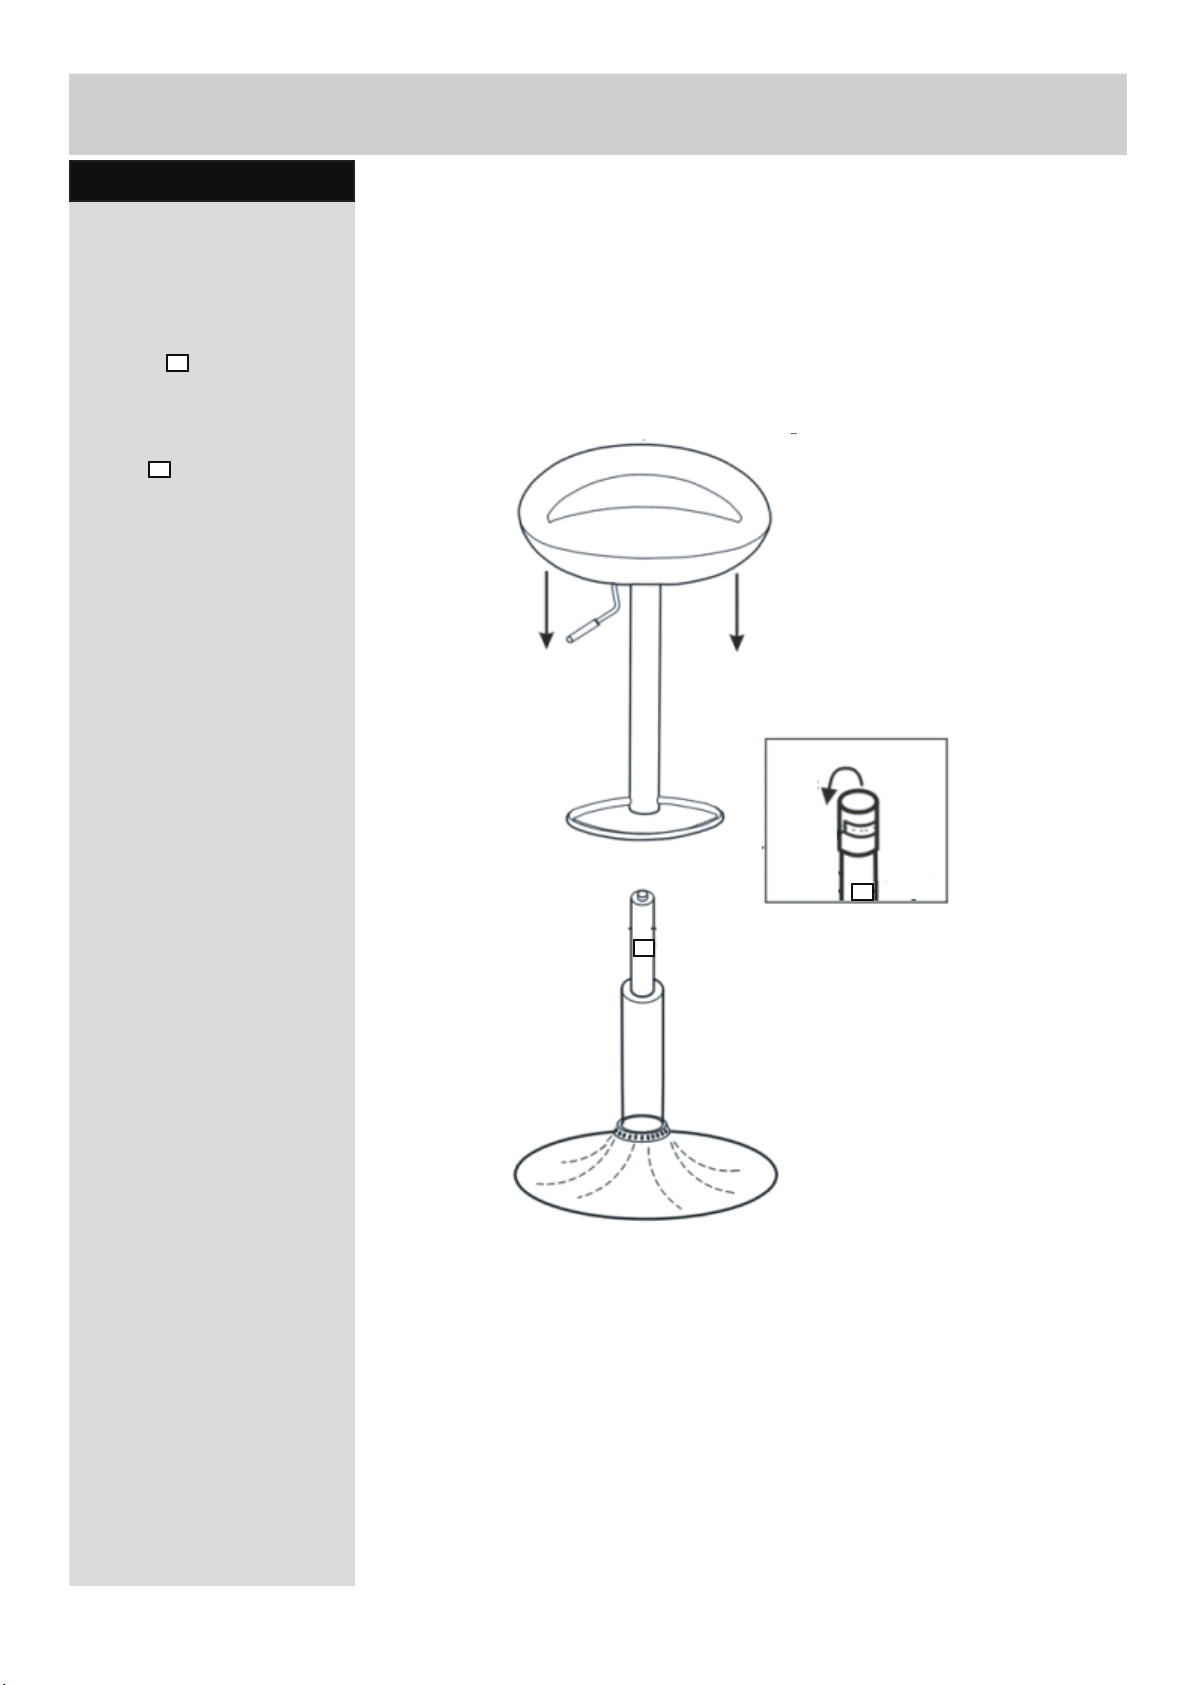
Step 3
Attaching seat frame
and base frame
First remove the black
plastic cap on top of
cylinder .
Carefully lower seat
assembly onto the end of
piston until the piston
is located into the seat.
Firmly push down on the
seat to ensure it is securely
located.
3
3
Remove cap
3
3
5
Page 7
Assembly Instructions
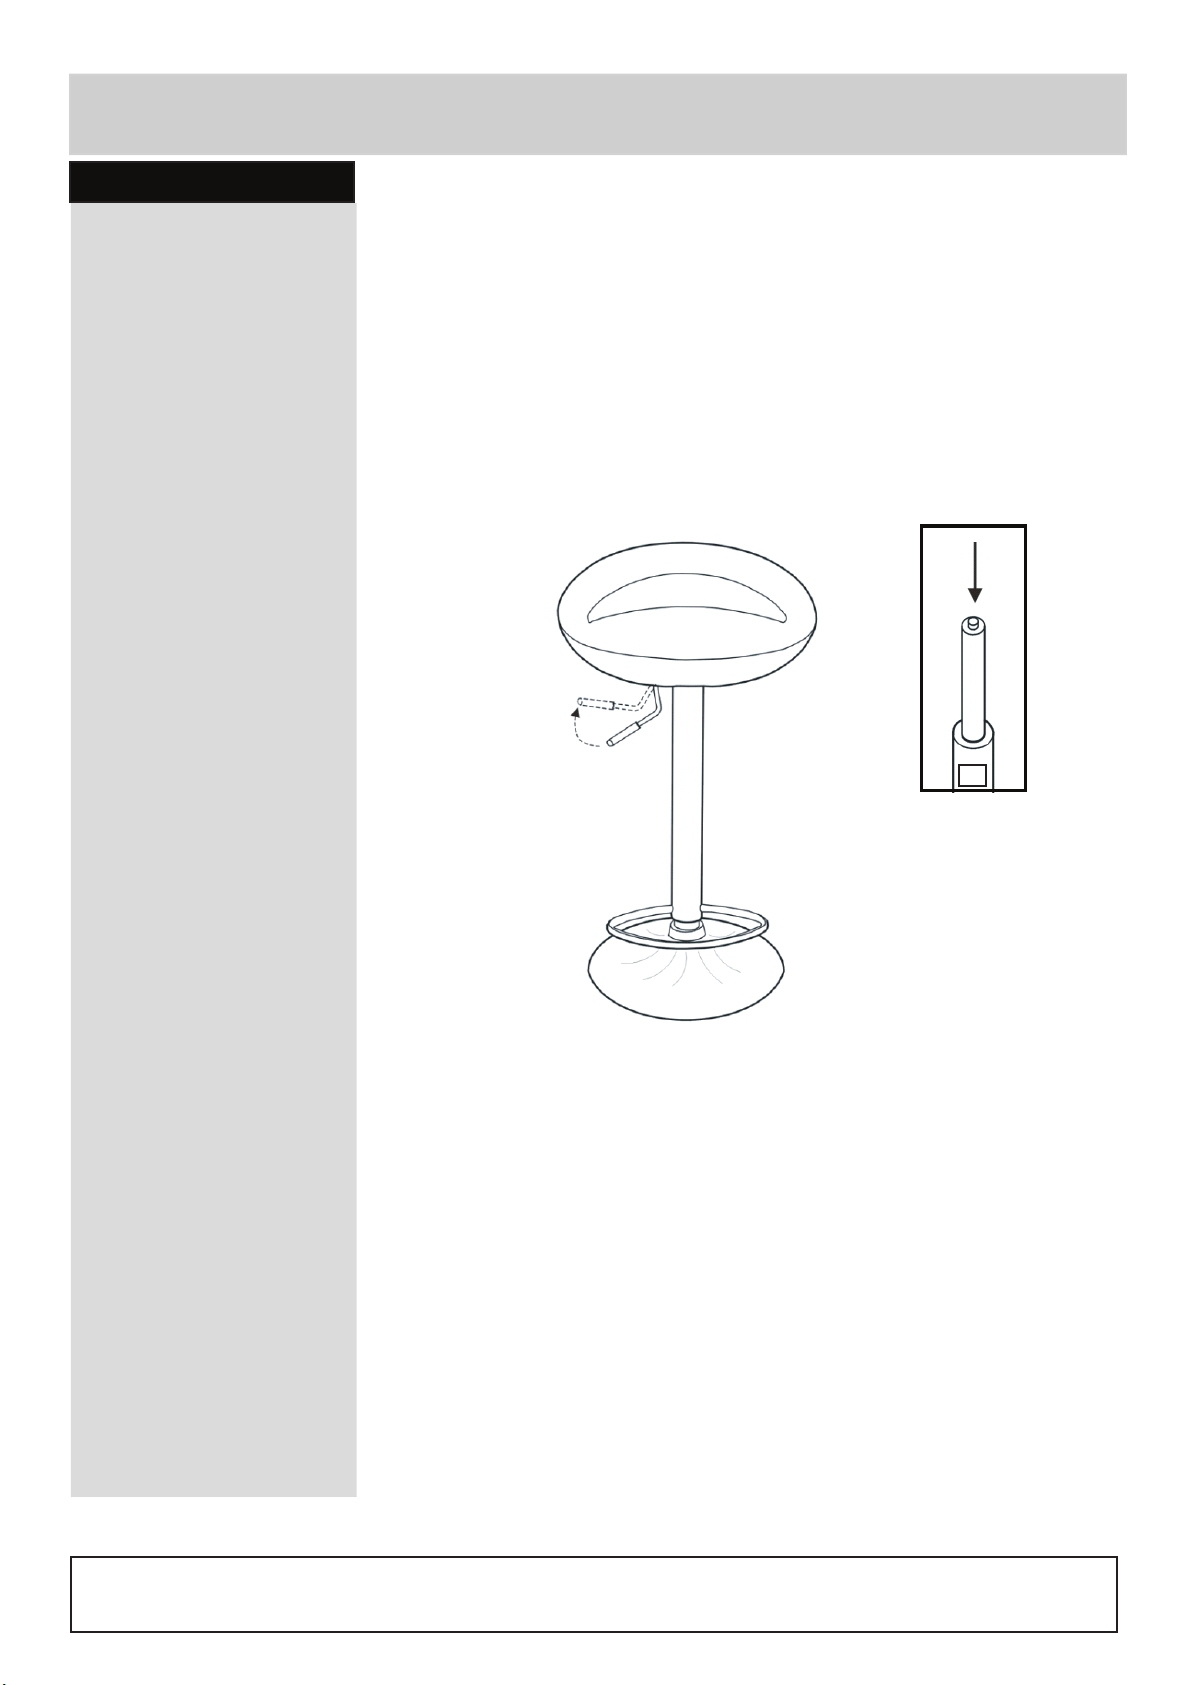
Step 4
Height adjustment
The lever on the right hand
side of the chair can be
used to adjust the chair
height.
Simply lift the handle to
operate.
Note: Due to dryness of
the seals during shipping,
it may take several
attempts to operate the
height adjustment function
first time.
Note: If the adjuster will
still not function correctly,
remove the seat assembly
and depress the top of the
piston to fully extend it.
Re-assemble the seat and
try adjuster again.
3
Assembly is complete.
If you need help for have damaged or missing parts, call the
Home Retail Group. 489-499 Avebury Boulevard. Saxon Gate West. Central Milton Keynes. MK9 2NW
Customer helpline:08456 400800
 Loading...