

Page 1
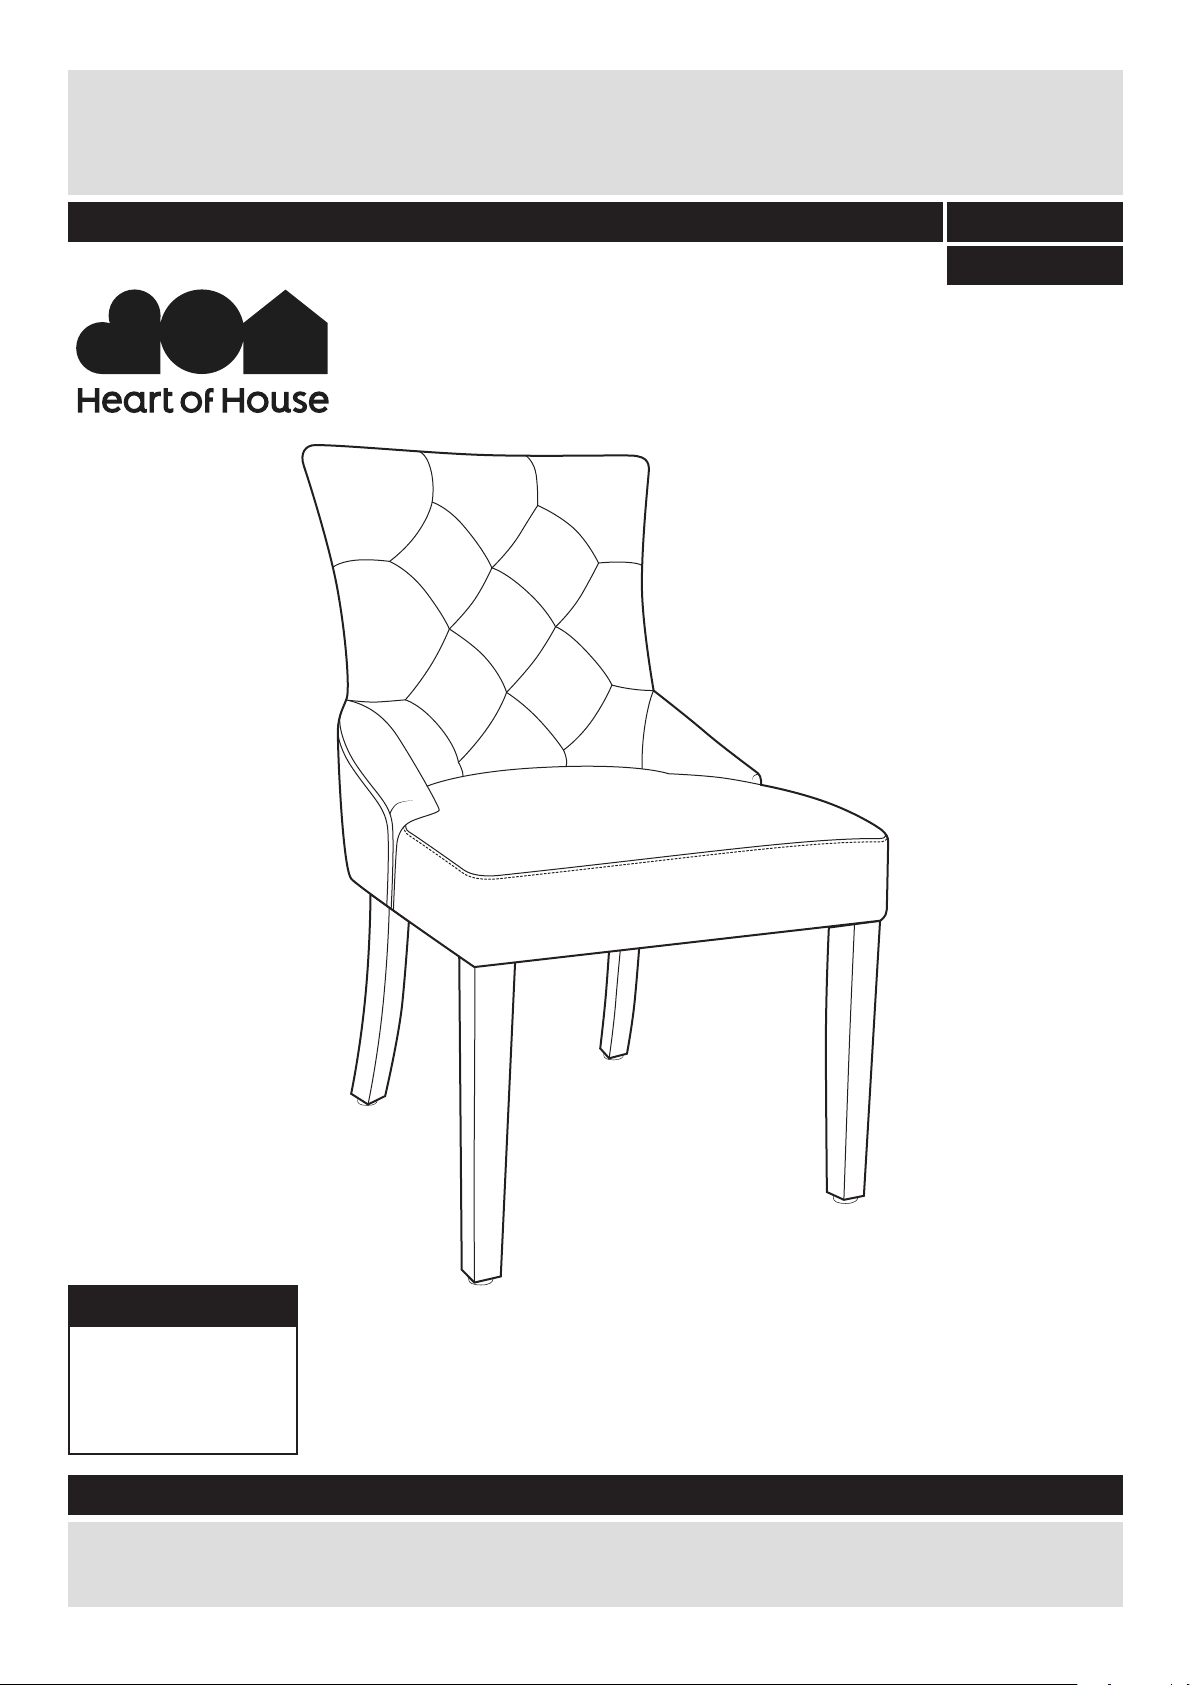
pin tuck oatmeal chair
Assembly Instructions - Please keep for future reference
532/3885
549/7591
Dimensions
Width - 56cm
Depth - 68cm
Height - 91cm
Important - Please read these instructions fully before starting assembly
If you need help or have damaged or missing parts, call the Customer Helpline:
Argos = 0345 640 0800
Issue 1 - 5/04/16
Page 2

Safety and Care Advice
Important - Please read these instructions fully before starting assembly
• Check you have all the
components and tools listed on
the following pages.
• Remove all fittings from the
plastic bags and separate them
into their groups.
• Keep children and animals
away from the work area, small
parts could choke if swallowed.
• Make sure you have enough
space to layout the parts before
starting.
Care and maintenance
• Only clean using a damp cloth
and mild detergent, do no use
bleach or abrasive cleaners.
• From time to time check that
there are no loose screws on
this unit.
• During assembly do not stand
or put weight on the product, this
could cause damage.
• Assemble the item as close to
its final position (in the same
room) as possible.
• Assemble on a soft level
surface to avoid damaging the
unit or your floor.
• Parts of the assembly will be
easier with 2 people.
• Do not stand on the chair.
• Do not use this chair as step
ladder.
• This product should not be
discarded with household
• We do not
recommend the
use of power
drill/drivers for
inserting screws,
as this could damage the unit.
Only use hand screwdrivers.
• Unit weight: 10.5 kgs.
• Maximum safe weight of user:
110kgs.
waste. Take to your local
authority waste disposal centre.
Handy Hints
• Assemble all parts and bolts
loosely during assembly, only
once the product is complete
should you fully tighten the
bolts.
• Regularly check and ensure
that all bolts and fittings are
tightend properly.
1
Page 3
If you have damaged or missing components, call the
Components - Parts
Customer Helpline: Argos = 0345 640 0800
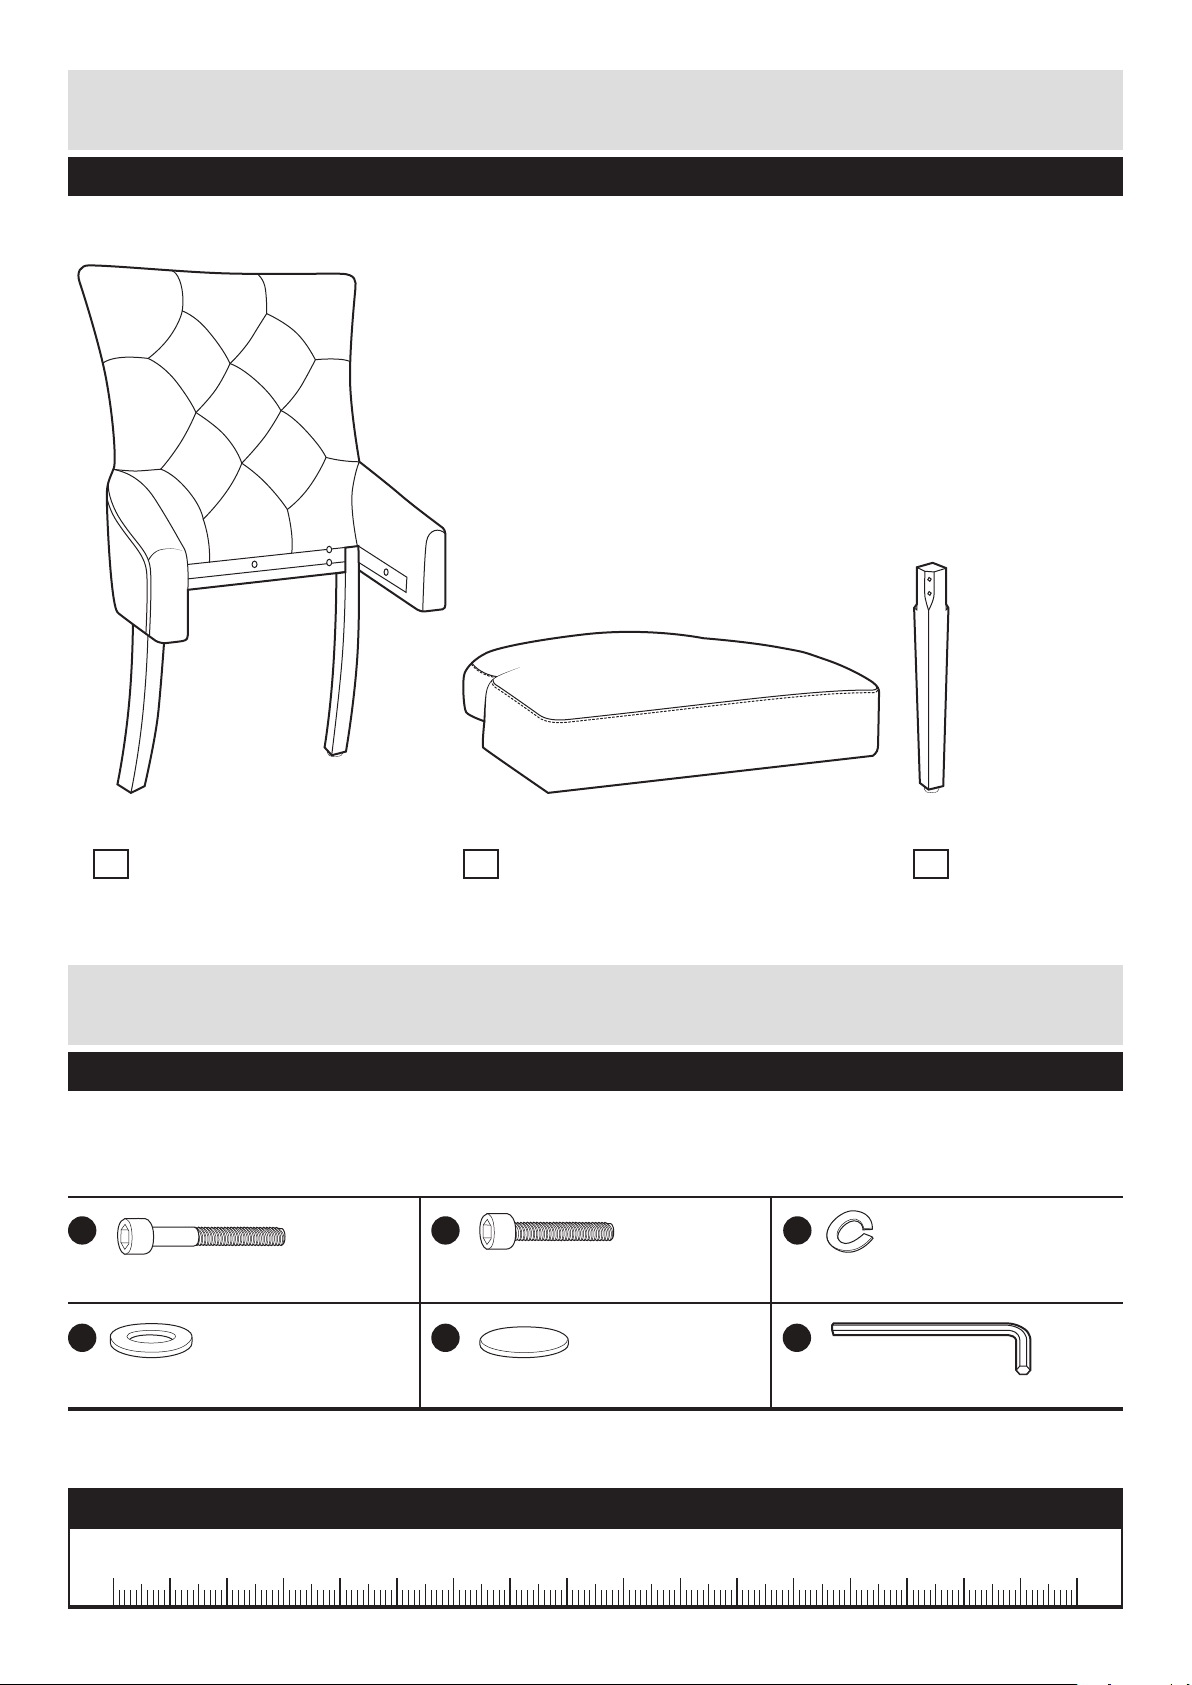
Please check you have all the parts listed below
Backrest
1 Seat
(92 x 55.5 x 35cm)
2 Leg x 2
(57 x 48 x 15cm)
3
(43.5 x 4.5 x 3.5cm)
Components - Fittings
Please check you have all the fittings listed below
Note: The quantities below are the correct amount to complete the assembly. In some cases more fittings
may be supplied than are required.
A
M8 x 65mm Bolt x 4
D
Flat washer x 11
B
M8 x 55mm Bolt x 7
E
Foot pad x 4
C
Spring washer x 11
F
Allen key x 1
Ruler - Use this ruler to help correctly identify the screws
0 15 30 45 60 75 905 20 35 50 65 80 9510 25 40 55 70 85 100 120 140105 125 145110 130 150115 135 155 160 165 170
2
Page 4
Assembly Instructions
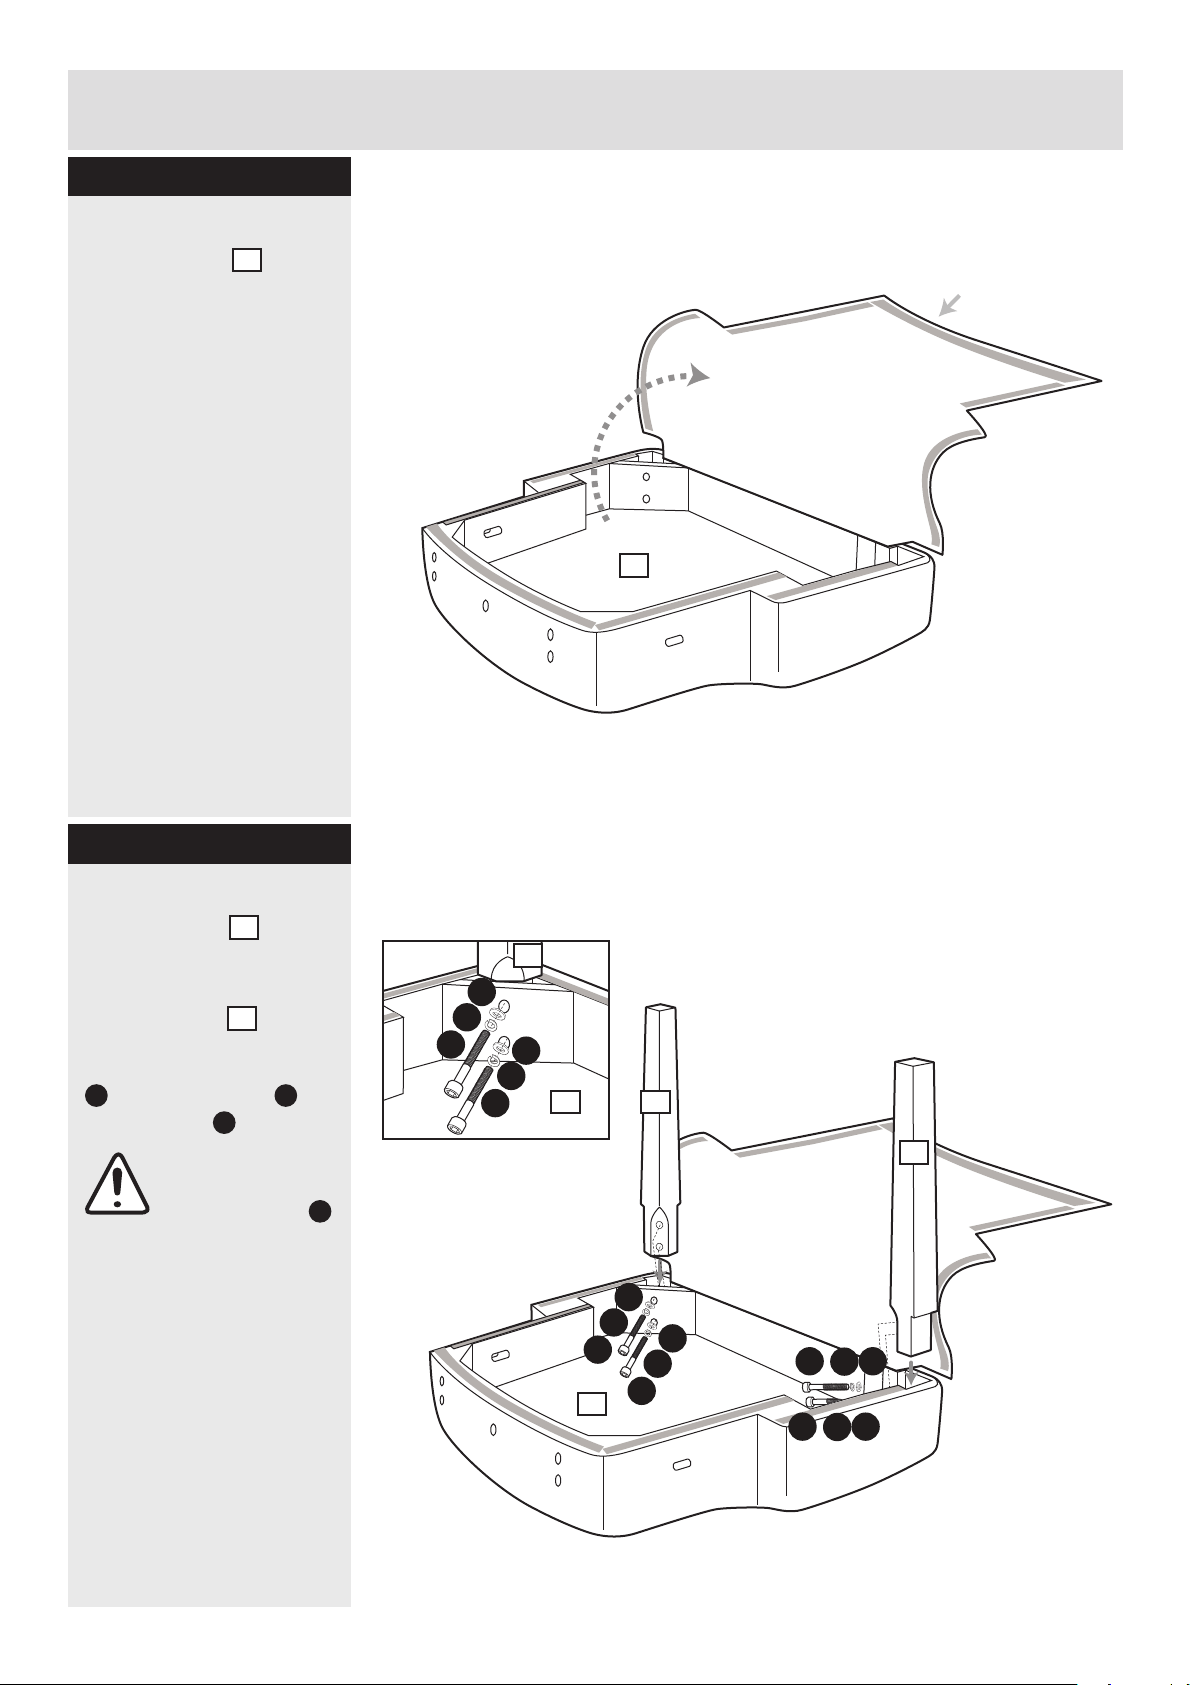
Step 1
Opening dust cover
Place the seat on a
2
flat protected surface.
Carefully peel off dust
cover of seat by pulling
the cloth from the back
side of the seat as
shown.
Dust cover
2
Step 2
Attaching legs
Place the seat upside
down on a flat protected
surface.
Insert the legs into the
holes of the seat as
shown and fix using bolts
A
, spring washers
and washers .
Important:
Fasten bolts
using allen key
but do not fully
tighten at this
stage.
Use oval head of
allen key on tight
angles.
2
3
C
D
F
3
D
C
A
D
C
A
2
3
3
D
C
A
2
D
C
A
D
C
A
A
D
C
3
Page 5
Assembly Instructions
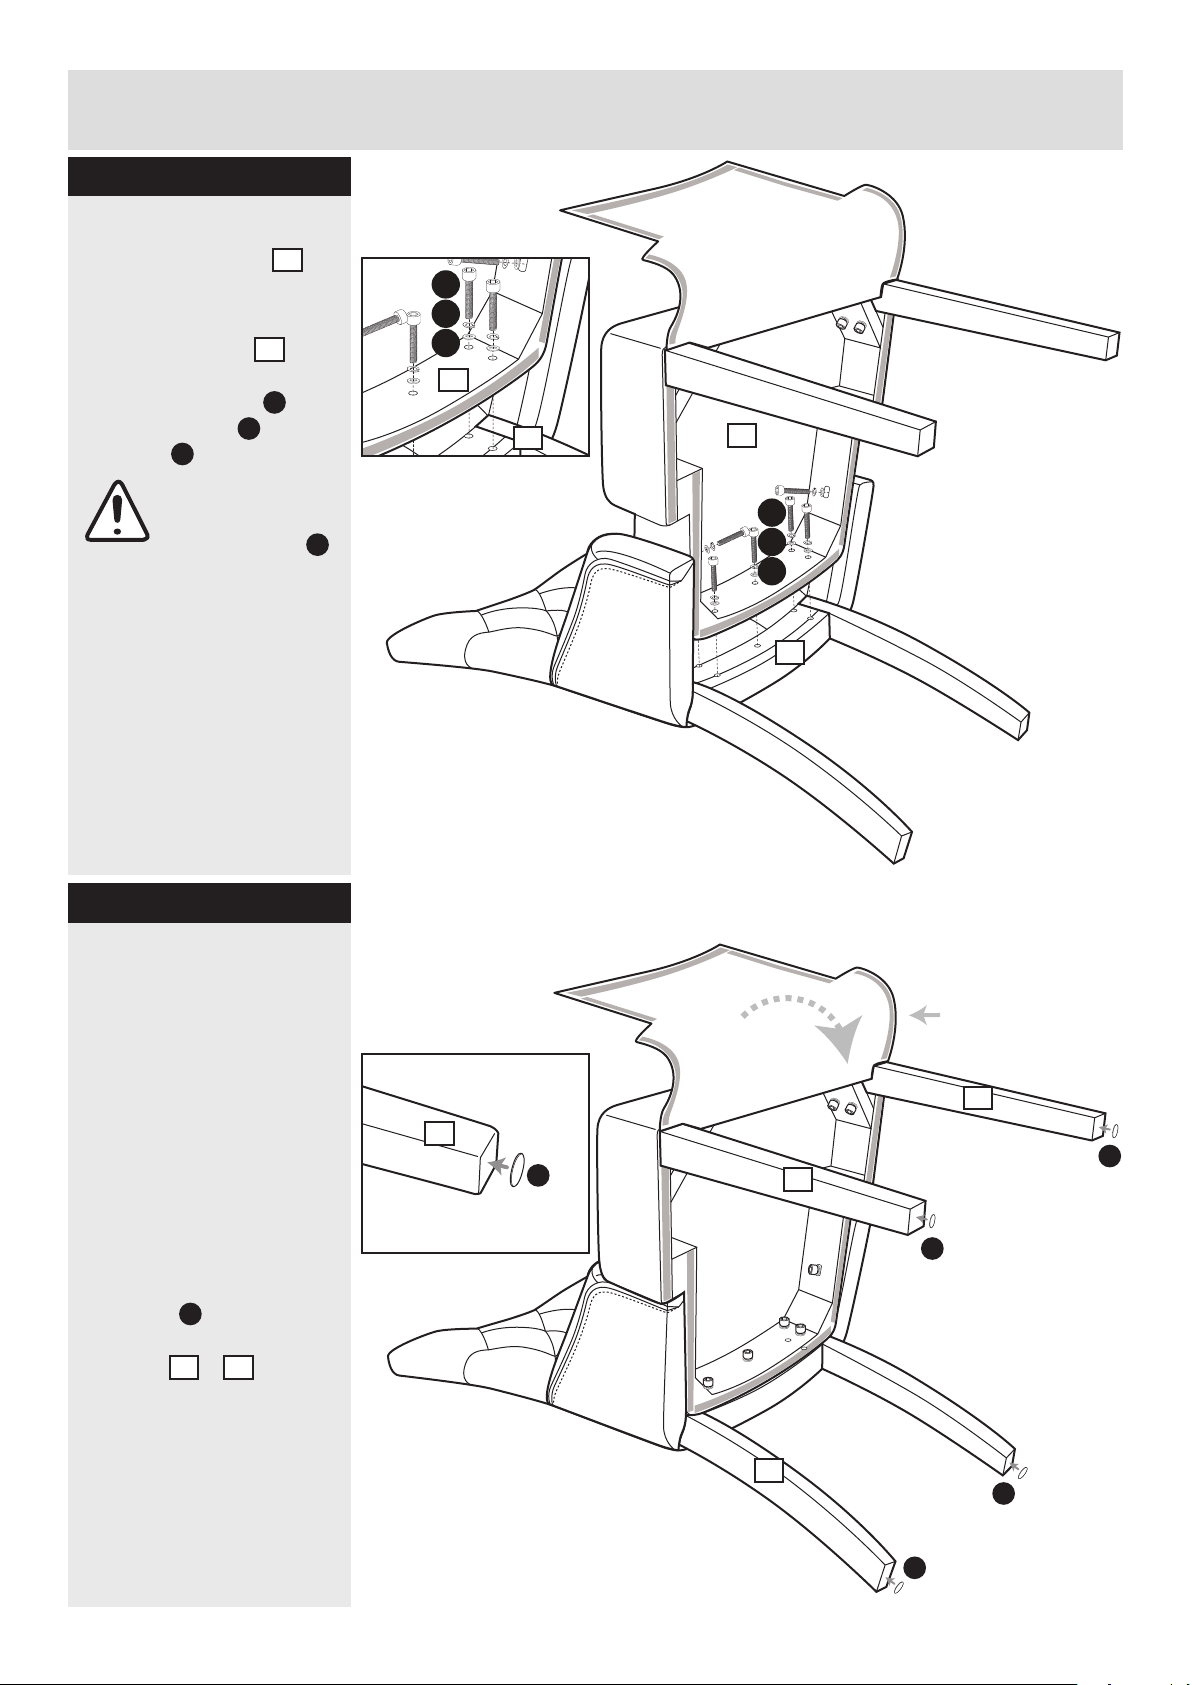
Step 3
Attaching the seat
Place the backrest on
1
a flat protected surface
as shown.
Position the seat on
2
the backrest as shown
and fix using bolts ,
spring washers and
washers .
D
B
C
Important:
Fasten bolts
using allen key
F
but do not fully
tighten at this
stage.
Use oval head of
allen key on tight
angles.
B
C
D
2
1
2
B
C
D
1
Step 4
Attaching dust cover
Attach the dust cover to
seat as shown and
fasten by sticking to edge
of seat.
Remove backing from
foot pads and carefully
position on the bottom of
the legs & as
shown.
E
1 3
Dust cover
3
3
E
3
E
1
E
E
E
4
Page 6
Assembly Instructions
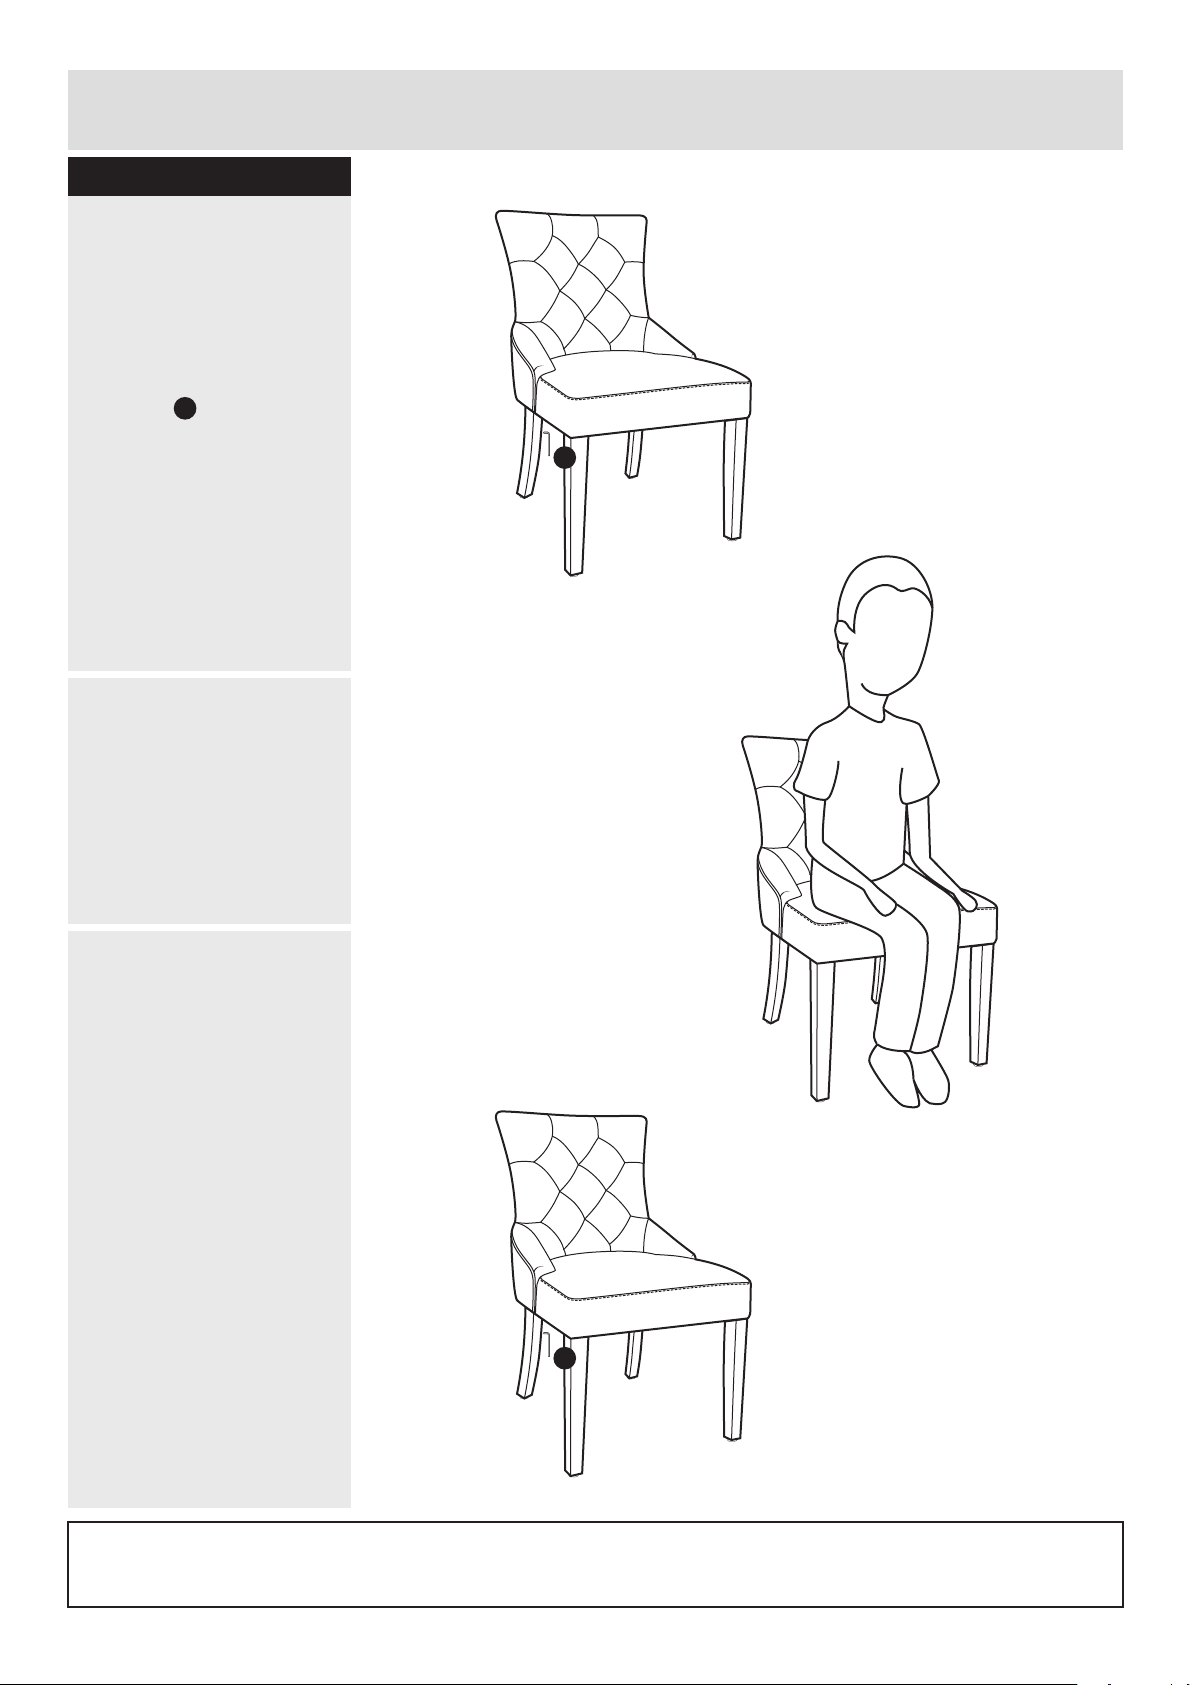
Step 5
Aligning & securing the
legs
Carefully turn the chair
upright and place on a
flat surface.
a: Tighten all bolts using
allen key .
Note:
Use oval head of allen
key on tight angles.
Note: This step is
essential to prevent the
chair from wobbling due
to uneven legs.
F
b: Carefully sit on the
chair and make
adjustments to ensure
the legs are flat even on
the floor.
a:
F
b:
c: After the sitting test,
re-tighten bolts again if
any adjustment is
needed.
Note: It is highly
recommended to
re-tighten all bolts after
using the chair for 7
days.
Note: Keep allen key to
re-tighten bolts when
required.
Assembly is complete.
If you need help or have damaged or missing parts, call the Customer Helpline:
Argos = 0345 640 0800
c:
F
5
 Loading...