

Page 1
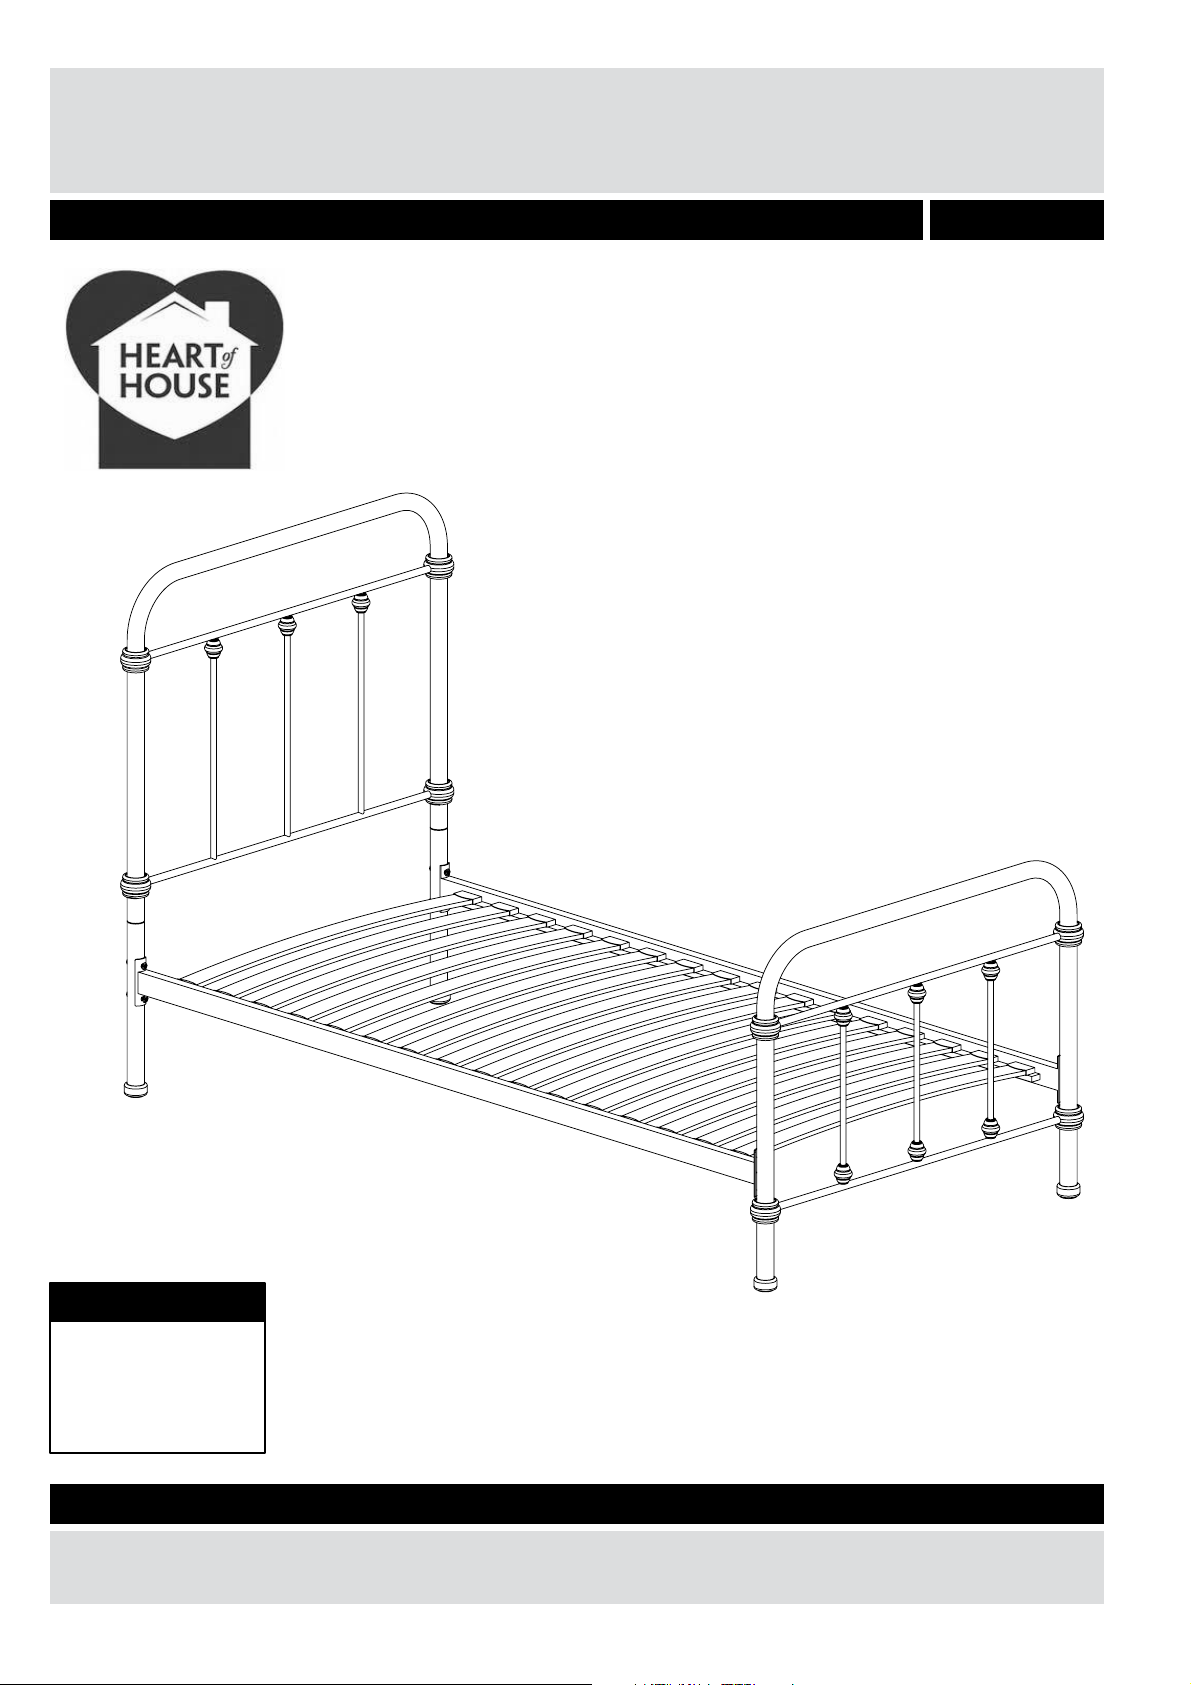
betsy 3' bed
Assembly Instructions – Please keep for future reference
503/1036
Dimensions
Length - 201cm
Width - 100cm
Height - 120cm
Important – Please read these instructions fully before starting assembly
If you need help or have damaged or missing parts, call the Customer Helpline: 0345 6400 800
Issue 1 - 15/10/15
Page 2

Safety and Care Advice
Important – Please read these instructions fully before starting assembly
• Check you have all the
components and tools listed on
pages 2 and 3.
• Remove all fittings from the
plastic bags and separate them
into their groups.
• Keep children and animals
away from the work area, small
parts could choke if swallowed.
• Parts of the assembly will be
easier with 2 people.
Care and maintenance
• Only clean using a damp cloth
and mild detergent, do no use
bleach or abrasive cleaners.
• Make sure you have enough
space to layout the parts before
starting.
• Assemble the item as close
to its final position (in the same
room) as possible.
• Dispose of all packaging
carefully and responsibly.
• Place the product on flat and
steady surface during use.
• From time to time check that
there are no loose screws on
this unit.
• Assemble on a soft level
surface to avoid damaging the
unit or your floor.
• Keep these instructions for
further use.
• To ensure an easier assembly,
we strongly advise that all
fittings are only finger tightened
during initial assembly. Only
upon completion of the
assembly should all fixing points
be fully tightened.
• This product should not be
discarded with household
waste. Take to your local
authority waste disposal
centre.
1
Page 3
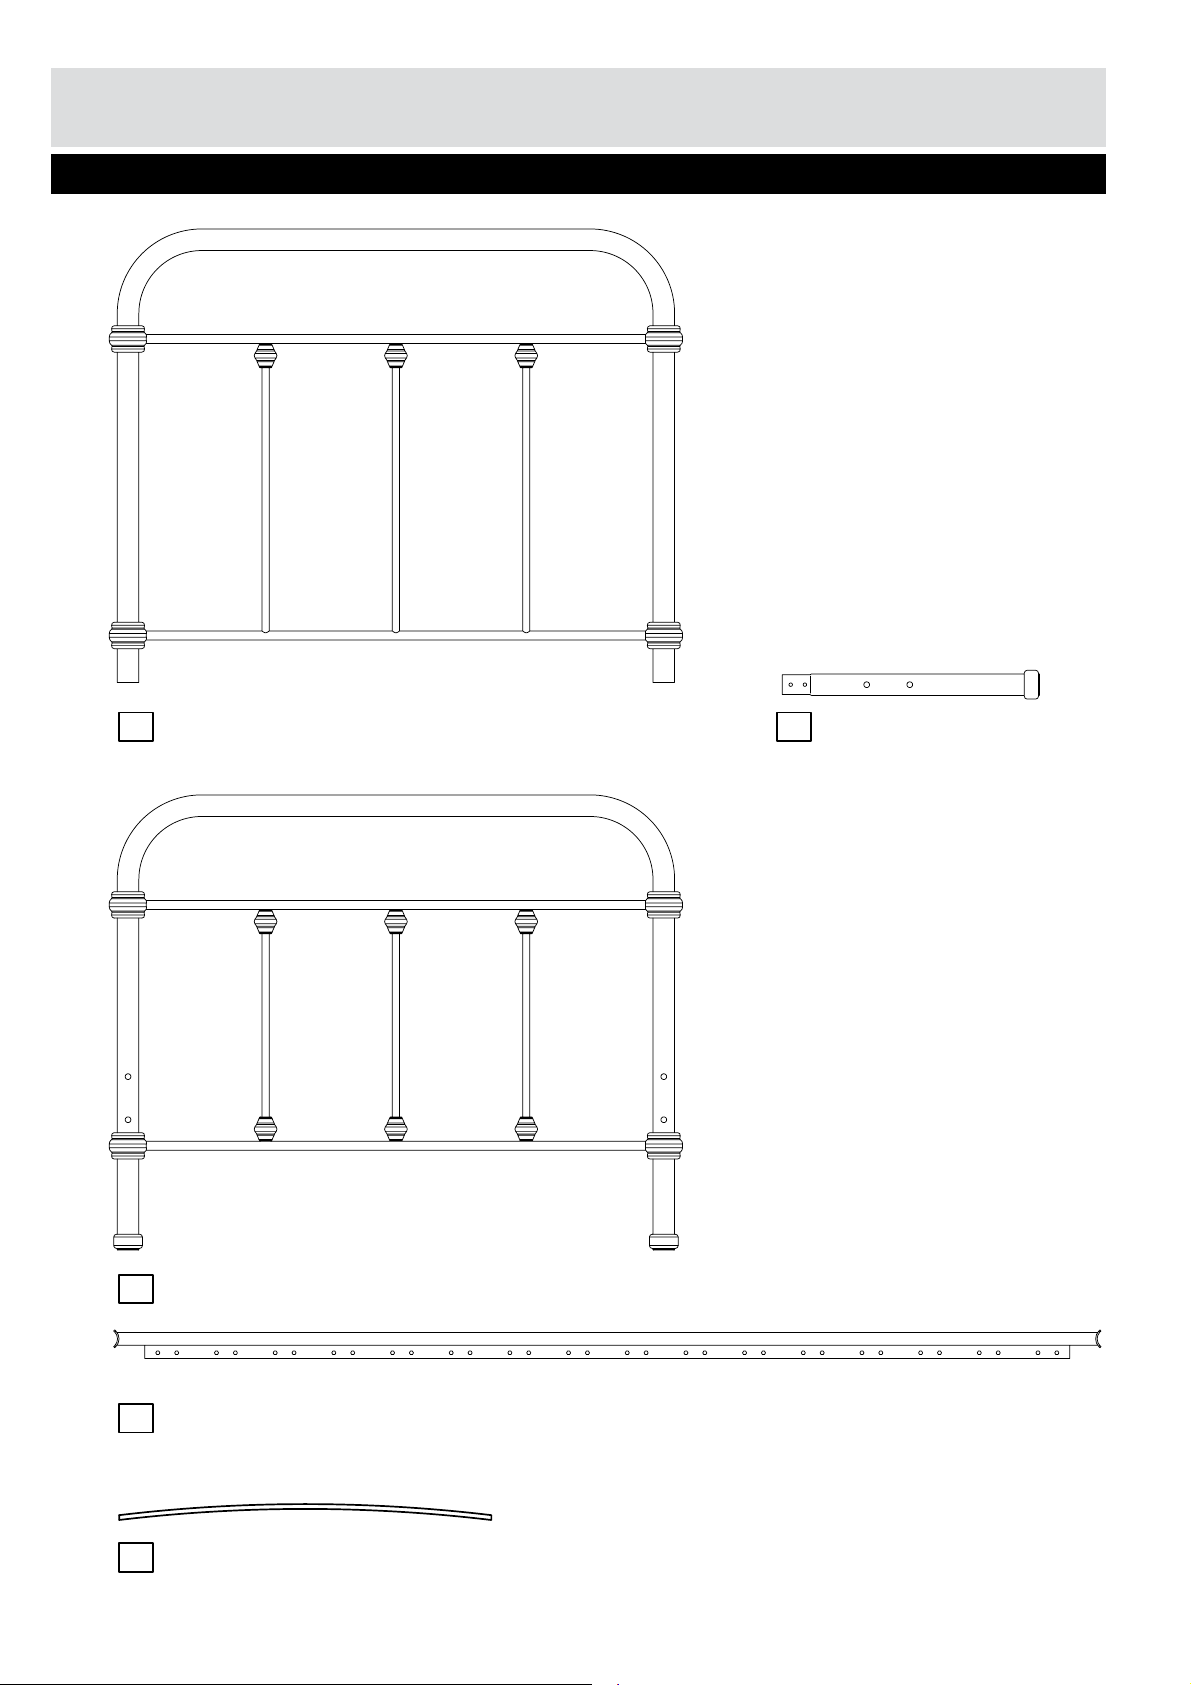
If you have damaged or missing components,
Components - Parts
call the Customer Helpline:
Please check you have all the parts listed below
0345 6400 800
Headboard panel (100 x 80cm)
1
Footboard (100 x 80cm)
3
Headboard post x 2
2
(45 x Ø3.8cm)
Side rail x 2 (192 x 5.1cm)
4
Bentwood slat x 16
5
2
Page 4
If you have damaged or missing components,
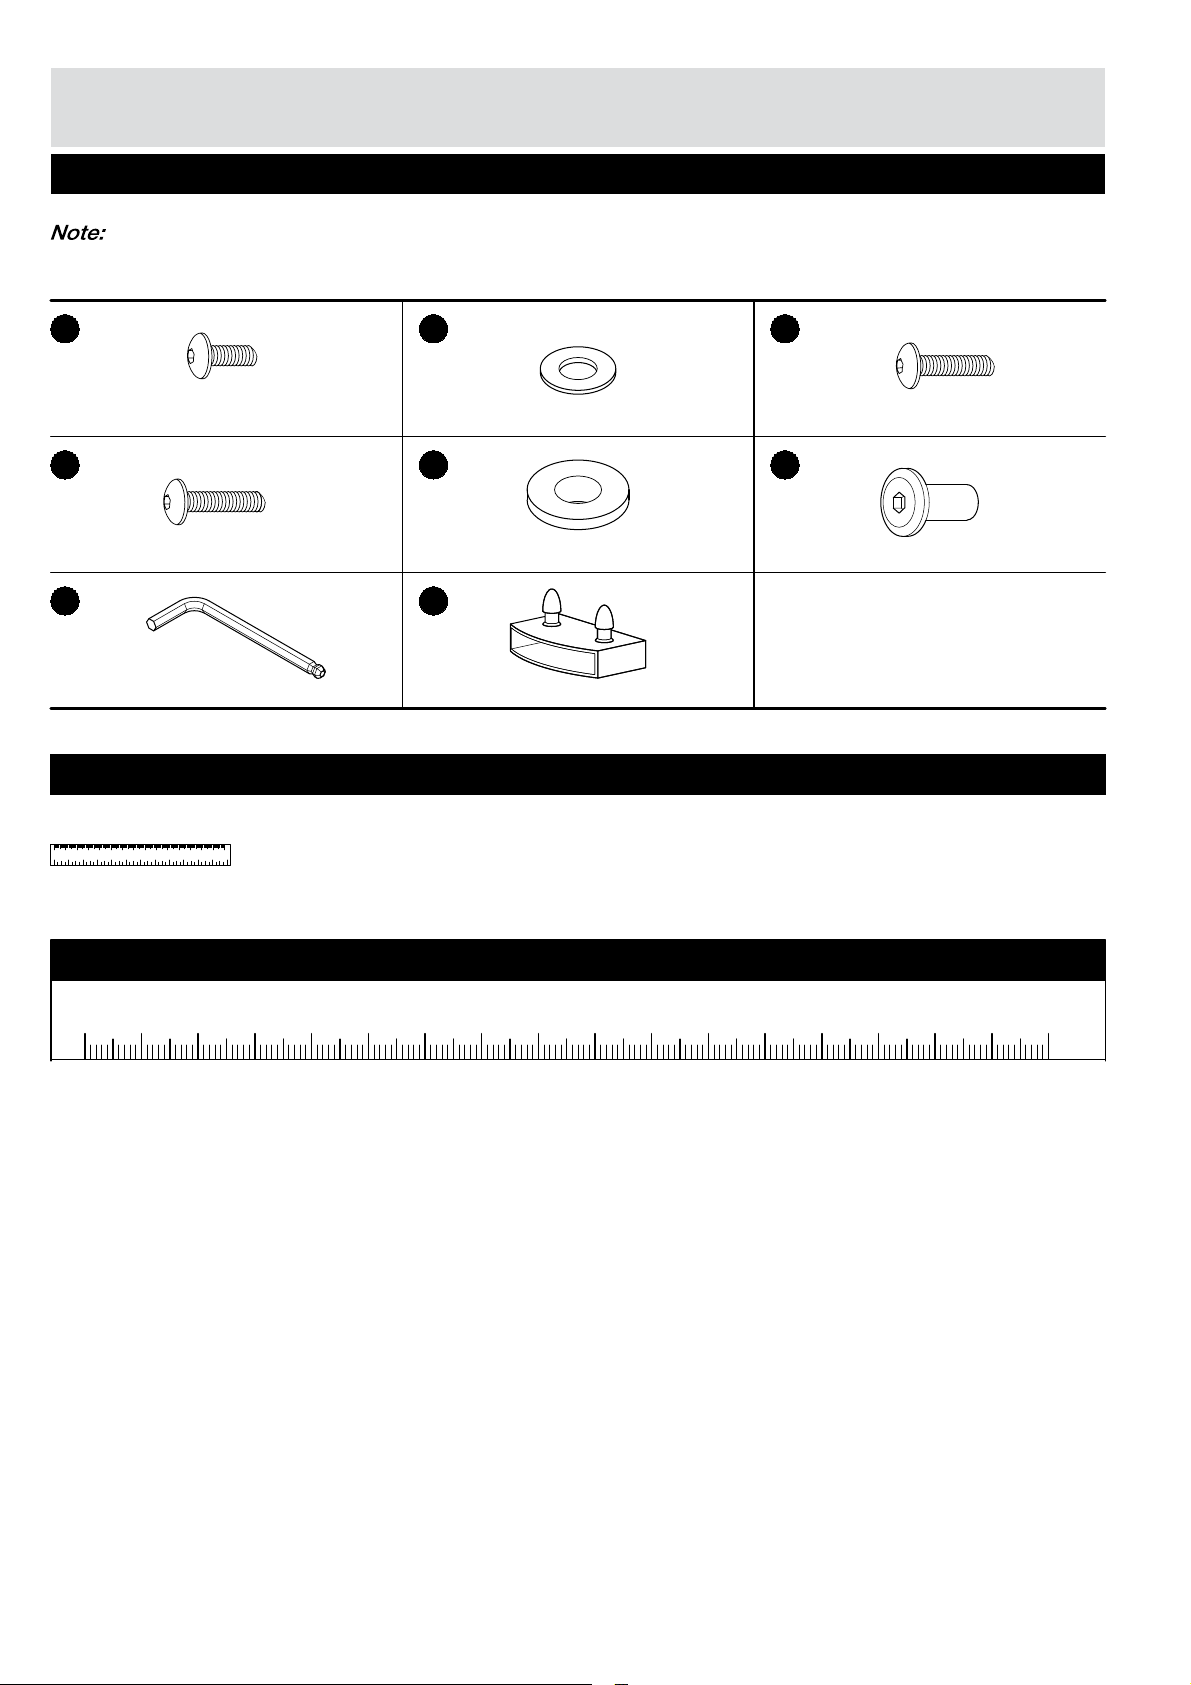
Components - Fittings
call the Customer Helpline: 0345 6400 800
Please check you have all the fittings listed below
The quantities below are the correct amount to complete the assembly. In some cases more
fittings may be supplied than are required.
A
13mm Allen screw x 4
B
Plain washer x 12
D E F
32mm Allen screw x 4
G
Allen key x 2
Rubber washer x 8
H
Plastic cap x 32
Tools required
0 5 10 15 20 25 30 35 40 45 50 55 60 65 70 75 80 85 90 95 100 105110 115 120125 130 135140 145 150
0
1 2 3 4 5 6
Ruler/tape
measure
C
25mm Allen screw x 4
Nut x 4
Ruler - Use this ruler to help correctly identify the screws
5
0
10 15 20 25 30 35 40
45
55
50
60 65 70
75
80 85 90 95 100 105 110 115 120 125 130 135 140 145 150 155 160 165 170
3
Page 5
Assembly Instructions
Note:
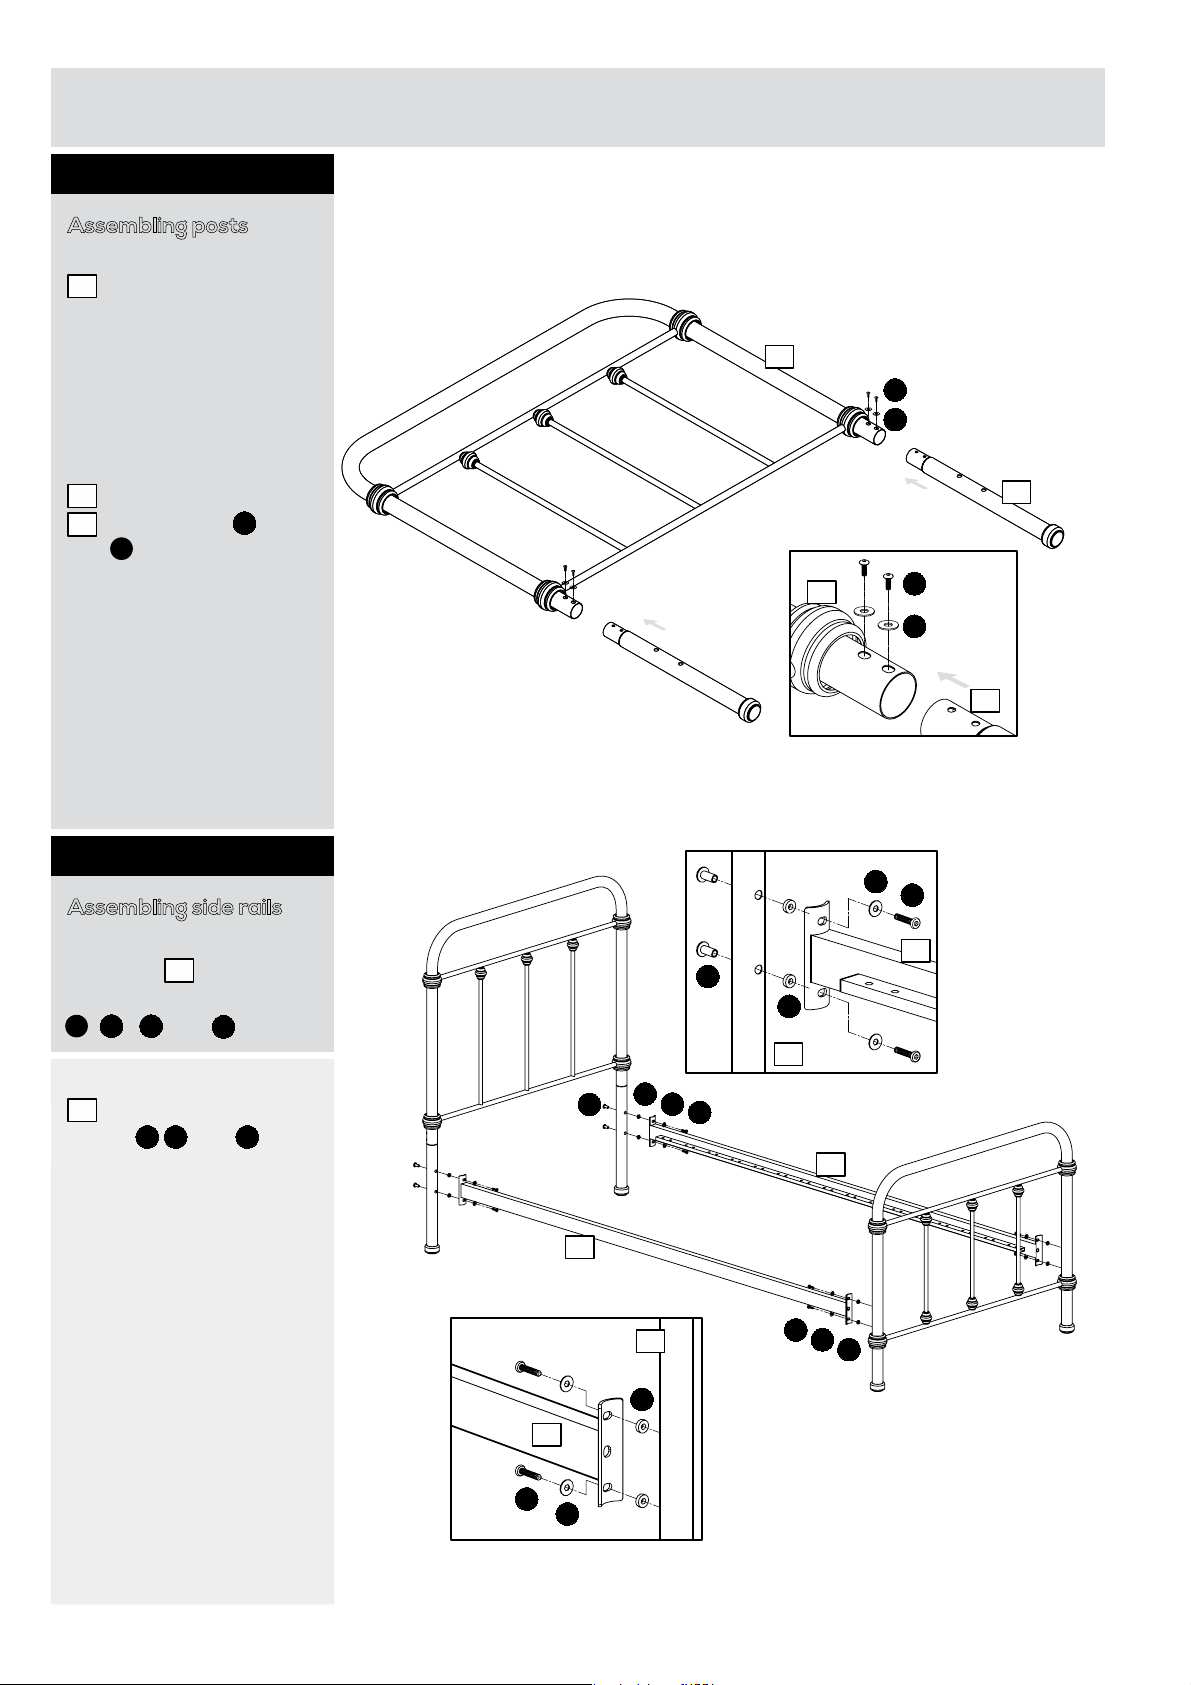
Step 1
Assembling posts
Place headboard panel
face down onto a
1
clean flat surface.
Back
Fixing holes for
posts should be facing
up.
Secure headboard posts
2
to headboard panel
using fixings
1
B
and .
A
1
A
B
2
Step 2
Assembling side rails
a: With help, assemble
side rails to the
headboard using fixings
D E
B
, , and .
b: Assemble footboard
3
to the side rails using
fixings and .
4
C E
B
F
a:
Front
F
1
a:
F
E
2
E
B
D
4
A
B
2
B
D
4
b:
4
3
E
4
C
B
b:
C
B
E
4
Page 6
Assembly Instructions
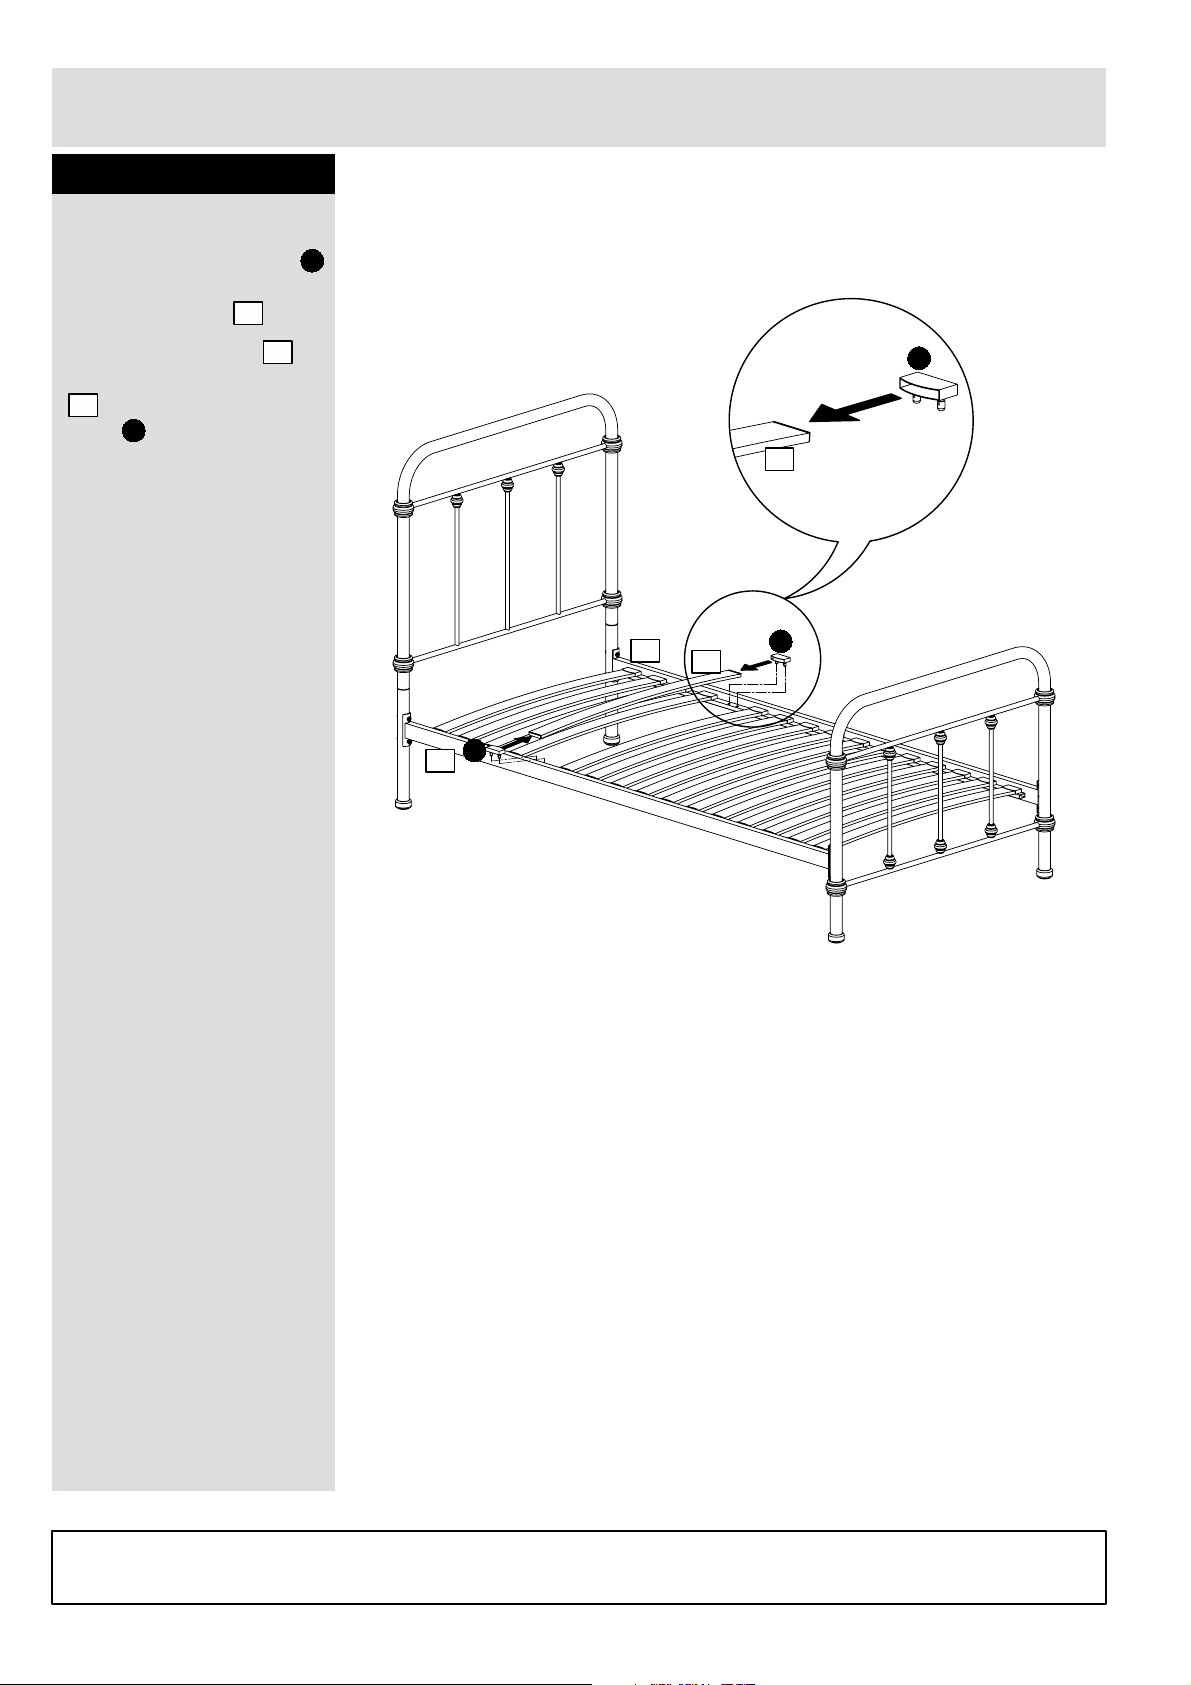
Step 3
Attaching slats
Assemble plastic caps
onto each end of
bentwood slats .
Flt bentwood slats
5
5
in between side rails
by locating plastic
4
caps into the holes.
H
H
H
5
4
H
4
5
H
Assembly is complete.
If you need help or have damaged or missing parts, call the Customer Helpline: 0345 6400 800
Home Retail Group. 489-499 Avebury Boulevard. Saxon Gate West. Central Milton Keynes. MK9 2NW
5
 Loading...