

Page 1
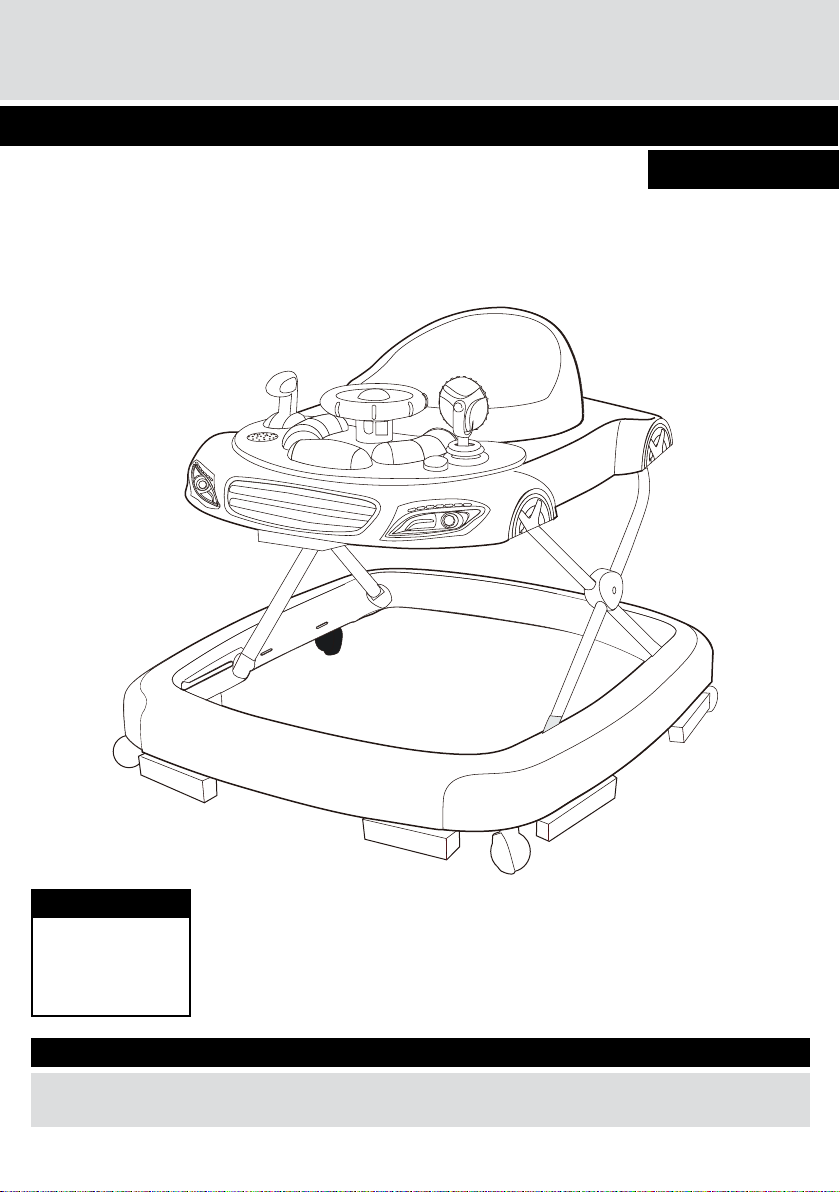
BABY BY CHAD VALLEY RAINBOW LIGHTS AND SOU
Assembly Instructions - IMPORTANT! Keep for future reference
464/5667
Dimensions
Width - 72cm
Depth - 62cm
Height - 52.5cm
Important – Please read these instructions fully before starting assembly
If you need help or have damaged or missing parts, call the Customer Helpline: 03456 400 800
Page 2
Safety and Care Advice
IMPORTANT! – KEEP FOR FUTURE REFERENCE
WARNING
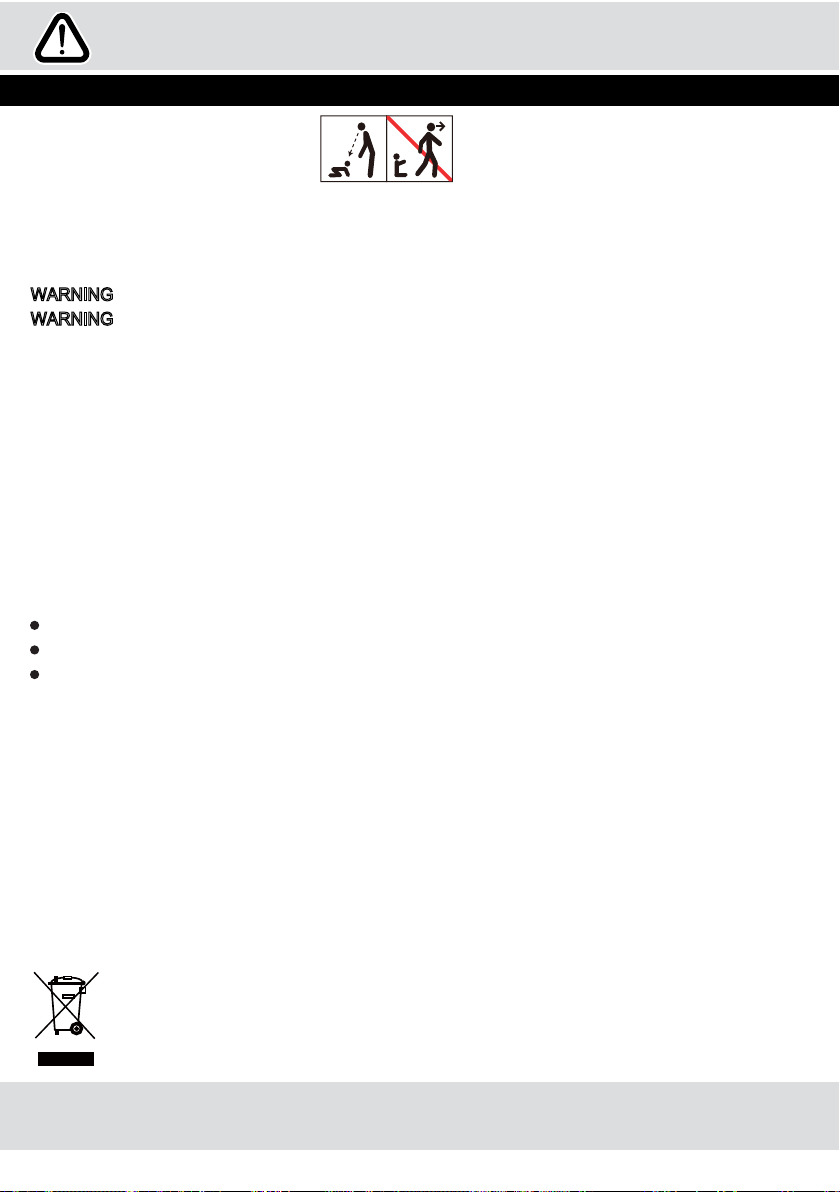
Read the instructions carefully before use and keep them for future reference. The child may be
hurt if you do not follow these instructions.This product should be assembled by an adult.
WARNING
WARNING
1) Prevent access to stairs, steps and uneven surfaces;
2) Guard all fires, heating and cooking appliances;
3) Remove hot liquids, electrical flexes and other potential hazards from reach;
4) Prevent collisions with glass in doors, windows and furniture;
5) Do not use the baby walking frame if any components are broken or missing;
6) This baby walking frame should be used only for short periods of time(e.g.20min);
7) This baby walking frame is intended to be used by children who can sit unaided,
approximately from 6 months. It is not intended for children weighing more than 12kg;
8) Do not use replacement parts other than those approved by the manufacturer or distributor;
9) Follow instructions for routine maintenance and cleaning or washing.
MAINTENANCE
Please check and maintain your walker regularly to prevent injury.
Inspect the parts regularly if some parts are broken.
Wash the plastic parts with warm soapy water.
---Never leave the child unattended.
---The child will be able to reach further and move rapidly when in the baby walking
Battery
-The recommended battery sizes for this unit is 1.5V size AA.
-Do not mix new & used batteries.
-Do not mix batteries of different types.
-Only the recommended batteries or equivalent are to be used, volts and size.
-Batteries should be inserted with the correct polarity.
-Remove batteries when unit is stored for a long period of time or when the batteries are exhausted
-Dispose exhausted battery properly
-Do not short-circuit supply terminals.
-Do not attempt to recharge a non-rechargeable battery.
-Rechargeable batteries are to be removed from the toy before being charged.
-Rechargeable batteries are only to be charged under adult supervision.
WASTE ELECTRICAL PRODUCTS SHOULD NOT BE
DISPOSED OF WITH HOUSEHOLD WASTE. PLEASE
RECYCLE WHERE FACILITIES EXIST. CHECK WITH
YOUR LOCAL AUTHORITY FOR RECYCLING ADVICE.
Read the instructions carefully before use and keep them for future reference. The child
may be hurt if you do not follow these instructions.
Page 3
1.Parts List
If you have damaged or missing components,
call the
Customer Helpline:
Please check you have all the parts listed below
03456 400 800
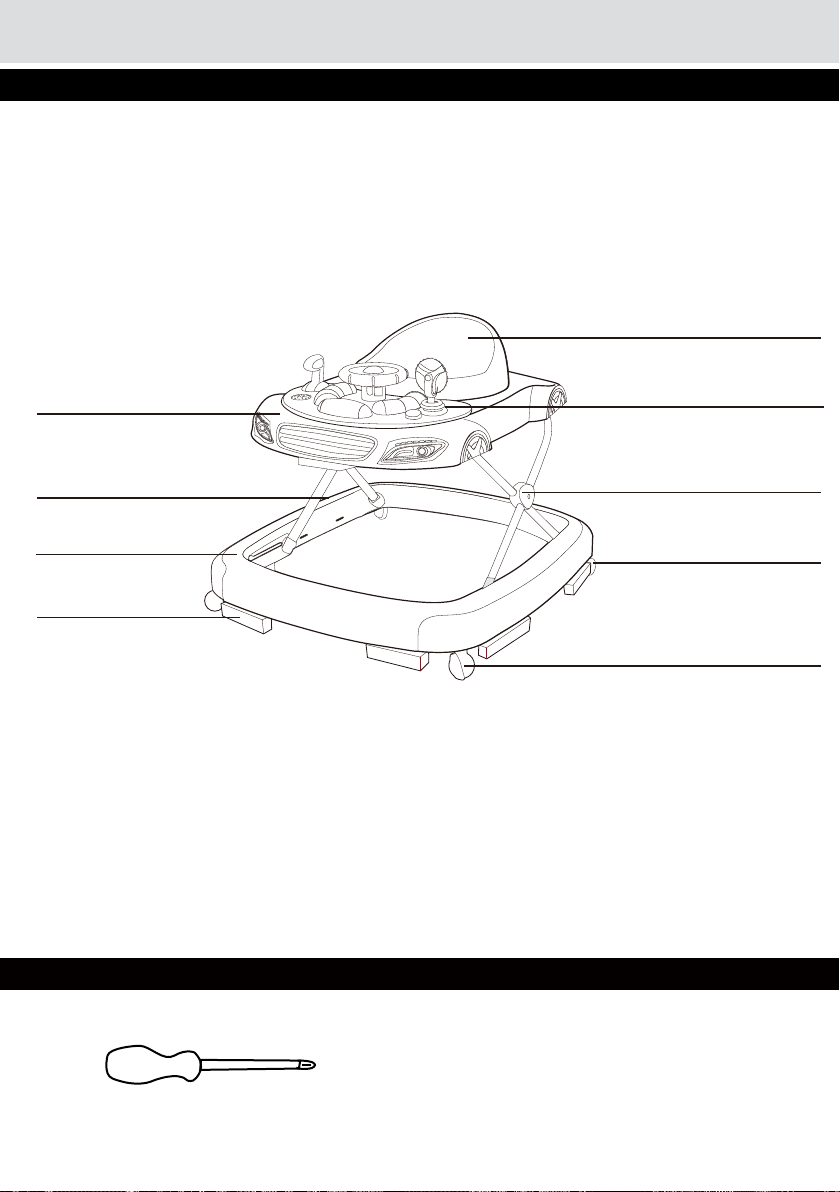
Seat
Tray
Frame
Bottom Base
Stopper
Toy
Cover
Directional
Wheel
Universal Wheel
Tools required(not included)
T
Phillips Screwdriver
Page 4
2.
Assembly
Step1
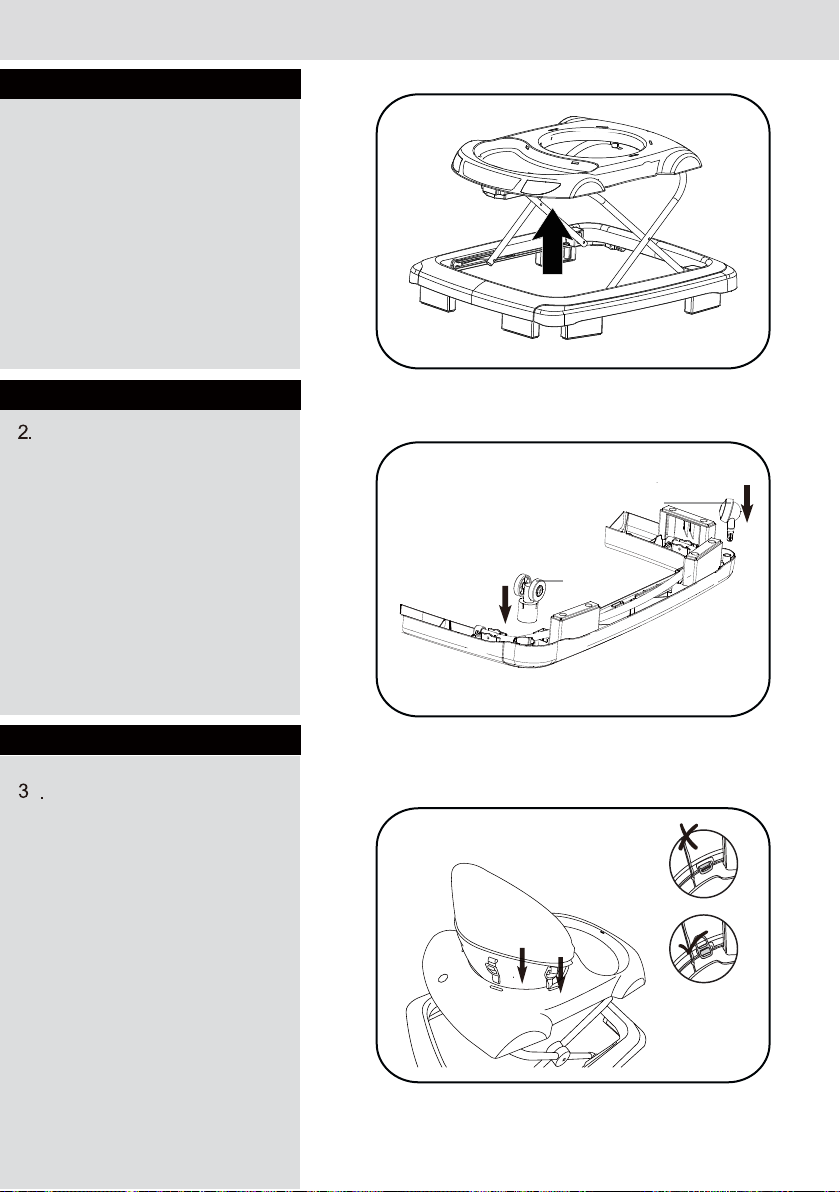
1. Pull the upper tray to
the right position, make
sure the adjusting
mechanism is locked.
Never put your hands
between the bottom
base and the upper tray
to avoid clamping.
p
Ste 2
Insert the directional
wheels and universal
wheels into their
corresponding holes.
directional
wheel
universa l
wheel
Step3a
a
Locate the fabric seat.
Insert the fabric seat
into the opening as
shown. Locate the
four plastic tabs
attached to
the perimeter of the
seat. Insert each of
the eight plastic tabs
through the slot s
located around the
perimeter of the s eat
assembly. Pull the
tab completely
through the slot and
fasten into place.
Page 5
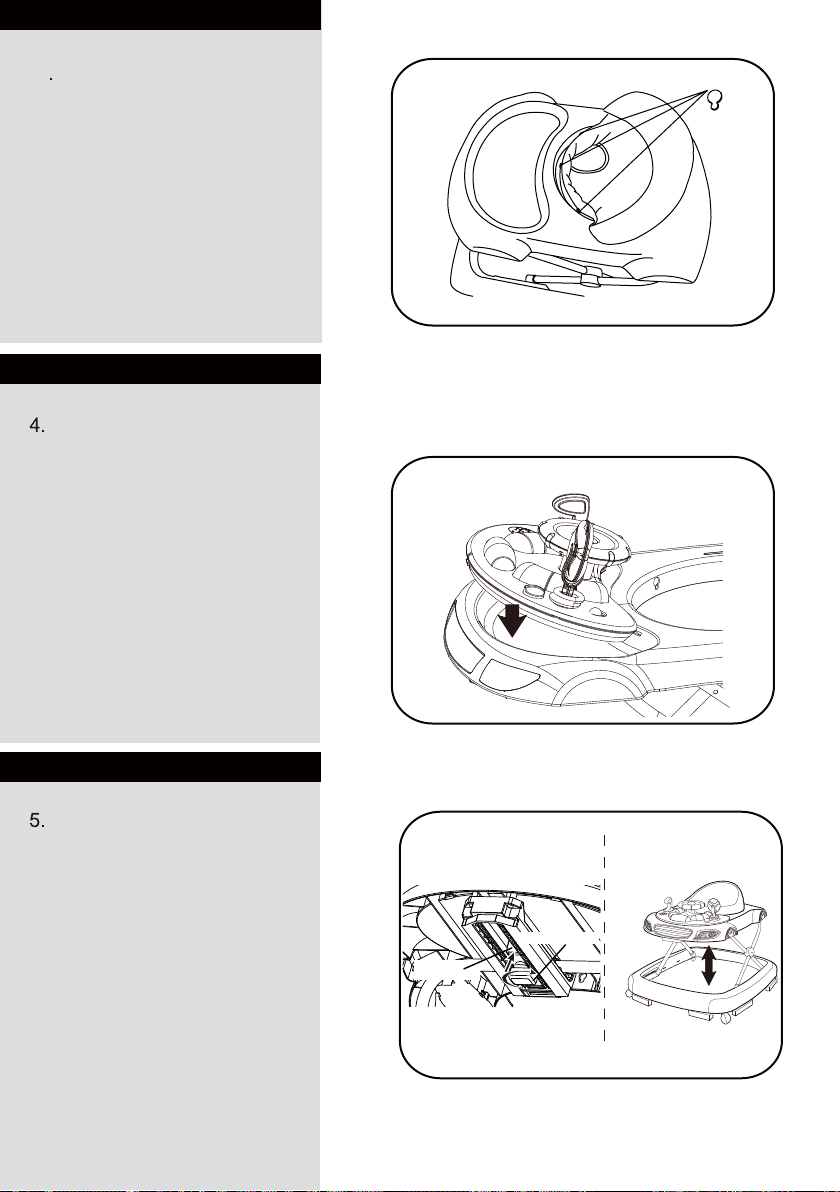
Step3b
Insert t he fron t 3 b utton s
3b
to the corre sponding
holes and pull down to
fix it firm.
S
tep4
Insert the fixation point of
toy tray to the plate hole
and pres s downward to
get a complet e fix ation.
Step5
To unfold the walker,
please pull the tray
upward. WARNING:
Make sure the adjusting
mechanism is loc ked.
To fold the walker, turn
the adjusting butto n to
90 degree and press the
button upward to release
the lock, then pu sh th e
tray downward to the
folding p osition and
release the b utton .
adjusting
mechanism
adjusting button
Page 6
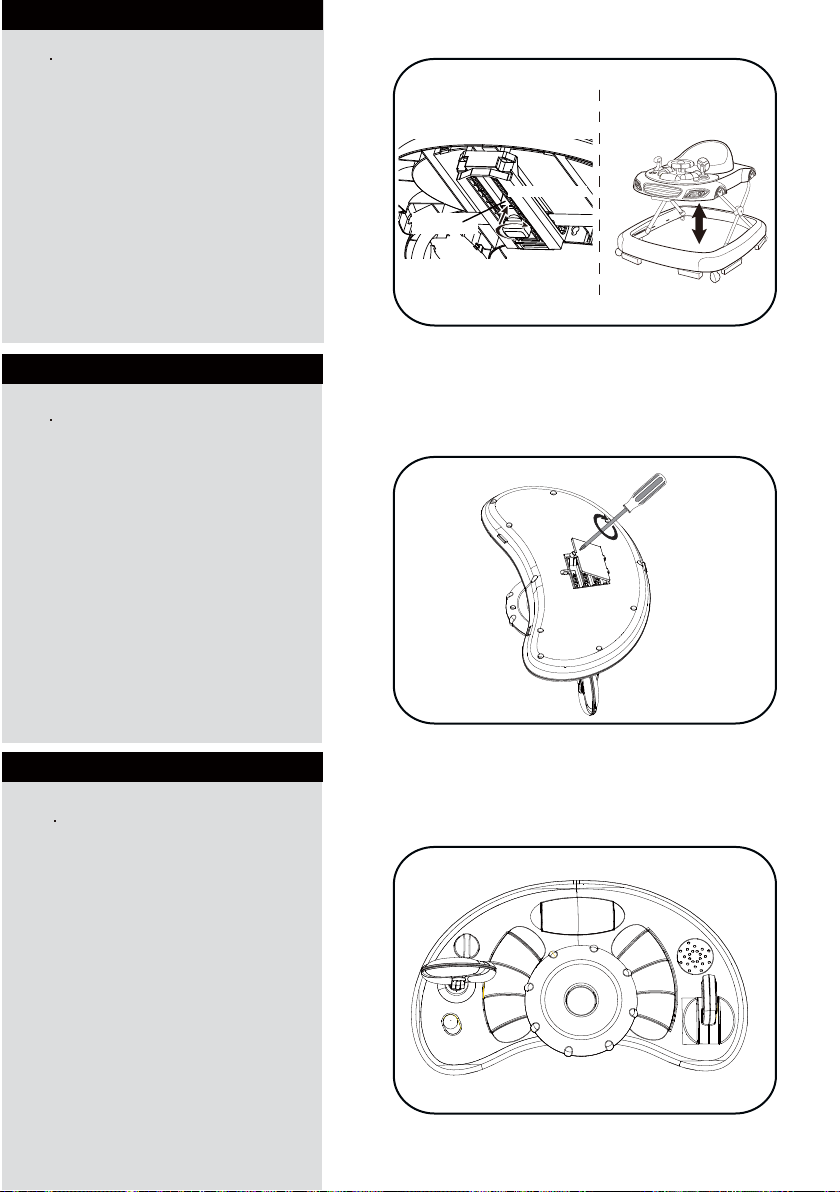
Step6
6
Your walker has 3
height posit ions. To
adjust the tray to the
desired height, simply
pull the tray up.
WARNING: Ensure
locking device i s
engaged.
To lower the tray,
turn the adjusting button
to 90 degree and press
the button upwards t o
release the lock, then
adjust the tray to desired
position.
S
tep7
Open the battery c over,
7
and put in 3pcs “AA”
battery(not inc luded)
(Pay attention the
electrode battery),and
close the cover with
fastening screw.
Fix the toy on the upper
tray of walker.
adjusting
mechanism
adjusting button
Step8
The toy features
8
buttons, music,
sounds, and lights for
child's enjoyment.
Page 7

Argos
Avebury, 489-499 Avebury Boulevard, Milton Keynes, MK9 2NW
www.argos.co.uk
Customer Helpline: 03456 400 800
 Loading...